- NAS
- Unraid
- 01 April 2026 at 09:31 UTC
-

- 1/2


To facilitate file management on Unraid, particularly remotely, you can install a file manager accessible from any web browser.
In this case, the one that we will present to you in this tutorial is: CloudCommander.
- File sharing on Unraid
- Download, install and configure CloudCommander
- CloudCommander web interface
- Move a file on Unraid via Cloud Commander
- Upload a file to your Unraid server
- Download a file from your Unraid server
- Access the Unraid console via Cloud Commander
- Protect the Cloud Commander interface with a password
1. File sharing on Unraid
On Unraid, you can create shared folders that are accessible or not accessible from the network and which can be protected or made public if you wish.
For this tutorial, we created 2 public shares: downloads and media.
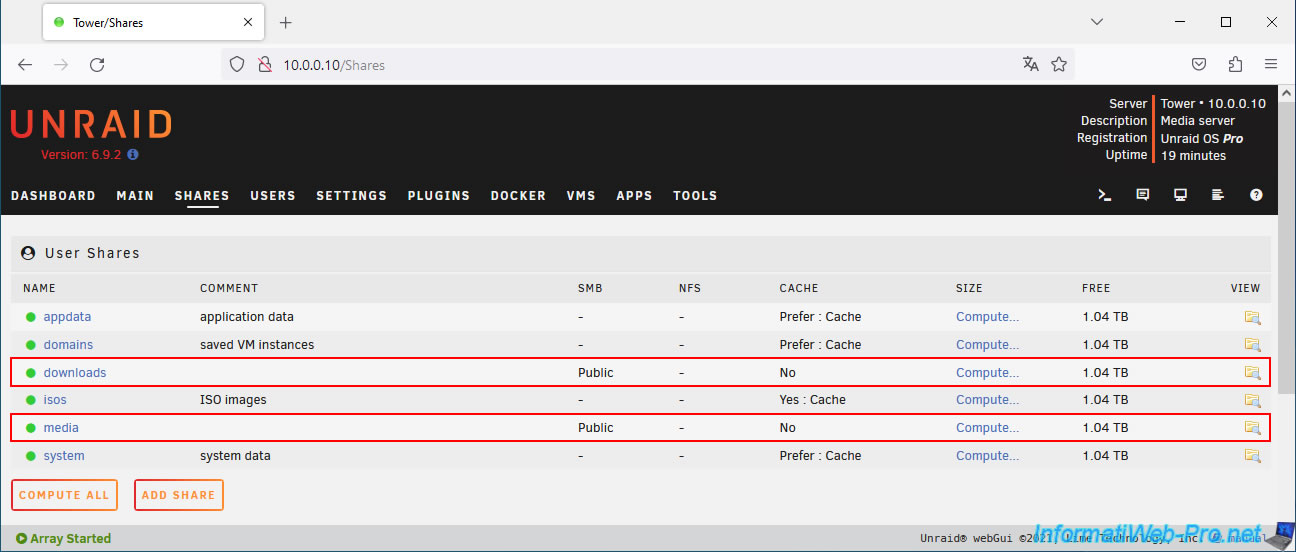
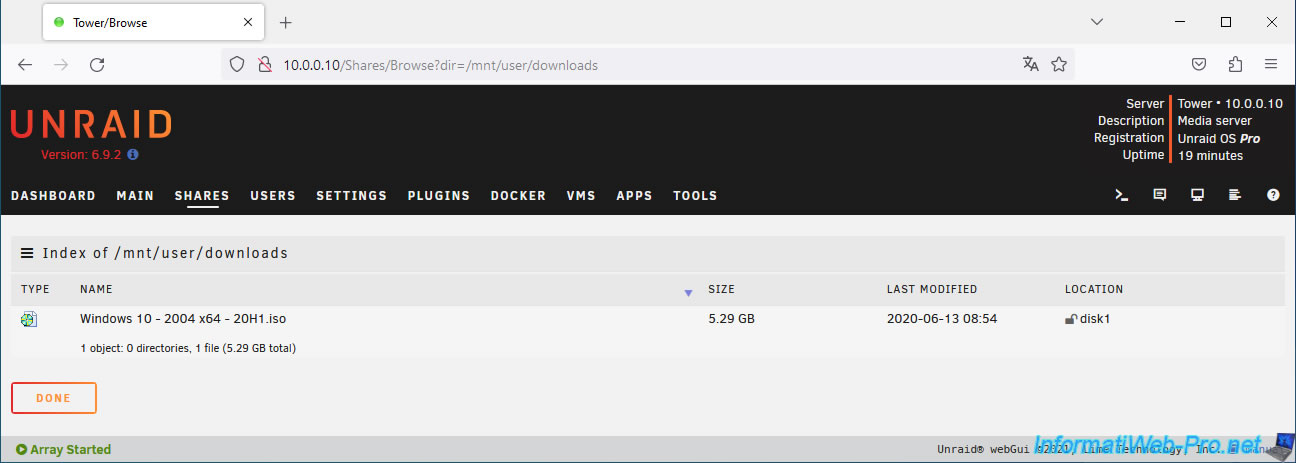
In the shared "downloads" folder, we have stored a Windows 10 ISO (downloaded some time ago from the Microsoft site).
It's an example. The file used does not matter.
Note: the "media" folder is empty.
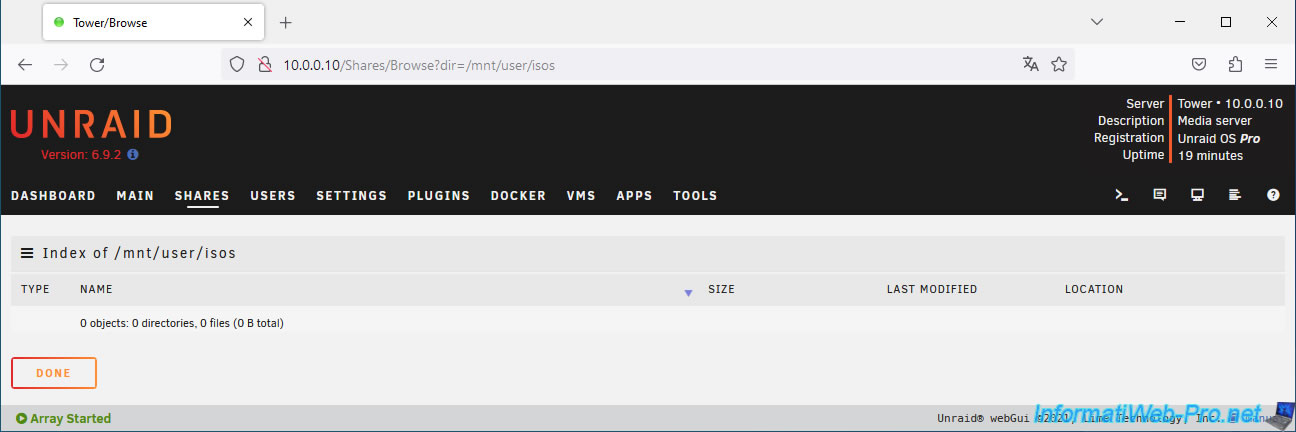
The "isos" shared folder (present by default on Unraid) is empty at the moment.
2. Download, install and configure CloudCommander
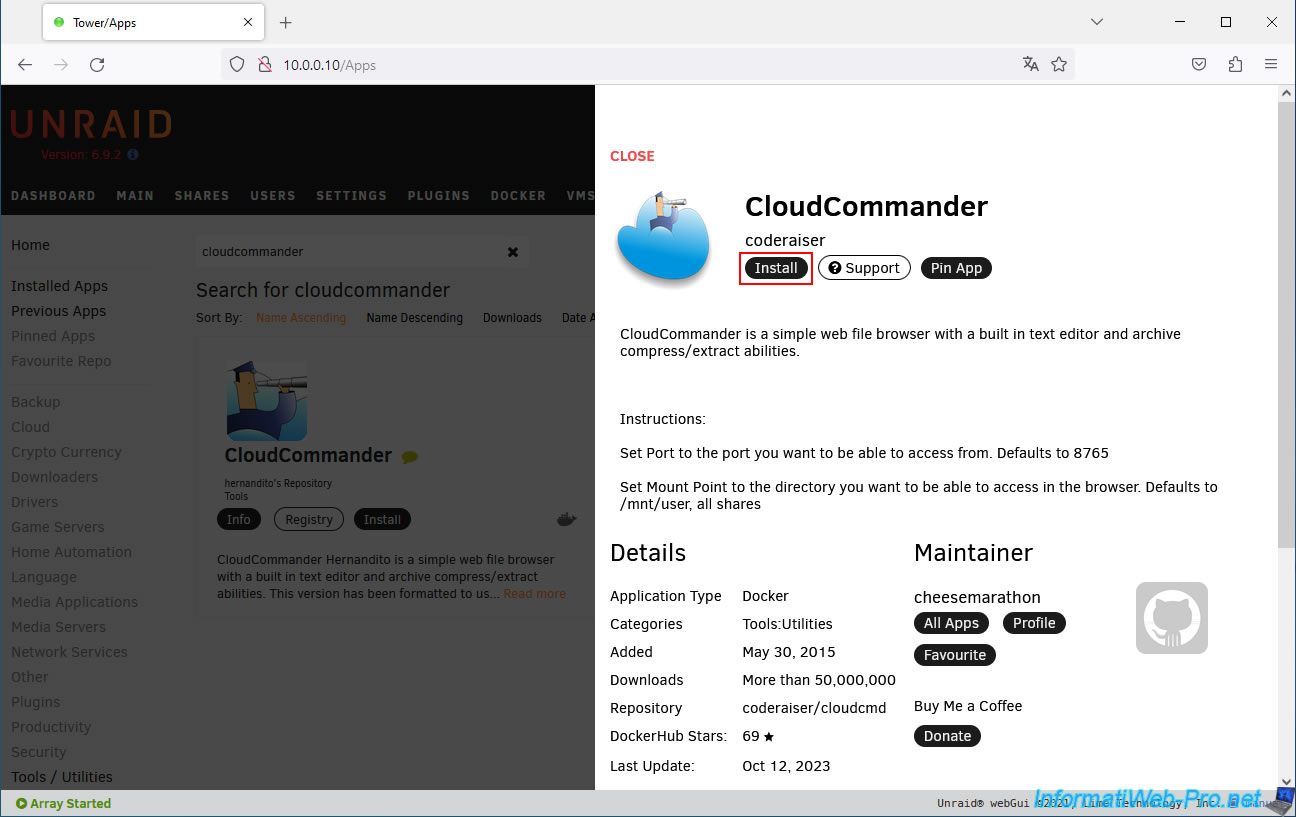
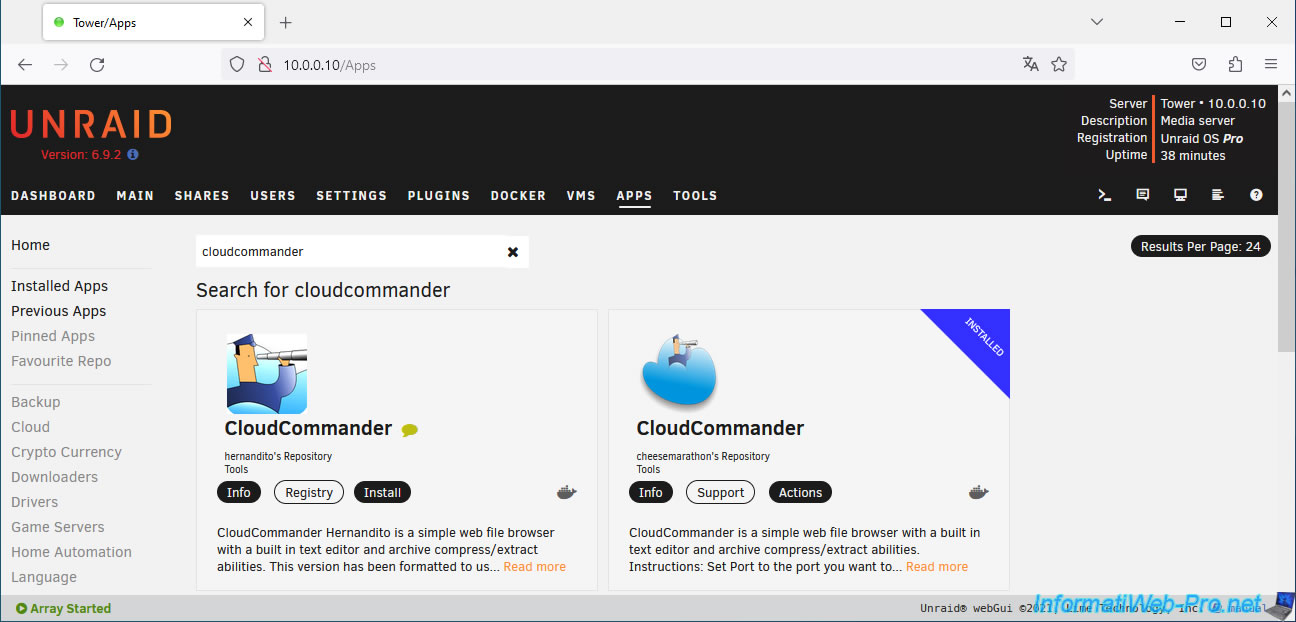
Go to Unraid's "Apps" tab and search for "cloudcommander".
Choose the one whose deposit is managed by "cheesemarathon" (indicated under the application).
Note: to see the "Apps" tab, you must first install the Community Apps plugin.
To do this, refer to our tutorial: Unraid 6.9.2 - Install the "Community Applications" (CA) plugin.
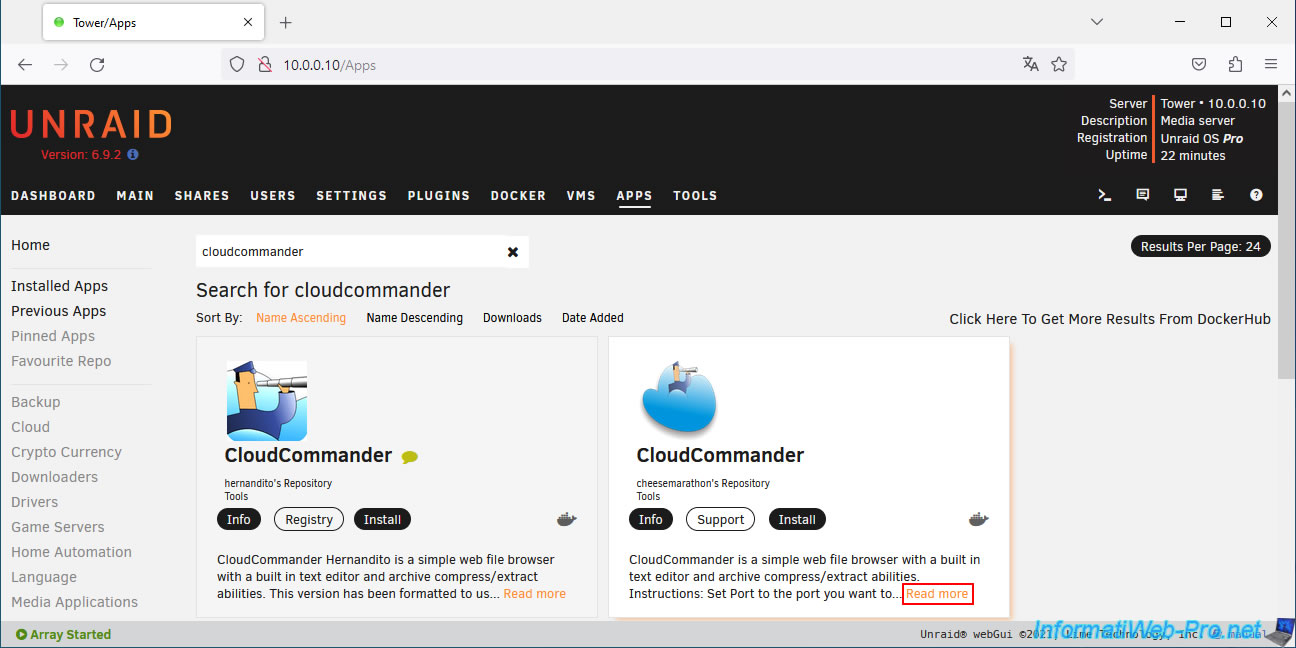
If you click on the "Read more" link, you will see that the repository used is "coderaiser/cloudcmd" and that it is maintained by "cheesemarathon".
Click: Install.
On the "Add Container" page that appears, you can configure:
- Name: the name under which this container should appear on Unraid.
Default: CloudCommander. - Repository: the source repository used.
Leave the default value. - Network Type: allows you to choose the network to use for this Docker container.
Default: Bridge. The container will therefore have direct access to the physical network. - Console shell command: concerns the console accessible from the CloudCommander interface.
Leave the default value. - Mount Path: Default mount point. In other words, the folder that you can access by entering the "UNRAID" folder that you will see in the CloudCommander interface.
By default, the user folder "/mnt/user". But you could also choose to use a specific folder on your Unraid server if you wish. - Port: allows you to use a different port for this Docker container.
Leave the default value.
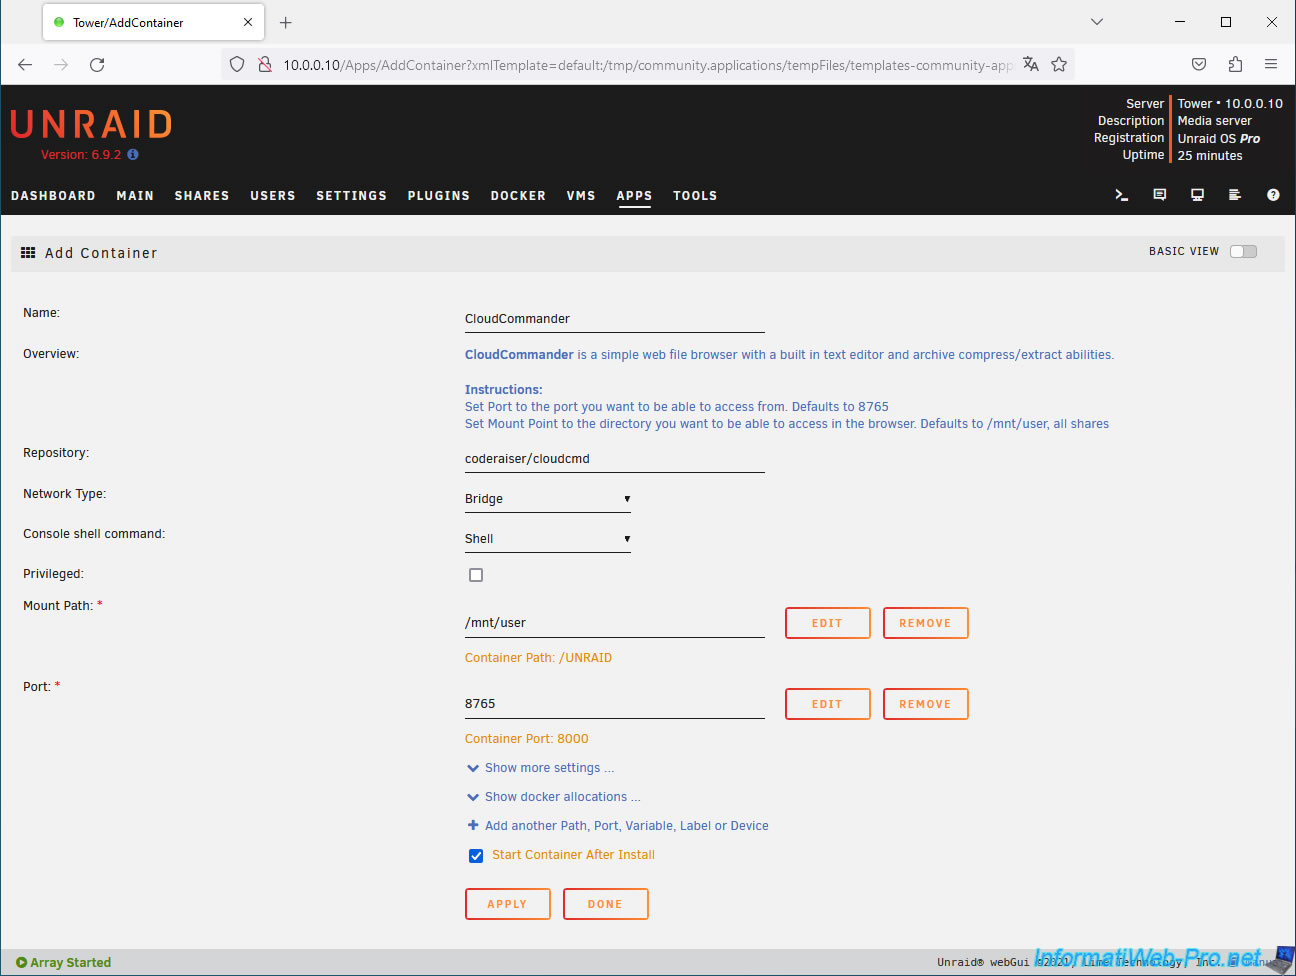
If you click on the "Show more settings" link, you will be able to configure the settings:
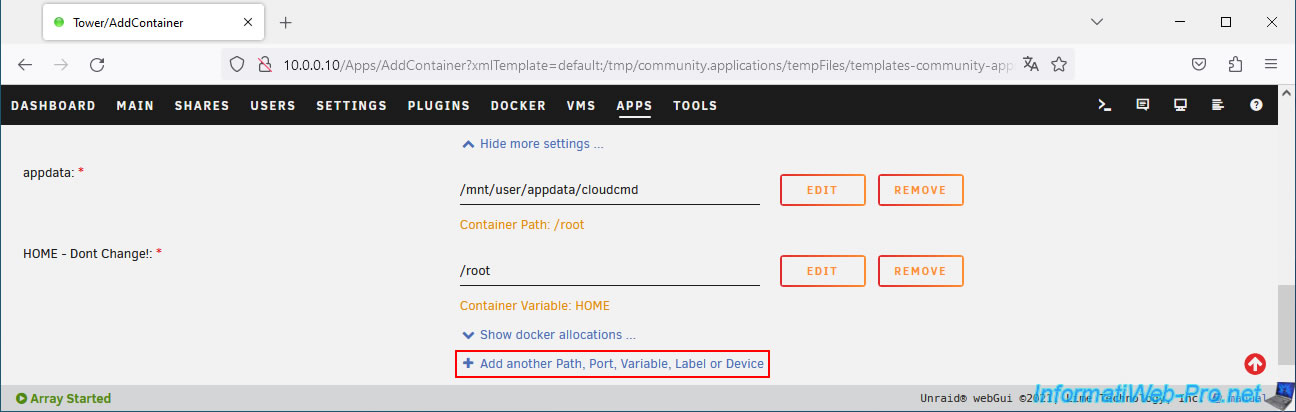
- appdata: allows you to change the location where the container will be installed on your Unraid server.
By default, CloudCommander will be installed in the "/mnt/user/appdata/cloudcmd" folder. - HOME - Dont Change! : do not change this setting.
If desired, you can add mappings to make specific folders appear in the CloudCommander root.
To do this, click on the "Add another Path, Port, Variable, Label or Device" link.
Note: shared folders are located by default in the Unraid "/mnt/user" folder.
All your shared folders are therefore already accessible from the "UNRAID" folder which will be displayed at the root in the CloudCommander interface.
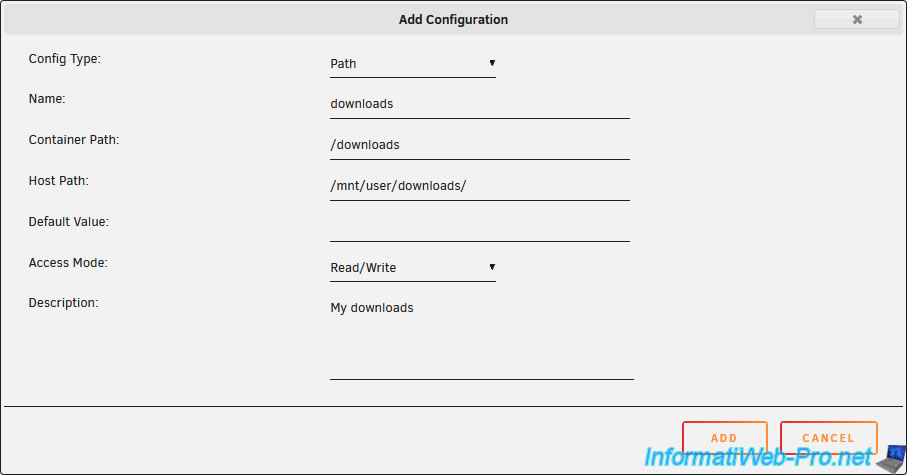
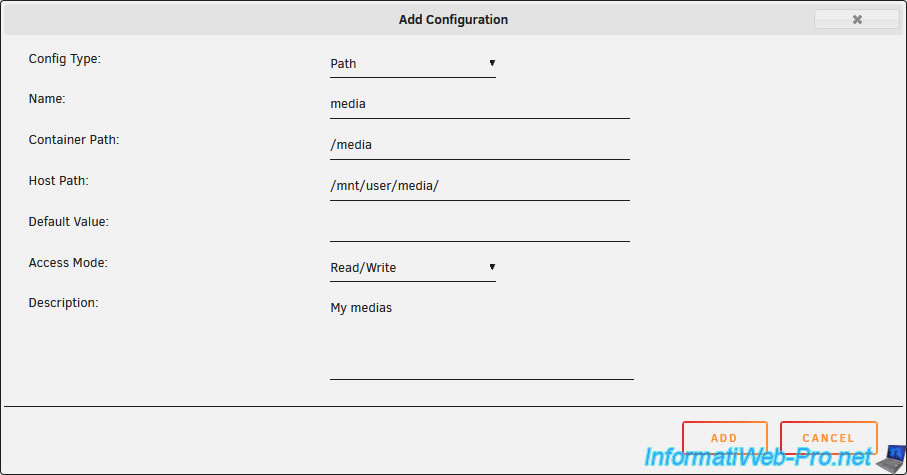
In the "Add Configuration" window that appears, configure these settings:
- Config Type: Path.
- Name: the name of the mapping.
In our case, we indicated "downloads". Because we will map the "downloads" folder. - Container Path: the path where the contents of the folder you want to map should be located in the CloudCommander web interface.
In our case: "/downloads". Which means that a "downloads" folder will appear at the root of the CloudCommander web interface. - Host Path: the actual folder path on your Unraid server.
Shared folders created on Unraid are always located under the path "/mnt/user".
Which gives in our case "/mnt/user/downloads".
Note that you can also click in this box to choose the desired folder by browsing the tree of your Unraid server. - Access Mode: choose whether you want to be able to access the contents of this folder in reading and writing (Read/Write) or in reading only (Read Only).
- Description: a description for this mapping (optional).
Next, click Add.
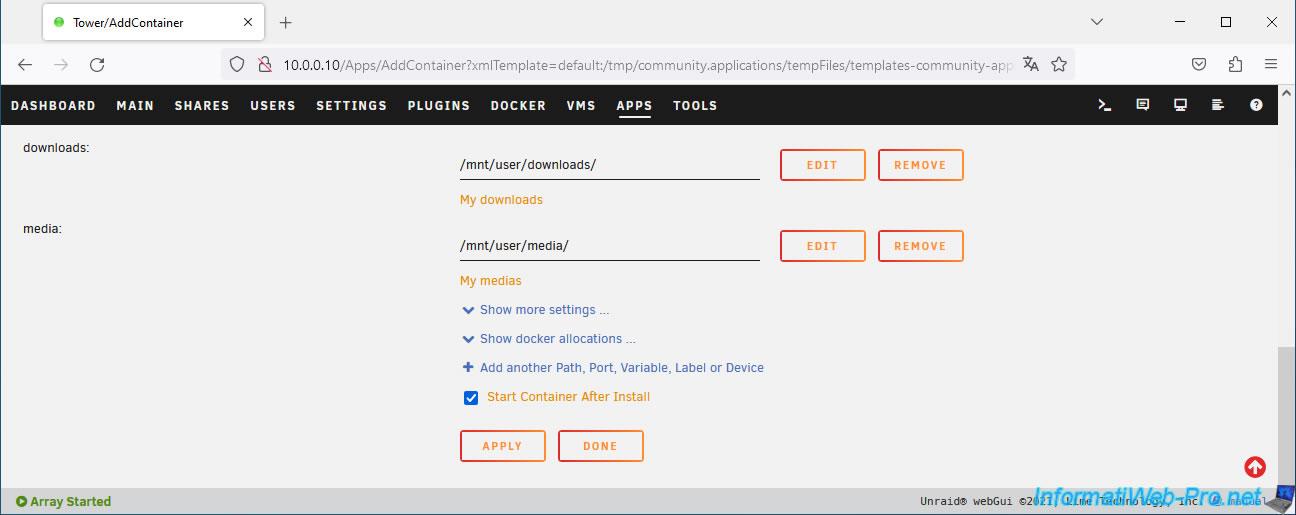
Your "downloads" mapping appears with its name (on the left), its path (on the right) and its description (on the right in orange).
To add other mappings, click the "Add another Path, Port, Variable, Label or Device" link again.
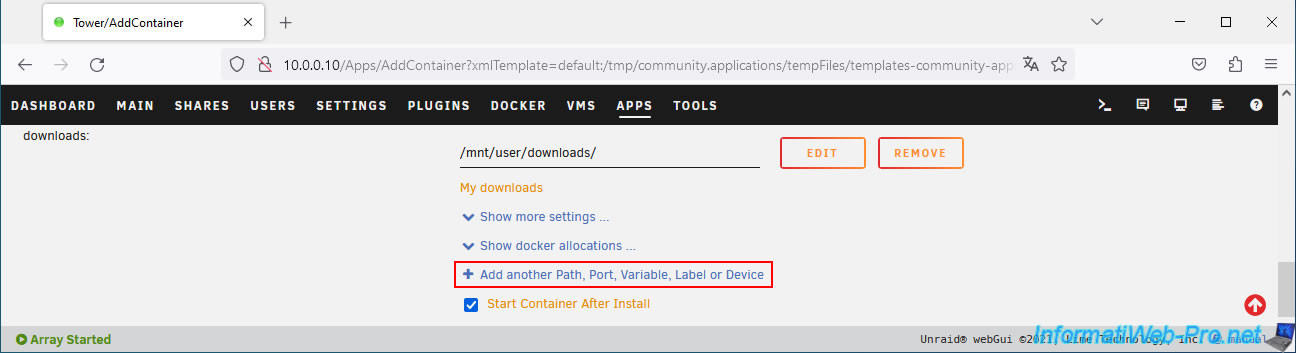
Do the same for the "media" folder (in our case) and click Add.
The 2nd mapping appears
Click on "Apply" to start installing the "CloudCommander" container.
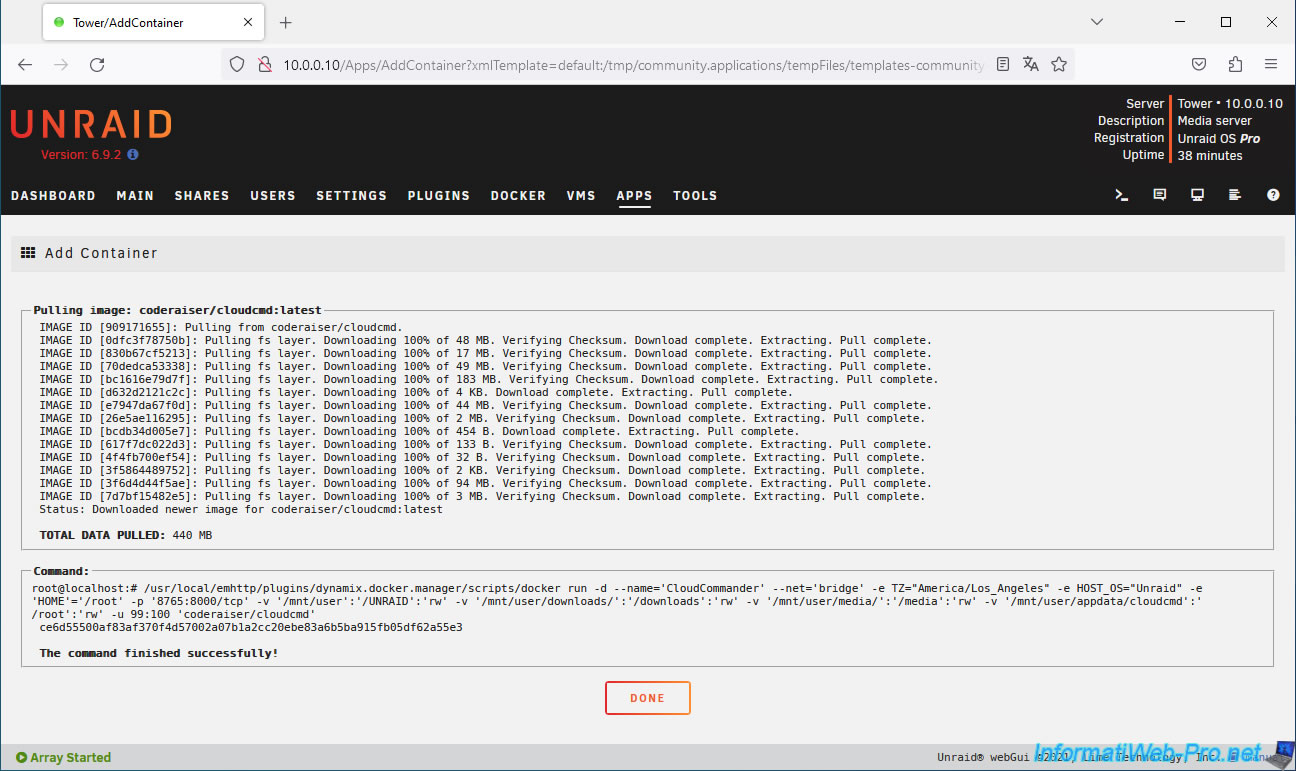
Wait while CloudCommander downloads and installs.
Plain Text
Pulling image: coderaiser/cloudcmd:latest.
IMAGE ID [909171655]: Pulling from coderaiser/cloudcmd.
...
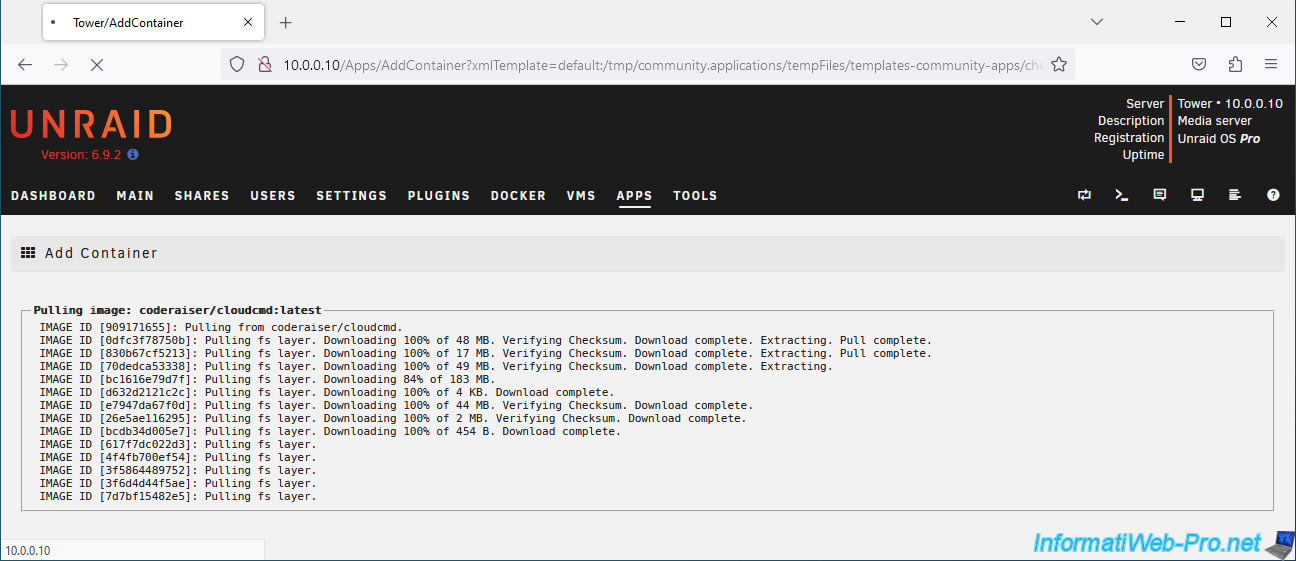
Once the installation and automatic configuration of the "CloudCommander" container are complete, the "Done" button will appear.
Click on this one.
The "CloudCommander" container is installed.
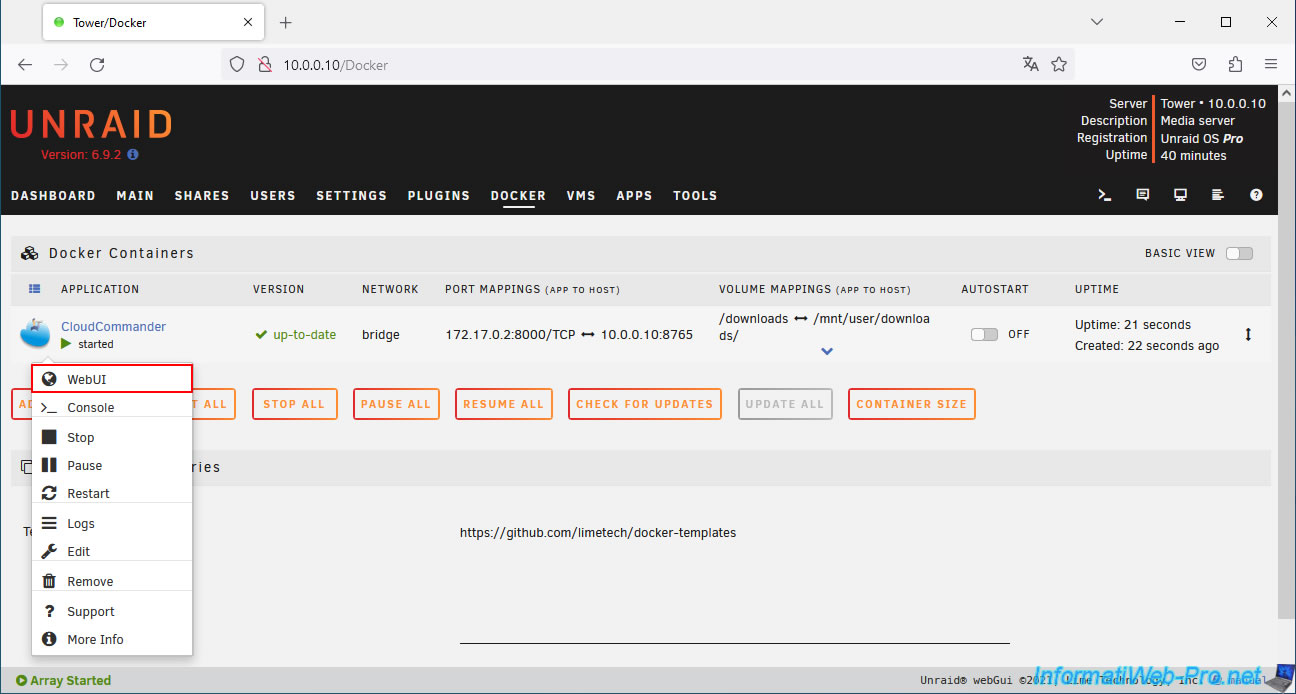
You will see this container appear in the "Docker" tab of Unraid.
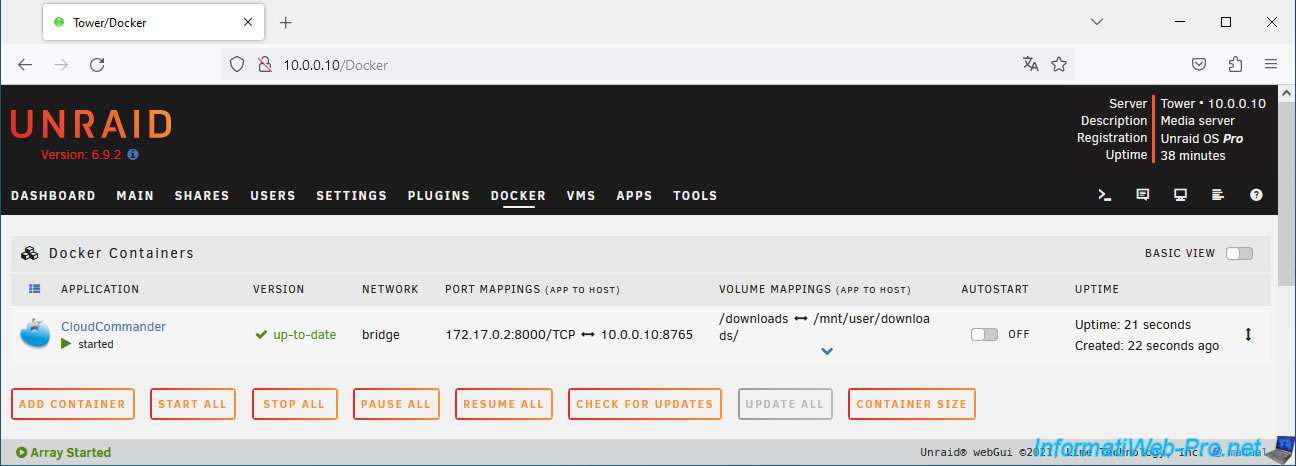
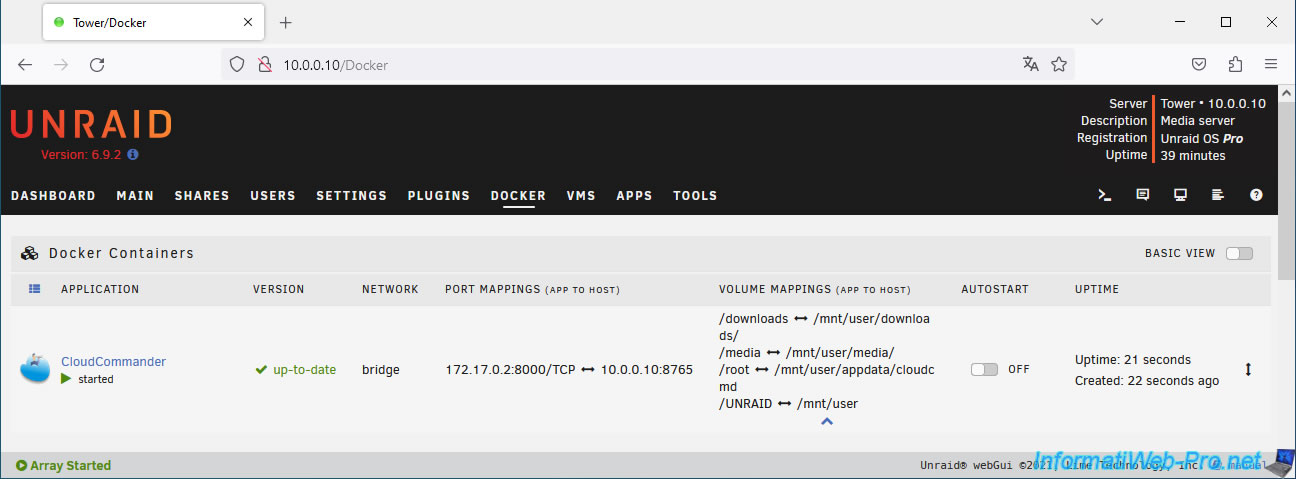
To see all the mappings, click on the "v" icon present in the "Volume mappings" column.
3. CloudCommander web interface
To access the CloudCommander web interface, click on the icon of this container, then on: WebUI.
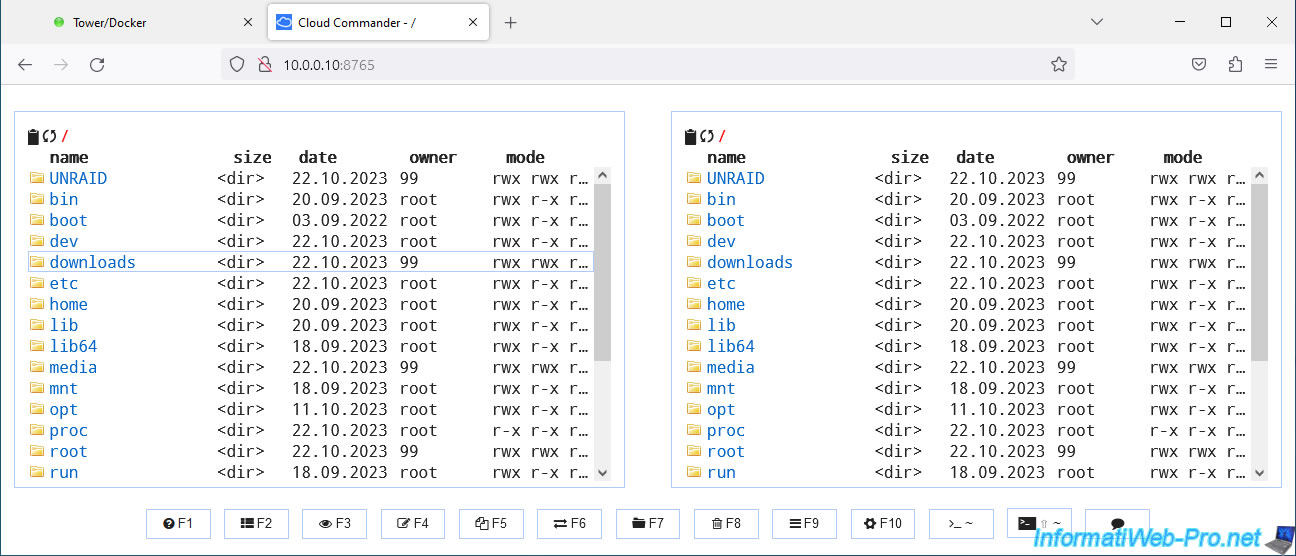
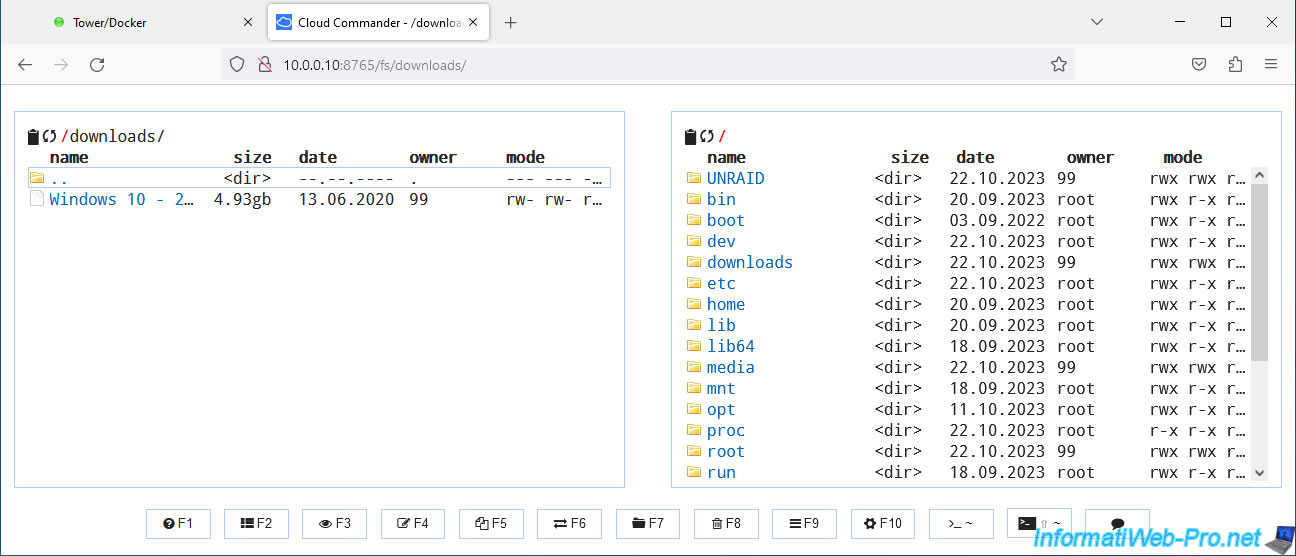
As you can see, at the root of the Cloud Commander interface, you will see the folders:
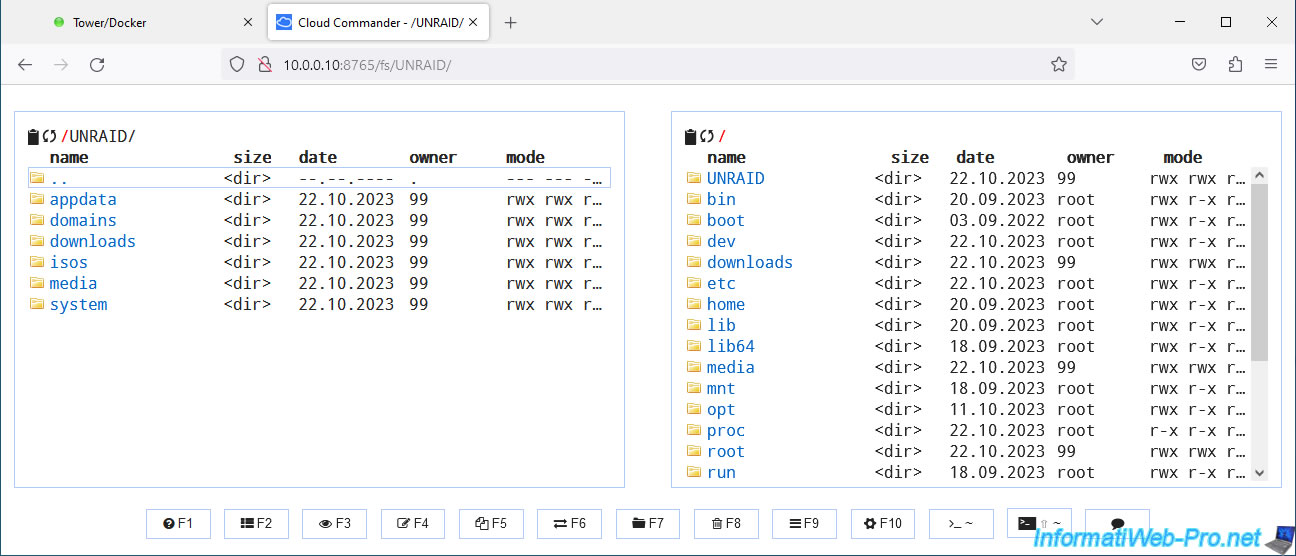
- UNRAID: which corresponds to the "/mnt/user" folder in which your shared folders created from the "Shares" tab of Unraid are located.
- downloads: the shared "downloads" folder that we mapped manually.
- media: same, but for the shared "media" folder.
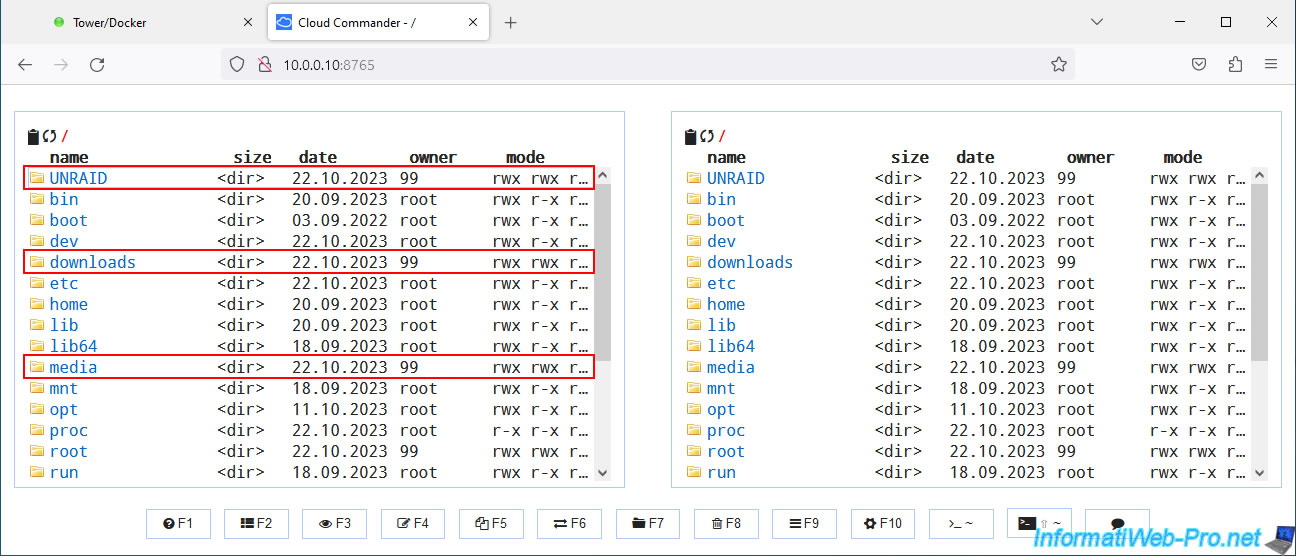
As expected, the "UNRAID" folder visible at the root of Cloud Commander contains your shared folders on Unraid.
As expected, our shared "downloads" folder also appears at the root of Cloud Commander thanks to the mapping configured previously.
As expected, we find our Windows 10 ISO (downloaded from the Microsoft site).
Share this tutorial
To see also
-
NAS 12/4/2025
Unraid 6.9.2 - Define a private static IP address
-
NAS 7/8/2026
Unraid 6.9.2 - Docker - Install a password manager (Vaultwarden)
-
NAS 5/13/2026
Unraid 6.9.2 - SWAG - Locally access the reverse proxy (SWAG)
-
NAS 7/1/2026
Unraid 6.9.2 - SWAG - Use a personal domain with a dynamic WAN IP
You must be logged in to post a comment