Customize the Unraid 6.9.2 web interface
- NAS
- Unraid
- 11 February 2026 at 14:25 UTC
-

- 2/3

4. Show sections of a page as tabs
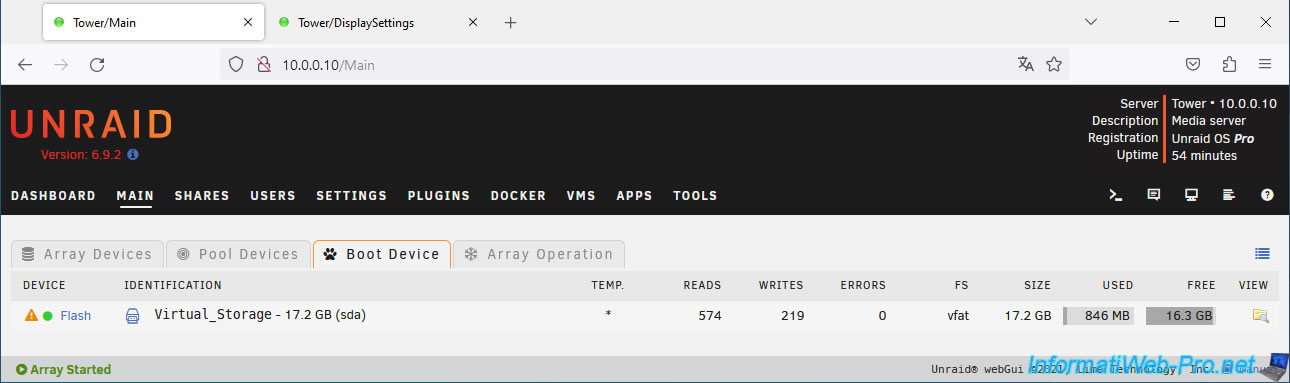
By default, all sections of a page are displayed one below the other (as in the image below).
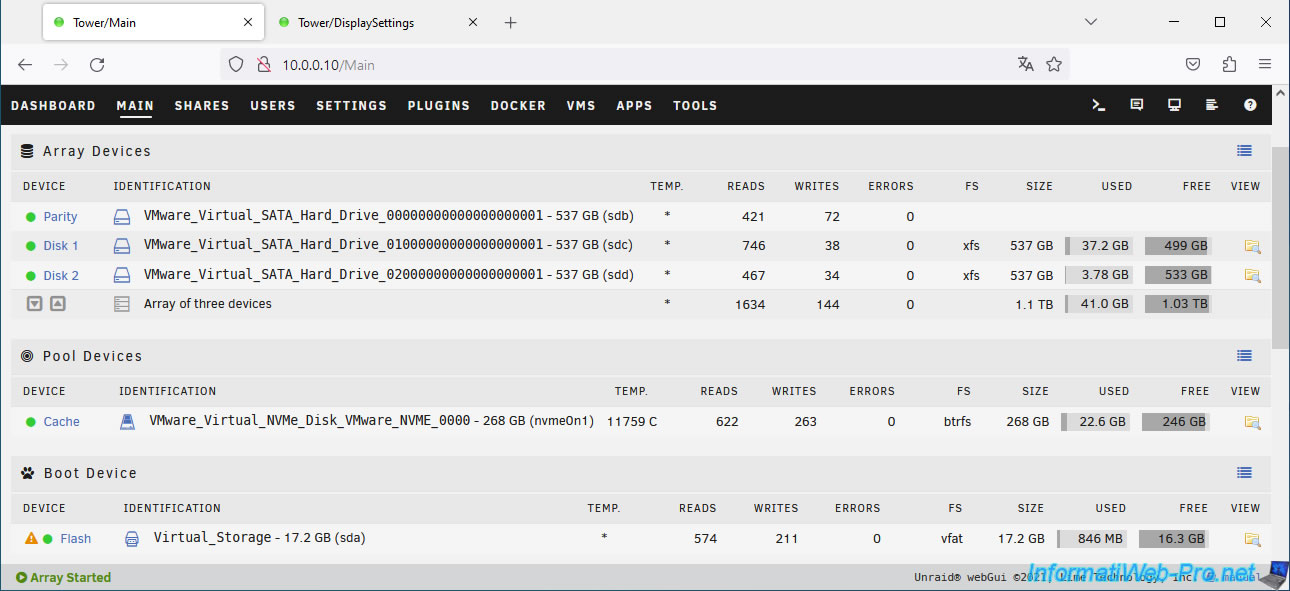
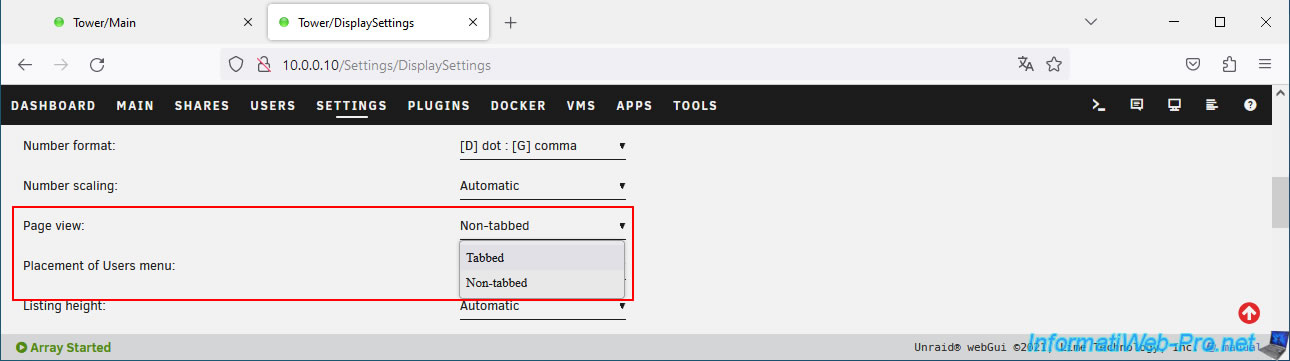
However, to avoid scrolling the entire page every time you want to see a section at the bottom of the page, you can modify the "Page view" setting to use tabs instead.
Note: the default value for this setting is "Non-tabbed".
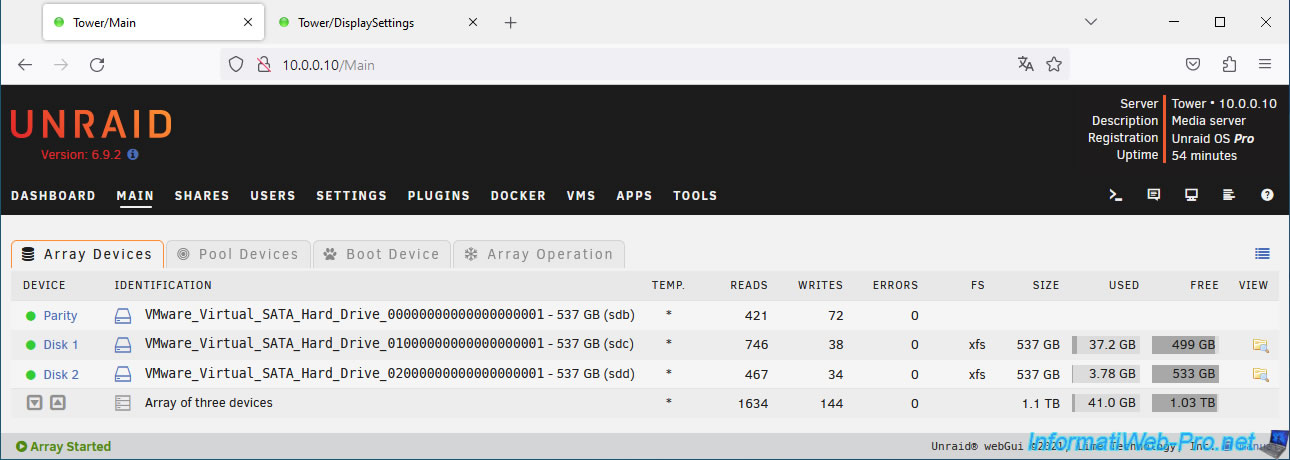
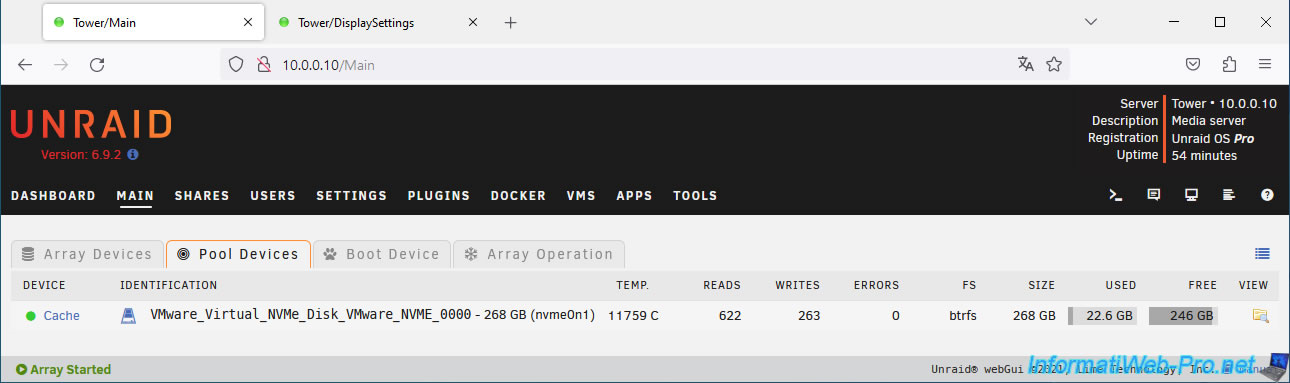
As expected, the different sections of the page are displayed via tabs (which greatly shortens the length of the page).
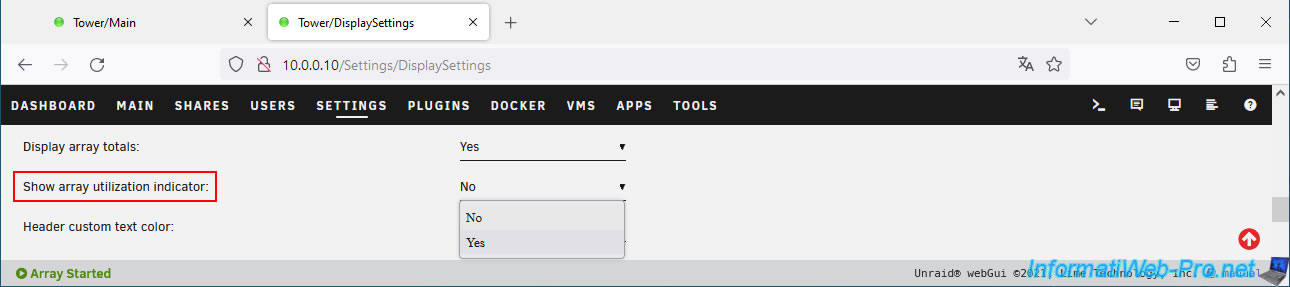
5. Show the array usage percentage at the top of the page
To be able to monitor the available disk space on your array more quickly, you can add an indicator to the top of all Unraid pages.
To do this, simply modify the "Show array utilization indicator" display setting by selecting the "Yes" value.
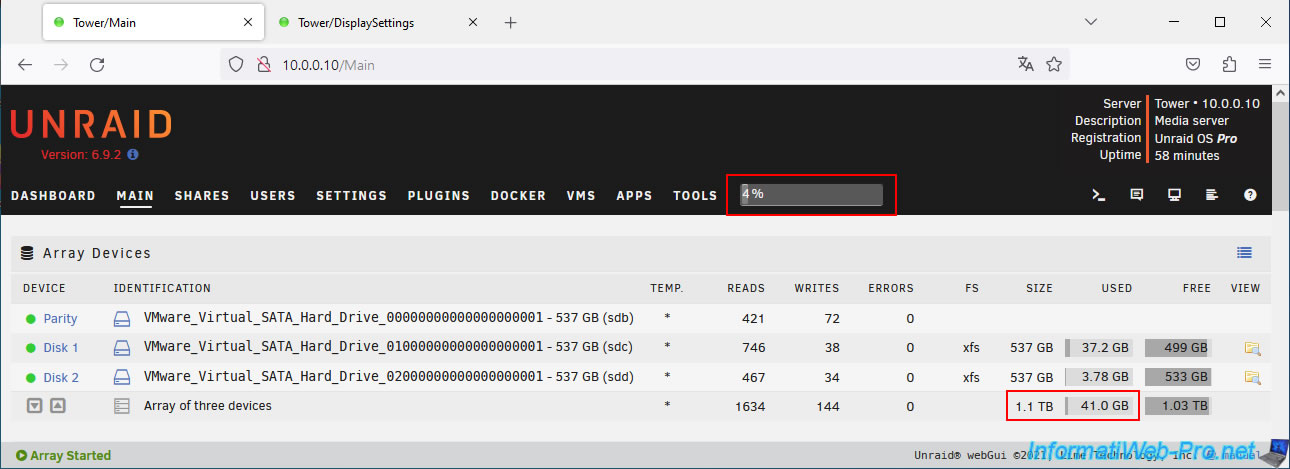
As expected, a bar with a percentage appears at the top of the page to show you the space used on your array.
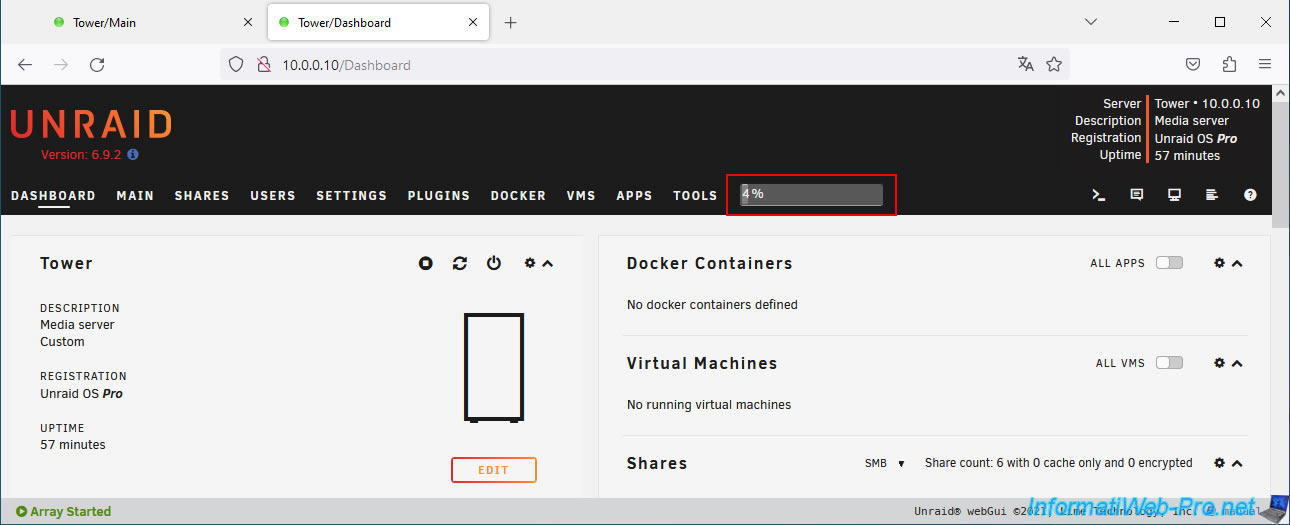
As you can check via the "Main" tab, the usage percentage corresponds to the space used on your entire array.
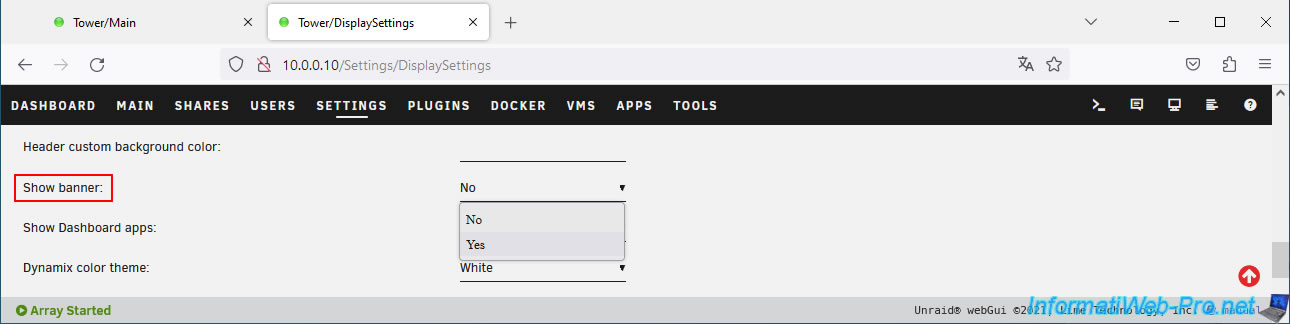
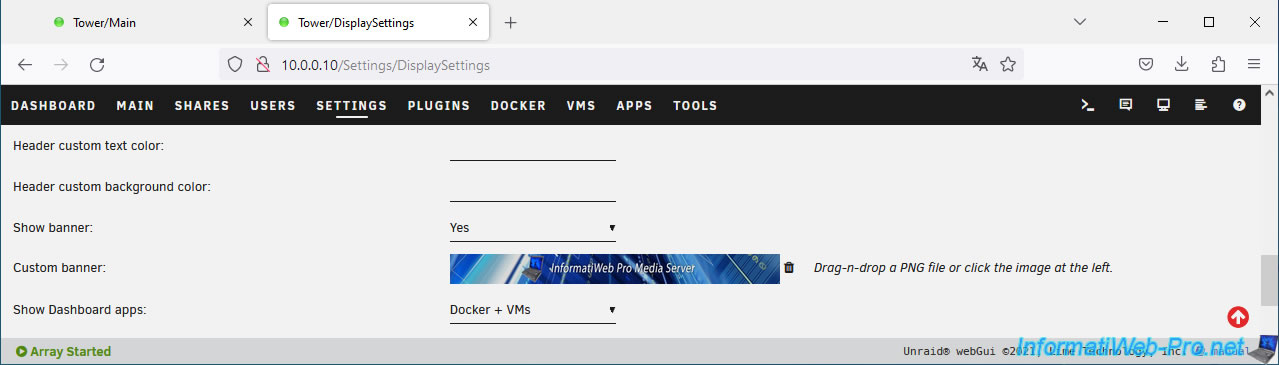
6. Display and customize the banner at the top of the page on Unraid
6.1. Display the Unraid banner at the top of the page
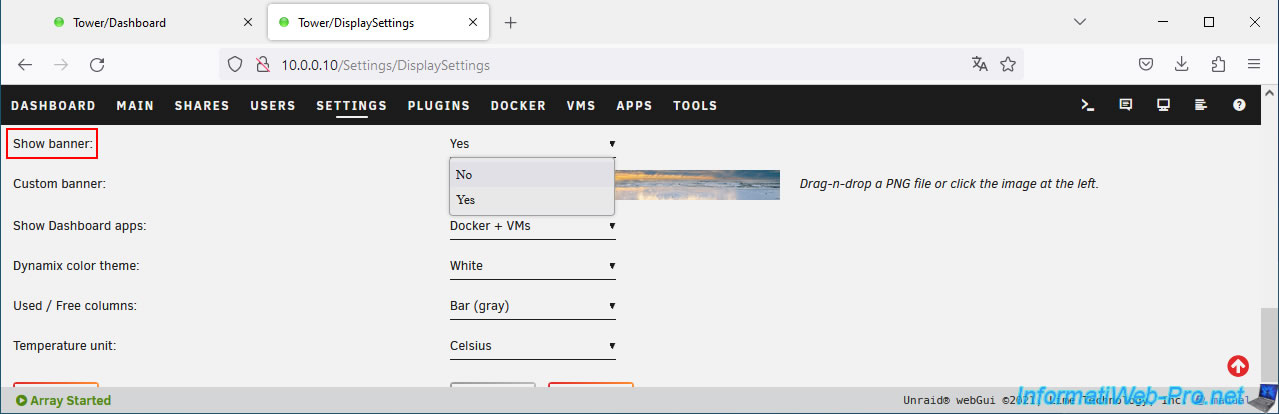
To display the Unraid banner at the top of the page, simply activate the "Show banner" display setting by selecting "Yes".
Note: as a reminder, the display settings are found in "Settings -> User Preferences -> Display Settings".
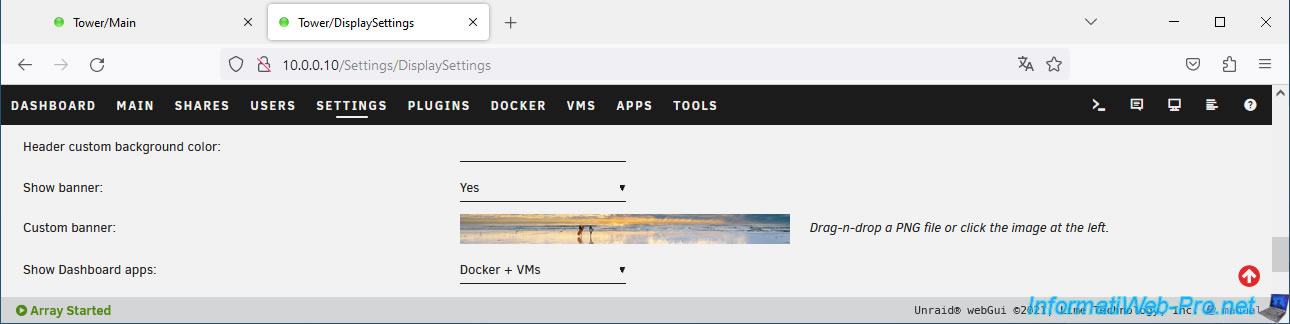
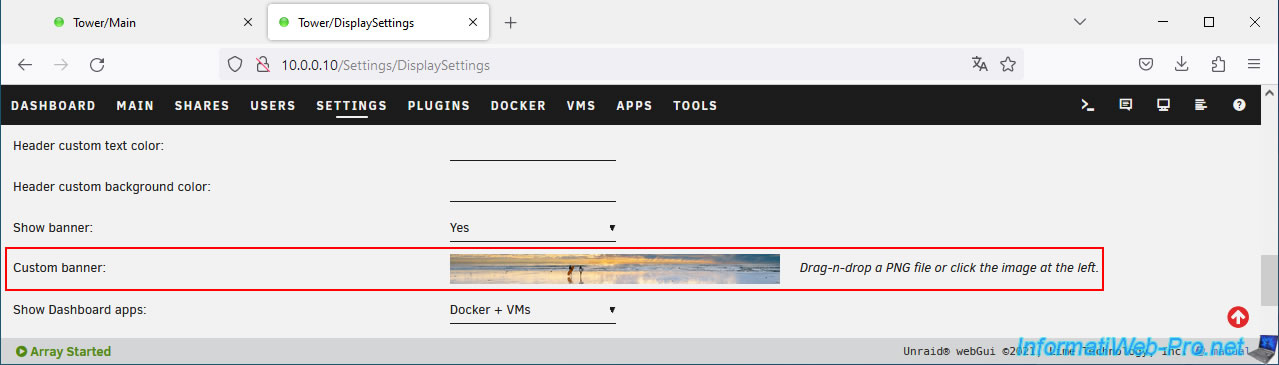
The "Custom banner" setting appears with the Unraid banner.
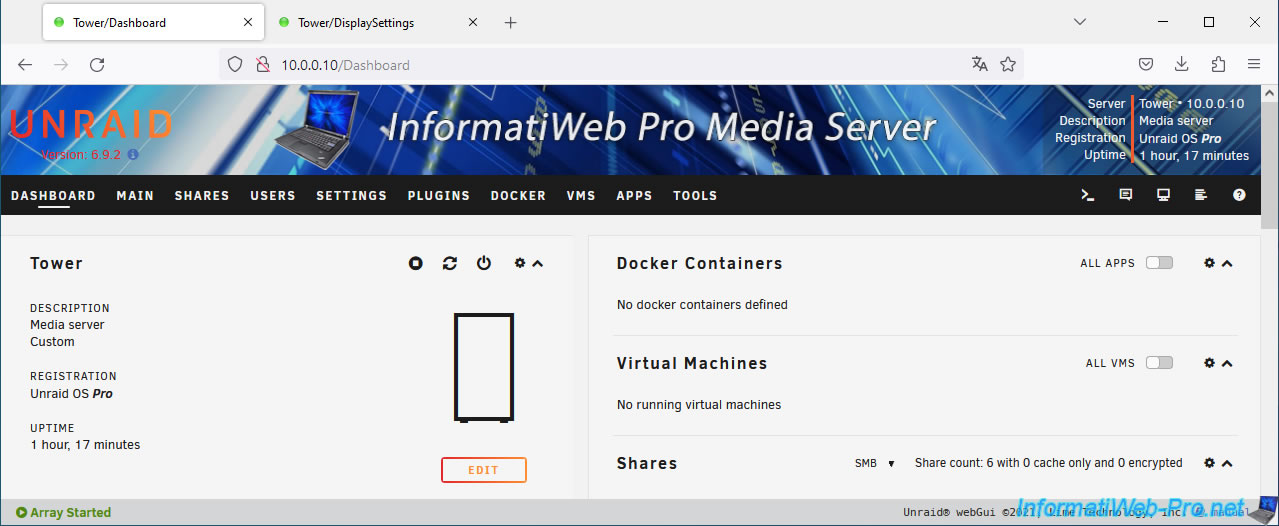
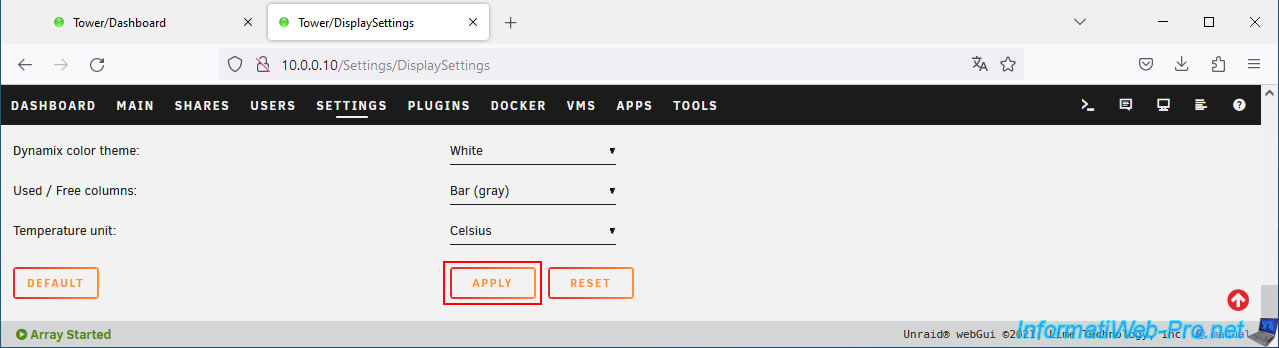
Click on "Apply" at the bottom of the page to display it at the top of the page.
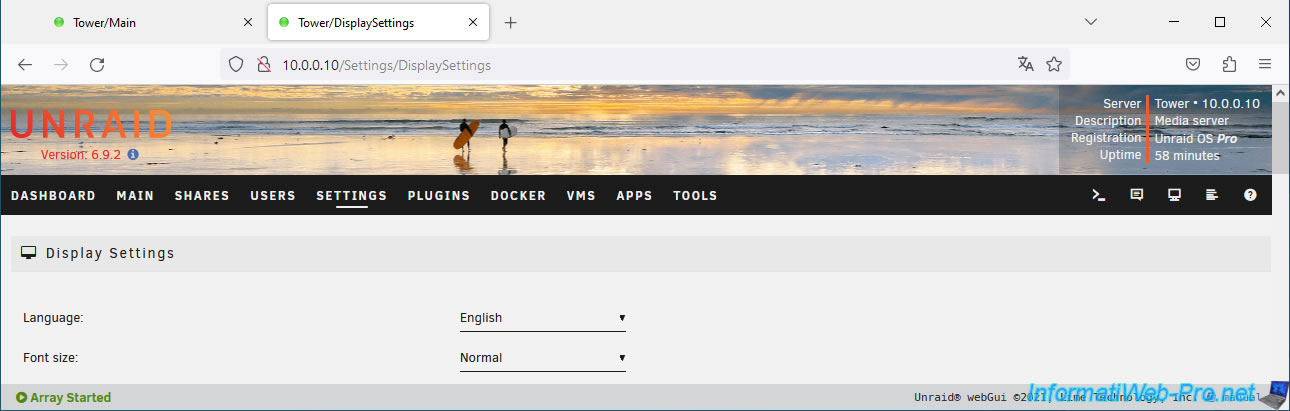
As expected, the Unraid banner appears at the top of the page.
6.2. Customize the banner on Unraid
To find out the size and format to use for the Unraid banner, right-click "Save image as" on the banner displayed in the "Custom banner" line.
Note: Unraid tells you to the right of the displayed banner that you will need to use an image in PNG format.
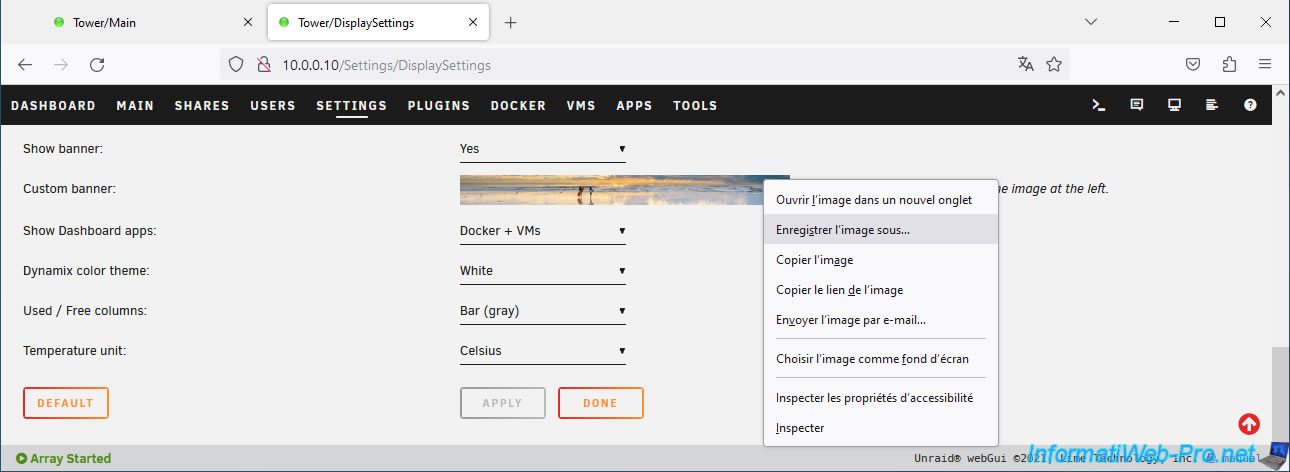
Click Save.
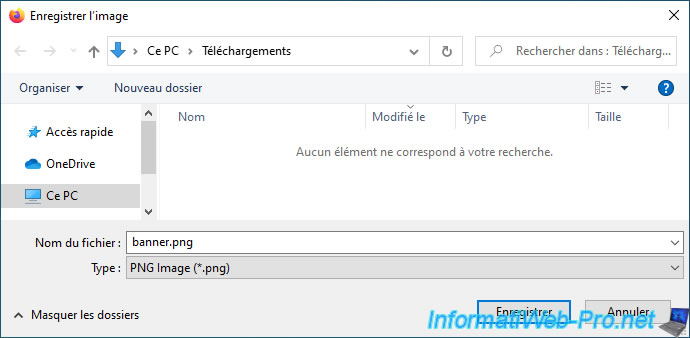
As you can see, the default banner size is: 1270 x 90px.
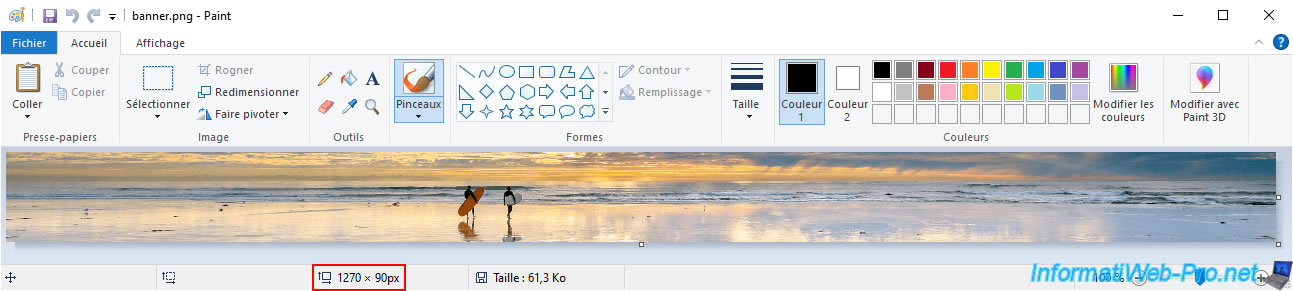
In our case, we created the banner below.
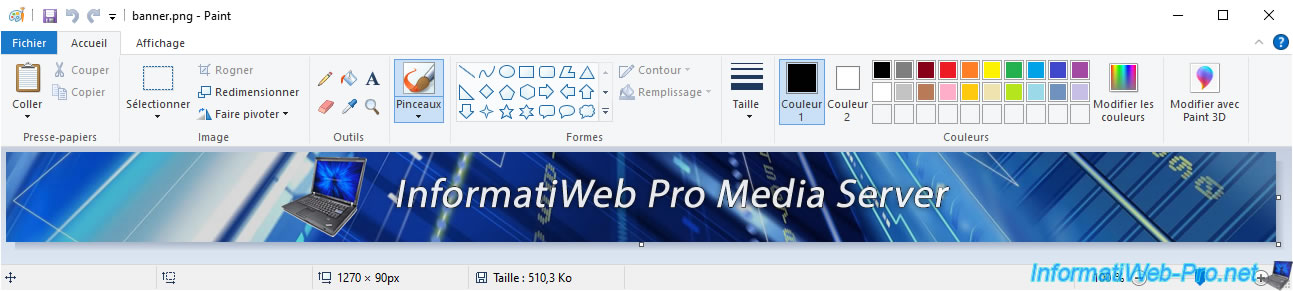
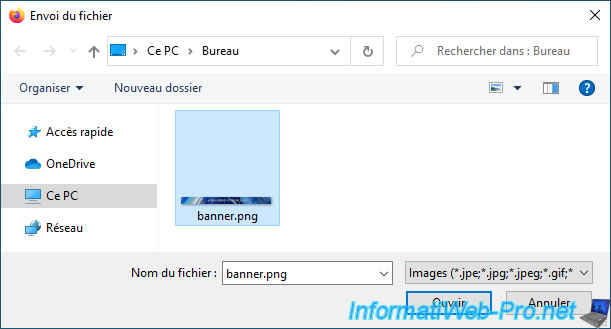
To import it, click on the displayed thumbnail banner or drag and drop your new PNG file onto it.
Select your PNG file and click Open.
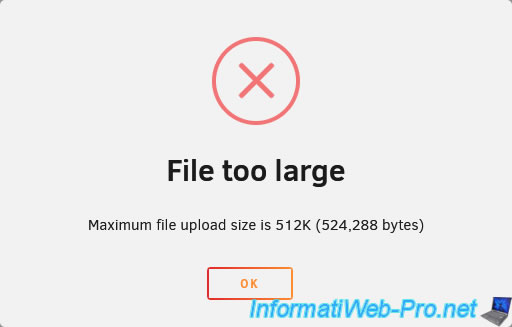
Important : the file you create in PNG format must be less than 512 KB.
Otherwise, you will receive an error when you try to import this file to your Unraid server.
Plain Text
File too large.
Maximum file upload size is 512K (524,288 bytes).
Tip: to lighten your PNG image, create a copy of it, then merge all its layers (if any).
So the size of your PNG image will be smaller.
If your PNG file is smaller than 512 KB, it will appear as a thumbnail instead of the Unraid one.
At the bottom of the page, don't forget to click on "Apply" to confirm this change.

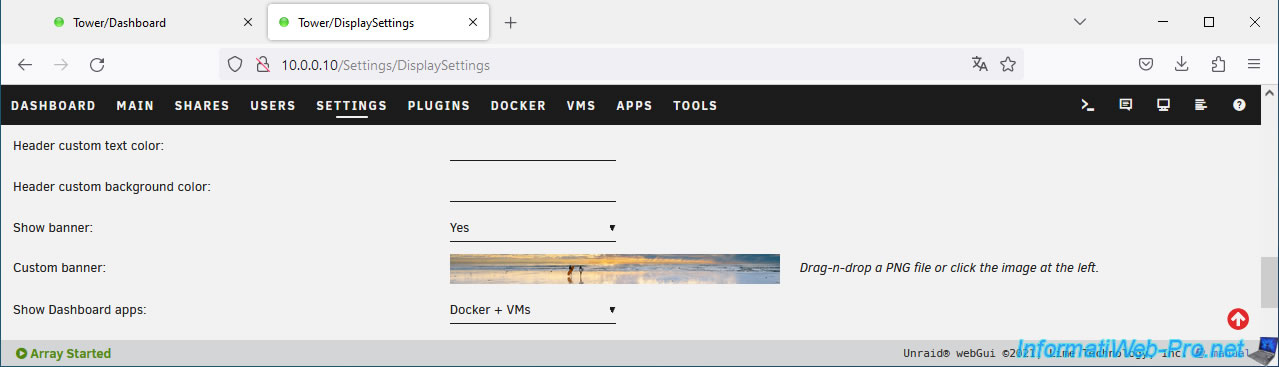
Your new banner appears at the top of the page.
6.3. Restore the original Unraid banner
To restore the original Unraid banner, simply click on the trash can icon.
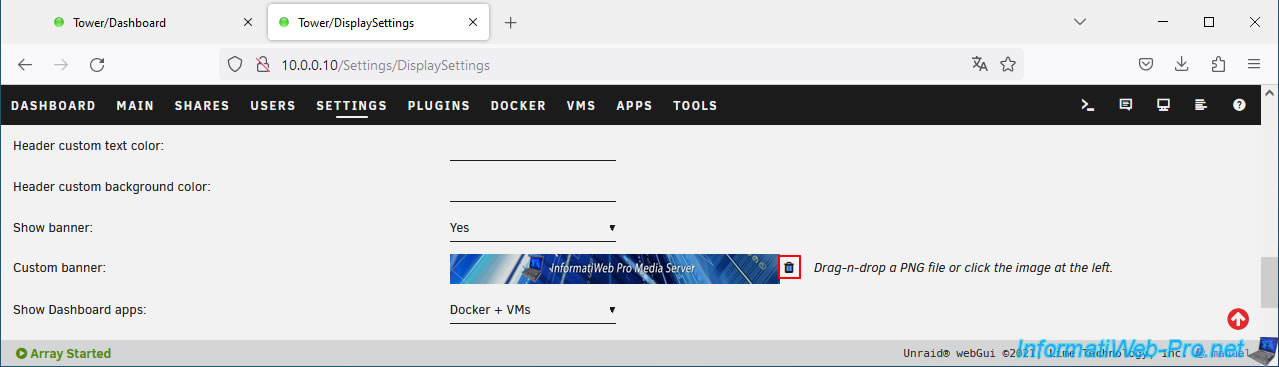
The original Unraid banner appears.
Click "Apply" at the bottom of the page to confirm the change.
The original Unraid banner reappears.

6.4. Remove (hide) the Unraid banner at the top of the page
To remove (hide) the Unraid banner at the top of the page, disable the "Show banner" setting by clicking on "No".
Then, click "Apply".
Note: the "Custom banner" setting will disappear.
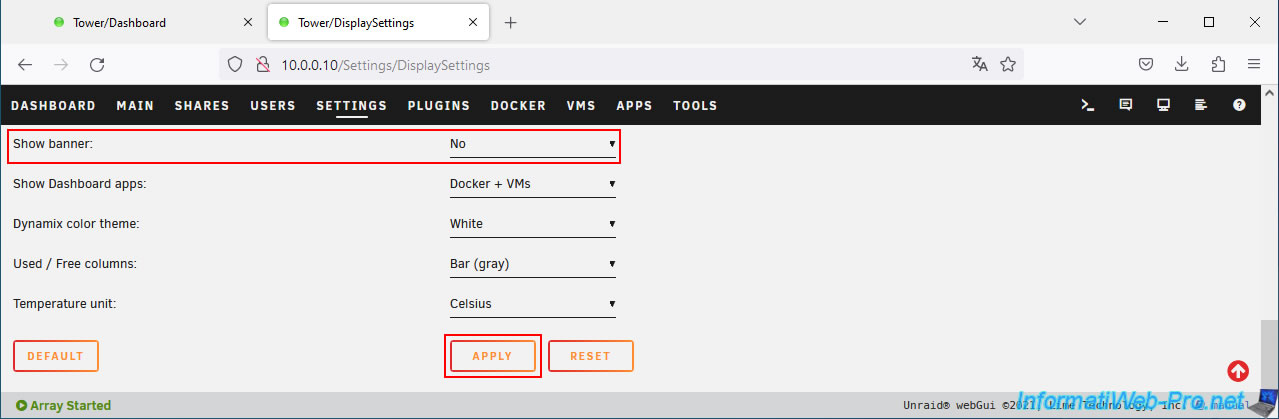
The Unraid banner has disappeared and the banner becomes black again (by default).
Share this tutorial
To see also
-
NAS 2/18/2026
Unraid 6.9.2 - Change temperature thresholds
-

NAS 4/1/2026
Unraid 6.9.2 - Docker - Install a file explorer (CloudCommander)
-
NAS 1/21/2026
Unraid 6.9.2 - Replace a storage disk
-
NAS 7/22/2026
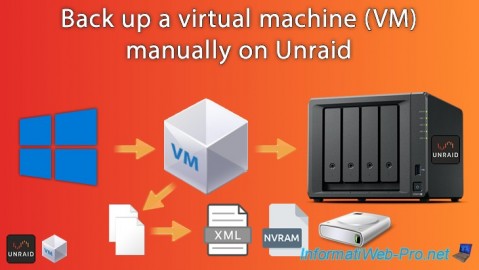
Unraid 6.9.2 - VMs - Backing up a VM manually
No comment