Create a VPN server (remote access) via OpenVPN (in L3 mode) secured via SSL/TLS on pfSense 2.6
- Firewall
- pfSense
- 05 September 2025 at 19:07 UTC
-

- 3/4

7. Install and use the OpenVPN Client Export package
7.1. Install the OpenVPN Client Export package
To install the "OpenVPN Client Export" package, go to: System -> Package Manager.
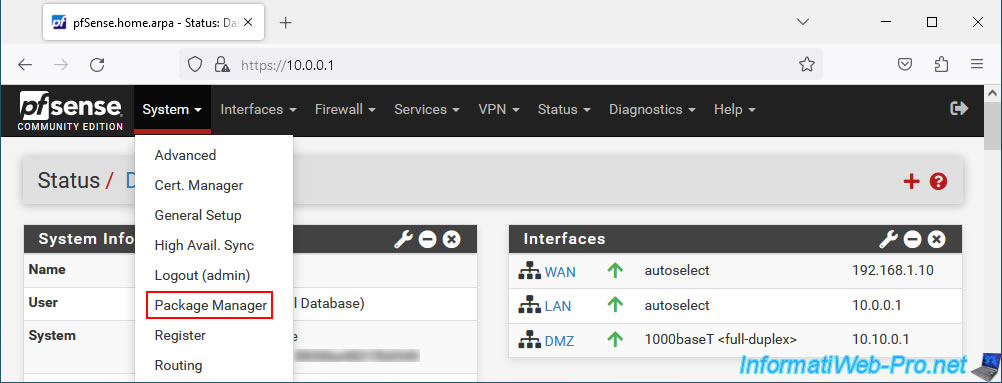
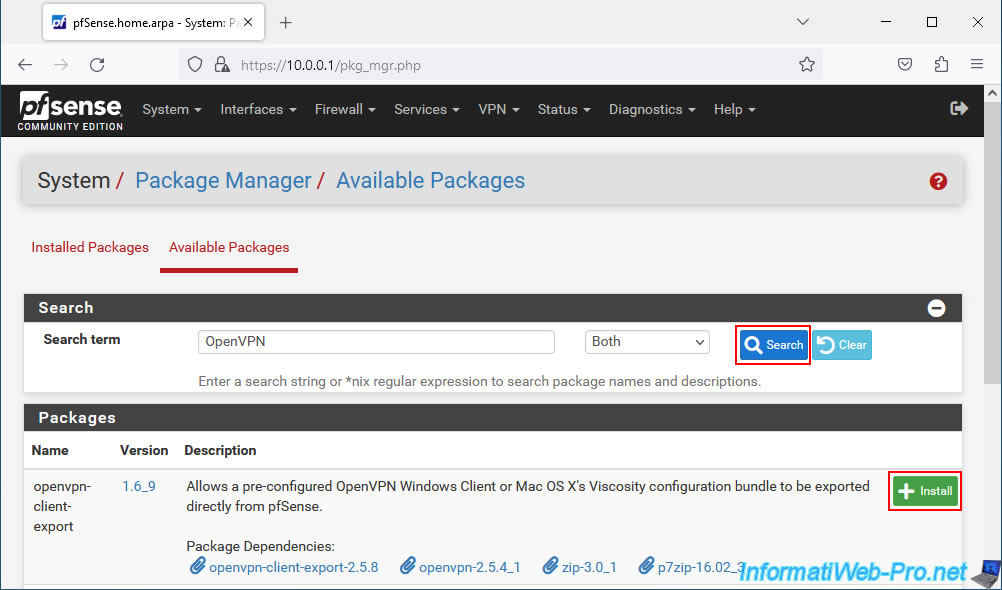
In the "Available Packages" tab, type "OpenVPN", then click: Search.
Next, install the "openvpn-client-export" package that appears.
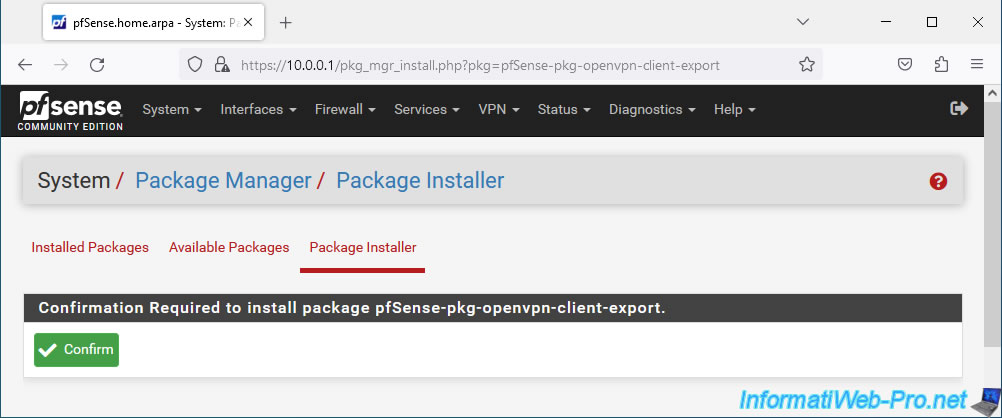
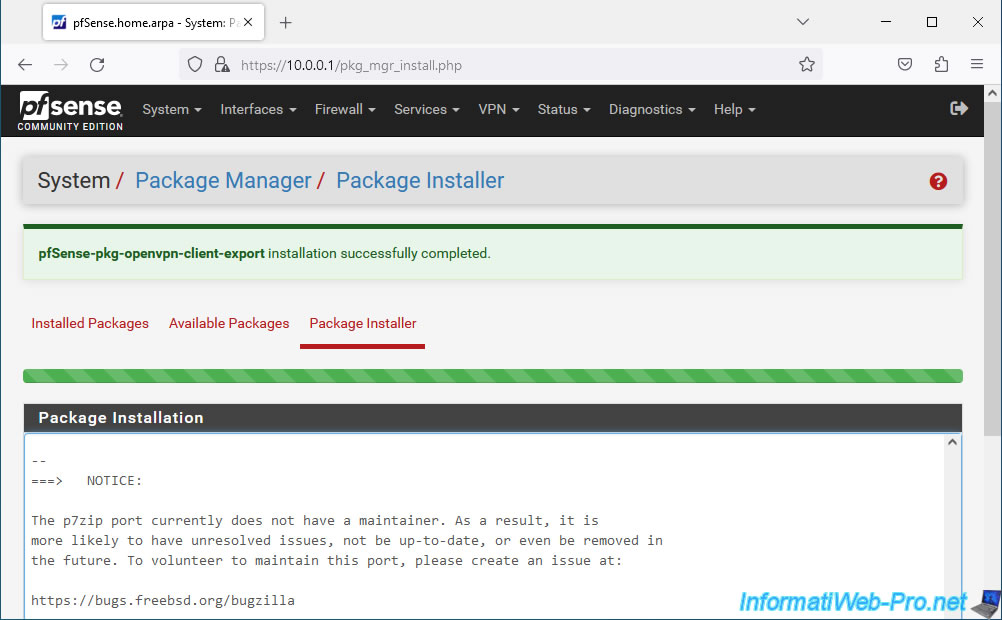
Confirm the installation of this package: pfSense-pkg-openvpn-client-export.
Wait while it installs.
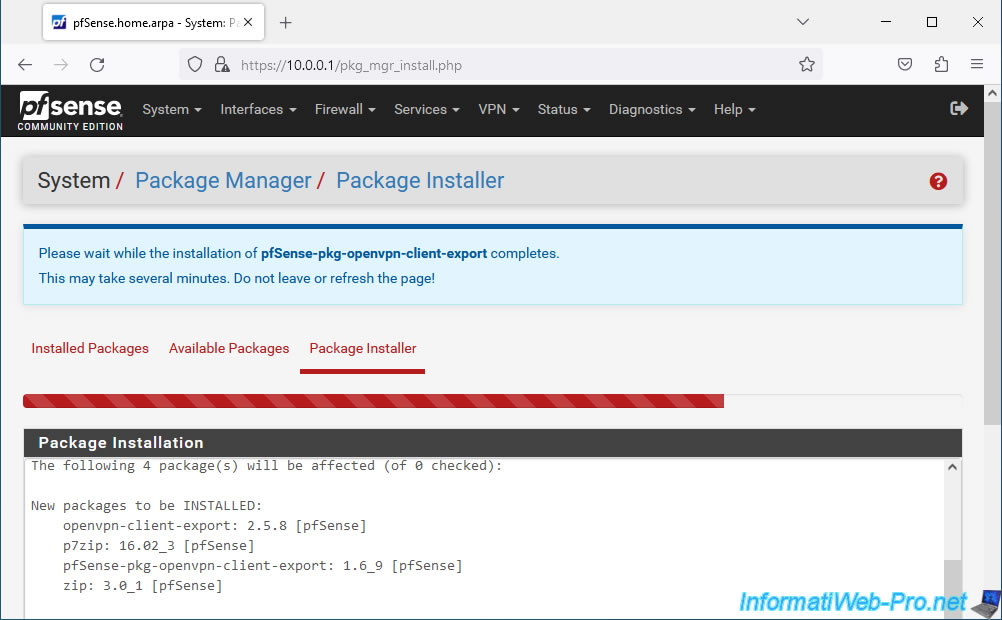
The "pfSense-pkg-openvpn-client-export" package has been installed.
7.2. Export configuration for OpenVPN clients
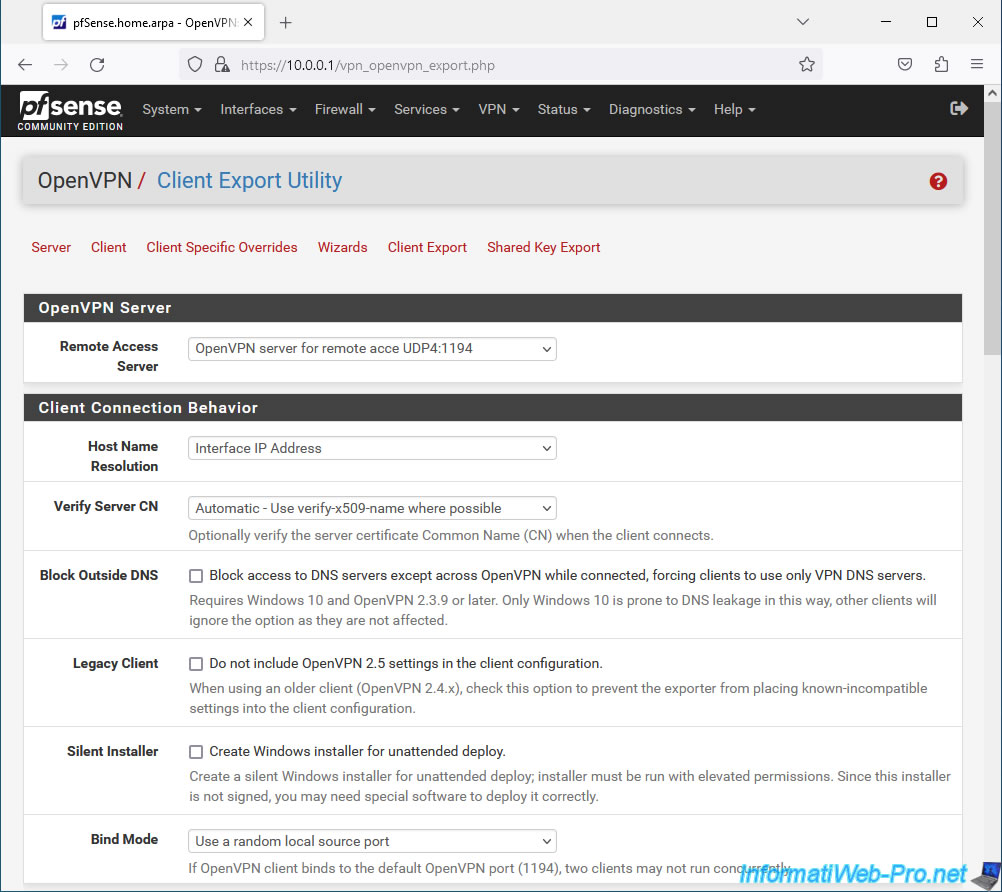
To easily install an OpenVPN client for a specific user, simply go to: VPN -> OpenVPN.

Then, go to the new "Client Export" tab (present since installing the "OpenVPN Client Export" package).

In the "OpenVPN Server" section, all you need to do is select your OpenVPN server configured in "remote access" mode.
In our case: OpenVPN server for remote access UDP4:1194.
Generally, the rest of the settings can be left as default.
However, here is some information regarding these just in case.
Then, in the "Client Connection Behavior" section, you can configure these settings:
- Host Name Resolution: indicates how the address of your OpenVPN server should be indicated in the configuration that will be exported for the OpenVPN client.
- Interface IP Address: use the IP address of your OpenVPN server interface. In our case, our OpenVPN server listens on the WAN interface. Therefore, the IP address assigned to the pfSense WAN interface will be indicated.
This choice is best if your business has a static (fixed) public IP address. - Automagic Multi-WAN IPs (port forward targets): useful if you use multi-WAN mode under pfSense. This option will be based on the IP address.
- Automagic Multi-WAN DDNS Hostnames (port forward targets): similar to the previous option, but based on a dynamic domain name. Which is useful if your company's external IP address is dynamic (changes regularly).
- Installation hostname: use the pfSense hostname configured on the "System -> General Setup" page.
- Other: allows you to manually specify the domain name or IP address to use.
Which is useful if pfSense is behind another router, for example. Note if pfSense is behind a router, you will also need to create the port forwarding rule and allow network traffic to pass through that port (if applicable).
- Interface IP Address: use the IP address of your OpenVPN server interface. In our case, our OpenVPN server listens on the WAN interface. Therefore, the IP address assigned to the pfSense WAN interface will be indicated.
- Verify Server CN: allows the client to verify that it will connect to the correct server by checking if the server certificate matches the one exported in this client configuration.
- Block Outside DNS: allows you to force clients (under Windows 10 only) to use the DNS servers of your OpenVPN server instead of the classic DNS servers configured on the client workstation if the "Block access to DNS servers..." box is checked .
- Legacy Client: indicates whether the configuration should include settings available from OpenVPN 2.5 or not.
- Silent Installer: allows you to create a silent installer using Windows Installer.
This allows, in business, the OpenVPN client to be deployed automatically in the background without any user interaction. - Bind Mode: by default, the "Use a random local source port" option is selected, which allows multiple clients to connect simultaneously.
Note that this may not be supported by older OpenVPN clients.
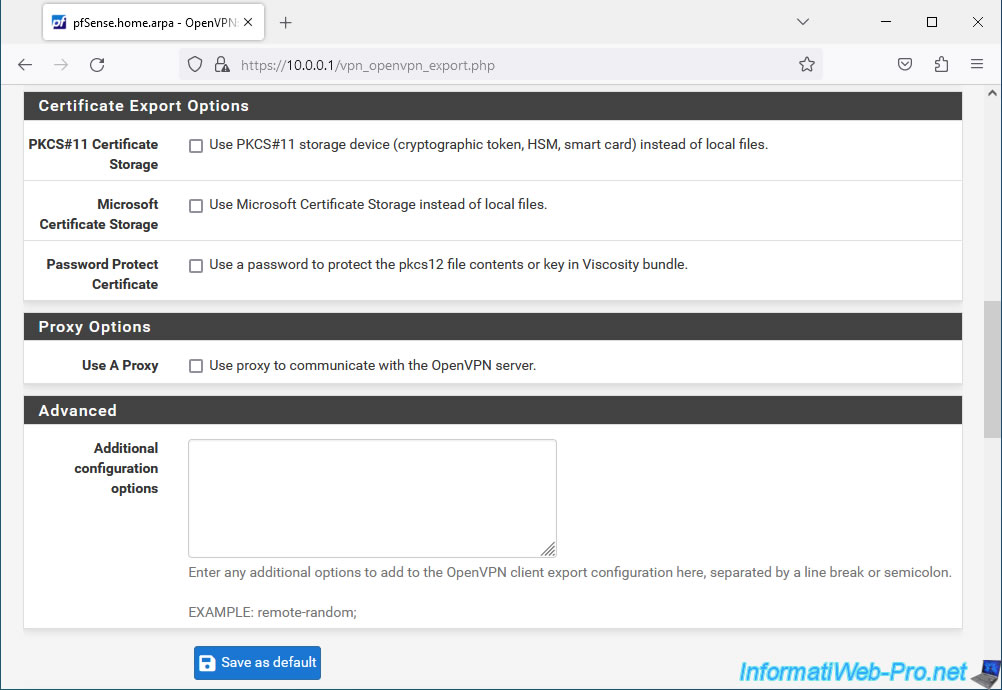
In the "Certificate Export Options" section, you can configure these parameters:
- PKCS#11 Certificate Storage: if you want to store the client certificate on a token, a smart card, ... instead of using a local file, you will need to check this box "Use PKCS#11 storage device (cryptographic token, HSM, smart card) instead of local files".
- Microsoft Certificate Storage: to store the certificate in the Windows certificate store instead of using a local file, check the "Use Microsoft Certificate Storage instead of local files" box.
- Password Protect Certificate: to protect the certificate with a certificate (for the "Viscosity" bundle), check the box "Use a password to protect the pkcs12 file contents or key in Viscosity bundle".
In the "Proxy Options" section, you can check the "Use proxy to communicate with the OpenVPN server" box to use a proxy to access the OpenVPN server.
Indeed, for security reasons, some companies force their employees to go through a proxy to access the Internet.
In the "Advanced" section, you will be able to specify advanced options to include in the OpenVPN client configuration by indicating them in the "Additional configuration options" box.
Important : click "Save as default" so that these choices are saved and reused automatically when you re-access the OpenVPN client export page later.
Below, you will see that you can export the configuration of an OpenVPN client for the desired users.
Warning : as indicated at the bottom of the page (on a blue background), if certain users are not present in the list, it is because the CA used by the server certificate and the client certificate is different, and the client certificate does not exist not or that the user does not have a certificate in his user account under pfSense (in our case).
To export the OpenVPN client configuration, you will have the choice between:
- Inline Configuration: allows you to export only the configuration for the OpenVPN client.
- Most Clients: configuration file usable with most OpenVPN clients
- Android: configuration file usable under Android.
- OpenVPN Connect (iOS/Android): or for the OpenVPN Connect client available on iOS and Android.
- Bundle Configurations :
- Archive: allows you to export the configuration for the OpenVPN client, the client certificate (of the user) and its associated private key, as well as the TLS key (which must be the same for the OpenVPN server and the client).
The files will be available in a compressed file in ".zip" format. - Config File Only: allows you to export only the configuration for the OpenVPN client.
- Archive: allows you to export the configuration for the OpenVPN client, the client certificate (of the user) and its associated private key, as well as the TLS key (which must be the same for the OpenVPN server and the client).
- Current Windows Installers: allows you to create an installer to automatically install and configure OpenVPN 2.5.8 for this user. You will have the choice between "64-bit" (for the x64 architecture of Windows) and "32-bit" (for the x86 architecture).
- Legacy Windows Installers: similar to the previous option, except this is an older version of OpenVPN that can be adapted to Windows 10 / Windows Server 2016/2019 or Windows 7/8/8.1/2012R2.
This may be useful for compatibility reasons. - Viscosity (Mac OS X and Windows): allows you to export the configuration and optionally the certificates, ... for the OpenVPN Viscosity client available on Mac OS
- Viscosity Bundle: allows you to export the CA certificate, the client certificate and its associated private key, the TLS key and the configuration for this OpenVPN Viscosity client.
- Viscosity Inline Configuration: allows you to export only the configuration for this client.
Important : the OpenVPN client requires at least Windows 7 to function.
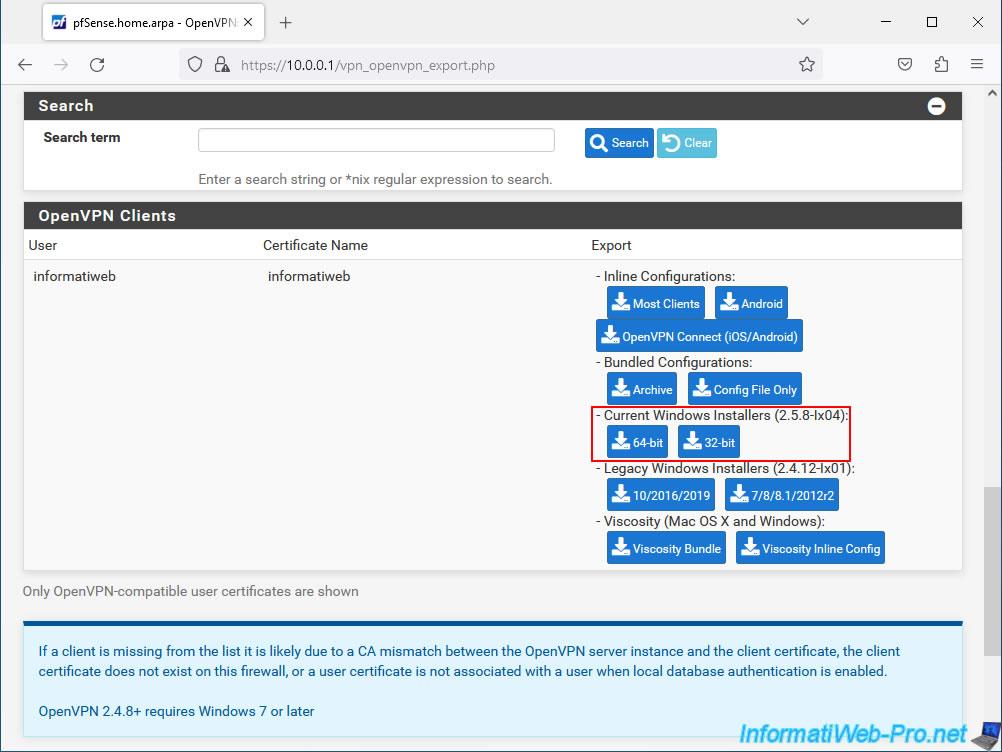
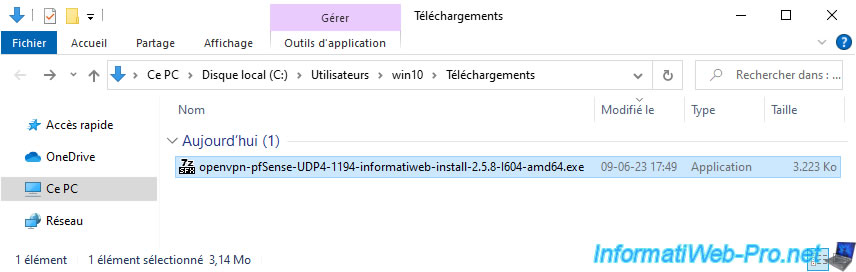
In our case, we chose "Current Windows Installers (2.5.8-lx04)" for the "64-bit" (x64) architecture.
So we have a single executable file named: openvpn-pfSense-UDP4-1194-informatiweb-install-2.5.8-l604-amd64.exe.
Source : OpenVPN Client Export Package | pfSense Documentation.
7.3. Automatically install and configure the OpenVPN client
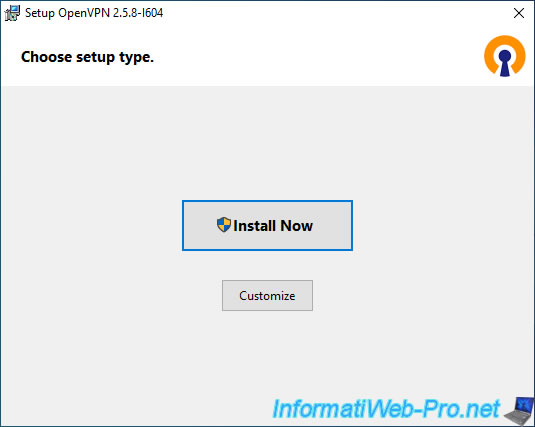
To automatically install and configure this OpenVPN client, launch the downloaded file and simply click: Install Now.
Note: this action requires administrator rights on the client PC.
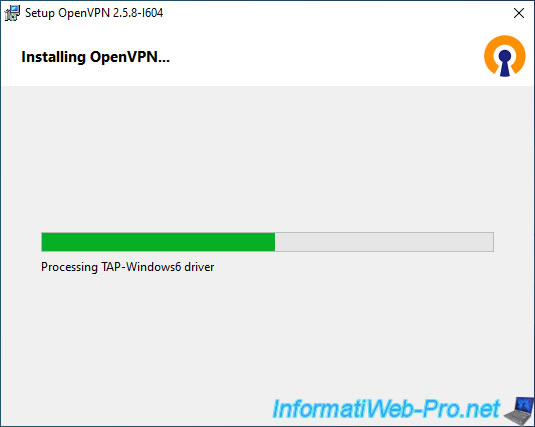
Wait while OpenVPN and its dependent drivers (including "TAP-Windows6") are installed.
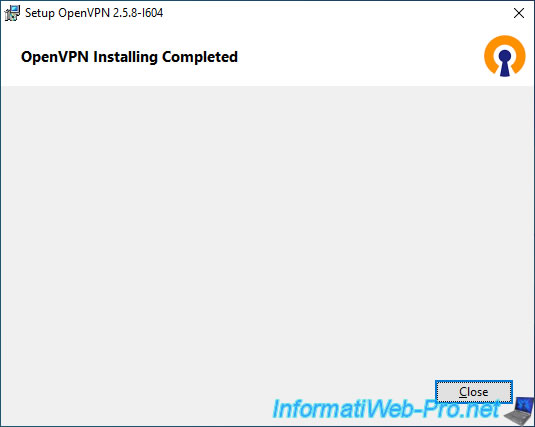
The OpenVPN client has been installed.
Click: Close.
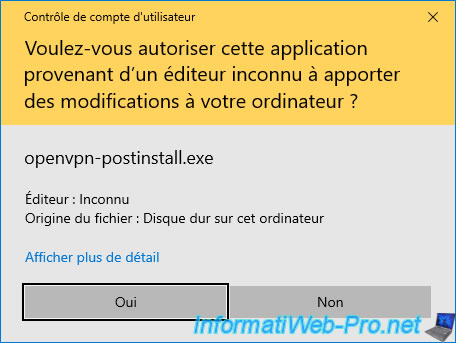
Then a new program "openvpn-postinstall.exe" (included in the previously downloaded file) will automatically launch
Click Yes when the "User Account Control" window appears.
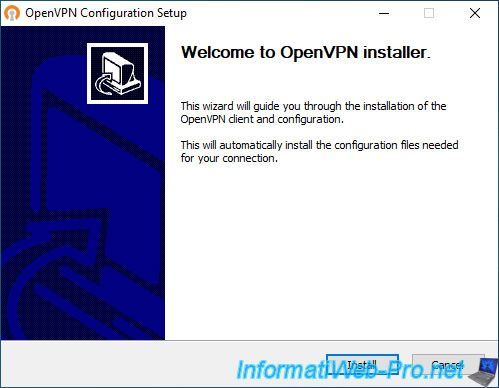
The "OpenVPN Configuration Setup" window appears.
Click: Install.
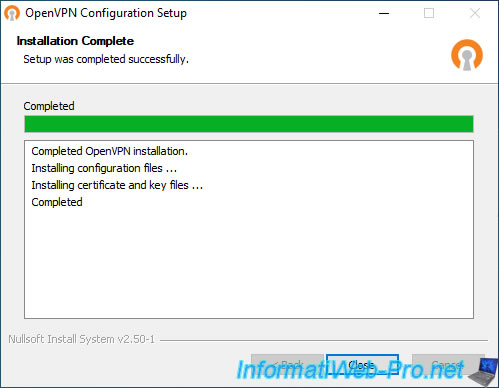
As you can see, this installer installs the configuration files, as well as the necessary certificate and keys.
Click: Close.
Plain Text
Completed OpenVPN installation.
Installing configuration files...
Installing certificate and key files...
Completed.
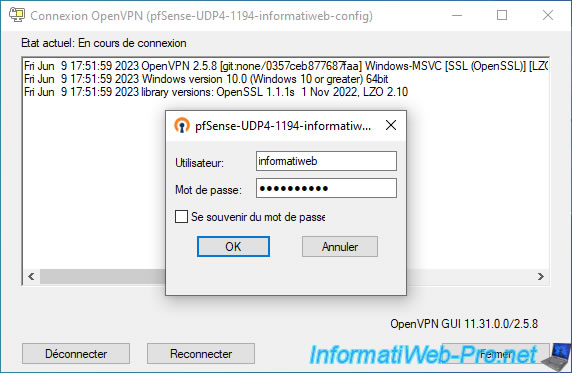
Double-click on the network icon with a padlock (and which therefore corresponds to the OpenVPN client).

Since our OpenVPN server is configured in "Remote Access (SSL/TLS + User Auth)" mode, the OpenVPN client asks us for a username and password.
We indicate the "informatiweb" user account for which we have just exported the OpenVPN configuration and we click OK.
Wait while connecting and configuring the network.
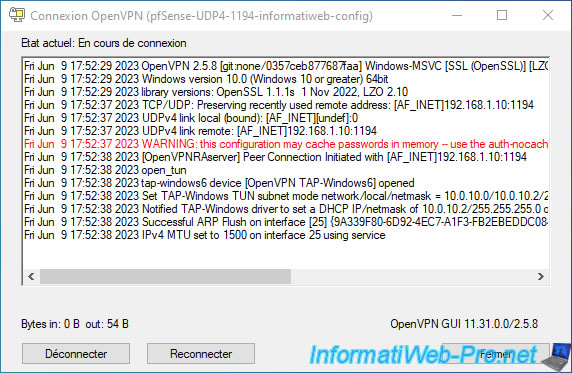
Once the VPN connection is successful, you will see a notification appear.
Plain Text
pfSense-UDP4-1194-informatiweb-config is now connected.
Assigned IP address: 10.0.10.2.
OpenVPN GUI for Windows.
The network icon with a padlock (which corresponds to the OpenVPN client) will turn green.

Share this tutorial
To see also
-
Firewall 5/21/2025
pfSense 2.6 - Access to the web interface via the WAN interface
-

Firewall 8/8/2025
pfSense 2.6 - Configure a LACP link (LAGG)
-
Firewall 9/10/2025
pfSense 2.6 - Create a VPN server (remote access) via OpenVPN (L2 mode)
-
Firewall 6/18/2025
pfSense 2.6 - Manage quality of service (QoS)
No comment