- Firewall
- pfSense
- 11 June 2025 at 07:59 UTC
-

- 1/2

As you already know, pfSense is a firewall (originally) with many other great features that allows it to be a true UTM.
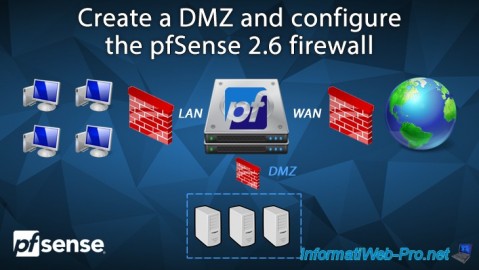
In this tutorial you will see how to create a DMZ zone and manage the rules of this pfSense firewall.
- Create a DMZ
- Configure the DMZ interface
- Enable DHCP server for DMZ zone
- Install a web server in the DMZ zone
- Testing access to the DMZ zone
- Create a rule in the firewall to allow ping to the LAN network
1. Create a DMZ
Without going into detail, a DMZ zone is an area separated from the local network where you will place your servers.
Thus, client PCs connected to the LAN network will be able to access your servers to access an intranet (a local website) or local file servers (via the FTP protocol or other).
On the other hand, servers in the DMZ zone will not be able to access client PCs as a security measure.
Thus, the DMZ servers can be made accessible from the Internet without the PCs on the LAN network being able to be attacked by hackers via a server that would be compromised in the DMZ zone.
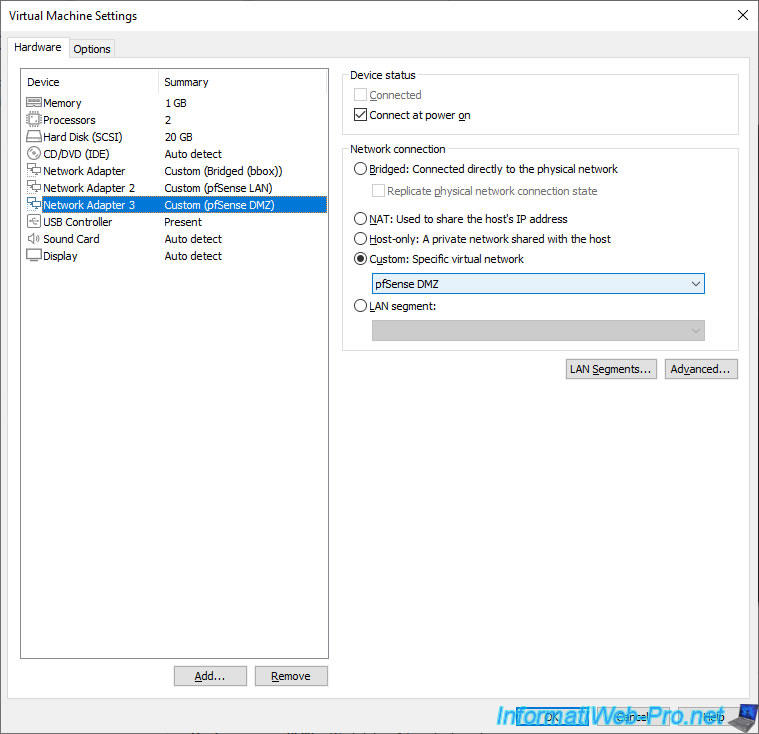
In short, in our case, we carry out our tutorials with virtual machines, so we add a new network card to our "pfSense" virtual machine and we connect it to our "pfSense DMZ" virtual network.
To find out how to create a new virtual network on VMware Workstation Pro, refer to step "4.4. Create a virtual switch" of our tutorial "VMware Workstation 16 / 15 - Network access modes".
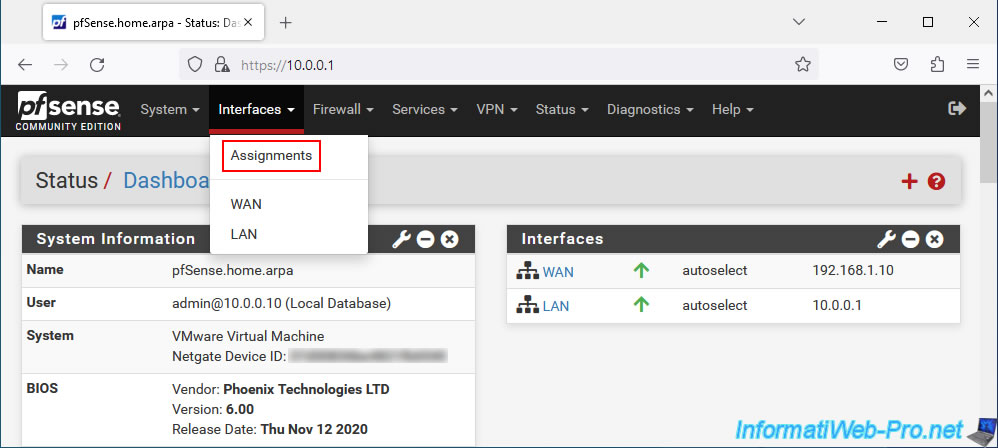
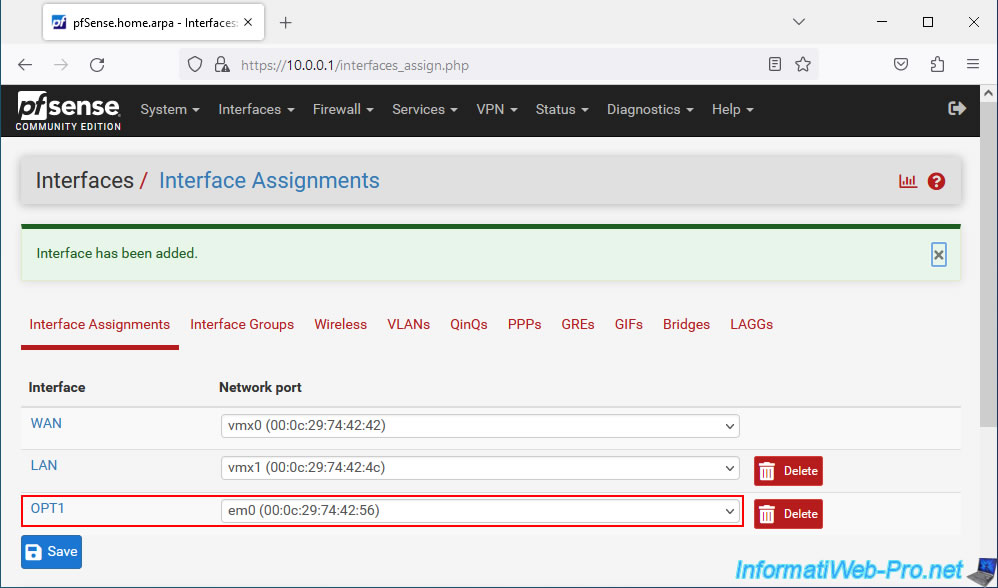
Start your pfSense machine, then go to the menu: Interfaces -> Assignments.
In the "Interface Assignments" tab, you will see that a new network port is available. This is your new network card that is not yet assigned to a pfSense interface.
Click Add.
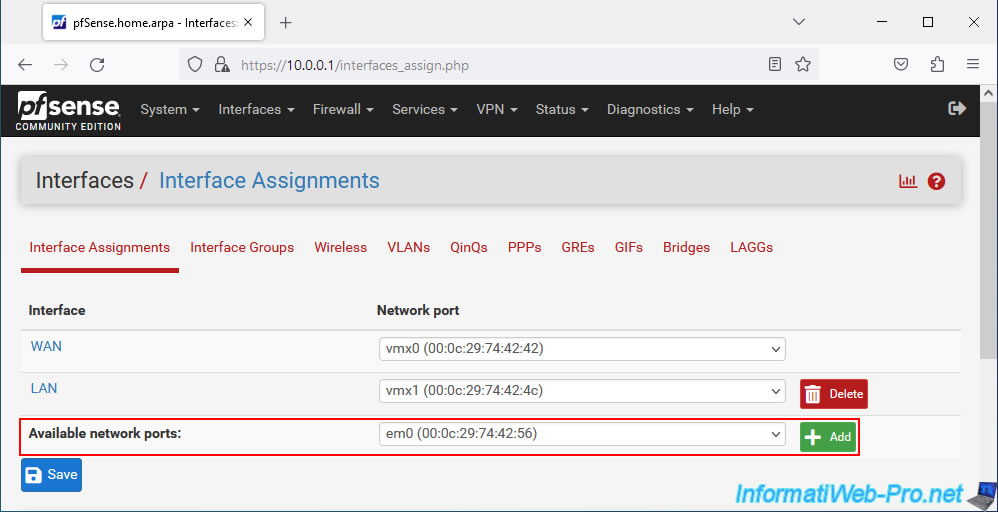
The network card (network port) is assigned by default to a new "OPTx" interface (in our case: OPT1).
But, you can change its name later.
2. Configure the DMZ interface
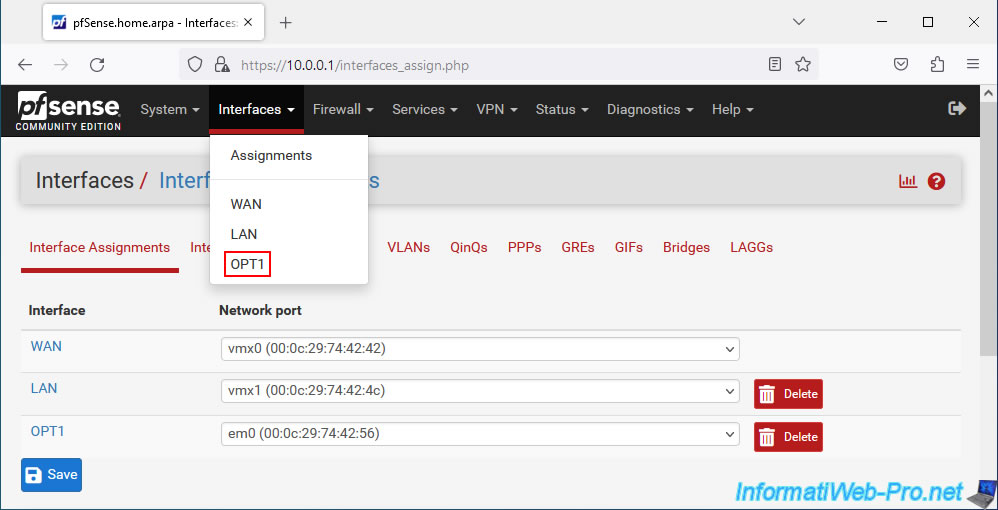
To configure your new DMZ interface, go to the "Interfaces -> OPT1" menu or click on its name "OPT1" in the displayed list.
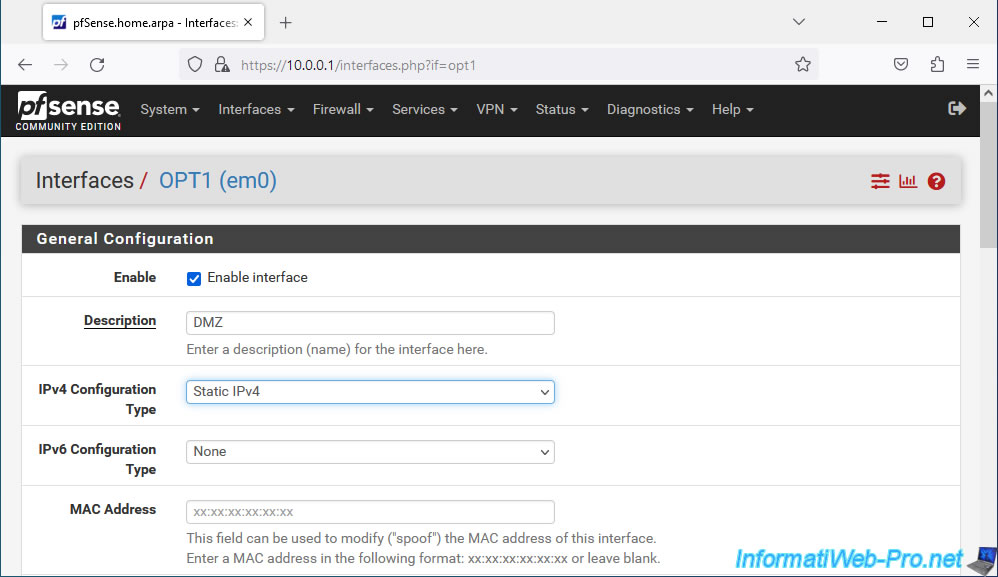
Change the description of this interface "OPT1" to "DMZ" to change its name on pfSense.
Then, choose "IPv4 Configuration Type: Static IPv4" to set a static IPv4 address for this network interface on this separate network.
Important : this interface will appear under the name "DMZ", but the system name used by pfSense and present in the pfSense URL will remain "optX".
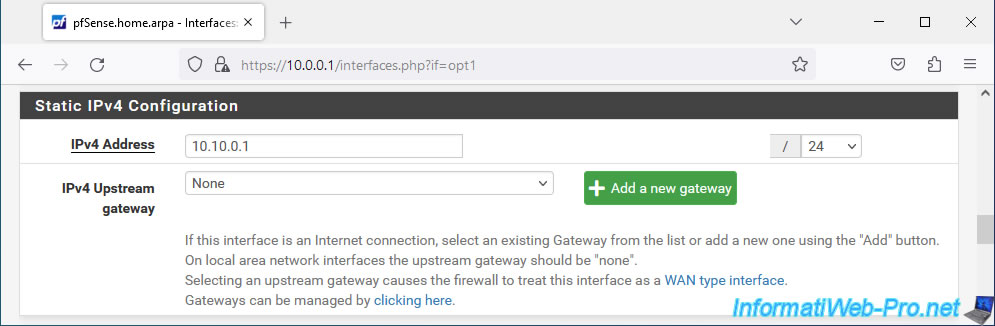
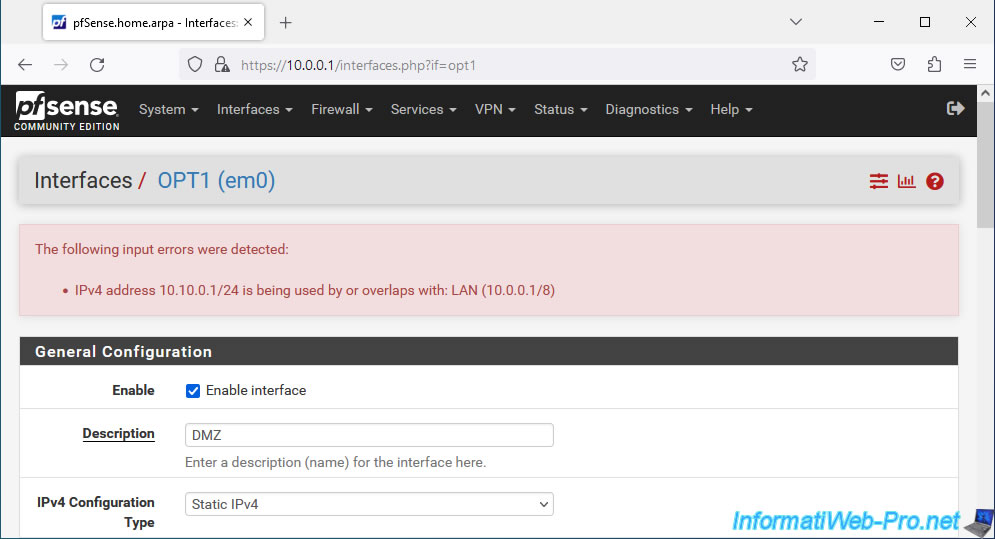
In the "Static IPv4 Configuration" section that appears, provide a static IPv4 address for this interface and select the subnet mask (in CIDR format) to use.
In our case, we assign the IPv4 address "10.10.0.1" to this DMZ interface and we select "24" for the subnet mask (which corresponds to the subnet mask "255.255.255.0").
That is, in our case, the DMZ zone will use the "10.10.0.x" network.
At the bottom of the page, click "Save".
Depending on the network mask and subnet masks used on other pfSense interfaces, an error may occur.
Plain Text
The following input errors were detected: IPv4 address 10.10.0.1/24 is being used by or overlaps with: LAN (10.0.0.1/8).
Which simply indicates that there is a conflict between the different subnets used by pfSense.
In our case, the "10.10.0.x" network in our DMZ zone conflicts with the "10.x.x.x" network used on the pfSense LAN network.
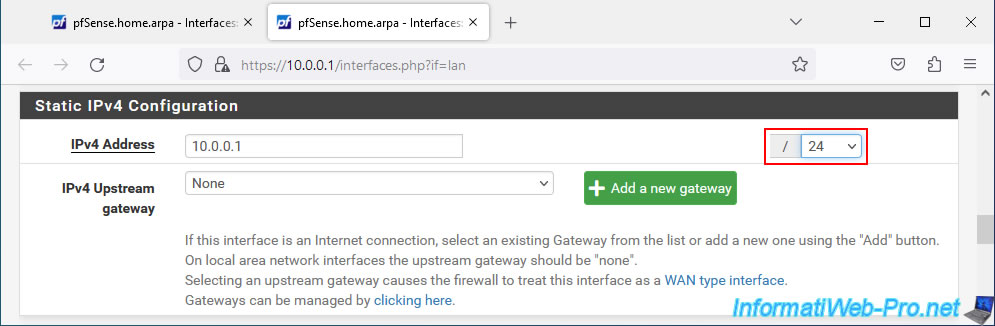
To fix the problem, open a new tab in your web browser and change the subnet of the interface that conflicts with your DMZ.
In our case we go to "Interfaces -> LAN" and we change the subnet mask "8" to "24".
So our LAN network will use the "10.0.0.x" subnet.
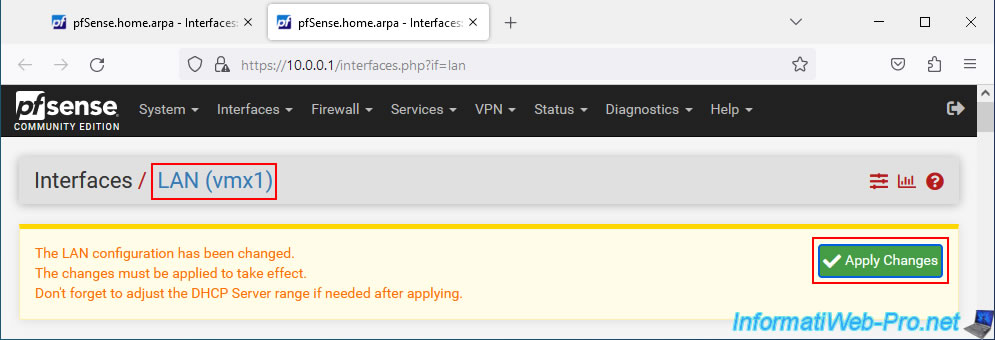
Then, at the bottom of the page, click "Save".
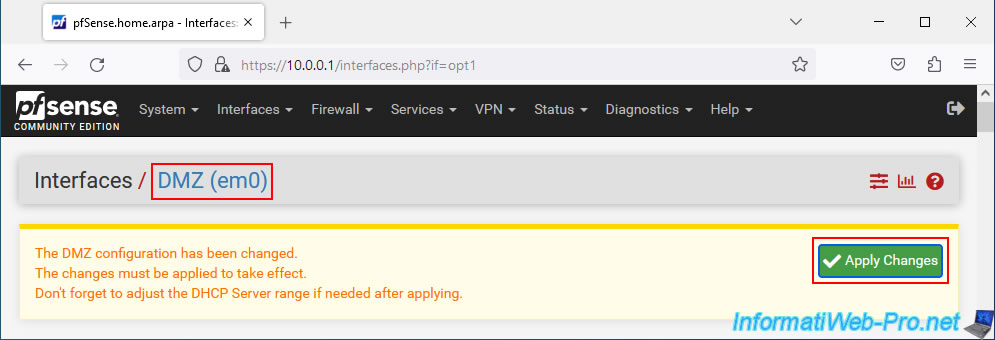
At the top of the page, click on the "Apply Changes" button to apply this change to the interface concerned.
Now click "Save" at the bottom of the page for the "DMZ" interface, then click "Apply Changes" at the top of the page.
In our case, pfSense therefore uses these networks:
- LAN : 10.0.0.x.
- DMZ : 10.10.0.x.
3. Enable DHCP server for DMZ zone
At this time, the pfSense DHCP server does not distribute IP addresses for devices connected to the DMZ.
Which means you should use IP addresses on all your servers (which is preferable).
However, if you want to automatically distribute IP addresses to this DMZ, you will need to modify the pfSense DHCP server configuration.
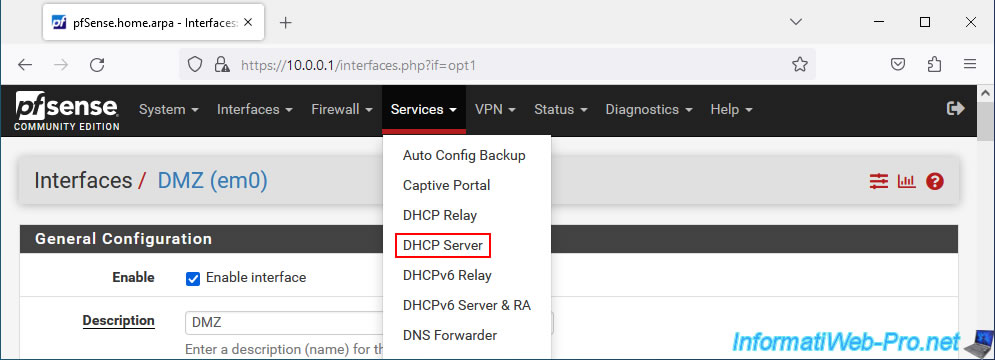
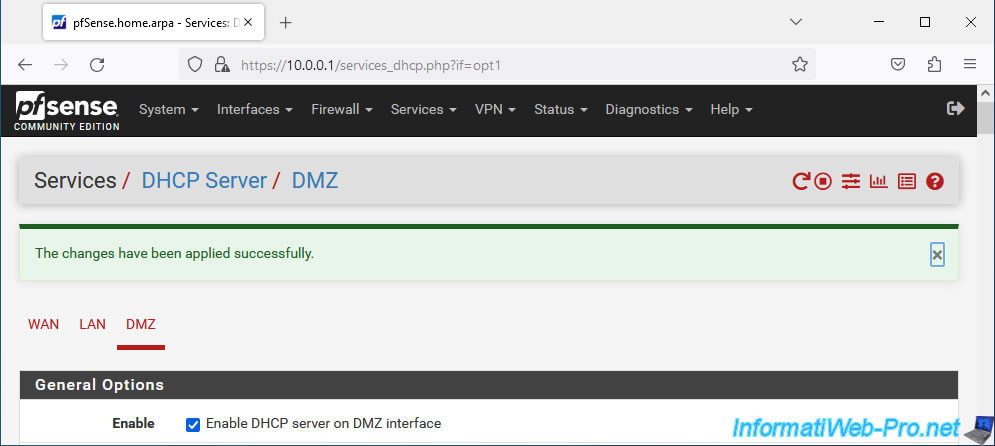
To do this, go to: Services -> DHCP Server.
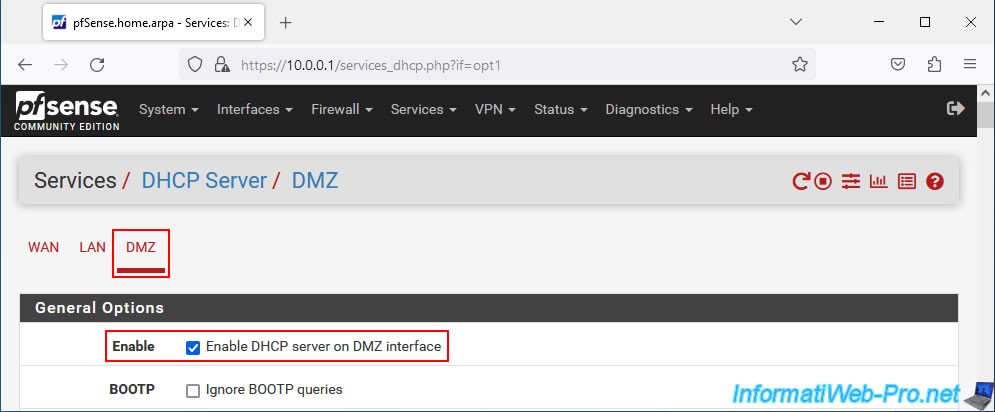
Go to the "DMZ" tab of the "DHCP Server" page that appears and check the "Enable DHCP server on DMZ interface" box.
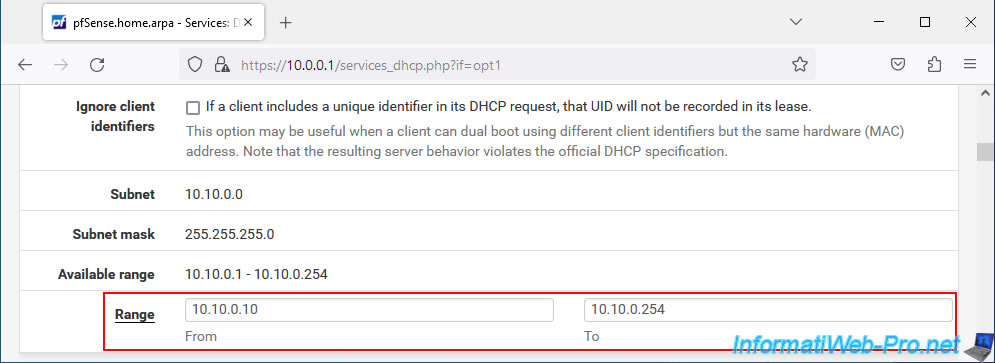
Define the range of IP addresses to distribute for this DMZ zone not exceeding the available range (Available range) for the subnet used on this DMZ interface.
Also remember that the IP address assigned to the pfSense DMZ interface must not be in the range you specify here. Otherwise, you will have an IP address conflict one day.
This will prevent the pfSense DMZ interface from working properly.
In our case, we set the IP address range: 10.10.0.10 to 10.10.0.254.
Note: the address ending in "255" is that of broadcast and is not included in the range available for your subnet.
At the bottom of the page, click "Save" to save this configuration.
Modifications have been saved.
Share this tutorial
To see also
-
Firewall 5/21/2025
pfSense 2.6 - Access to the web interface via the WAN interface
-
Firewall 5/9/2025
pfSense 2.6 - Download and installation on VMware Workstation
-
Firewall 5/17/2025
pfSense 2.6 - Enable SSH protocol
-
Firewall 8/16/2025
pfSense 2.6 - Monitoring via SNMP and Zabbix 6
You must be logged in to post a comment