- Firewall
- pfSense
- 06 August 2025 at 07:51 UTC
-

- 1/2

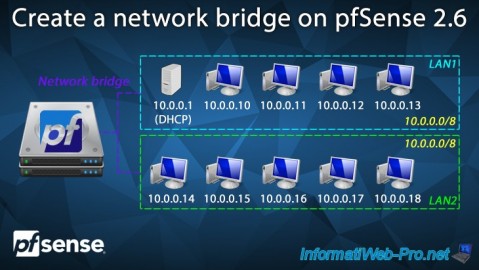
Thanks to pfSense, you can create a bridge between 2 network interfaces (to connect 2 switches, to connect a remote network via a VPN and a LAN network, ...).
In this tutorial, we will create a simple bridge between 2 switches (not routers) using pfSense.
- Configuration used
- Rename LAN interface to LAN1
- Add a LAN2 network interface
- Enable DHCP server only on LAN interface
- Create a bridge
- Allow DHCP traffic through network bridge
- Force a machine to obtain new DHCP information
- Fix the problem of access to the network and the Internet via the network bridge
- Access to network machines via the bridge
- Advanced options for network bridge
1. Configuration used
To start, install pfSense with the default configuration as explained in our tutorial: pfSense 2.6 - Download and installation on VMware Workstation.
As you can see, in our case pfSense currently has 2 network interfaces:
- WAN: interface connected to the Internet.
- LAN: interface connected to the local network (on the 1st switch).
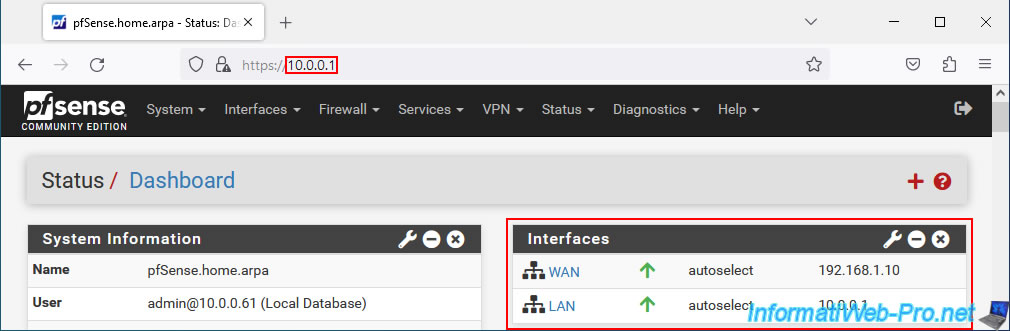
The pfSense DHCP server is enabled on the LAN interface to distribute IP addresses to the machines connected to the 1st switch.
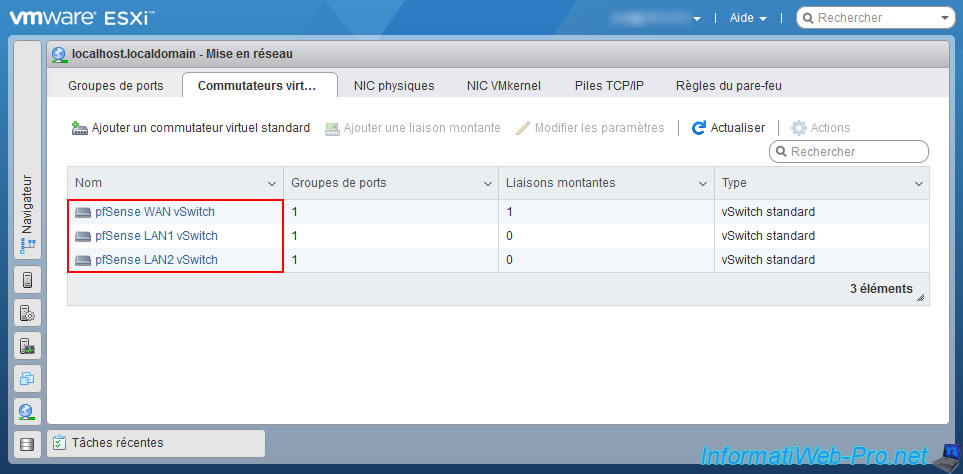
For this tutorial, we used 3 switches:
- pfSense WAN vSwitch: represents your Internet Box.
- pfSense LAN1 vSwitch: switch where the pfSense LAN network interface is connected.
Note that the pfSense LAN interface will be renamed LAN1 in the rest of this tutorial. - pfSense LAN2 vSwitch: switch where the future pfSense LAN2 network interface will be connected, as well as a 2nd PC running Windows 10.
The machines that you connect to the "pfSense LAN2 vSwitch" will receive an IP address from the DHCP server of the pfSense LAN interface thanks to the bridge that will be created between the LAN1 and LAN2 interfaces.
Thus, the machines of LAN1 and LAN2 will find themselves on the same network and will therefore be able to communicate without problem.
Note: this tutorial was created with virtual machines on the VMware ESXi hypervisor to be able to use the same subnet on 2 virtual switches.
Indeed, this is not possible with VMware Workstation Pro.
However, in production, you will probably use physical switches.
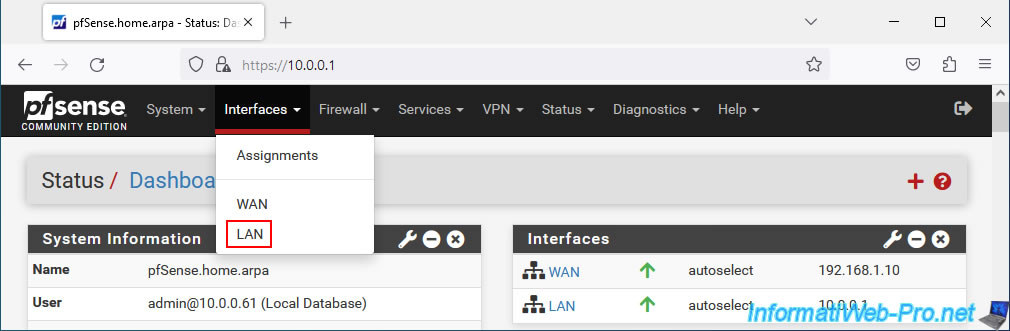
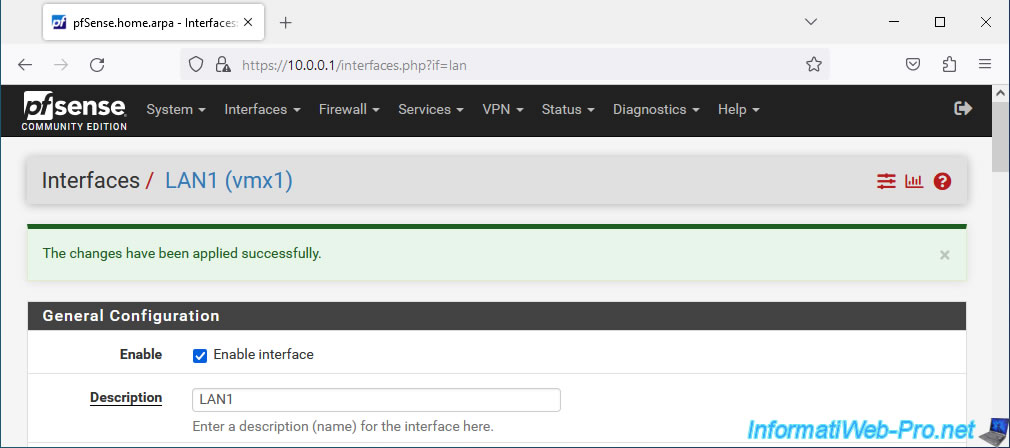
2. Rename LAN interface to LAN1
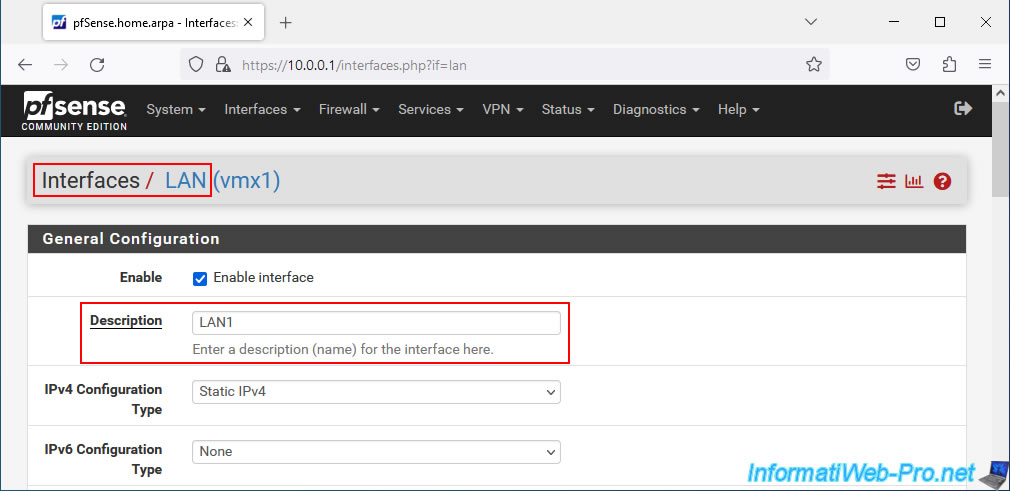
For the clarity of this tutorial, rename the pfSense LAN interface by going to: Interfaces -> LAN.
Change the interface description from "LAN" to "LAN1".
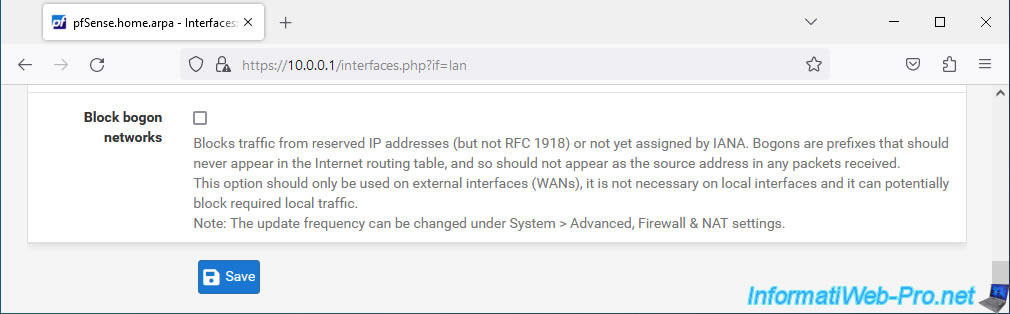
Then, click "Save" at the bottom of the page.
At the top of the page, click: Apply Changes.
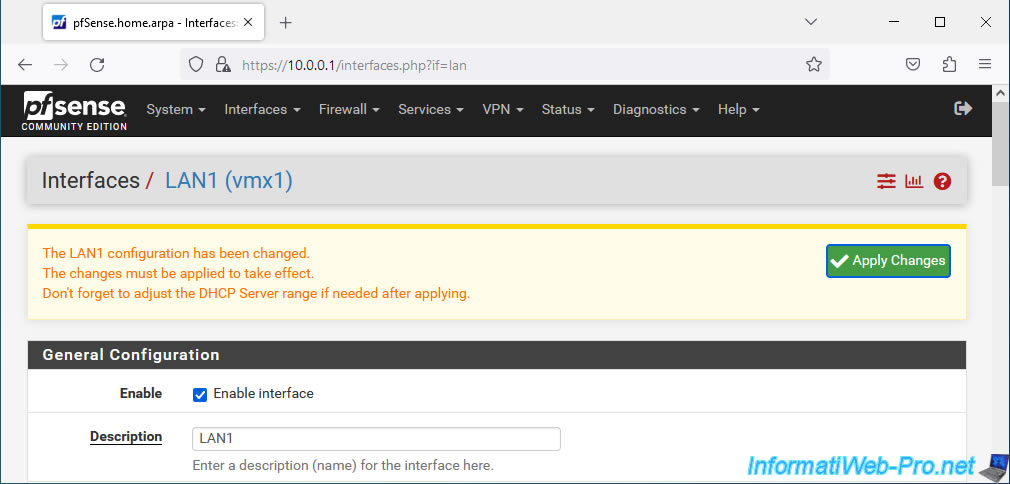
The LAN interface has been renamed to LAN1.
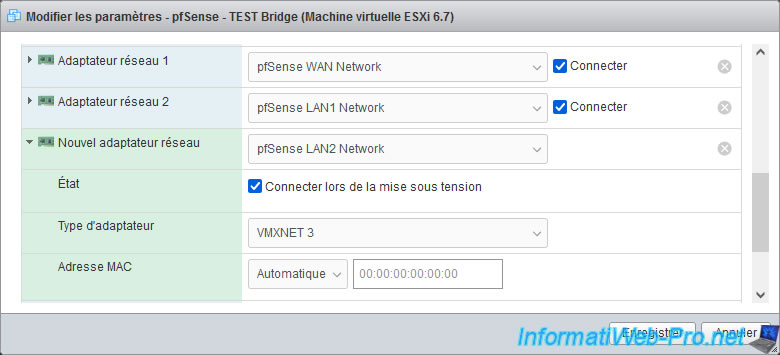
3. Add a LAN2 network interface
Add a network adapter to your pfSense machine and connect it to your 2nd switch (LAN2 in our case).
Then, if you added this network card hot (without turning off the machine, which is possible virtually), then restart pfSense via the menu: Diagnostics -> Reboot.
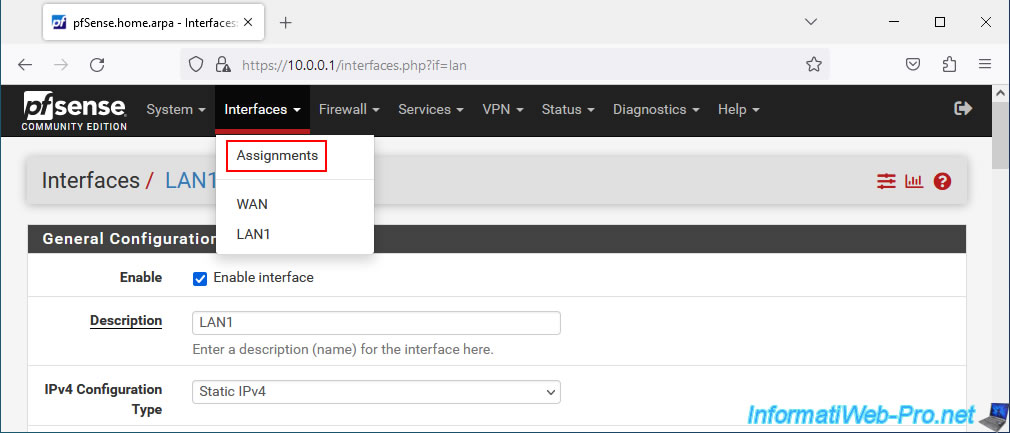
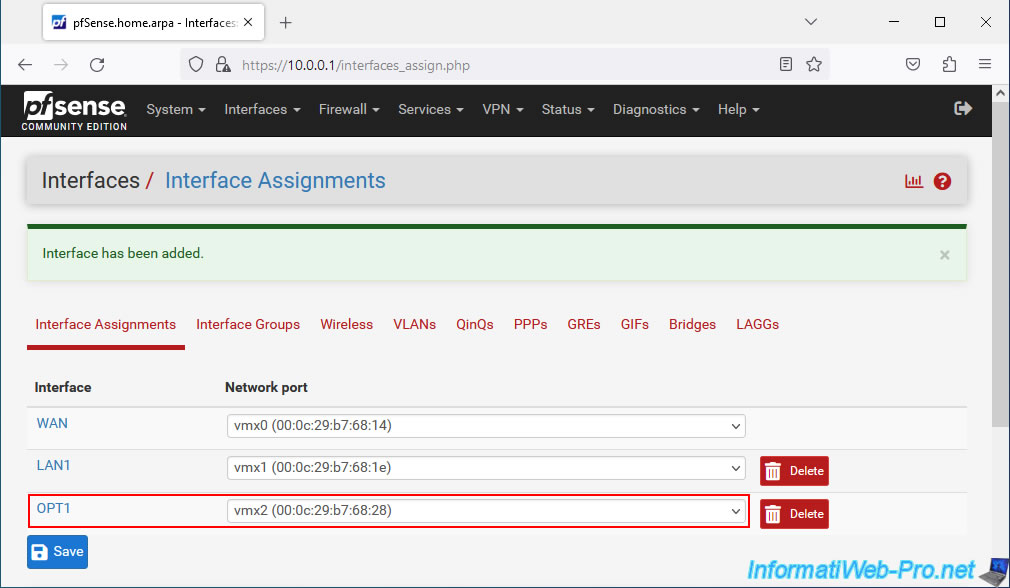
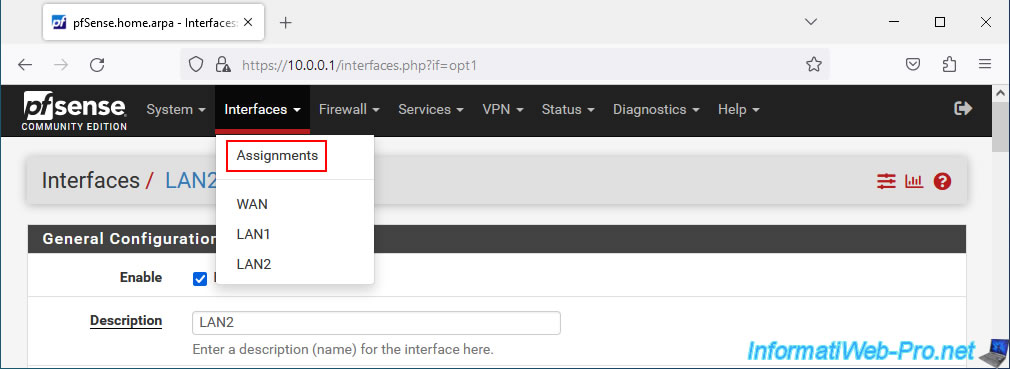
Once the pfSense machine has restarted, go to: Interfaces -> Assignments.
An "Available network ports" section will appear with the unused network card (in our case: vmx2) that you have just added to your pfSense machine.
Click Add.
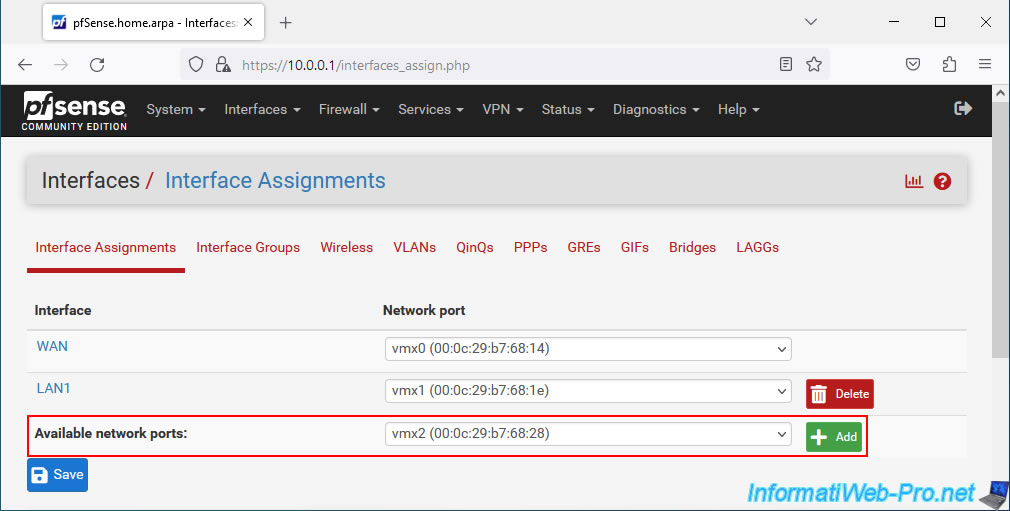
The new network card is added as logical interface "OPT1" by default.
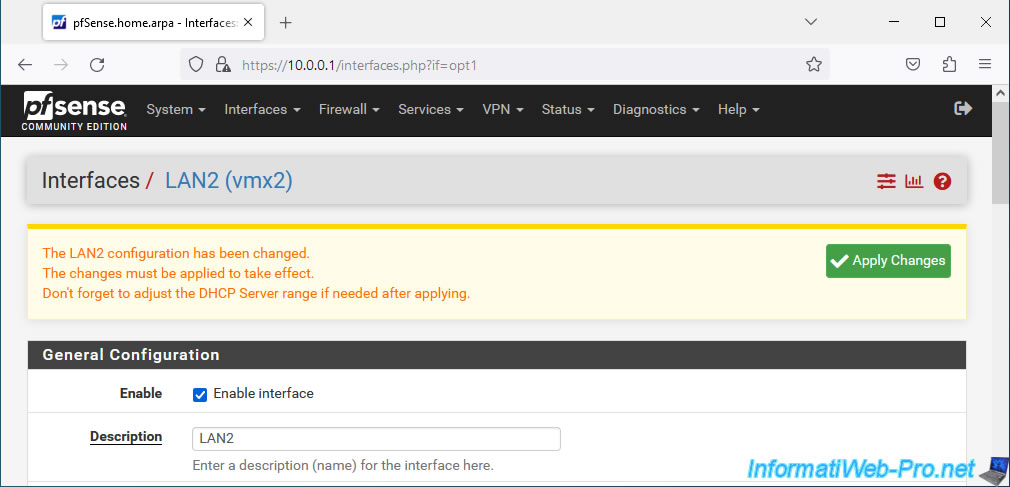
Click on its name or go to: Interfaces -> OPT1.
Enable this new interface by checking the "Enable interface" box and change the description of this interface "OPT1" to "LAN2" to rename it.
Warning : leave the value "None" for the 2 "IPv4 Configuration Type" settings.
Thus, this interface will not have any IP address. The machines connected to the LAN2 switch will have access to the network via the bridge that you add between LAN1 and LAN2.

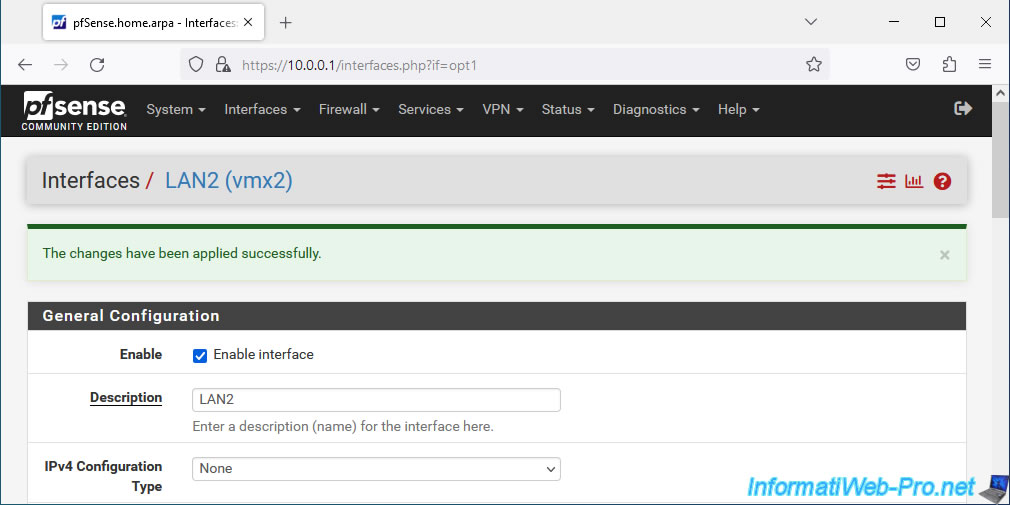
Then, click "Save" at the bottom of the page.

Click: Apply Changes.
The logical network interface "OPT1" has been renamed to "LAN2".
4. Enable DHCP server only on LAN interface
Since the 2 interfaces will be part of the same network thanks to the bridge that you will create later, the DHCP server must only be enabled on the LAN interface.
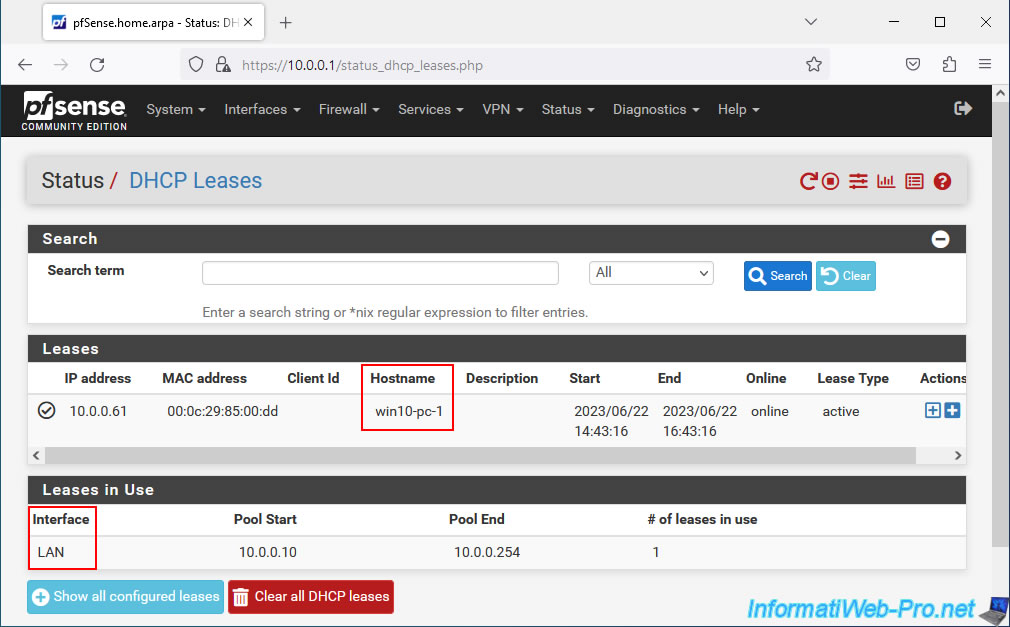
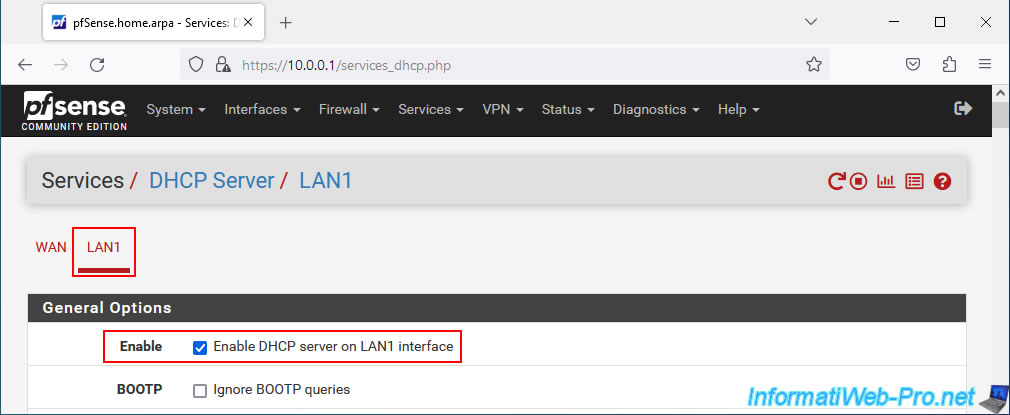
To check this, go to: Services -> DHCP Server.
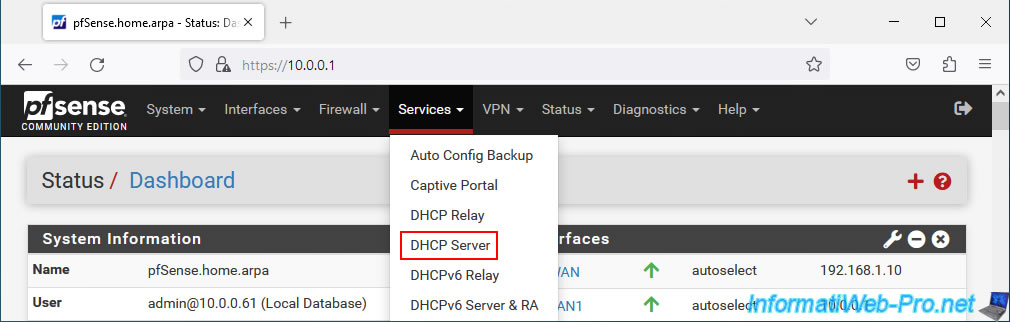
In the "LAN1" tab, verify that the "Enable DHCP server on LAN1 interface" box is checked.
Note: the "LAN2" interface does not appear since you have not defined an IP address for this logical interface.
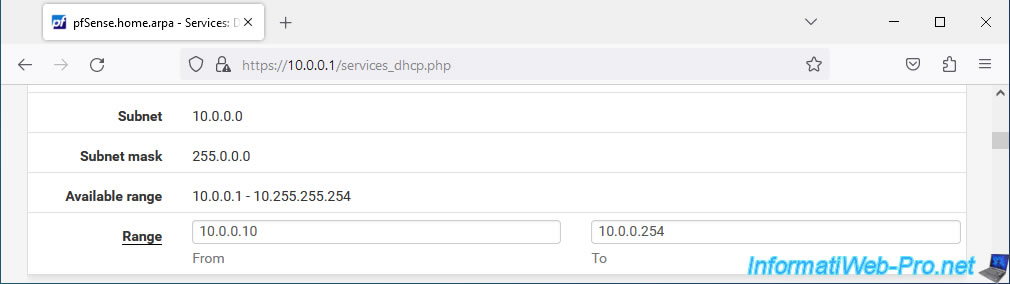
In our case, the DHCP range used is "10.0.0.10" to "10.0.0.254".
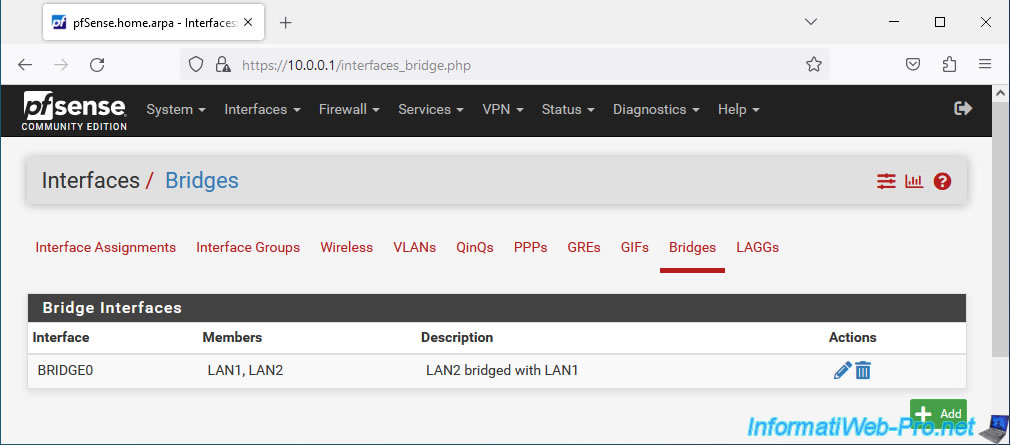
5. Create a bridge
To create a bridge in pfSense, go to: Interfaces -> Assignments.
In the "Bridges" tab, click: Add.

Configure your bridge like this:
- Member Interfaces: select the network interfaces to be part of this bridge.
In this case, the logical network interfaces "LAN1" and "LAN2".
Note: to select several interfaces, hold the left click when you select them or hold down the CTRL key and click on them one by one (like in Windows). - Description: enter for example "LAN2 bridged with LAN1". This is for guidance only.
Then, click Save.
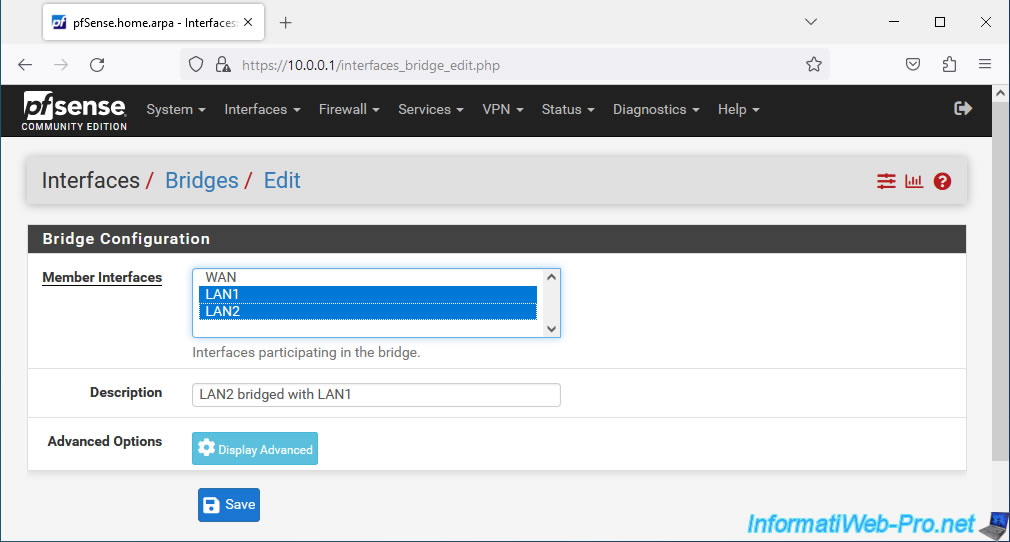
Your new network bridge appears under the name "BRIDGE0" by default.
Share this tutorial
To see also
-
Firewall 7/30/2025
pfSense 2.6 - Backup and restore configuration
-
Firewall 6/11/2025
pfSense 2.6 - Create a DMZ and configure the firewall
-
Firewall 5/23/2025
pfSense 2.6 - Network interfaces
-

Firewall 7/23/2025
pfSense 2.6 - Synchronize the clock from a time server (NTP)
You must be logged in to post a comment