Create a site-to-site (S2S) VPN tunnel via OpenVPN secured with SSL/TLS (L2 mode) on pfSense 2.6
- Firewall
- pfSense
- 19 September 2025 at 07:48 UTC
-

- 4/7

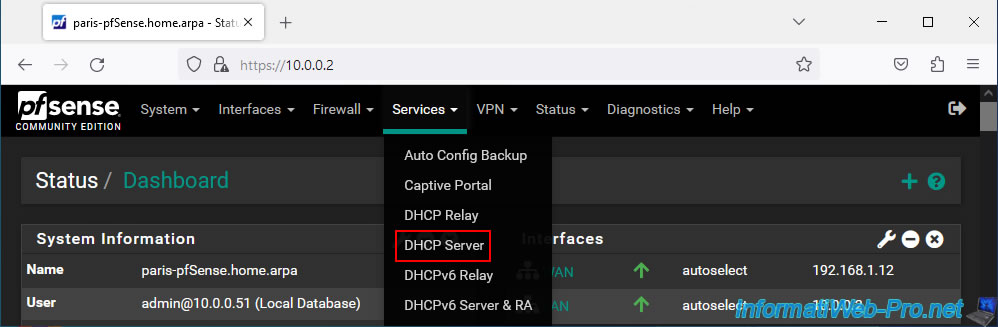
6. Configure site 2 in Paris for OpenVPN
6.1. Disable the DHCP server of site 2 (Paris)
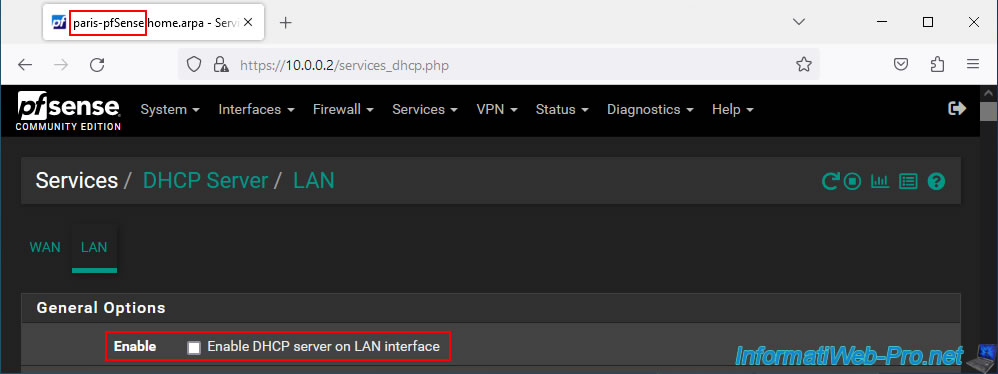
To avoid IP address conflicts in the future, it is important that you disable the remote site's DHCP server.
Thus, only the DHCP server of site 1 (Brussels) installed and configured at the company's headquarters will take care of distributing IP addresses to the machines of your different physical sites connected using the layer 2 (L2) OpenVPN tunnel.
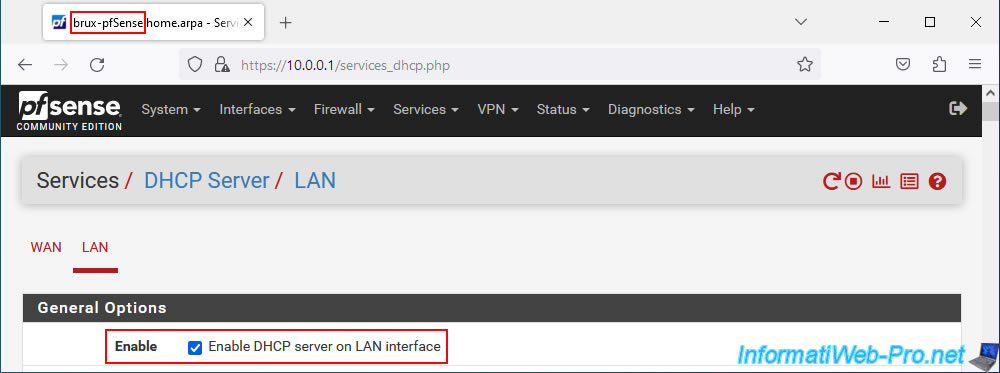
On site 2 (Paris), go to: Services -> DHCP Server.
In the "LAN" tab, uncheck the "Enable DHCP server on LAN interface" box to disable this DHCP server for the LAN network of site 2 (Paris).
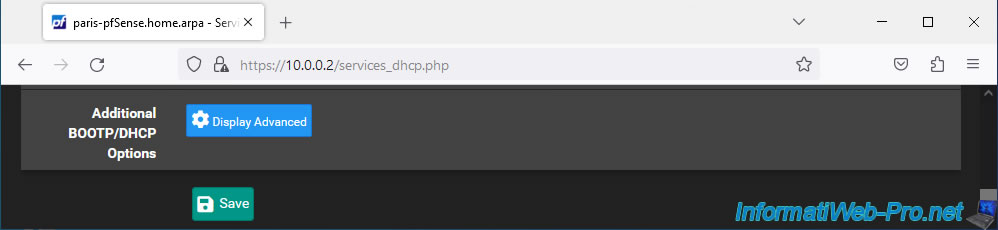
At the bottom of the page, click Save.
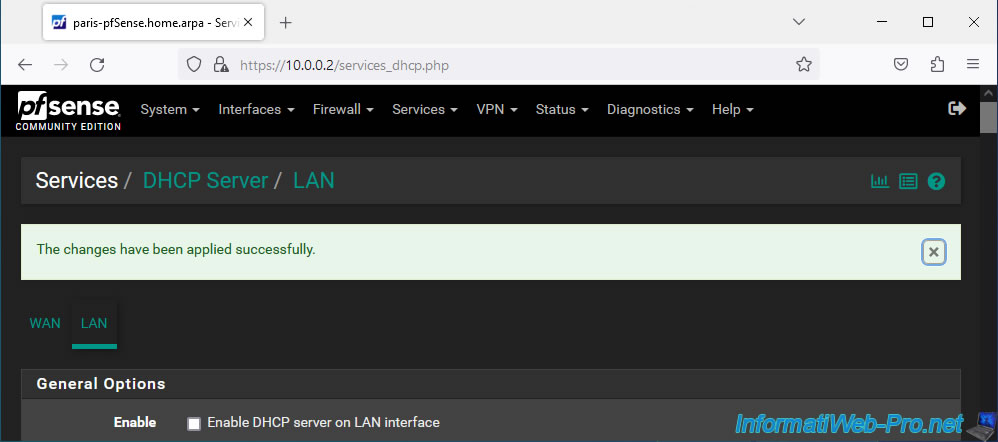
The change has been saved.
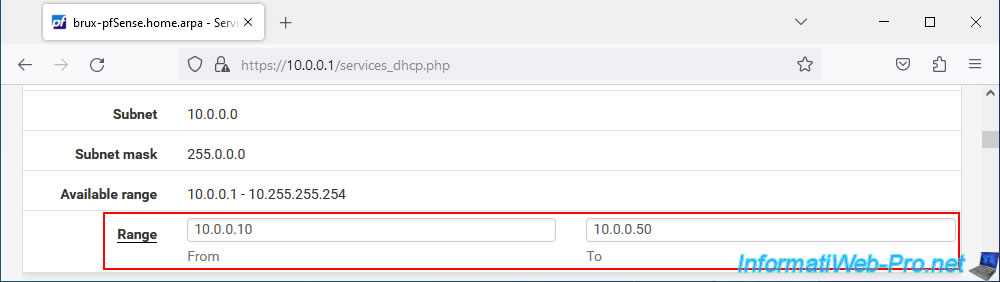
On site 1 (Brussels), go to the same place and make sure the "Enable DHCP server on LAN interface" box is checked.
As you can see, in our case our DHCP server will distribute IP addresses "10.0.0.10" to "10.0.0.50".
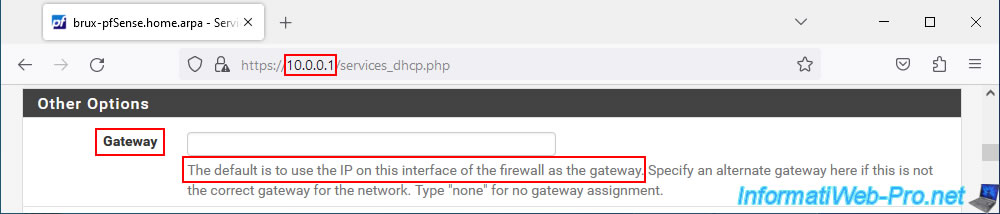
For the default gateway, pfSense will automatically send the IP address of the LAN interface of this machine.
Which means that the machines on site 2 (Paris) will also receive the IP address of the LAN interface of the pfSense machine located on site 1 (Brussels).
Which means that the Internet will always go through site 1 (Brussels). Which is practical for filtering Internet access from machines present on other physical sites of your company.
6.2. Import certificates for OpenVPN on site 2 (Paris)
To configure the OpenVPN client on site 2 (Paris), you will need:
- of the internal certification authority (CA) certificate previously created on site 1 (Brussels)
- of the certificate and private key of your future OpenVPN client.
Which gives in our case:
- VPNclientParis: the certificate of the future OpenVPN client.
- VPNclientParis.key: the private key associated with this certificate.
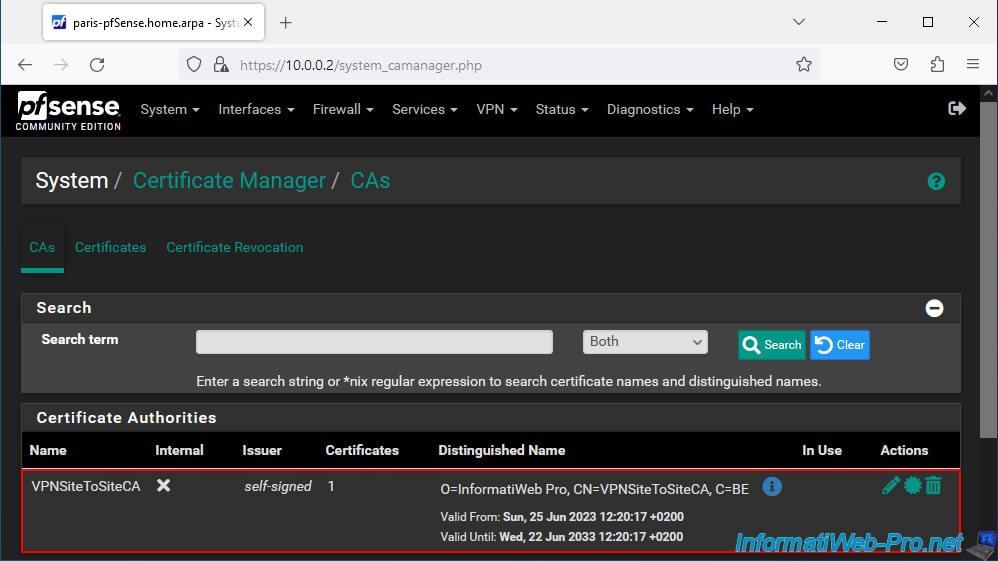
- VPNSiteToSiteCA: the internal certificate authority (CA) certificate.
Note: these files were exported previously by following step "1.4. Export the internal CA certificate and the client certificates" of the tutorial cited above.

To import these files, follow steps "2.1." and "2.2." (Import certificate...) from our "pfSense 2.6 - Create a site-to-site (S2S) VPN tunnel via OpenVPN secured with SSL/TLS (L3 mode)" tutorial.
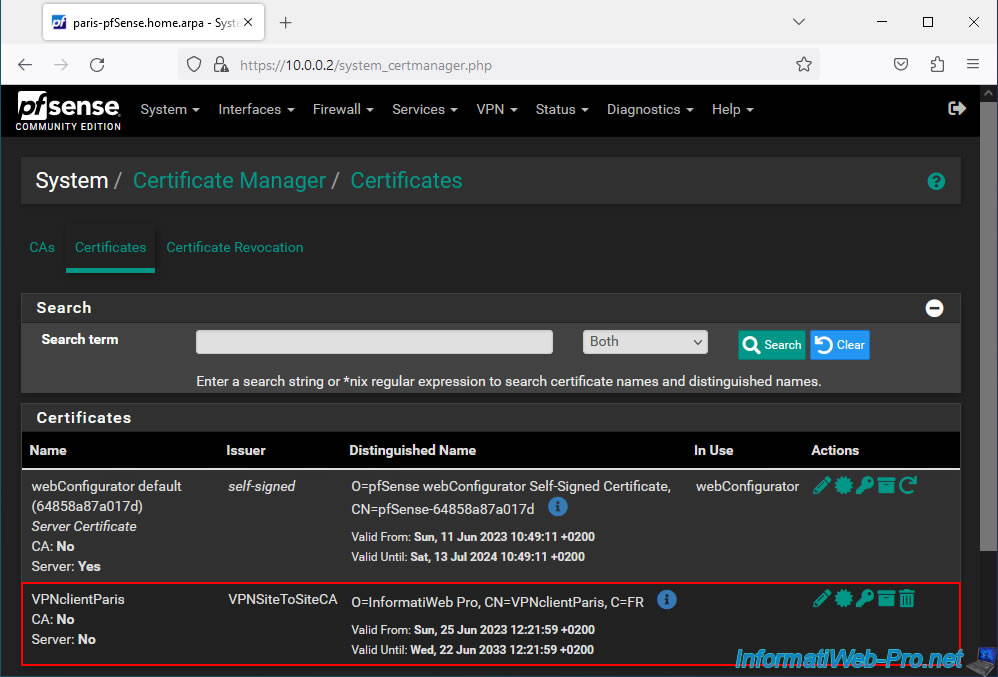
Once the files have been imported, you will have the "VPNSiteToSiteCA" certificate in the "CAs" tab of the "System -> Cert. Manager" menu.
In the "Certificates" tab, you will find the "user" type certificate for your future OpenVPN client.
In our case: VPNclientParis.
6.3. Create an OpenVPN client on site 2 (Paris)
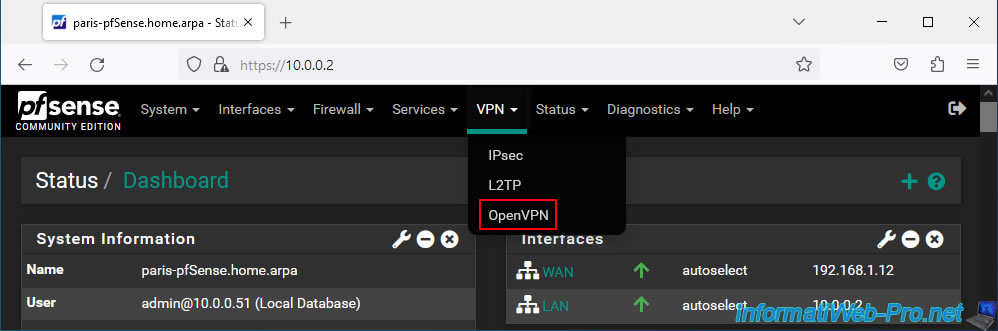
To create the OpenVPN client on site 2 (Paris), go to: VPN -> OpenVPN.
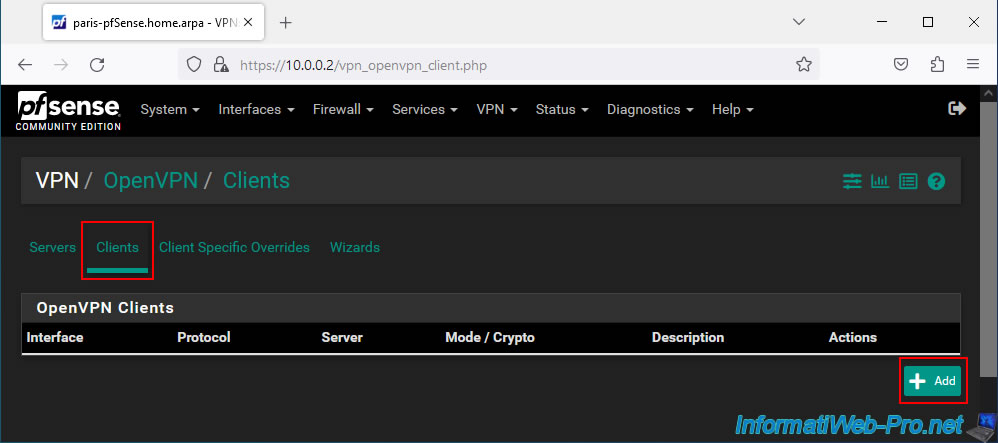
In the "Clients" tab, click: Add.
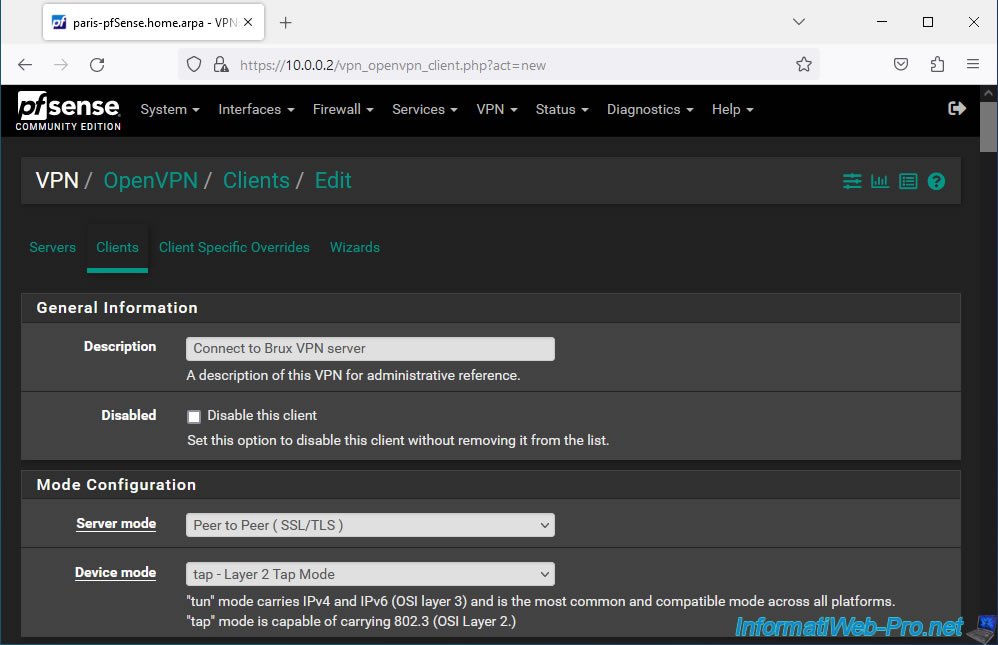
On the page that appears, configure these settings:
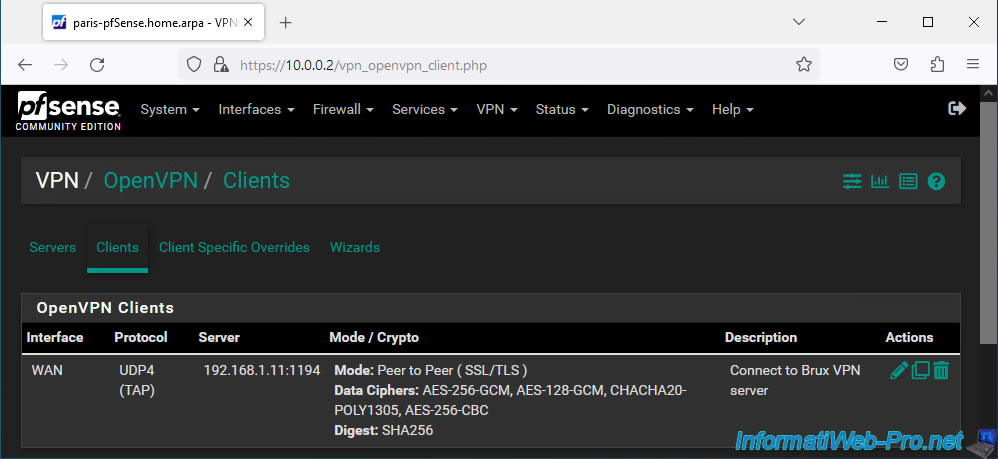
- Description: Connect to Brux VPN server.
- Server mode: Peer to Peer (SSL/TLS). Secure site-to-site tunnel via SSL/TLS.
- Device mode: tap - Layer 2 Tap Mode. Allows you to create a layer 2 (L2) VPN tunnel using OpenVPN's "TAP" mode.
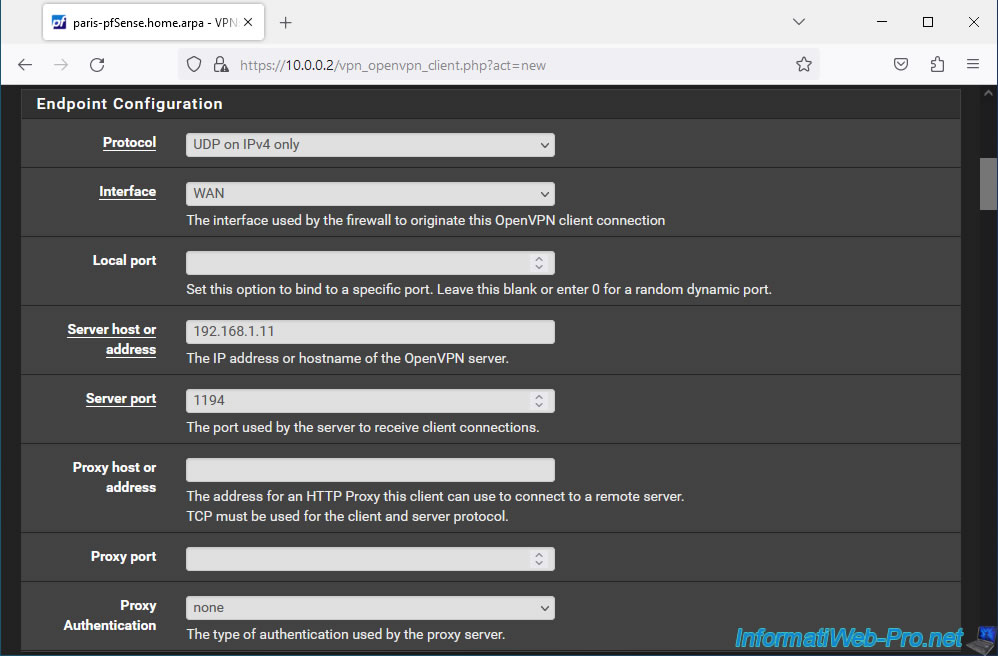
For the "Endpoint Configuration" section, indicate:
- Protocol: UDP on IPv4 only. OpenVPN uses the UDP protocol.
- Interface: WAN. The VPN tunnel will be established across the Internet.
- Server host or address: the external IP address of your OpenVPN server.
In our case: 192.168.1.11. - Server port: the port used by default by OpenVPN is 1194.
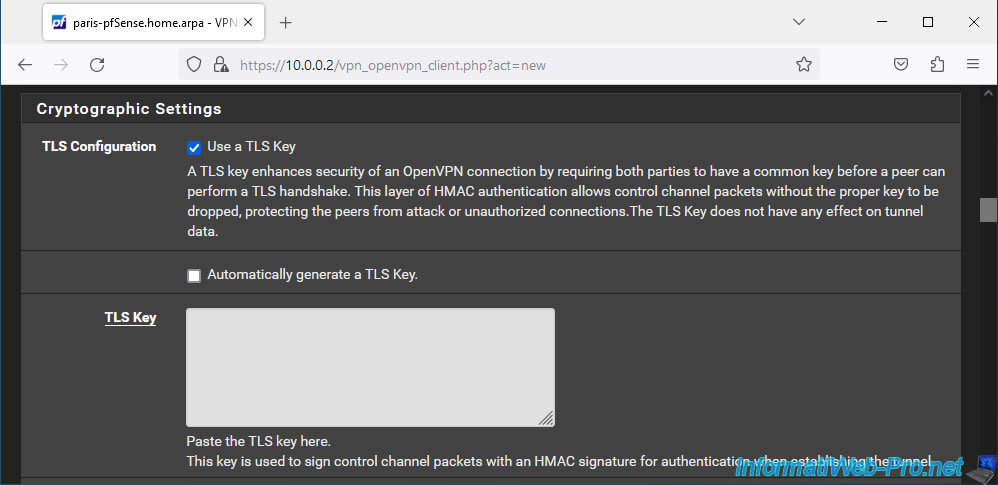
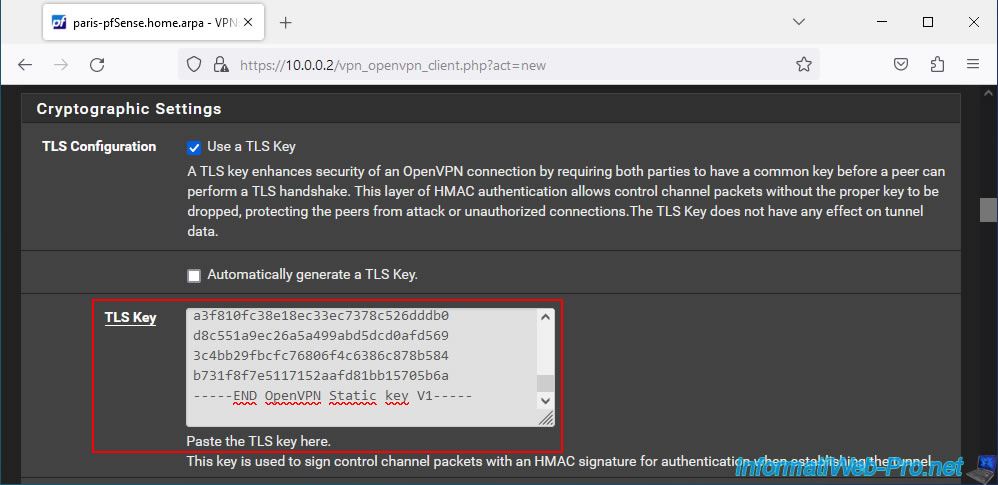
In the "Cryptographic Settings" section, check the "Use a TLS Key" box to use a TLS key (like on the OpenVPN server).
But, uncheck the "Automatically generates a TLS Key" box so that the "TLS Key" box appears.
Indeed, it is necessary that the OpenVPN server and client use the same TLS key.
To find this, go to the pfSense machine where you installed the OpenVPN server and go to: VPN -> OpenVPN.
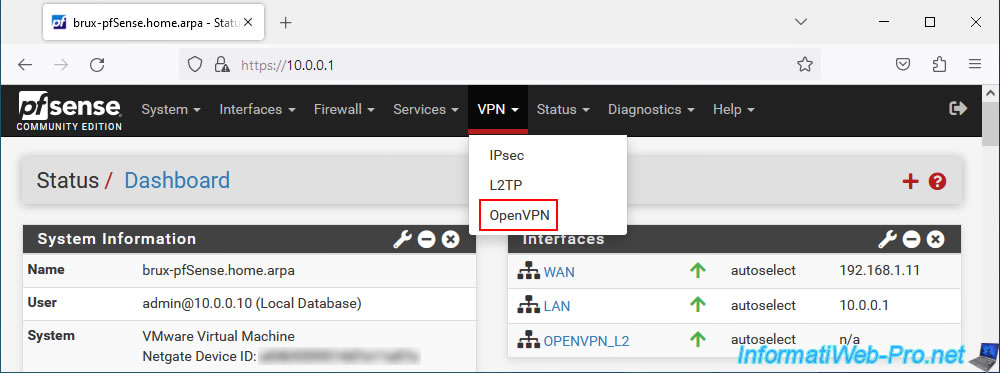
In the "Servers" tab, click on the small pencil icon (to the right of your OpenVPN server).

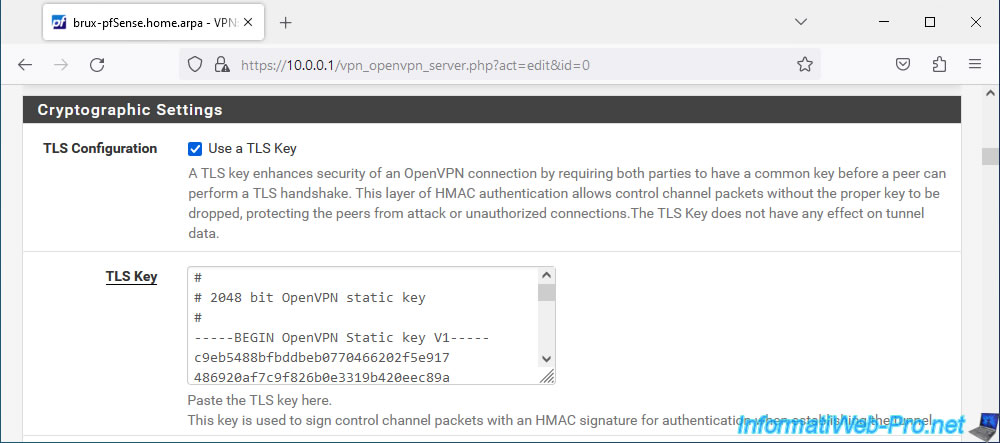
In the "Cryptographic Settings" section, you will see the TLS key appear in the "TLS Key" box.
Plain Text
#
# 2048 bit OpenVPN static key
#
-----BEGIN OpenVPN Static key V1-----
xxxxxxxxxxxxxxxxxxxxxxxxxxxxxxxxxxxx...
-----END OpenVPN Static key V1-----
Copy this TLS key.
Paste this TLS key into the "TLS Key" box in the OpenVPN client configuration.
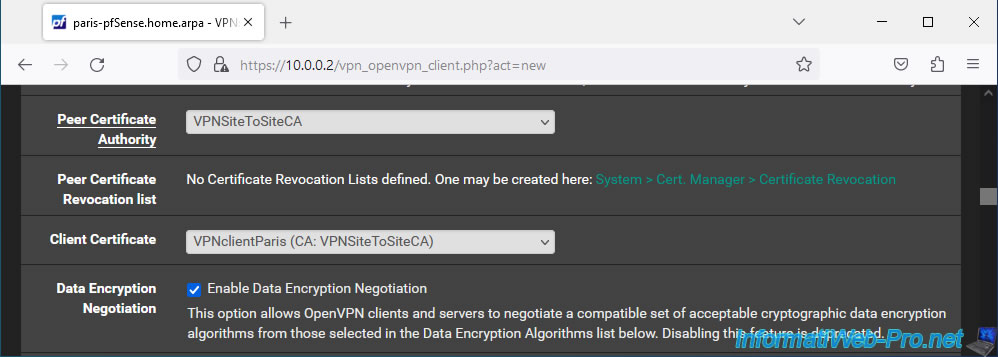
Then, in this same section, select the SSL certificates to use:
- Peer Certificate Authority: select your internal certificate authority (CA) certificate.
In our case: VPNSiteToSiteCA. - Client Certificate: select the certificate for your OpenVPN client.
In our case: VPNclientParis.
Again, when OpenVPN operates on key 2 (therefore in "TAP" mode), you do not need to indicate anything for the tunnel network, the remote network, ...

At the bottom of the page, click Save.
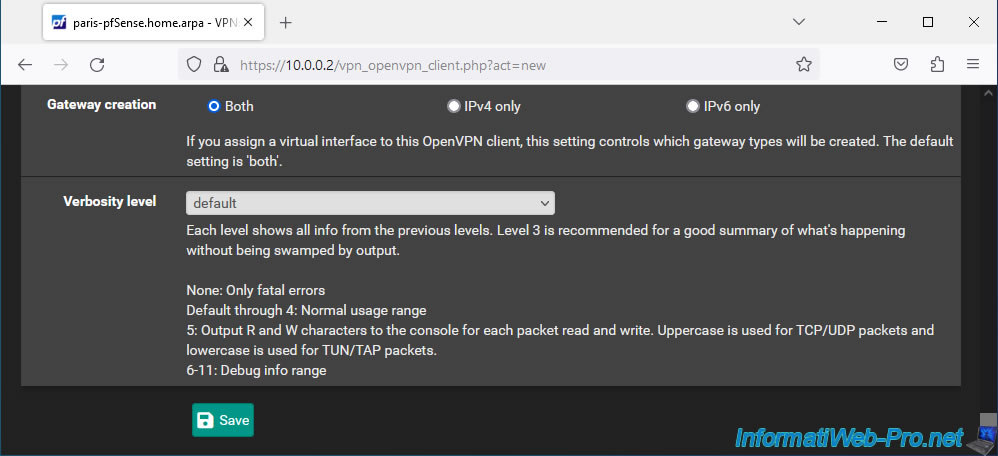
Your OpenVPN client in TAP mode has been created.
Share this tutorial
To see also
-

Firewall 9/17/2025
pfSense 2.6 - Create a site-to-site (S2S) VPN tunnel via OpenVPN secured with SSL/TLS (L3 mode)
-

Firewall 6/18/2025
pfSense 2.6 - Manage quality of service (QoS)
-
Firewall 7/9/2025
pfSense 2.6 - Secure the web interface in HTTPS
-

Firewall 7/23/2025
pfSense 2.6 - Synchronize the clock from a time server (NTP)
No comment