- Firewall
- pfSense
- 09 July 2025 at 07:48 UTC
-

- 1/2

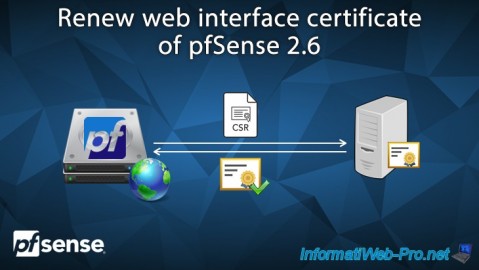
When you install pfSense, a self-signed SSL certificate is used by default to "secure" the connection to its web interface.
However, as with any self-signed certificate, your web browser will display a security warning each time you access the pfSense web interface.
In this tutorial, you will see how to replace this self-signed SSL certificate with a valid certificate from your certificate authority (CA) installed on Windows Server.
- Warning due to pfSense self-signed certificate
- Change the hostname and domain used by pfSense
- Configure your local DNS server for the pfSense domain name
- Create the Certificate Signing Request (CSR)
- Submit the certificate request to your certificate authority (CA)
- Import the new certificate into pfSense
- Configure the pfSense web interface to use the new certificate
1. Warning due to pfSense self-signed certificate
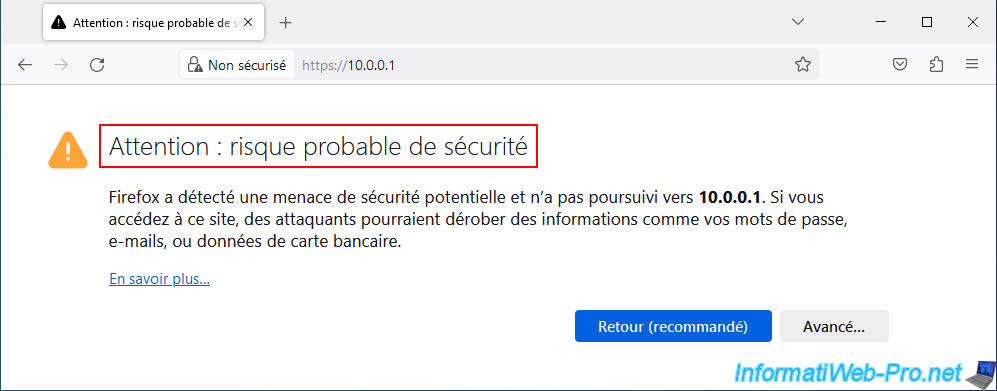
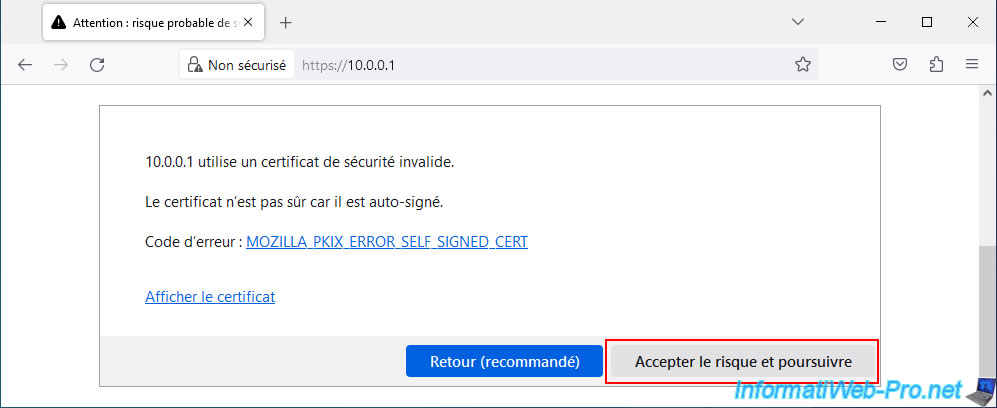
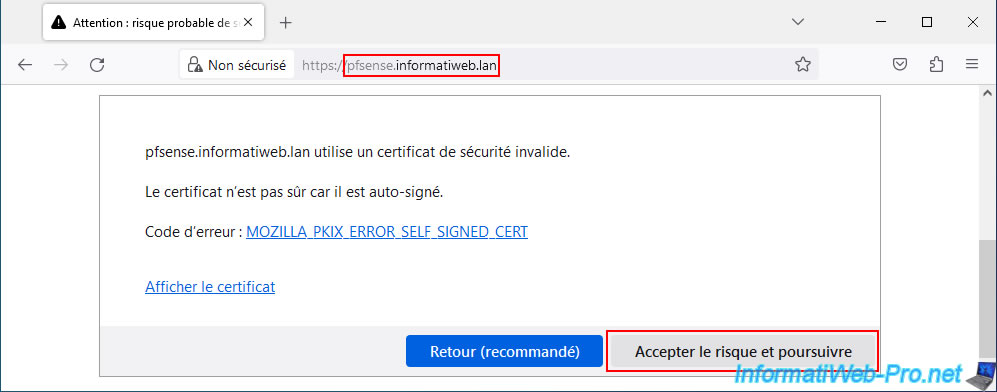
When you try to access the pfSense web interface via Mozilla Firefox, this warning appears: "Warning: Potential Security Risk Ahead".
Click: Advanced.
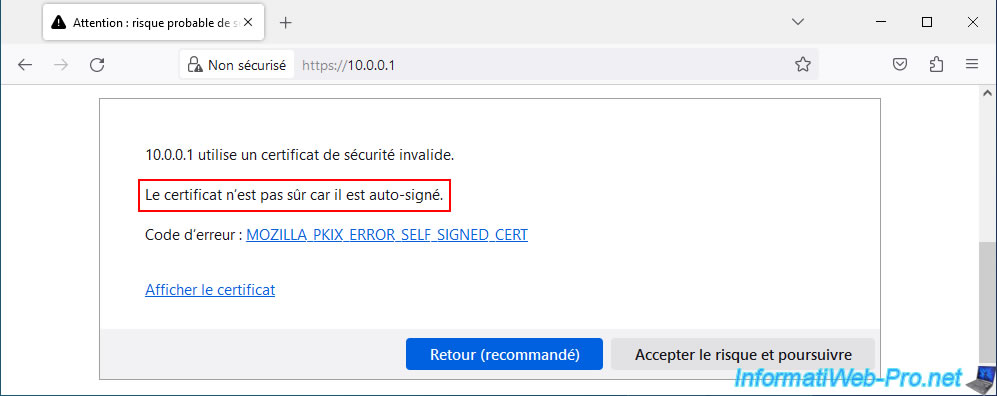
As Mozilla Firefox tells you, the certificate used by default is self-signed.
Plain Text
The certificate is not trusted because it is self-signed.
Click: View certificate.
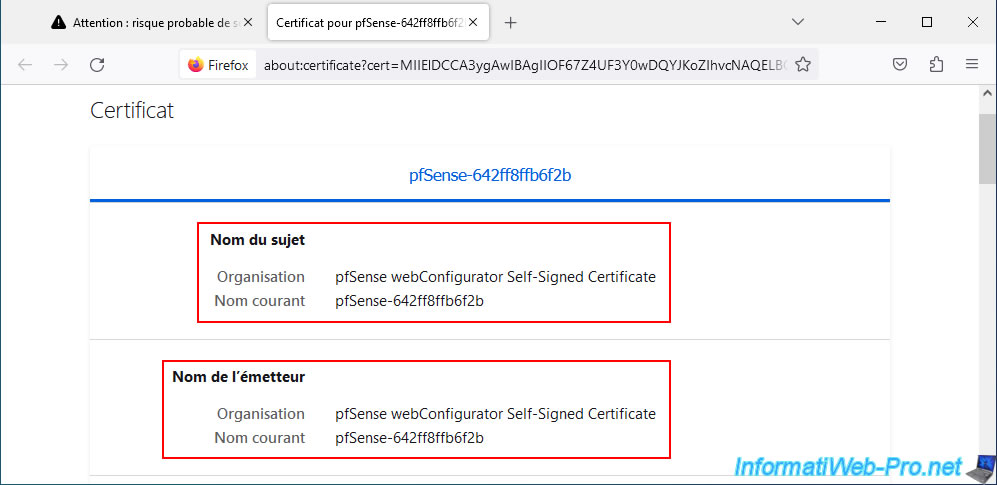
As you can see, the subject (who the certificate is intended for) is issued by itself.
Which proves that this certificate is self-signed.
For now, click: Accept the risk and continue.
For the moment, you can see that a triangle appears on the padlock in the address bar.
If you click on it, Mozilla Firefox will tell you "Insecure connection".
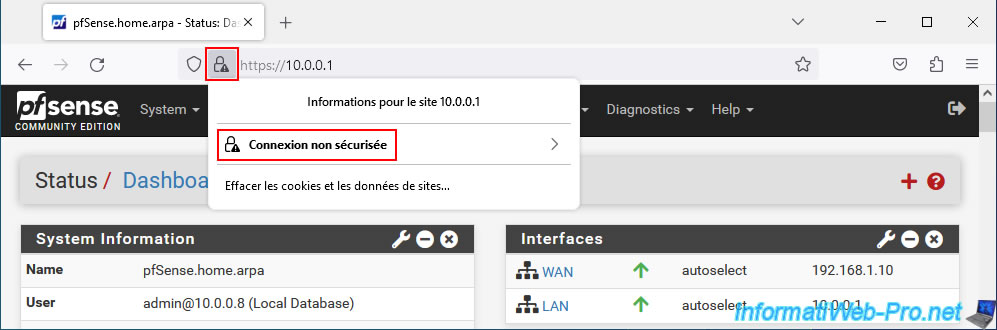
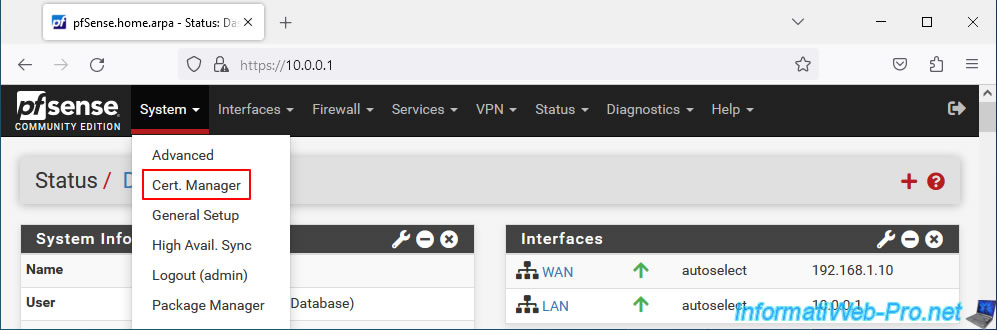
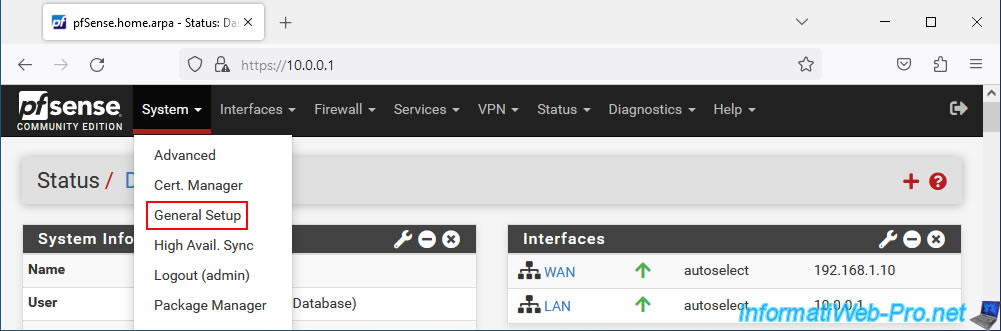
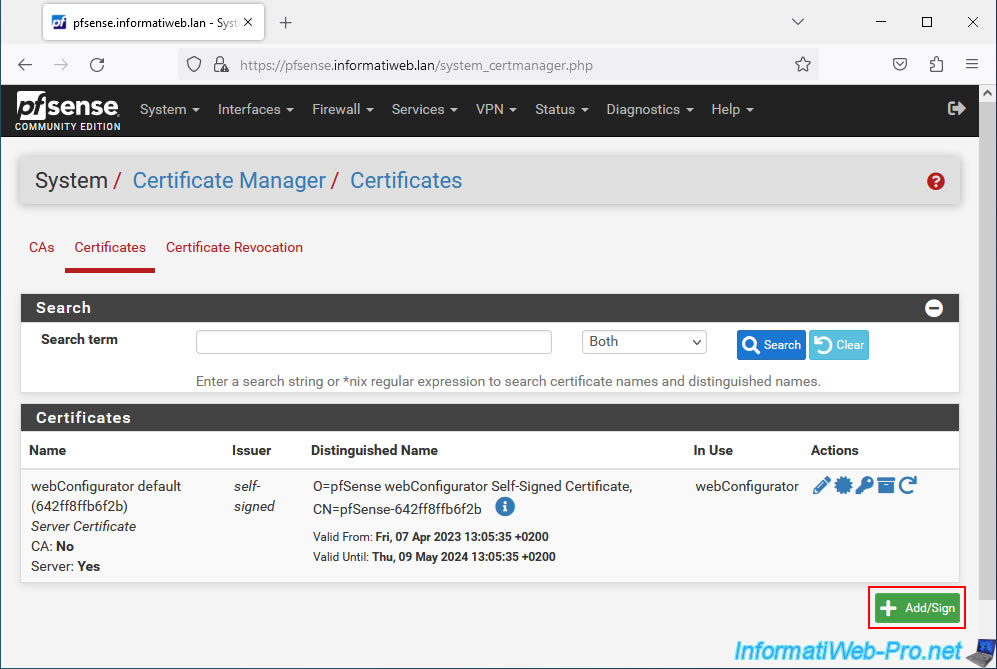
Go to: System -> Cert. Manager.
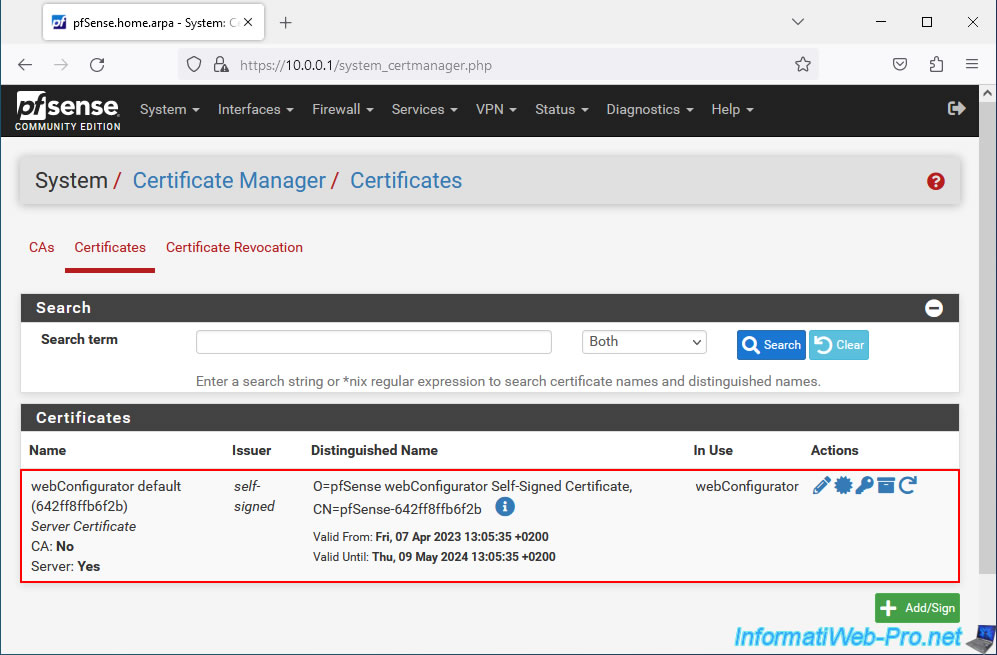
In the "Certificates" tab, you will see that a "webConfigurator default" certificate already exists and that it is self-signed.
2. Change the hostname and domain used by pfSense
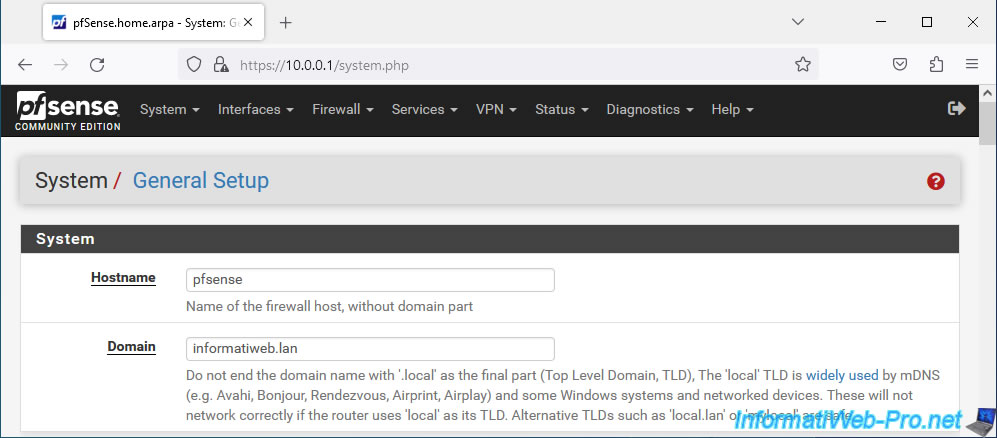
To change the hostname and domain used by pfSense, go to: System -> General Setup.
In the "System" section, configure the settings:
- Hostname: for the host name. For example: pfsense.
- Domain: the host name used locally in your company.
In our case: informatiweb.lan.
Which means that this pfSense machine will be accessible via the FQDN domain name "pfsense.informatiweb.lan" (to be configured manually on your local DNS server).
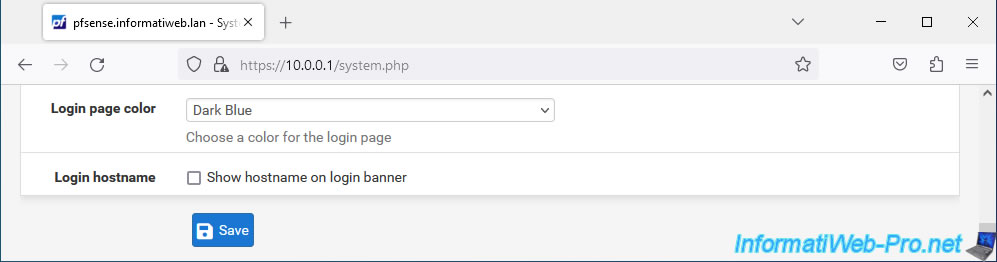
At the bottom of the page, click Save.
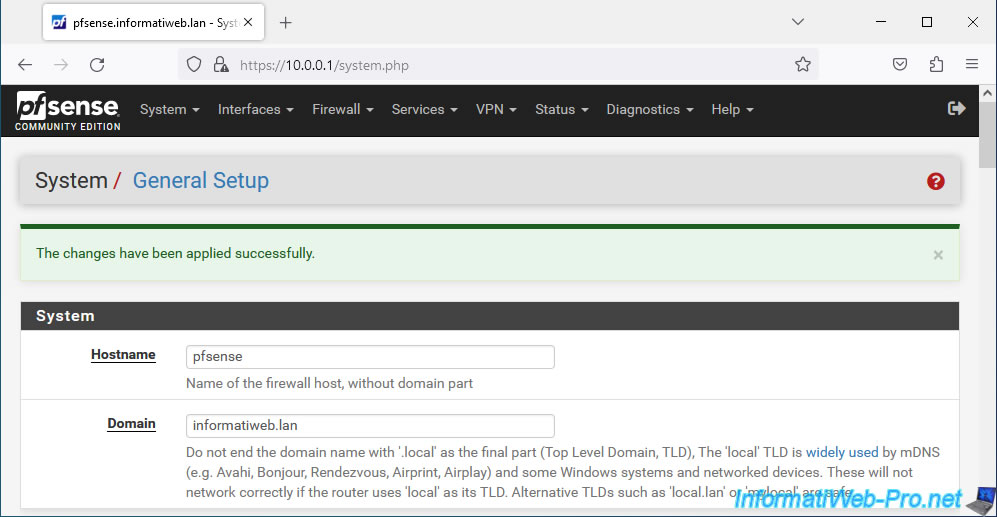
Modifications have been saved.
3. Configure your local DNS server for the pfSense domain name
For this tutorial, we used a local DNS server on Windows Server.
To configure this local DNS server, open DNS Manager and go to your forward lookup zone.
Then right-click "New Host (A or AAAA)".
Note: the certification authority used in our case is a enterprise certification authority installed on Windows Server.
Which requires an Active Directory domain and therefore a local DNS server.
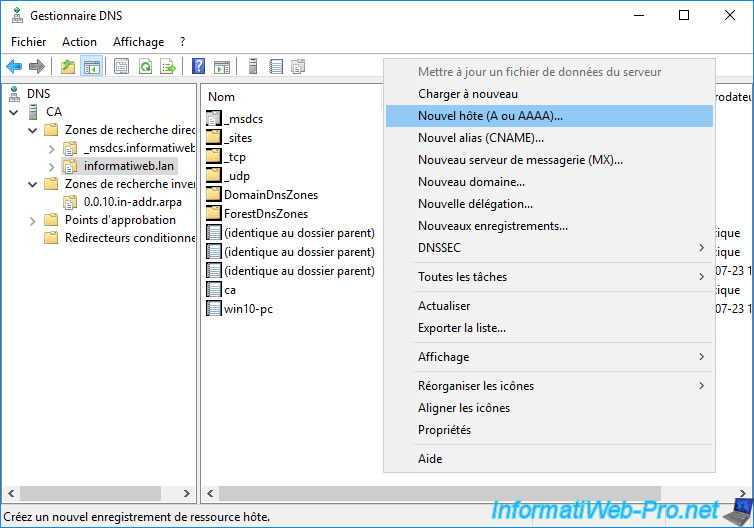
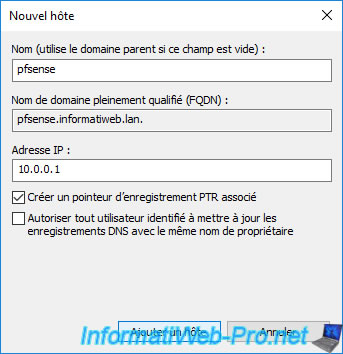
Provide only the host name of your pfSense machine, as well as the IP address of that machine.
Then click: Add host.
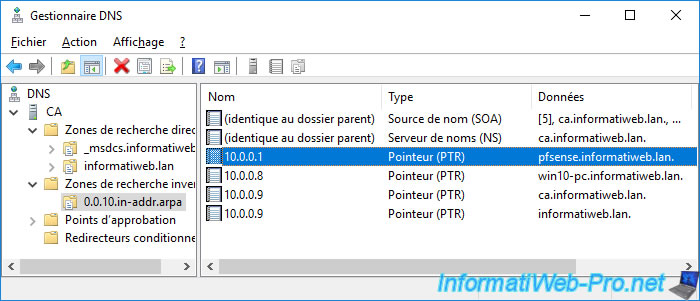
Note: the "Create associated pointer (PTR) record" box allows you to create the associated pointer in the reverse lookup zone (if it exists) for reverse DNS resolution (IP to DNS domain name).
The host record has been created.
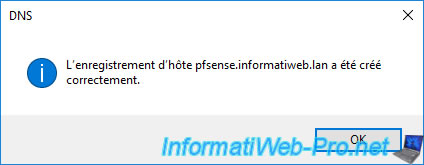
The DNS record was created in the forward lookup zone.
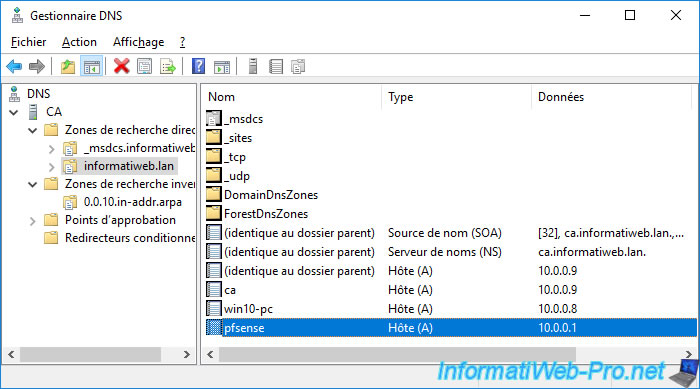
Same for the pointer (PTR) in the reverse search area (if applicable).
4. Create the Certificate Signing Request (CSR)
Now that your local domain name is configured for pfSense, navigate to it and again ignore the warning due to the self-signed SSL certificate.
Go to: System -> Cert. Manager.

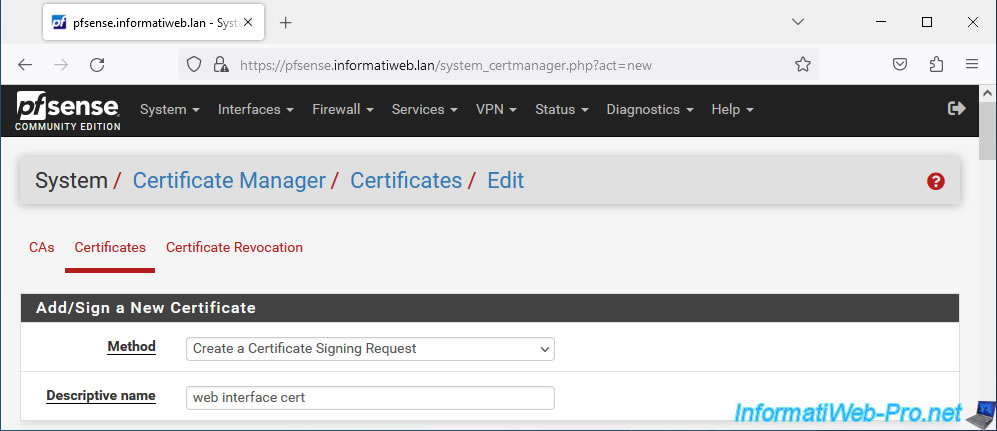
In the "Certificates" tab, click: Add/Sign.
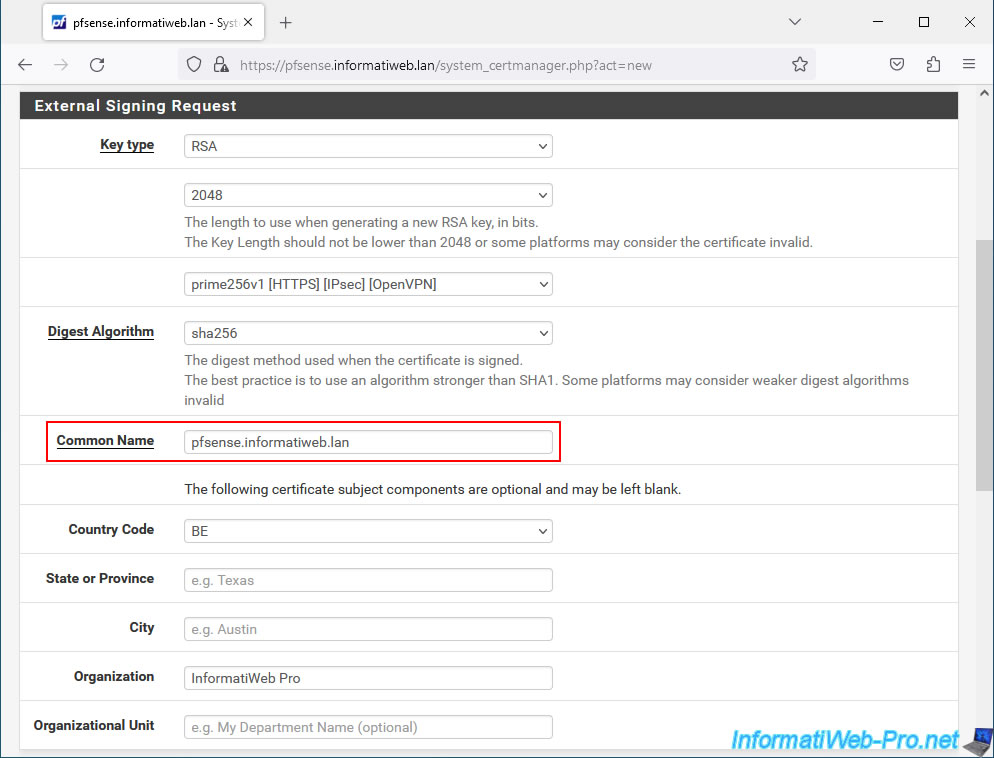
Choose "Method: Create a Certificate Signing Request" and specify "web interface cert" as the name (Descriptive name).
Enter the fully qualified domain name of your pfSense machine in the "Common Name" box.
In our case: pfsense.informatiweb.lan.
For the Key type and Digest Algorithm to use, leave these as default if you are unsure of what to use.
Indeed, by default, these are the currently recommended values.
The other fields (Country Code, Organization, etc.) are optional and allow you to add information about your company.
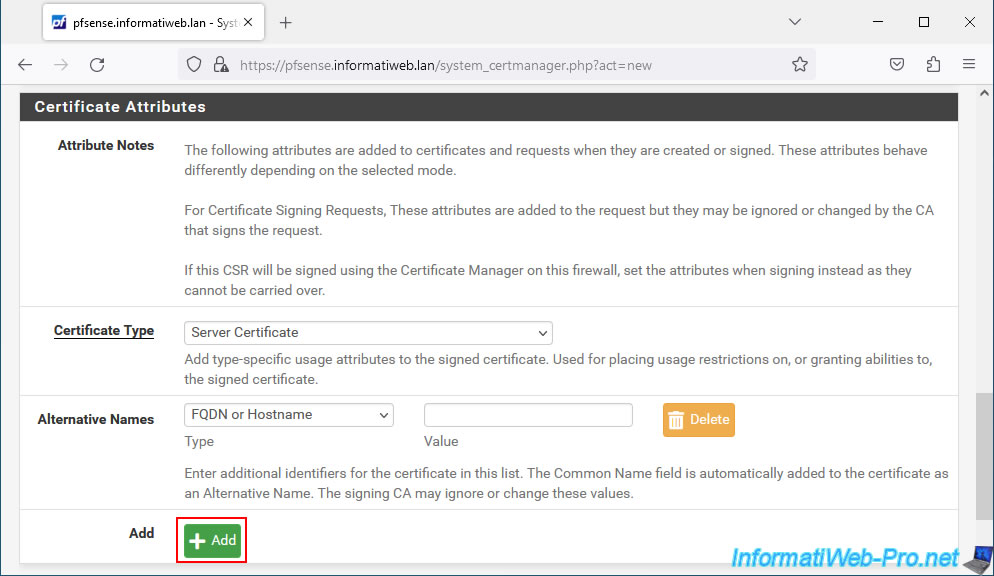
In the "Certificates Attributes" section, configure these settings:
- Certificate Type: Server Certificate.
To secure the pfSense graphical interface (GUI), you must use a "server" type certificate. - Alternative Names: allows you to indicate alternative names (such as the host name (short name), IP address, ... of the pfSense machine).
Click the "Add" button.
Source : Certificate Management - Certificate Settings | pfSense Documentation.
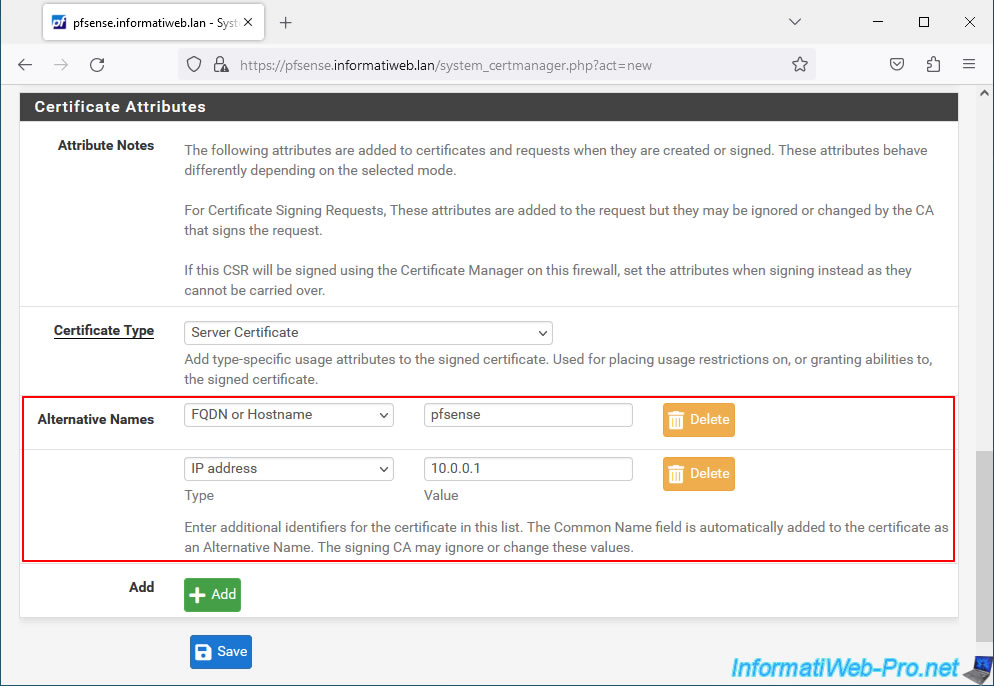
For alternative names, specify:
- FQDN or Hostname - pfsense.
Corresponds to the hostname of your pfSense machine. - IP address - 10.0.0.1.
Corresponds to its IP address.
Then click Save.
Source : Certificate Properties - Subject Alternative Name | pfSense Documentation.
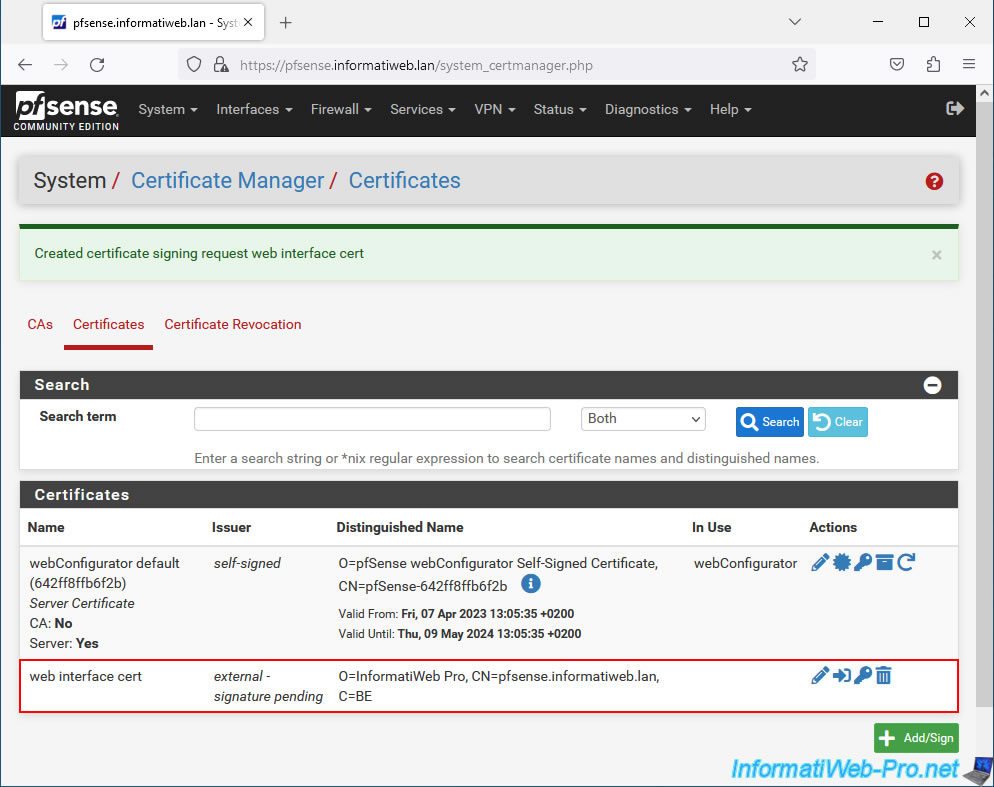
The certificate signing request has been created on your pfSense machine.
Plain Text
Created certificate signing request web interface cert.
Share this tutorial
To see also
-
Firewall 9/3/2025
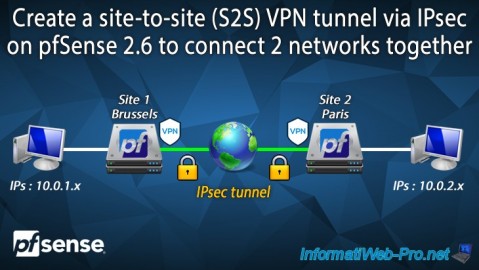
pfSense 2.6 - Create a site-to-site (S2S) VPN tunnel via IPsec
-

Firewall 9/17/2025
pfSense 2.6 - Create a site-to-site (S2S) VPN tunnel via OpenVPN secured with SSL/TLS (L3 mode)
-
Firewall 8/20/2025
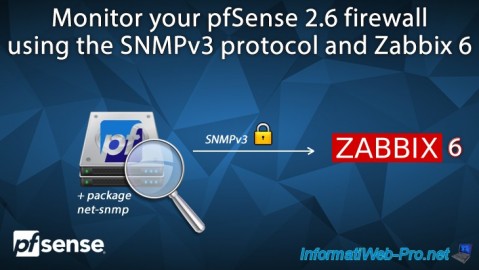
pfSense 2.6 - Monitoring via SNMPv3 and Zabbix 6
-
Firewall 7/16/2025
pfSense 2.6 - Renew web interface certificate
You must be logged in to post a comment