- Firewall
- pfSense
- 16 August 2025 at 07:45 UTC
-

- 1/4

Thanks to the SNMP protocol, you can centralize the monitoring of your machines (including pfSense).
- Enable SNMP protocol on pfSense
- Installing Zabbix (for monitoring via SNMP)
- Configure Zabbix 6 to monitor pfSense via SNMP
- Configure Zabbix 6 to monitor pfSense via Zabbix agent and SNMP
1. Enable SNMP protocol on pfSense
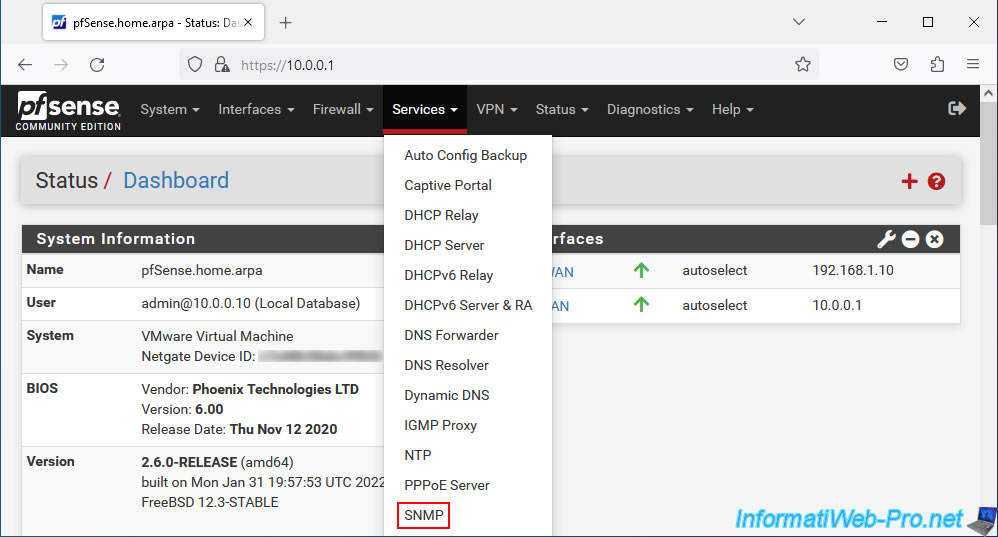
To enable the SNMP protocol on pfSense, simply go to: Services -> SNMP.
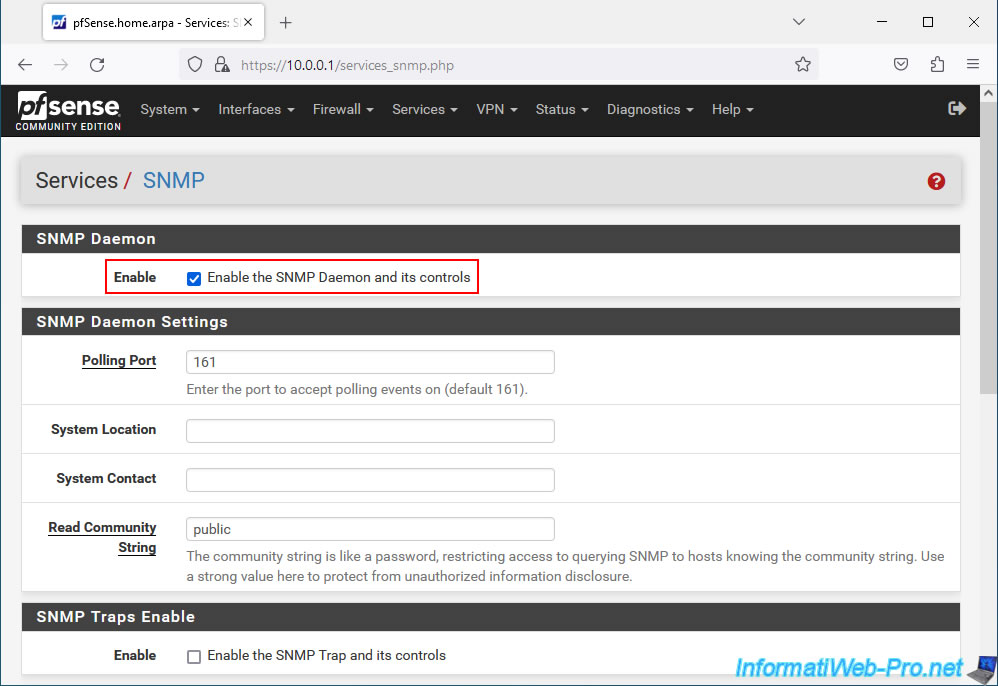
Check the box "Enable the SNMP Daemon and its controls" to enable the SNMP protocol on pfSense.
To protect access to SNMP data, you can use only the name of an SNMP community as a password (default: public).
In business, it is therefore recommended to use a separate network (to protect SNMP traffic which is sent in the clear) and to configure the firewall to only allow the desired monitoring server to communicate with pfSense.
Warning : pfSense does not currently support SNMPv3.
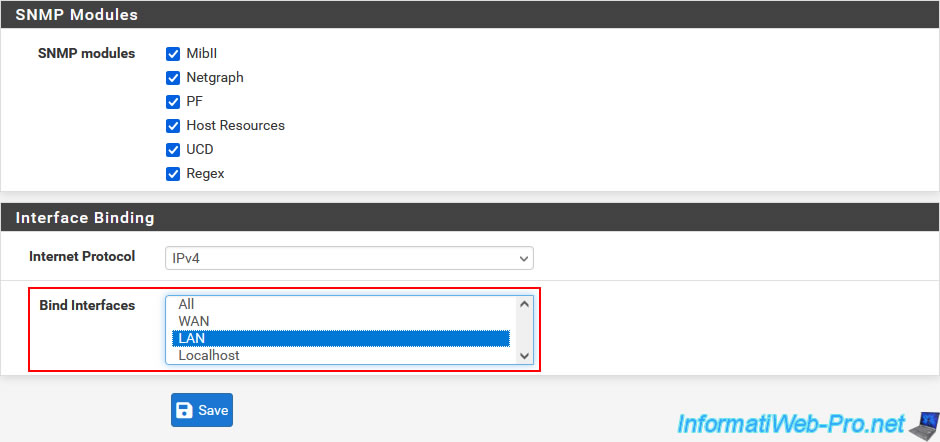
At the bottom of the page, you can choose on which interface the pfSense SNMP server should listen.
In our case, the LAN interface.
2. Installing Zabbix (for monitoring via SNMP)
To monitor machines and servers using the SNMP protocol, there are many monitoring softwares available.
Ex: Zabbix, Nagios, Cacti, ...
In our case, we will use Zabbix which offers a template for SNMP data from pfSense.
Source : Monitoring pfSense 2.4 with SNMP (at 9 min 22).
2.1. Enable root account (on Ubuntu)
In our case, we will install Zabbix 6.4 under Ubuntu v22.04.2.
However, as you will see later in this tutorial, Zabbix requires a database server (to be installed separately).
In our case, we will use MySQL (which is very well known). However, you may notice that MySQL now uses the operating system (in this case: Ubuntu) "root" account by default instead of the "root" account local to MySQL.
It is therefore necessary to activate the Ubuntu "root" account to be able to connect later as "root" to your MySQL server.
To activate the "root" account in Ubuntu, type the command below.
Note: indicate the password of the current user, then twice the new password to define for the "root" account.
Note that your user account must be part of the "/etc/sudoers" file to be able to change the password for the "root" account.
Bash
sudo passwd root
Then, to log in to the terminal as "root" (and therefore test the root password), type:
Bash
su -
2.2. Install MySQL server
Although Zabbix doesn't indicate it in its installation procedure, the database server (in this case: MySQL) required by Zabbix is not installed by default.
On the other hand, you will quickly notice it by watching the official video "Zabbix 6.0 LTS: Step by step deployment guide with MySQL/PostgreSQL/TimescaleDB".
To install the MySQL server, force the package list to be updated (if necessary).
Bash
apt-get update
Then, install the MySQL server.
Bash
apt-get install mysql-server
2.3. Install Zabbix on Ubuntu 22.04
To get started, install the Zabbix repository and update the list of available packages.
Bash
wget https://repo.zabbix.com/zabbix/6.4/ubuntu/pool/main/z/zabbix-release/zabbix-release_6.4-1+ubuntu22.04_all.deb
dpkg -i zabbix-release_6.4-1+ubuntu22.04_all.deb
apt update
Next, install the Zabbix server, interface, agent.
Bash
apt install zabbix-server-mysql zabbix-frontend-php zabbix-apache-conf zabbix-sql-scripts zabbix-agent
Create the initial database.
To do this, log in as "root" to your MySQL server.
Bash
mysql -uroot -p
As a reminder, MySQL now uses the operating system's "root" account for authentication.
You must therefore indicate the password for the Ubuntu "root" account (in our case).
Plain Text
Enter password:
If you see this error appear, it is because the MySQL server (mysql-server) is not installed.
Plain Text
ERROR 2002 (HY000): Can't connect to local MySQL server through socket '/var/run/mysqld/mysqld.sock' (2)
To check it, you can use the command below.
If you get the error below, the MySQL server is not installed.
Bash
service mysql status
Unit mysql.service could not be found.
As explained previously, by default, the MySQL server now uses the "root" account of the operating system.
Which prevents you from changing the password of the local MySQL "root" account.
If you attempt to do this, this error will occur.
Plain Text
New password:

Re-enter new password:
... Failed! Error: SET PASSWORD has no significance for user 'root'@'localhost' as the authentication method used doesn't store authentication data in the MySQL server. Please consider using ALTER USER instead if you want to change authentication parameters.
If the MySQL server is installed and the password for the "root" account is correct, then this will appear:
Bash
mysql>
In this MySQL command prompt, type the SQL queries below.
These queries allow you to:
- create a "zabbix" database and use the default UTF8 encoding for it.
- create a user "zabbix" with the password "password" (default) and who can only connect from localhost.
- give full privileges to the "zabbix" user on the "zabbix" database you just created.
- allow binary logging to trust stored function creators.
Note that this option will be disabled a little later in this tutorial.
SQL
create database zabbix character set utf8mb4 collate utf8mb4_bin;
create user zabbix@localhost identified by 'password';
grant all privileges on zabbix.* to zabbix@localhost;
set global log_bin_trust_function_creators = 1;
quit;
Import the SQL schema, along with the initial data from Zabbix by running the command below.
Notes:
- the requested password corresponds to that of the user "zabbix" that you have just created using the SQL queries above.
- it may take a little time. So, wait up to 1 minute and the command will complete automatically.
Bash
zcat /usr/share/zabbix-sql-scripts/mysql/server.sql.gz | mysql --default-character-set=utf8mb4 -uzabbix -p zabbix
Disable the previously enabled MySQL "log_bin_trust_function_creators" option.
To do this, connect as "root" to your MySQL server.
Bash
mysql -uroot -p
Then, type the commands below in the MySQL command prompt.
SQL
set global log_bin_trust_function_creators = 0;
quit;
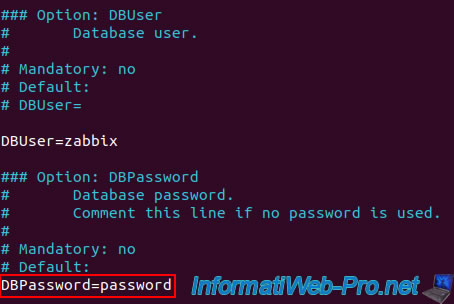
Specify the Zabbix database password in the configuration file "/etc/zabbix/zabbix_server.conf".
Bash
vi /etc/zabbix/zabbix_server.conf
In this file, locate the "Option: DBPassword" section, uncomment the "DBPassword=" line and indicate the password to use to access the Zabbix database.
Plain Text
DBPassword=password
Start the Zabbix server and agents and configure them to start automatically at system startup by typing these commands.
Bash
systemctl restart zabbix-server zabbix-agent apache2
systemctl enable zabbix-server zabbix-agent apache2
Source : Install and configure Zabbix for your platform.
2.4. Initial configuration of Zabbix from the web interface
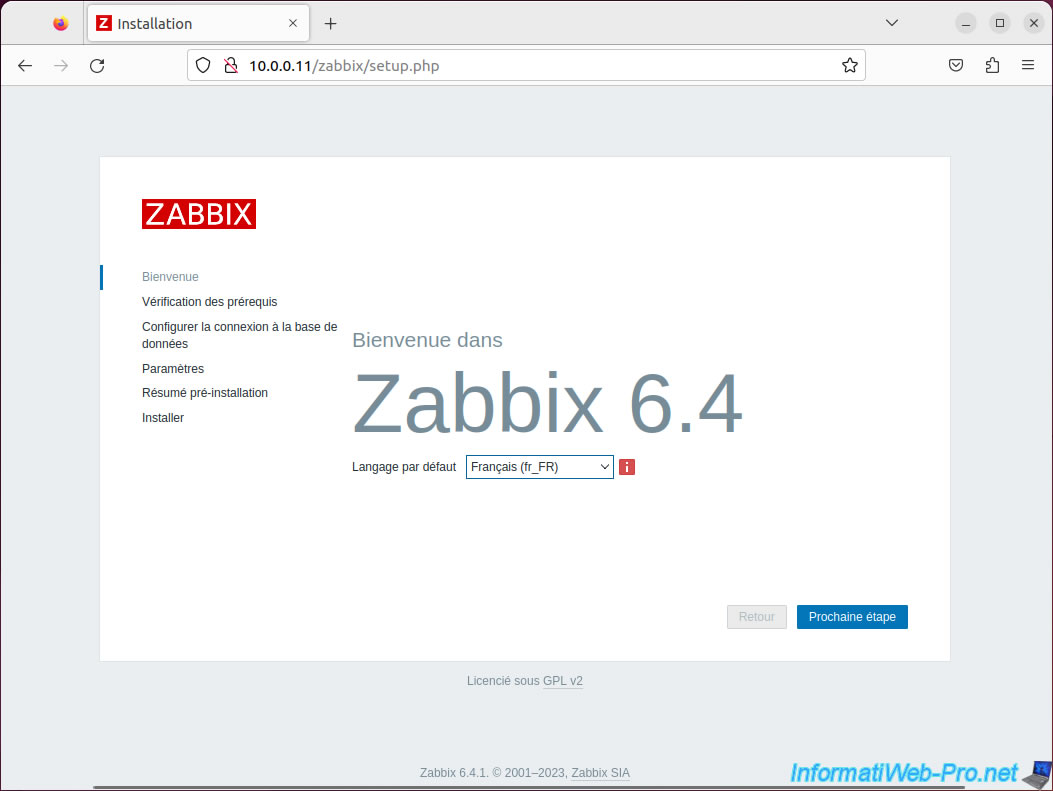
Access the Zabbix web interface by typing "http://127.0.0.1/zabbix" (or use the IP address of your Zabbix server).
The Zabbix configuration wizard will appear.
Select "French (fr_FR)" from the list and click: Next step.
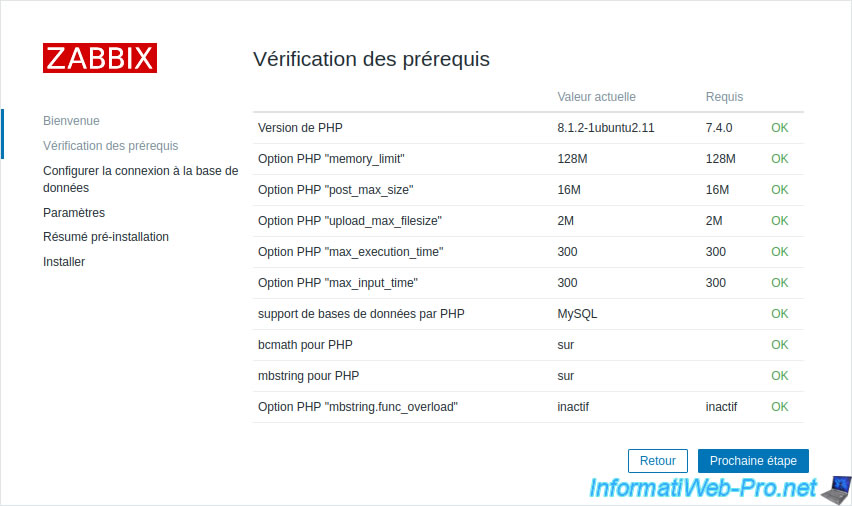
The wizard checks PHP prerequisites. Go down the list to check that everything is OK, then click: Next step.
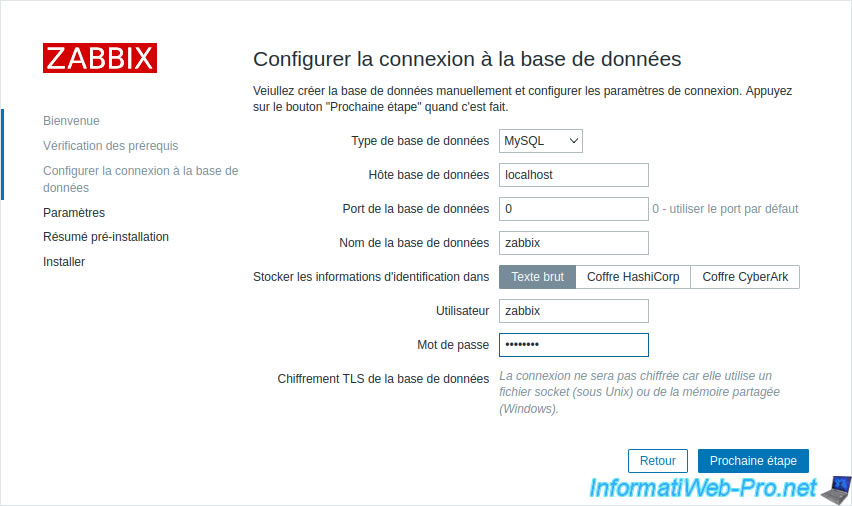
In the "Configure DB connection" step, the information will already be provided.
All you have to do is enter the password for the user "zabbix", then click on: Next step.
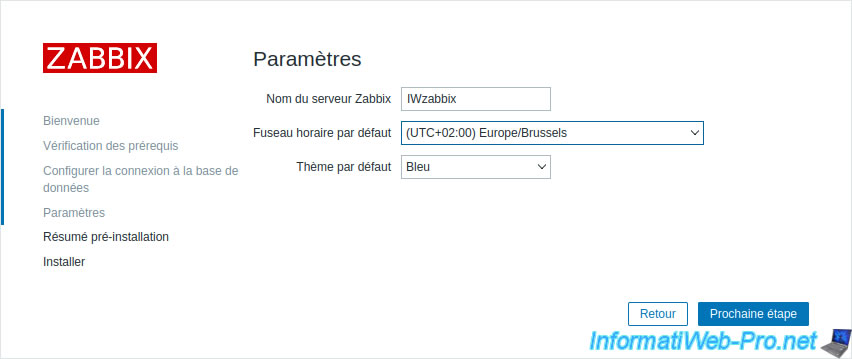
Provide a name for your Zabbix server and select your time zone.
Ex: "(UTC+02:00) Europe/Brussels" for Belgium or "(UTC+02:00) Europe/Paris" for France.
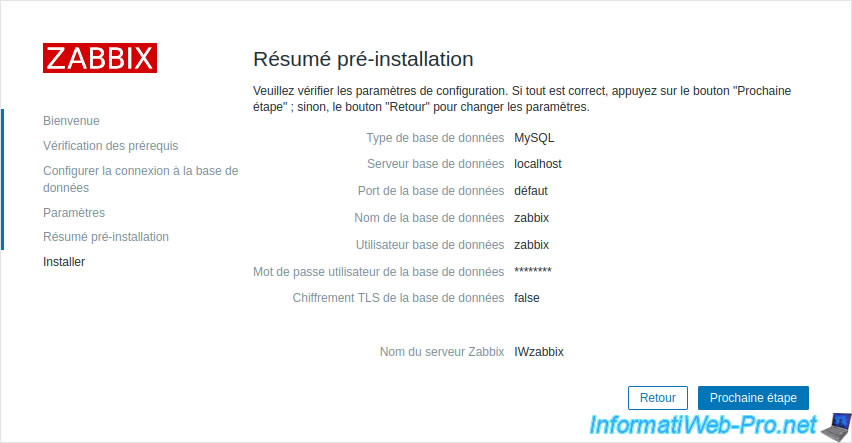
A pre-installation summary appears.
Click: Next step.
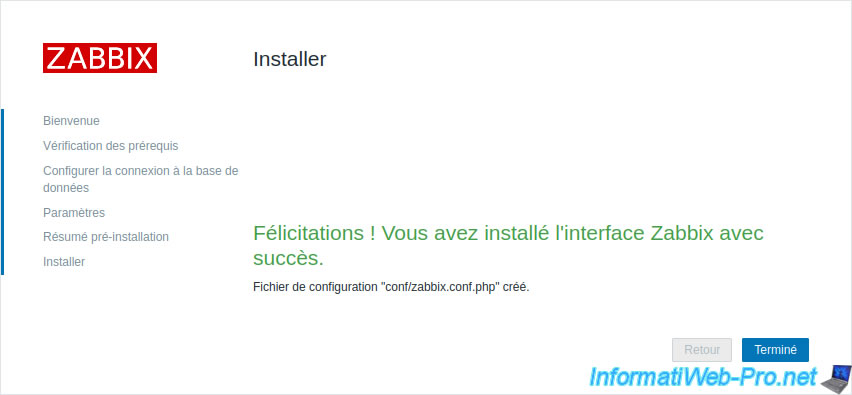
The "Congratulations! You have successfully installed Zabbix frontend" message appears.
Click Finish.
Share this tutorial
To see also
-

Firewall 9/3/2025
pfSense 2.6 - Create a site-to-site (S2S) VPN tunnel via IPsec
-
Firewall 6/4/2025
pfSense 2.6 - DNS resolution
-

Firewall 5/17/2025
pfSense 2.6 - Enable SSH protocol
-

Firewall 5/23/2025
pfSense 2.6 - Network interfaces
You must be logged in to post a comment