Install Windows 95 with VMware Workstation / Player
- VMware
- 25 March 2013 at 20:23 UTC
-

- 2/4

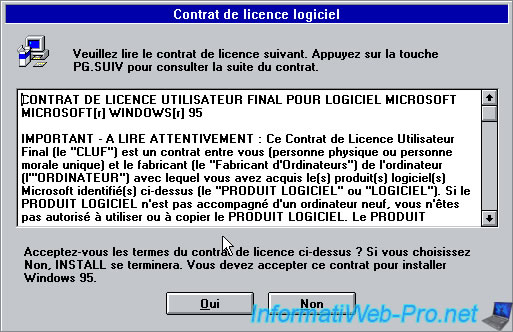
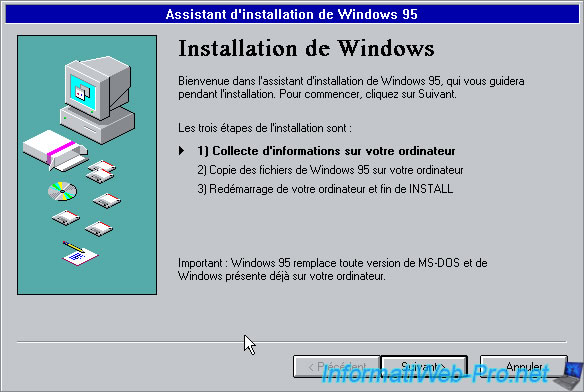
3. Installing Windows 95
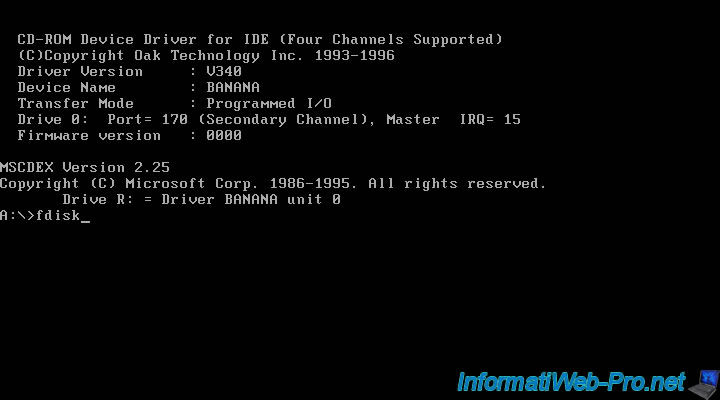
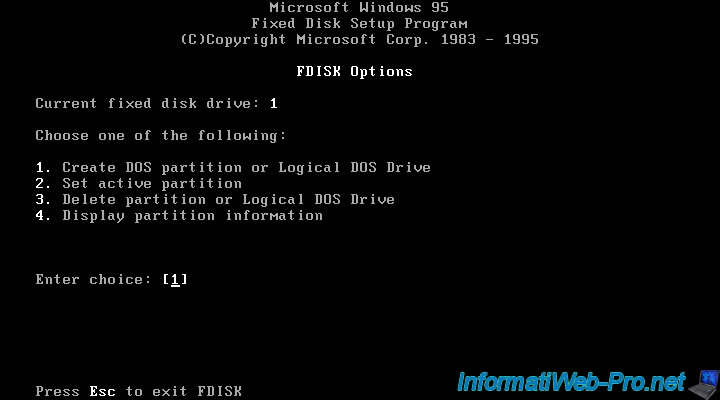
First, we create a partition on the hard drive. To do this, use the fdisk program.
Type 1 to create a DOS partition and press ENTER.
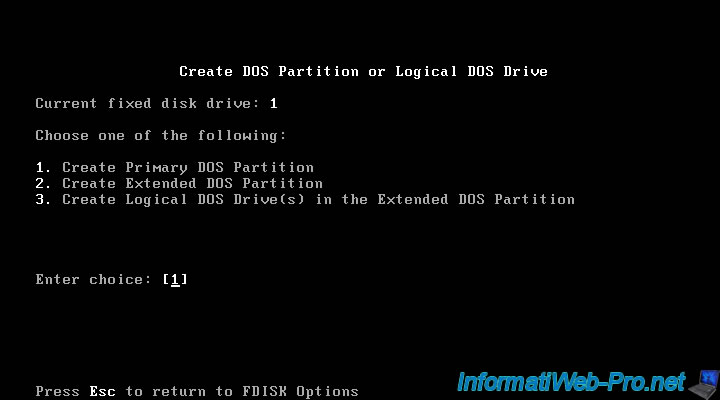
Type 1 to create a primary partition
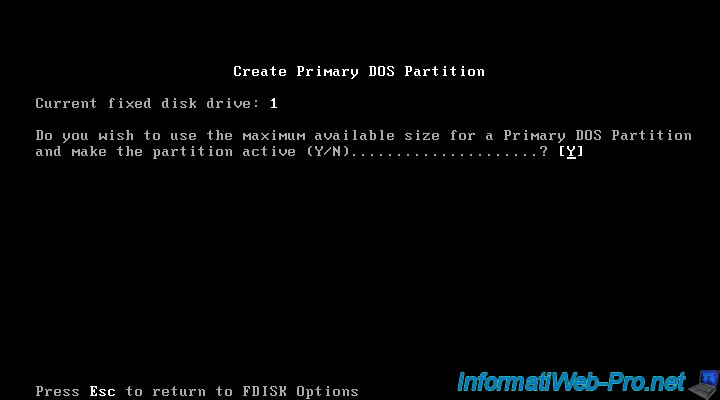
Then type Y to use all available space on the virtual hard disk.
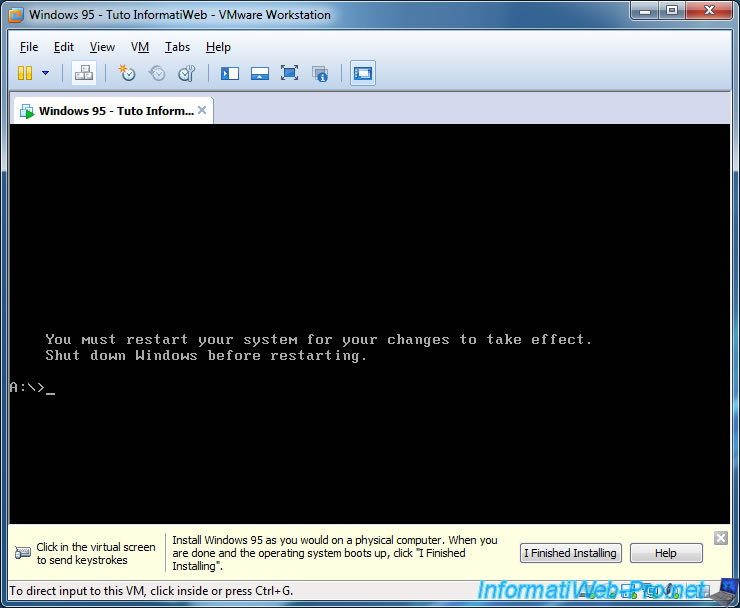
Once the partition is created, you must restart the virtual machine. To do this, click the VMware Workstation icon that represents the 3 keys (CTRL + ALT + DEL).
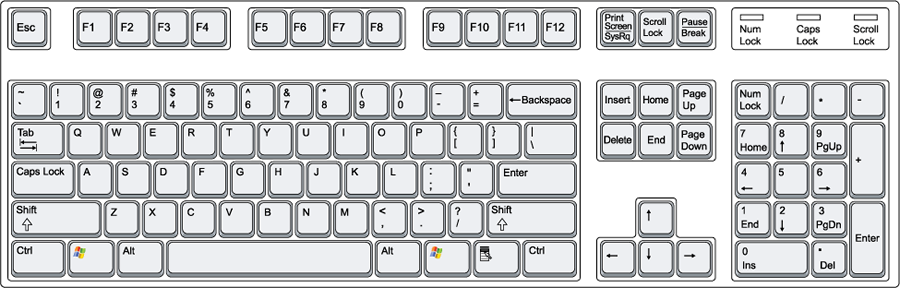
Because the keyboard is configured in QWERTY in this bootable floppy, here is the layout of the buttons on it :
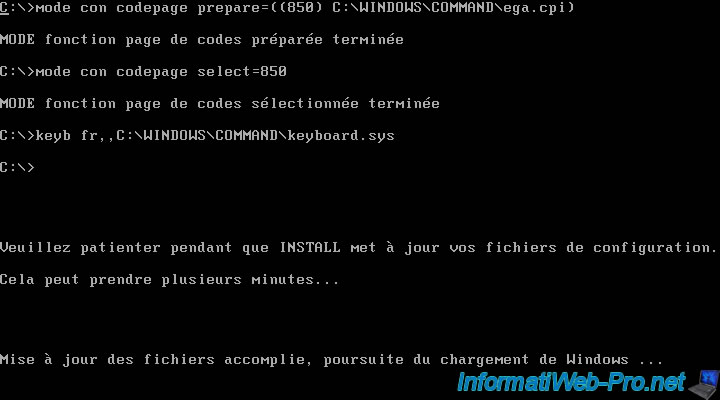
Then, format the C partition to create the file system (if you have the following later error message : INSTALL Windows requires 7340032 bytes available on your C: drive).
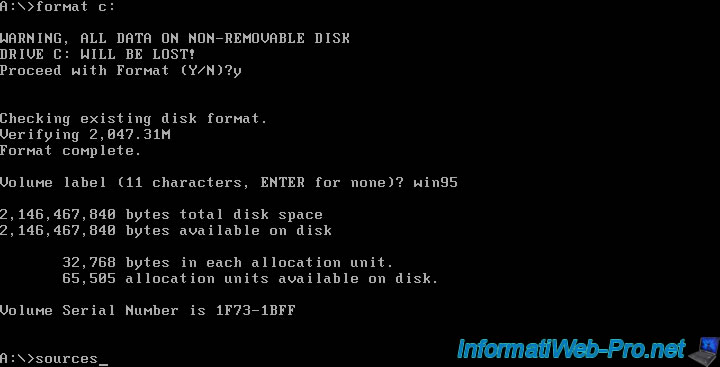
Then type "Y" to confirm formatting (formatting will erase all the data present on the partition)
Then enter a name for the partition if you want (11 characters max).
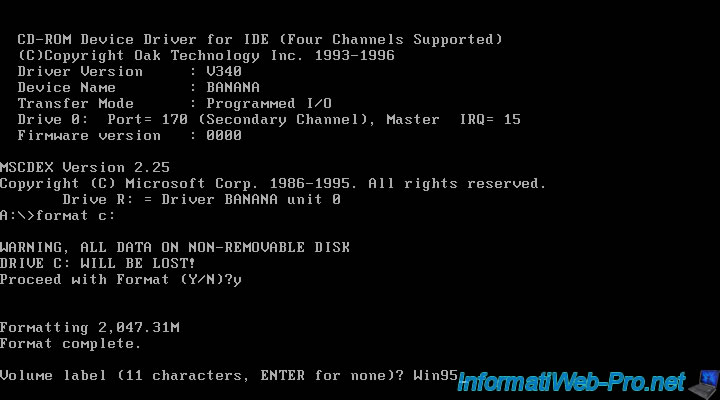
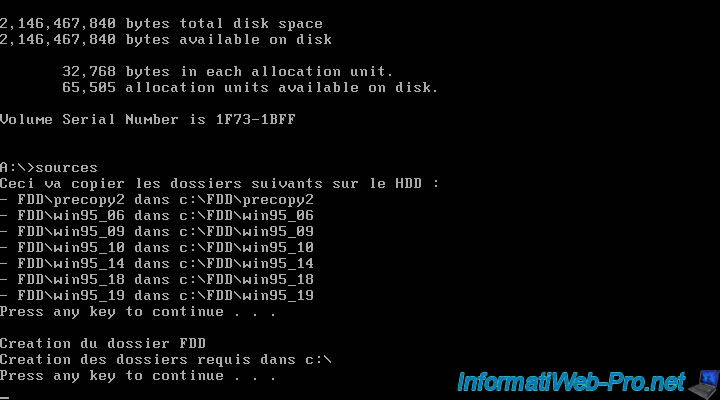
After formatting the partition made, we will now copy the files we will need during installation.
To do this, just type "sources" (without the quotes).
The program tells you that it will transfer the specified folders on the CD-ROM to the hard disk.
Press the "ENTER" button to start copying the files 2 times.
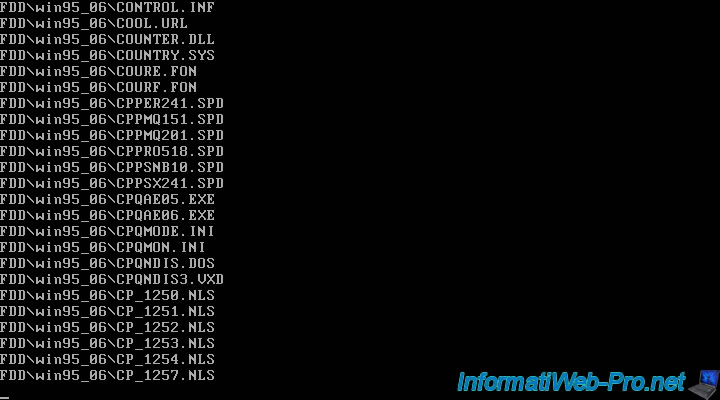
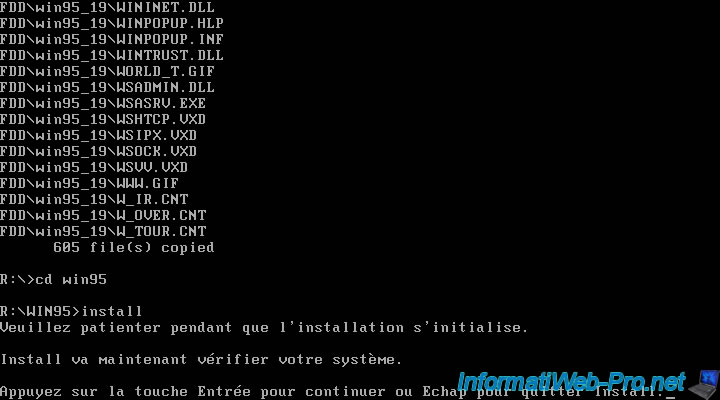
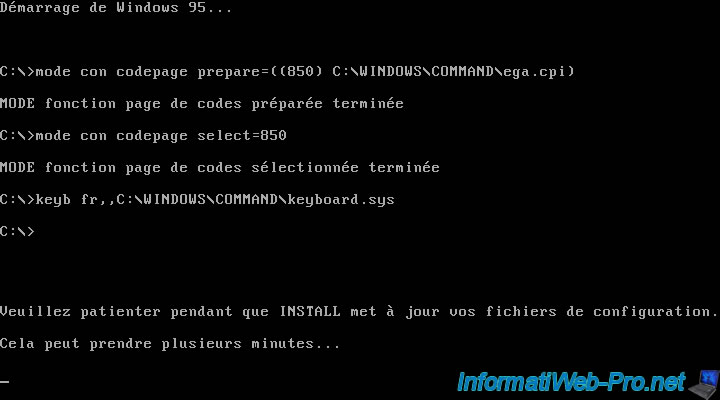
Copying files is done. This may take a few minutes.
Once the copy is complete, go to the "Windows 95 CD-ROM folder by typing this : cd win95
Then start the installation of Windows by typing : install and press Enter when prompted.
The GUI is displayed.
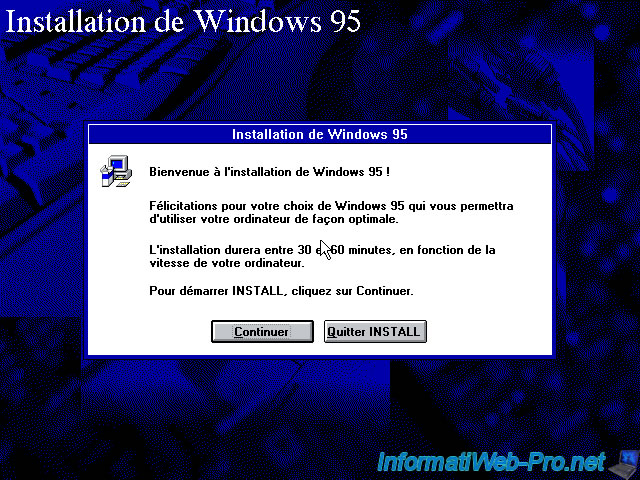
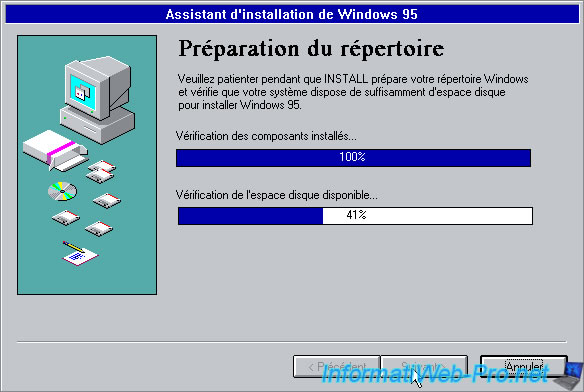
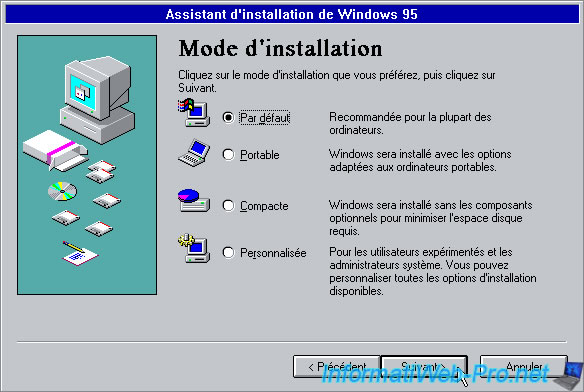
To start the installation, nothing special.
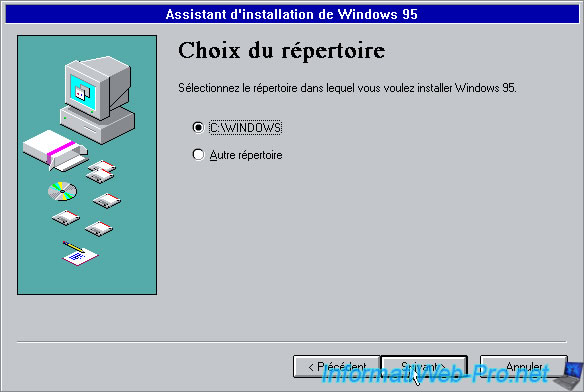
Select "Default".
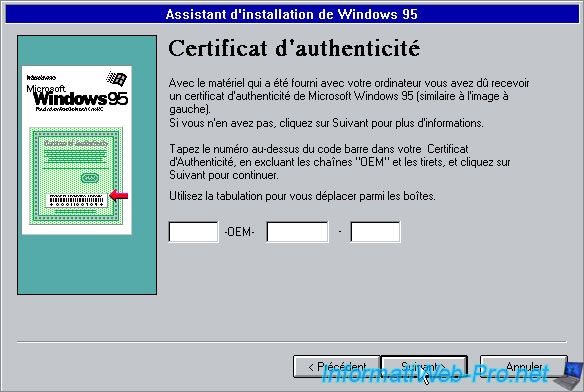
Then enter your serial number Windows 95.
Note : The format of it differs according to the type of license it is : OEM, Retail ...
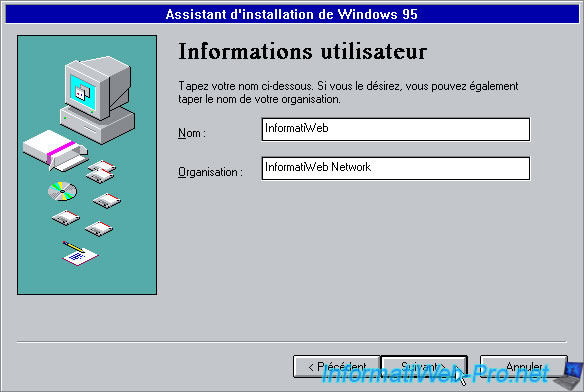
Specify a name and an organization
Leave unchecked boxes. We install them manually later.

Select "Install the most common components (recommended)".

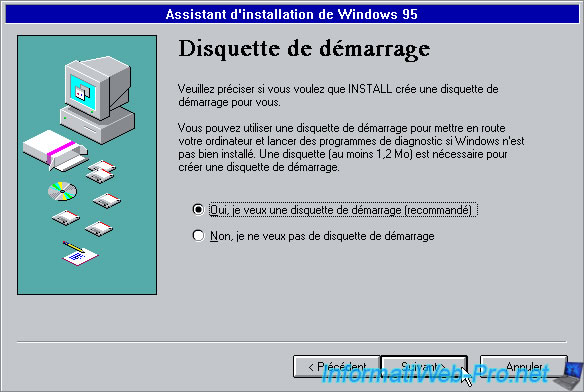
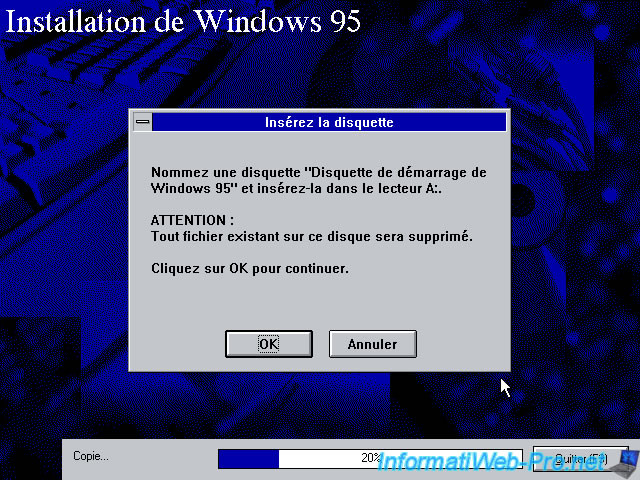
The wizard will then propose to create a boot disk.
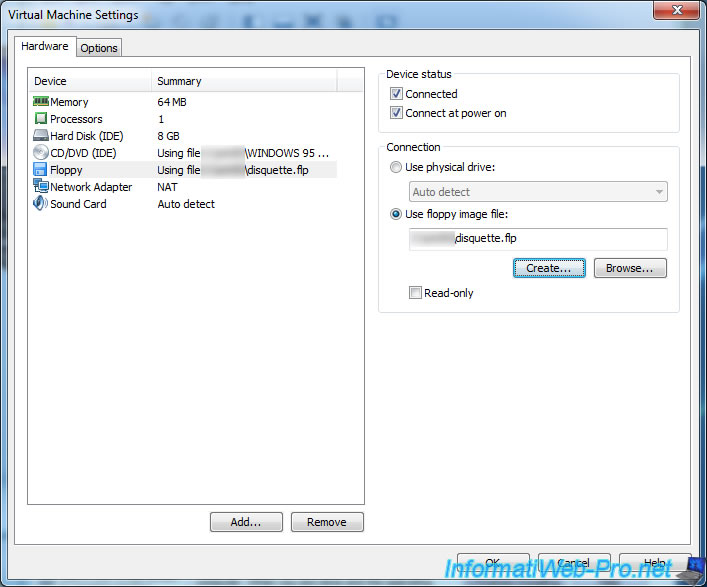
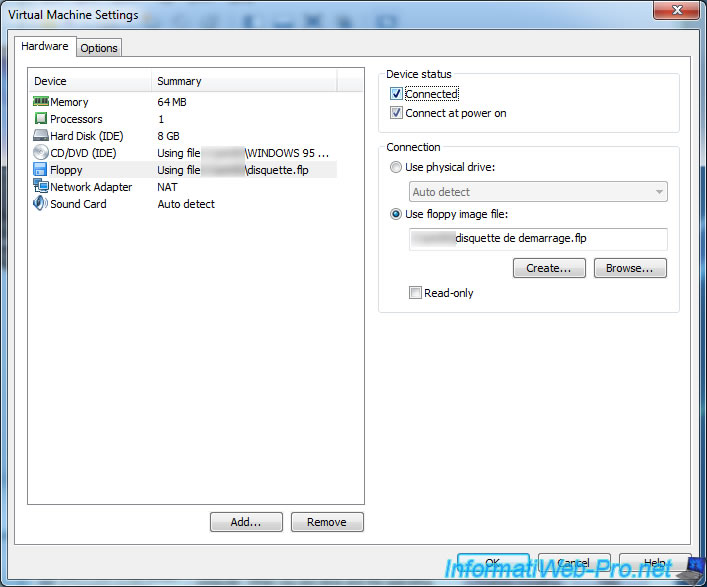
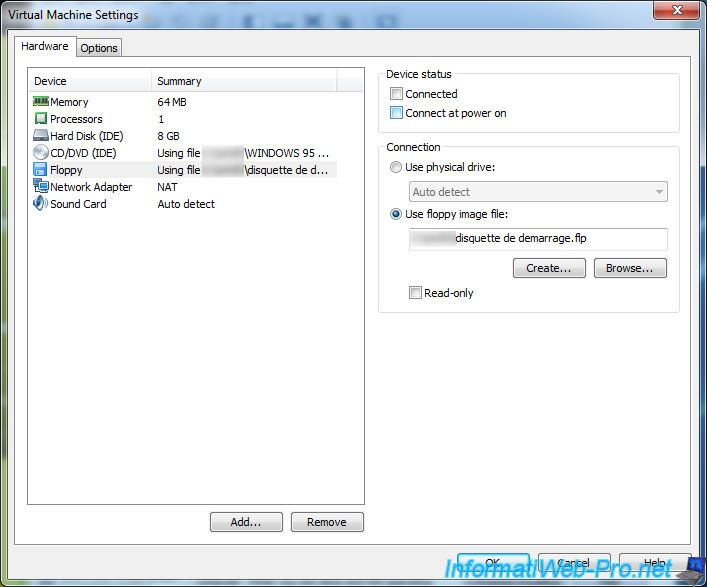
To avoid losing your floppy disk, right click on the disk icon in the interface of VMware and click on "Settings".
Note : If you use VMware Player, click on the "<<" icon on the top right of the VMware window to bring up the icons : hard drive, CD drive, floppy drive, ...
Click "Floppy" on the left side and click on "Create" on the right side.
Note : This creates a new virtual floppy disk.
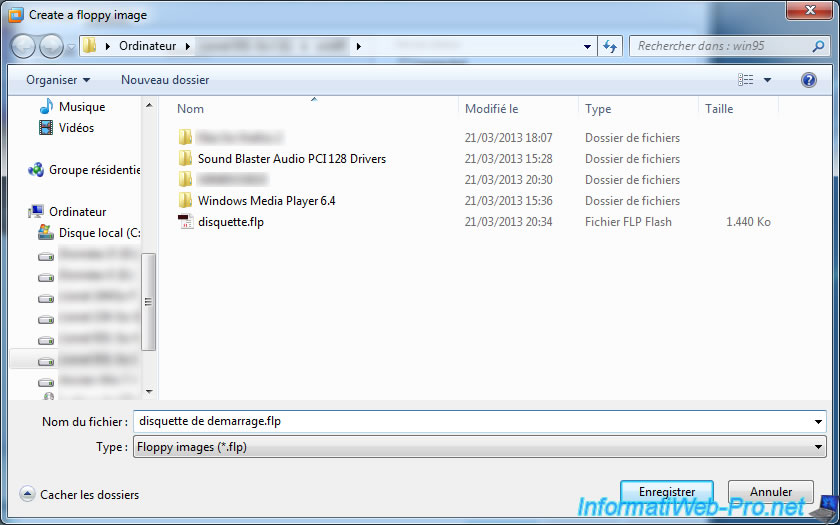
Choose a name to save your new floppy disk.
Make sure the boxes "Connected" and "Connect at power on" are checked and click OK.
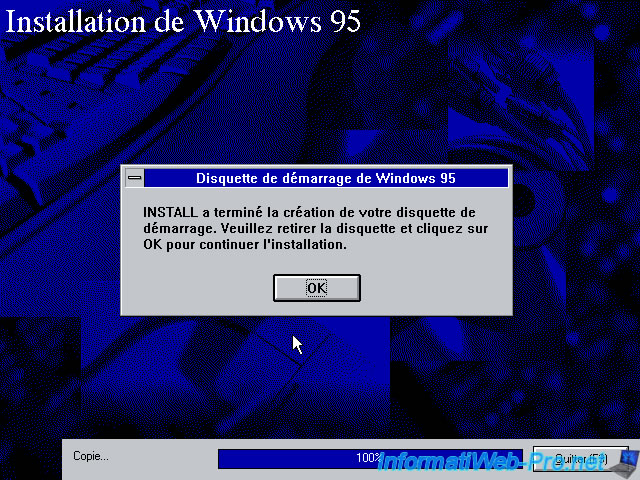
Click "OK" to create the boot disk Windows 95.
Once the disk created you can remove the floppy drive if the wizard will warn you after.
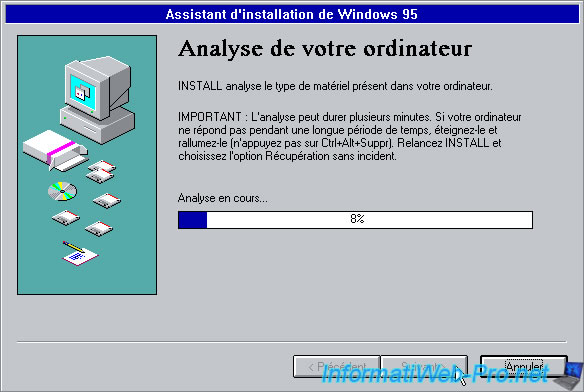
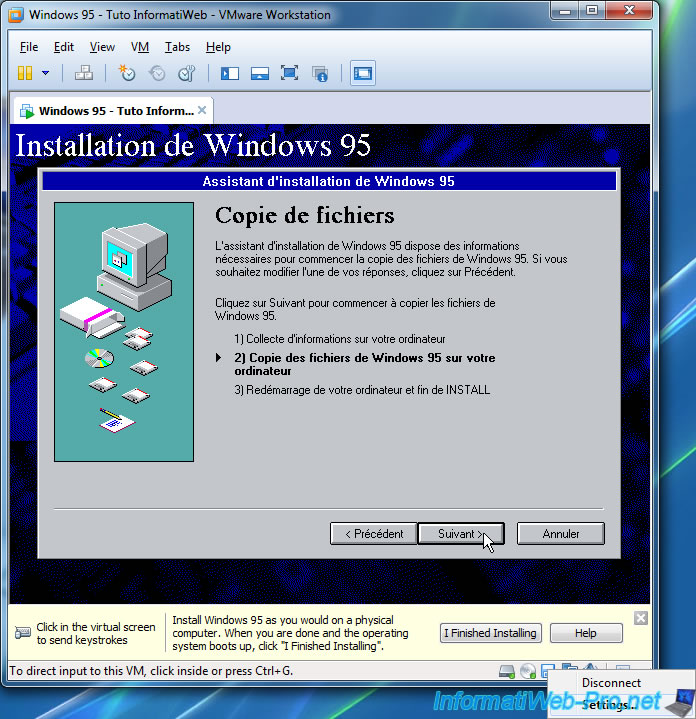
The installation is performed.
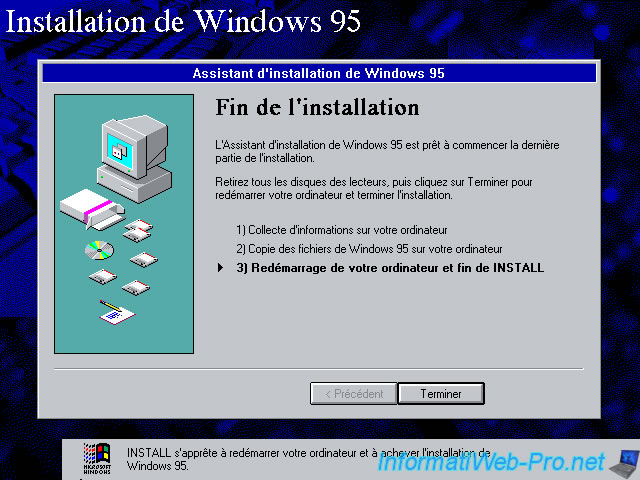
If you still have not removed the disk, the wizard will ask you to remove it.
To do this, right click on the disk in the vmware interface and click on "Settings".
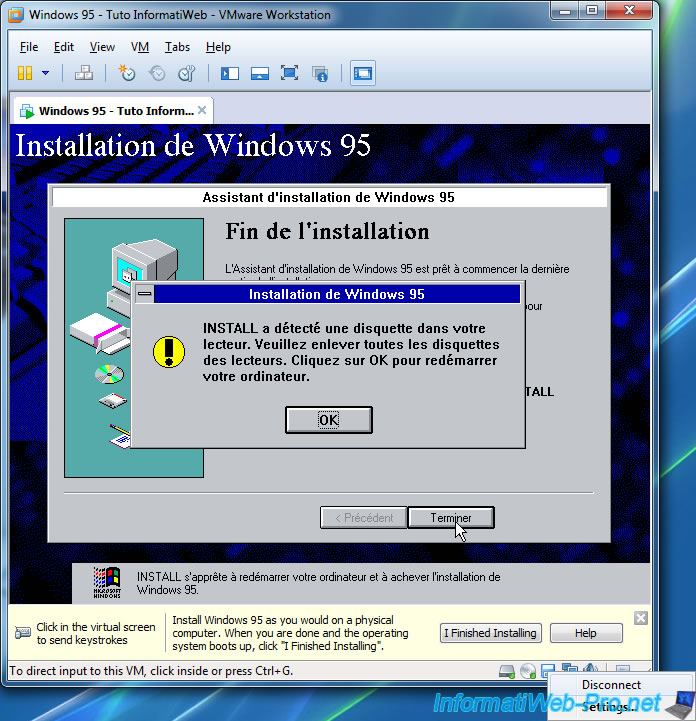
Then uncheck the 2 boxes "Connected" and "Connect at power on" in the "Floppy" part.
Then, the virtual machine will restart.
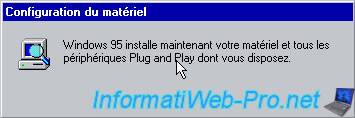
As you can see the keyboard language now happening in French (so AZERTY).

Windows will then configure your Plug and Play hardware.
Specify as early tutorial, this message will appear during the installation. First click OK.
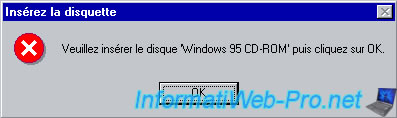
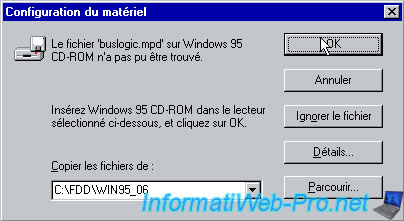
Then another error message saying that the file 'buslogic.mpd' (in this case) was not found. In fact, this file is located on disk 6 of Win. 95 contained in the "win95_06.cab" file that we extracted and copied to the hard disk in order to provide it during installation.
Click on "Browse".

Then go to the c drive (listed below) and go to the folder : c:\fdd\win95_06.
Then click "OK".
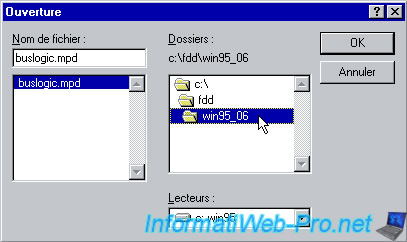
Then click OK to continue the installation.
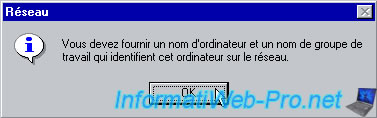
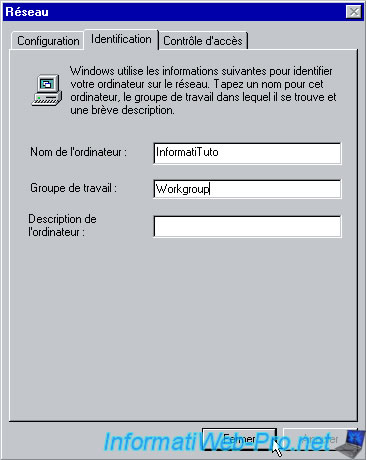
The wizard will ask you to configure the computer name and the name of the workgroup in which it will be.
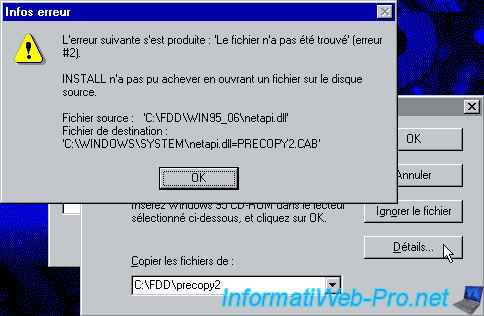
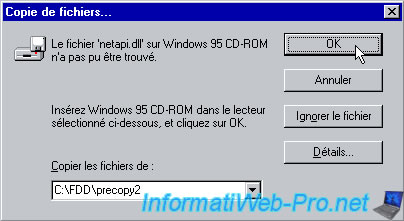
Then returns the same error but for a different file.

The following error appears : The file 'netapi.dll' on Windows 95 CD-ROM could not be found.
This file is located in the "precopy2.cab" file. So enter this path "C:\FDD\precopy2" checkbox and click OK.
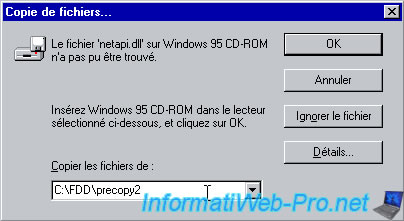
If you're wondering how we found where the files were well click the "Details" button. The name of the CAB file is located at the end of the "Destination File" line.
In this case : Destination File : C:\WINDOWS\SYTEM\netapi.dll=precopy2.cab.
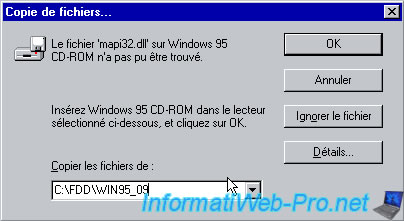
The following file "mapi32.dll" is on the disk 9.
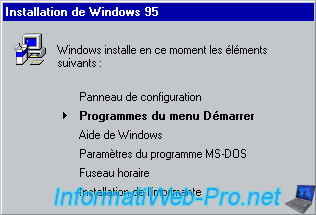
The rest of the files will be copied automatically without further intervention on your part.
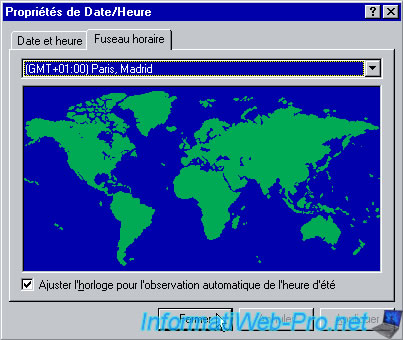
Then another window will appear on the Windows configuration panel which, time zone settings ...
Default settings are those on your computer.
Note : On a normal computer, these settings are saved in the BIOS of your motherboard.
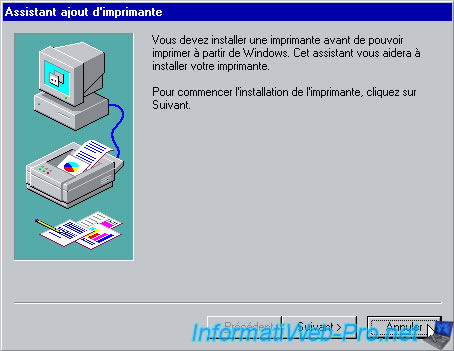
Skip step of adding the printer because we do not need.
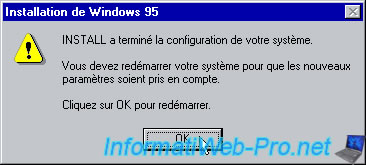
Once the installation is complete, click "OK" to restart the virtual machine.

Enter a user name to create a new user and click "OK".
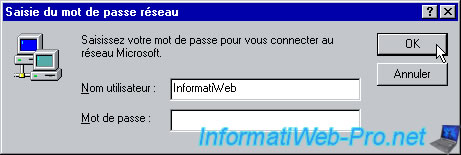
Enter a password if you wish, or leave blank.
Share this tutorial
To see also
-
VMware 2/24/2016
VMware Workstation - Remotely access to a VM over VNC
-
VMware 1/31/2020
VMware Workstation 10 - Import Windows XP Mode of Microsoft
-
VMware 1/31/2020
VMware Workstation 11 / 10 - Virtualize Windows XP to make it fluid
-
VMware 8/14/2020
VMware Workstation 12 / 11 / 10 - Virtualize Citrix XenServer 6.5.0
No comment