Virtualize Unraid 6.9.2 with VMware Workstation 17.5.1
- VMware
- VMware Workstation
- 11 December 2025 at 08:45 UTC
-

- 4/5

6. Configure Unraid Array
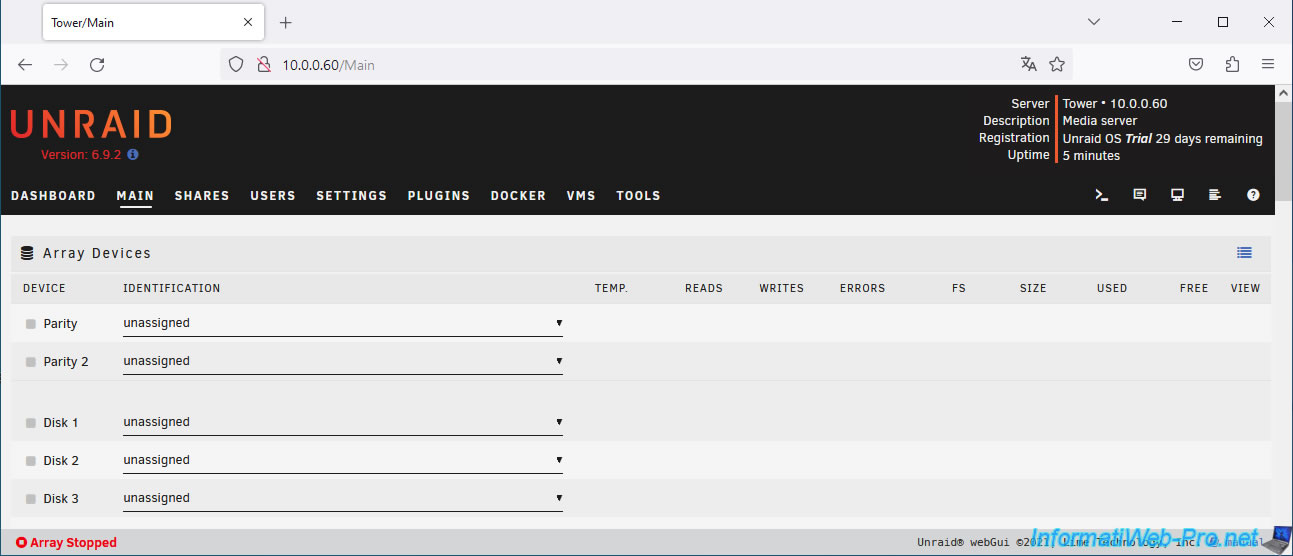
To configure the Unraid array, go to the "Main" tab.
By default, no disks are assigned (unassigned).
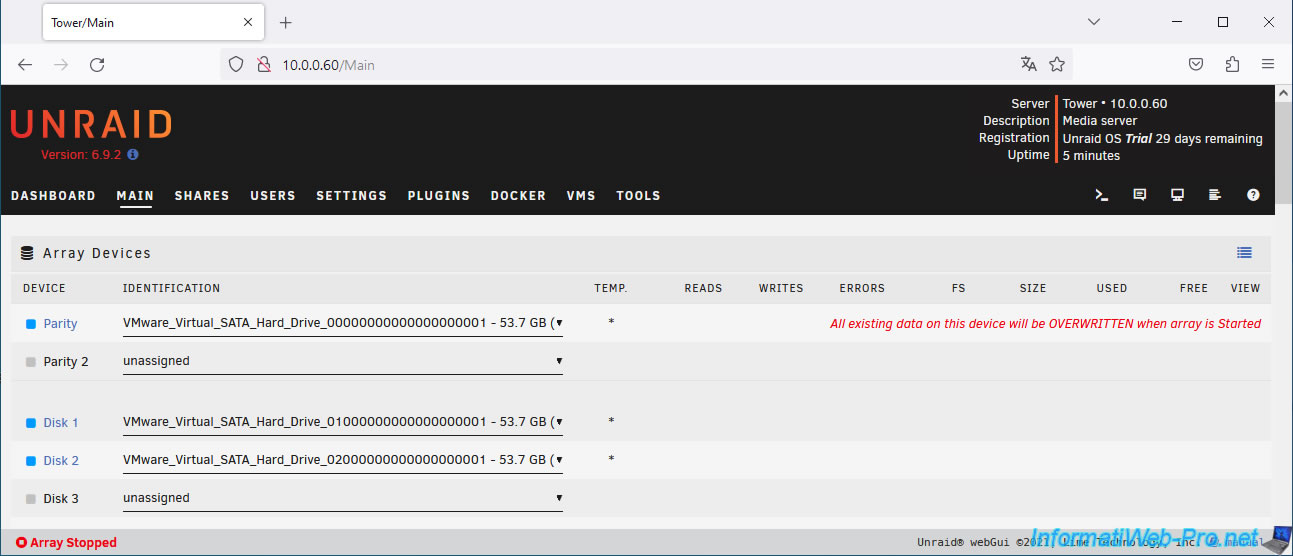
Start by assigning the virtual SATA hard drives (VMware_Virtual_SATA_Hard_Drive) for the "Parity" (parity), "Disk 1" and "Disk 2" (data disks) devices.

Once the SATA virtual hard drives are assigned, you will see a blue icon for the devices: Parity, Disk1, and Disk2.
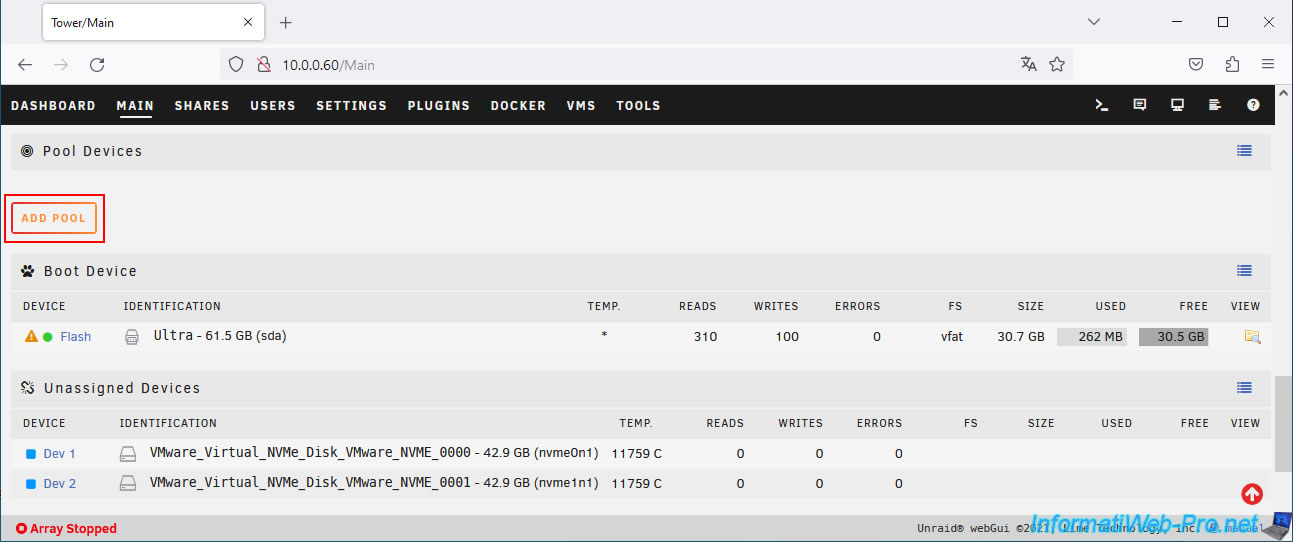
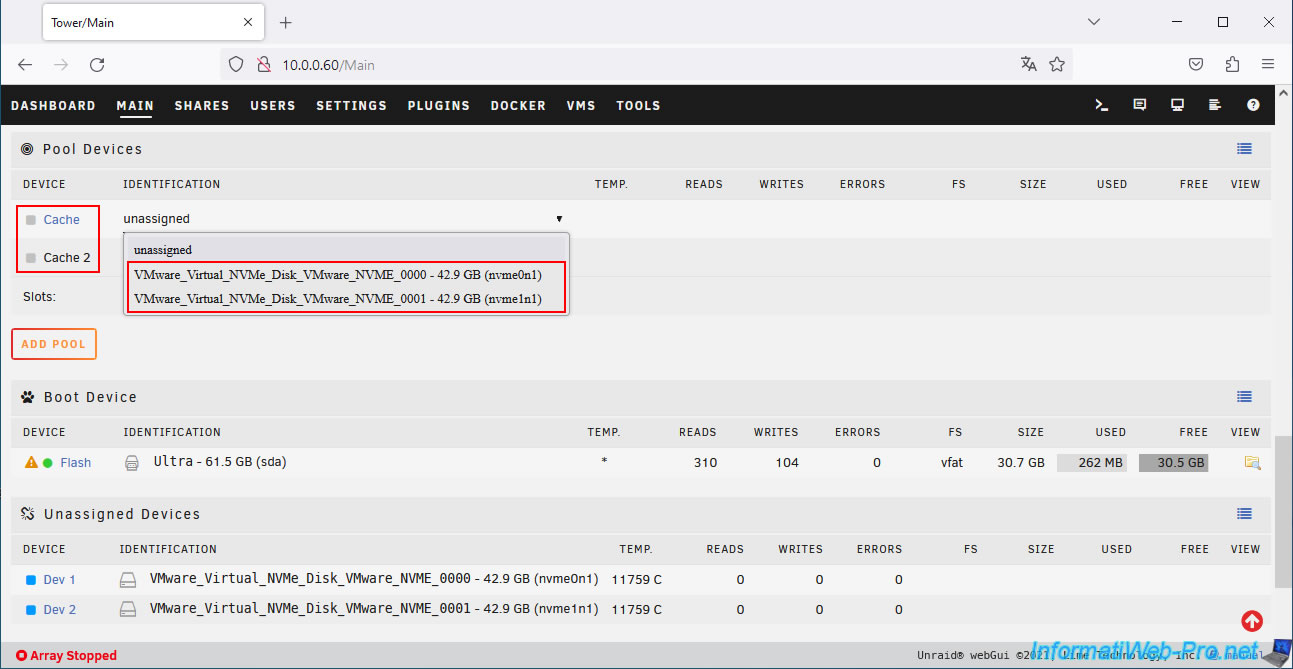
Then, a little further down (in the "Pool Devices" section), click on "Add pool".
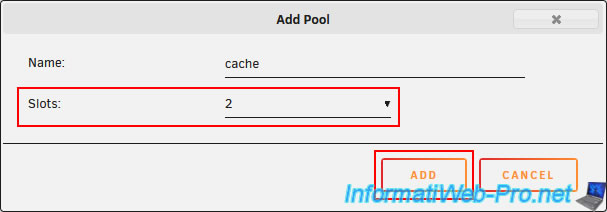
By default, this pool is named "cache."
Select "2" for the number of slots.
This will allow you to use two virtual SSDs for Unraid's cache.
Otherwise, Unraid would consider the files in the cache unprotected (because if the single SSD failed, the data would be lost).
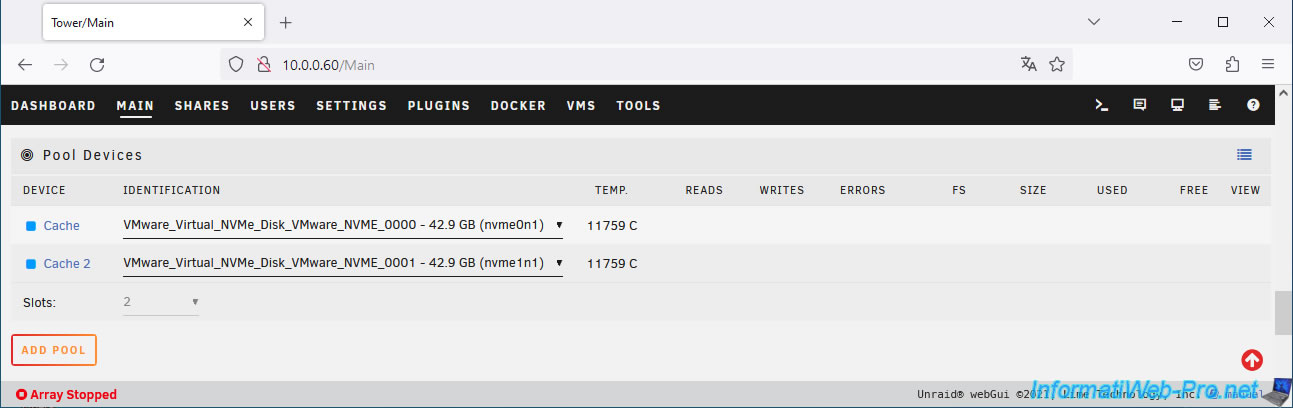
Assign the remaining 2 NVMe virtual hard disks (VMware_Virtual_NVMe_Disk) to the devices: "Cache" and "Cache 2".
The 2 virtual NVMe SSDs are assigned to the Unraid cache.
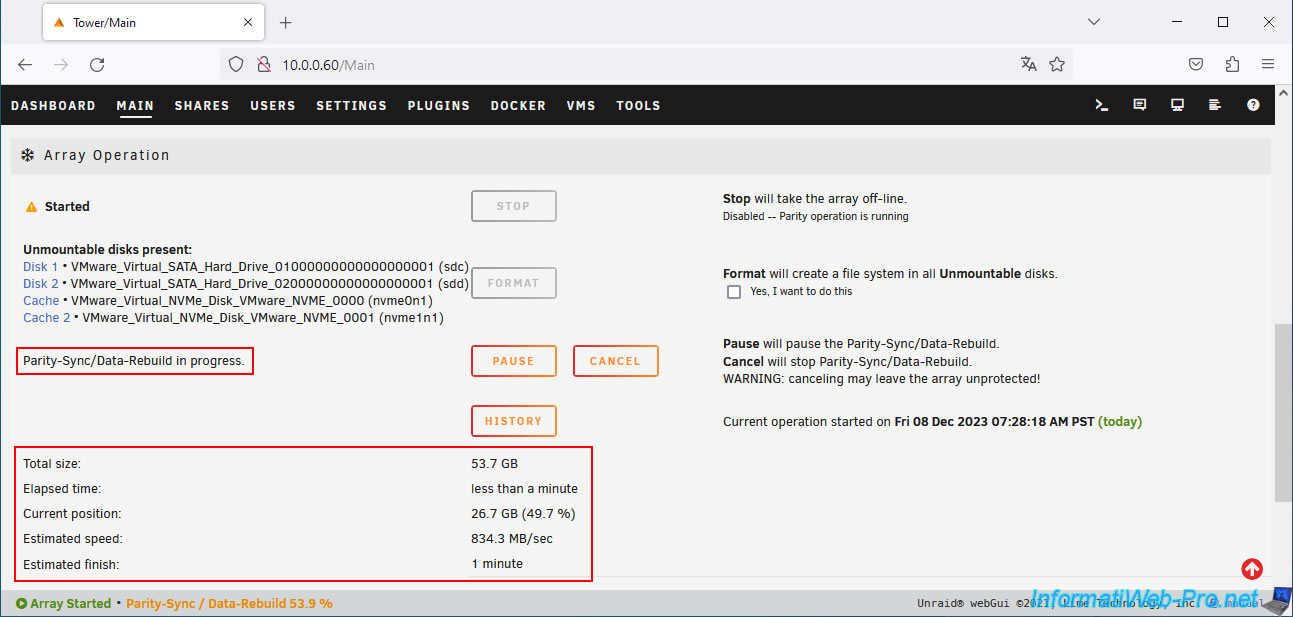
At the bottom of the page, click "Start" to start the parity disk calculation, then start the Unraid array.
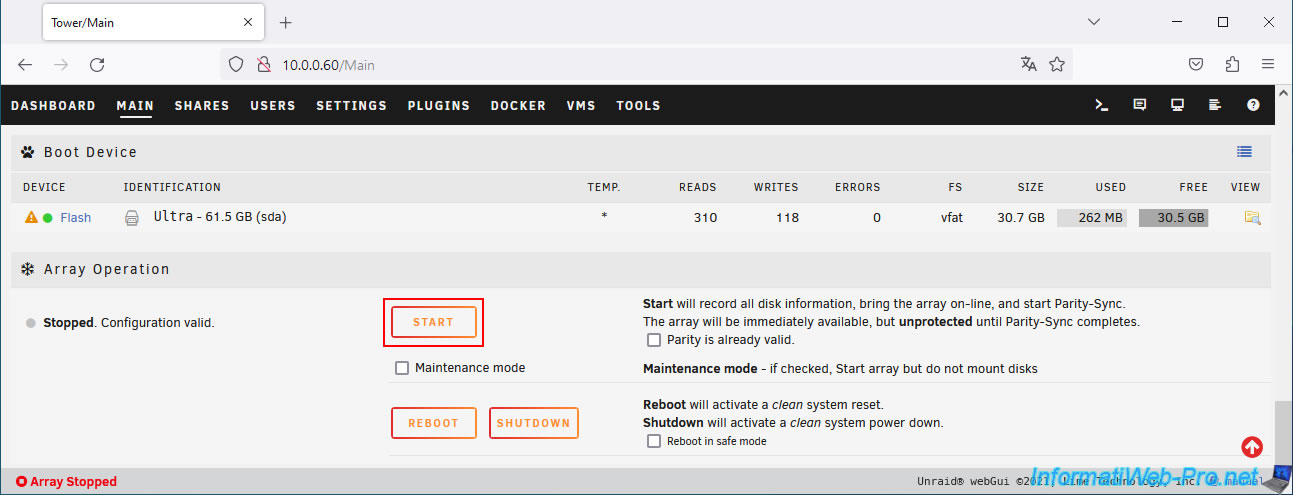
Click "Proceed" to start the parity disk calculation.

At the bottom of the page, you will see the status "Parity-Sync / Data-Rebuild xx.x%" appear.
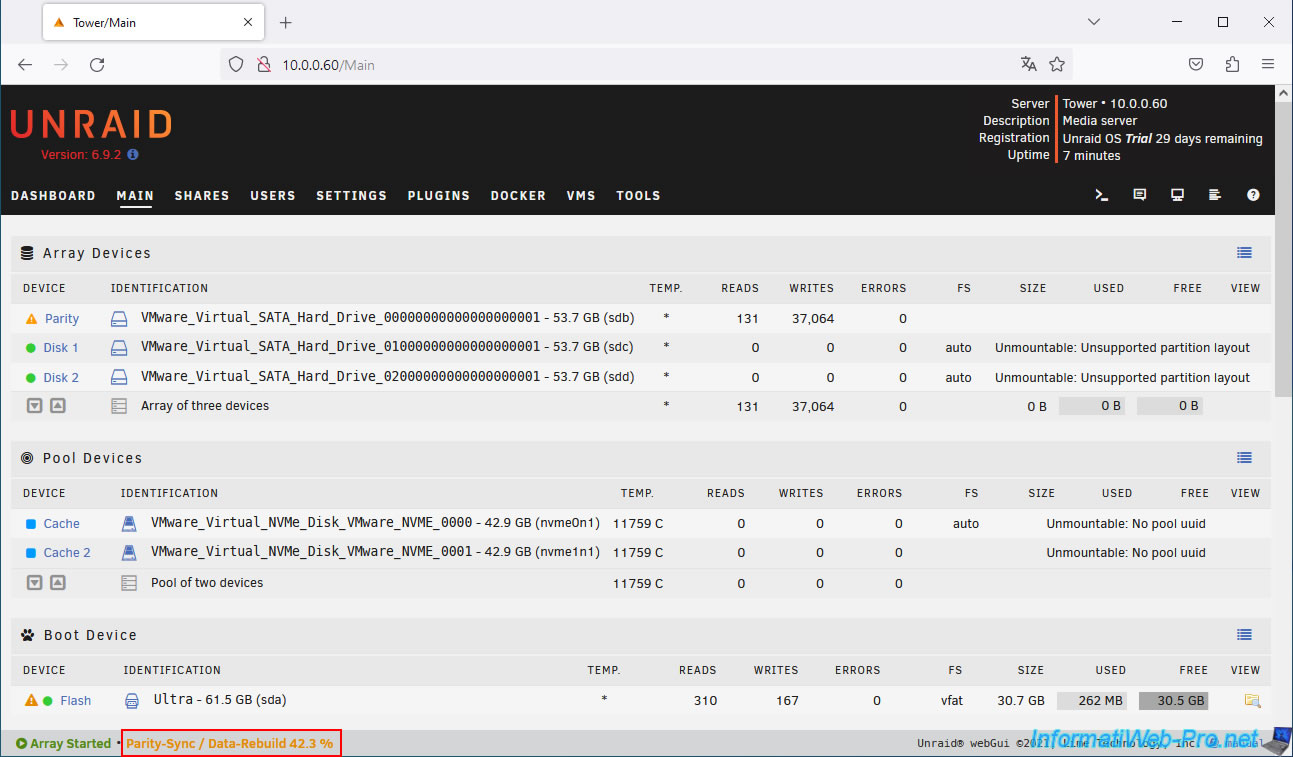
At the bottom of the page, you can monitor the progress of the parity disk calculation.
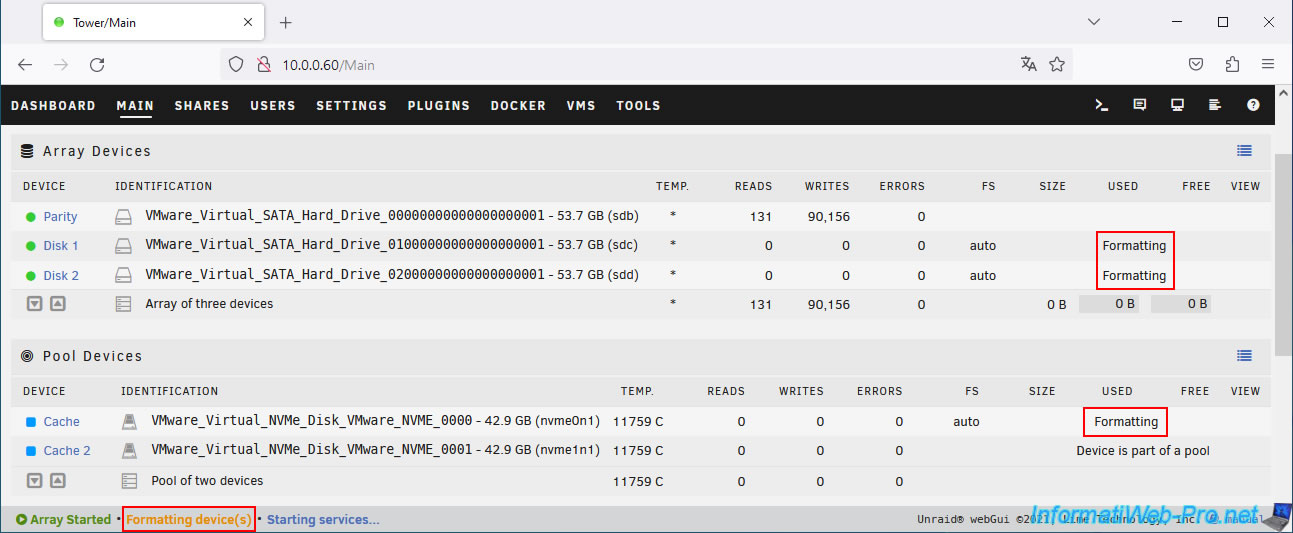
Once the parity disk is calculated, you'll see green icons for the three disks in the array (the one for parity and the other two for data).
But you'll also see on the right that the disks are currently unusable.
Plain Text
Unmountable: Unsupported partition layout.
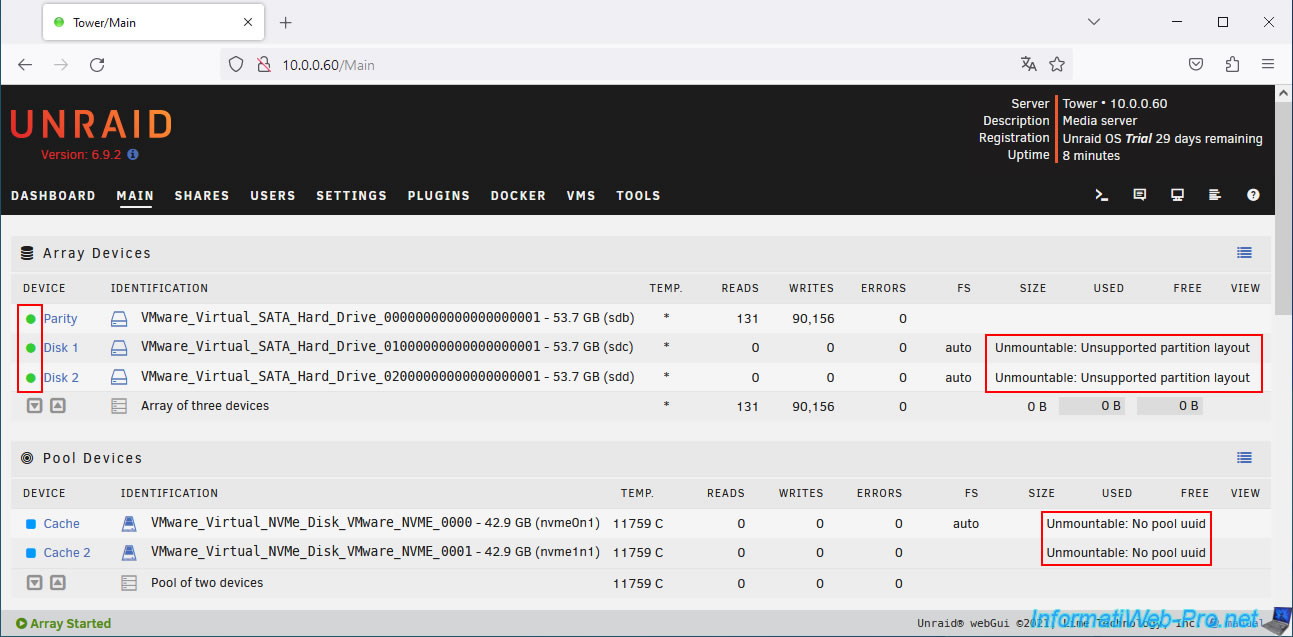
Indeed, if you look at the bottom of the page, you'll see that the data disks and those assigned to the Unraid cache must be formatted to create a file system.
Check the "Yes, I want to do this" box to the right of the "Format" button.
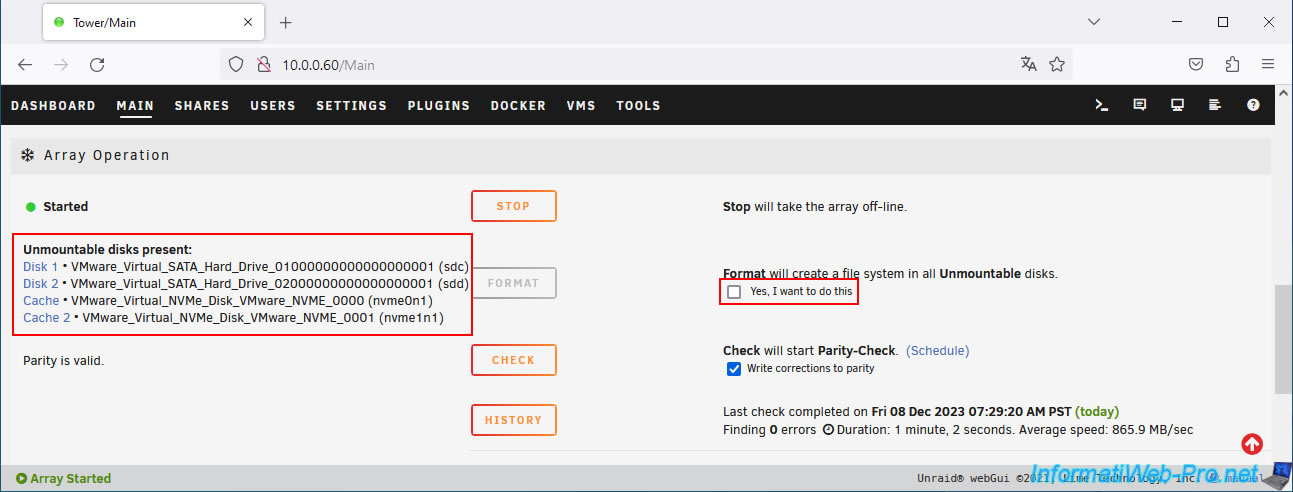
Confirm the action by clicking OK.

Then, click on the "Format" button.
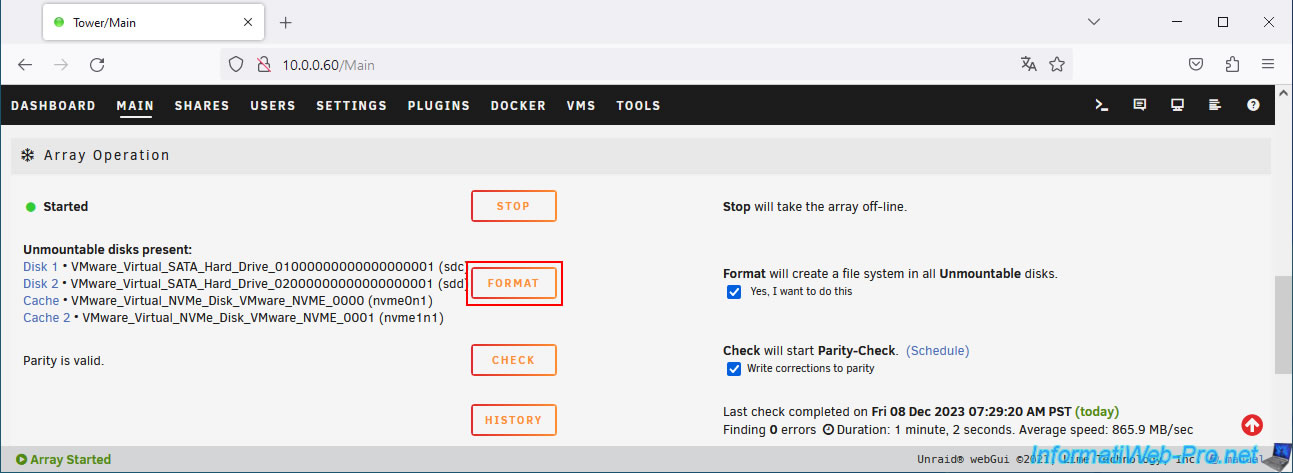
Please wait while your disks are formatted.
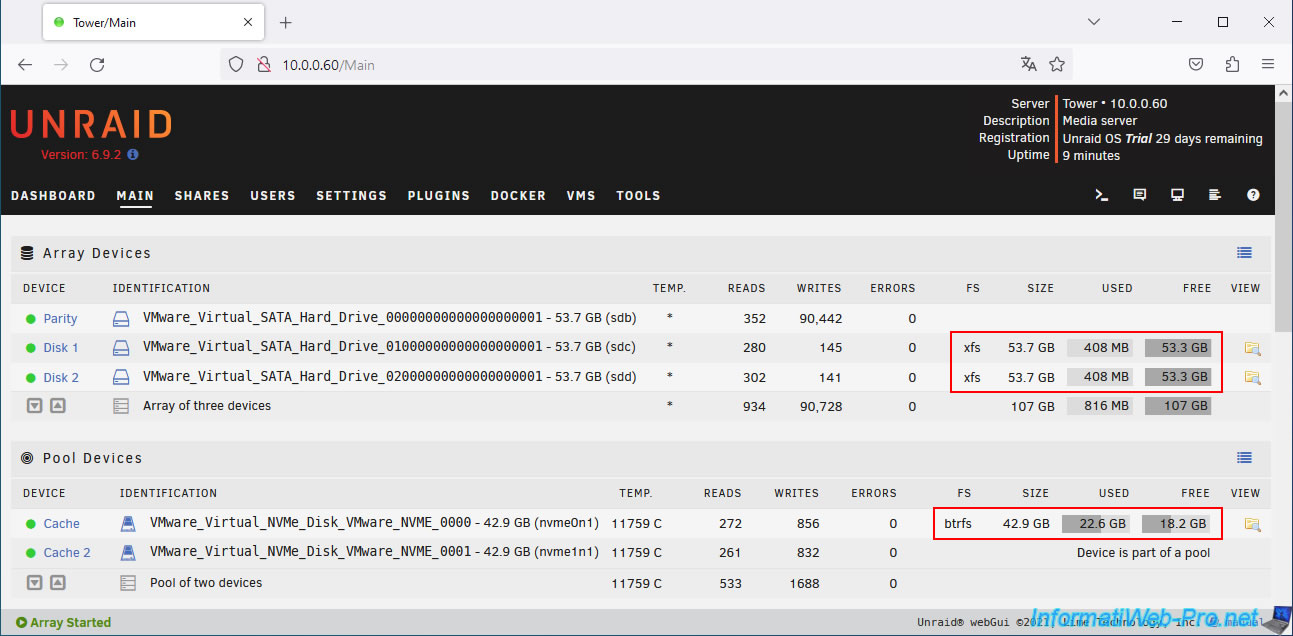
Once the disks have been formatted, you will see information about the capacity (size), used space, and free space on them.
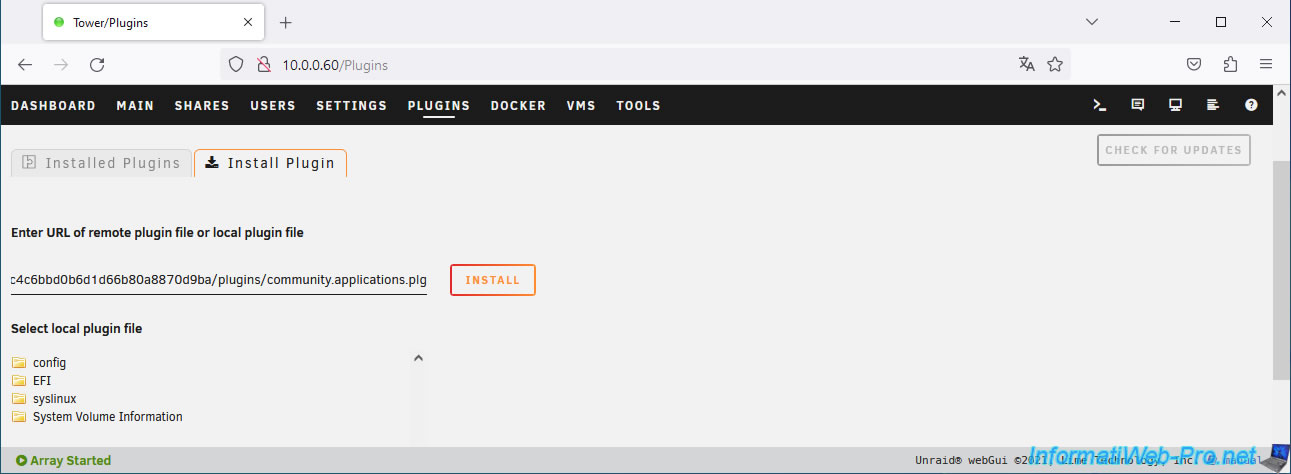
7. Install the plugin: Community Applications
To install Docker plugins and/or applications, you will need the "Community Applications" plugin for Unraid.
Go to the "Plugins" tab and enter the plugin's address in the "Install Plugin" tab.
To install the latest version of this "Community Applications" plugin, enter the address "https://raw.githubusercontent.com/Squidly271/community.applications/master/plugins/community.applications.plg".
Note: for version 6.9.2 of Unraid, you will need to use an older version (dated 08/31/2021) of this plugin.
To do this, use the address "https://raw.githubusercontent.com/Squidly271/community.applications/d075fda8b8337c4c6bbd0b6d1d66b80a8870d9ba/plugins/community.applications.plg".
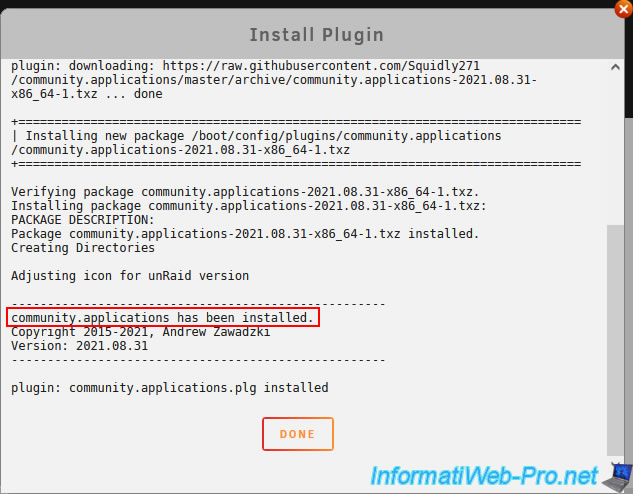
The "community.applications" plugin has been installed.
Share this tutorial
To see also
-

VMware 3/25/2013
VMware Workstation / Player - Install Windows 95
-

VMware 2/7/2020
VMware Workstation 15 - Installation on Linux
-

VMware 4/30/2020
VMware Workstation 16 / 15 - Manage virtual hard disks
-

VMware 7/21/2023
VMware Workstation 17 / 16 - Unable to connect an USB key to a VM (solution)
No comment