- VMware
- 12 June 2020 at 09:14 UTC
-

VMware Workstation is a professional virtualization solution that allows you to do a lot of things and is able to manage many virtual machines at the same time (if the resources of the host PC allow it).
However, in rare cases (and especially when you edit manually some settings in the vmx files), VMware Workstation can become unstable and arrive in a state where you will not be able to access or close some virtual machines.
Again, this is very rare, but here is how to solve ou avoid these problems.
- Take ownership error
- Freeze of a virtual machine
- Conflict detected : Panda USB vaccine
- Conflict detected : Disk Management
- The device was unable to connect to its ideal host controller
- This VMware USB Device can perform faster
- This host supports Intel VT-x, but VT-x is disabled
1. Take ownership error
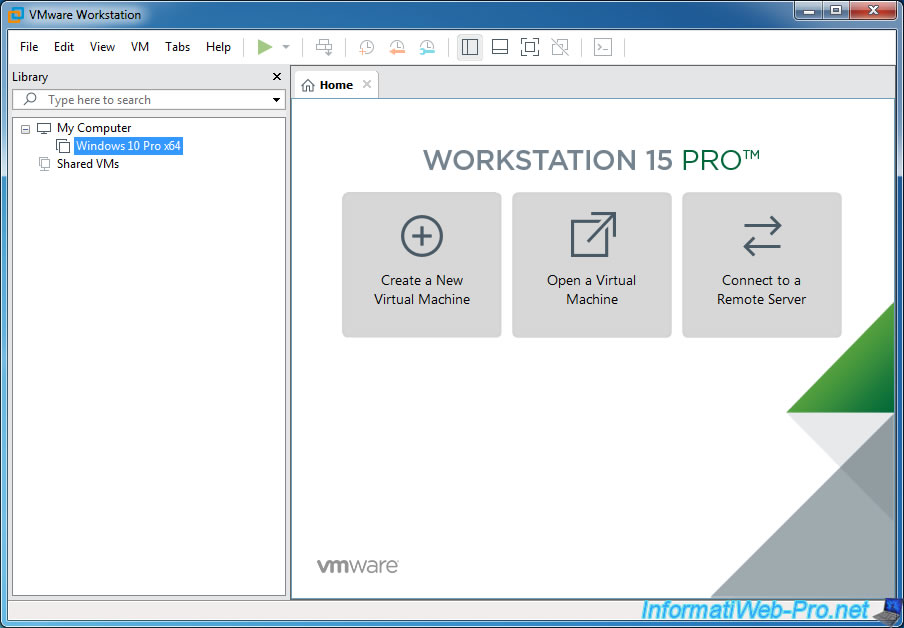
At some moments, you may not have access to a virtual machine (even if it's down and not password protected).
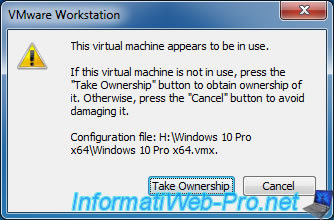
When you want to access it from VMware Workstation, a "This virtual machine appears to be in use" warning is displayed.
VMware Workstation offers you to obtain the rights on it by clicking on : Take Ownership.
Plain Text
If this virtual machine is not in use, press the "Take Ownership" button to obtain ownership of it. Otherwise, press the "Cancel" button to avoid damaging it.
This warning can occur in 2 cases :
- you have opened 2 windows of VMware Workstation and you are trying to open the same virtual machine from the 2 windows. In this case, click : Cancel.
- VMware Workstation has become unstable or a bug is temporarily blocking you from accessing it. In this case, click : Take Ownership.
Most of the time, it will fail and this message will appear :
Plain Text
Could not open virtual machine ... .vmx

Taking ownership of this virtual machine failed.

The virtual machine is in use by an application on your host computer.

Configuration file: ... .vmx
Click Cancel.
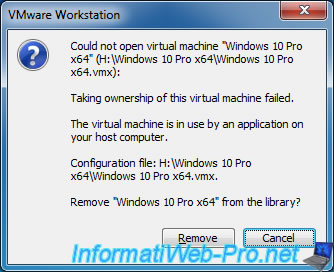
Note that in older versions of VMware Workstation, the icon displayed was an error icon and the "Remove" button did not exist.
With these older versions, you had to click OK.
.jpg)
Since VMware Workstation can't open this virtual machine, a red icon appears on it.
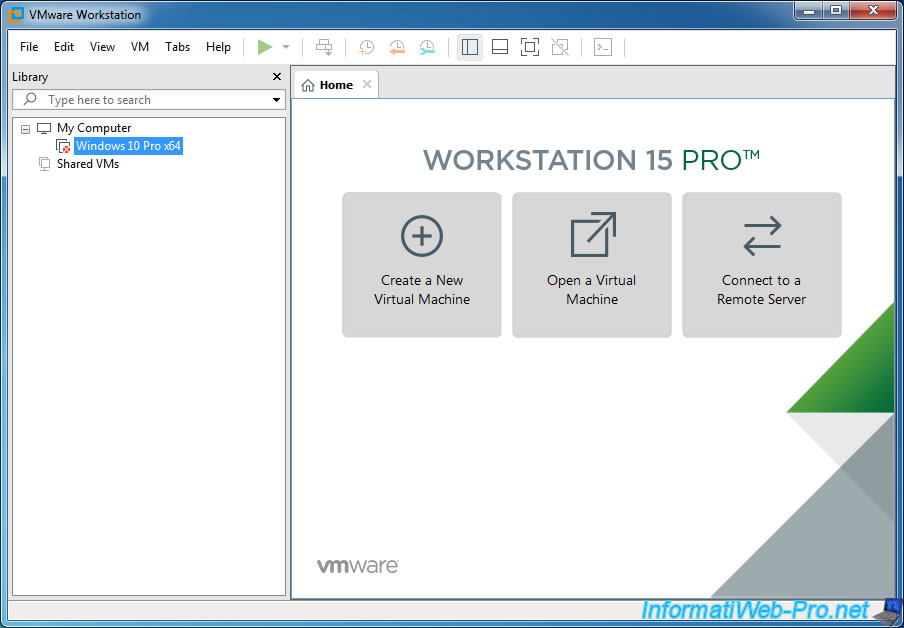
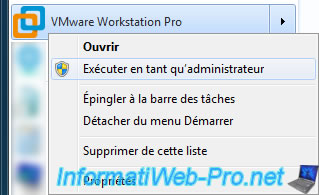
To solve this problem, close all open VMware Workstation windows and open VMware Workstation again, but as an administrator.
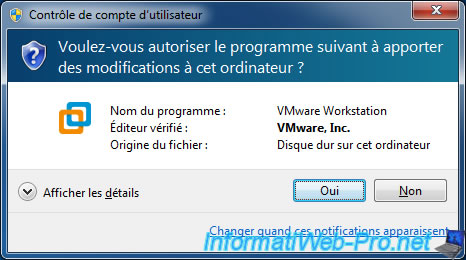
Click Yes.
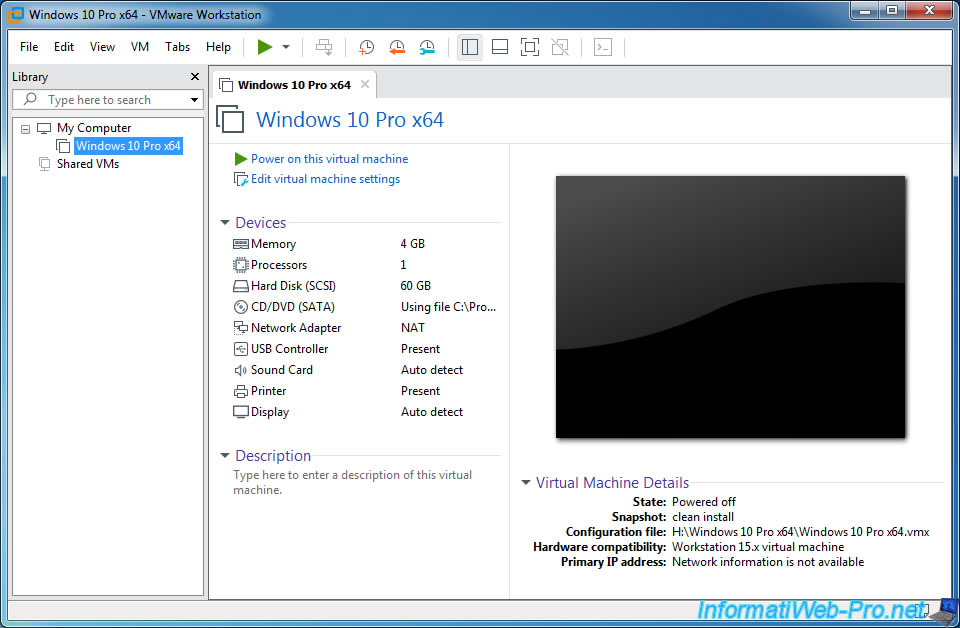
Now, you will have access to your virtual machine.
From now, you will be able to access it again normally (without having to restart VMware Workstation every time as administrator).
2. Freeze of a virtual machine
When you run too many virtual machines at the same time or you have mismanaged the amount of RAM allocated to them, your virtual machines may fail.
If it's not too late, try pausing them to prevent the guest OS from being damaged. Then, restore the virtual machines one by one by stopping them correctly before "booting" the next virtual machine.
If it's too late, you may not be able to force the virtual machine to shutdown from VMware Workstation.
Indeed, in this case, we wanted to shut down Windows properly by sending the Windows shutdown ACPI signal from VMware Workstation (via the "Shut Down Guest" option).
The problem is that the virtual machine never stopped, and because the virtual machine was shut down, no more options were available for this virtual machine.
Even when you want to close VMware Workstation to force the virtual machine to shut down, it will not work because VMware Workstation will display this warning : Virtual machine is busy.
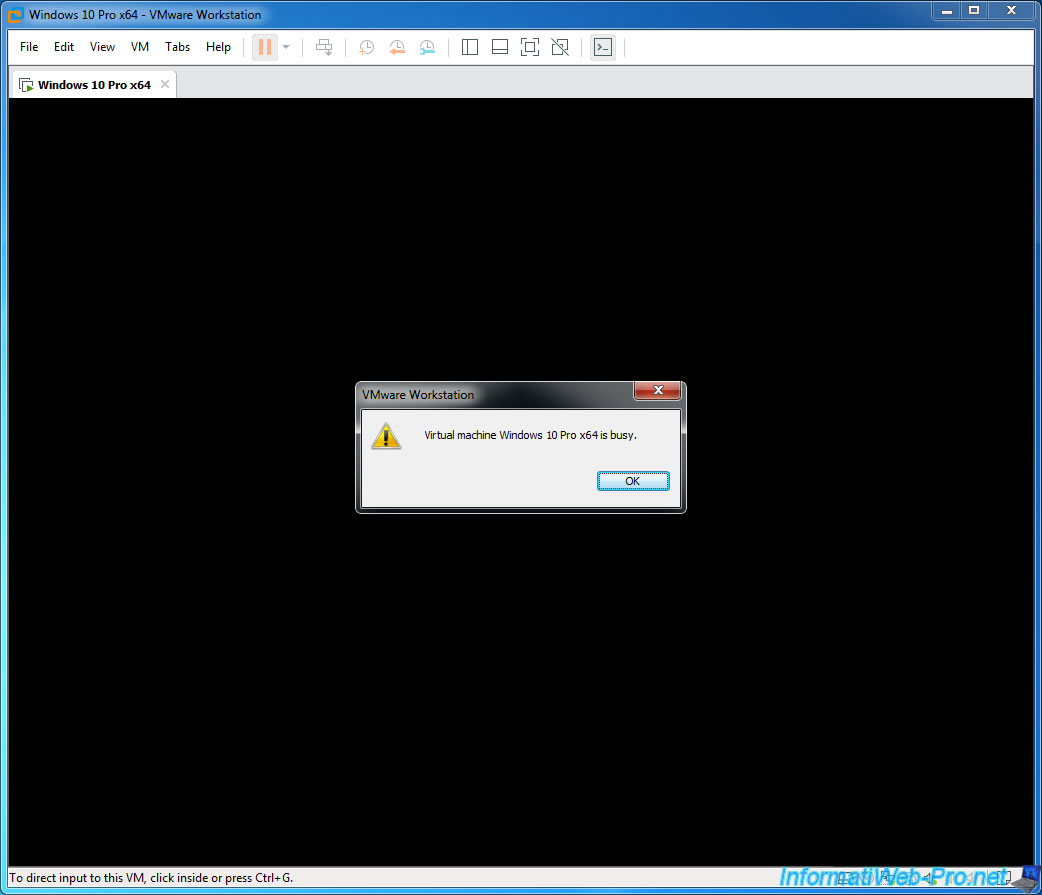
In this case, you will only have 2 possibilities :
- shut down your computer : except that shutting down your computer will take a long time, because of this problem. Even if in the end after a few minutes, even 10 minutes, the host PC will finally turn off properly.
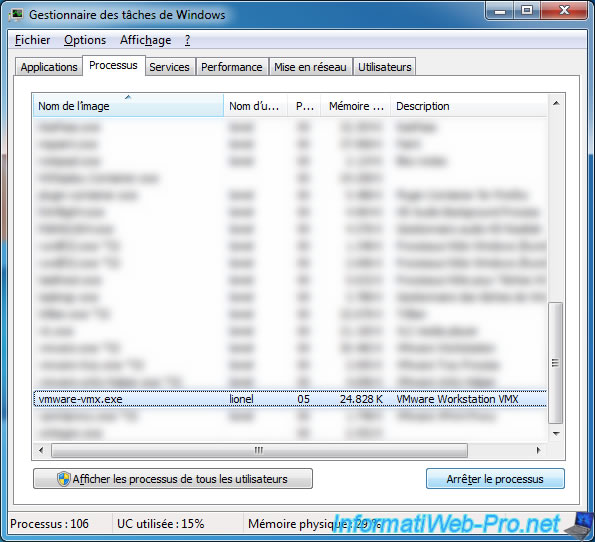
- stop other virtual machines that you can still shut down properly, then kill the "vmware-vmx.exe" process that allows the virtual machine to run on the host PC.
The only problem is that you can't know which instance of the "vmware-vmx.exe" process corresponds to which virtual machine.
For security, you will have to shut down all possible virtual machines before killing this process or processes. Otherwise, you risk cutting off a virtual machine that was still running correctly.
Confirm the action.
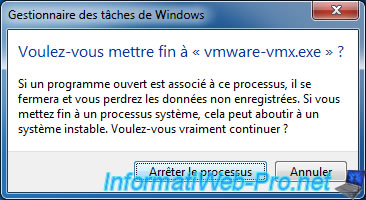
Like magic, the virtual machine will be considered shut down by VMware Workstation.
Nevertheless, don't forget that the sudden shutdown of the "vmware-vmx.exe" process only allows you to recover your hand on the management of the host PC.
Indeed, by killing the "vmware-vmx.exe" process, the host PC will become unstable because of the information left in its RAM.
This may result in a slower shutdown of your host PC when you shut down Windows this time.
Once the host PC is shutdown and then power on again (and not with an automatic restart from Windows), the RAM will be correct again.
This solution therefore only allows you to save what you were doing, rather than losing important changes because of a virtual machine that would have become unstable.
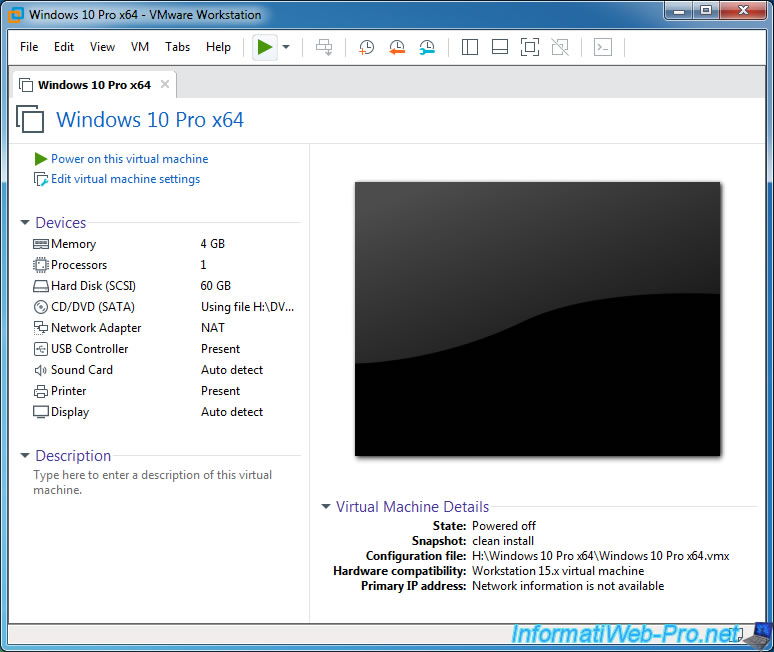
3. Conflict detected : Panda USB vaccine
On our InformatiWeb.net website, we talked about the Panda USB Vaccine program that automatically vaccinate USB keys that you connect to your computer to prevent a virus on a USB key infect your physical PC.

The problem is that from the moment you use VMware Workstation, you will not be able to use the automatic vaccination of USB keys with Panda USB Vaccine.
When at least 1 virtual machine is running with VMware Workstation, if you plug an USB key on your physical PC, VMware Workstation and the currently powered virtual machine will be freezers.
Which is very problematic.
To avoid this conflict, we recommend that you no longer use Panda USB Vaccine on your PC where VMware Workstation is installed.
Update : this problem no longer occurs on Windows 10 v2004.
4. Conflict detected : Disk Management
As you probably know, on Windows, you can manage disks (and their partitions) by right-clicking on Computer (or This PC), then clicking on : Disk Management.
The problem is that when virtual machines run on VMware Workstation on your PC, there is a good chance that your PC (including VMware Workstation and the "Computer Management" console) will start blocking (freezing).
Update : this problem no longer occurs on Windows 10 v2004.
It's pretty annoying, but be aware that this bug only occurs if virtual machines are running when you want to manage physical PC disks.
If no virtual machine is currently running, disk management will be possible without any problem.
PS : if you konw other conflicts that occur each time in the same way, don't hesitate to point them out in comments for us to add them in this tutorial.
5. The device was unable to connect to its ideal host controller
Depending on the guest OS you are virtualizing, VMware Workstation selects the most suitable version for the USB controller of your virtual machine.
However, this can be problematic in some cases.
For example : you can't plug an USB 3.0 key into an USB 3.0 port on the host PC and pass it to a virtual machine using a USB 2.0 or lower controller.

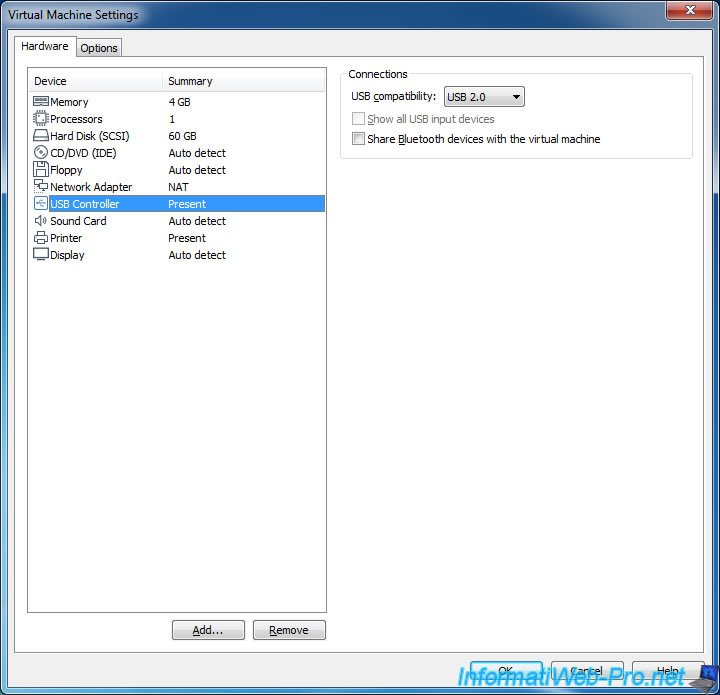
If VMware Workstation displays the "New USB Device Detected" window, select the virtual machine to which you wish to connect the USB key (or any other USB support).
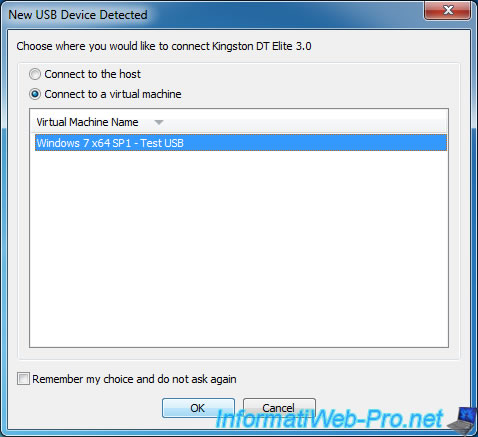
As mentioned above, you will not be able to plug an USB 3 key into an USB 3 port on the host PC and pass it to a virtual machine using version 2.0 or lower of the USB controller.
In this case, an error will be displayed :
Plain Text
The device '[Name of the USB 3.0 key]' was unable to connect to its ideal host controller. An attempt will be made to connect this device to the best available host controller. This might result in undefined behavior for this device.
Click OK.
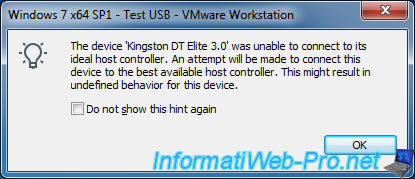
Due to the previous error, an error will also be displayed in the guest OS :
Plain Text
USB Device Not Recognized
One of the USB devices attached to this computer has malfunctioned, and Windows does not recognize it.
For assistance in solving this problem, click this message.
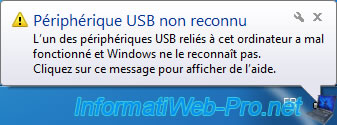
If you click on this message, you will see a window appear with an "USB Root Hub" and an "Unknown Device" (which corresponds to your USB key).
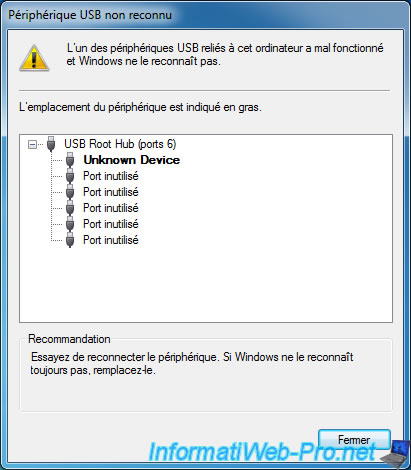
In the device manager, you will see the same problem.
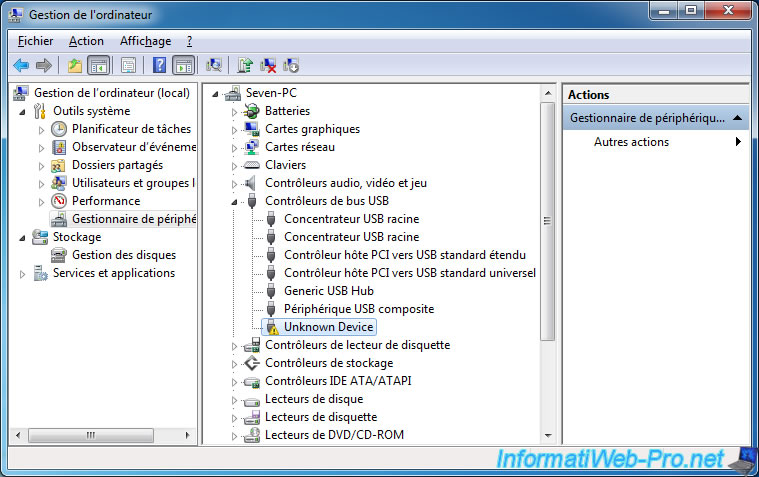
To solve this problem, simply plug your USB key into a USB 2.0 port on your host PC.
Or change the version of the virtual machine's USB controller to USB 3.0 if you want to connect it to a USB 3.0 port on your host PC.
6. This VMware USB Device can perform faster
If you plug an USB 3.0 key or any other USB storage medium (such as an external hard drive) to an USB 2.0 port on your host PC, this message will be displayed on the host PC where VMware Workstation is installed.
Plain Text
This device can perform faster.
This VMware USB Device can perform faster if you connect it to a Hi-Speed USB 3.0 port.

When you pass this USB 3.0 key to your virtual machine, a similar message will appear :
Plain Text
This USB Mass Storage Device can transfer information faster ...

However, the USB key will be accessible from the guest OS.
As you can check in the device manager.
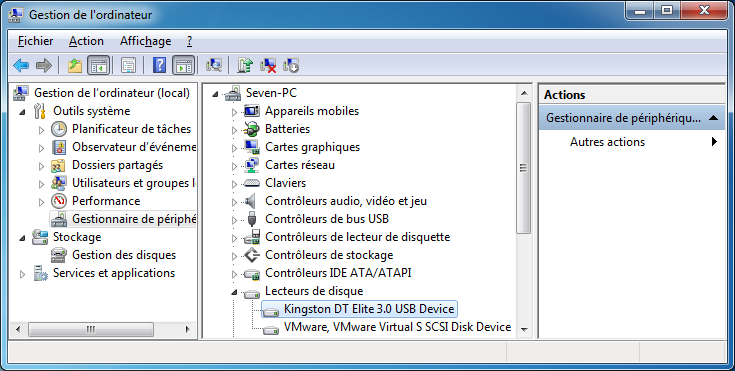
7. This host supports Intel VT-x, but VT-x is disabled
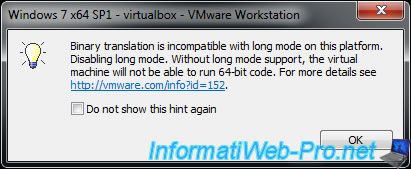
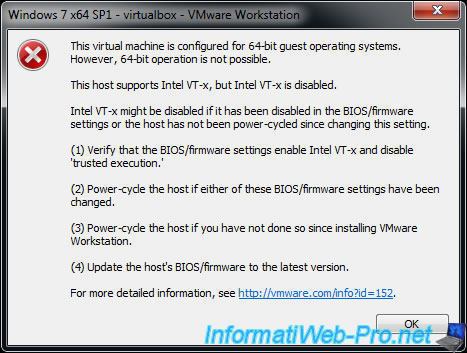
When you launch one of your virtual machines, one of these messages appears :
Plain Text
Binary translation is incompatible with long mode on this platform.
Disabling long mode. Without long mode support, the virtual machine will not able to run 64-bit code. For more details see https://vmware.com/info?id=152.
Plain Text
This virtual machine is configured for 64-bit guest operating systems.
However, 64-bit operation is not possible.

This host supports Intel VT-x, but VT-x is disabled.

Intel VT-x might be disabled if it has been disabled in the BIOS/firmware settings or the host has not been power-cycled since changing this setting.

(1) Verify that the BIOS/firmware settings enable Intel VT-x and disable 'trusted execution.'

(2) Power-cycle the host if either of these BIOS/firmware settings have been changed.

(3) Power-cycle the host if you have not done so since installing VMware Workstation.

(4) Update the host's BIOS/firmware to the latest version.

For more detailed information, see https://vmware.com/info?id=152.
Depending on your version of VMware Workstation Pro, the error message may be a bit longer and include this :
Plain Text
VMware Workstation does not support the user level monitor on this host.

Module 'MonitorMode' power on failed.

Failed to start the virtual machine.
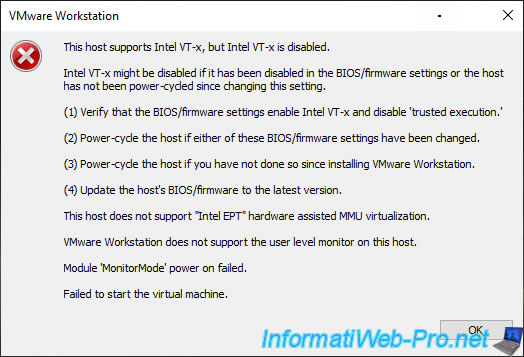
These errors occur when processor virtualization is not supported by your processor (CPU), motherboard BIOS, or not enabled by default in your motherboard BIOS.
If your processor supports processor virtualization (Intel VT-x or AMD-V), you just need to enable it in your motherboard BIOS.
Important : if you have just installed VMware Workstation and the "This host supports Intel VT-x, but VT-x is disabled" error message appears, restart your computer at least once.
If this error message persists, then processor virtualization is not enabled and/or supported by the BIOS of your motherboard.
Share this tutorial
To see also
-
VMware 3/16/2013
VMware Workstation - Boot a VM on the BIOS / EFI firmware
-
VMware 2/7/2020
VMware Workstation 15 - Installation on Linux
-
VMware 12/24/2021
VMware Workstation 15 - Slice the virtual hard disk of a VM
-
VMware 12/10/2021
VMware Workstation 15.5 - Convert a Virtual PC virtual machine to a VMware VM

You must be logged in to post a comment