Improve iSCSI storage performance with multipath and Jumbo frames on VMware vSphere 6.7
- VMware
- 04 September 2024 at 07:36 UTC
-

- 3/4

2.2. Enable Jumbo frame support on your physical switch
As stated previously, if you want to use Jumbo frames, it is necessary that Jumbo frame support is also available and enabled on the physical switches that are in the path of iSCSI traffic (= between your hosts and your iSCSI server or NAS) .
In our case, we use virtualized VMware ESXi hosts.
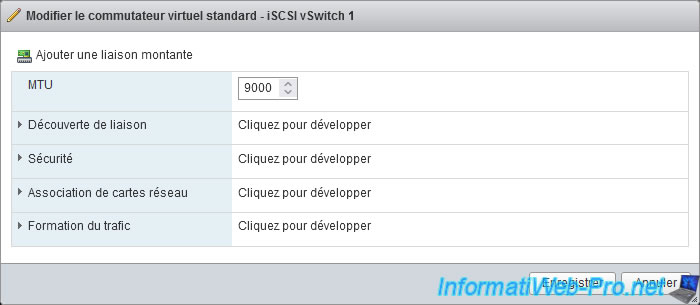
The switches used between our VMware ESXi hosts and our iSCSI server are therefore the standard virtual switches of our physical VMware ESXi host.
Again, specify an MTU of 9000 to enable Jumbo frame support.

2.3. Enable Jumbo frame support on your iSCSI or NAS server
On your iSCSI server, in the case of Windows Server, you must enable Jumbo frame support in the properties of the network cards used for iSCSI traffic.
In our case, these are the "iSCSI 1" and "iSCSI 2" network cards.
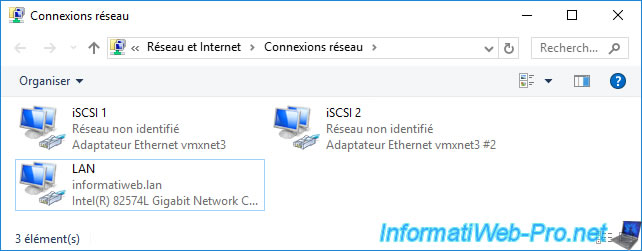
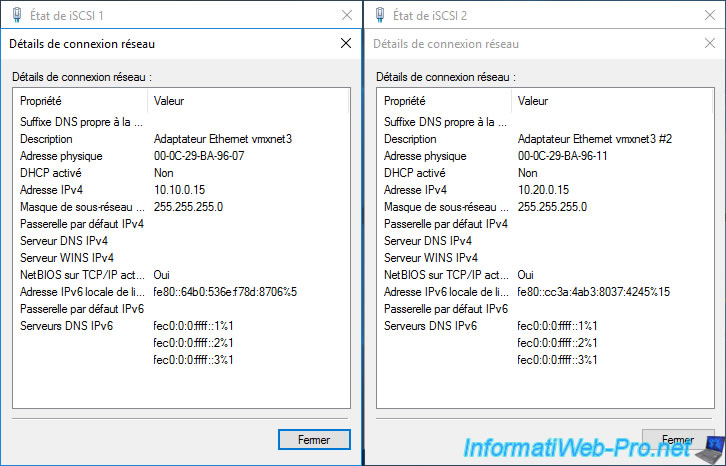
As you can see, our iSCSI server has 2 different IP addresses on 2 different subnets (which correspond to the subnets used on our VMware ESXi host).
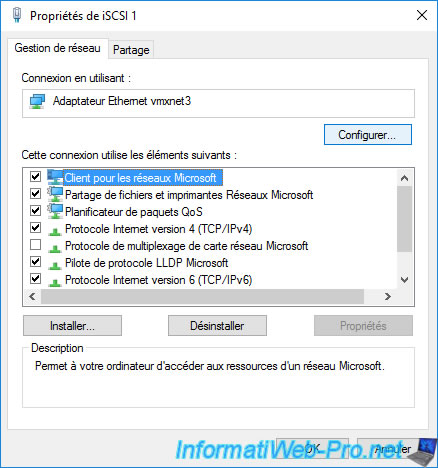
To enable Jumbo frame support on Windows Server, right-click "Properties" on the desired network card.
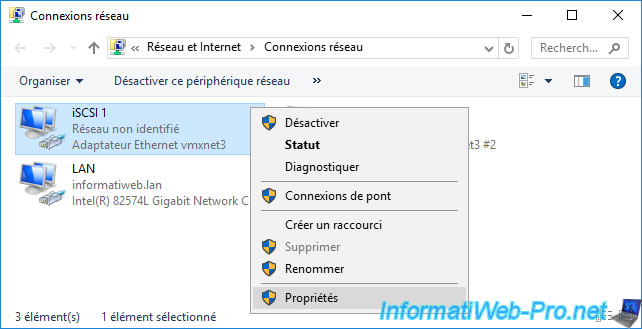
Click the "Configure" button.
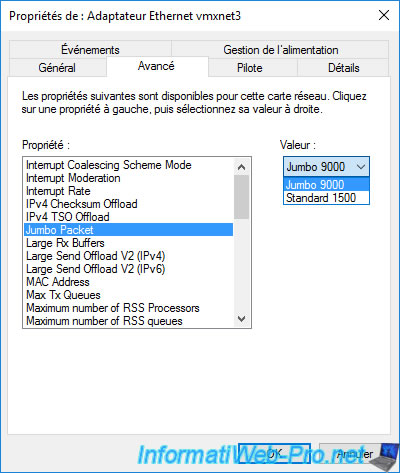
In the "Advanced" tab, select the "Jumbo Packet" property, then select the "Jumbo 9000" value.
Note that the available properties change from network adapter to network adapter. The important thing is to spot the keyword "Jumbo".
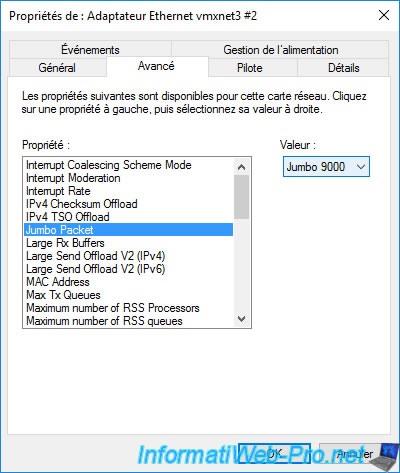
Do the same on the 2nd network card of your iSCSI server dedicated to iSCSI traffic.
3. Configuring the iSCSI server
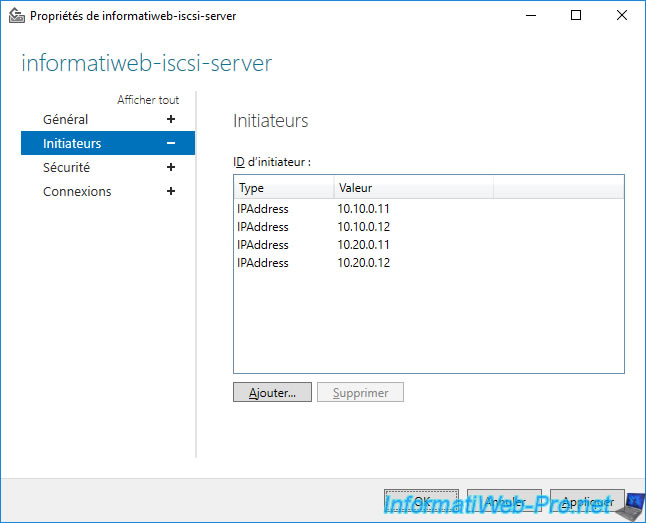
On your iSCSI server, go to the properties of your iSCSI target, then to the "Initiators" section.
In this list, add all the IP addresses of your VMware ESXi hosts for iSCSI traffic.
4. Configure the software iSCSI controller on your VMware ESXi host
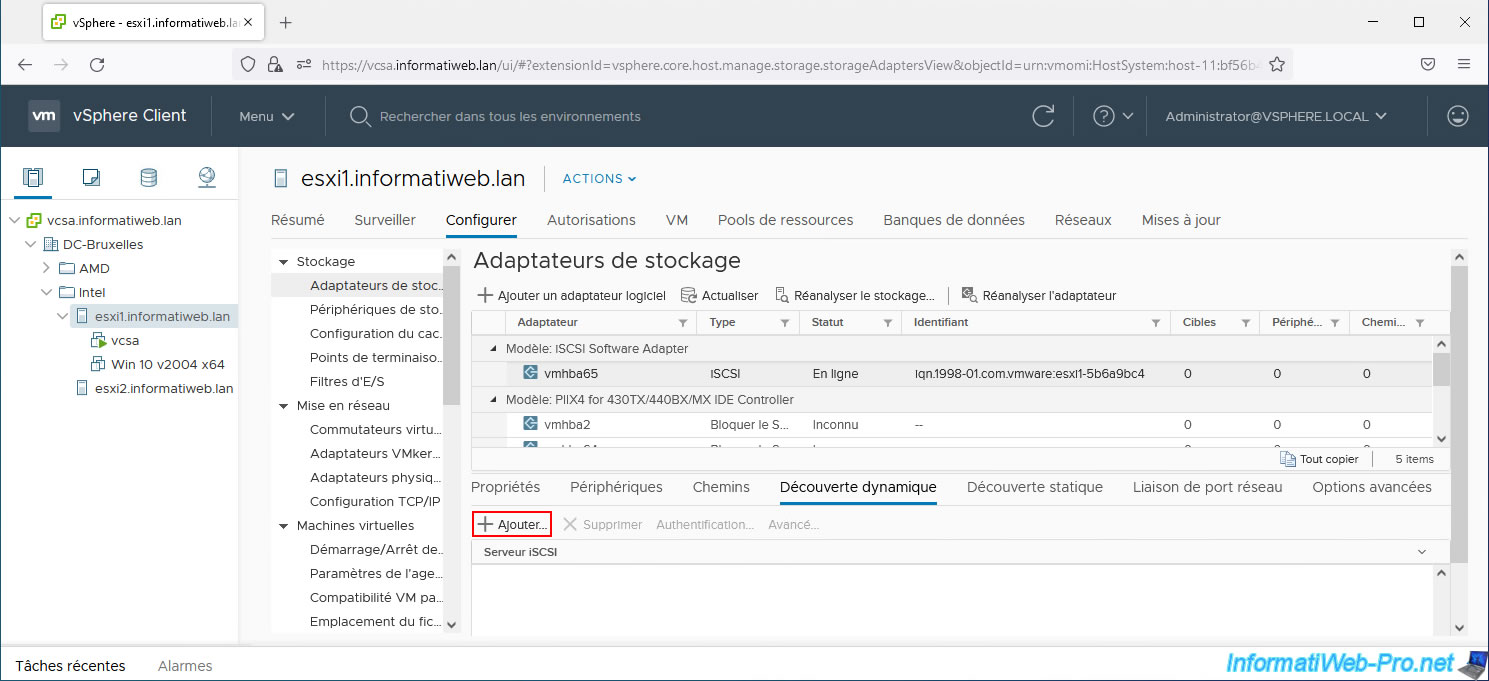
Select your VMware ESXi host and go to: Configure -> Storage -> Storage Adapters.
Next, select your software iSCSI controller, go to the "Dynamic Discovery" tab (at the bottom of the page) and click Add.
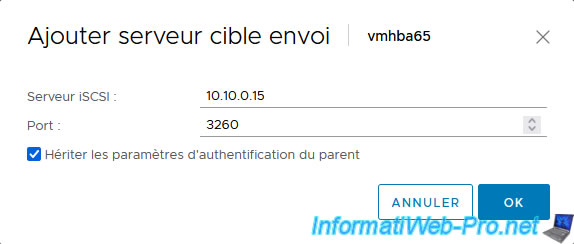
In the "Add Send Target Server | vmhba65" window that appears, indicate the 1st IP address of your iSCSI server for the 1st subnet used for iSCSI traffic.
In our case, the IP address "10.10.0.15".
If you have configured CHAP or reverse CHAP authentication on your iSCSI server, select the iSCSI server you just added and click: Authentication.
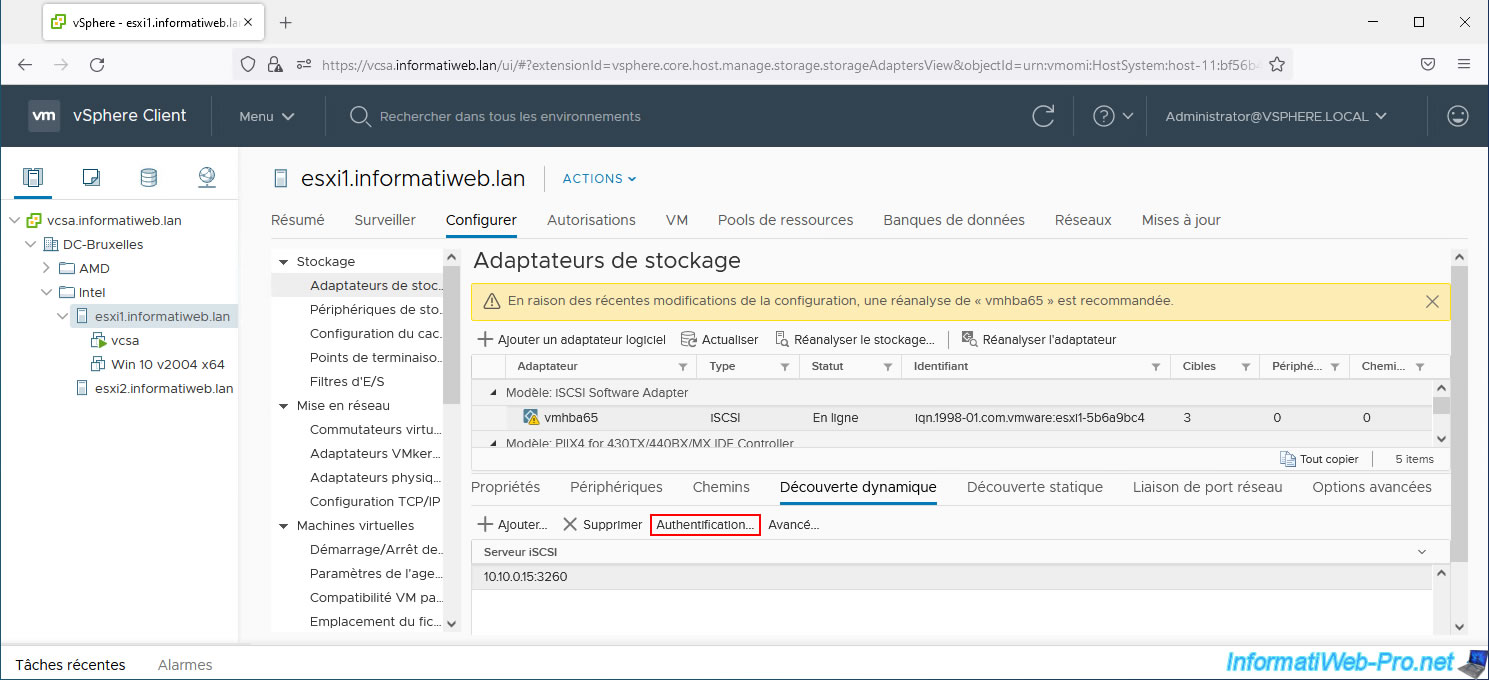
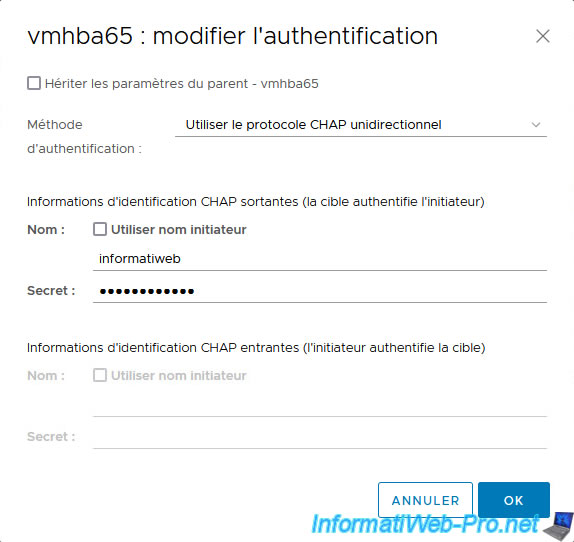
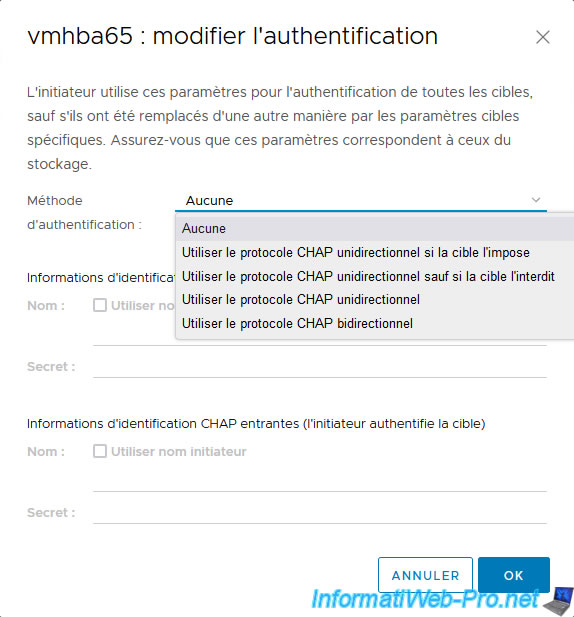
For CHAP authentication, uncheck the "Inherit settings from parent - vmhba65" box and select "Authentication Method: Use unidirectional CHAP".
Next, provide the username and password configured for CHAP authentication on your iSCSI server in the "Outgoing CHAP Credentials..." section.
For more information on these authentication options, refer to our tutorial: VMware ESXi 6.7 - Create an iSCSI datastore.

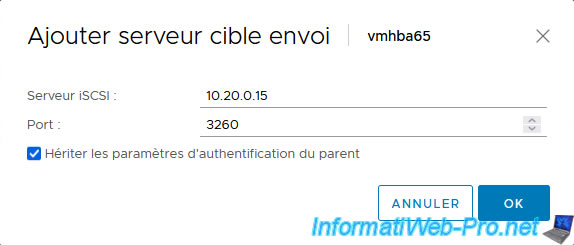
In the "Dynamic Discovery" tab, click again: Add.
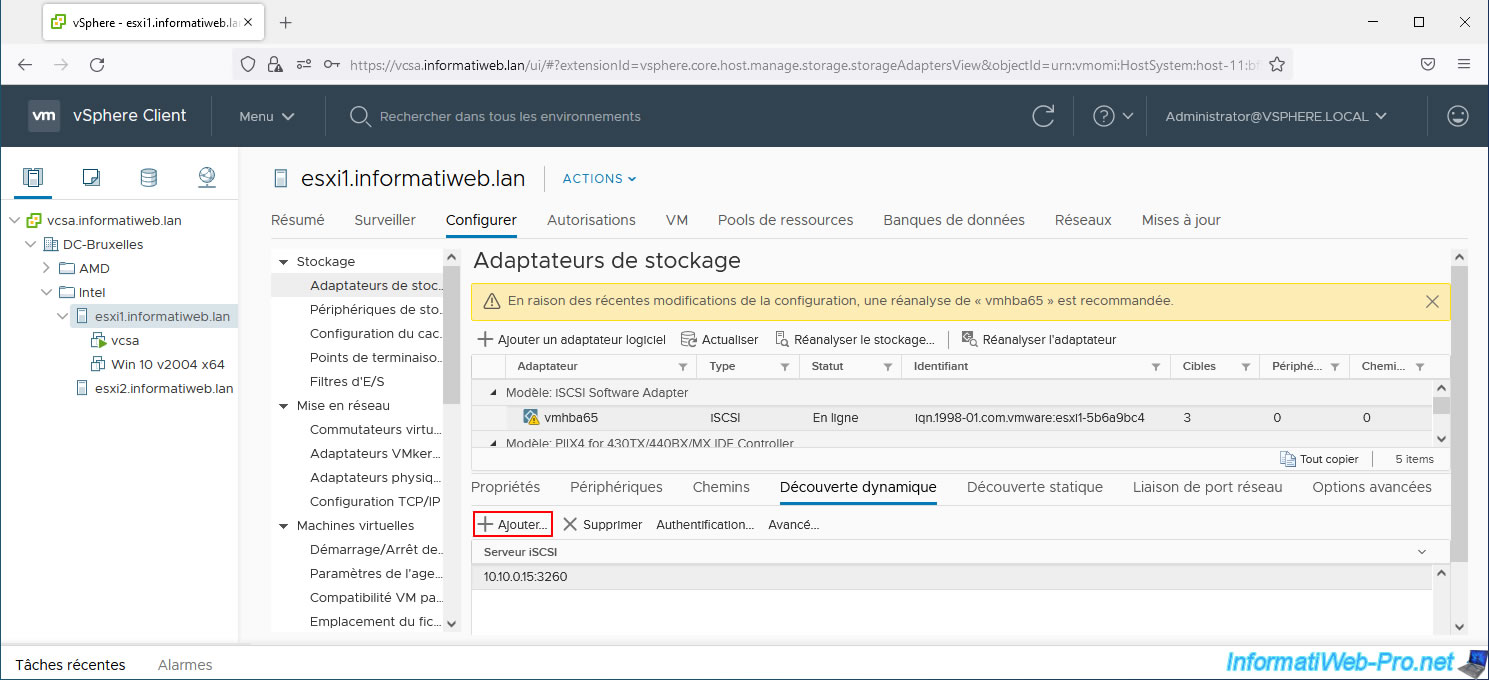
Provide the 2nd IP address of your iSCSI server for the 2nd subnet used for iSCSI traffic.
In our case, the IP address "10.20.0.15".
Again, if you have configured CHAP or reverse CHAP authentication, select the added iSCSI server and click: Authentication.

Indicate the same as before.
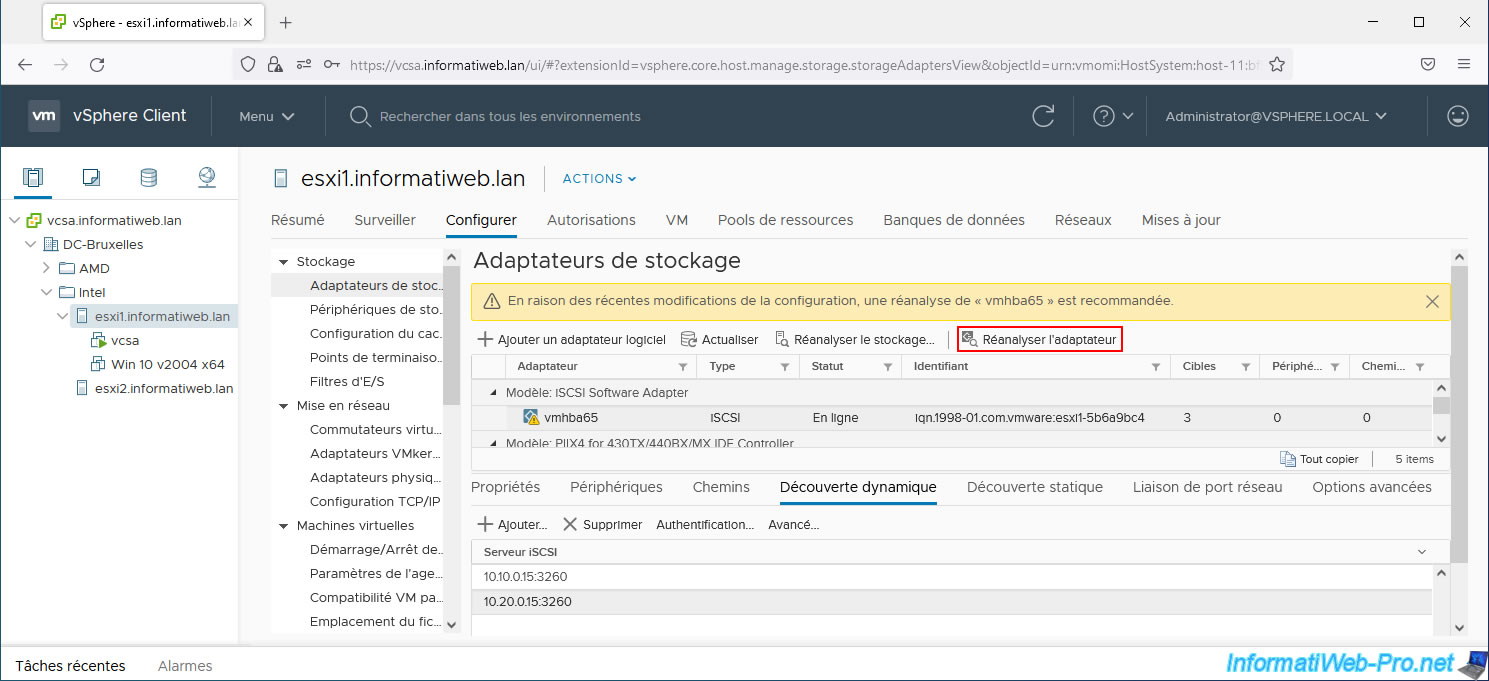
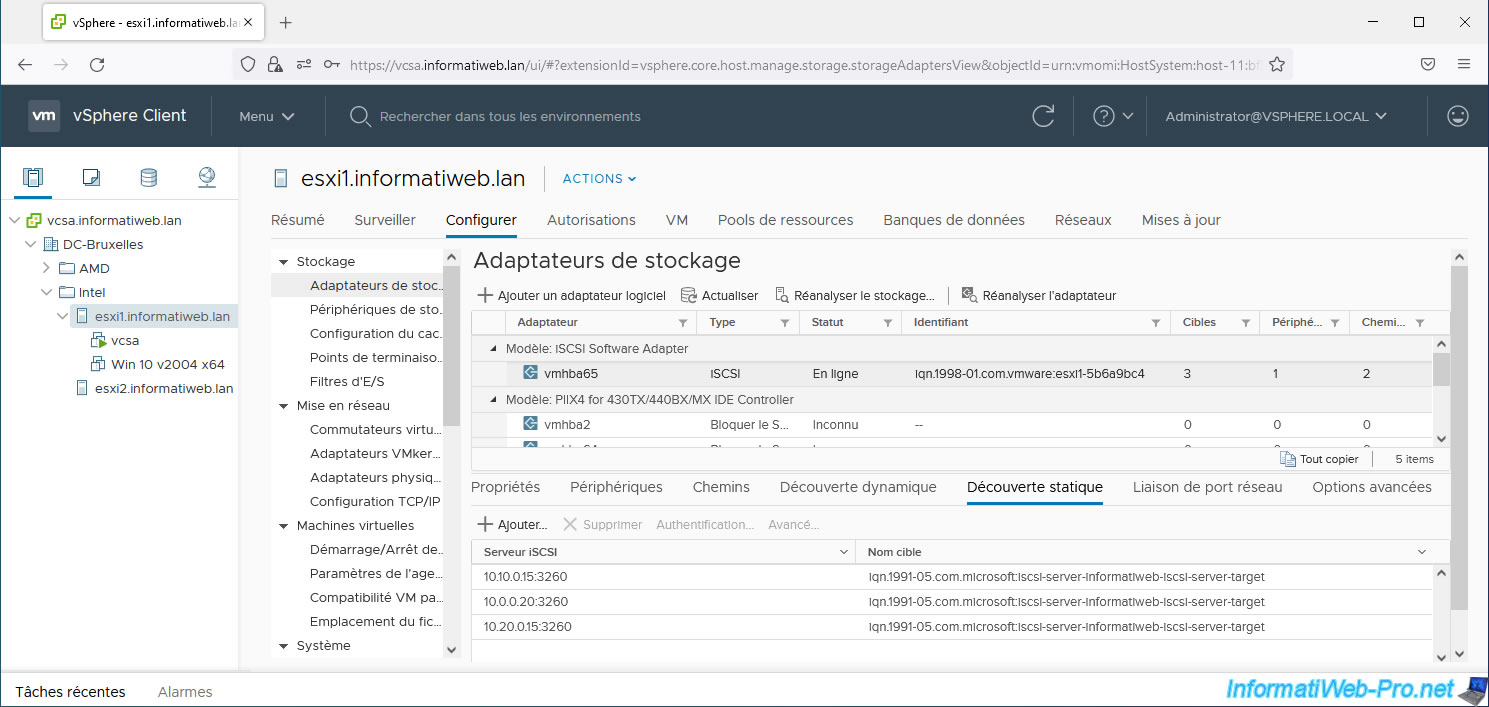
Now click "Rescan Adapter" (as prompted by the warning shown at the top of the page).
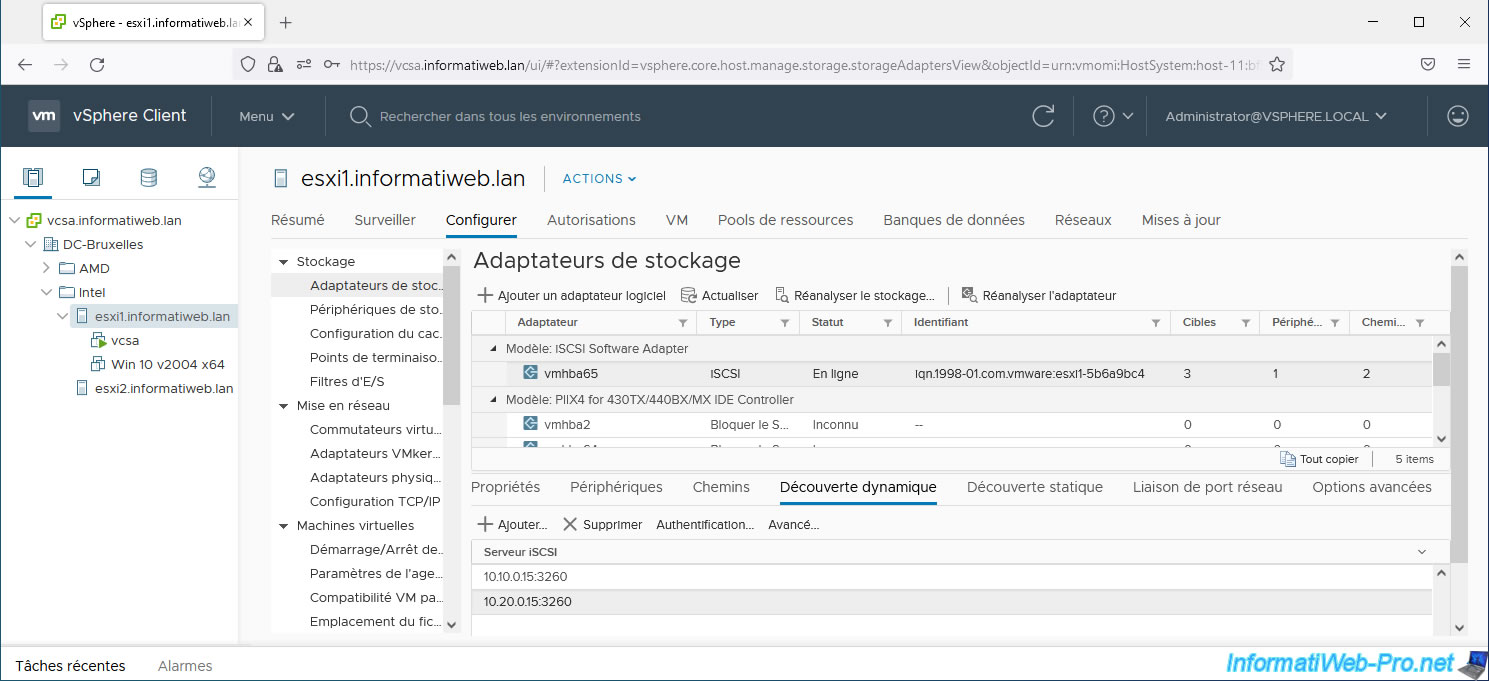
As you can see at the top of the page, your VMware ESXi host has detected:
- 3 iSCSI targets (since your iSCSI server has 3 IP addresses)
- 1 device (since there is only one iSCSI virtual disk configured on our iSCSI server)
- 2 paths (given that you added 2 IP addresses for the same iSCSI server)
In the "Static Discovery" tab, you will see that 3 iSCSI servers (iSCSI targets) have been discovered.
Even if in reality, it is the same iSCSI target, but your iSCSI server has 3 IP addresses:
- 10.10.0.15: for the 1st subnet dedicated to iSCSI traffic
- 10.20.0.15: for the 2nd subnet dedicated to iSCSI traffic
- 10.0.0.20: for your company's normal LAN network
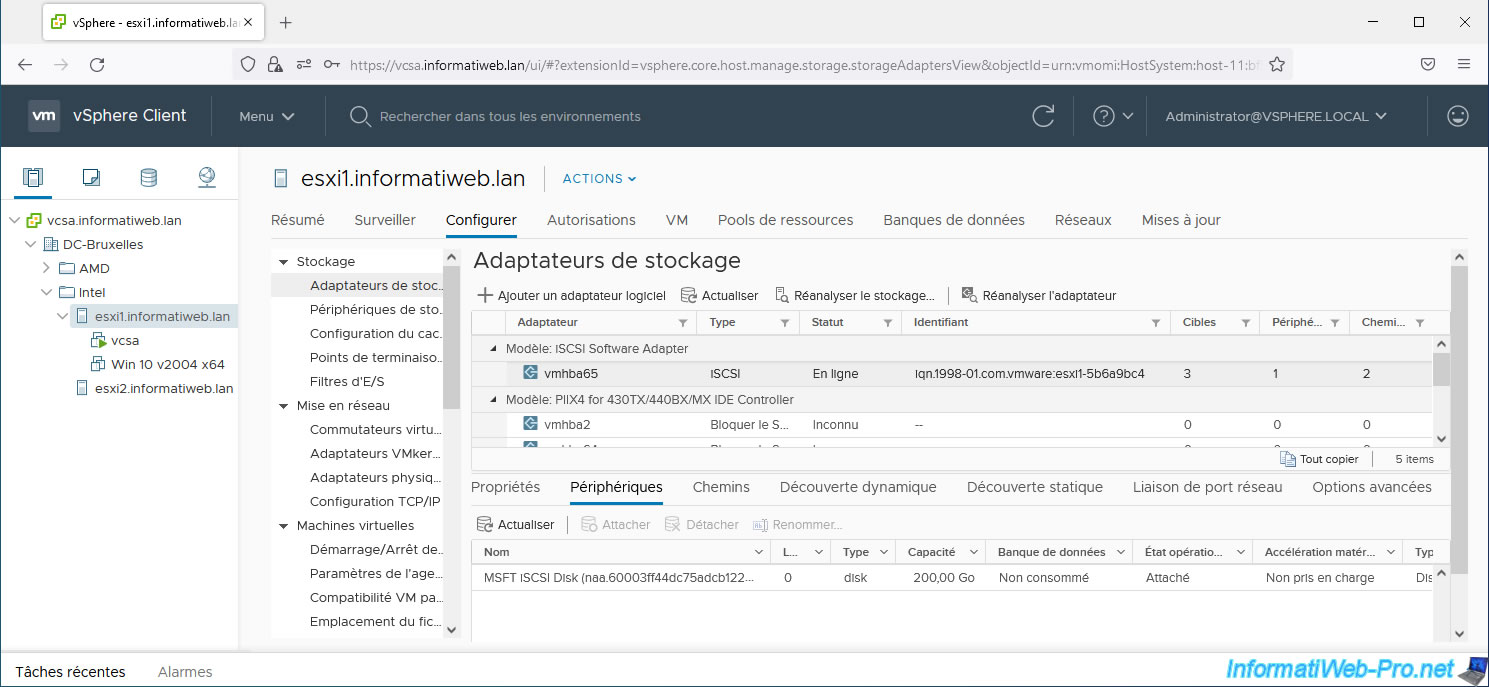
In the "Devices" tab, you will see your iSCSI virtual disk once.
Indeed, even if you have added several IP addresses in the "Dynamic Discovery" tab, your host knows that it is the same iSCSI server.
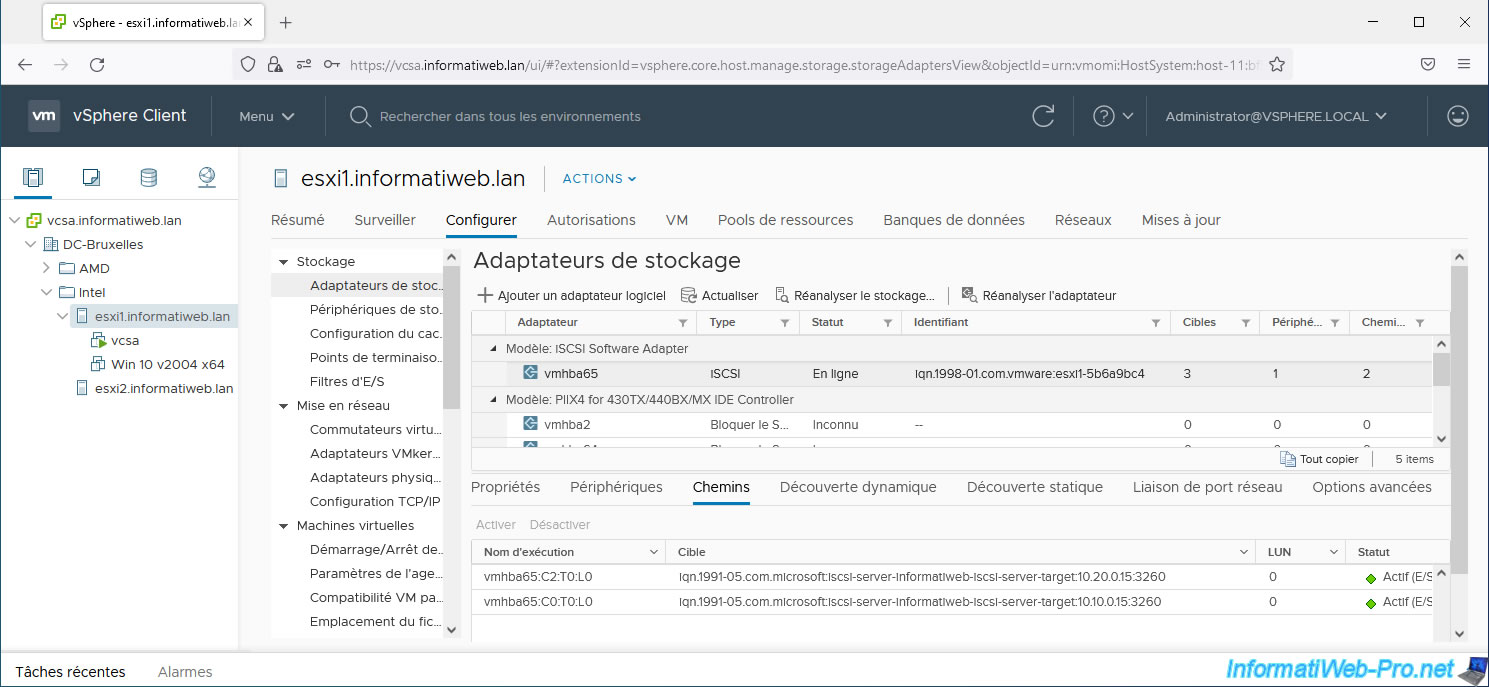
In the "Paths" tab, you will therefore see that there are 2 paths (because 2 IP addresses were specified in the "Dynamic Discovery" tab).
One path for the 1st subnet "10.10.0.x" dedicated to iSCSI traffic and another path for the 2nd subnet "10.20.0.x" dedicated to iSCSI traffic.
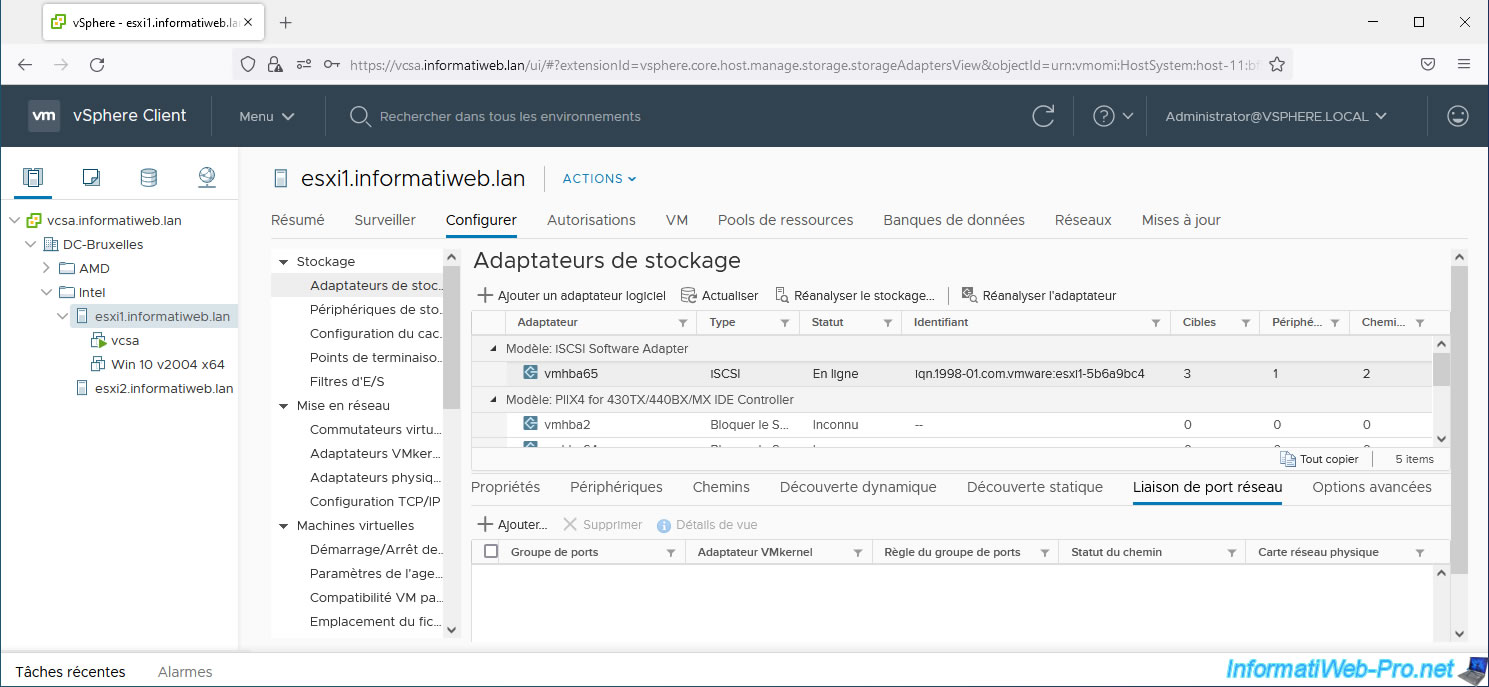
Important : because different subnets are used for your VMkernel adapters dedicated to iSCSI traffic, you should not configure a network port bond.
Additionally, if you configure network port bonding in this case, it could create unnecessary problems or slowness.
For your information, please note that it is possible to configure the authentication options (CHAP / reverse CHAP) directly on the software iSCSI controller of your host if you wish.
If you have a lot of network links, this will save you from having to manually configure authentication options for each different IP address.
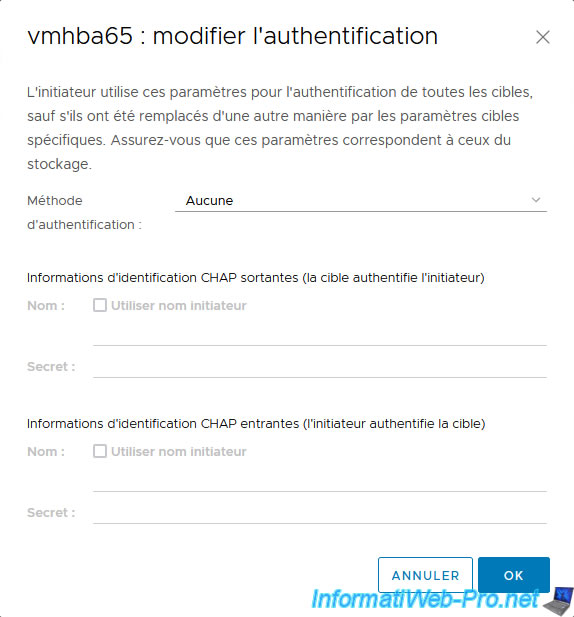
To do this, select the software iSCSI controller of your VMware ESXi host, go to the "Properties" tab and click on the "Edit" link (to the right of "Authentication").
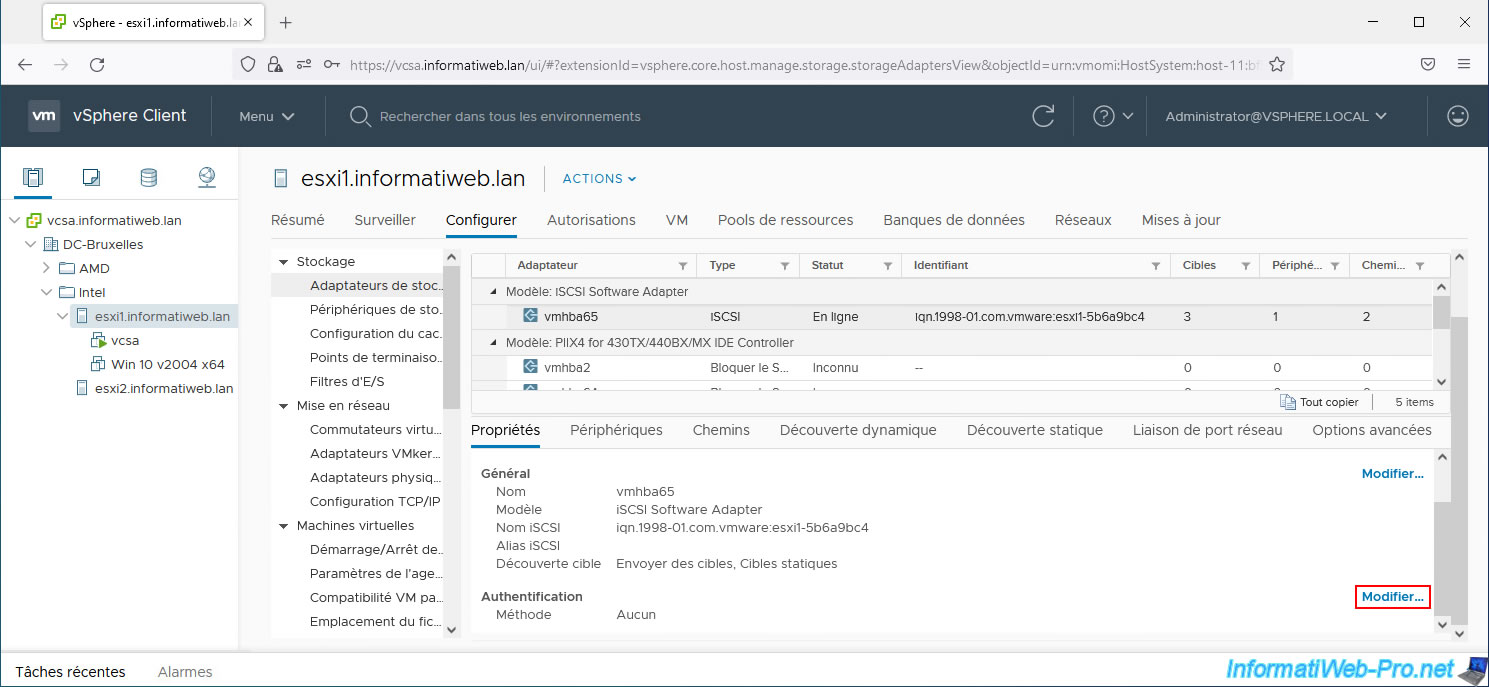
As you can see, the authentication settings are identical.
The only box that is not present is the box at the top which allows you to inherit the configuration from the parent (where you are currently located).
Share this tutorial
To see also
-

VMware 5/15/2024
VMware vSphere 6.7 - Add a physical disk to host
-

VMware 9/27/2024
VMware vSphere 6.7 - Array integration APIs (VAAI)
-

VMware 9/6/2024
VMware vSphere 6.7 - Configure port binding (iSCSI traffic)
-

VMware 6/13/2024
VMware vSphere 6.7 - Configure Virtual Flash (SSD cache)
No comment