- VMware
- 28 April 2023 at 18:25 UTC
-

By default, VMware ESXi doesn't support network adapters connected via USB. This is because VMware ESXi is intended for professionals and is only officially compatible with professional hardware that is part of VMware's compatibility matrix.
Nevertheless, consumer hardware is increasingly compatible with recent versions of VMware ESXi.
On the other hand, the use of network adapters connected via USB is not natively supported by VMware ESXi.
To use one, you will need to install VMware ESXi with at least one normal network adapter (integrated into the motherboard or in PCI-E). Then, you can add the necessary driver for your network adapter connected via USB using a fling.
Important : by using a network adapter connected via USB, you will not be able to obtain support from VMware since this type of network adapter is not officially compatible with VMware ESXi.
You should therefore not use this technique in a professional environment, because you will not be able to ask VMware for help if something goes wrong.
This is therefore only useful in the case of a lab.
- USB network adapter detection
- Add support for USB network adapters on VMware ESXi
- Install USB Network Native Driver fling for ESXi
- USB network adapters detected
- Uninstall the fling USB network native driver for ESXi
1. USB network adapter detection
As indicated previously, VMware ESXi doesn't natively support USB-connected network adapters.
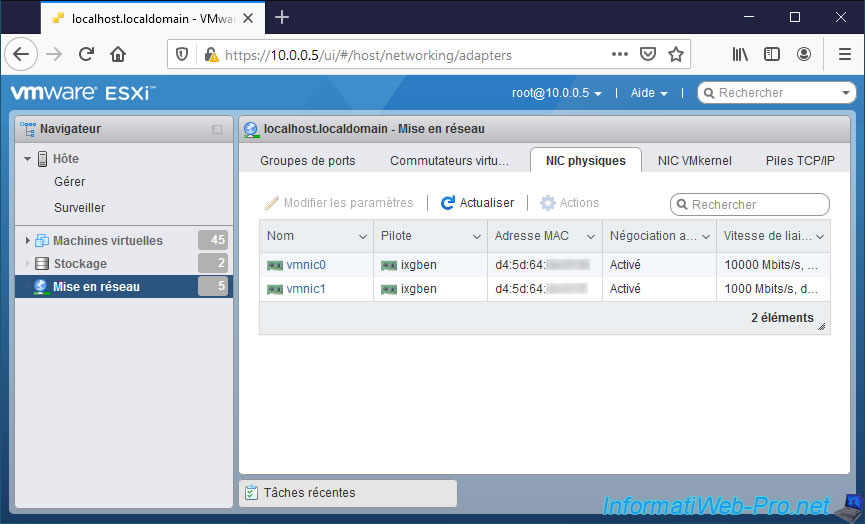
Which means if you go to "Networking -> Physical NICs" you won't see it appear.
In our case, we only see the physical network adapters that correspond to the 2 "10 Gigabit Ethernet" ports of our Asus motherboard.
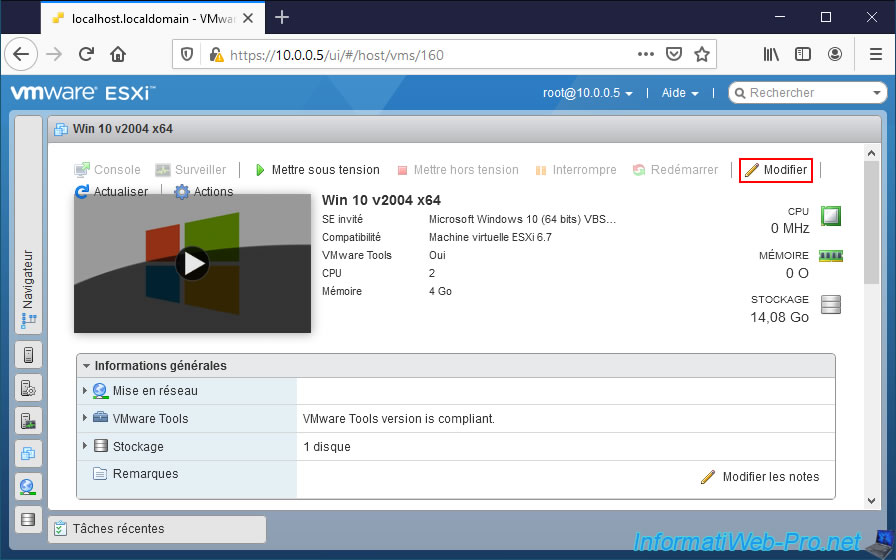
Nevertheless, VMware ESXi allows you to plug it into one of your virtual machines if you wish.
To do this, select any virtual machine in your hypervisor and click Edit.
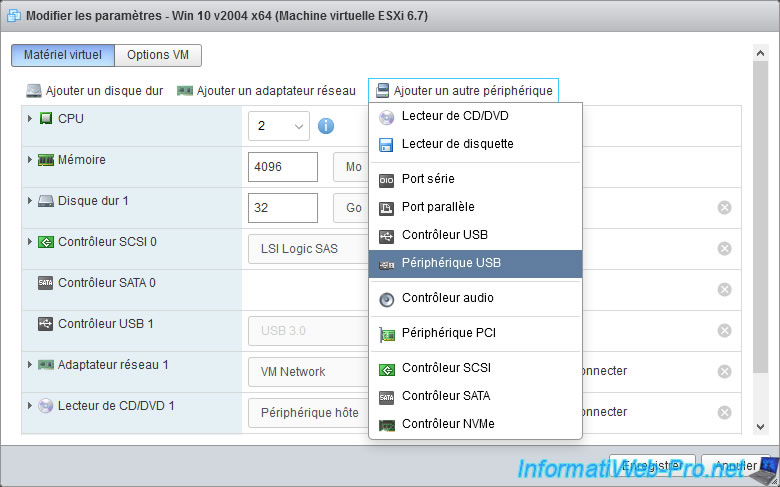
In the "Virtual Hardware" section, click : Add other device -> USB device.
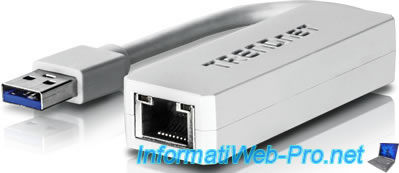
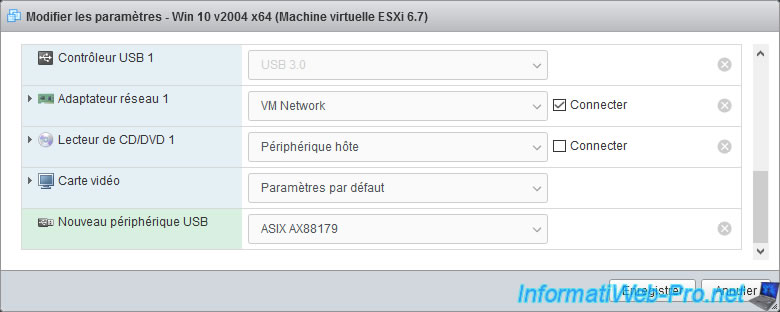
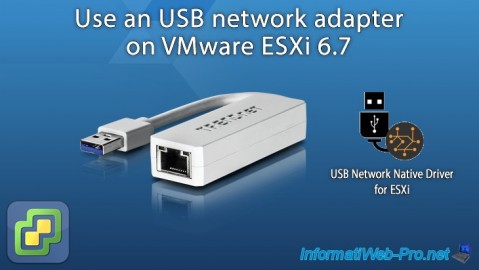
In our case, we have a Trendnet USB 3.0 to Gigabit Ethernet Adapter - TU3-ETG.
As you can see, this adapter is recognized as "ASIX AX88179" by VMware ESXi when you want to pass it as an USB device to a virtual machine.
2. Add support for USB network adapters on VMware ESXi
To add support for USB network adapters on VMware ESXi 6.5, 6.7 or 7.0, simply download the "USB Network Native Driver for ESXi" fling.
To do this, download the fling corresponding to your version of VMware ESXi :
- 6.7.0 : ESXi670-VMKUSB-NIC-FLING-39203948-offline_bundle-16780994.zip
- 7.0.0 : ESXi700-VMKUSB-NIC-FLING-39035884-component-16770668.zip
- 7.0.1 : ESXi701-VMKUSB-NIC-FLING-40599856-component-17078334.zip
- 7.0.2 : ESXi702-VMKUSB-NIC-FLING-47140841-component-18150468.zip
- 7.0.3 : ESXi703-VMKUSB-NIC-FLING-51233328-component-18902399.zip
In our case : ESXi670-VMKUSB-NIC-FLING-39203948-offline_bundle-16780994.zip.
Note that the download link for version 6.5.0 is no longer available on this fling's page, but the file is still on VMware's server.
Here it is : ESXi650-VMKUSB-NIC-FLING-39176435-offline_bundle-16775917.zip.
The download URL is always the same : "https://download3.vmware.com/software/vmw-tools/USBNND/[name of .zip file without brackets]".
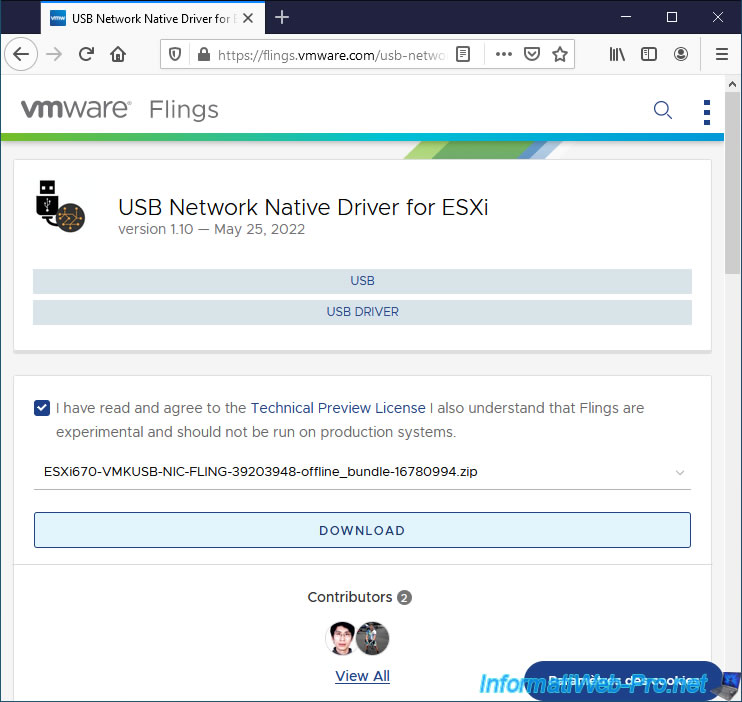
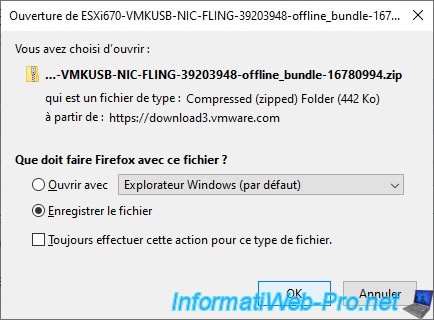
As you can see, the .zip file will be downloaded from a VMware server.
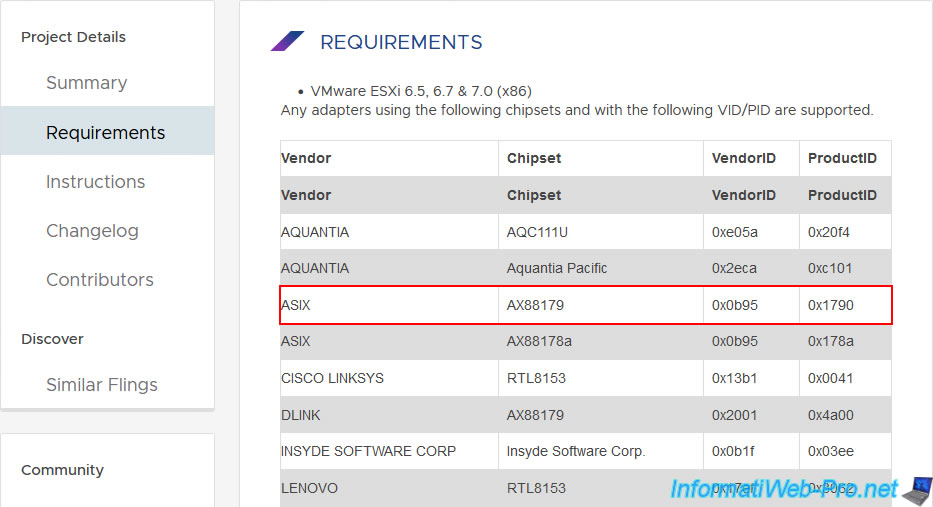
In the "Requirements" section of this "USB Network Native Driver for ESXi" fling, you can see the list of supported chipsets for USB network adapters.
Including the one recognized by VMware ESXi in our case : ASIX AX88179.
3. Install USB Network Native Driver fling for ESXi
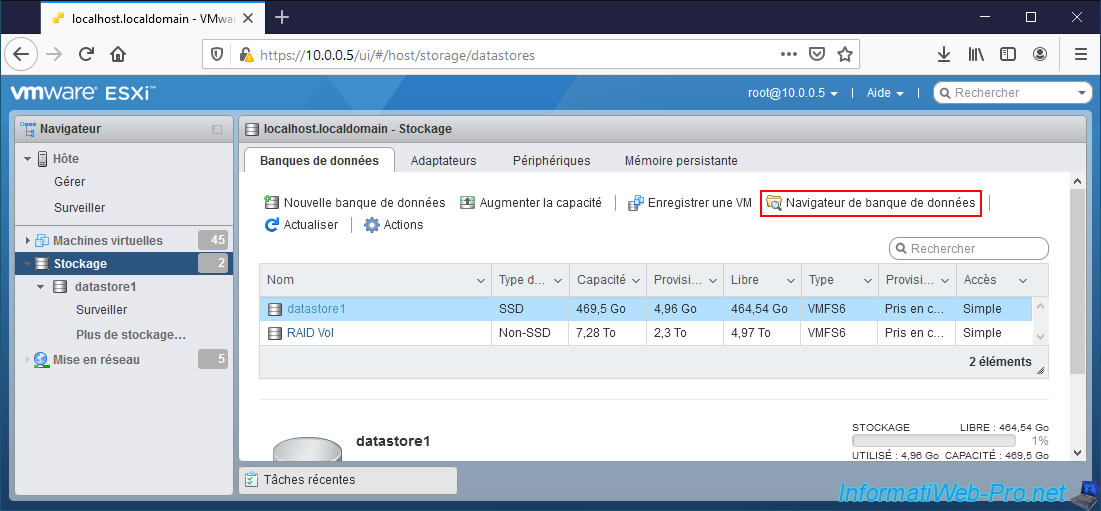
To install the "USB Network Native Driver for ESXi" fling, go to the "Storage" section of the web interface of your VMware ESXi hypervisor, then click on : Datastore browser.
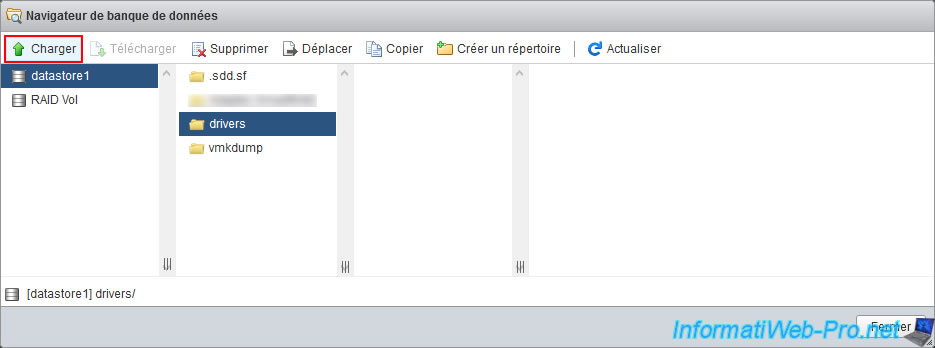
Create a "drivers" directory (or whatever you want), select it and click on : Upload.
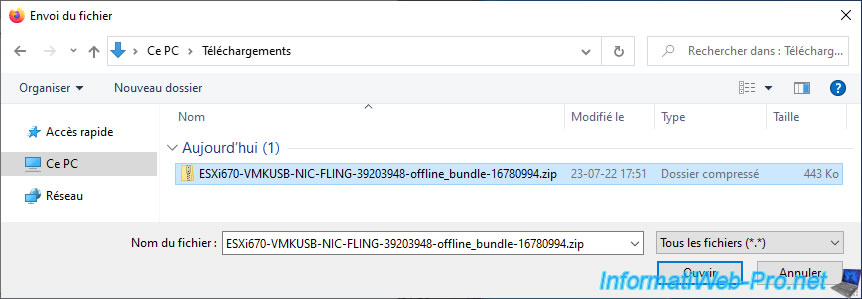
Select the downloaded .zip file and click Open.
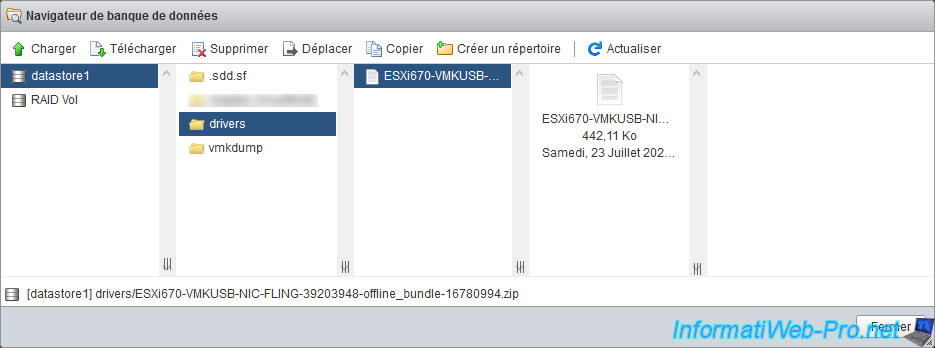
The .zip file appears in your datastore.
Warning : as mentioned in the "Instructions" section of this fling, Secure Boot can't be enabled in your motherboard's BIOS if you want to use this USB NIC as your primary NIC (for managing your host vmware ESXi).

As you will also see in the "Instructions" section of this fling, using multiple USB network adapters through this fling can cause problems.
Indeed, as discussed in the section following the one below, USB network adapters are picked up later during your hypervisor startup.
To avoid this problem, the author of this fling provides a script to add to the "/etc/rc.local.d/local.sh" file of your VMware ESXi hypervisor.

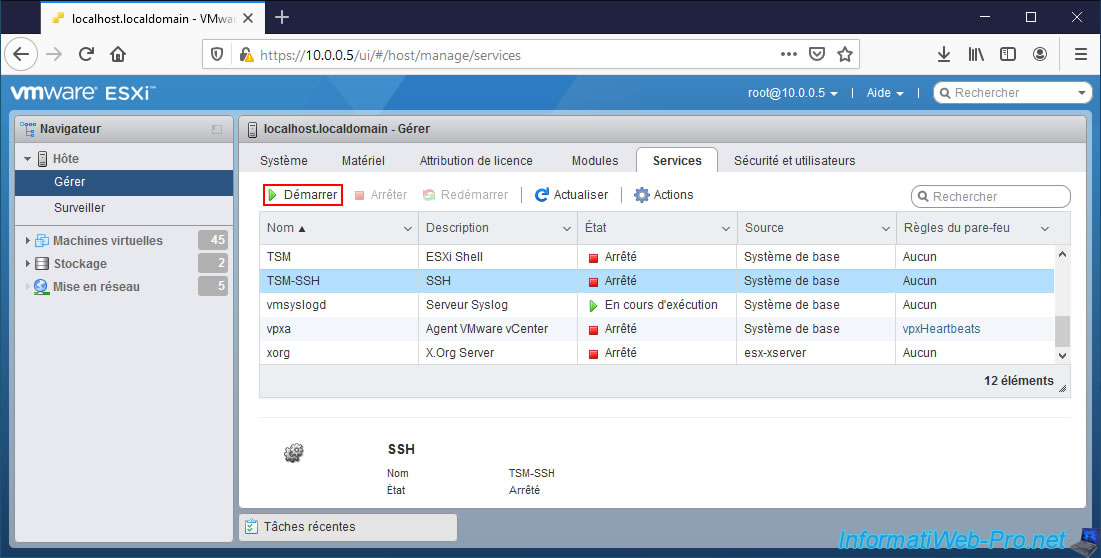
To get started, go to the "Host -> Manage -> Services" section of the VMware ESXi web interface and start the "TSM-SSH" service.
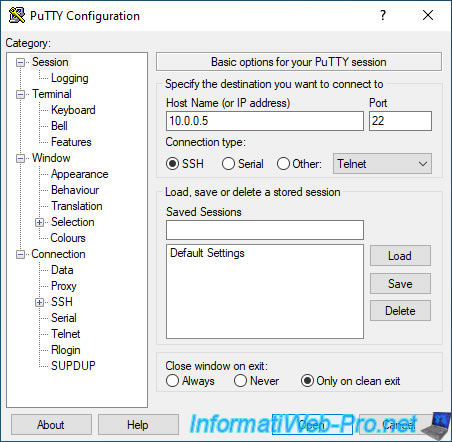
Then, connect in SSH to your VMware ESXi hypervisor using PuTTY (for example).
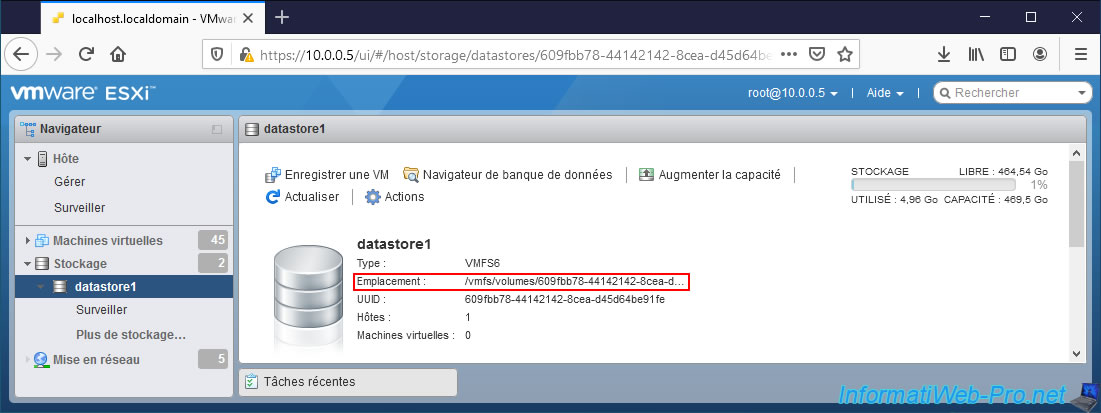
Retrieve the path to the datastore where you stored the "ESXixxx-VMKUSB-NIC-FLING-xxxxxx.....zip" file downloaded earlier.
To do this, go to "Storage" and click on the name of this datastore.
The path you need is the location value displayed.
On VMware ESXi 7.0 and later, you must use the command :
Bash
esxcli software component apply -d /path/to/the/component.zip
On VMware ESXi 6.5. and 6.7, use the command :
Bash
esxcli software vib install -d /path/to/the/offline bundle.zip
Which in our case gives this.
Note that you can specify the name of the datastore (ex : datastore1) instead of the very long identifier displayed by VMware ESXi.
Both values point to the same place.
Note: this may take 30 seconds. Wait a bit (even if nothing appears during the installation).
Bash
esxcli software vib install -d /vmfs/volumes/datastore1/drivers/ESXi670-VMKUSB-NIC-FLING-39203948-offline_bundle-16780994.zip
As expected, the "update" was installed, but a reboot is required.
Do not restart your hypervisor just yet.
Plain Text
Installation Result
   Message: The update completed successfully, but the system needs to be rebooted for the changes to be effective.
   Reboot Required: true
   VIBs Installed: VMW_bootbank_vmkusb-nic-fling_2.1-6vmw.670.2.48.39203948
   VIBs Removed:
   VIBs Skipped:
Then, edit the "/etc/rc.local.d/local.sh" file and add this before the "exit 0" line.
As specified by VMware : Modifying the rc.local or local.sh file in ESX/ESXi to execute commands while booting (2043564).
Bash
vi /etc/rc.local.d/local.sh
Plain Text
vusb0_status=$(esxcli network nic get -n vusb0 | grep 'Link Status' | awk '{print $NF}')
count=0
while [[ $count -lt 20 && "${vusb0_status}" != "Up" ]]
do
    sleep 10
    count=$(( $count + 1 ))
    vusb0_status=$(esxcli network nic get -n vusb0 | grep 'Link Status' | awk '{print $NF}')
done

esxcfg-vswitch -R
Which gives this :
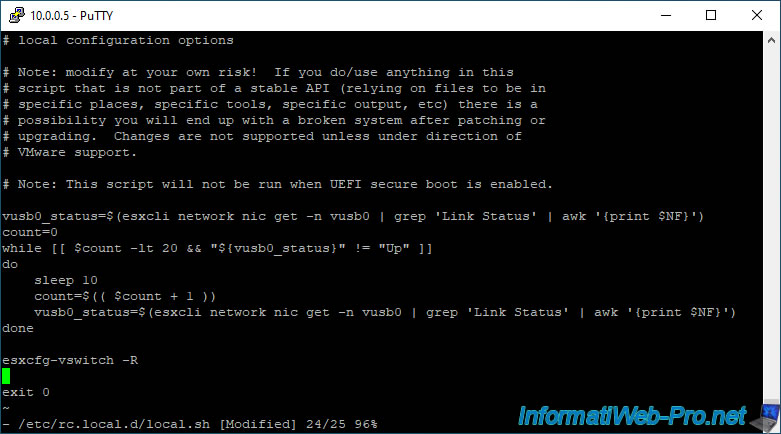
Now, restart your VMware ESXi hypervisor.
If you are sure that no virtual machine is running on your server, you can restart your hypervisor by running the command :
Bash
reboot
If you have multiple USB network adapters, you can use this command to prevent them from changing names when rebooting ESXi.
In our case, we have 2 USB network adapters.
- vusb0 is the name assigned by VMware to your 1st USB network adapter.
- vusb1 is the name assigned by VMware to your 2nd USB network adapter.
- xx:xx:xx:xx:xx:x1 and xx:xx:xx:xx:xx:x2 correspond to the MAC addresses of these USB network adapters.
Note : you can see the MAC addresses of your USB network adapters after restarting your hypervisor in the "Networking -> Physical NICs" section of the VMware ESXi web interface.
Bash
esxcli system module parameters set -p "vusb0_mac=xx:xx:xx:xx:xx:x1 vusb1_mac=xx:xx:xx:xx:xx:x2" -m vmkusb_nic_fling
4. USB network adapters detected
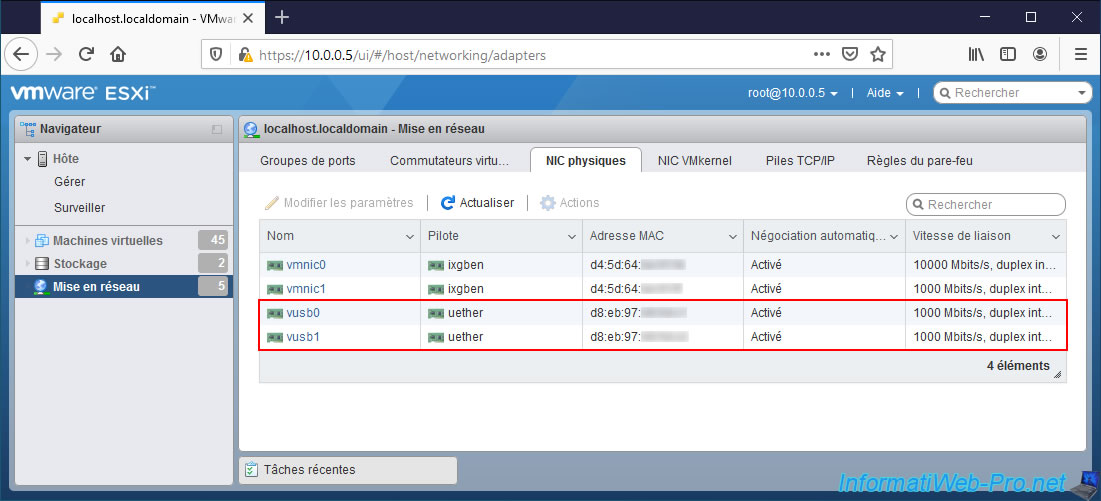
Once the VMware ESXi hypervisor has restarted, you will be able to see your supported USB network adapter(s) appear in the "Networking -> Physical NICs" section with in our case, the "uether" driver.
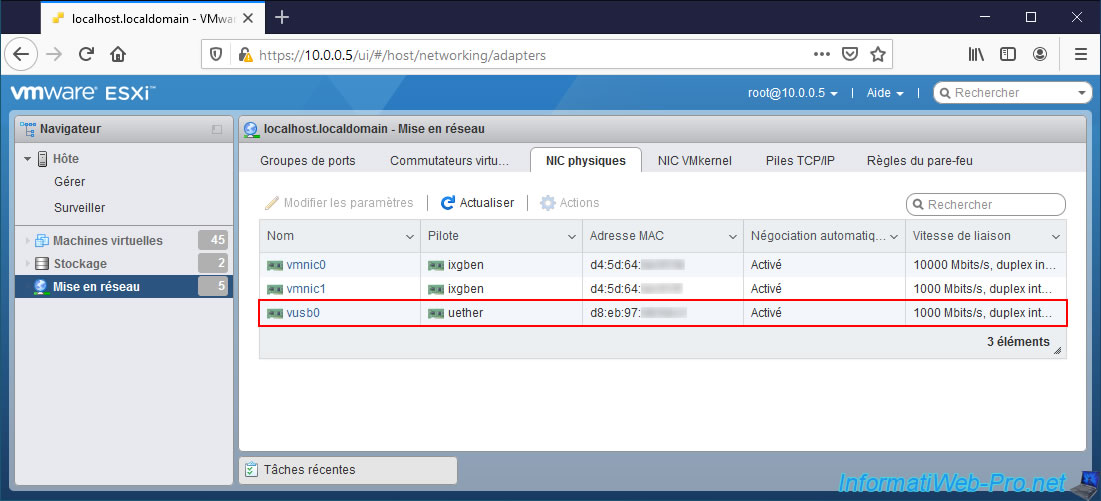
In our case, we have 2.
5. Uninstall the fling USB network native driver for ESXi
If you unplug your USB network adapters and no longer need this fling, here's how to properly uninstall it.
To begin, find the correct name of the package that was installed.
To do this, list the packages (modules) that are currently installed on your hypervisor.
Bash
esxcli software vib list
In the list that appears, you will find the "vmkusb-nic-fling" package :
Plain Text
...
vmkusb-nic-fling               2.1-6vmw.670.2.48.39203948            VMW      VMwareAccepted    2022-07-23
...
To get started, uninstall this package :
Bash
esxcli software vib remove --vibname=vmkusb-nic-fling
Which will display this.
As noted, a reboot will be required to complete the uninstallation, but don't do this just yet.
Plain Text
Removal Result
   Message: The update completed successfully, but the system needs to be rebooted for the changes to be effective.
   Reboot Required: true
   VIBs Installed:
   VIBs Removed: VMW_bootbank_vmkusb-nic-fling_2.1-6vmw.670.2.48.39203948
   VIBs Skipped:
Then, don't forget to remove the script you added in the "/etc/rc.local.d/local.sh" file.
Bash
vi /etc/rc.local.d/local.sh
In this file, remove this block :
Plain Text
vusb0_status=...
...
esxcfg-vswitch -R
Share this tutorial
To see also
-
VMware 3/3/2023
VMware ESXi 6.7 - Add a VMkernel interface
-
VMware 2/24/2023
VMware ESXi 6.7 - Create a new virtual network
-
VMware 3/24/2023
VMware ESXi 6.7 - Enable Jumbo frame support
-
VMware 3/17/2023
VMware ESXi 6.7 - Limit outbound bandwidth

You must be logged in to post a comment