Improve iSCSI storage performance with multipath and Jumbo frames on VMware vSphere 6.7
- VMware
- 04 September 2024 at 07:36 UTC
-

- 2/4

1.3. Associate a physical network adapter per VMkernel iSCSI port
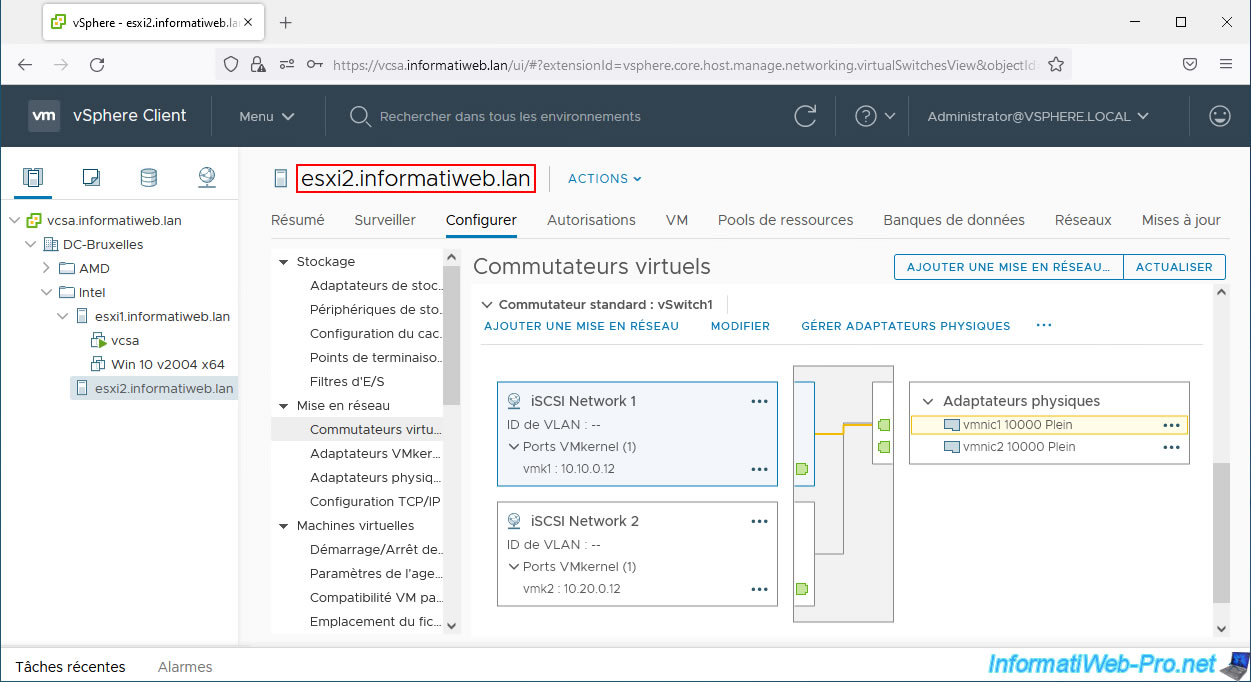
If you go to "Configure -> Networking -> Virtual switches", you will see that a new standard switch (vSwitch1) has been created with:
- 2 port groups: iSCSI Network 1 and iSCSI Network 2.
- 2 VMkernel ports: vmk1 and vmk2.
- 2 physical adapters: vmnic1 and vmnic2.
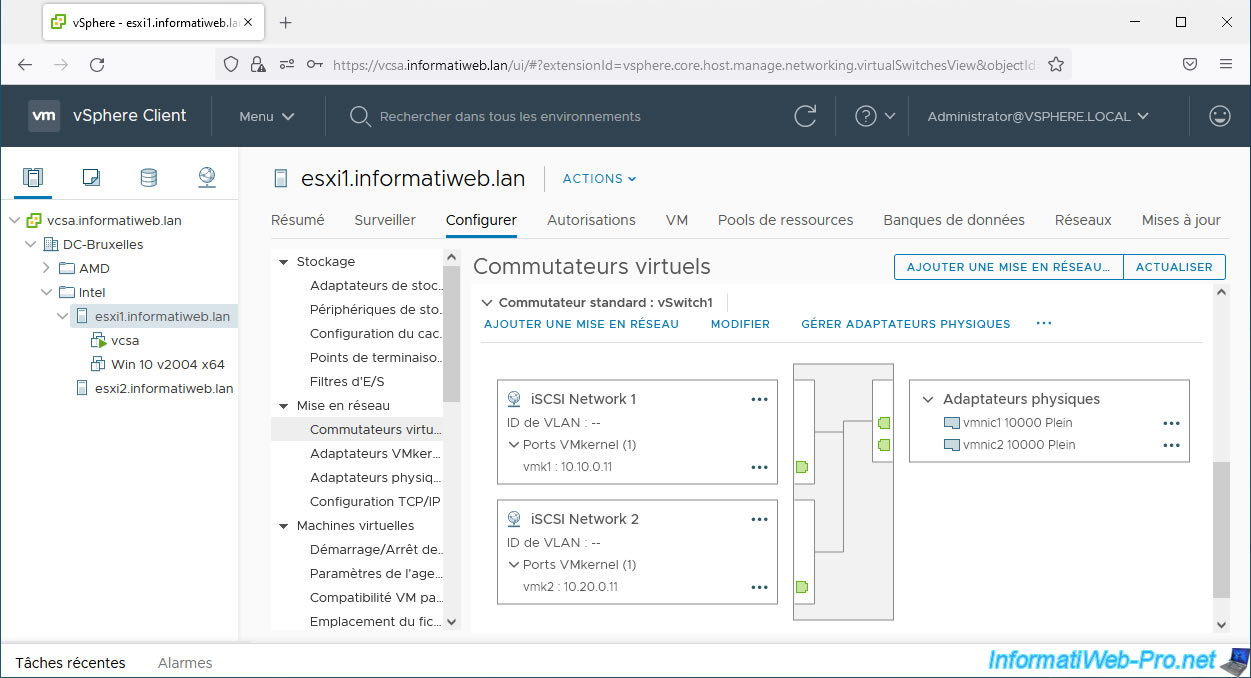
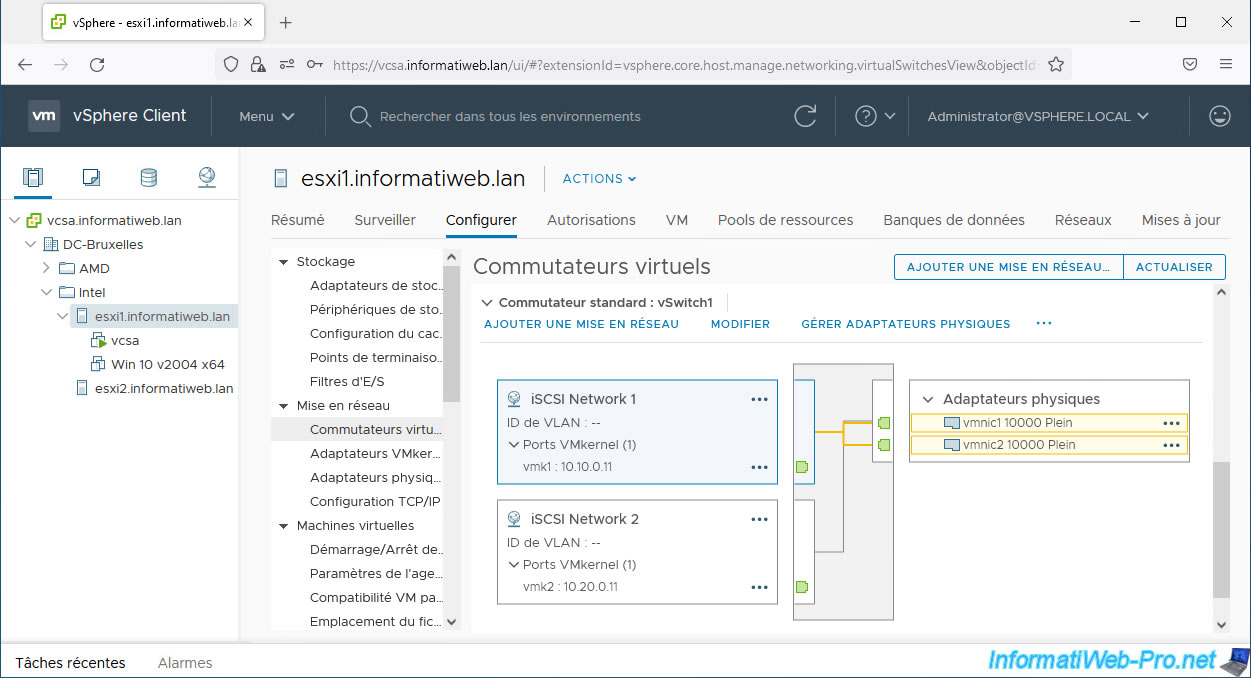
However, if you click on the name of a port group or the VMkernel port located there, you will see that the 2 physical adapters are used each time.
However, for multipathing to work correctly for iSCSI traffic, VMware specifies that each VMkernel port can only use one physical adapter.
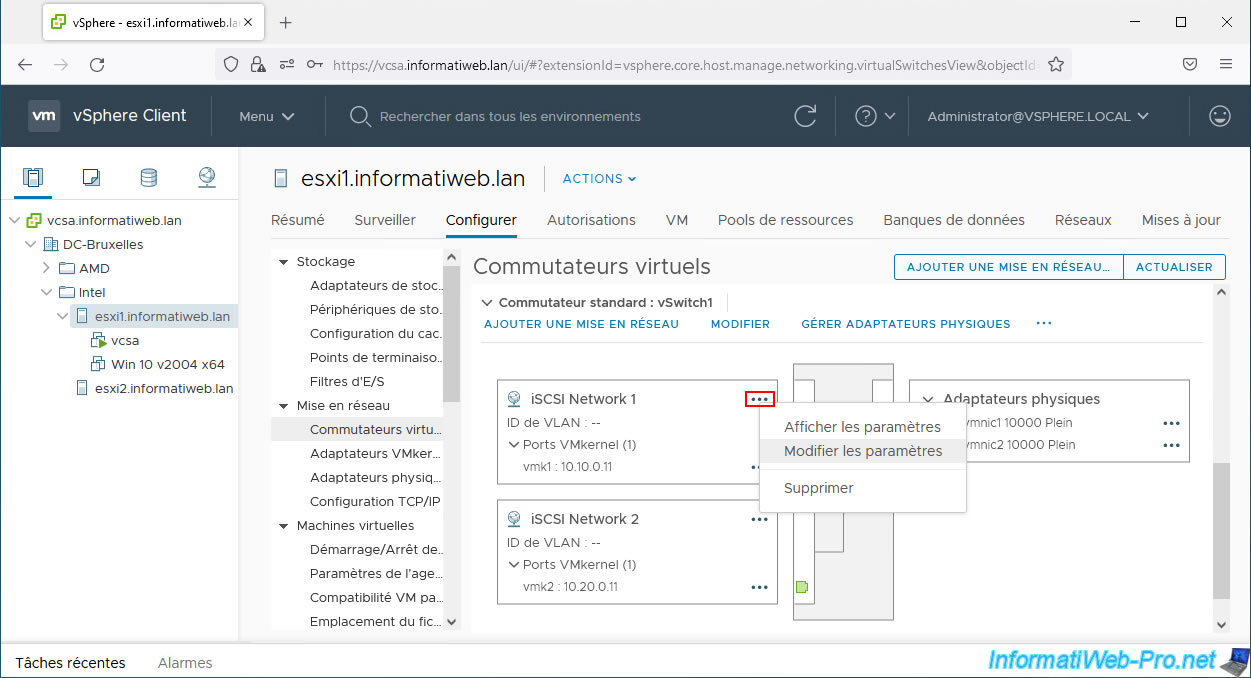
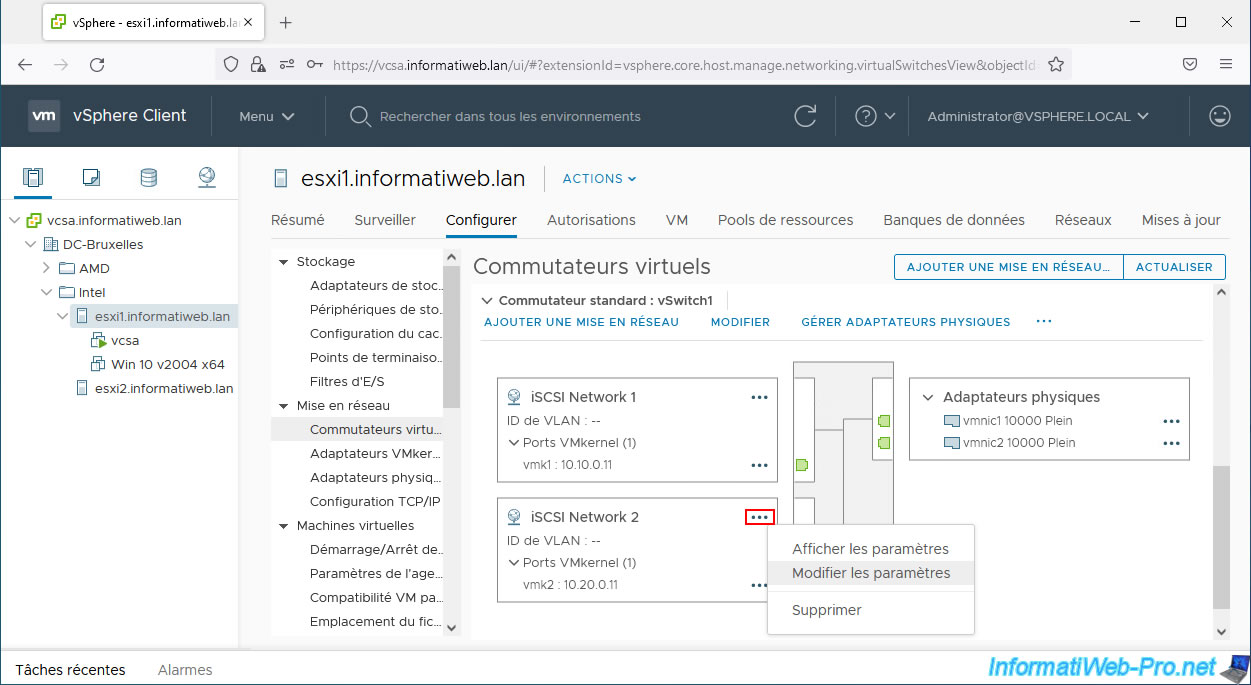
To resolve this issue, simply modify the settings for each port group created.
To do this, click on "..." (to the right of its name), then click on: Edit Settings.
In the "Teaming and Failover" section of your port group settings, check the "Override" box for the failover order.
Next, select the 2nd physical adapter (vmnic2) and click the "down" arrow to move it to the "Unused adapters" section.
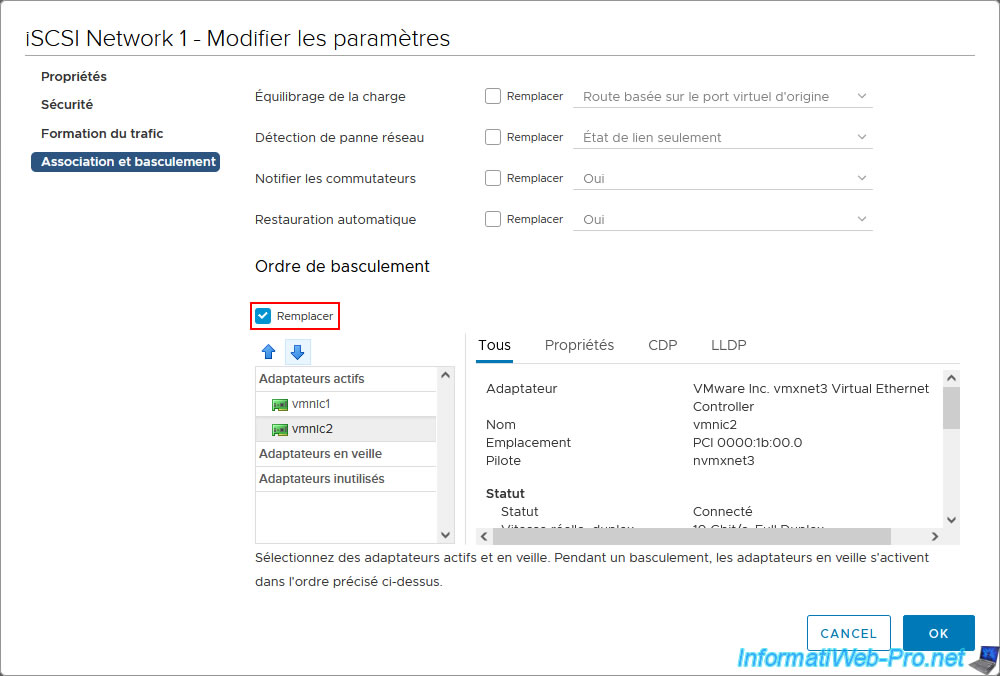
For your 1st port group, leave only your 1st physical adapter (vmnic1) as the active adapter.

Change your 2nd port group settings for iSCSI traffic.
For your 2nd port group, leave only your 2nd physical adapter (vmnic2) as the active adapter.

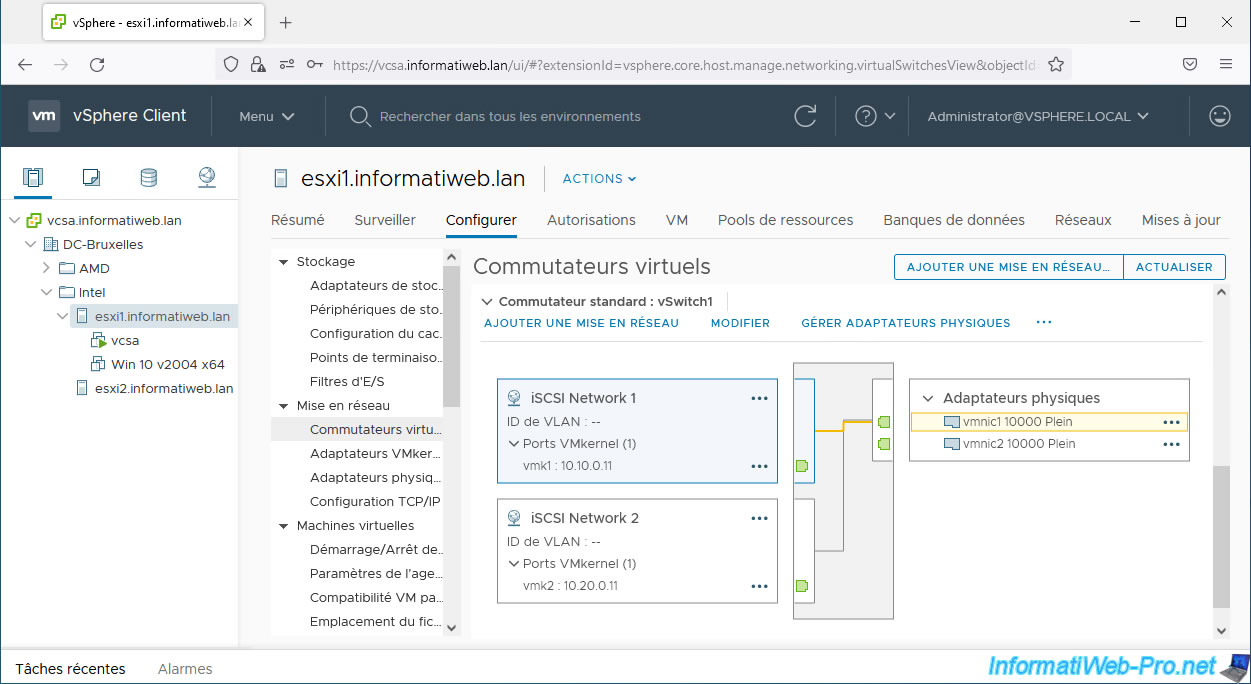
Now if you click on the name of the 1st port group or 1st VMkernel port that is there, you will see that the only physical adapter that will be used will be the 1st physical adapter (vmnic1).
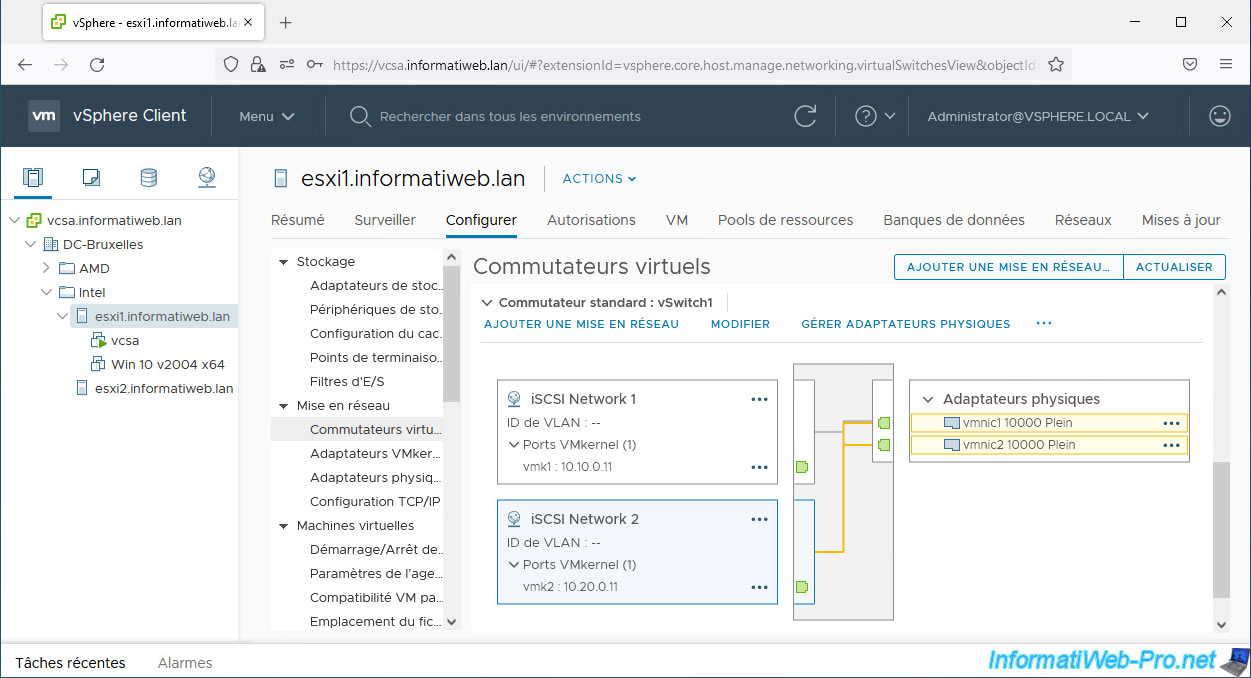
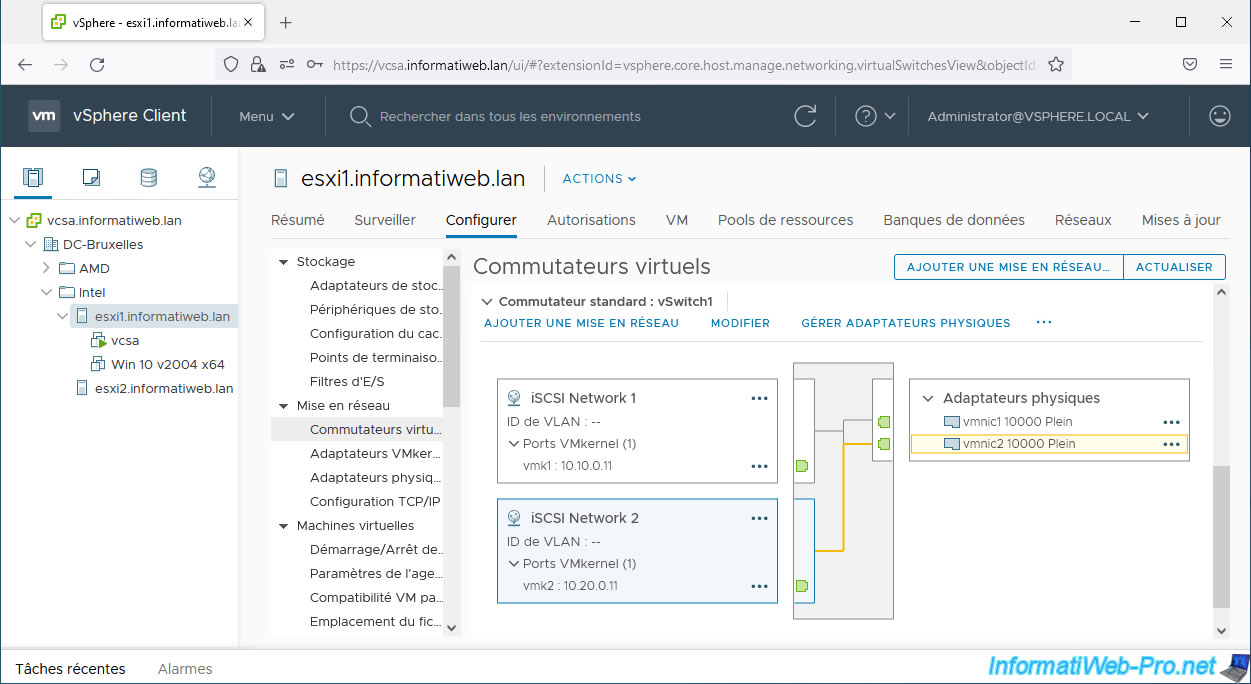
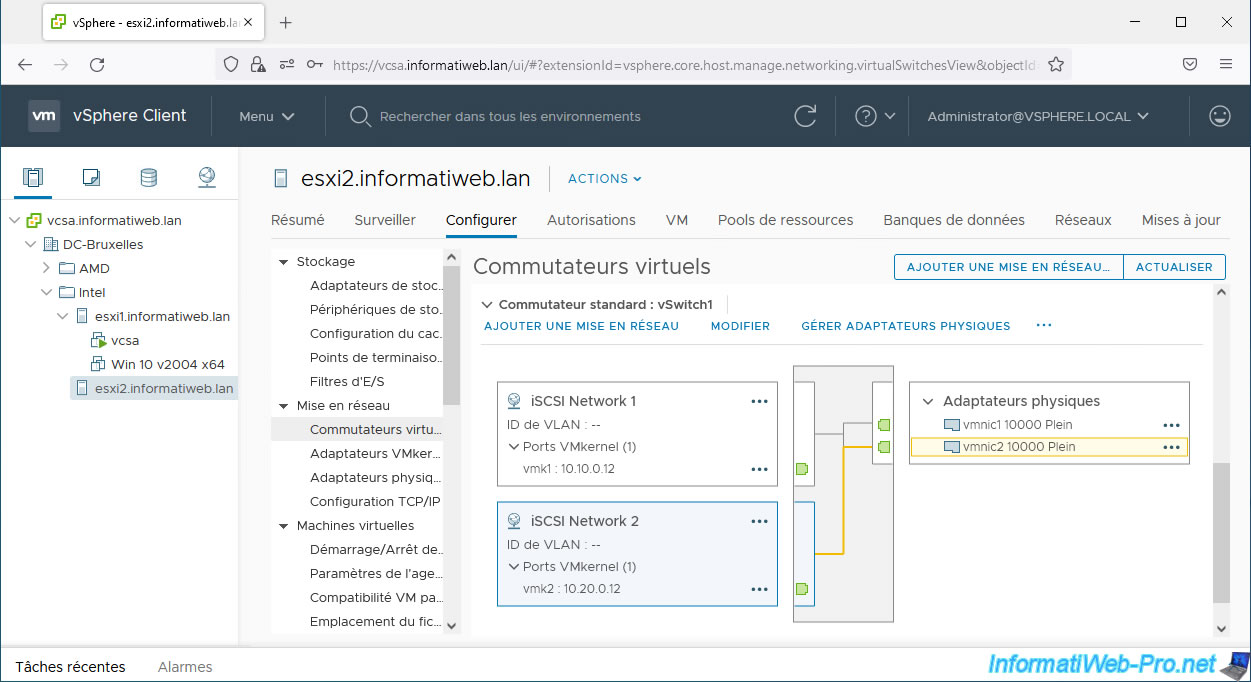
Now if you click on the name of the 2nd port group or 2nd VMkernel port that is there, you will see that the only physical adapter that will be used will be the 2nd physical adapter (vmnic2).
Do the same for the 2nd host.
2. Use Jumbo frames to improve performance (optional)
2.1. Enable Jumbo frame support on your VMware ESXi hosts
To improve performance for accessing your NAS storage via the iSCSI protocol, you can enable Jumbo frame support.
However, Jumbo frame support must be available and enabled end-to-end (VMkernel adapter, virtual switch, physical switch(es) and physical network cards) as explained in our tutorial: VMware ESXi 6.7 - Enable Jumbo frame support.
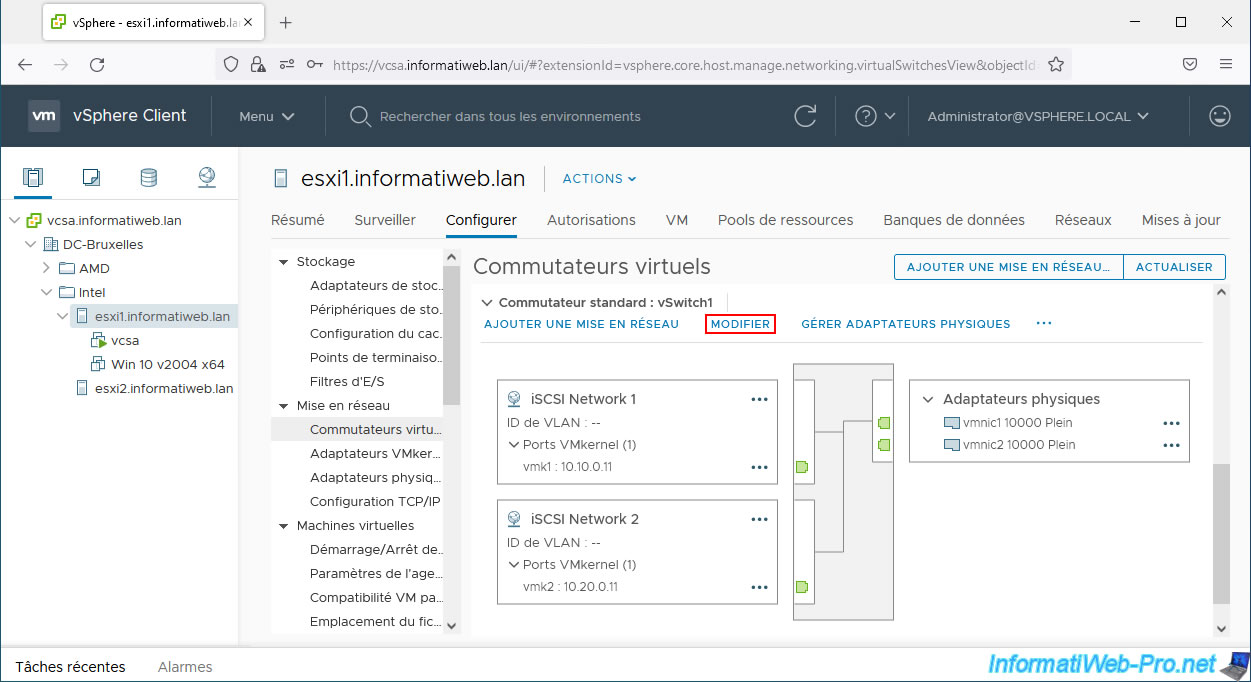
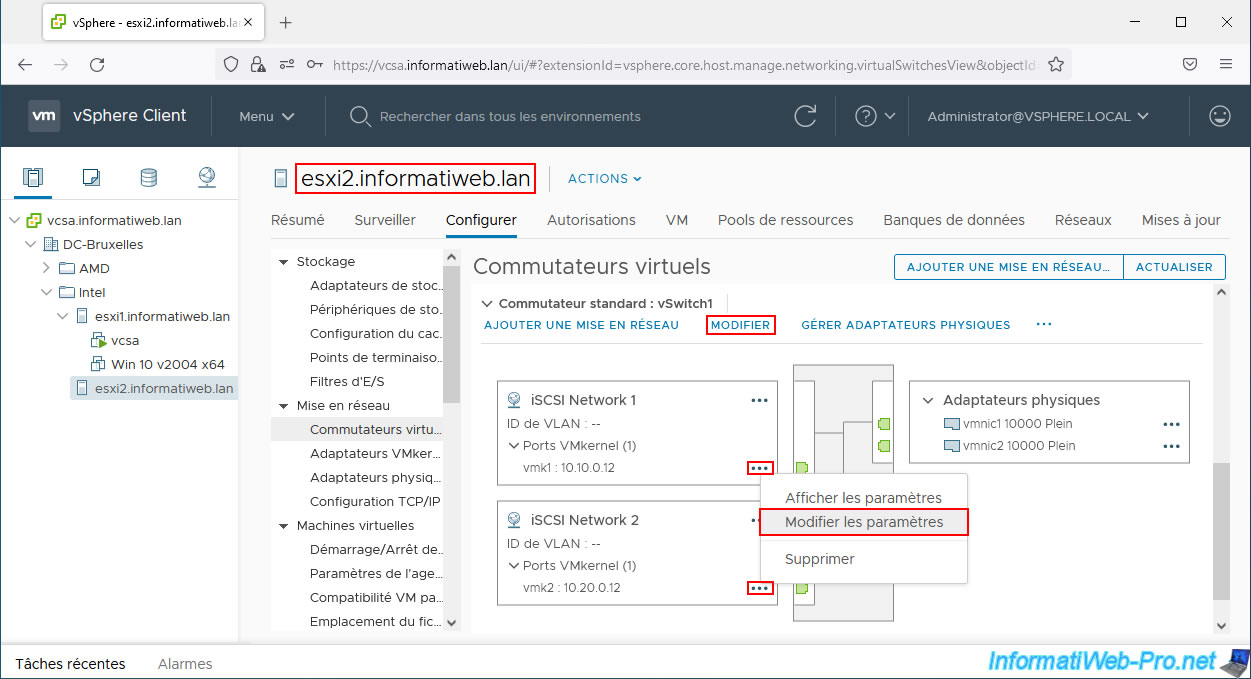
To begin, click "Edit" for your new standard virtual switch (vSwitch1) dedicated to iSCSI traffic.
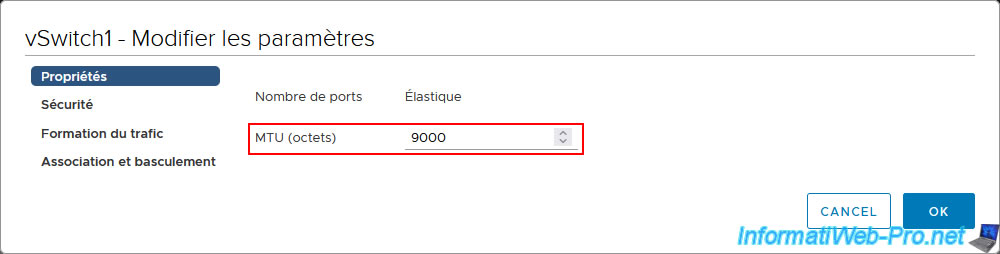
In the "Properties" section of your virtual switch settings, specify an MTU of 9000 (Jumbo frames) instead of 1500 (default).
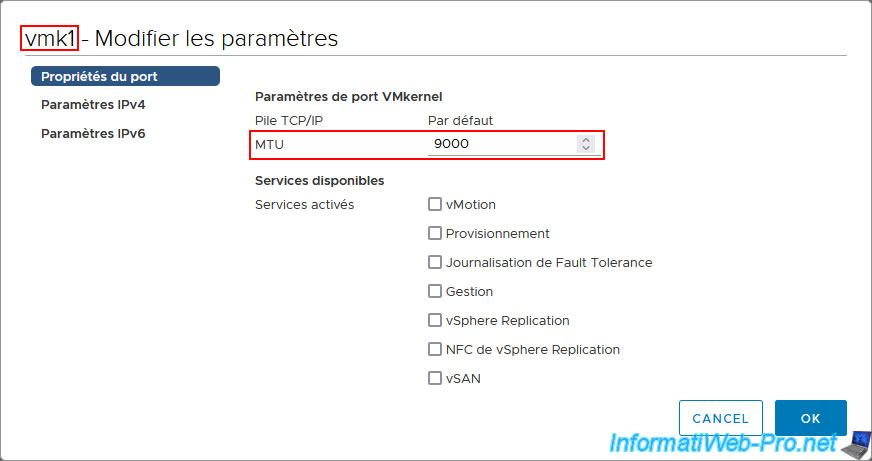
Also modify the settings of your 2 VMkernel adapters dedicated to iSCSI traffic.
To do this, click on "..." (to the right of each VMkernel adapter), then click on: Edit Settings.

In the "Port properties" section of your 1st VMkernel adapter (vmk1) dedicated to iSCSI traffic, specify an MTU of 9000 again.
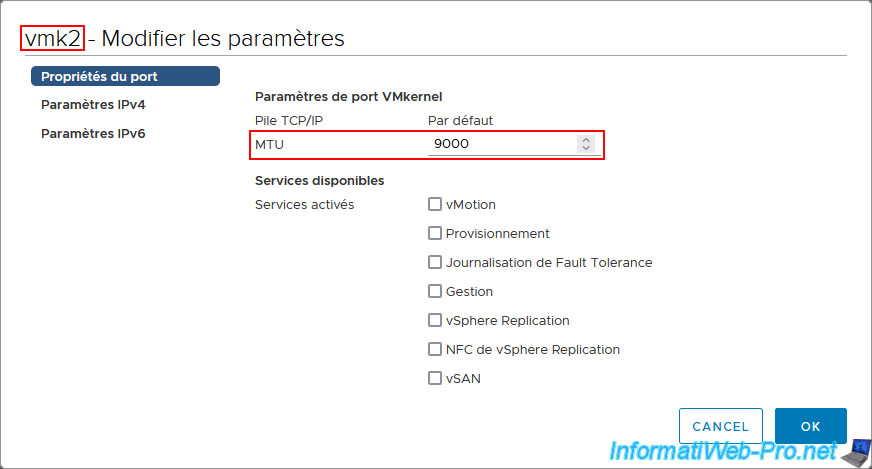
Do the same for your 2nd VMkernel adapter (vmk2) dedicated to iSCSI traffic.
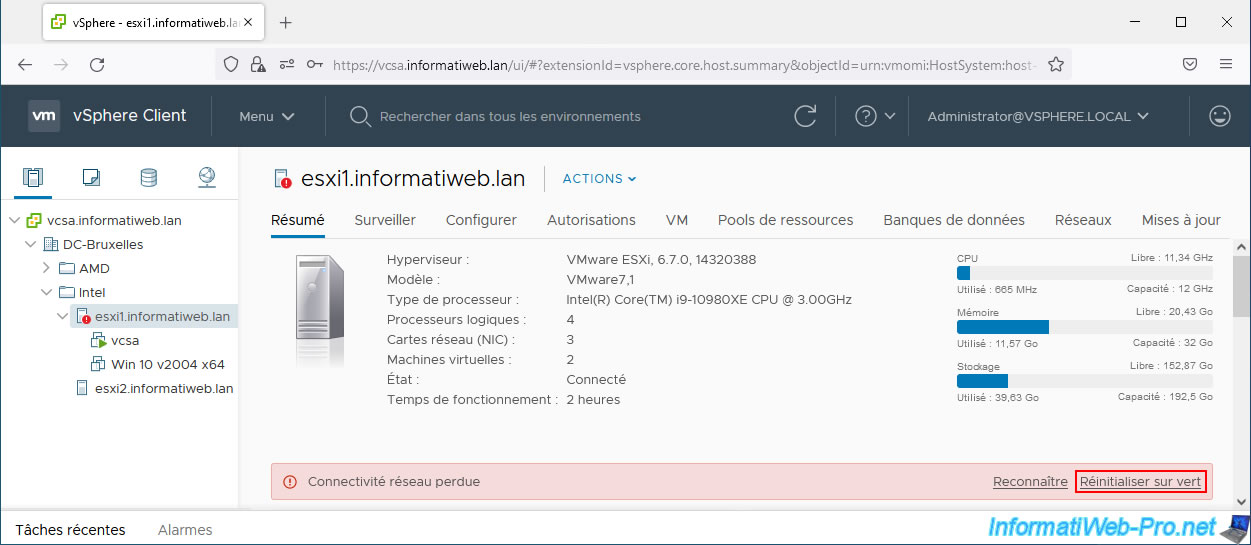
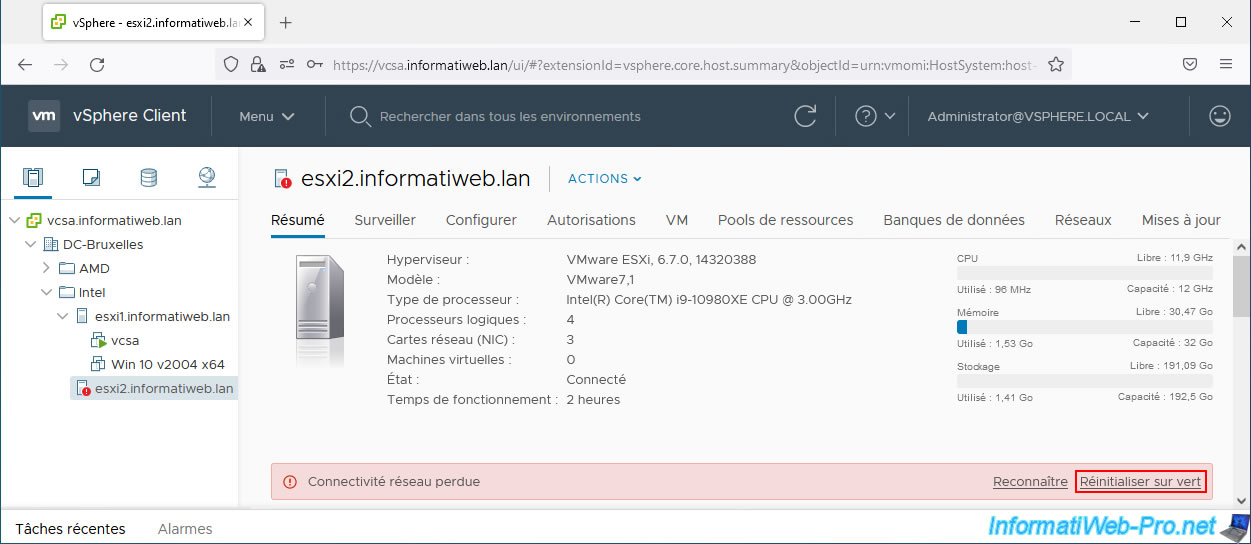
Following the MTU change, a "Lost Network Connectivity" error will appear on the affected host.
Click "Reset to Green" to ignore it. In fact, the MTU change only caused a micro outage at the network level.
Specify an MTU of 9000 again on the new virtual switch (vSwitch1) and the 2 VMkernel adapters there on your 2nd VMware ESXi host.
Again, ignore the "Lost Network Connectivity" error that will occur on your 2nd host by clicking "Reset to Green".
Share this tutorial
To see also
-

VMware 5/15/2024
VMware vSphere 6.7 - Add a physical disk to host
-

VMware 9/27/2024
VMware vSphere 6.7 - Array integration APIs (VAAI)
-

VMware 9/6/2024
VMware vSphere 6.7 - Configure port binding (iSCSI traffic)
-

VMware 6/13/2024
VMware vSphere 6.7 - Configure Virtual Flash (SSD cache)
No comment