- VMware
- 20 January 2023 at 12:48 UTC
-


Previously, we explained how to simulate persistent memory on a VMware ESXi hypervisor.
To do this, refer to our tutorial : VMware ESXi 6.7 - Use persistent memory (PMem) via NVDIMMs modules.
However, in the tutorial below, we are going to show you how to provide persistent memory to nested (virtualized) VMware ESXi hypervisors.
Note that this is possible in 2 cases : if you have simulated enough persistent memory on the physical VMware ESXi hypervisor or if you have real persistent memory modules (PMem) in your physical server.
- Simulate persistent memory (PMem) on the physical VMware ESXi hypervisor
- Add NVDIMM modules (Virtual Persistent Memory) to a nested VMware ESXI hypervisor
- Persistent memory available on nested (virtualized) VMware ESXi hypervisor
- Add an NVDIMM to a nested virtual machine
- Restart the virtual machine
- Restarting the nested (virtual) VMware ESXi hypervisor
- Persistent memory cleared when the physical server is restarted
1. Simulate persistent memory (PMem) on the physical VMware ESXi hypervisor
To get started, you need persistent memory (PMem) on your physical VMware ESXi hypervisor.
For this, either you use persistent memory modules (PMem), as explained in the tutorial cited at the beginning of the tutorial.
Either you simulate it on your physical VMware ESXi hypervisor by configuring the "VMKernel.Boot.fakePMemPct" advanced setting thereof.
For the procedure to follow, refer to the tutorial mentioned above.
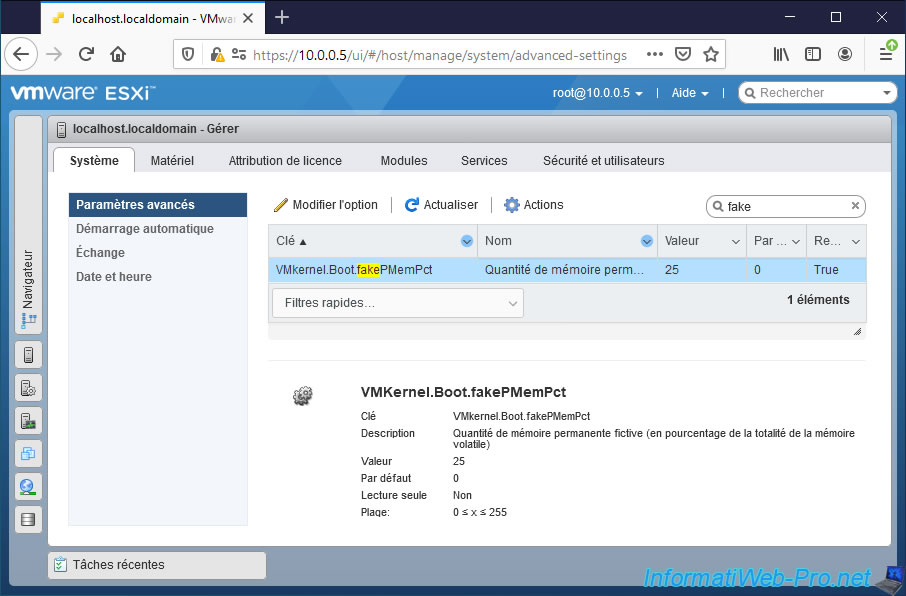
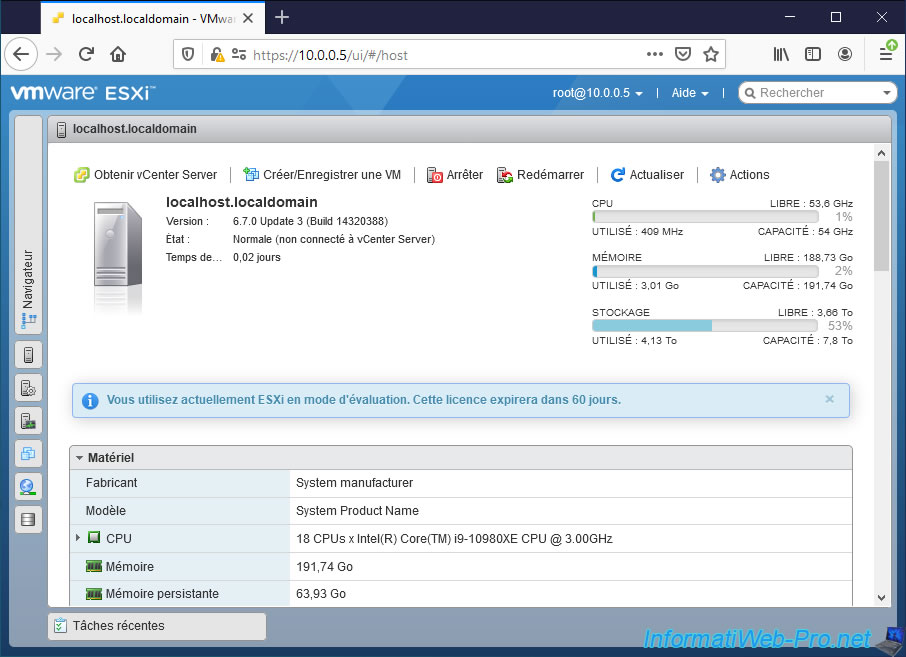
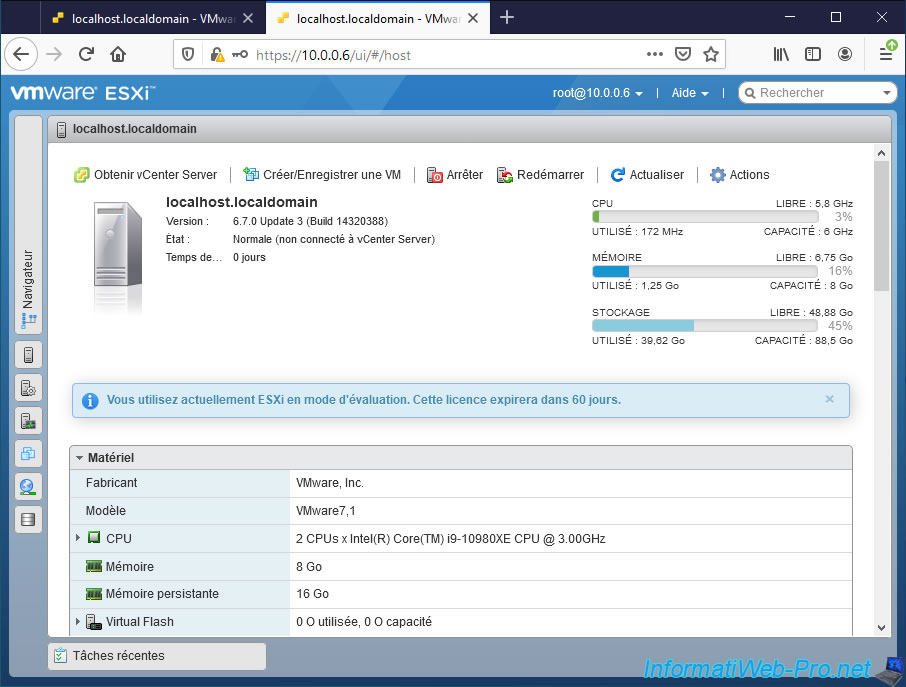
In our case, our physical server has 256 GB of RAM physically and we simulated persistent memory (PMem) using 25% of our random access memory (RAM).
Which gives in our case : 191.74 GB of random access memory (RAM) and 63.93 GB of persistent memory (PMem).
2. Add NVDIMM modules (Virtual Persistent Memory) to a nested VMware ESXI hypervisor
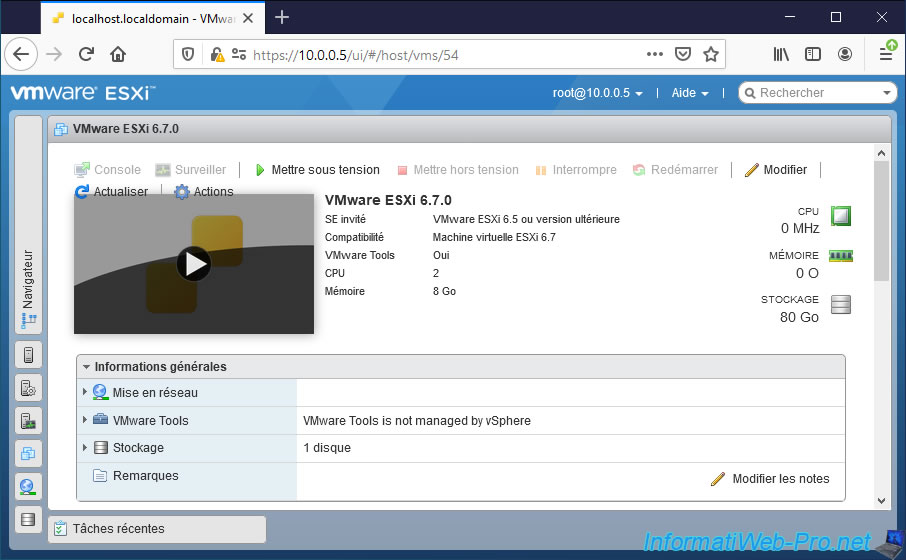
For this tutorial, we virtualized VMware ESXi 6.7.0 U3 on a physical VMware ESXi hypervisor using the same version.
To virtualize VMware ESXi on VMware ESXi, refer to our "VMware ESXi 6.7 - Virtualize VMware ESXi 6.7.0" tutorial.
Once VMware ESXi has been virtualized, modify this "VMware ESXi ..." virtual machine.
Click on : Add device -> NVDIMM.
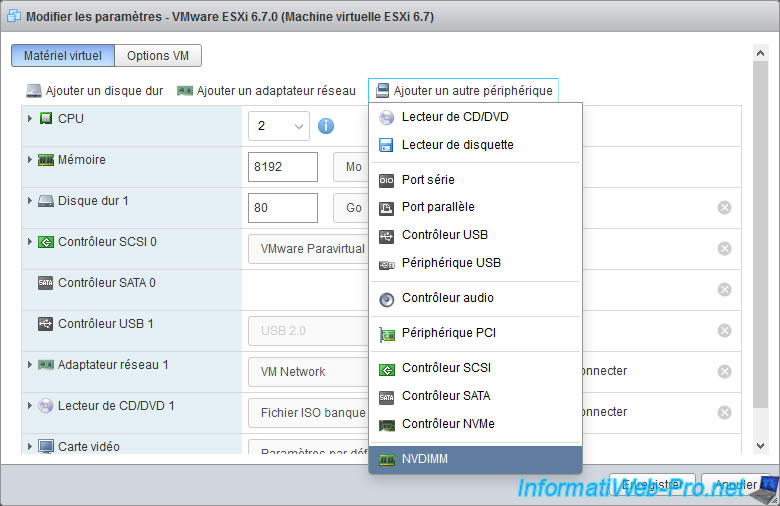
A new NVDIMM appears.
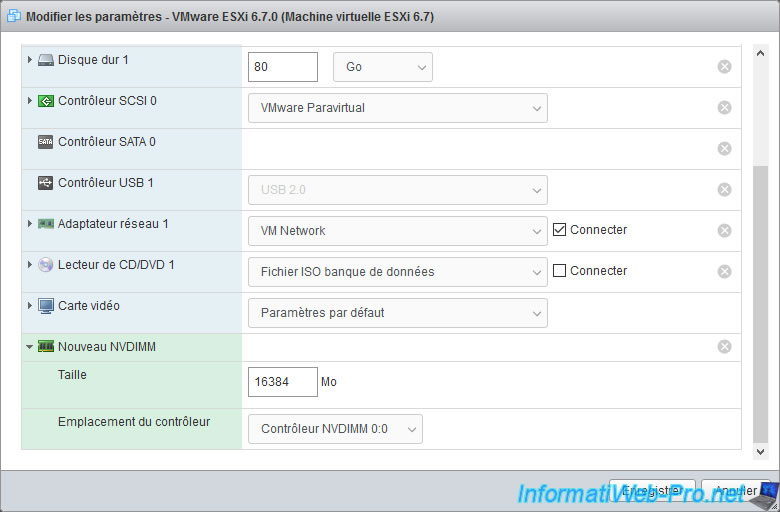
In our case, we are going to add a virtual 16 GB (= 16384 MB) NVDIMM.
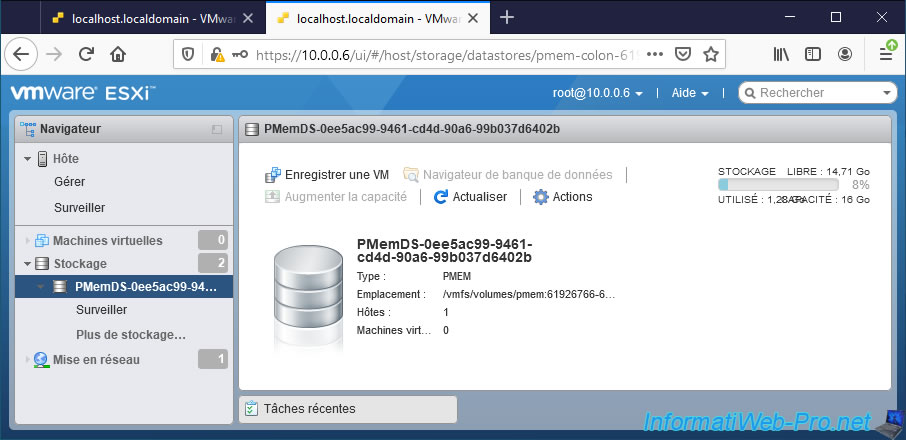
3. Persistent memory available on nested (virtualized) VMware ESXi hypervisor
As you can see, a 16 GB (16,384 MB) NVDIMM module appears in the hardware configuration of our "VMware ESXi 6.7.0" virtual machine.
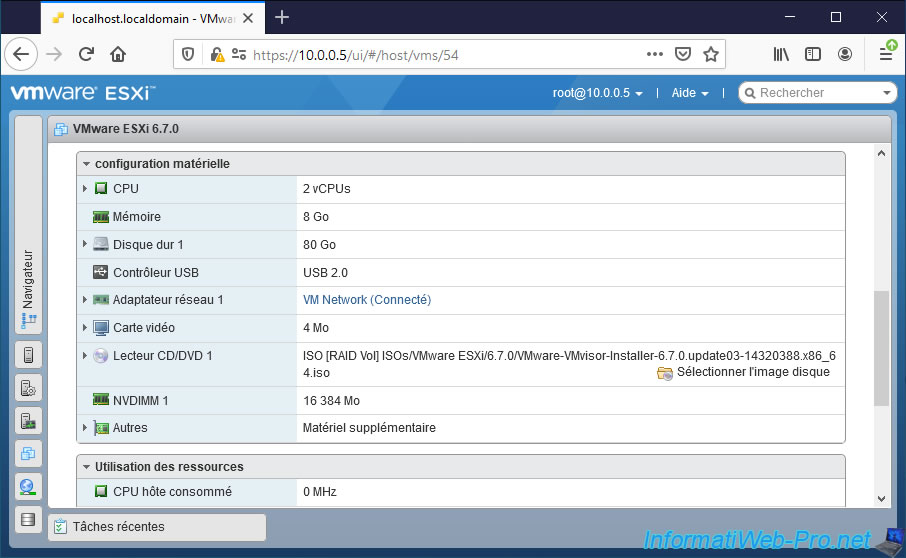
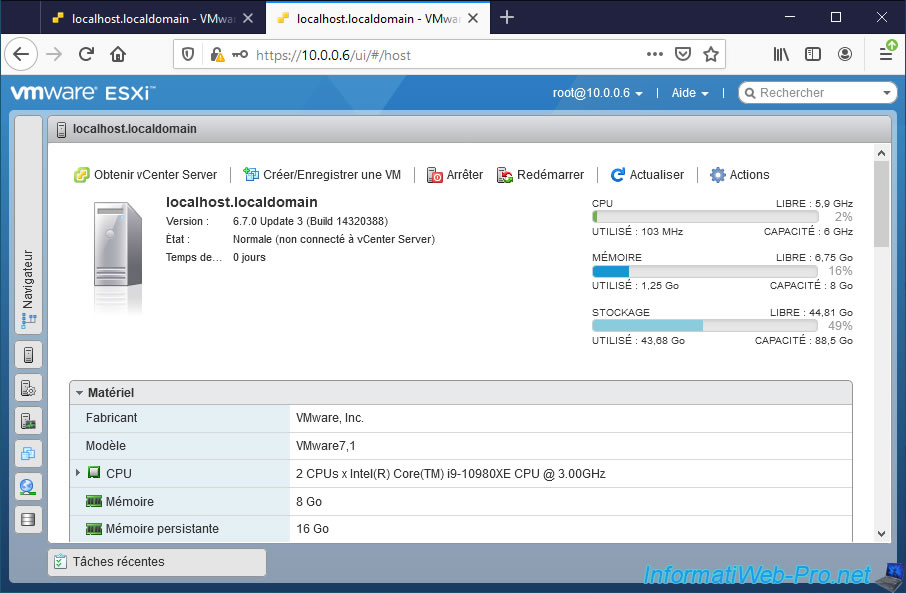
Once this virtual VMware ESXi 6.7.0 hypervisor is started, access its web interface and you will see that it has persistent memory.
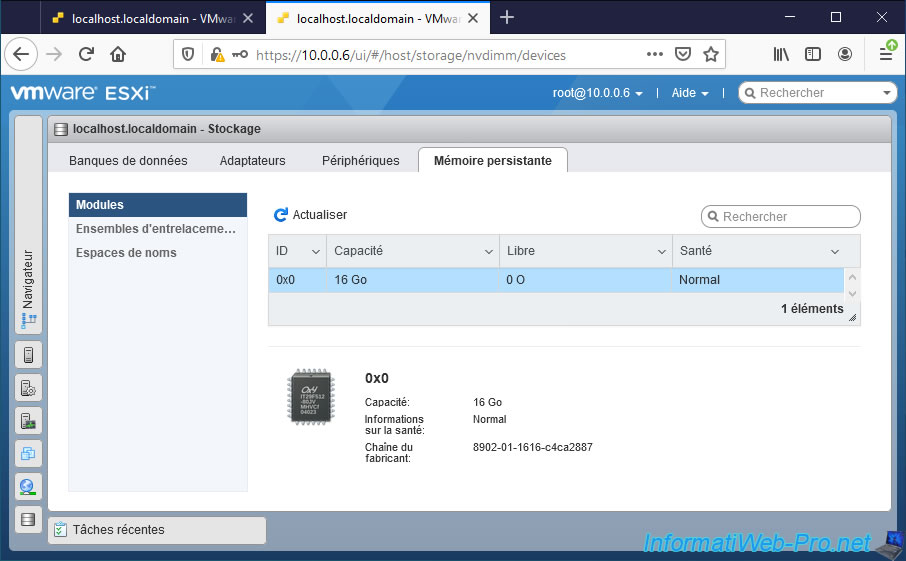
Since these are NVDIMMs, you can find information about them in the section : Storage -> Persistent Memory -> Modules.
As you can see, our virtual VMware ESXi hypervisor detects the presence of a 16 GB persistent memory module.
Note that this information doesn't appear when you simulate persistent memory (PMem) directly on a VMware ESXi hypervisor through the "VMKernel.Boot.fakePMemPct" advanced setting.
This is not the case here, since this persistent memory (PMem) is simulated on the physical hypervisor and not the virtual (nested) hypervisor installed in a virtual machine.
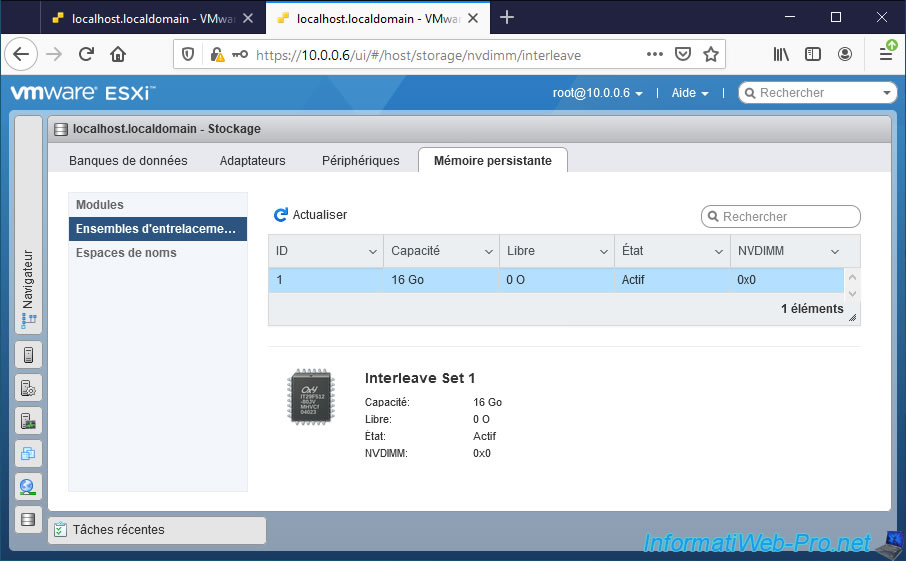
In the "Interleave sets" section, you will find a single 16 GB set.
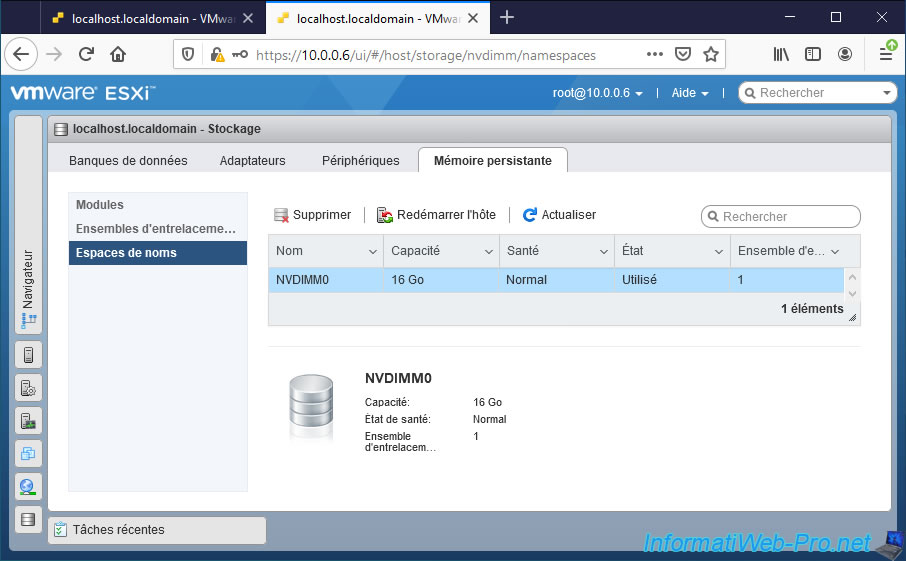
And in the "Namespaces" section, you will find a single 16GB "NVDIMM0" namespace.
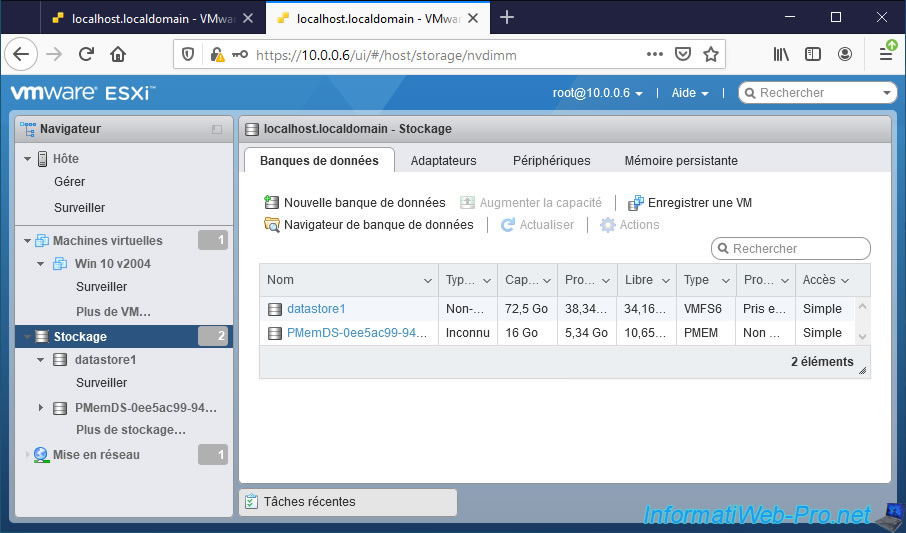
If you go to the "Storage -> Datastores" menu, you will find your "PMemDS-" datastore.
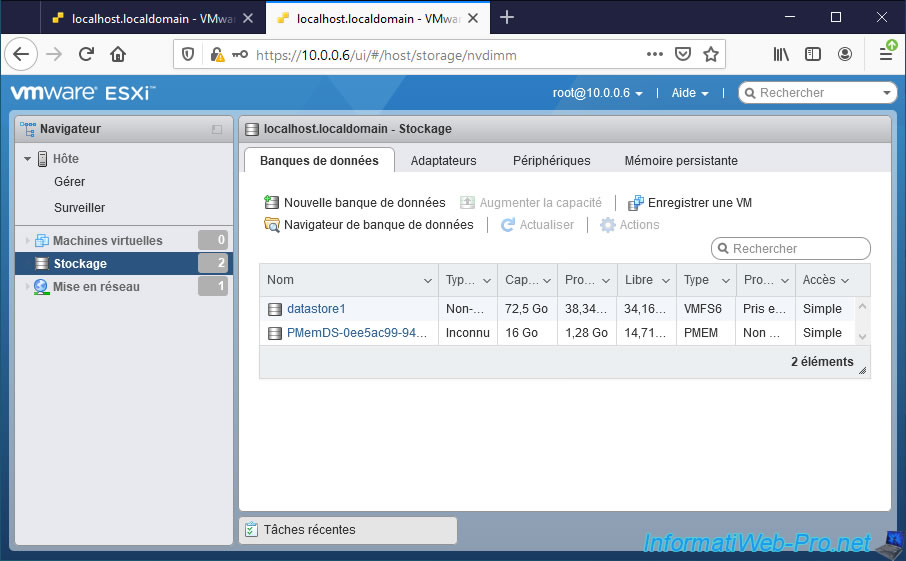
As you can see, this "PMemDS -..." datastore has a size of 16 GB (in our case).
4. Add an NVDIMM to a nested virtual machine
As we explained in our tutorial "VMware ESXi 6.7 - Use persistent memory (PMem) via NVDIMMs modules", it's possible to assign persistent memory to a virtual machine in different ways.
Additionally, some operating systems support NVDIMMs and some don't.
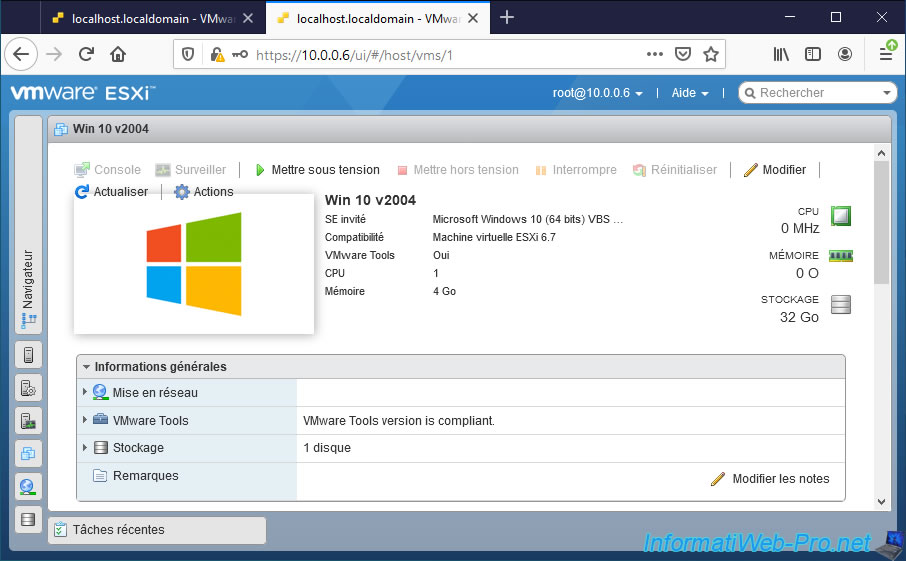
For the example, we will use a virtual machine on Windows 10 v2004 created on our virtual (nested) hypervisor.
Once this virtual machine has been created, click on "Edit".
Click : Add another device -> NVDIMM.
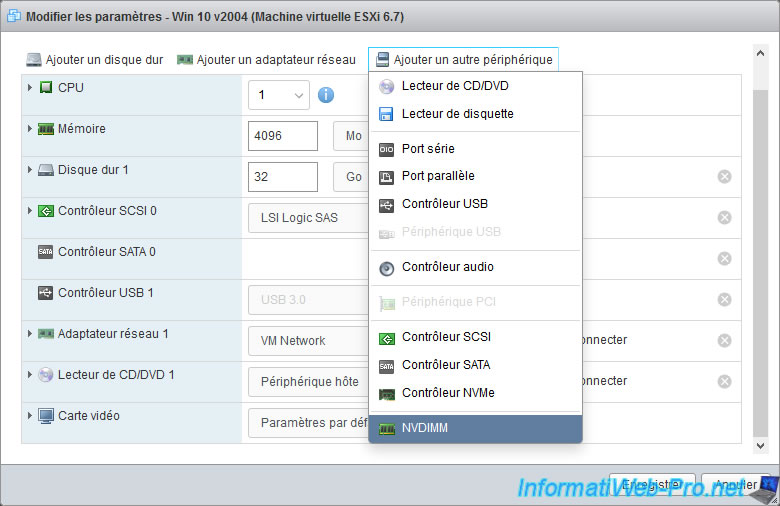
The new NVDIMM module appears.
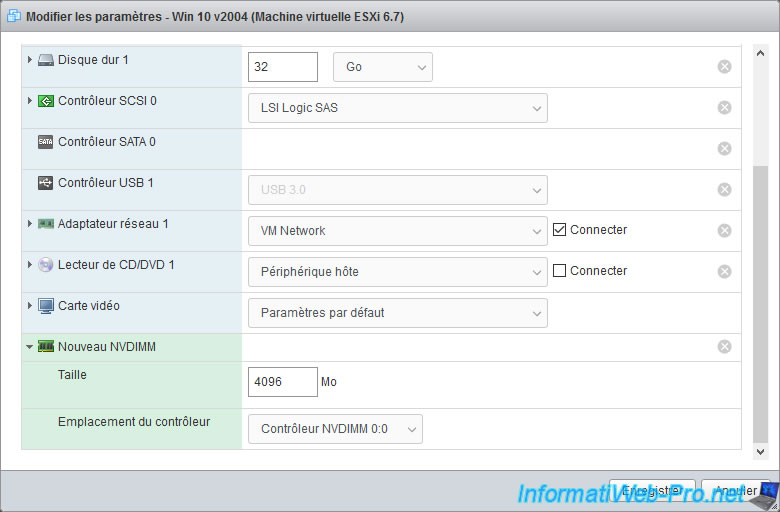
For the example, we will create a 4 GB (4096 MB) NVDIMM since we have 16 GB of persistent memory on our virtual (nested) VMware ESXi hypervisor.
The new added NVDIMM module appears in the hardware configuration of this "Win 10 v2004" virtual machine.
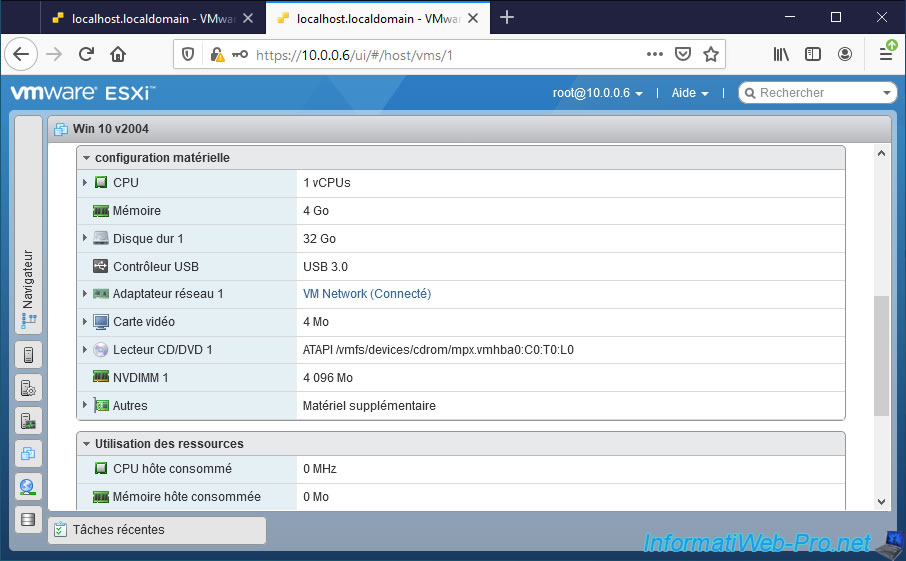
Start this virtual machine and open Disk Management.
To do this, open the file explorer, then right-click "Manage" on "This PC".
Then, click on "Disk Management" on the left side.
As you can see, a new unknown not initialized disk appears.
Click OK to initialize it.
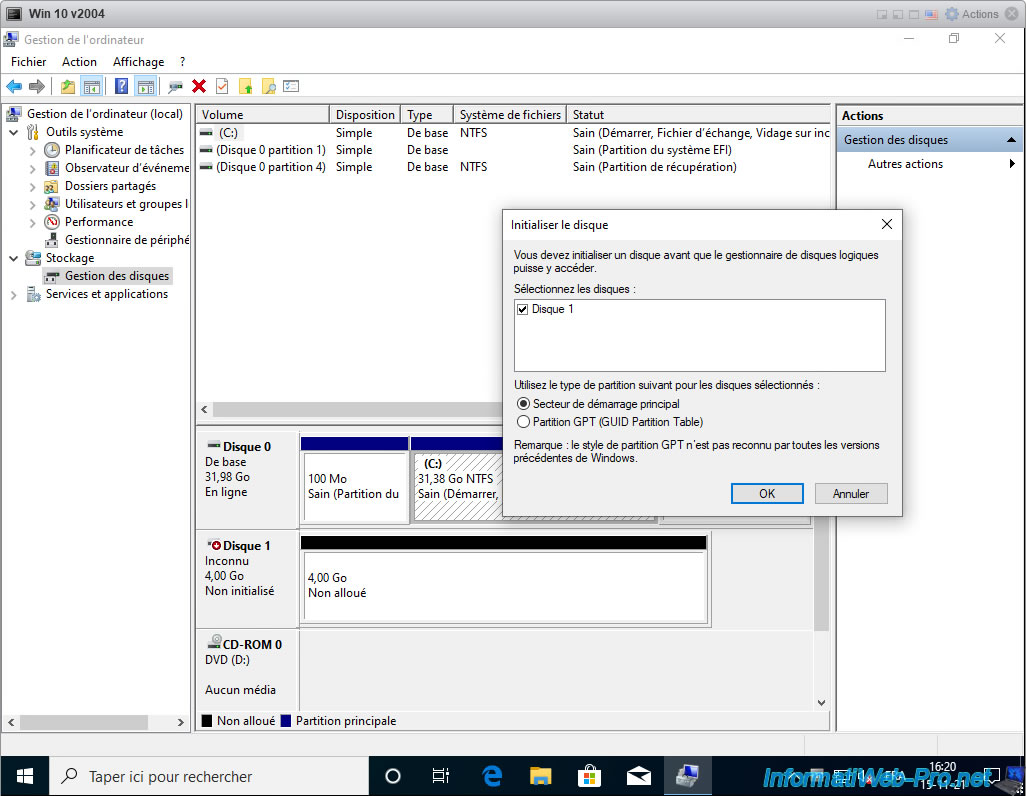
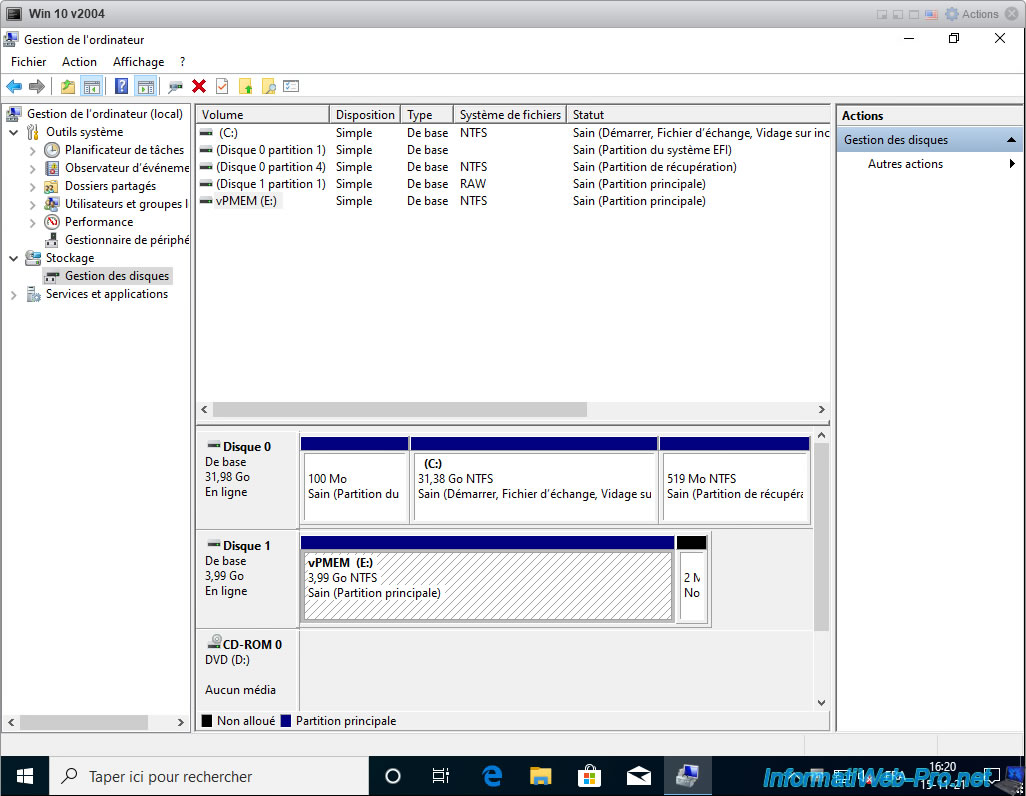
Create a partition on this new disk, giving it for example "vPMEM" as name.
5. Restart the virtual machine
If you restart this virtual machine, you will see that the disk will still be present and no data has been lost.
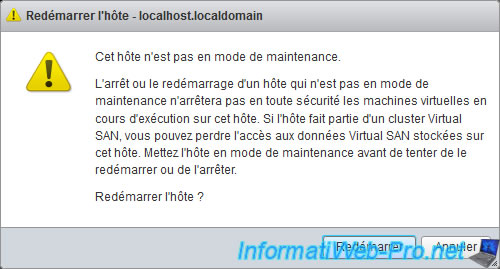
6. Restarting the nested (virtual) VMware ESXi hypervisor
Now, shut down your virtual machine and restart your nested (virtual) VMware ESXi hypervisor.

Confirm its restart.
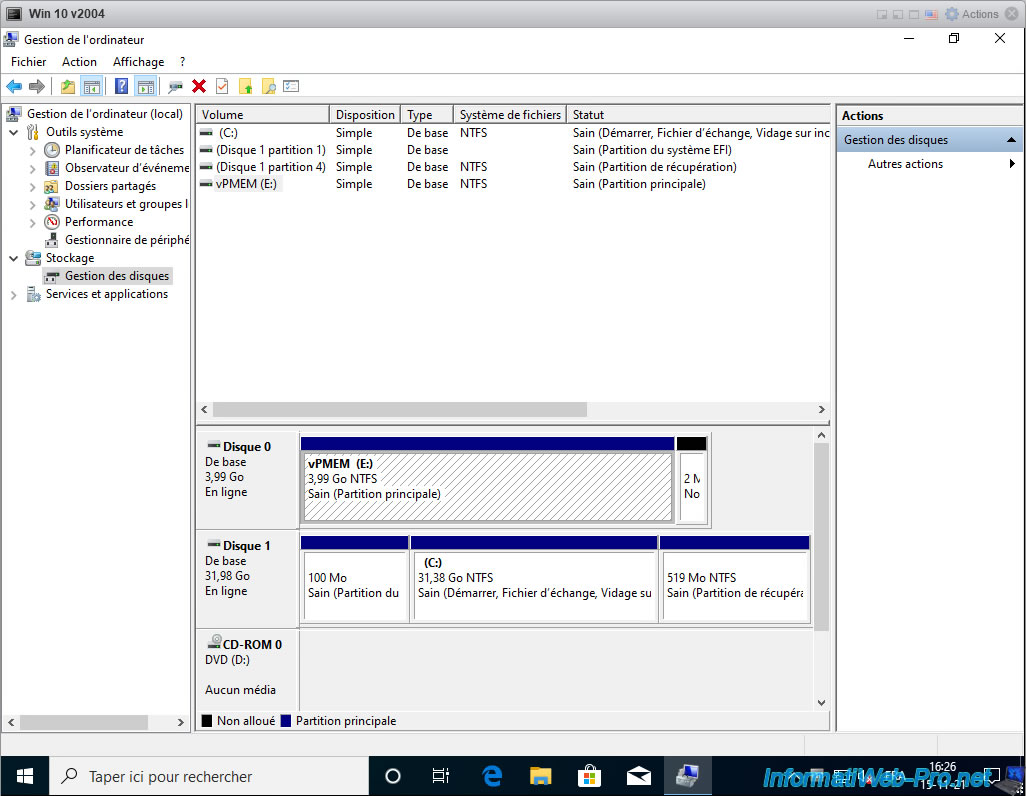
As you can see, persistent memory is still present on this nested (virtual) VMware ESXi hypervisor.
The "PMemDS -..." datastore is always present on this one.
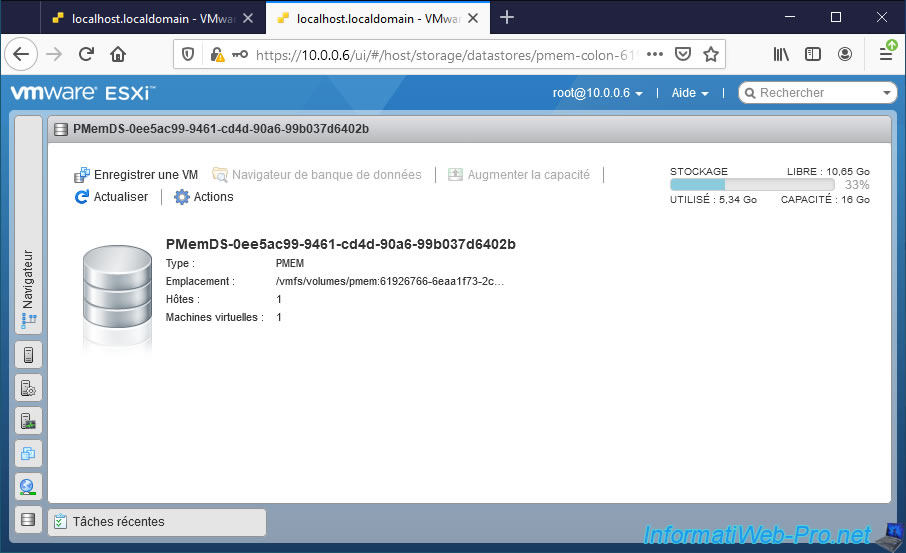
And if you click on its name, you will see that the identifier of this "PMemDS -..." datastore has not changed.
In addition, you can see that there is still space used by a virtual machine on this "PMemDS -..." datastore.
However, if you had simulated persistent memory directly on the virtual hypervisor, this datastore would have been erased.
More precisely, it would have disappeared and would have been recreated on restart with a different identifier.
The reason is simple, everything that is stored in the (virtual) persistent memory of this nested (virtual) hypervisor is stored in the persistent memory (simulated in our case) of the physical hypervisor.
As long as the physical server is not restarted, all data is therefore retained.
If you have persistent memory modules (PMem) in your physical server, data will never be lost.
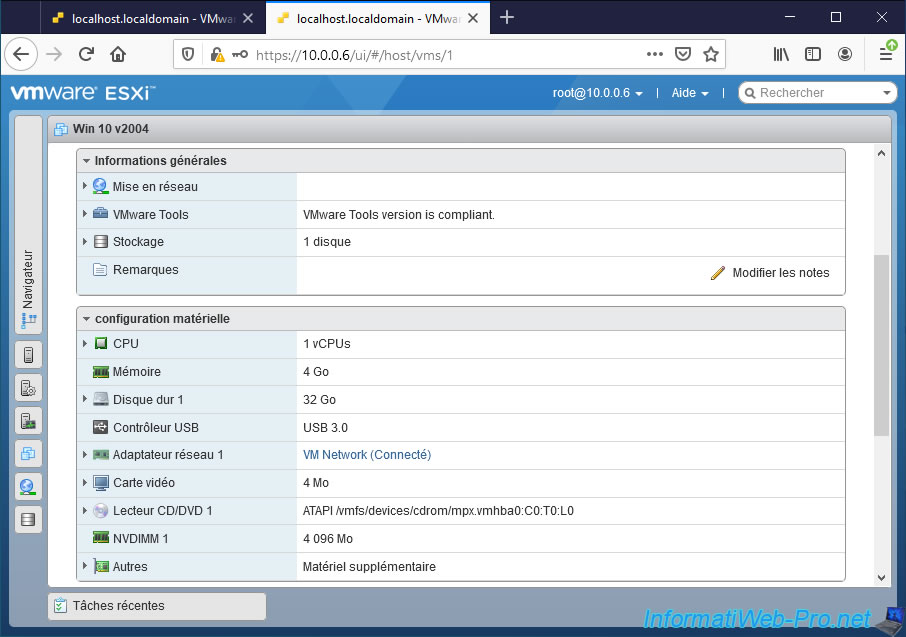
If you view the information of your "Win 10 v2004" virtual machine created on your nested (virtual) hypervisor, you will see that its "NVDIMM 1" module is still present and that it's still "4096 MB" in size.
This would not be the case if the persistent memory (PMem) had been simulated directly on this nested (virtual) hypervisor.
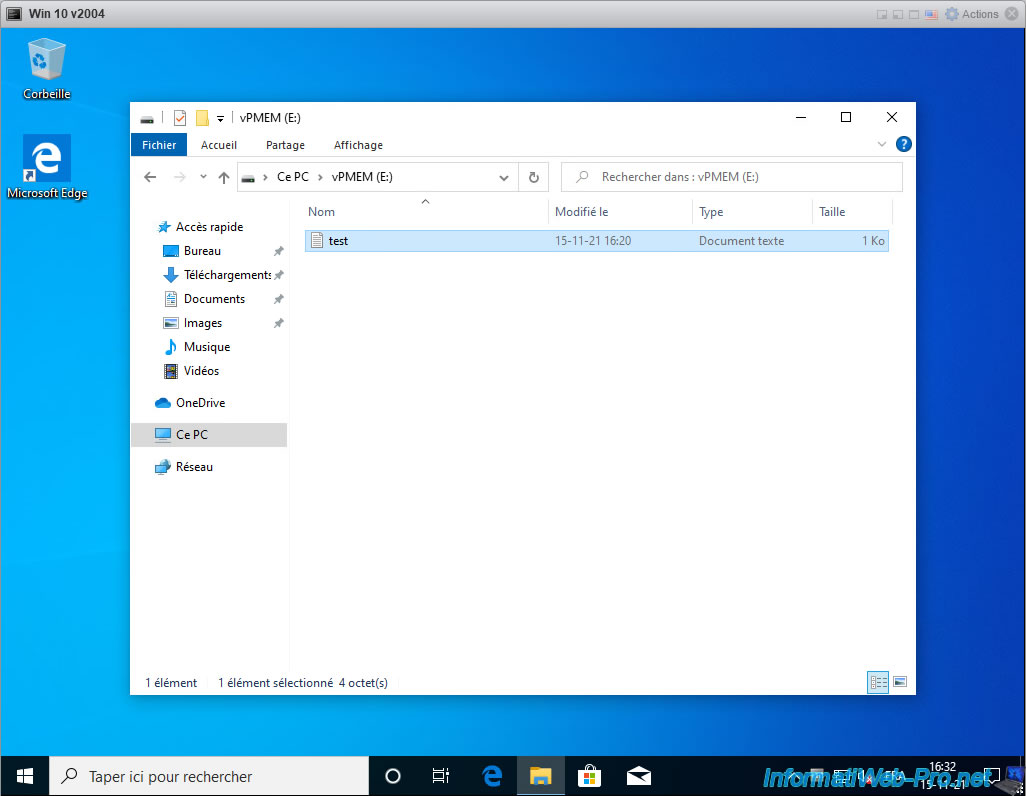
If you start this virtual machine, you will therefore see that the partition created previously on this disk is still present.

If you enter this partition, you will see that the data that were there are still there.
7. Persistent memory cleared when the physical server is restarted
If the persistent memory (PMem) used on your physical hypervisor is simulated persistent memory (PMem), then the persistent memory of your nested (virtual) hypervisor will be lost if you restart your physical server.
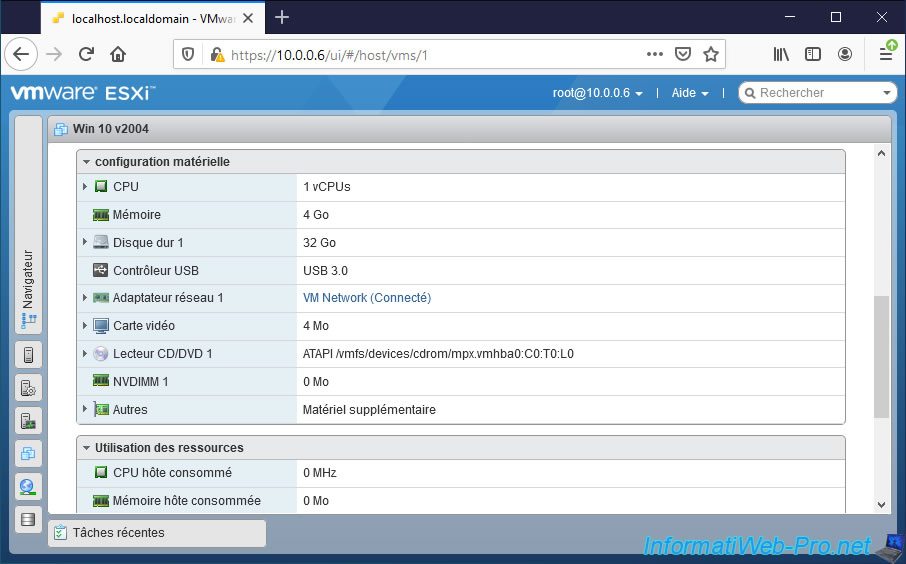
In this case, the NVDIMM will be 0 MB in size on the virtual machine created on your nested (virtual) hypervisor.
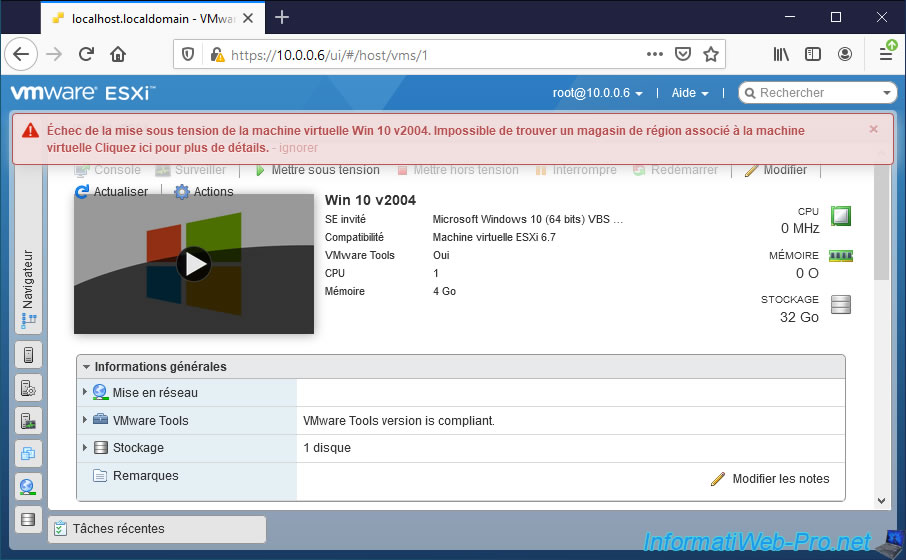
And the virtual machine will no longer be able to start and this error will appear :
Plain Text
Failed to power on virtual machine [VM name]. Unable to find a region store associated with the virtual machine. Click here for more details.
Share this tutorial
To see also
-
VMware 4/14/2023
VMware ESXi 6.7 - Best practices for creating a VM
-
VMware 2/17/2023
VMware ESXi 6.7 - Configure your virtual machines settings
-
VMware 6/2/2023
VMware ESXi 6.7 - Connect a smart card reader to a VM
-
VMware 10/19/2022
VMware ESXi 6.7 - DirectPath I/O (PCI passthrough)
You must be logged in to post a comment