- VMware
- 10 January 2025 at 09:13 UTC
-

- 1/4

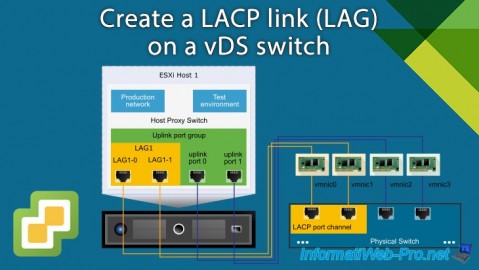
On VMware vSphere 6.7, you have the ability to increase network bandwidth and/or obtain fault tolerance by creating one or more LACP links.
Note that the LACP protocol was originally available on Cisco switches, but it is now also supported on other switch brands (including Netgear).
On VMware vSphere, you can create up to 64 LACP links per vDS virtual switch per host.
Source : Configuring a LAG on a vSphere Distributed Switch Port Group when using LACP.
Important : LACP support is only available on vSphere Virtual Distributed Switches (vDS).
- Create a vSphere Distributed Virtual Switch (vDS)
- Add hosts to your vDS virtual switch
- Create a LACP link (LAG) on VMware vSphere
- Create a LACP (LAG) link on a Netgear GS810EMX (Nighthawk SX10) switch
- Migrate network traffic to LAGs (LACP links)
- LACP link OK on the Netgear switch
- Errors visible on the host
- LACP link testing (LAG)
1. Create a vSphere Distributed Virtual Switch (vDS)
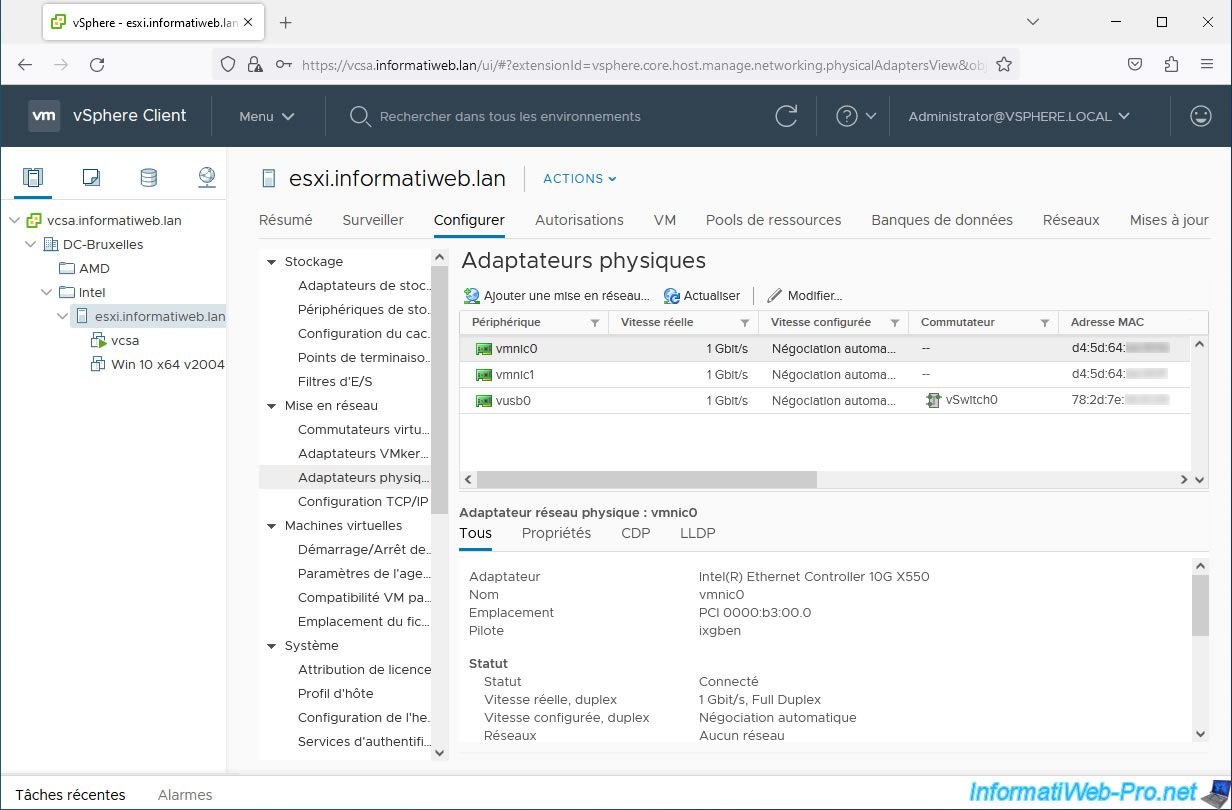
For this tutorial, we will create an LACP link using the 2 Ethernet network ports on our Asus motherboard.
As you can see, these are recognized as "Intel(R) Ethernet Controller 10G X550" and the driver used by VMware ESXi is "ixgben".
In this tutorial, you will see how to create a vDS switch for your virtual machines' network and create a LACP link between this vDS virtual switch and your physical switch (which must also support the LACP protocol).
Important : we do not recommend using USB network cards, even in the case of a lab.
Indeed, during an LACP test with another software solution, the LACP link never worked and this was only because of the use of network adapters connected via USB.
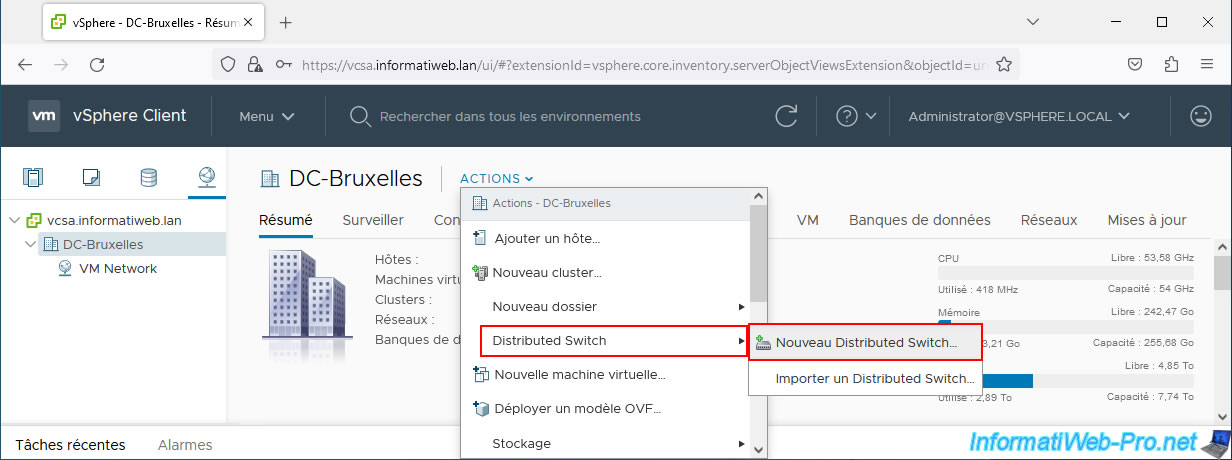
As indicated in the introduction to this tutorial, the LACP protocol is only supported on vDS virtual switches.
So, go to the network tab of the vSphere Client, select one of your data centers and click: Actions -> Distributed Switch -> New Distributed Switch.
Provide a name for your vDS switch.
For example: MyDSwitch.
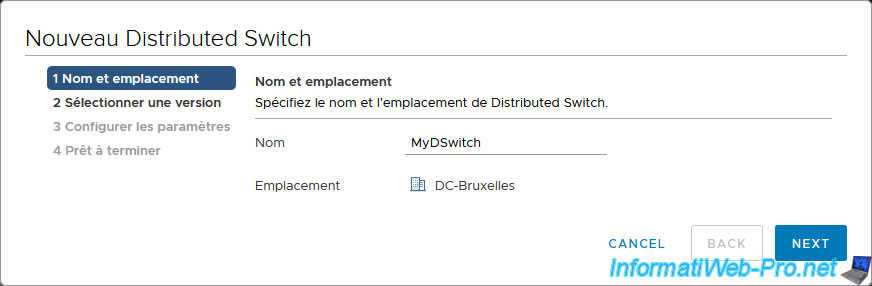
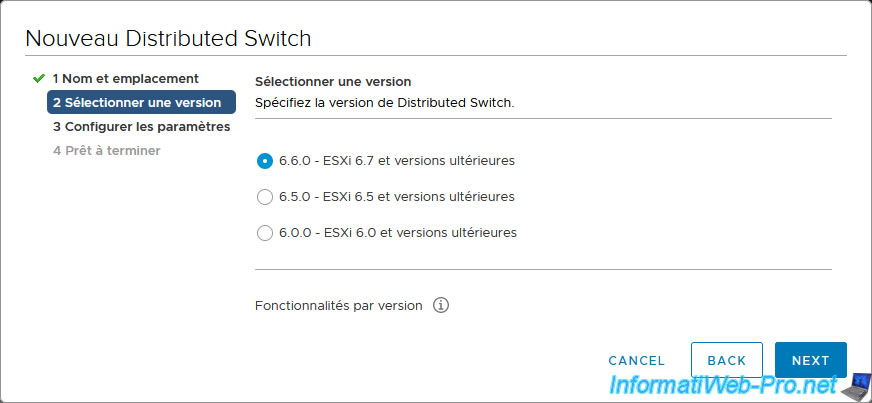
Leave the most recent version selected to benefit from all features.
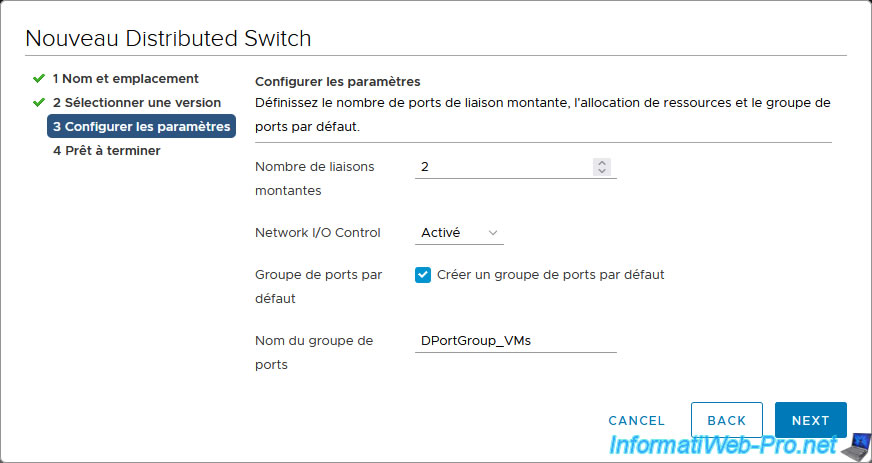
Configure your vDS switch settings like this:
- Number of uplinks: 2. In our case, we will use the 2 network ports on our motherboard.
- Network I/O Control: doesn't matter. It doesn't matter in this case.
- Default port group: Check the "Create a default port group" box to create a distributed port group on your vDS switch.
- Port group name: DPortGroup_VMs. This port group will be used by our virtual machines for network access.
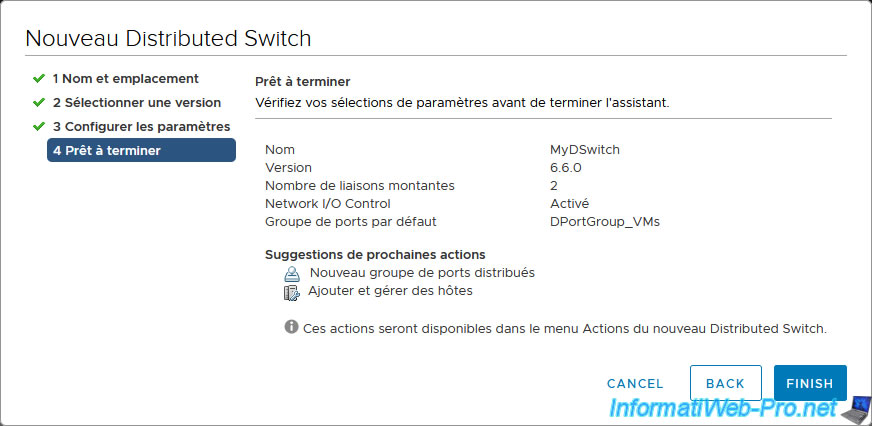
A summary of your vDS switch configuration appears.
Click Finish.
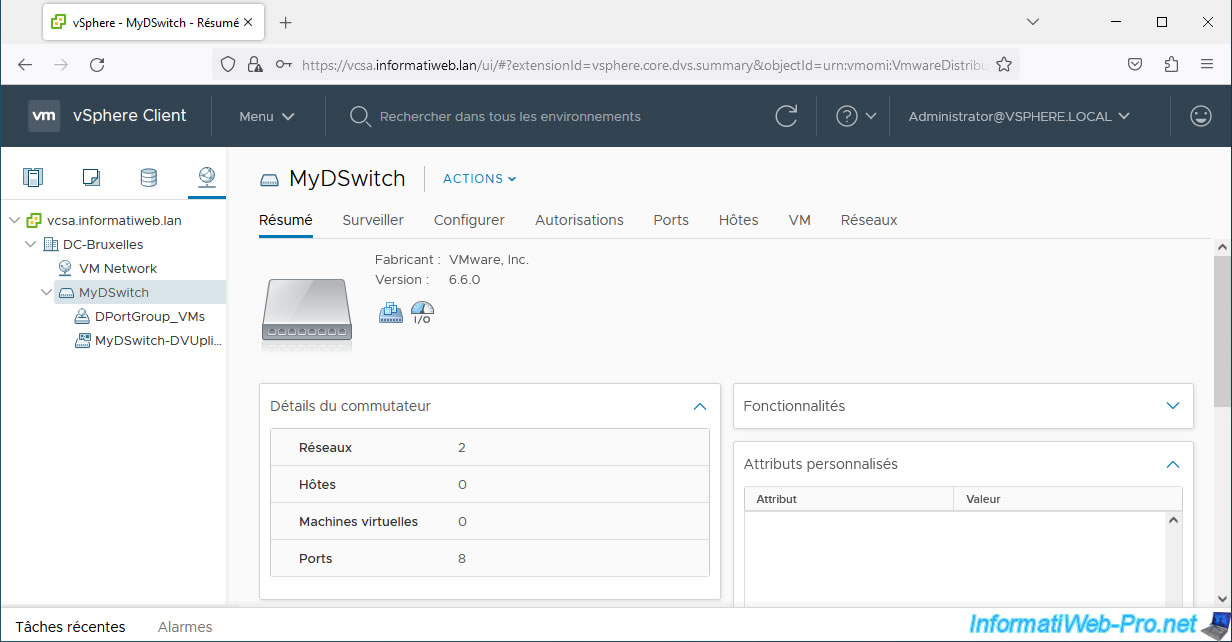
Your vDS virtual switch has been created.
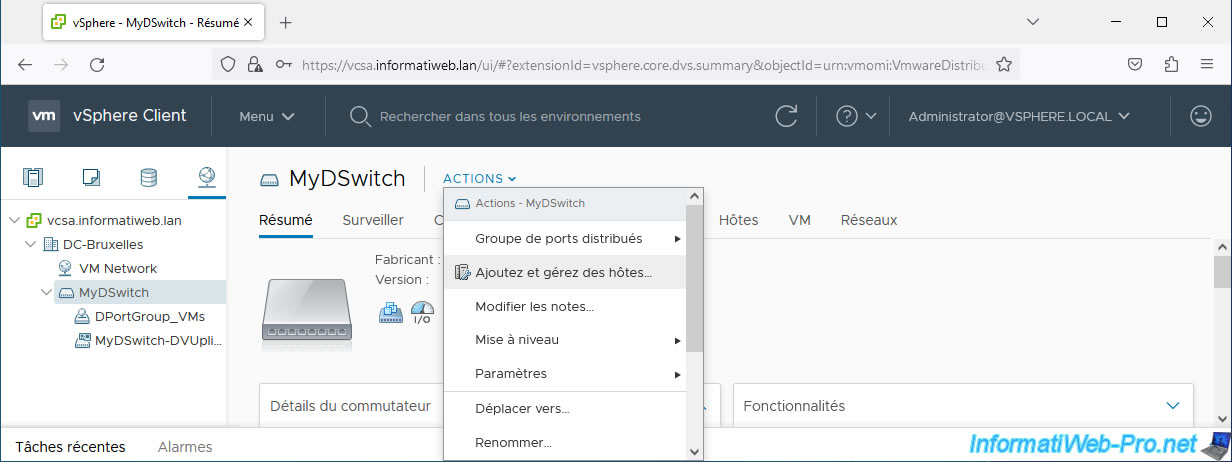
2. Add hosts to your vDS virtual switch
Currently, your vDS virtual switch is not used by any hosts.
To resolve this issue, click: Actions -> Add and Manage Hosts.
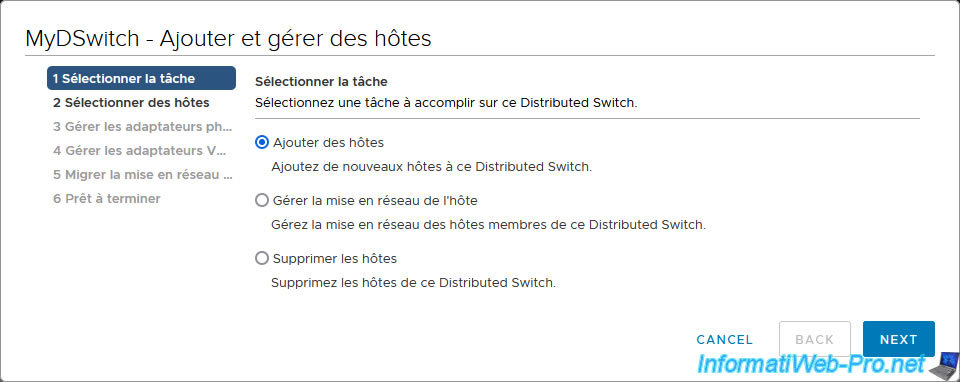
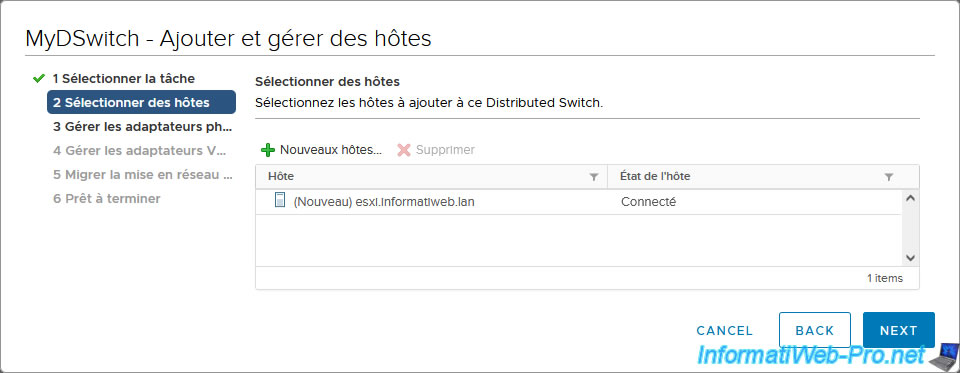
Select "Add hosts".
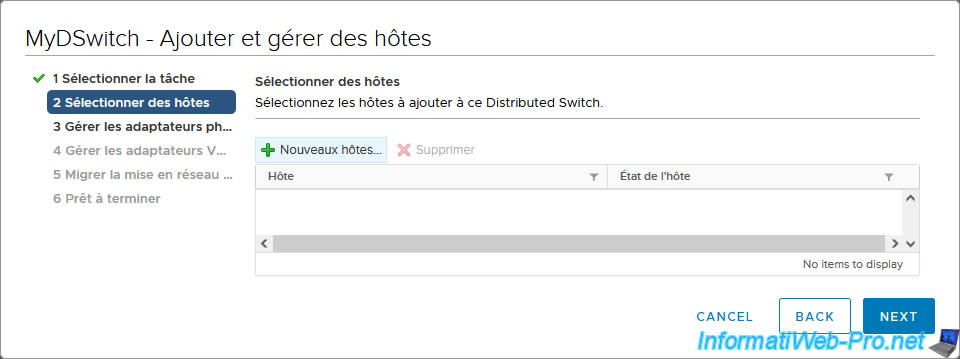
Click: New hosts.
Select the host(s) you want to add to your vDS switch.
In our case, we have only one in this case.
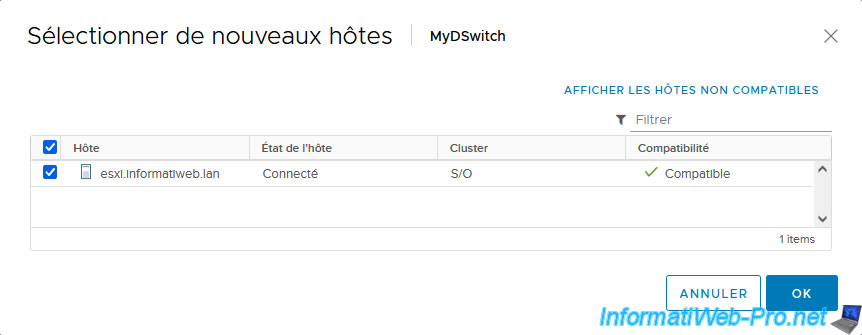
The desired host(s) appear in the list.
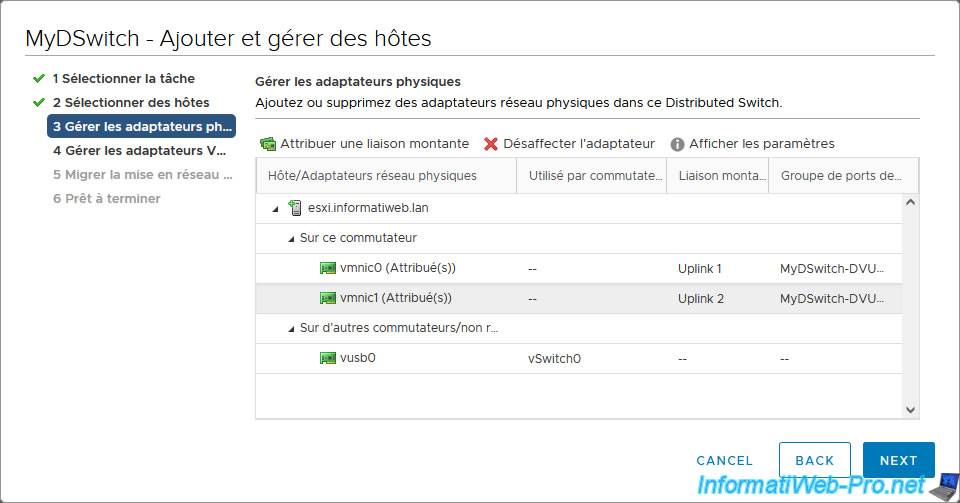
In step "3. Manage physical adapters", you will need to assign your 2 new network cards to an uplink of your vDS virtual switch.
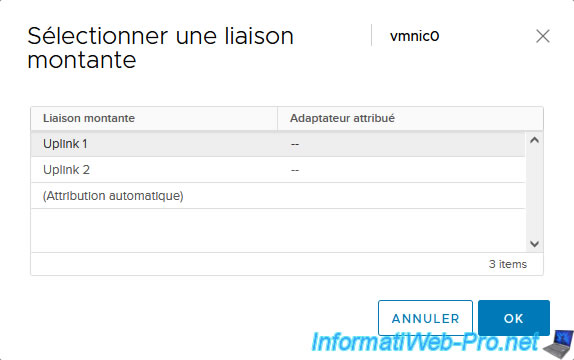
To do this, select a 1st physical network adapter (in our case: vmnic0) and click on: Assign uplink.
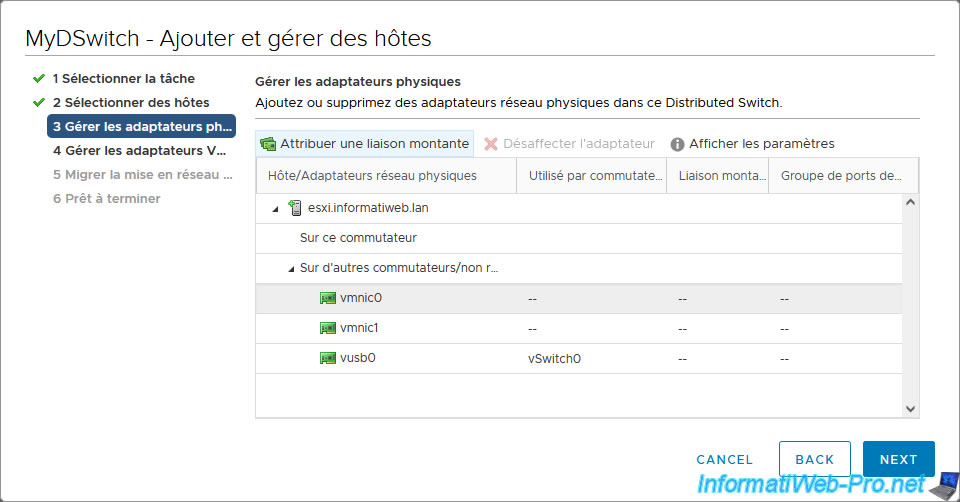
Select the uplink "Uplink 1" and click OK.
Now select the 2nd physical network adapter that will be part of the future LACP link and click again: Assign uplink.
Select the uplink "Uplink 2" and click OK.

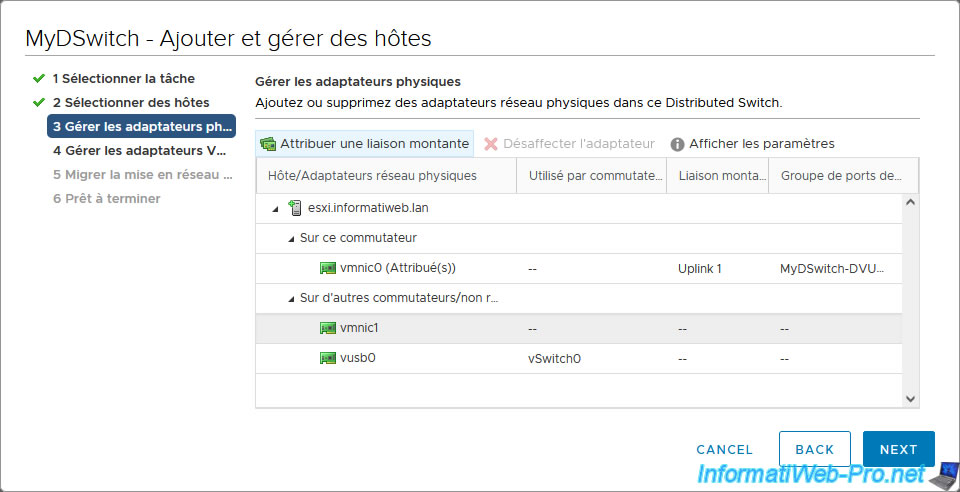
As expected, your 2 new physical network cards (vmnic0 and vmnic1 in our case) are assigned to the uplinks (Uplink) of your vDS virtual switch.
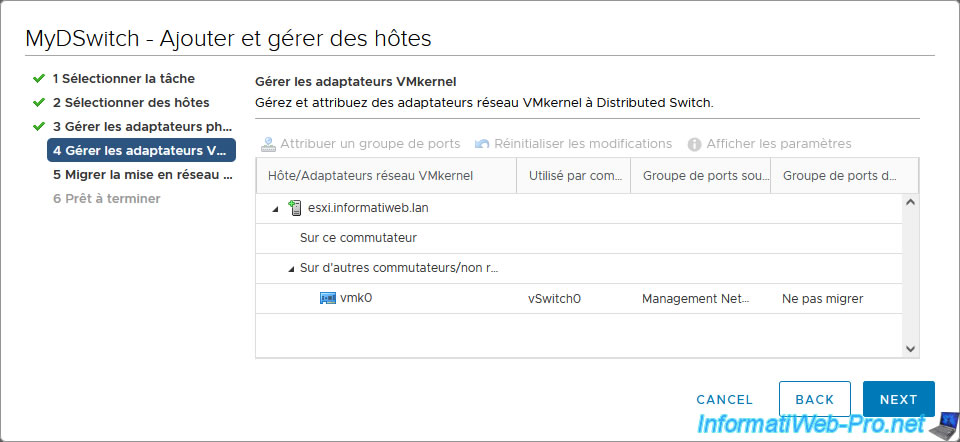
Skip the step about VMkernel adapters.
Indeed, in our case, we will use this vDS virtual switch only for the virtual machine network.
However, the VMkernel adapter "vmk0" visible here concerns the management network of your VMware ESXi host.
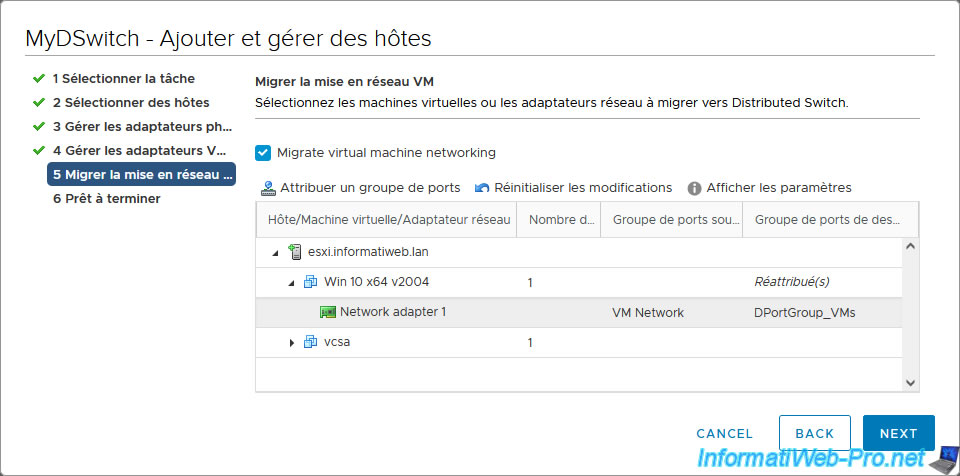
In the "Migrate VM networking" step, check the "Migrate virtual machine networking" box to migrate the network of one or more virtual machines.
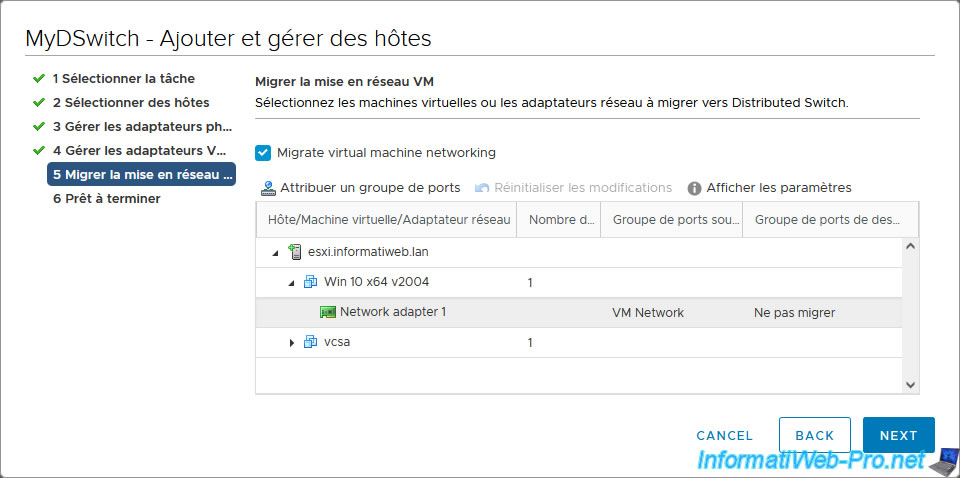
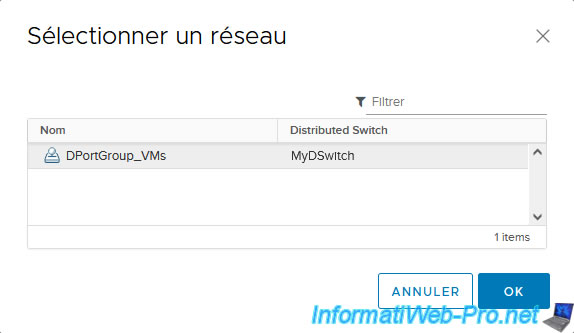
Next, select the virtual machine you want to migrate to your vDS virtual switch and click: Assign port group.
Select the port group for your vDS virtual switch and click OK.
In our case, the distributed port group: DPortGroup_VMs.
Do the same for the other VMs that you want to migrate if you wish.
Then, click Next.
Warning : do not migrate your "vcsa" virtual machine at this time otherwise the vSphere Client (hosted by VMware vCenter Server) risks becoming inaccessible.
Only migrate this virtual machine when the LACP link is correctly configured (if you want to migrate it).
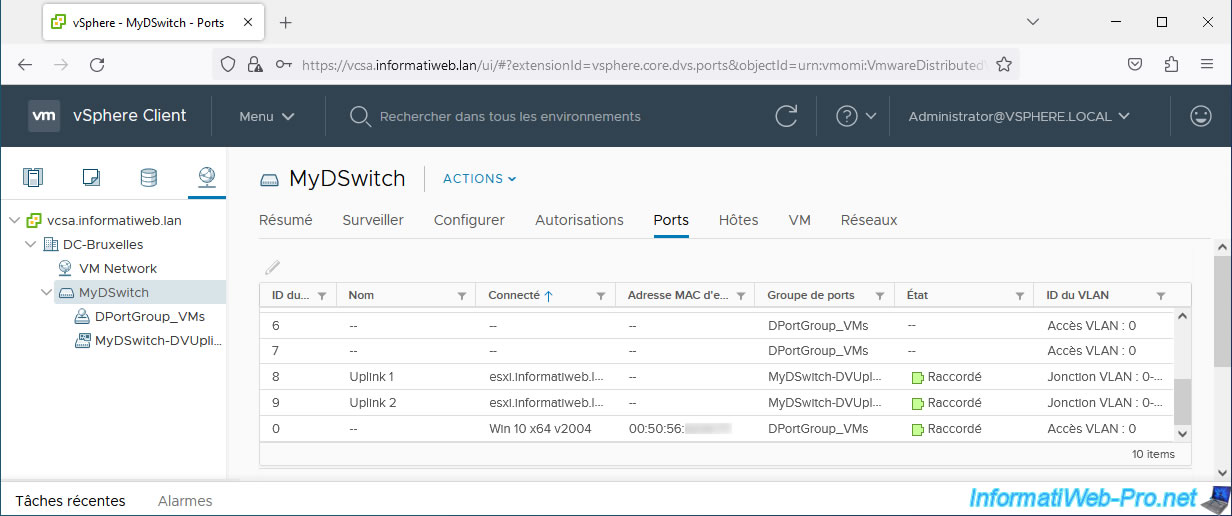
In the "Ports" tab of your vDS virtual switch, you will see that your host is connected on the uplinks (Uplink) of your vDS virtual switch and that your virtual machine is also connected on your vDS.
Share this tutorial
To see also
-
VMware 8/21/2024
VMware vSphere 6.7 - Add a VMkernel interface
-
VMware 8/2/2024
VMware vSphere 6.7 - Collect logs with SexiLog
-
VMware 8/9/2024
VMware vSphere 6.7 - Collect logs with VMware Aria Operations for Logs
-
VMware 1/24/2025
VMware vSphere 6.7 - Create a network protocol profile
You must be logged in to post a comment