Create a LACP link (LAG) on a vDS switch on VMware vSphere 6.7
- VMware
- VMware vCenter Server (VCSA), VMware vSphere
- 10 January 2025 at 09:13 UTC
-

- 3/4
5.2. Reassign physical adapters to LAG ports
Next, you need to reassign the hosts' physical adapters to the LAG ports.
To do this, click on the link: Add and Manage Hosts.
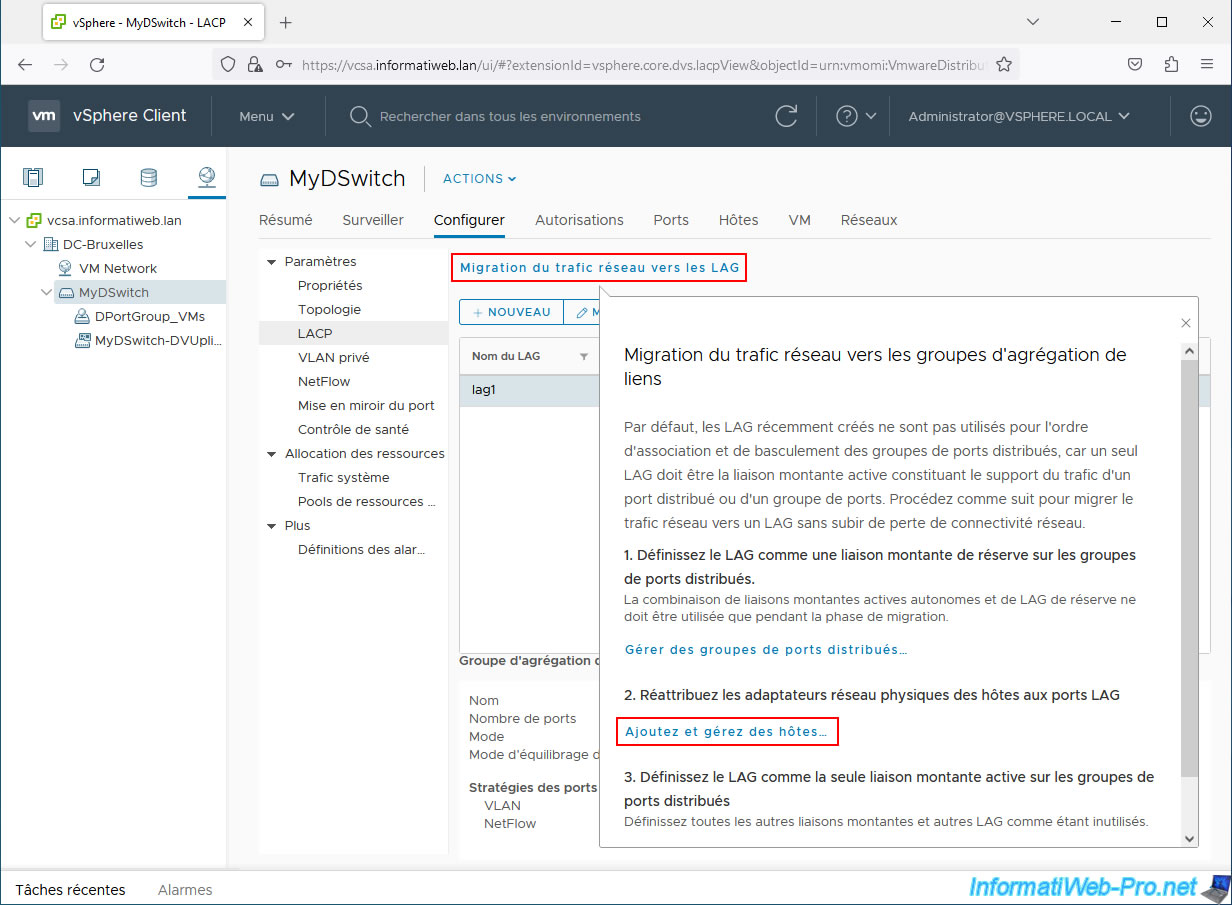
In the "[vDS switch name] - Add and Manage Hosts" wizard that appears, select "Manage host networking" and click Next.
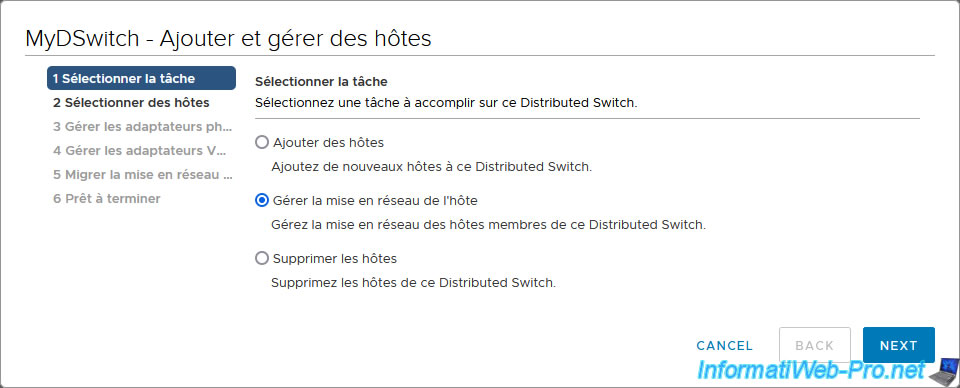
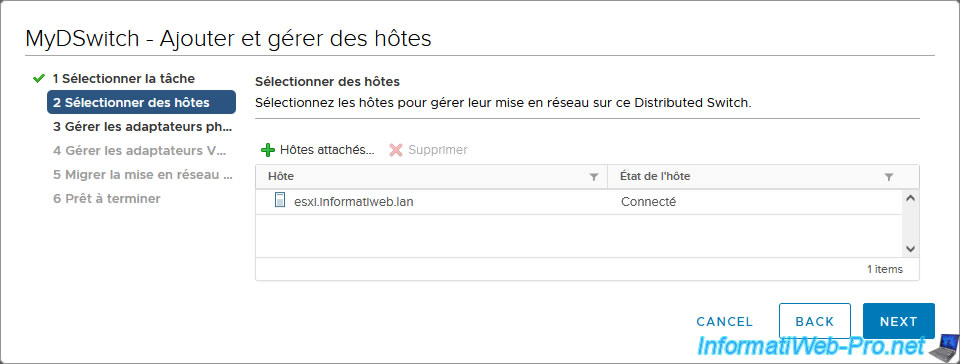
Click “Attached hosts” to add hosts.
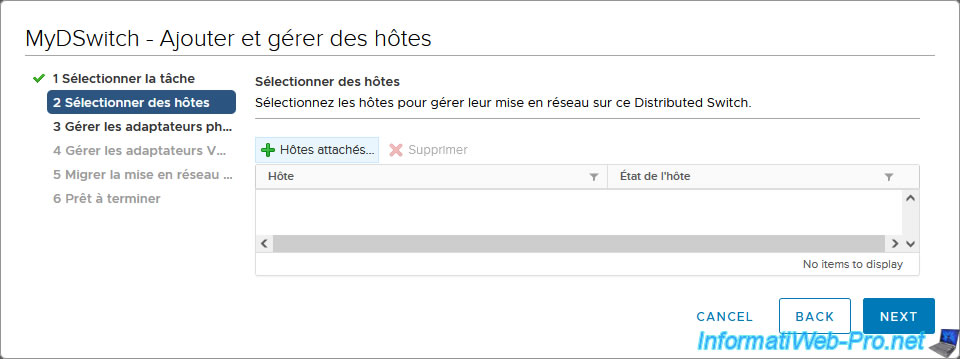
Select the host affected by the LACP link (LAG) to configure.
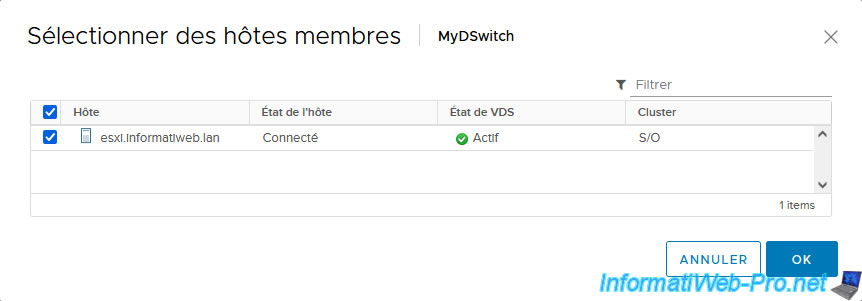
The desired host appears.
Click Next.
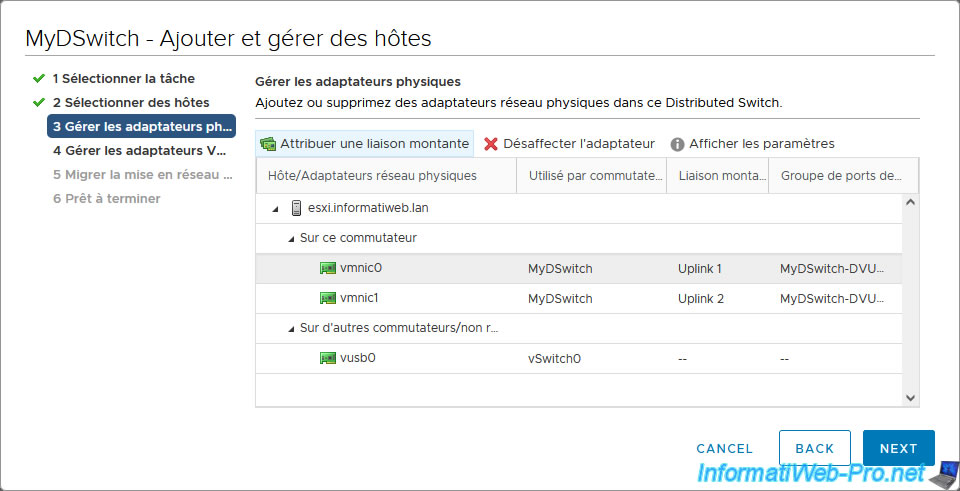
Previously, we added physical network adapters "vmnic0" and "vmnic1" to our vDS switch by assigning them to uplinks "Uplink 1" and "Uplink 2" respectively.
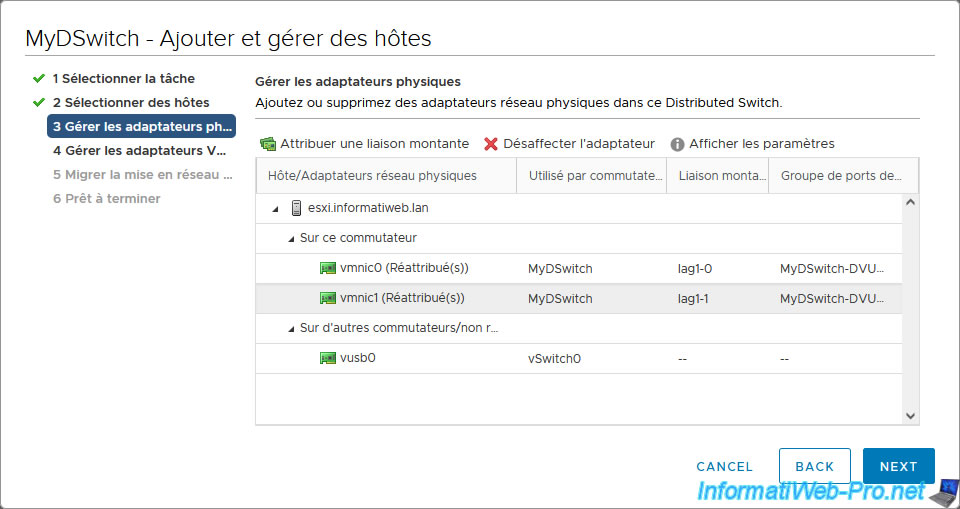
This time, you need to reassign the same physical network adapters, but to the uplinks corresponding to the previously created LAG.
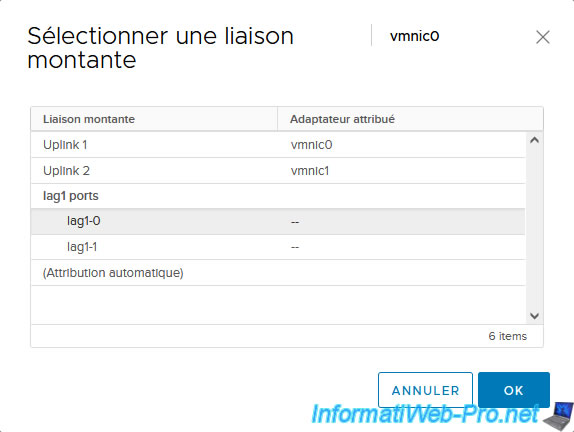
To do this, select one of the physical network adapters (in our case: vmnic0) and click: Assign uplink.
This time, select the "lag1-0" uplink and click OK.
Next, select the other physical network adapter (in our case: vmnic1) and click again: Assign uplink.
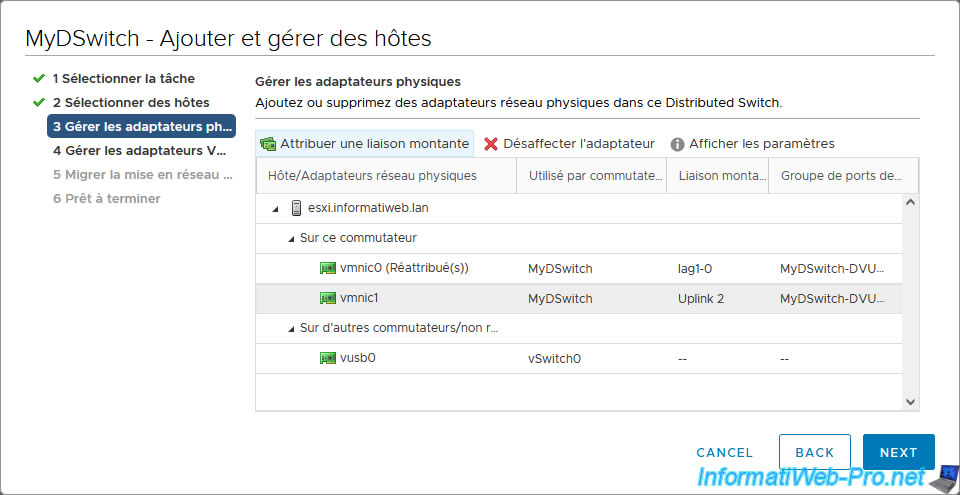
This time, select the "lag1-1" uplink and click OK.
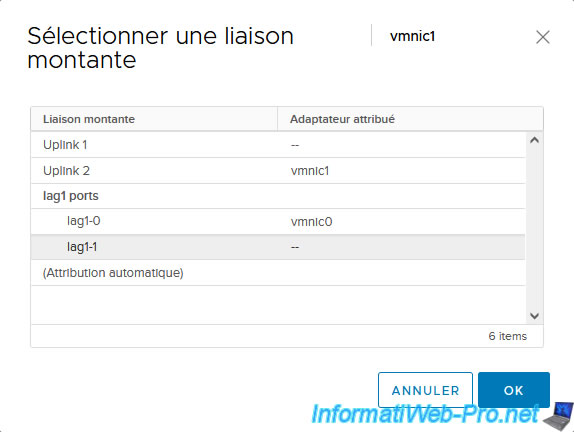
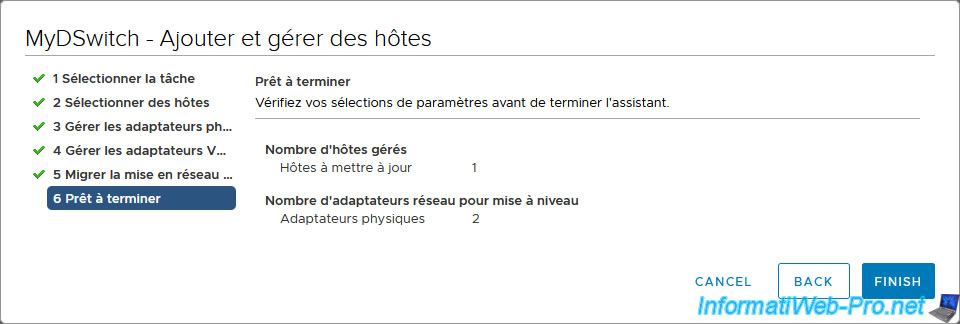
Once the physical network adapters are reassigned to the ports on your LAG, click Next.
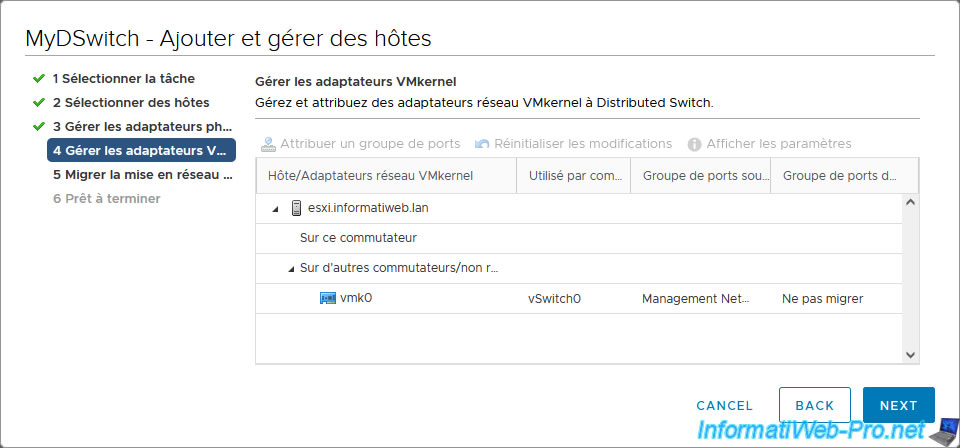
Skip VMkernel adapter migration.
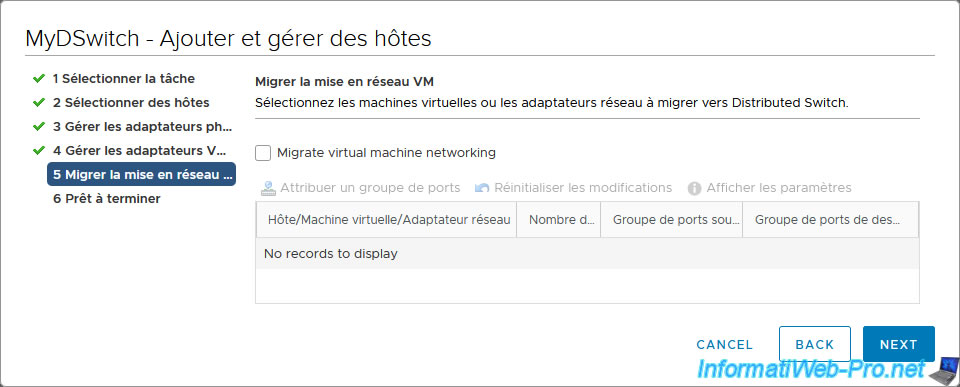
Also skip the network migration of the VMs since we have already migrated the VMs to the distributed port group of our vDS switch previously.
Click Finish.
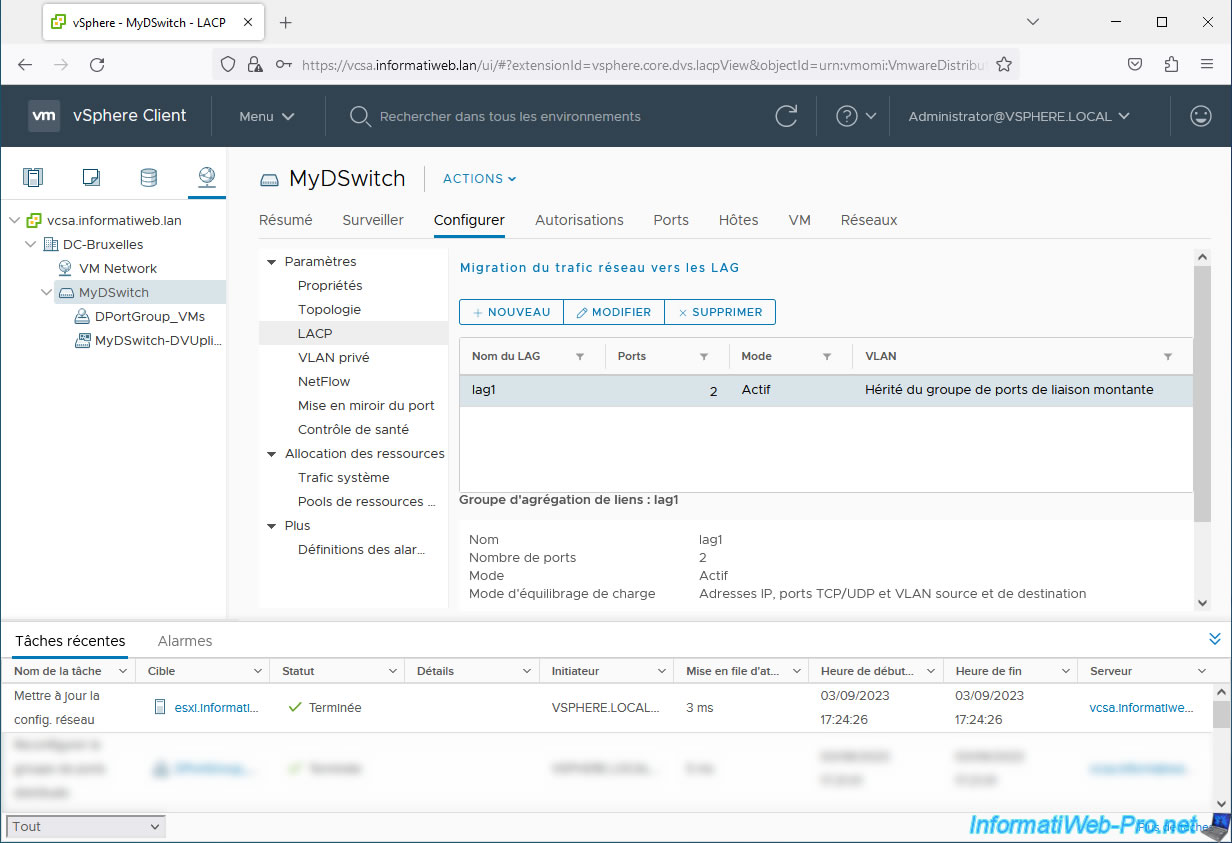
The "Update Network Conf." task appears at the bottom of the page.
5.3. Set only LAG as active uplink on distributed port group
To finish migrating network traffic to your LAG, you must set the LAG as the only active uplink on the distributed port group.
To do this, the vSphere Client offers you a link: Manage Distributed Port Groups.
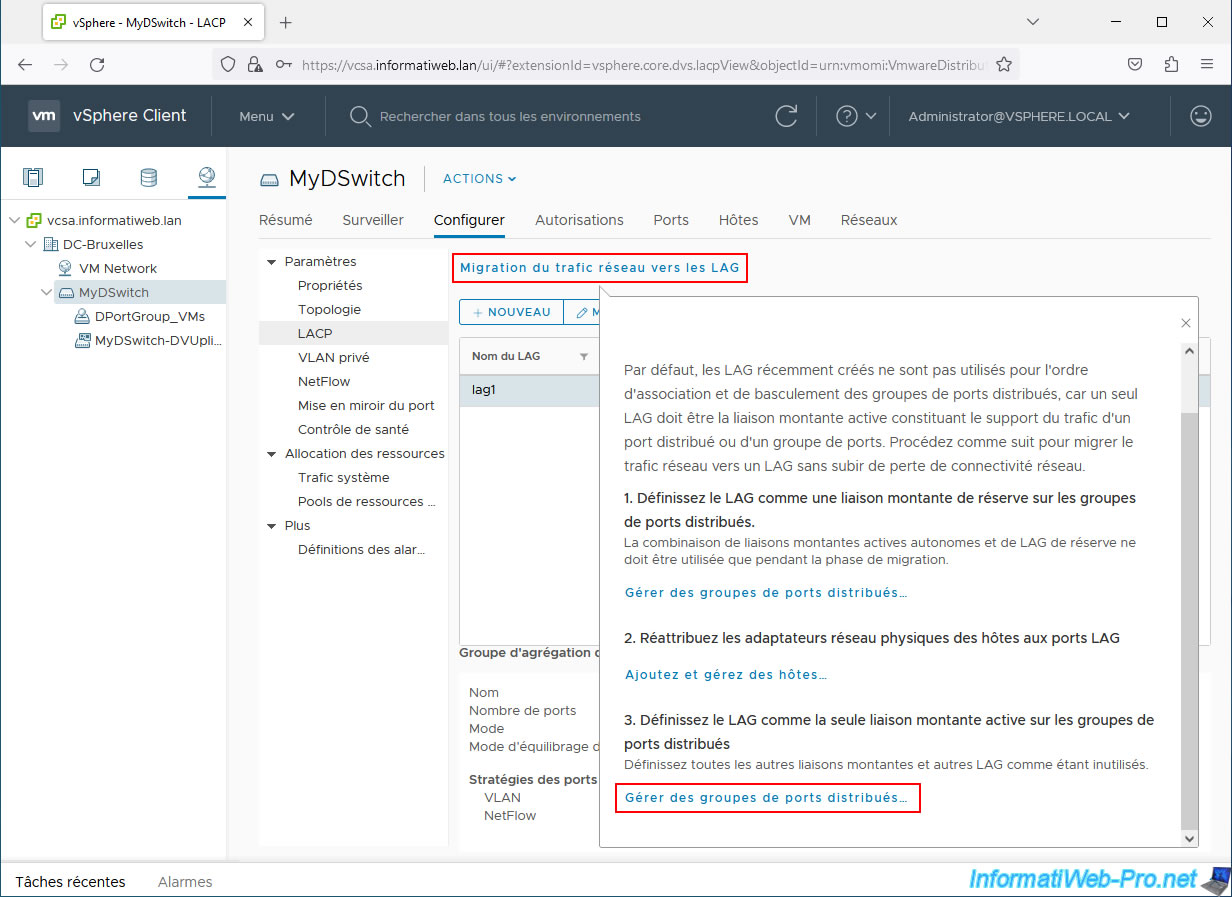
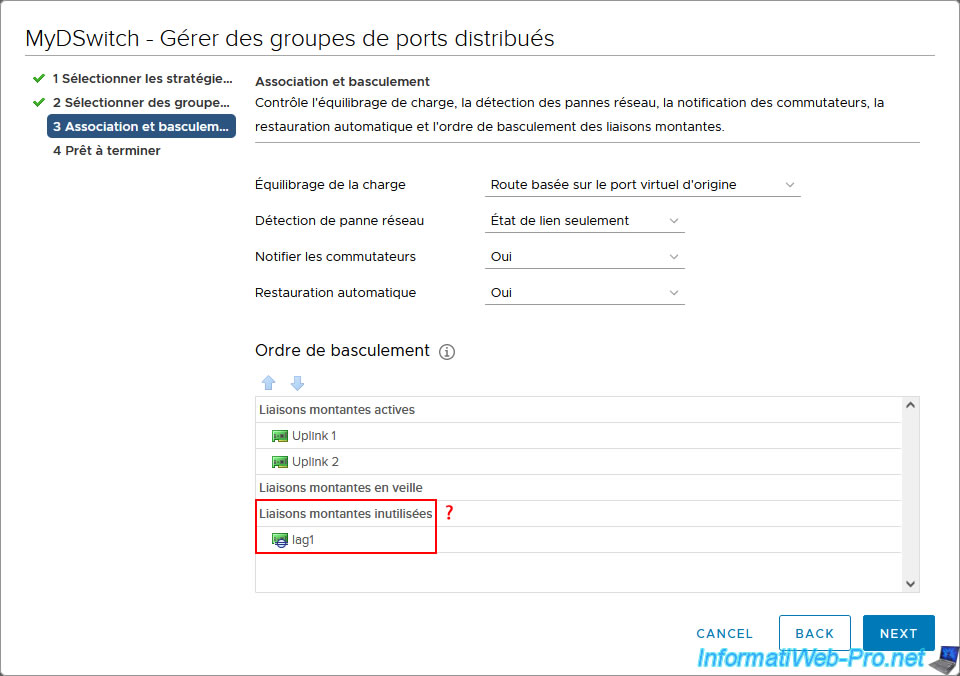
The problem is that if you go through this link, the vSphere client will show you that your LAG is not used on your distributed port group.
Whereas you had defined it as "standby uplink" earlier.
If you go to "Configure -> Settings -> Topology" and click on the name of your distributed port group, you can see that the uplinks used are always the "Uplink 1" and "Uplink 2".
Which is normal since these are the uplinks that are set as active at the moment on your distributed port group.
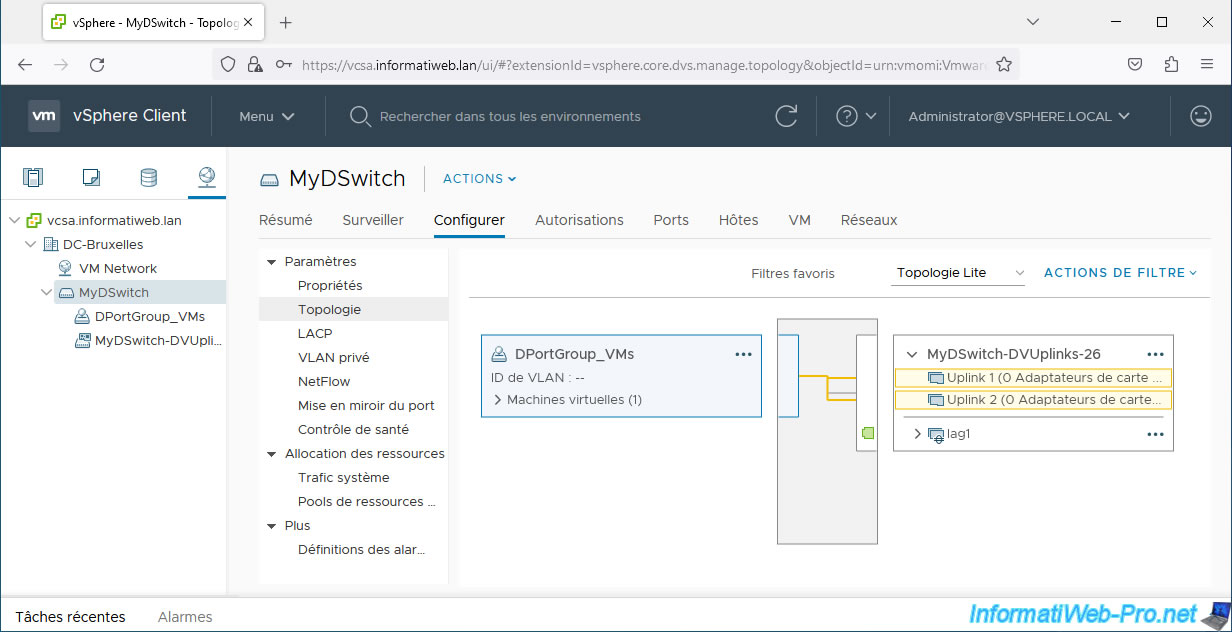
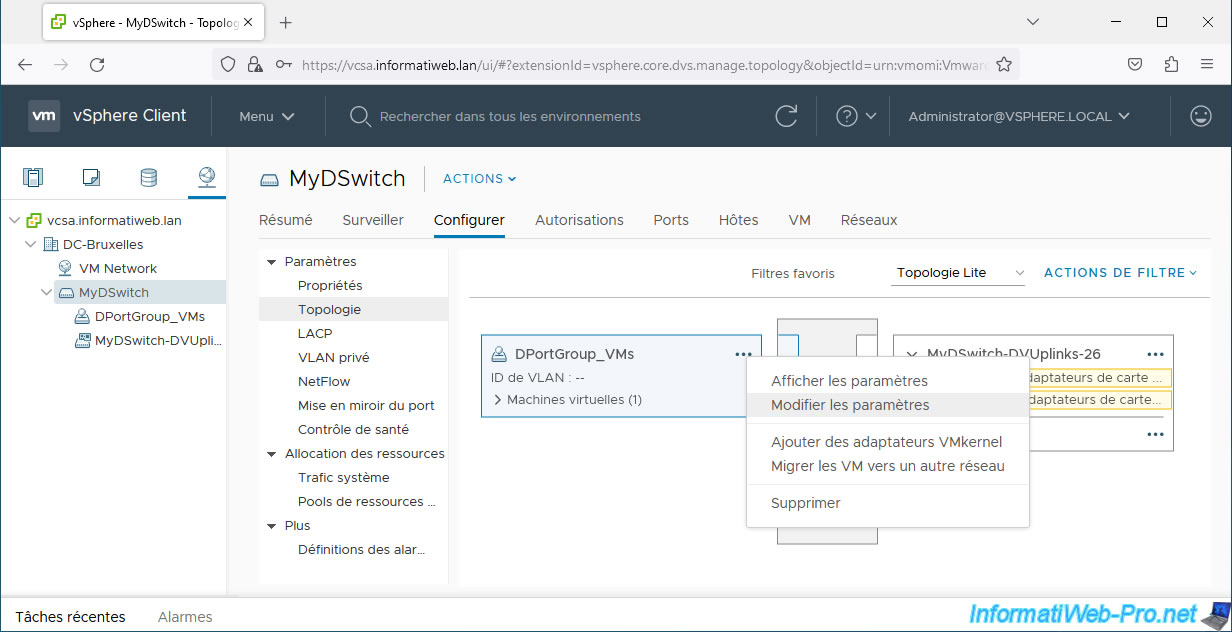
Click on the "..." icon of your distributed port group and click: Edit Settings.
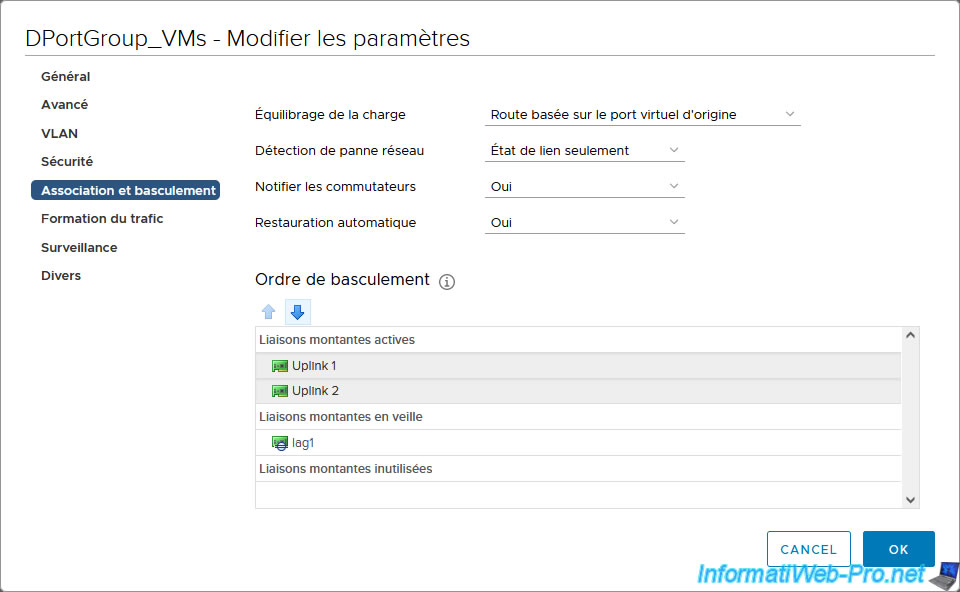
In the "Teaming and failover" section of your Distributed Port Group settings, you will see that your LAG (lag1 in our case) is indeed set as "Standby uplink" at the moment.
Select the "Uplink 1" and "Uplink 2" uplinks and click the "down" arrow to move them down to the "Unused uplinks" section.
Uplinks "Uplink 1" and "Uplink 2" are now unused.
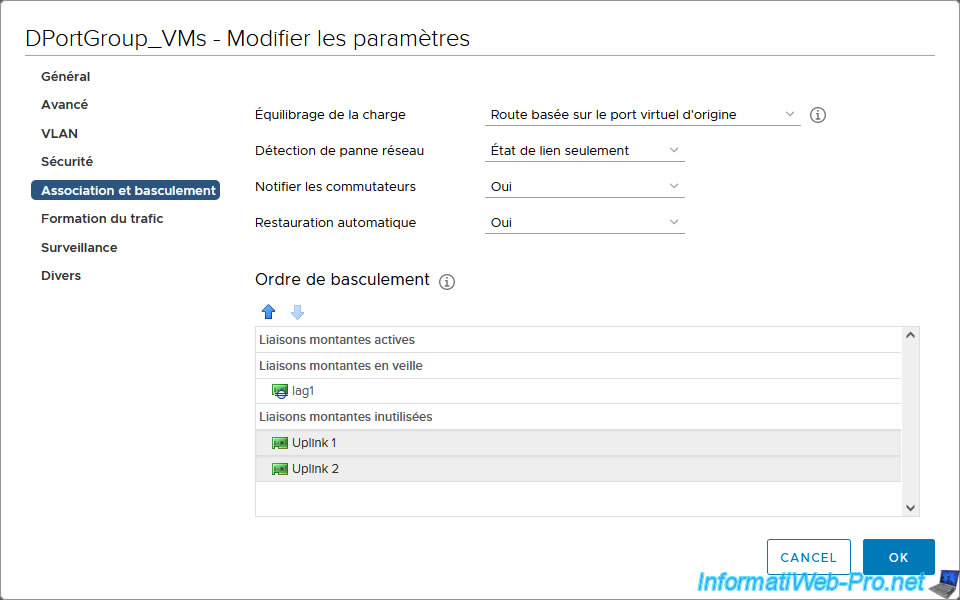
Select the "lag1" uplink (which is currently sleeping) and click the "up" arrow to move it up to the "Active uplinks" section.
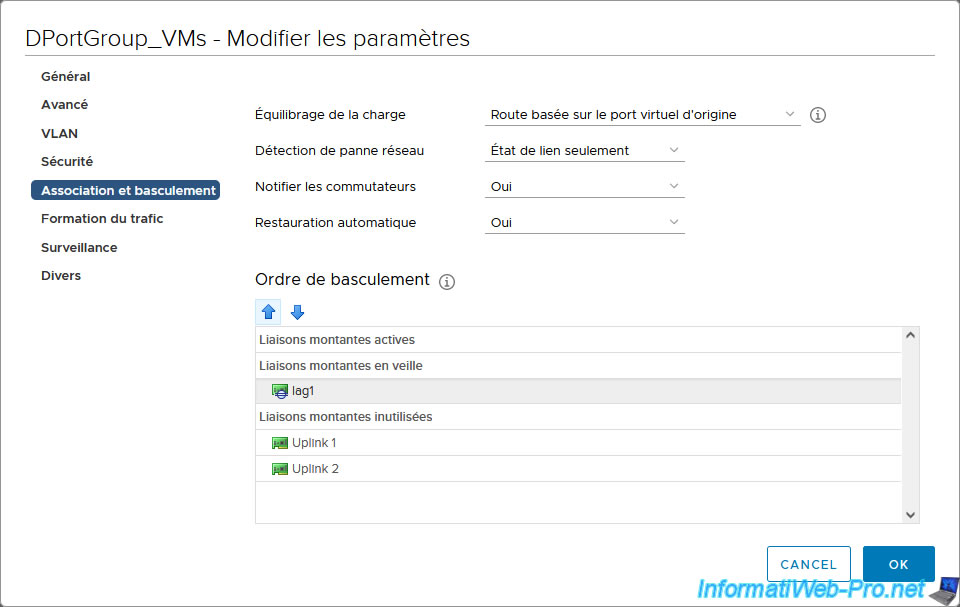
Now, as requested by the vSphere client, the only active uplink is your LAG (lag1 in our case).
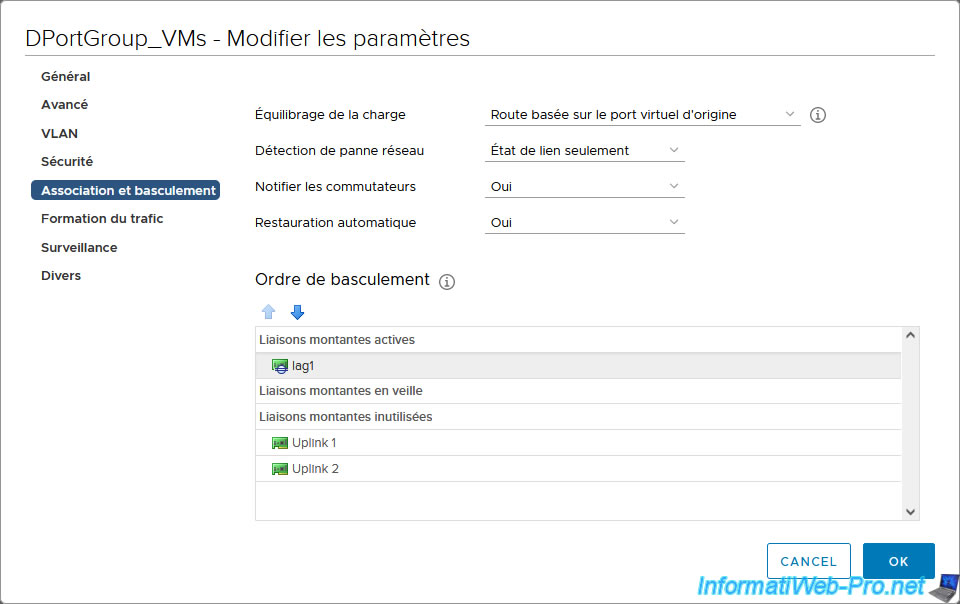
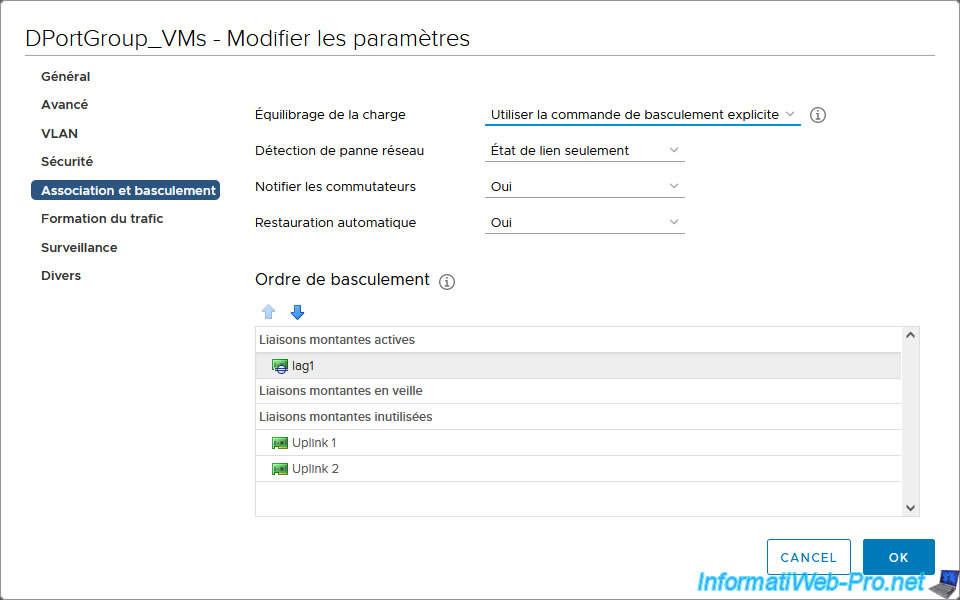
As shown in the official VMware video when migrating network traffic to a LAG, you need to change the load balancing method to "Use explicit failover order" (to use the method defined on the previously created LAG).
Source : Link Aggregation Groups - VMware vSphere Distributed Switch - VMware - Youtube.
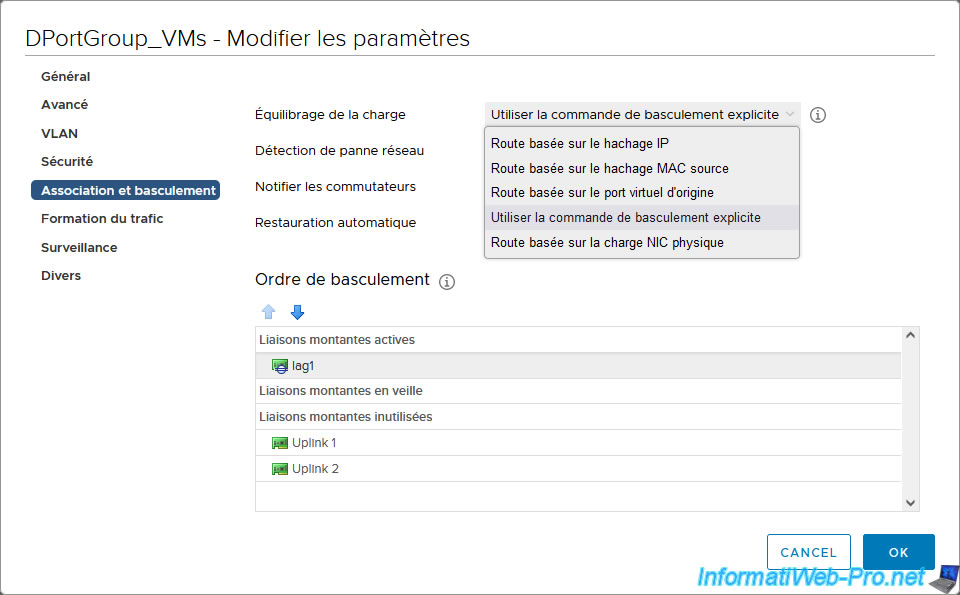
Click OK.
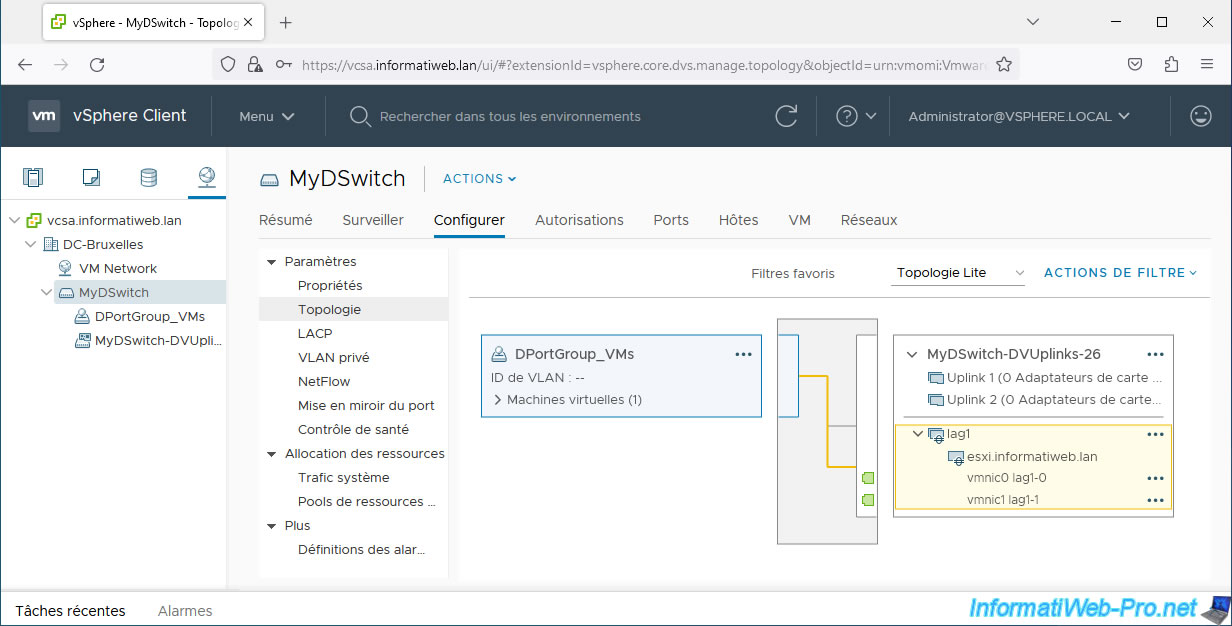
Return to your vDS switch's network topology and click again on the name of your distributed port group.
As you can see, the only uplink in use is now your LAG (lag1 in our case).
Which corresponds in our case:
- to the physical network adapters "vmnic0" and "vmnic1" of our VMware ESXi host.
- to ports “lag1-0” and “lag1-1” of our LAG created on vSphere.
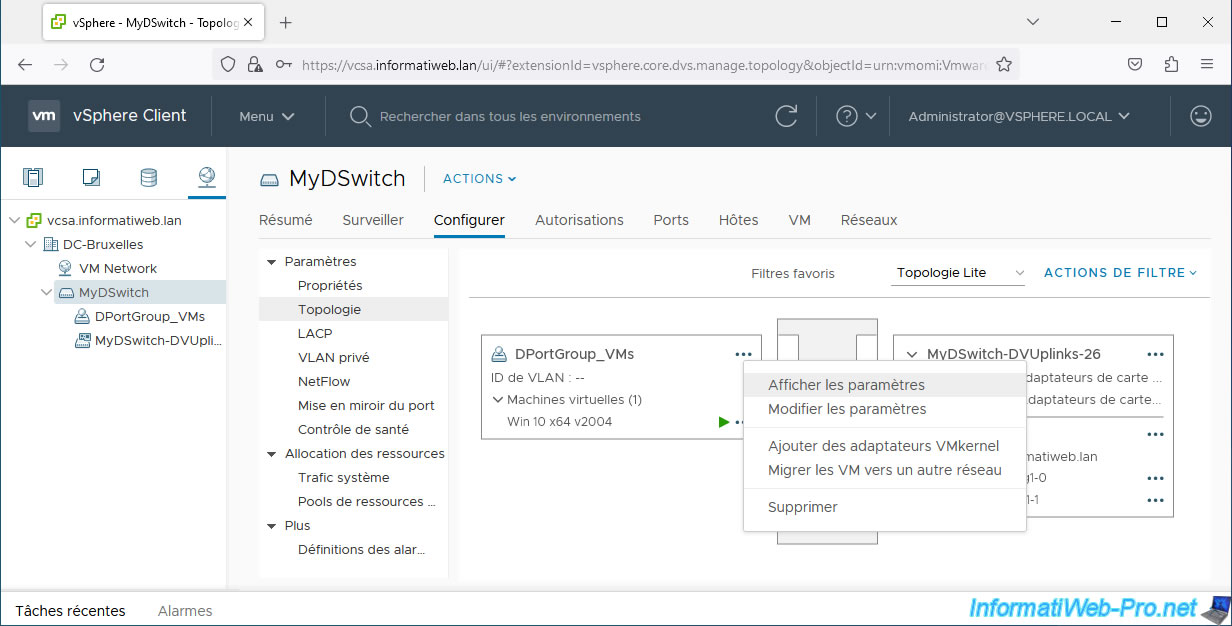
You can also check the configuration of your distributed port group by clicking on its "..." icon, then on: View Settings.
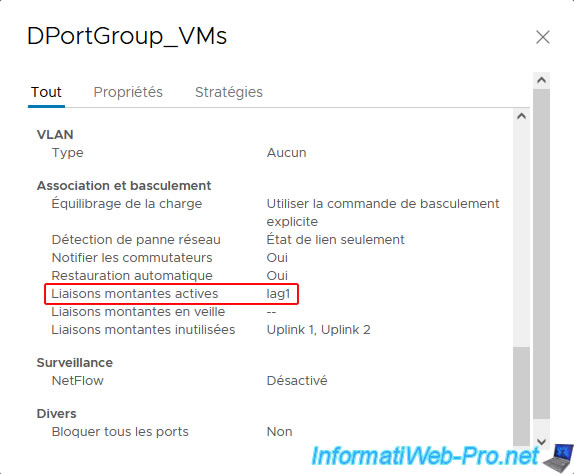
As you can see :
- active uplinks are: lag1.
- unused uplinks are: Uplink 1, Uplink 2.
Share this tutorial
To see also
-

VMware 9/23/2022
VMware ESXi 6.7 - Make virtual machines unique
-

VMware 6/15/2022
VMware ESXi 7.0 / 6.7 - Enable SSH protocol
-

VMware 3/7/2025
VMware vSphere 6.7 - Enable vSphere FT on a cluster
-

VMware 8/7/2024
VMware vSphere 6.7 - Secure access to SexiLog (HTTPS)

No comment