- VMware
- 04 June 2024 at 15:13 UTC
-

- 1/2

As a system administrator (or virtualization administrator, in this case), you will often be called upon to perform such or such modification on a server, a router, ...
In the case of VMware ESXi, as with other technologies (including Active Directory), it's possible to create additional users with limited rights to be able to delegate some common tasks without giving them too many rights.
To delegate some tasks to people you trust (whether managers or employees), you will always need to use a combination of 3 elements : user accounts, roles and permissions.
In this tutorial, you will see how to add, edit and delete each of these items and how to configure them on different types of objects (host server, virtual machines, storage or port group).
- Manage roles
- Manage users
- Manage permissions on different objects
- Grant privileges to users on objects through roles
- Test configured permissions
1. Manage roles
To be able to grant such or such right to a user on such or such object, VMware ESXi uses a role system.
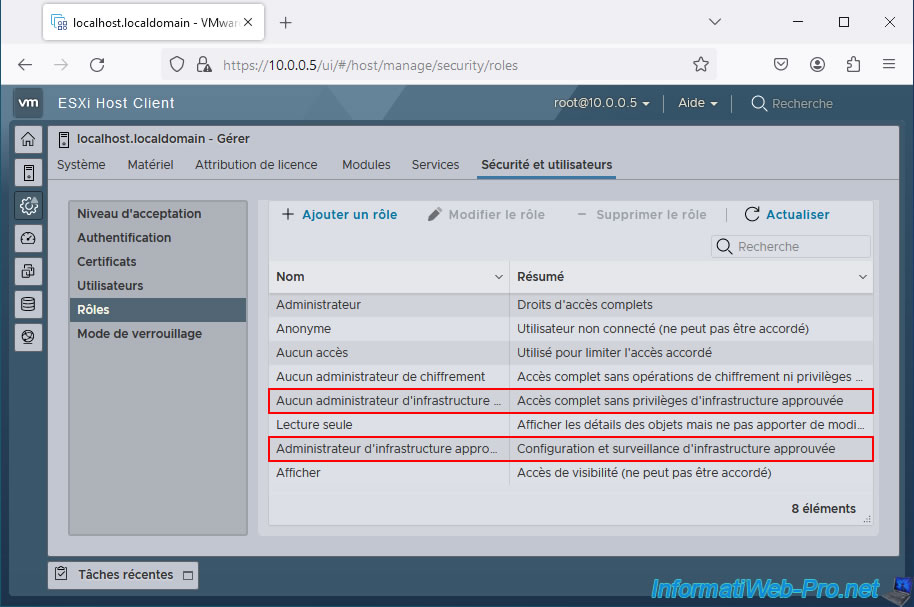
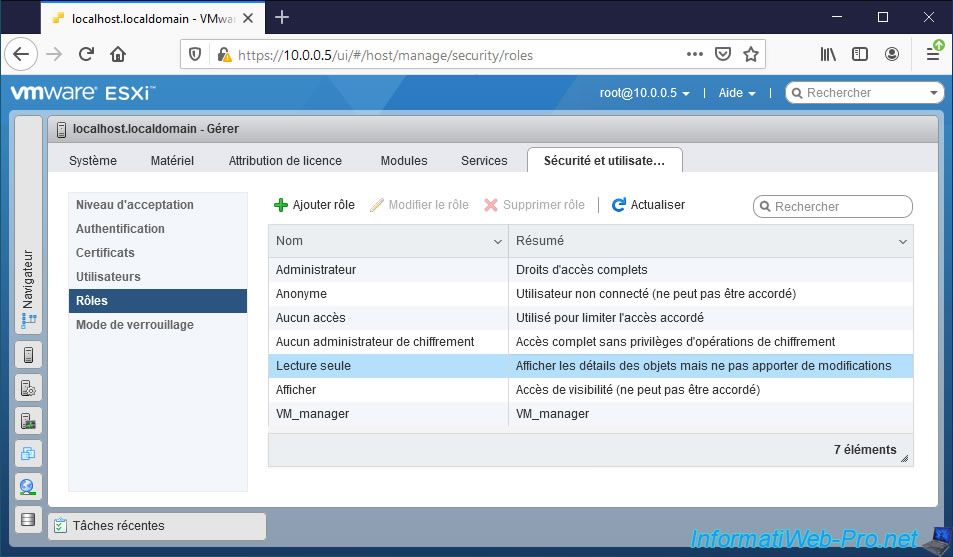
To see the list of roles available by default, go to : Host -> Manage -> Security & users -> Roles.
As you can see, by default, VMware ESXi provides different roles :
- Administrator : allows you to give all rights to a user on an object (whether it's the entire hypervisor, or a specific virtual machine, or any other object).
- Anonymous : corresponds to the rights possessed by an unconnected "user". Note that this right can't be granted and that it will therefore not be visible in the "Actions -> Permissions" menu of the desired objects.
- No access : allows you to limit (remove) the rights that a user had on a child object thanks to the rights that you would have granted him on a parent object.
- No cryptography administrator : has almost the same rights as the "Administrator" role except for encryption operations which will not be possible with this role.
- Read-only : allows you to see various information (depending on the object concerned), but the user will not be able to make any changes to the objects concerned.
- Show : similar to the previous role (Read-only), but with the difference that this role can't be granted. It will therefore not be visible from the window for managing permissions on the desired object.

Since VMware ESXi 7, you will find these 2 new roles in the list of available roles:
- No Trusted Infrastructure administrator: allows you to grant all rights on the vCenter Server (except the rights necessary for calls to the vSphere Trust Authority APIs).
- Trusted Infrastructure administrator: allows you to configure and manage a vSphere Trust Authority deployment.
Sources :
- Trusted Infrastructure Administrator Privileges - VMware Docs
- Prerequisites and Required Privileges for vSphere Trust Authority - VMware Docs
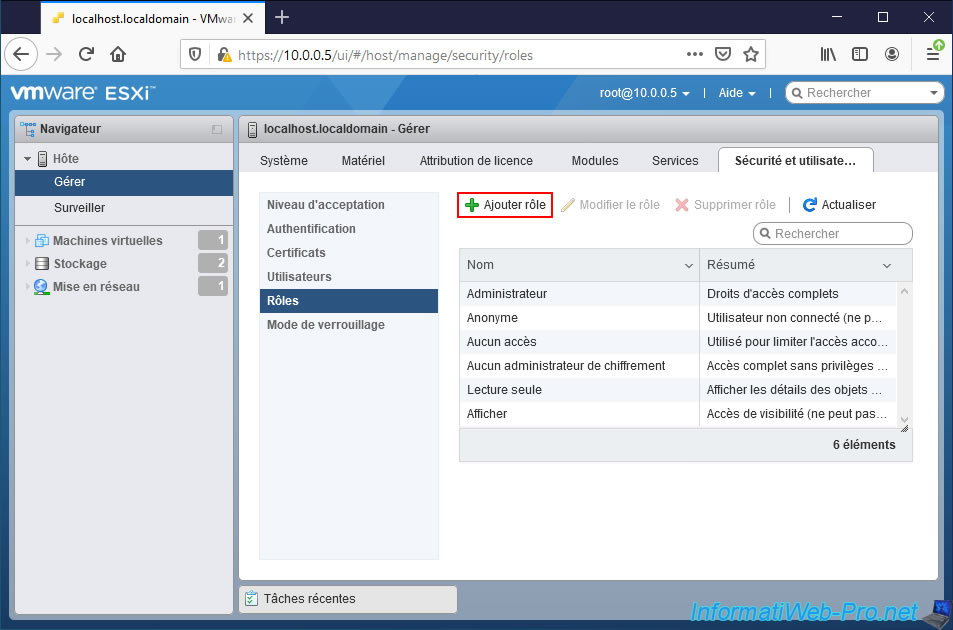
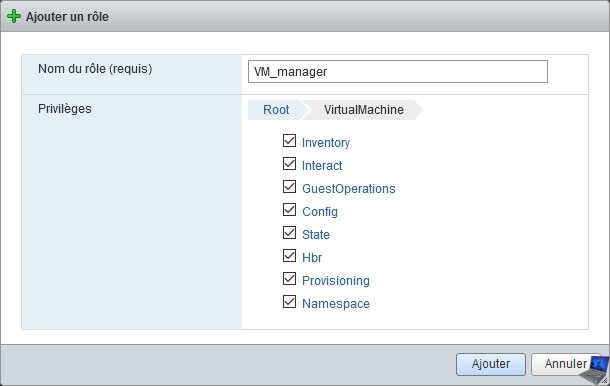
1.1. Add a custom role
Although there are default roles with predefined permissions for them, you can also create your own roles to be able to manage the granting of permissions in more detail.
To do this, click on : Add role.
To add a role, you will need to :
- Role name (required) : enter a name for it
- Privileges : choose the privileges you want to grant to your future users thanks to this role
As you can see, you will be able to grant or not grant privileges for :
- Datastore : management of datastores. To allow or not users to manage files, move them, delete them, allocate space (necessary to create a virtual hard disk, for example), ...
- Network : network management. Configure networks, delete them, assign them, ...
- Host : host (VMware ESXi hypervisor) management
- VirtualMachine : virtual machine management.
- Authorization : management of roles and permissions.
- Certificate : digital certificate management.
- and more.
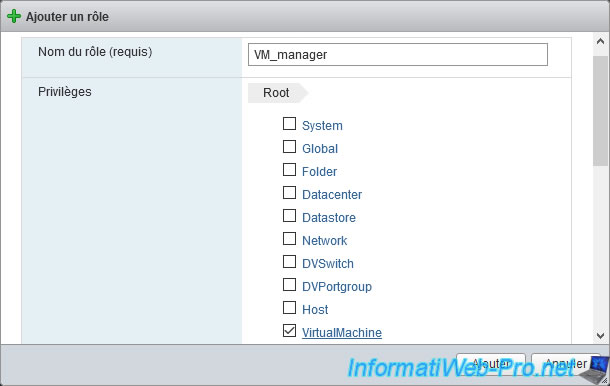
If you click on one of the available privilege categories, you will be able to carefully manage the privileges relating to the desired category.
For this tutorial, we have only granted management of virtual machines.
However, this may not be sufficient depending on the specific actions the user will attempt to perform.
Indeed, although he will be able to access the list of virtual machines, start them and use them (for example), he will not be able to create additional virtual hard disks for them.
Indeed, for that, you will also have to grant additional privileges located in the category "Datastore". And in particular, the "AllocateSpace" privilege which allows space to be allocated in a datastore.
To return to the root of the list of available privilege categories, click on the "Root" element of the breadcrumb trail.
Then, once you have checked all the rights to be assigned to users using this role, click on : Add.
Your new role has been added.

1.2. Edit a custom role
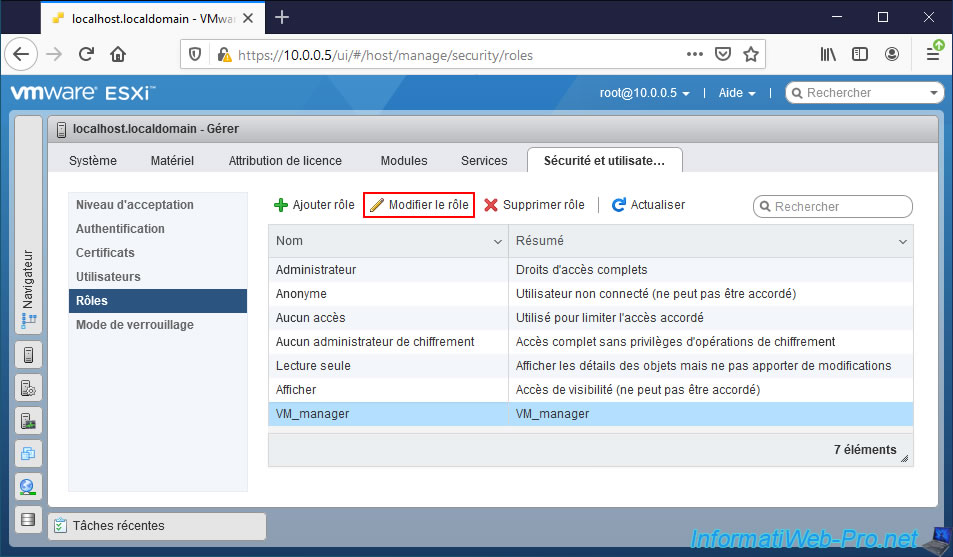
To get started, be aware that the predefined roles can't be changed.
Moreover, if you select one in the list of roles, you will see that the "Edit role" option will be grayed out.
But, by selecting one of the custom roles that you added, you will be able to click on "Edit role".
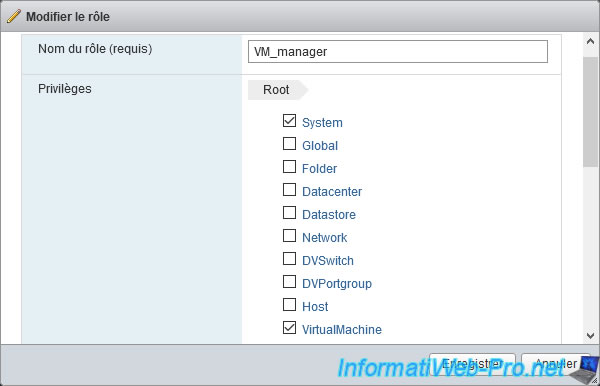
As expected, you will be able to change the name of this role, as well as the list of privileges associated with it.
Note that VMware ESXi may have automatically added some rights to your custom role. As is the case here, with the "System" privilege category which was automatically checked by the VMware ESXi hypervisor.
WARNING : if you have already assigned this role for several users on your hypervisor, pay attention to the rights that you are going to change here since this will change the rights for all these users on the desired objects.
You may therefore accidentally assign rights to some users without wanting to, or even without realizing it at the time.
1.3. Remove a custom role
To delete a role, select it in the list and click on : Remove role.
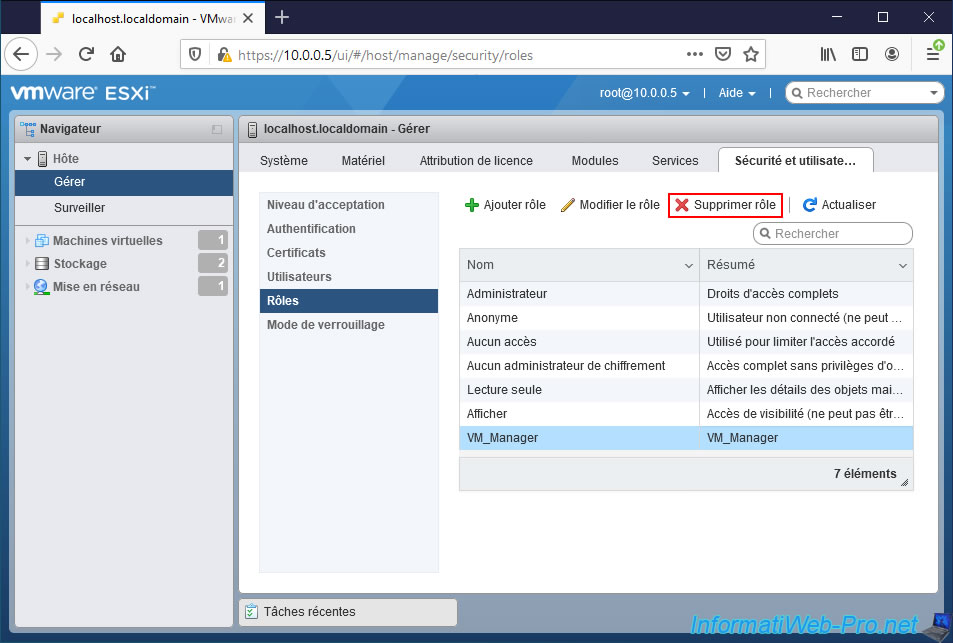
Select the "Remove only if unused" check box, then click Yes to confirm the removal of this role.
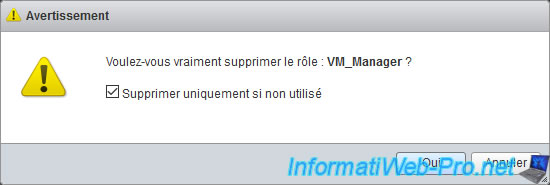
If this role is no longer used on your VMware ESXi hypervisor, the "Role [role name] successfully removed" message will appear.
Otherwise, the "Failed to remove role" error will occur and the desired role will not be removed.

2. Manage users
Once you have grouped the different privileges to be granted to your future users thanks to the roles, you will have to create user accounts for them.
In business, creating users allows you to grant different rights depending on the user, but also to control what they do.
This way, if something goes wrong, you can easily tell which person did the wrong thing or something they shouldn't have done.
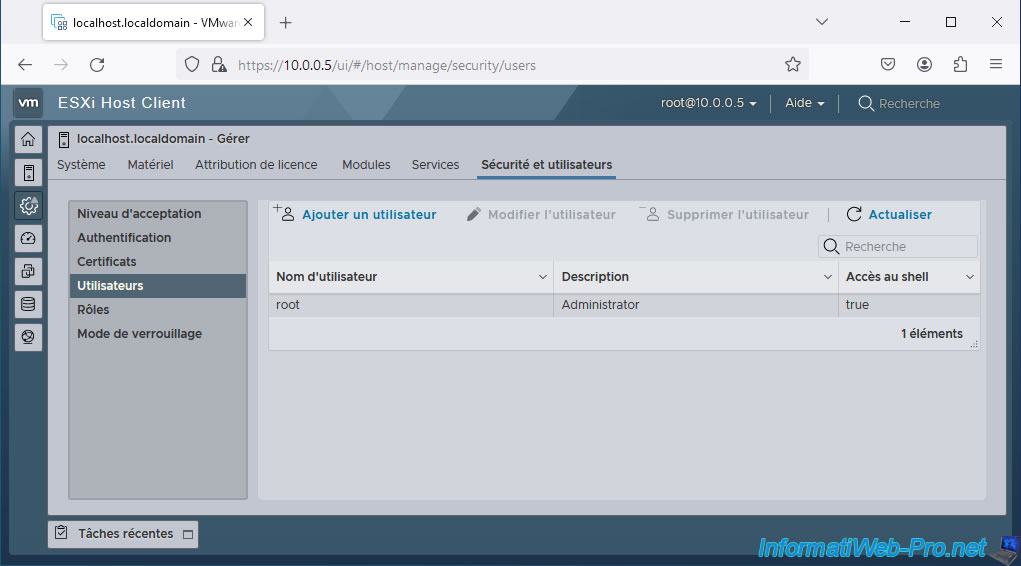
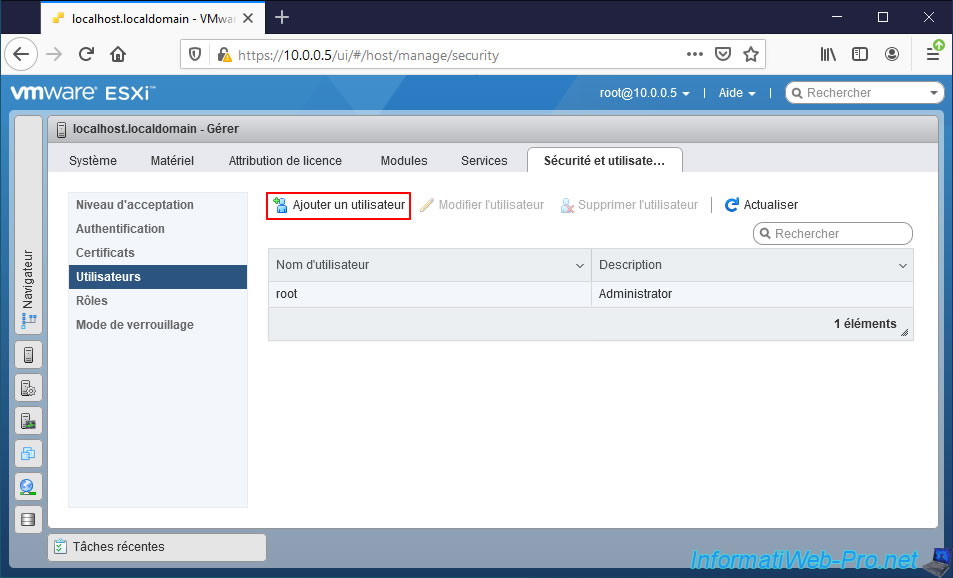
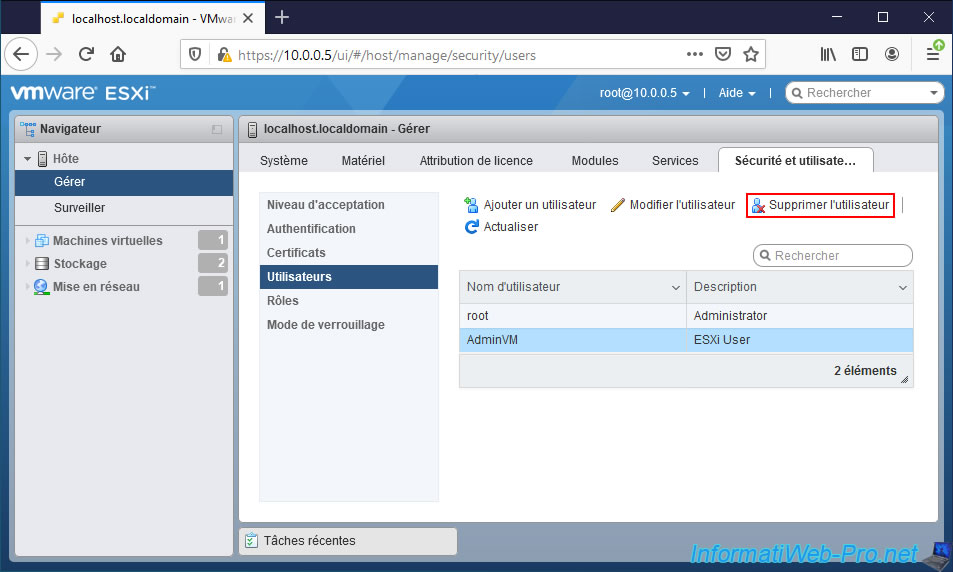
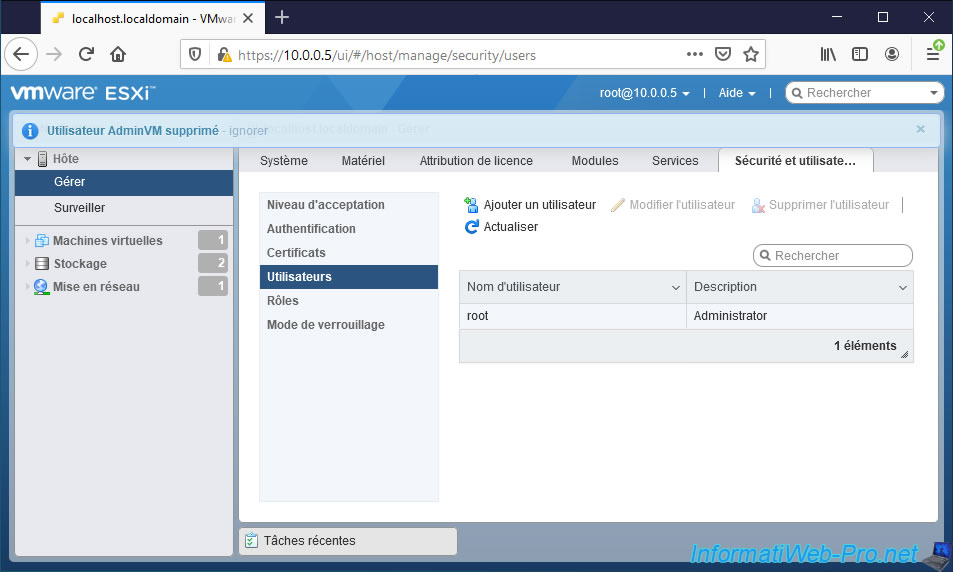
To manage the users of your VMware ESXi hypervisor, go to : Host -> Manage -> Security & Users -> Users.
As you can see, by default only the "root" account is present in this user list.
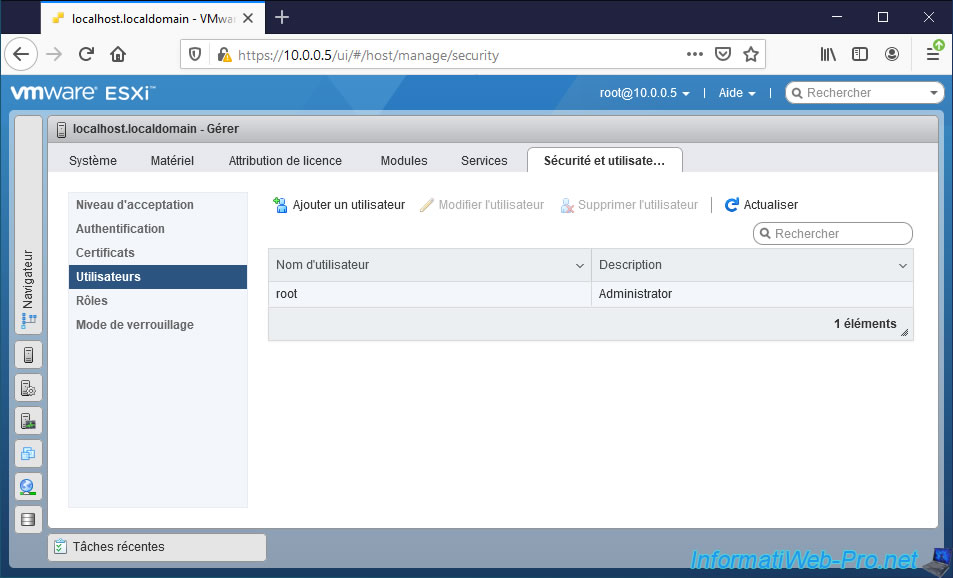
Since VMware ESXi 7, a new "Shell Access" column has appeared (and is supposed to tell you which user has access to the shell).
2.1. Add a user
To add a user, simply click on : Add User.
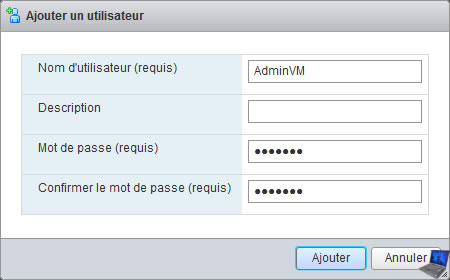
In the "Add a user" window that appears, specify :
- User name (required) : the username he or she should use to connect to the VMware ESXi server
- Description : a description to know who it's (optional)
- Password : 2 times a password for this one.
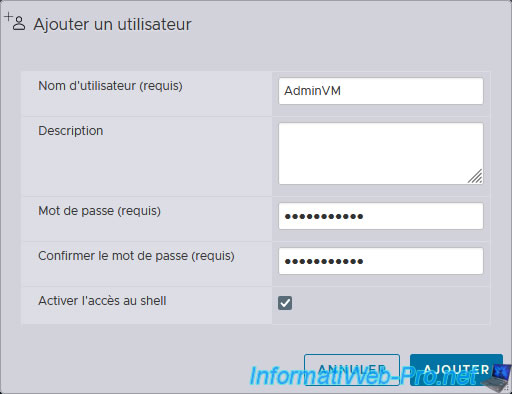
Note that by default, VMware ESXi requires the password to be at least 7 characters long (including at least 1 lowercase, 1 uppercase, 1 number, and a special character).
However, if you want to decrease this complexity to allow your users to use less complicated passwords, you can do so by following our tutorial : VMware ESXi 6.7 - Change the complexity required for passwords.
Then, click on : Add.
Since VMware ESXi 7, an "Enable Shell Access" box allows you to authorize a user to manage your host from the command line (via SSH and via the DCUI console shell, if the corresponding services are enabled).
However, for a user to have access to the shell, they must also be assigned the "Administrator" role on the "Host" object from the web interface of your VMware ESXi hypervisor.
Otherwise, the connection will fail.
Sources :
The "User [user name] added successfully" message appears.

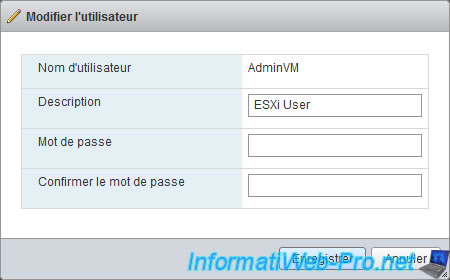
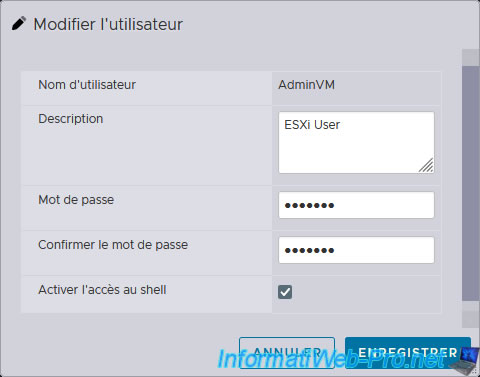
2.2. Edit a user
To edit a user, select it in the list and click on : Edit user.
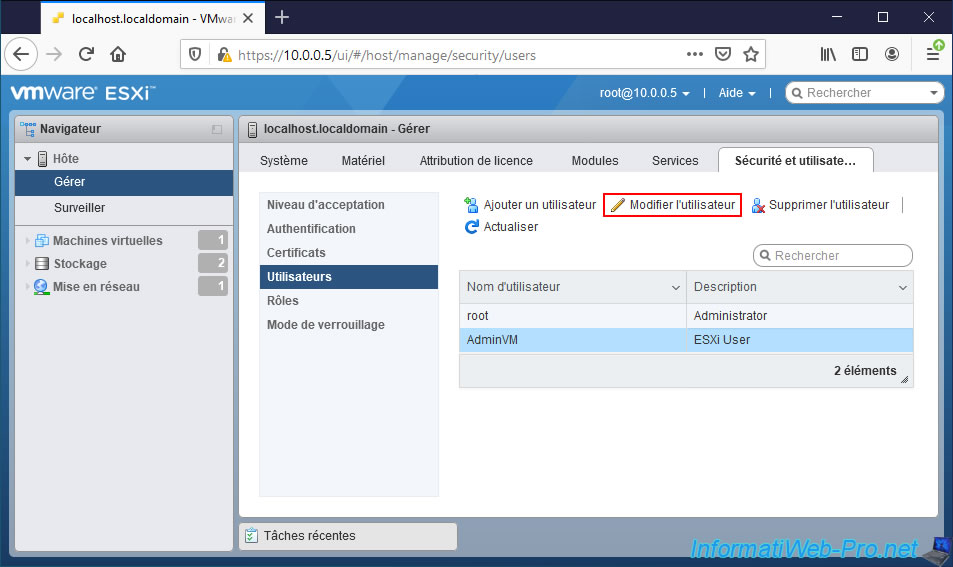
As you can see, you can change its description and password, if needed.
Notes :
- VMware ESXi automatically specifies "ESXi User" as the description when it's empty when adding the user.
- if you leave the "Password" boxes empty, the password will not be changed or deleted.
Again, when you edit a user created on VMware ESXi, you can change the "Enable shell access" option explained previously (in section "2.1. Add a user").
2.3. Remove a user
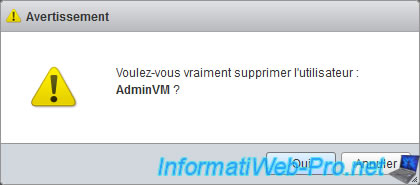
To remove a user, select it in the list and click on : Remove user.
Answer Yes to the "Are you sure you want to remove user: [user name]?" question.
The message "User [user name] successfully removed" appears.
Share this tutorial
To see also
-

VMware 5/25/2022
VMware ESXi 6.0 - Install the VMware Host Client web client
-

VMware 5/27/2022
VMware ESXi 6.5 - Add a network driver in the installation ISO
-

VMware 1/27/2023
VMware ESXi 6.7 - Enable virtualization-based security (VBS)
-

VMware 12/2/2022
VMware ESXi 6.7 - Install and use the VMRC console on Linux
You must be logged in to post a comment