Complete presentation of the VMware Host Client web client of VMware ESXi 6.7
- VMware
- 10 February 2023 at 19:22 UTC
-

- 2/4

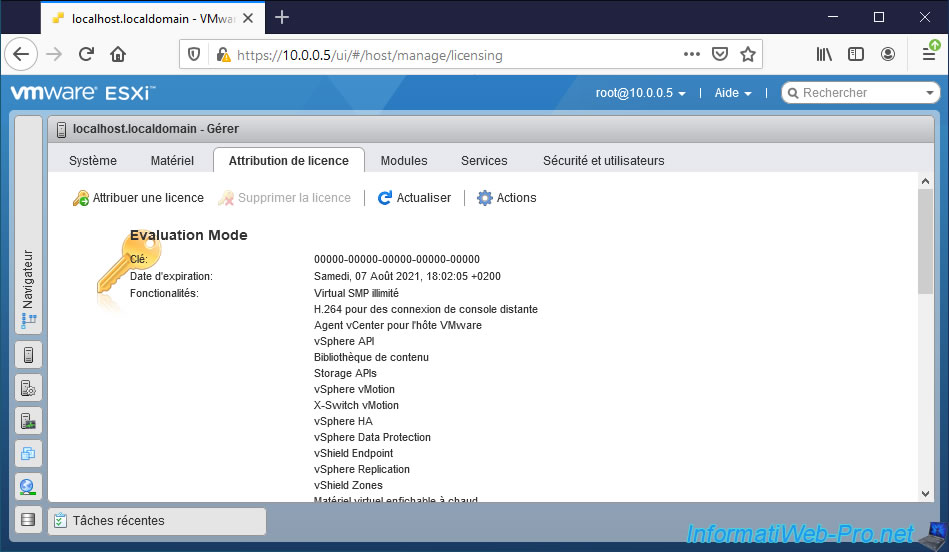
2.2.3. Licensing
In the "Licensing" tab, you can register your VMware ESXi (vSphere) hypervisor by assigning a free (VMware ESXi) or paid (VMware vSphere) license.
You can also delete the previously assigned license if necessary.
Indeed, when you are in an evaluation period (for 60 days), you have access to all the features of VMware vSphere. This will no longer be the case if you use a free license (ESXi) or a paid license (vSphere) whose features are more limited than those offered here.
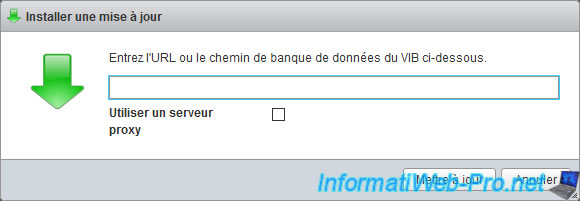
2.2.4. Packages
In the "Packages" tab, you will be able to see the list of packages (including many drivers) that are currently installed on your VMware ESXi hypervisor.
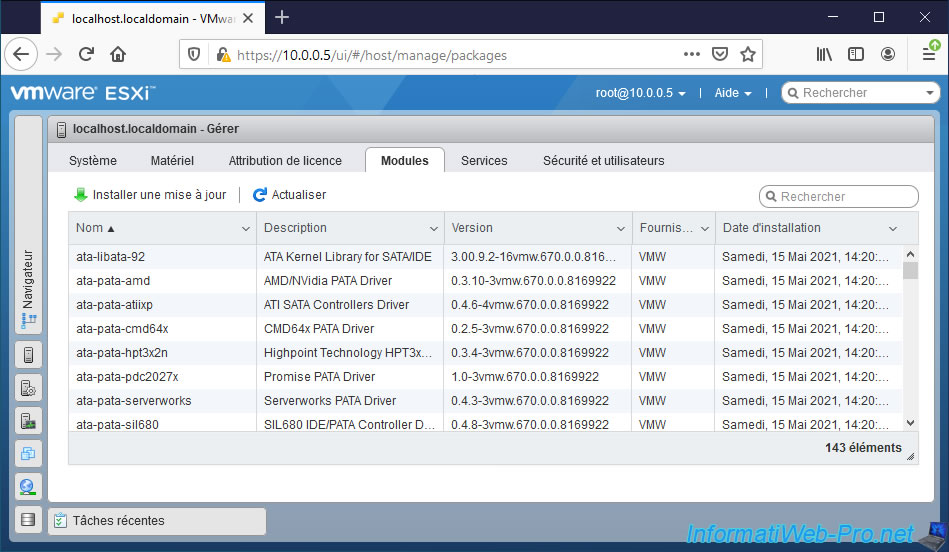
By clicking on "Install update", you can also install an update for one of these packages by specifying the URL of the concerned VIB file.
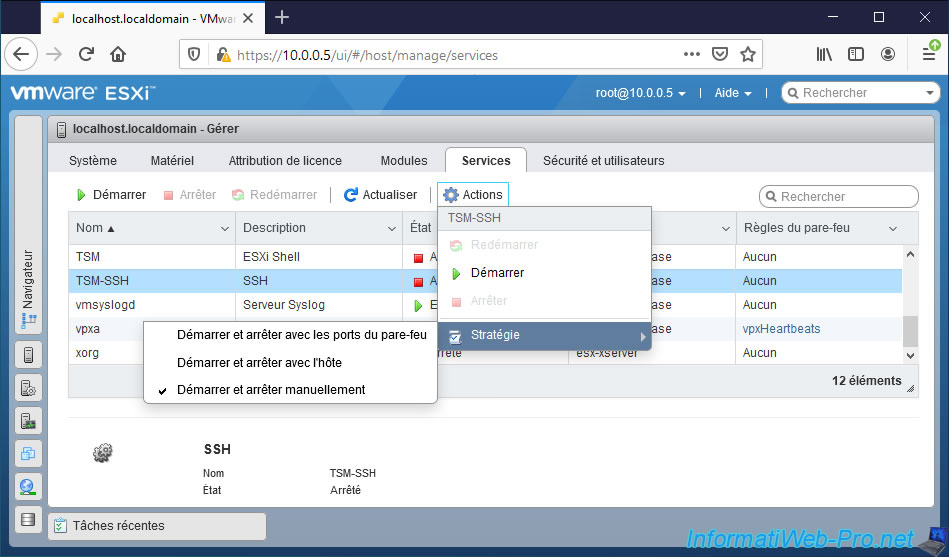
2.2.5. Services
In the "Services" tab, you can :
- see the list of services present on your VMware ESXi hypervisor
- see their status (running / stopped)
- start, stop or restart them
- change the policy for starting and stopping them
To learn more about the services available on VMware ESXi, refer to our "VMware ESXi 6.7 - Manage services and firewall" tutorial.

To change the policy for starting and stopping them, select the desired service and click on : Actions -> Policy.
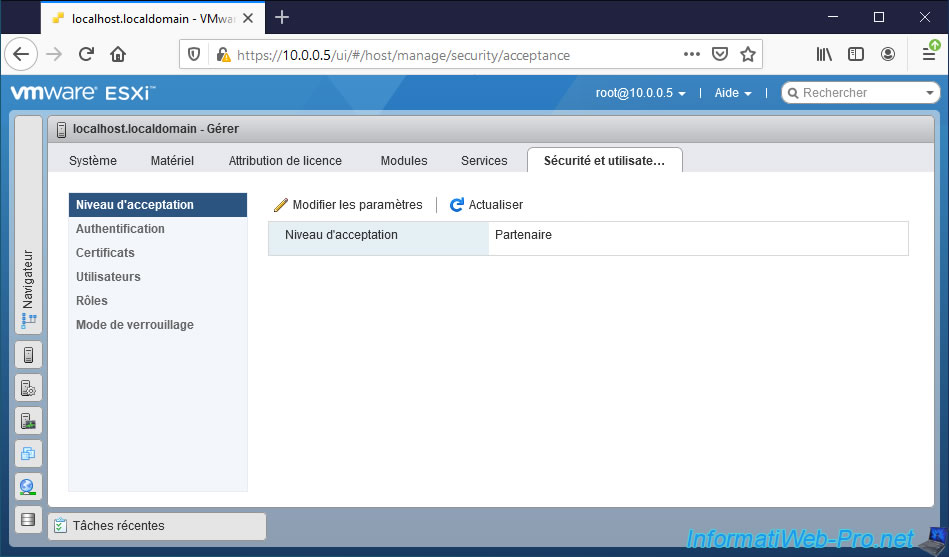
2.2.6. Security & users
In "Security & users -> Acceptance level", you can find out the chosen acceptance level.
To change it, click on : Edit settings.
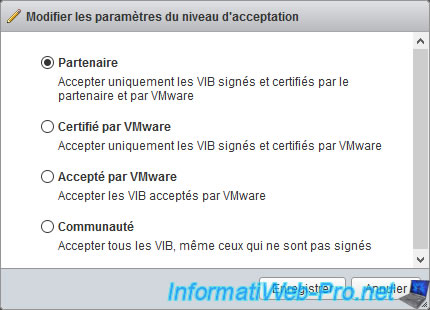
Depending on the acceptance level, you will be able to install only VIB files signed and/or certified by a partner and/or VMware.
- Partner : allows you to install only VIB files signed and certified by VMware and the partner
- VMware certified : allows you to install only VIB files signed and certified by VMware
- VMware accepted : allows you to install only VIB files accepted by VMware
- Community : allows you to install all VIB files, including unsigned ones. Which is strongly discouraged in business.
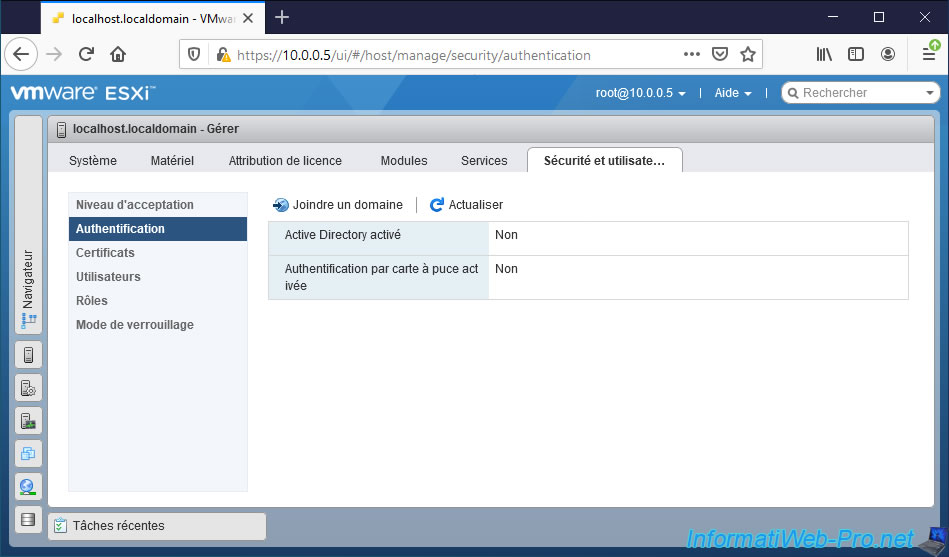
In "Security & users -> Authentication", you can manage the junction of your VMware ESXi hypervisor to an Active Directory domain.
To do this, refer to our "VMware ESXi 6.7 - Join the hypervisor to an Active Directory domain" tutorial.
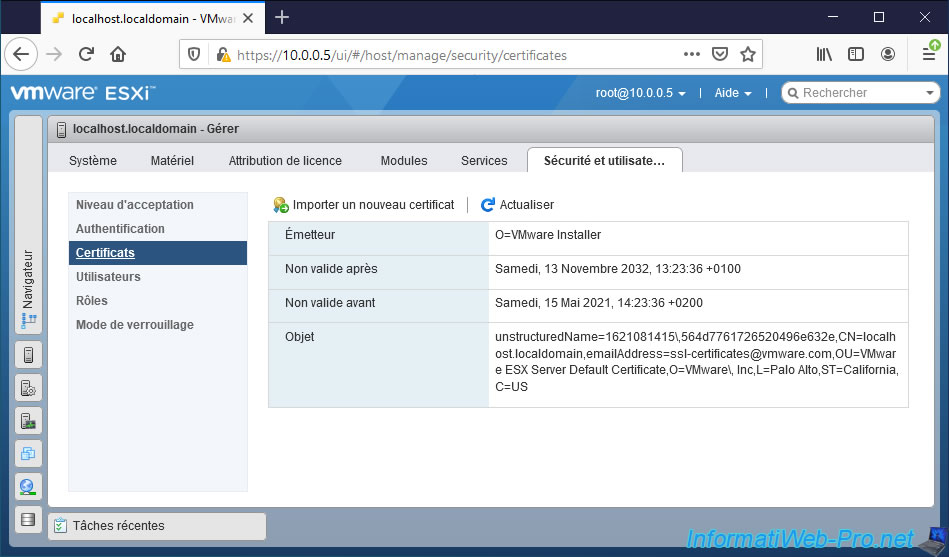
In "Security & users -> Certificates", you can import a new SSL certificate to replace the self-signed SSL certificate used by default with a valid certificate from a valid certificate authority (on the Internet or in your intranet).
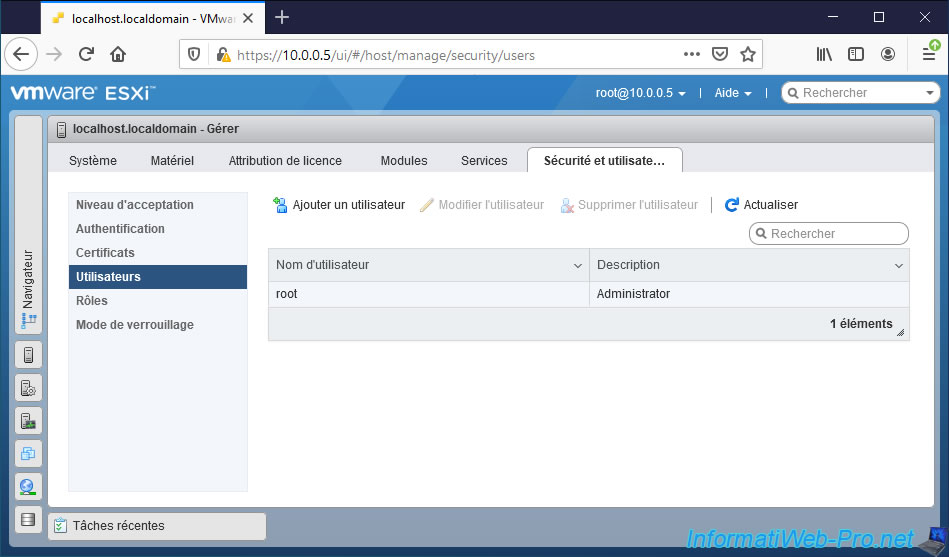
In "Security & users -> Users", you can create new users, as well as modify or delete them.
To manage the rights of these users, you will also need to create and assign roles (configured in the next section).
To learn how to manage users, roles, and permissions on your VMware ESXi hypervisor, refer to our "VMware ESXi 6.7 - Manage roles, users and permissions" tutorial.
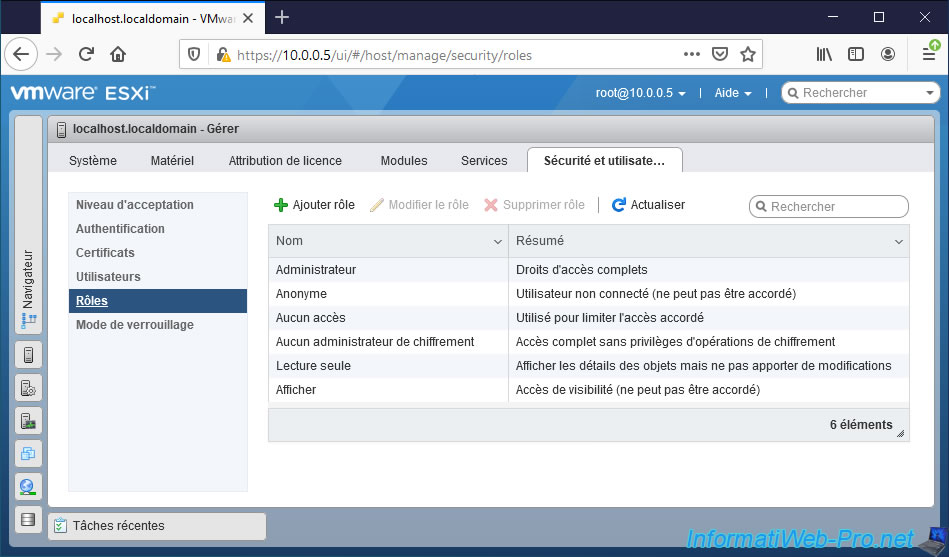
In "Security & users -> Roles", you will find the list of roles defined by default, including these :
- Administrator : role allowing you to give all rights on your VMware ESXi hypervisor to a user. This role is granted by default to the root account on your entire hypervisor.
- No access : role used to remove rights on a child object when rights had been granted on a parent object.
- Read-only : role allowing you to give a right to display only information on different objects.
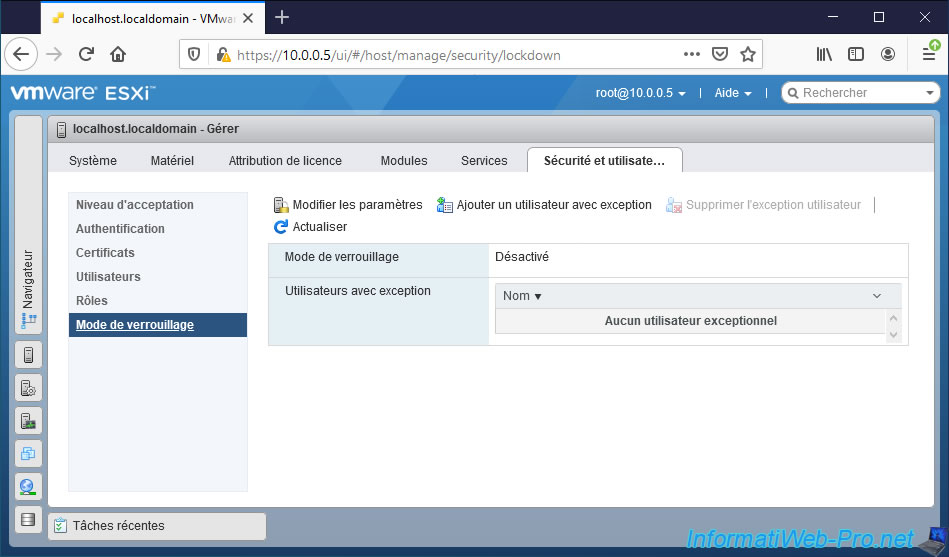
In "Security & users -> Lockdown mode", you can enable or disable the lockdown mode.
You will also be able to add exception users to allow them to manage this VMware ESXi host even when lockdown mode is enabled.
However, this is only useful when your VMware ESXi hypervisor is linked to a VMware vCenter Server.
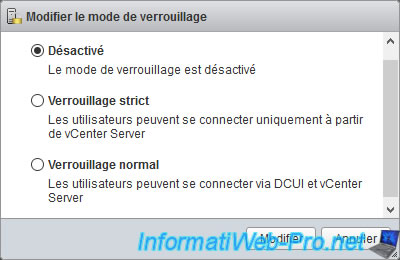
By clicking on "Edit settings", you can choose between :
- Disabled : Lockdown mode will be disabled.
- Strict lockdown : users will only be able to log in from a VMware vCenter Server
- Normal lockdown : users will be able to log in only from a VMware vCenter Server or from the DCUI console of that VMware ESXi hypervisor.
2.3. Monitor host
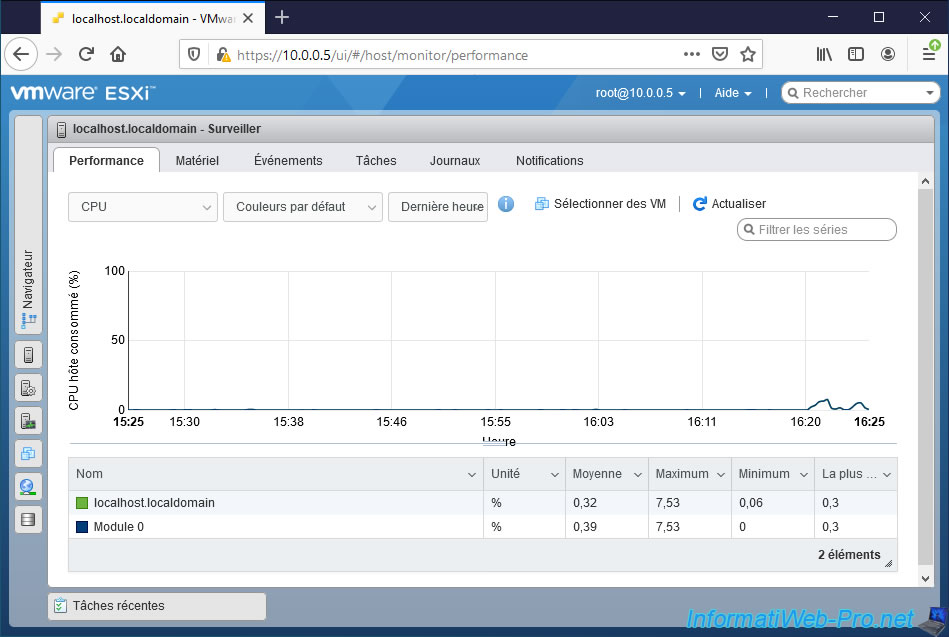
2.3.1. Performance
In the "Performance" tab, you can monitor the use of system resources (CPU, memory, network and disk) of your hypervisor over the last hour.
By default, this graphic is for your VMware ESXi host only.
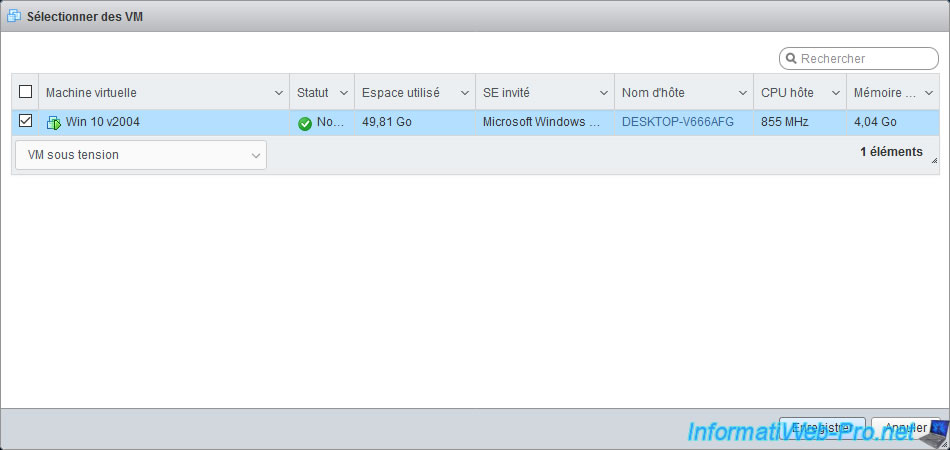
To monitor the use of system resources by a specific virtual machine, click "Select VMs" (at top right).
Check the desired virtual machine and click Save.
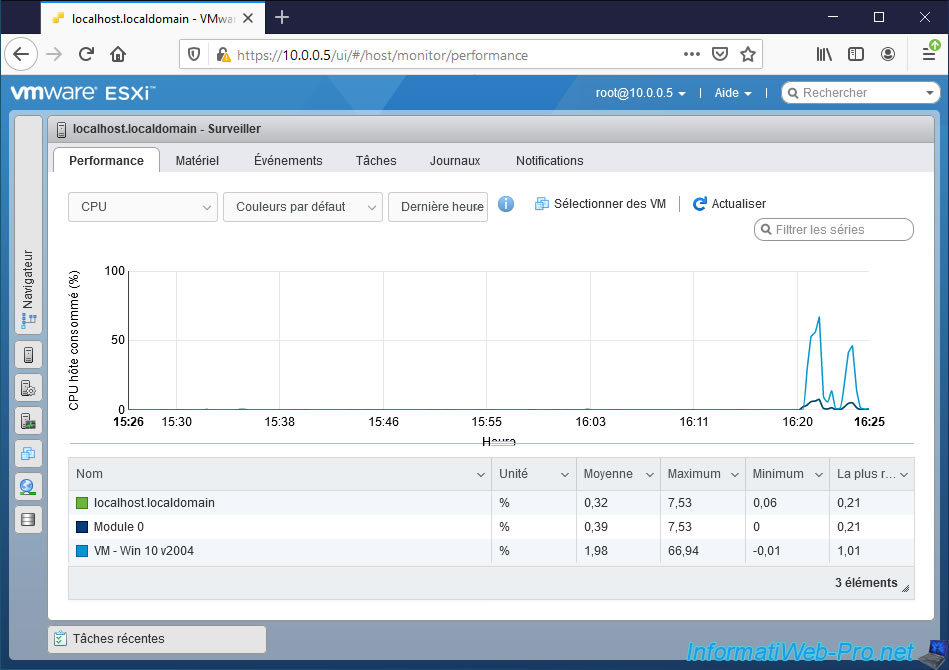
The curve concerning the desired virtual machine also appears on the graph and in the table just below.
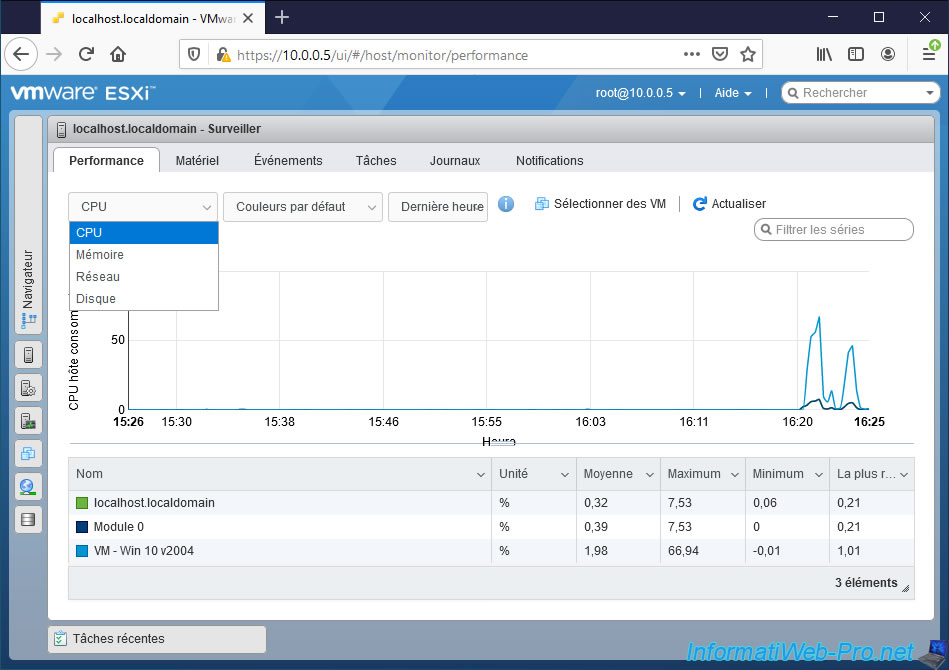
To monitor a system resource other than the processor (CPU), click on the "CPU" list and select the desired resource : CPU (processor), memory (RAM), network or disk (hard disk).
2.3.2. Hardware
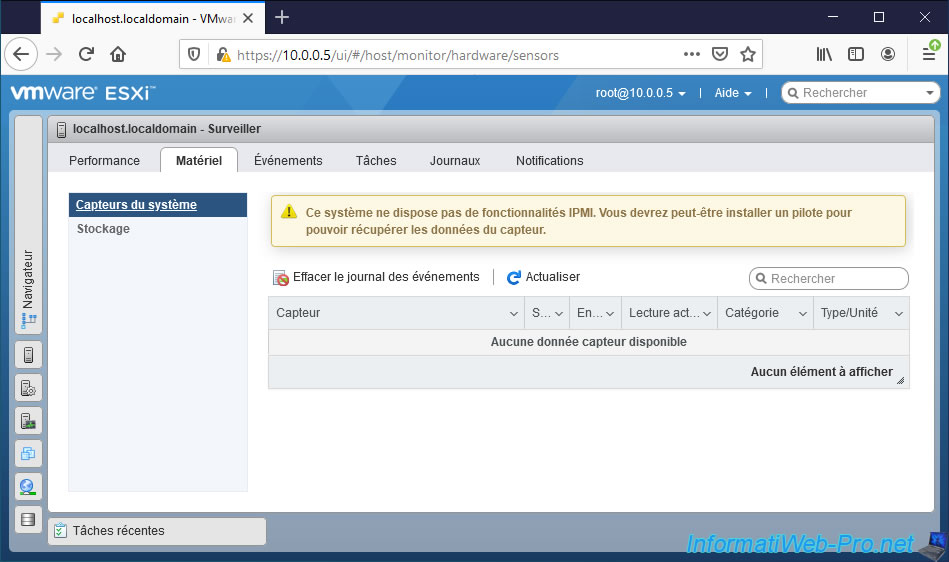
In "Hardware -> System sensors", you will be able to see information concerning the different sensors present in your server.
However, this will only work if the necessary drivers are installed.
If you have purchased a physical server that is officially supported by VMware for this VMware ESXi product (in the currently installed version), this is most likely to work.
But, if it's a standard computer used for educational purposes only, then there is a high probability that this feature is not supported.
What is our case:
Plain Text
This system has no IPMI capabilities, you may need to install a driver to enable sensor data to be retrieved.
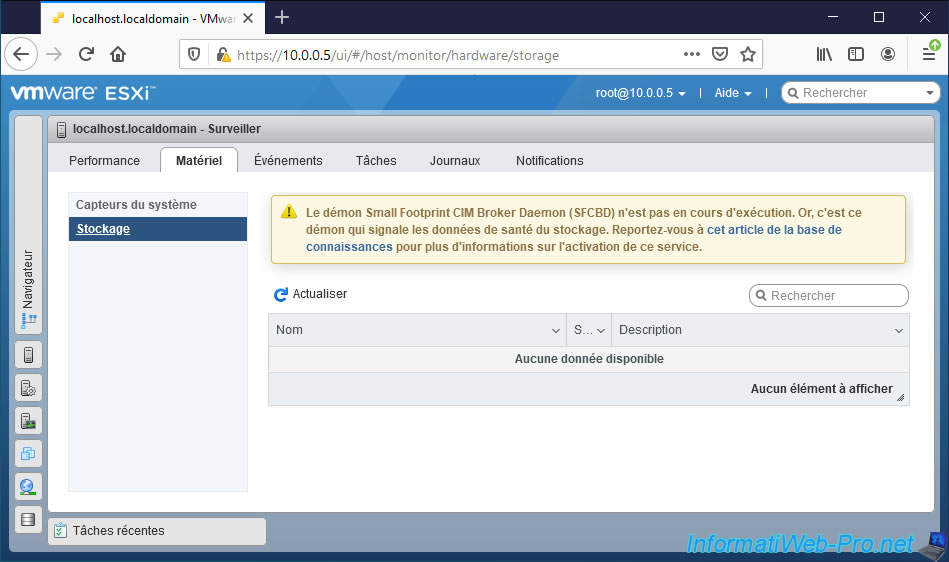
In "Hardware -> Storage", you will be able to get information about the storage of your server if the storage CIM server used in it is installed and supported by your version of VMware ESXi.
Otherwise, this warning will be displayed :
Plain Text
The Small Footprint CIM Broker Daemon (SFCBD) is not running. Storage health data is reported by this daemon. Please see this KB article for information on enabling this service.
If your storage vendor's CIM server is installed, but not supported, this page may also only display a "No data available" message.
Share this tutorial
To see also
-
VMware 4/14/2023
VMware ESXi 6.7 - Best practices for creating a VM
-
VMware 2/17/2023
VMware ESXi 6.7 - Configure your virtual machines settings
-
VMware 6/2/2023
VMware ESXi 6.7 - Connect a smart card reader to a VM
-
VMware 10/19/2022
VMware ESXi 6.7 - DirectPath I/O (PCI passthrough)
No comment