Hyper-V server and generation 1 and 2 virtual machine settings on WS 2012 R2 or WS 2016
- Microsoft
- 20 December 2019 at 10:07 UTC
-

- 4/4
3. Generation 2 virtual machine settings
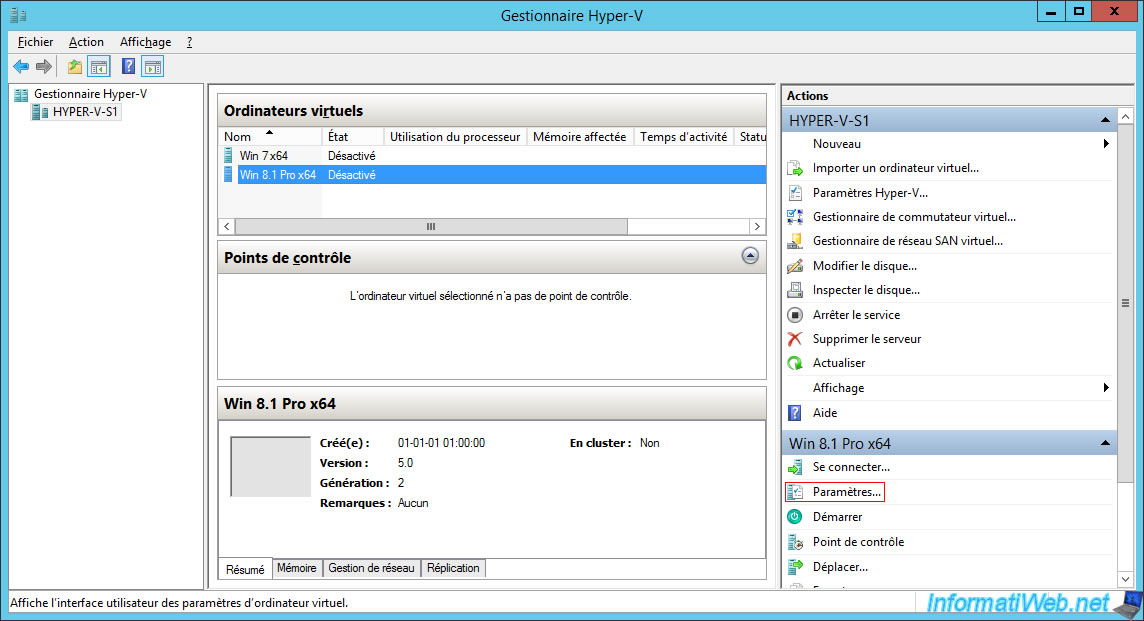
Open the virtual machine settings by clicking Settings.
3.1. Add Hardware
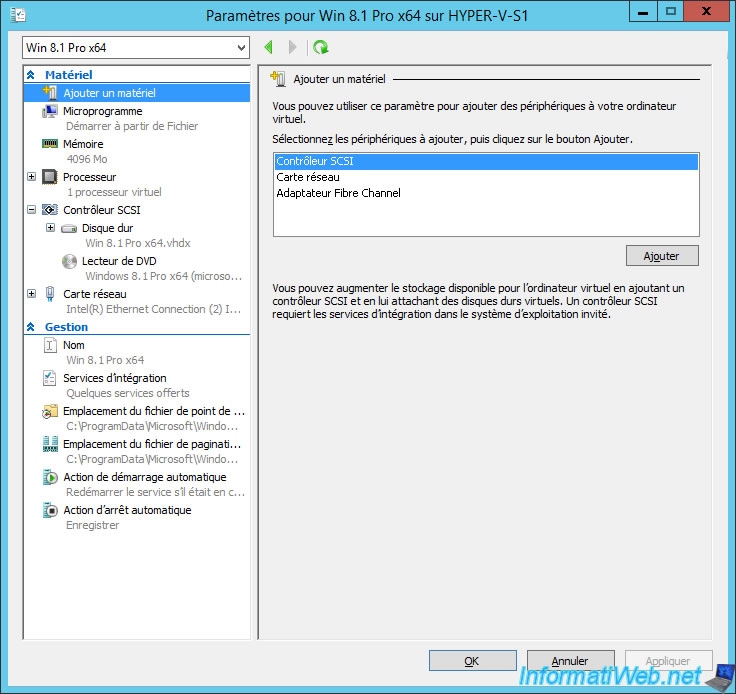
For virtual machines of generation 2, you can add these types of virtual hardware :
- SCSI controller
- Network Adapter
- Fibre Channel Adapter
However, integration services will need to be installed in the guest operating system for the SCSI controller to be recognized.
With these virtual machines of generation 2, you will not be able anymore to use these virtual hardware :
- IDE controller
- Legacy Network Adapter
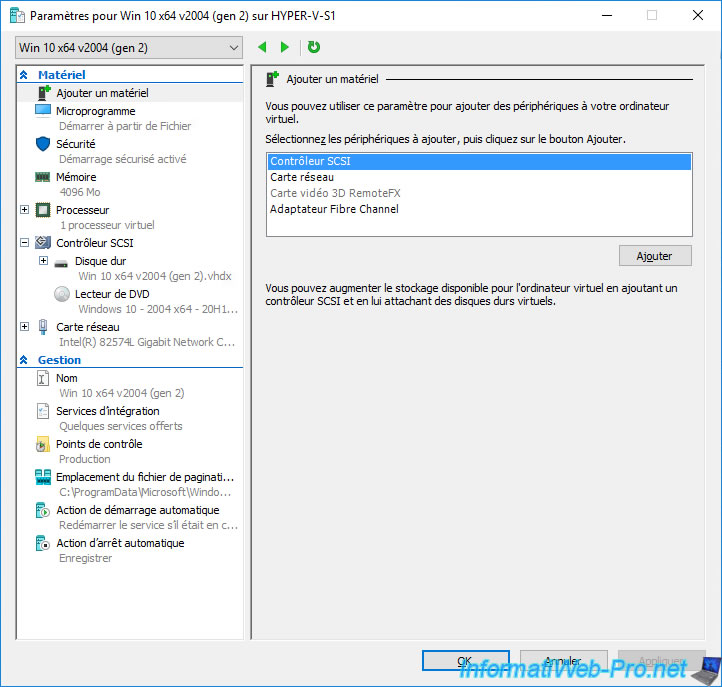
- RemoteFX 3D Video Adapter (for the passthrough GPU)
On Windows Server 2016, the "RemoteFX 3D Video Adapter" option is also available for generation 2 virtual machines.
3.2. Firmware
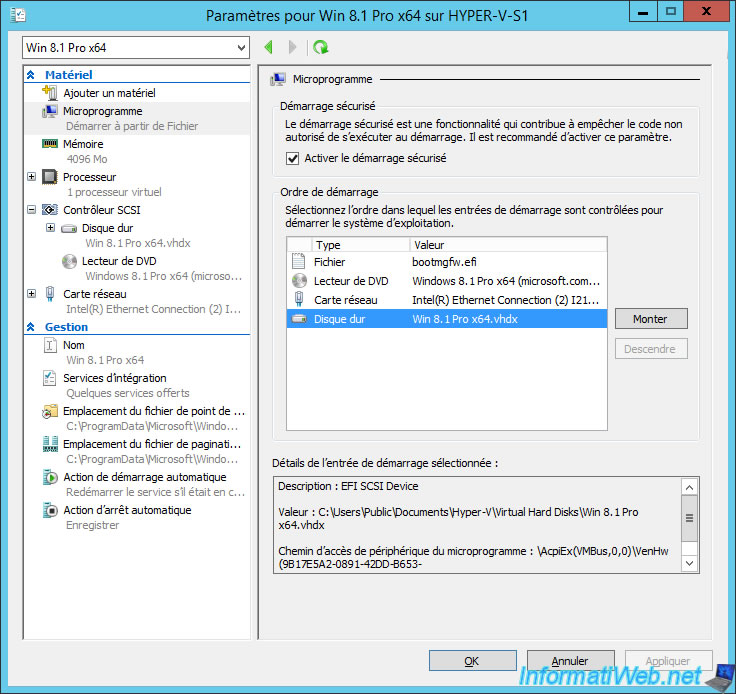
Generation 2 virtual machines use EFI firmware instead of the traditional BIOS.
You can enable the secure boot of this virtual machine, but also change the boot order :
- the "bootmgfw.efi" file : which is the boot manager of Windows
- DVD Drive : virtual DVD drive
- Network Adapter : to boot over the network (PXE)
- Hard Drive : virtual hard drive
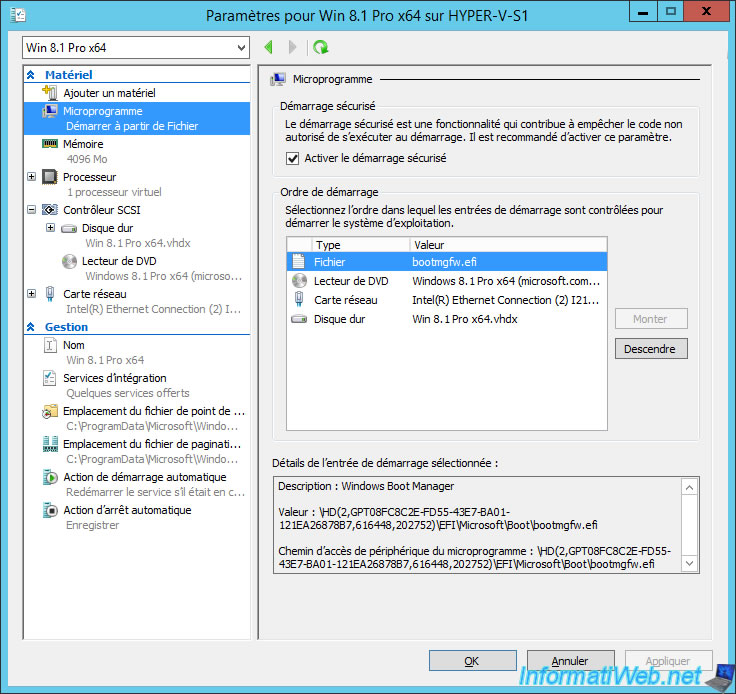
Note that by default, the virtual machine will use a virtual hard drive connected on a virtual SCSI controller.
3.3. Security
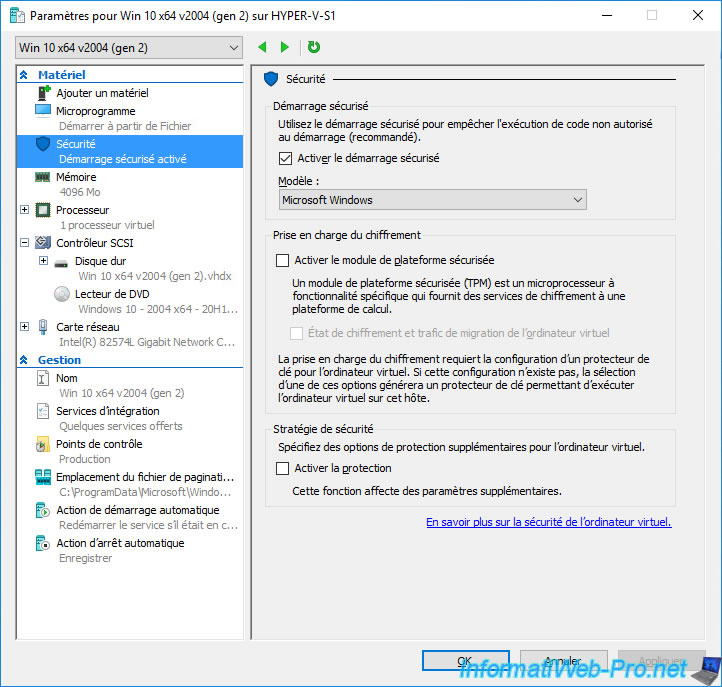
Since Windows Server 2016, a new "Security" section has appeared for generation 2 virtual machines with several options :
- Enable Secure Boot : to enable or disable secure boot for use with EFI firmware.
This allows secure boot to be disabled when an operating system or version of Windows (such as Windows 7) supports booting in EFI mode, but not secure boot. - Template :
- Microsoft Windows : secure booting a virtual machine with Windows or Windows Server as the guest operating system.
- Microsoft UEFI Certificate Authority : secure booting a virtual machine with a Linux distribution as the guest operating system.
- Enable Trusted Platform Module : allow you to provide a virtual TPM to the virtual machine.
This makes it possible to virtualize Windows 11 while respecting all the prerequisites (including the presence of the TPM). - Encrypt state and virtual machine migration traffic : allows you to encrypt the state of the virtual machine, as well as its live migration traffic.
- Enable Shielding : disables management via the console, disables some integration components, ...
If you enable this protection, all the options present in this "Security" section will be enabled automatically.
3.4. SCSI Controller
Since virtual machines of Generation 2 use a SCSI controller by default, you can add only :
- virtual SCSI hard disks
- virtual SCSI DVD drives
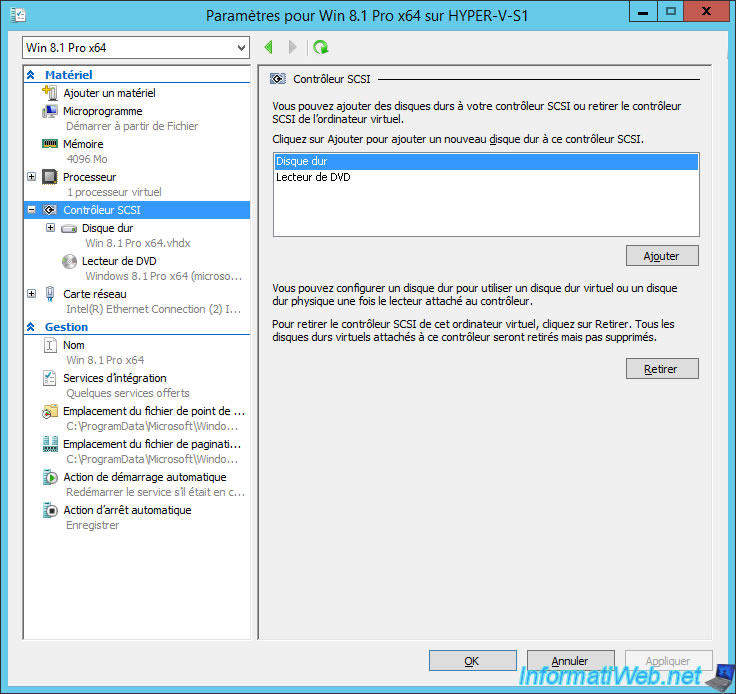
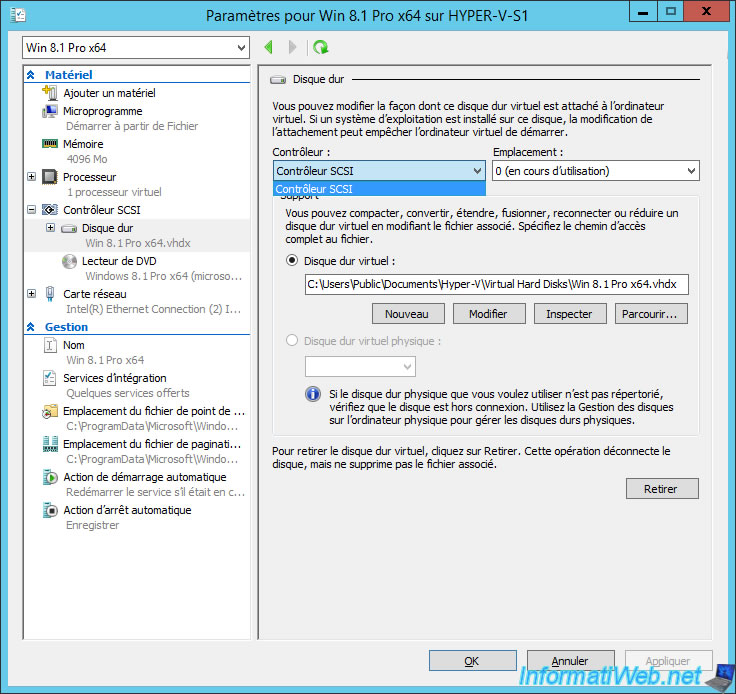
For the virtual hard disk, you can choose which SCSI controller to use and where you want to connect this virtual hard disk to this SCSI controller.
You can also create a new virtual hard disk, change the virtual hard disk to use or use a physical hard disk as a virtual SCSI hard disk.
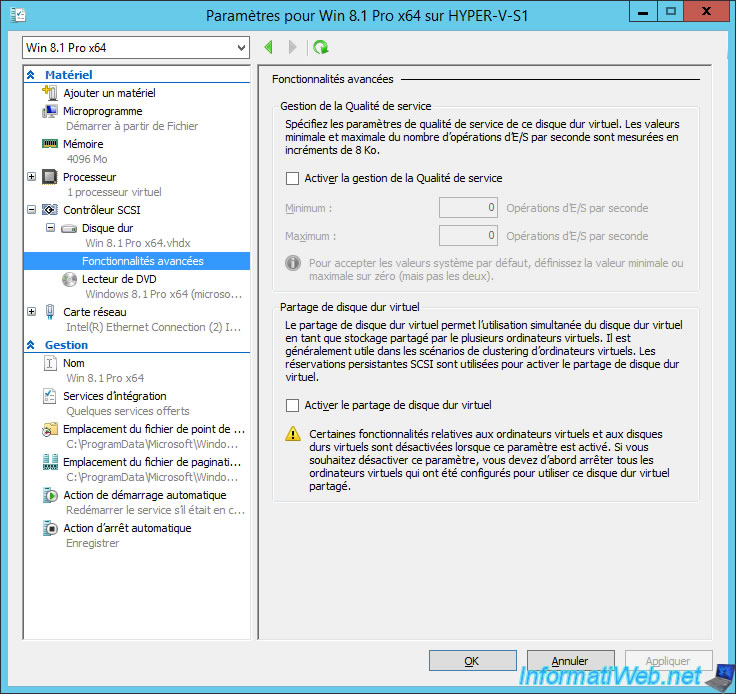
To avoid slowing down the server due to too much input / output (I/O) on the virtual hard disk of the virtual machine, you can enable Quality of Service (QoS) management.
This will allow you to specify a minimum and maximum number of I/O operations per second to prevent a virtual hard disk from overloading the physical hard disk bandwidth of your host server.
Since virtual machines of Generation 2 use a SCSI controller, you will be able to share a virtual hard disk between multiple virtual machines.
This was not possible with the IDE controller used by default for Generation 1 virtual machines.
Virtual hard disk sharing allows multiple virtual machines to use a single virtual hard disk at the same time.
4. Virtual network management
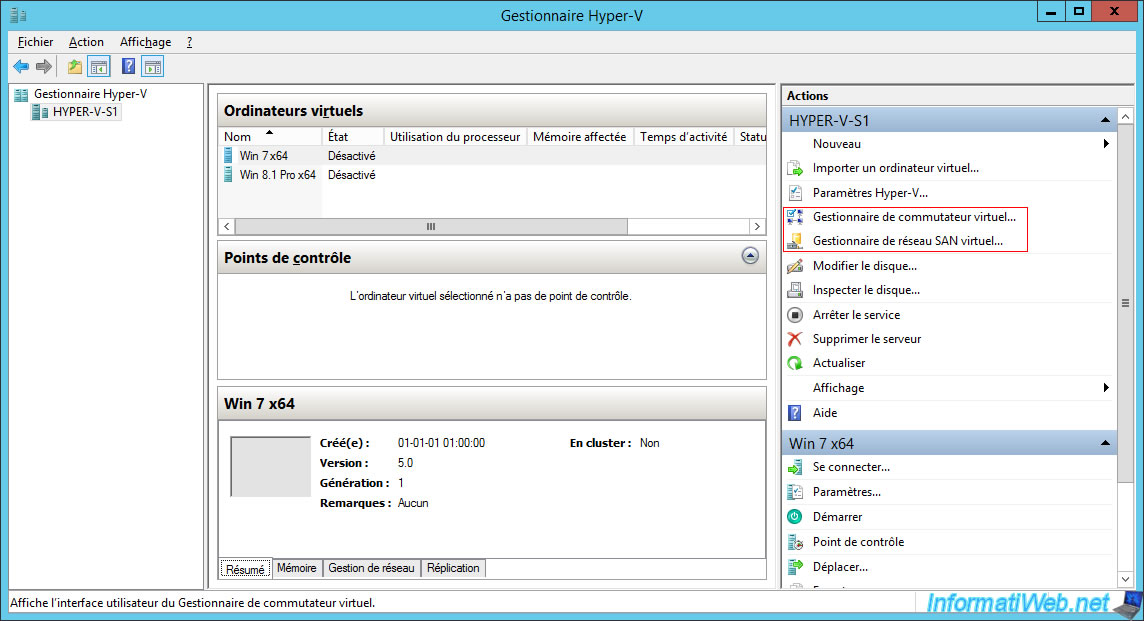
From the Hyper-V Manager, you will be able to manage the different virtual networks thanks to :
- the Virtual Switch Manager : for virtual switches
- the Virtual SAN Manager : to use a fiber channel network
4.1. Virtual Switch Manager
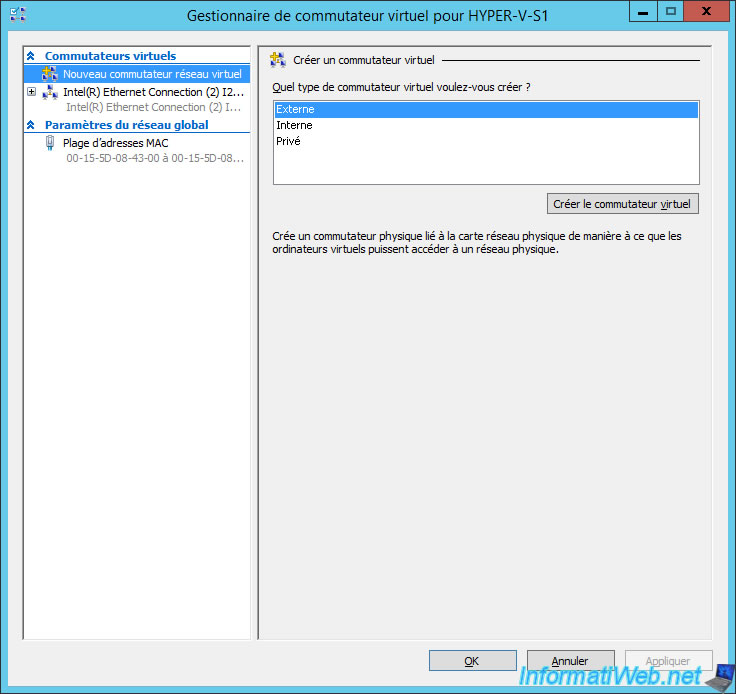
The Virtual Switch Manager is used to create and configure the various virtual switches.
As you can see, you can create external, internal or private virtual switches.
In other words, you can connect your virtual machines to the physical network of the company or connect them internally by isolating them from the physical network.
To learn more about this Virtual Switch Manager, refer to our tutorial : Manage virtual switches and improve server network performance
4.2. Virtual SAN Manager
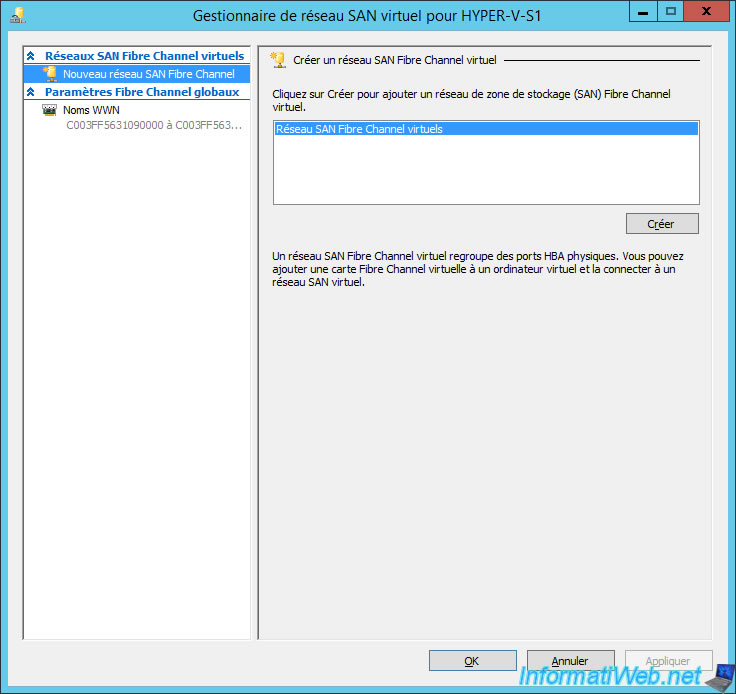
For the Virtual SAN Manager, it will allow you to connect your Hyper-V server to an existing SAN in Fiber Channel.
The Fiber Channel is very expensive, but can significantly improve performance at the network level.
5. Create a virtual diskette
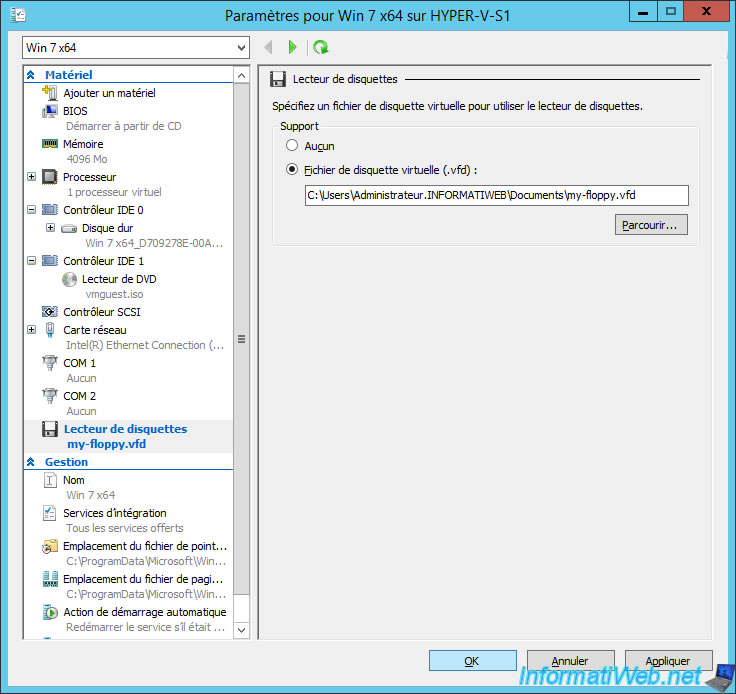
As you can see in the Generation 1 virtual machine settings, you can use a virtual floppy drive and insert a floppy disk in ".vfd" format.
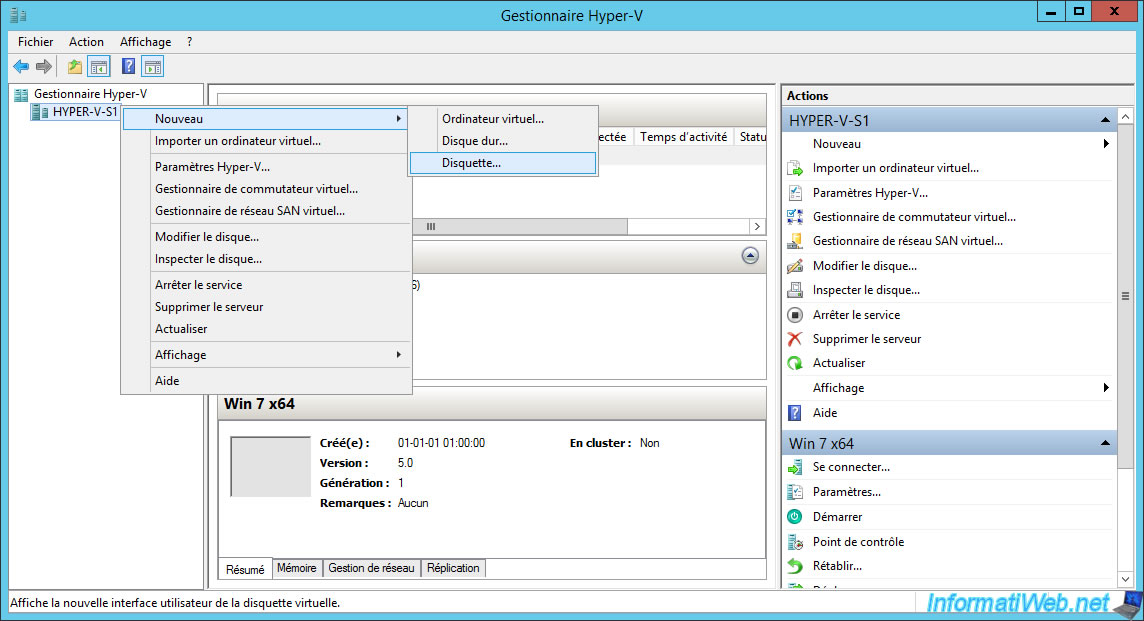
To create a virtual floppy disk in this format, simply right-click on your Hyper-V server and click on : New -> Floppy Disk.
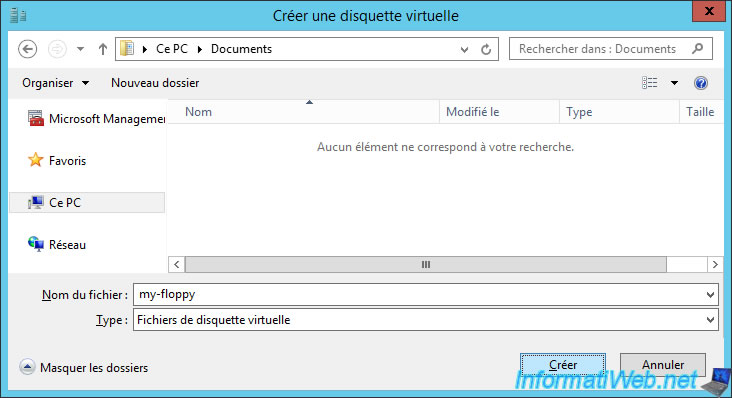
In the "Create Virtual Floppy" window that appears, provide a name for this floppy disk and select the folder where you want to store it.
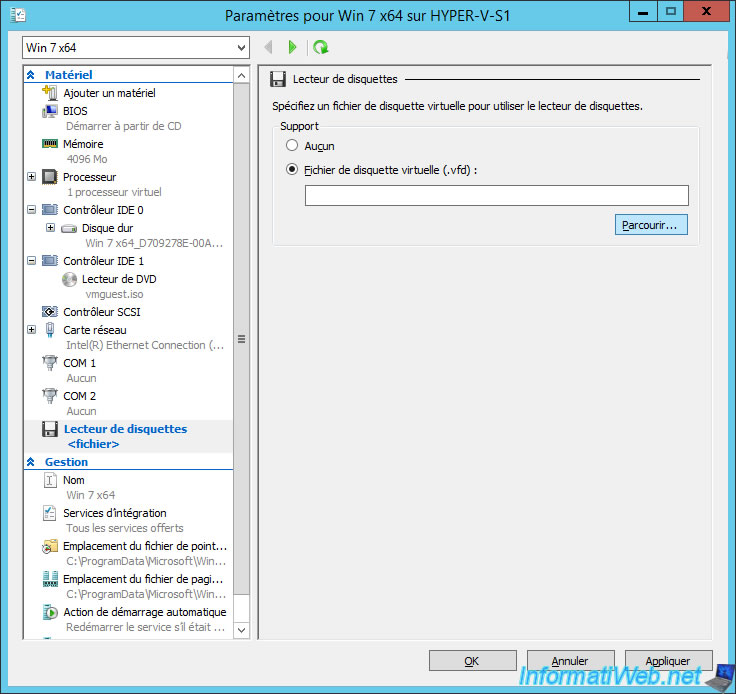
Then, in your Generation 1 virtual machine, go to the "Diskette Drive" section, select "Virtual floppy disk (.vfd) file" and click "Browse".
Select the virtual floppy file created previously.
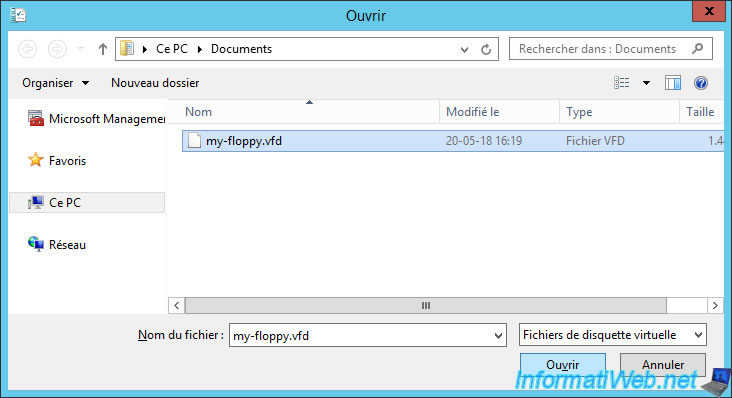
The virtual floppy disk is inserted into the diskette drive of your virtual machine.
Share this tutorial
To see also
-
Microsoft 9/6/2019
Hyper-V (WS 2012 R2 / 2016) - Create a generation 2 VM
-
Microsoft 8/10/2019
Hyper-V (WS 2012 R2 / 2016) - Install Hyper-V and create your first VM
-
Microsoft 11/8/2019
Hyper-V (WS 2012 R2 / WS 2016) - Automatically replicate virtual machines
-
Microsoft 11/15/2019
Hyper-V (WS 2012 R2 / WS 2016) - Automatically replicate virtual machines (securely)

No comment