- VMware
- 15 May 2020 at 17:40 UTC
-

- 1/2
With VMware Workstation VMware Tools available for many types of operating systems, you can easily transfer folders and files from your physical computer to a virtual machine and vice versa.
For this, you can use :
- drag and drop
- VMware Workstation folder shares
Note that in both cases, you will need the VMware Tools in the guest OS and activate the corresponding option in the settings of your virtual machine.
1. Windows file transfer
1.1. Drag and drop and copy/paste
To begin, you can easily transfer files from the physical PC to the virtual machine with a simple drag and drop.
But, you can also use copy/paste in both directions (physical machine to virtual machine and vice versa).
However, to do this, make sure that these features are enabled in the settings of your virtual machine.
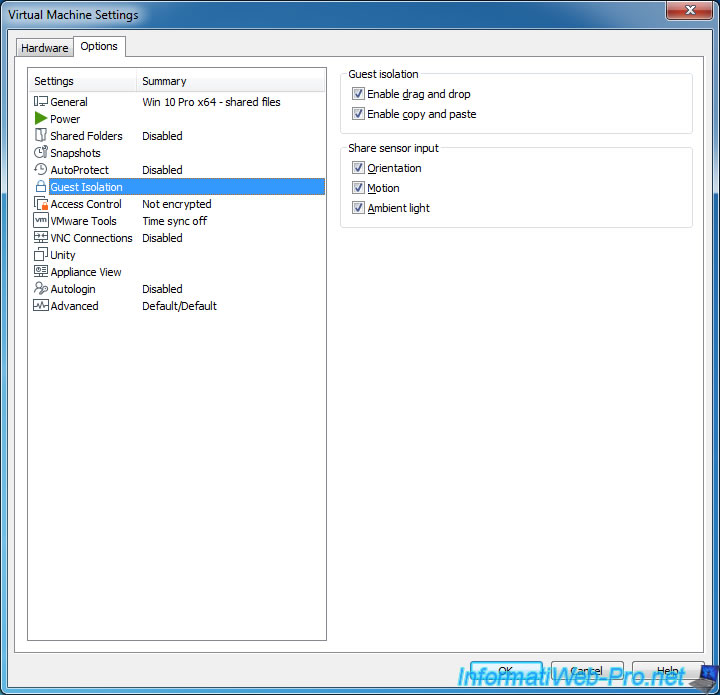
By default, these options are enabled and are available in the "Guest isolation" section :
- Enable drag and drop
- Enable copy and paste
Note : if these options are disabled and dimmed, shut down the virtual machine to enable them.
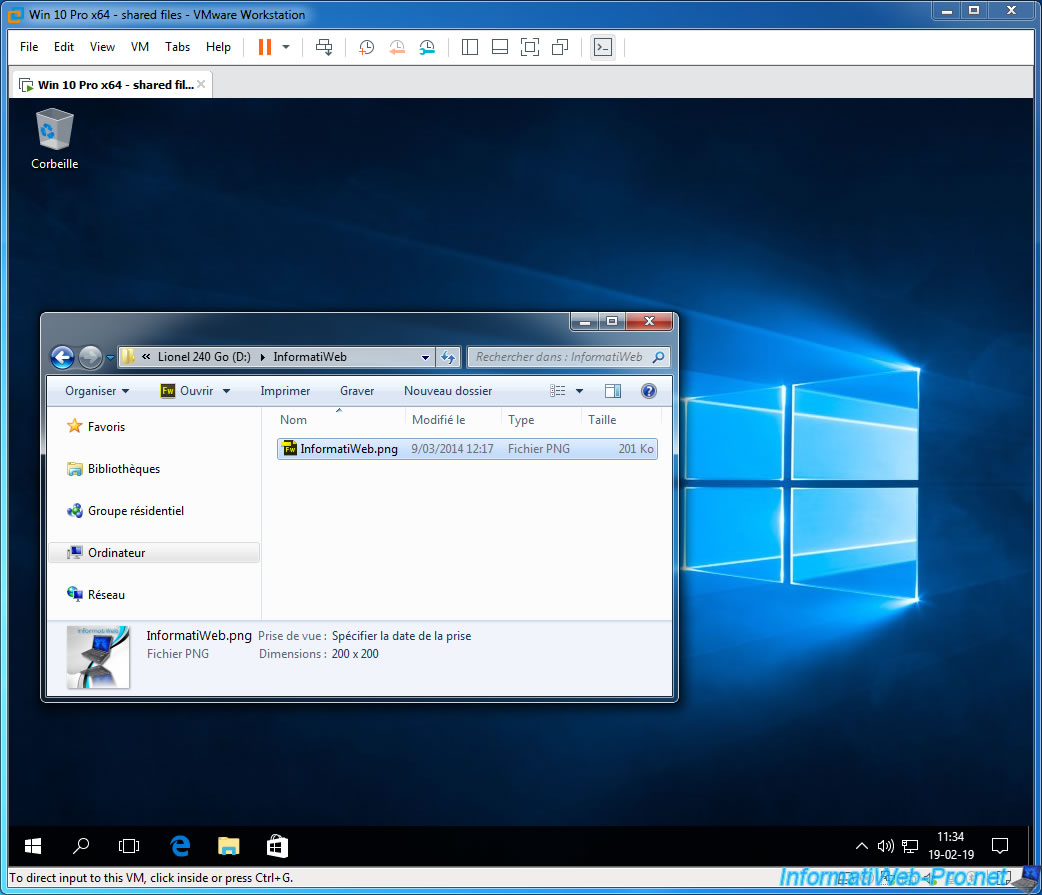
To transfer a file from the physical computer to the virtual machine, simply drag it to the virtual machine window (where the guest OS is displayed).
You can also right-click "Copy" on the physical computer and right-click "Paste" in the guest OS.
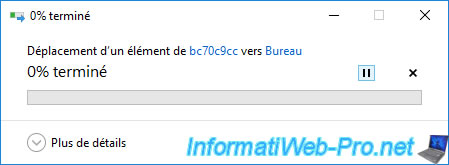
A VMware transfer window will be displayed and another will be displayed by the guest OS.
As you can see, the files or folders dragged/dropped will be copied by the guest OS from a folder with a weird name.
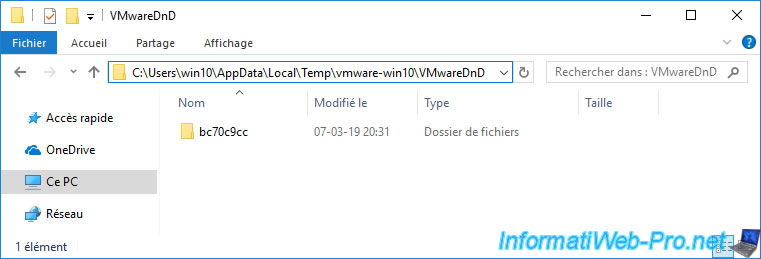
In fact, when you use drag and drop, the VMware tools temporarily copy the data into a subfolder "vmware-xxxx\VMwareDnD" of the temporary folder of the guest OS.
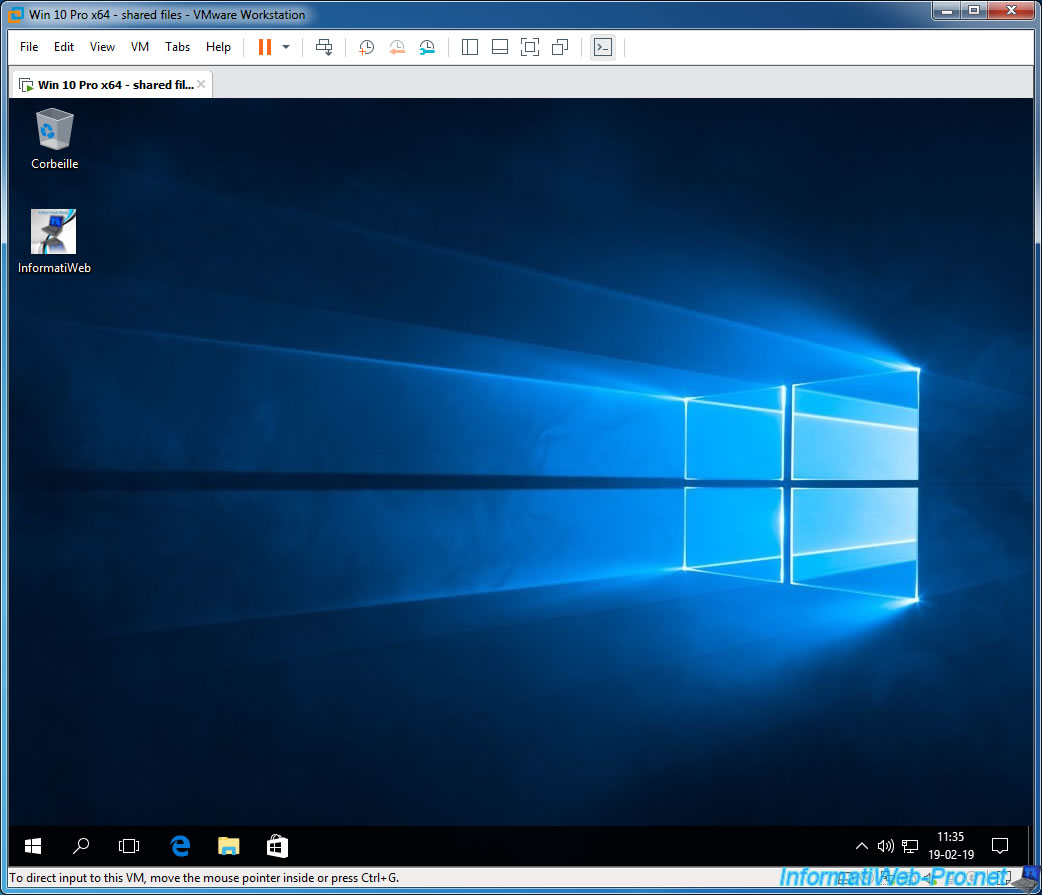
1.2. VMware file sharing on Windows
To share folders on your physical PC to make them read-only (for security) or read/write (if needed) by the virtual machine.
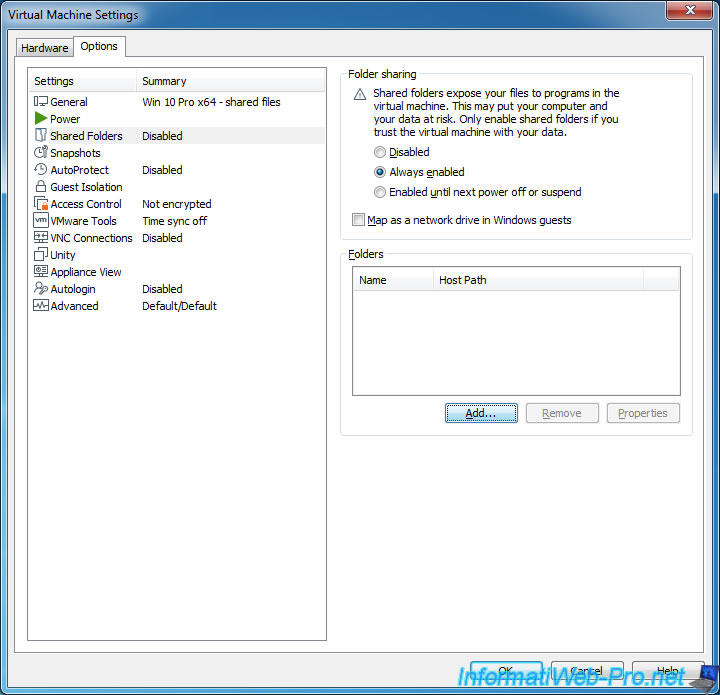
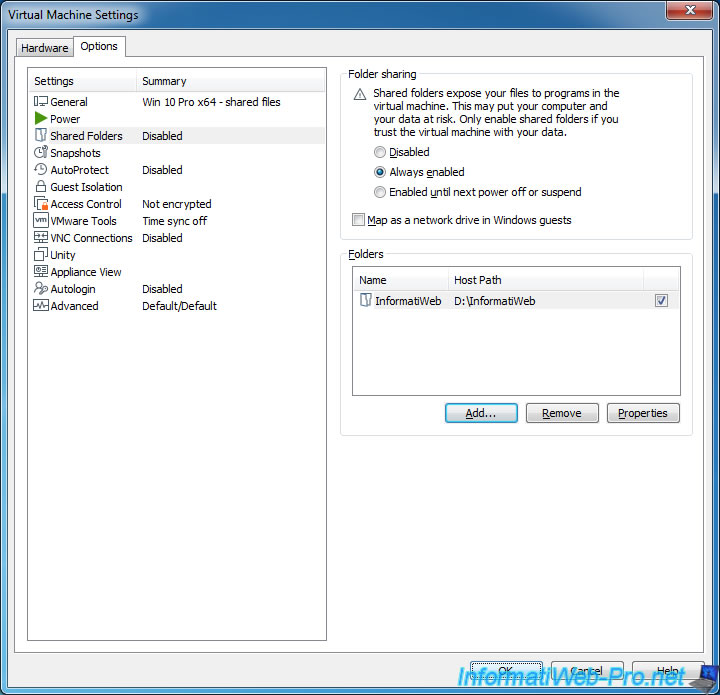
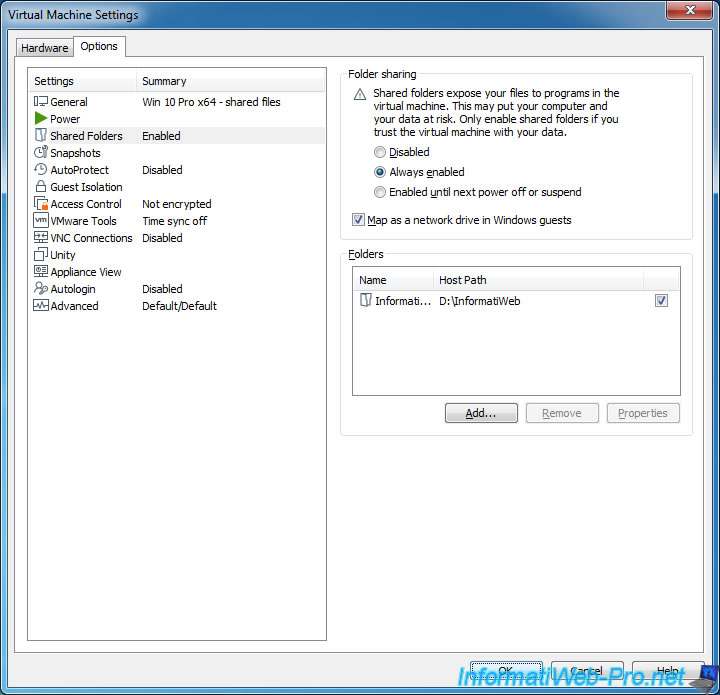
To do this, open the settings of the virtual machine and go to the "Shared Folders" section and select the desired option :
- Disabled : VMware file sharing disabled (default value)
- Always enabled : always enabled (for this virtual machine)
- Enabled until next power off or suspend : activated until the virtual machine is power off or paused
- Map as a network drive in Windows guests : Automatically create a network drive where you will find all the shares created here. Which makes it easier to access these shares.
Click Add to create a new share.
The Add Shared Folder Wizard appears.
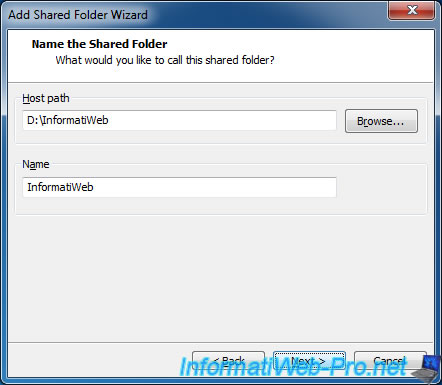
Click Browse to select the folder you want to share and make available to the virtual machine.
Then, enter the name under which this share will appear in the guest OS.
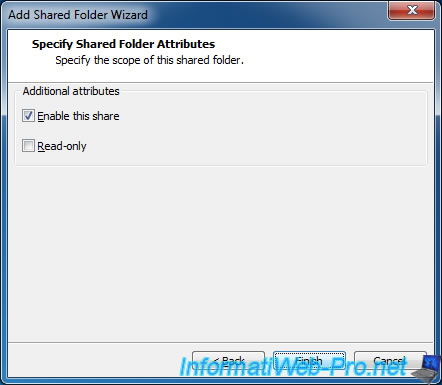
Enable sharing by checking the "Enable this share" box and check the "Read-only" box if you want this share to be read only.
Save the settings and click Yes.
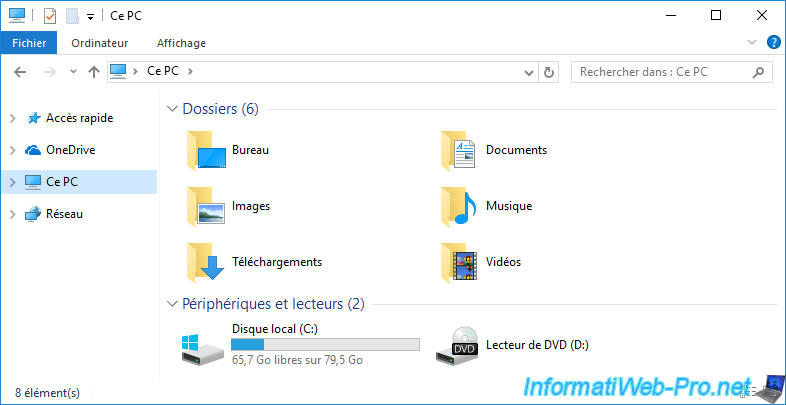
If you don't check the "Map as a network drive ..." box, the share will not appear in Computer (or This PC) by default.
In order to access it, you will have to go through the network option (but you will probably encounter a network discovery disabled by default error).
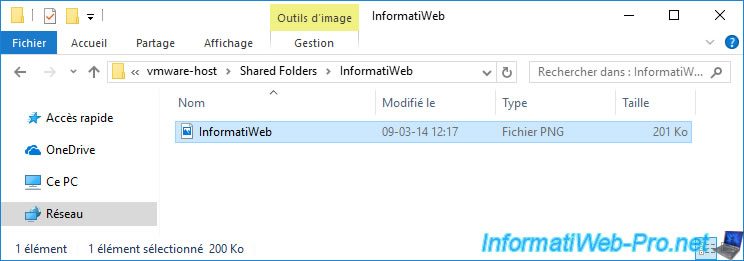
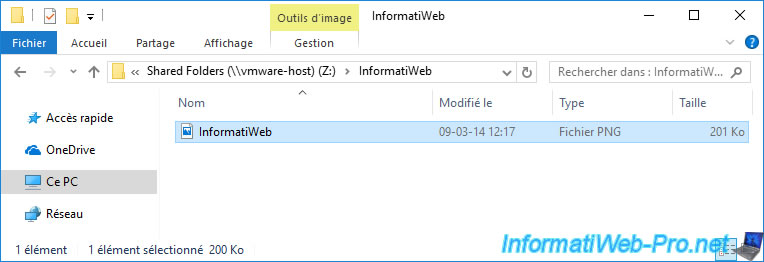
To access them without problem, type : \\vmware-host\Shared Folders
As you can see, our InformatiWeb share appears.
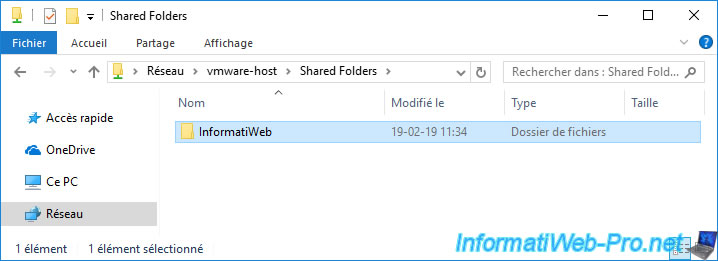
In this folder, we find the files of this shared folder.
To make your life easier, we recommend that you check the "Map as a network drive in Windows guests" box to have VMware Workstation automatically create a network drive whose contents will match the list of shared folders here.
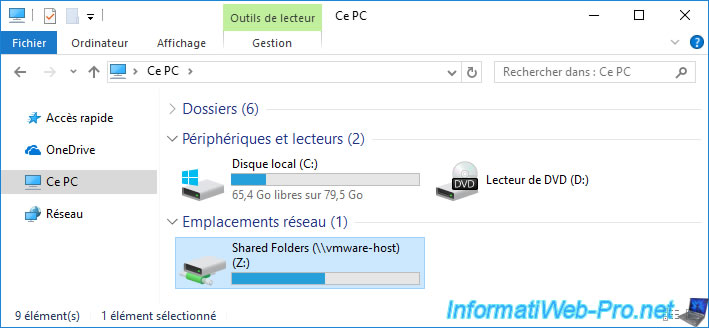
In Computer (or This PC), you will see a "Shared Folders" network drive that is accessible with the letter Z and is mapped to \\vmware-host\Shared Folders.
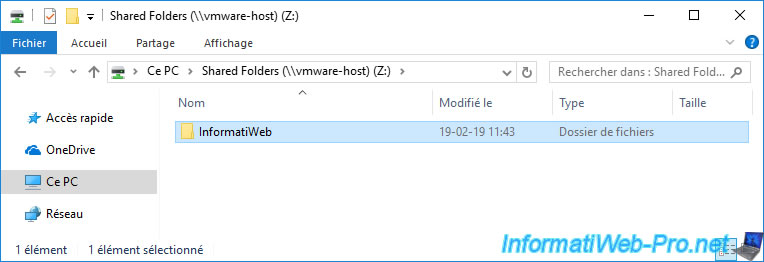
As expected, you will have access to the list of shares created in the virtual machine settings.
Share this tutorial
To see also
-
VMware 3/16/2013
VMware Workstation - Boot a VM on the BIOS / EFI firmware
-
VMware 2/7/2020
VMware Workstation 15 - Installation on Linux
-
VMware 12/24/2021
VMware Workstation 15 - Slice the virtual hard disk of a VM
-
VMware 12/10/2021
VMware Workstation 15.5 - Convert a Virtual PC virtual machine to a VMware VM

You must be logged in to post a comment