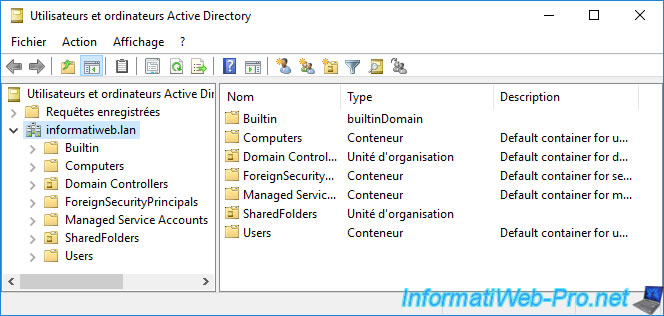
Presentation of the "Active Directory Users and Computers" console on Windows Server 2016
- Windows Server
- 20 August 2021 at 13:46 UTC
-

- 2/3

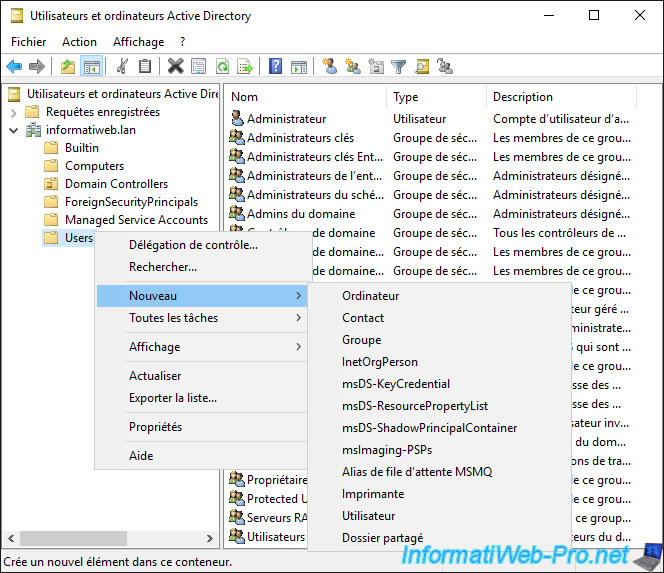
2. Create new objects in your Active Directory domain
To create new objects in your Active Directory domain, right-click "New" on the desired folder and choose one of the available options :
- Computer : to create a computer type object manually. Usually, you will not use this option because, these are created automatically when you join a computer to a domain (whether online or offline with "djoin").
- Group : to create a group of users or computers
- Printer : to reference a printer in the Active Directory. Although this option doesn't seem to work and there is another easier way to do it.
- User : to create a new user account
- Shared Folder : to reference a shared folder in the Active Directory. Note that this must have already been shared before you can reference it in the AD using this option.
- and more
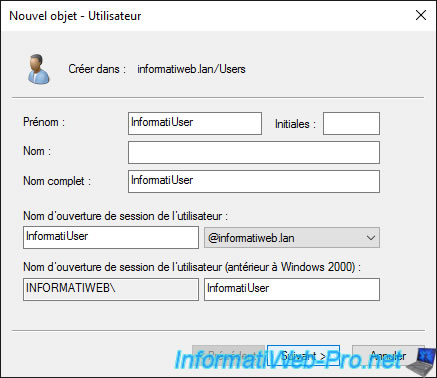
2.1. Create a new user
To create a new user, right-click "New" on the "Users" folder, then click on : User.
Then, enter a first name for it, as well as a username in the "User logon name" box.
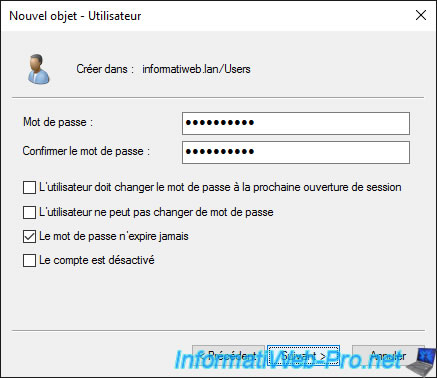
Then, enter a password that respects the password complexity policy on your server.
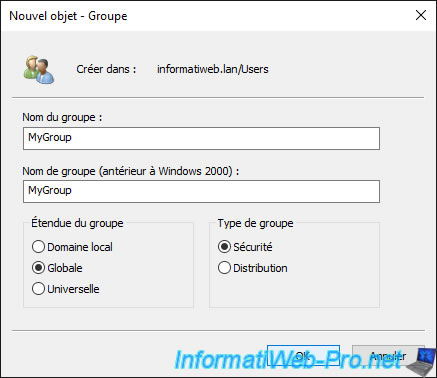
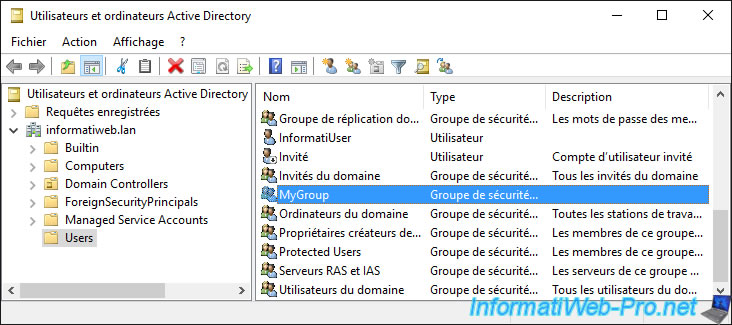
2.2. Create a new group
When you want to create a group, you need to choose a group type and the scope of the group.
The scope of the group defines what the group can contain : objects from the same domain, from the same forest, or from any domain.
The type of group can be of type :
- security : these groups have a SID and allow you to assign NTFS rights to a folder, for example
- distribution : these groups are only used for sending mail, via Microsoft Exchange, for example
To learn more about group types and scopes, refer to our tutorial : WS 2016 - AD DS - Manage groups
The group appears.
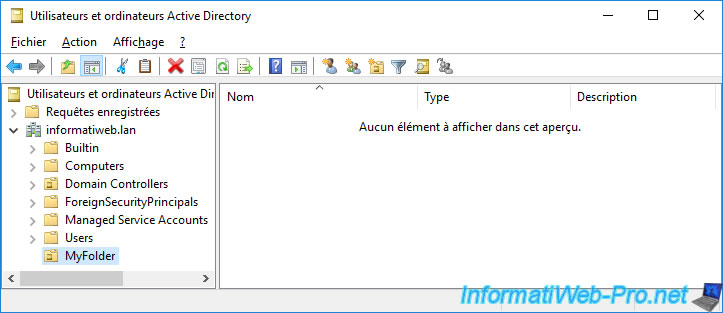
2.3. Create an organizational unit
An organizational unit is a kind of folder, but it can also be used to manage the application of Group Policies (GPO).
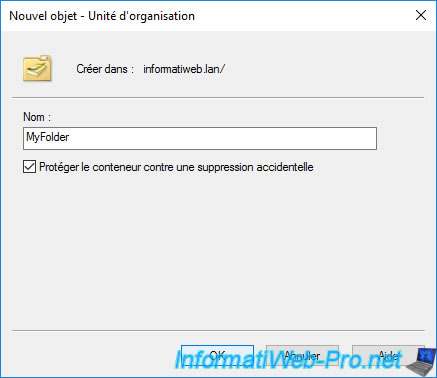
As you can see, organizational units have a slightly different icon from other folders (which are containers).
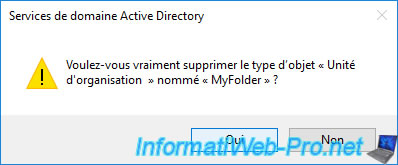
Note that if you want to delete the organizational unit created previously, this will not be possible if you did not uncheck the "Protect container from accidental deletion" check box when creating it.
Confirm the attempt to delete this "organizational unit".
The following error message will be displayed :
Plain Text
You do not have sufficient privileges to delete [organizational unit name], or this object is protected from accidental deletion.

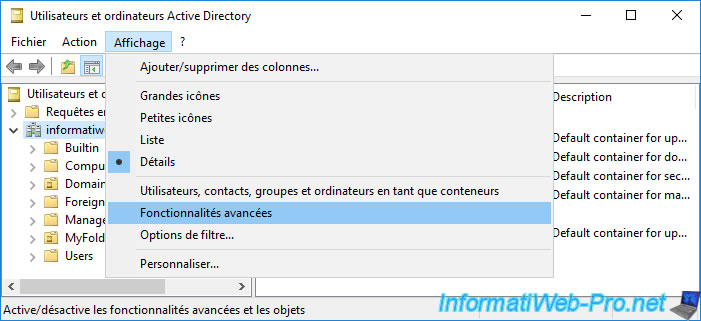
To disable this protection against accidental deletions, enable the advanced features by clicking on : View -> Advanced Features.
Clear the "Protect object from accidental deletion" checkbox and click OK.
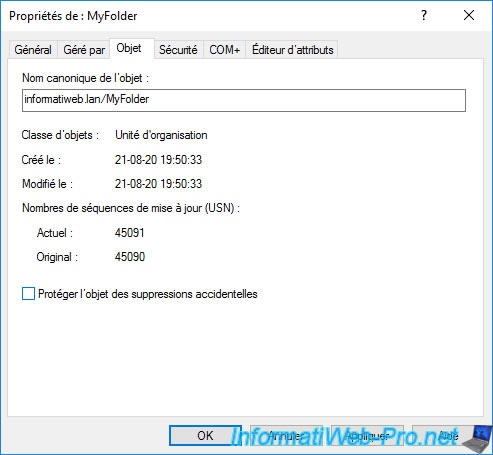
Now that this protection is disabled, you will be able to delete this organizational unit.
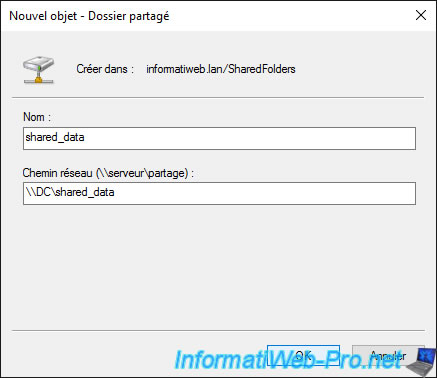
2.4. Reference a shared folder
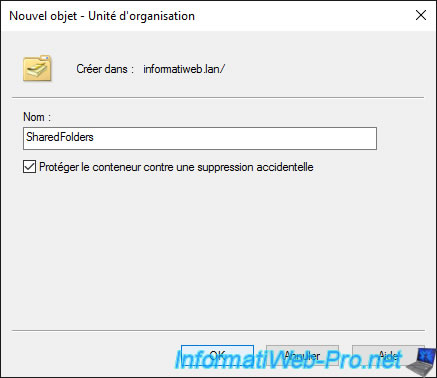
To begin, for example, create a new folder (thus an organizational unit) named "SharedFolders".
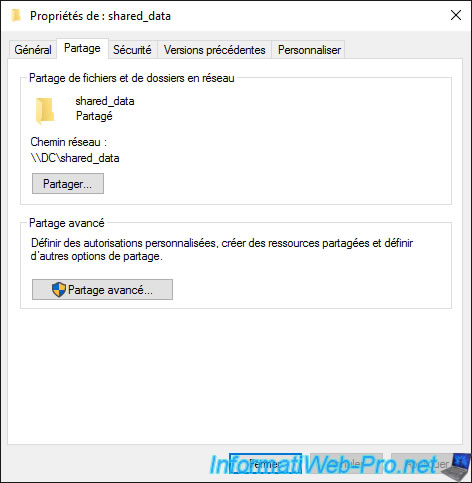
Then, share the desired folder from the file explorer.
Once the desired folder has been shared, its network path will appear in the "Sharing" tab of the properties of the concerned folder.
Then, in the "Active Directory Users and Computers" console, specify :
- a name : for example, the name of the shared folder. But, you can indicate what you want.
- the network path of the previously shared folder.
Warning : this wizard doesn't check the existence or the availability of the network path indicated here. In addition, this wizard only allows you to reference the path of a shared folder, in Active Directory, and not to directly share a folder.
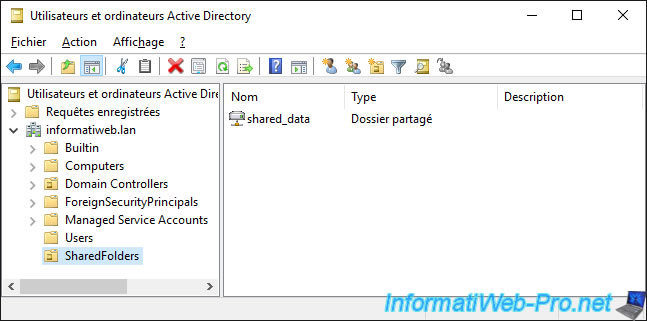
The object of type "Shared folder" appears.
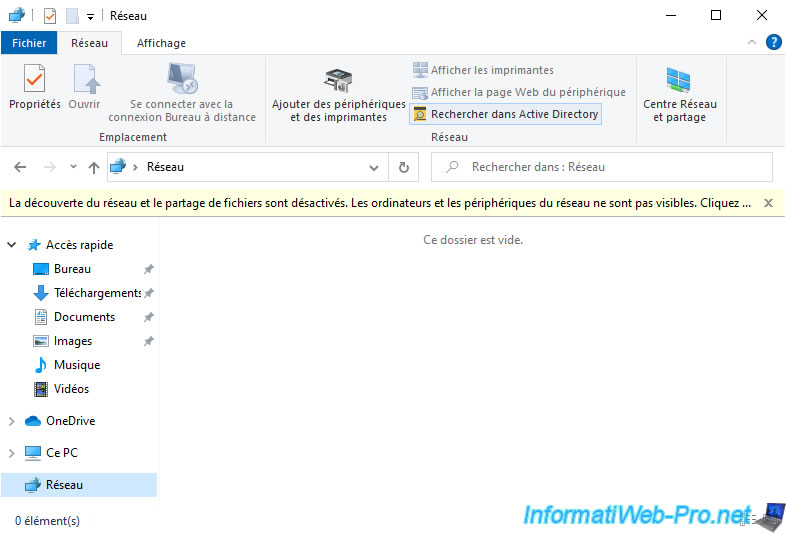
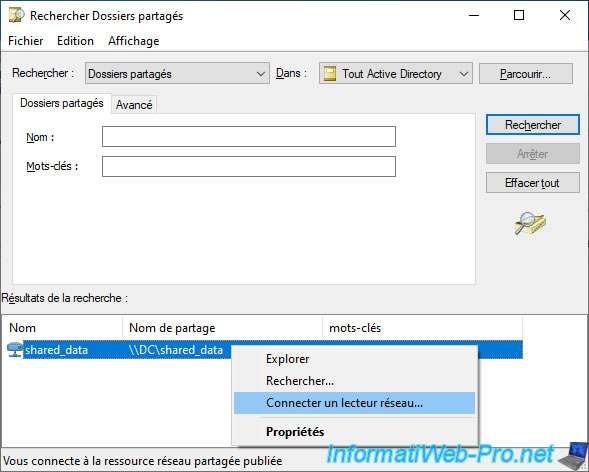
On a client computer linked to your Active Directory domain, open the file explorer and click "Network" in the left column.
Then, in the top bar, click on "Network", then on "Find in Active Directory".
In the "Find" list available at the top of the window, choose "Shared folders" and click on : Find Now.
The shared folder previously referenced in Active Directory appears.
Right click on it and click on :
- Explore : to display the contents of this shared folder using its network path (also known as the "UNC path")
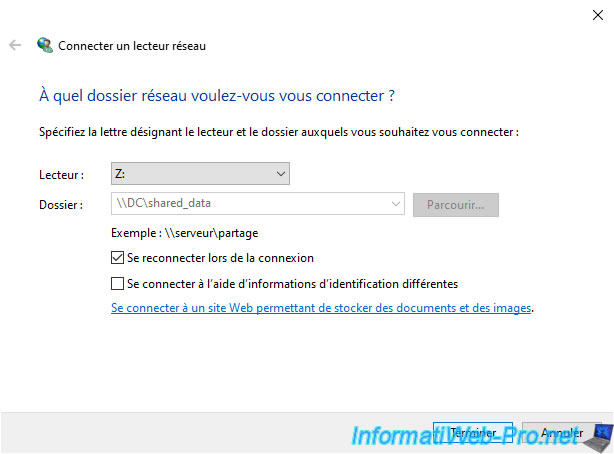
- Connect a network drive : to assign a drive letter to this shared folder and thus be able to access its content very easily from the file explorer (in "This PC" and formerly : Computer or workstation).
By default, Windows chooses the last available drive letter when you create a network drive.
Click on "Finish".
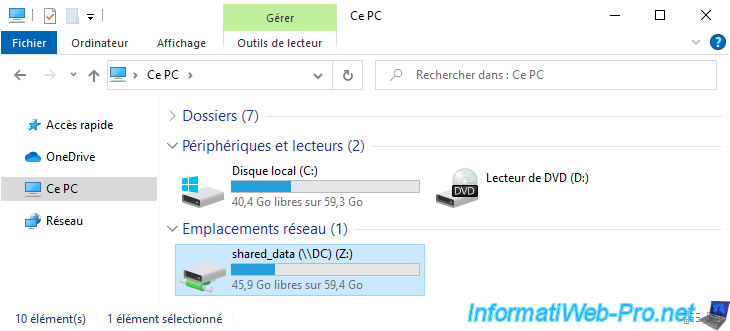
The network drive appears.
2.5. Reference a shared printer
When you right-click "New" on a folder, the "Active Directory Users and Computers" console offers you in particular to create a new "Printer" type object.
This wizard simply asks you for the network path of a printer that has been shared beforehand.
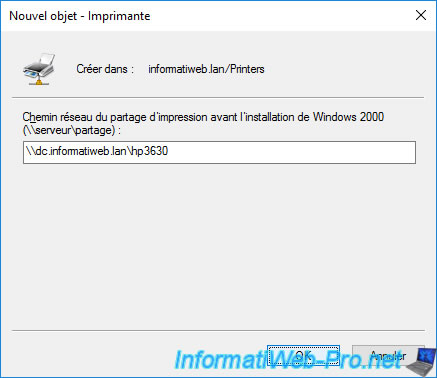
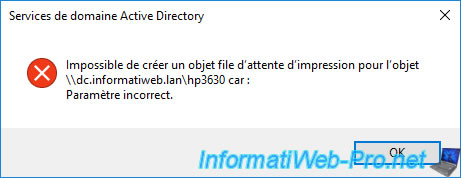
Except that this method doesn't work and shows you this error message :
Plain Text
A printer queue object for object \\[server name]\[printer share name] cannot be created because: The parameter is incorrect.
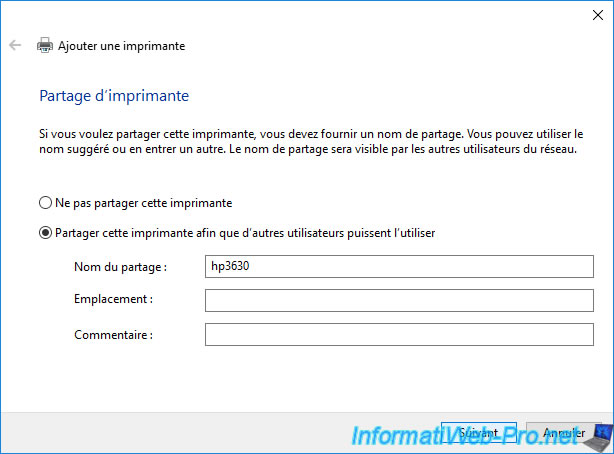
Once the printer is configured on a server or a computer that is always available, share this printer from Windows and specify a name without spaces (preferably) for the name of the share.
Indeed, the name of the share will be part of the network path of this printer. It's therefore recommended that it doesn't include any space.
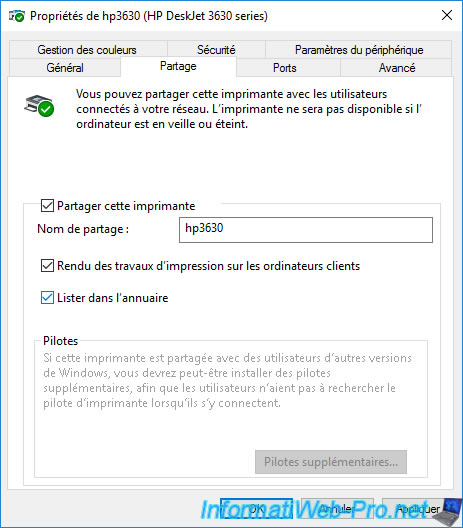
Then, open the properties of the printer you want to reference in the Active Directory.
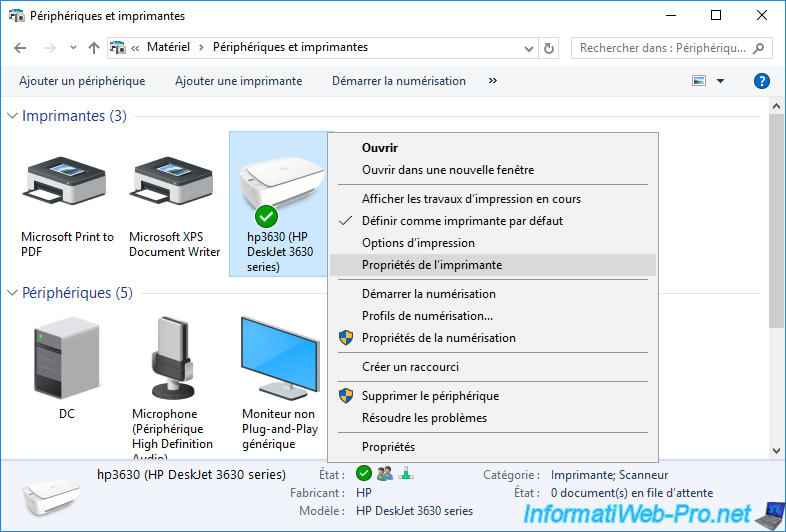
In the "Sharing" tab, check that the "Share this printer" box is checked and check the "List in the directory" box so that this printer is listed in your Active Directory.
If you look in the "Active Directory Users and Computers" console, you will not find, by default, the printers listed in the Active Directory.
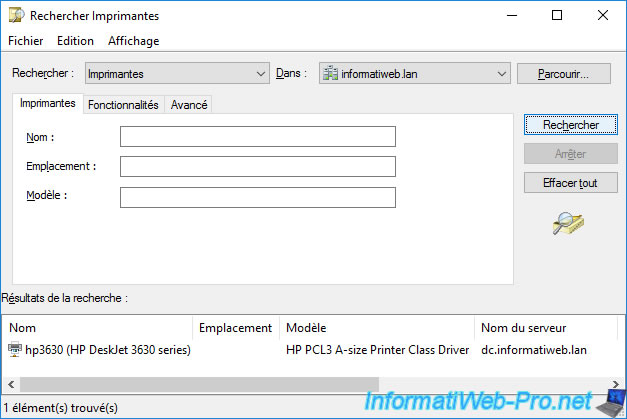
To obtain the list of printers referenced in your Active Directory, go to the "Actions" menu and click on "Search".

Select "Printers" from the "Find" list and click the "Find" button.
The printer previously referenced via the "List in the directory" box appears in the bottom list.
2.6. Add a printer on a client PC from the Active Directory
The fact of referencing a printer in the Active Directory simply makes it possible to simplify the addition of this one on the client workstations.
Although the addition can also be configured automatically through group policies if you wish.
In this case, we have a Windows 10 client PC linked to our Active Directory domain.
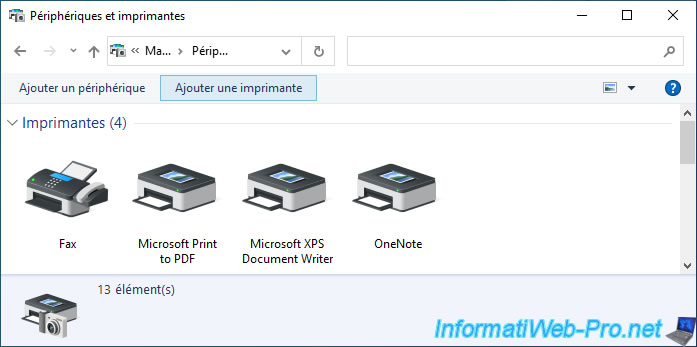
On Windows 10, open the Control Panel and go to : Hardware and Sound -> Devices and Printers.
Then, click on : Add a printer.
If the client PC is on the same network (or subnet) as the server where the printer was shared, Windows may automatically detect it.
If so, you can select it and click "Next".
But, in our case, we will consider that it was not detected automatically.
So, we click on : The printer that I want isn't listed.
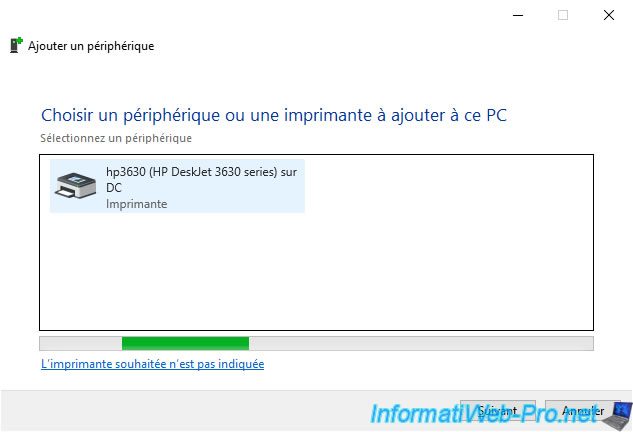
Choose "Find a printer in the directory, based on location or feature" and click "Next".
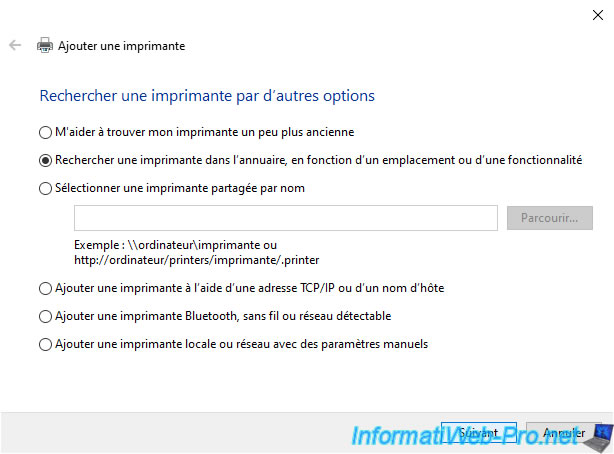
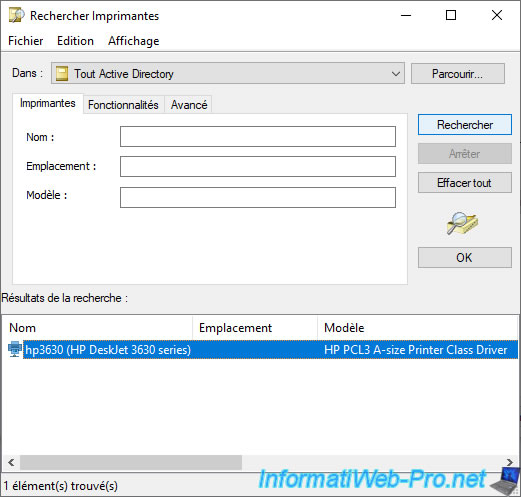
The "Find Printers" window appears.
Click on the "Find Now" button and the printer that you previously listed in your Active Directory appears.
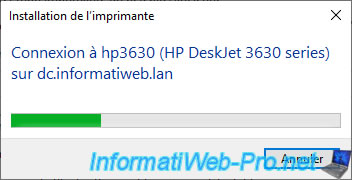
Wait while connecting to your printer.
As you can see, in our case, our HP DeskJet 3630 Series printer was installed on the client PC using the HP PCL3 A-size Printer Class Driver.
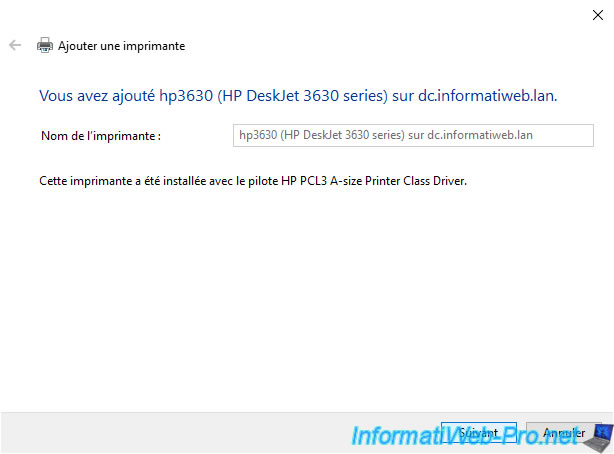
If you want, you can print a test page to make sure it works.
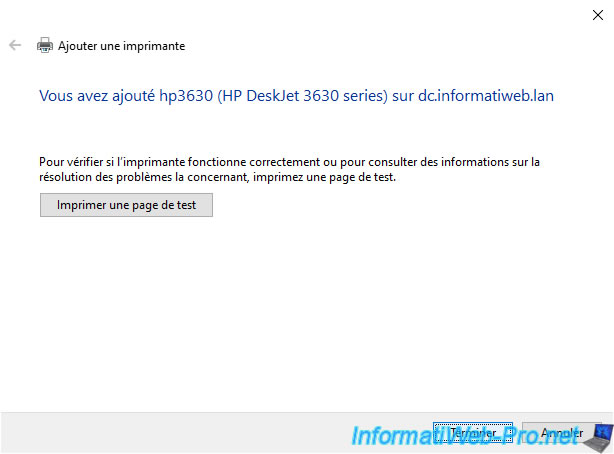
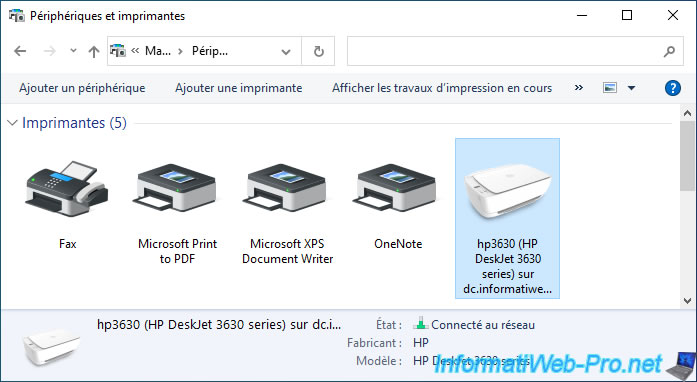
And there you have it, the printer shared from your server appears on your client PC.
Share this tutorial
To see also
-

Windows Server 4/16/2021
Windows Server - AD DS - How Active Directory replication works
-
Windows Server 4/30/2021
Windows Server - AD DS - Overview of Active Directory functional levels
-
Windows Server 4/3/2021
Windows Server - AD DS - The basics of Active Directory
-
Windows Server 5/21/2021
WS 2016 - AD DS - Add a domain controller to an existing AD domain
No comment