What is a certificate authority (CA) and install enterprise CA on Windows Server 2016
- Windows Server
- 15 September 2023 at 15:39 UTC
-

- 3/5
8. Enable auditing of your certificate authority (CA)
8.1. Enable auditing of your certificate authority (CA) through the GUI
When you deploy a public key infrastructure (PKI) or in other words, a certificate authority (for simplicity), security is paramount.
You therefore have the possibility of enabling the audit of this one to record all the events concerning this one.
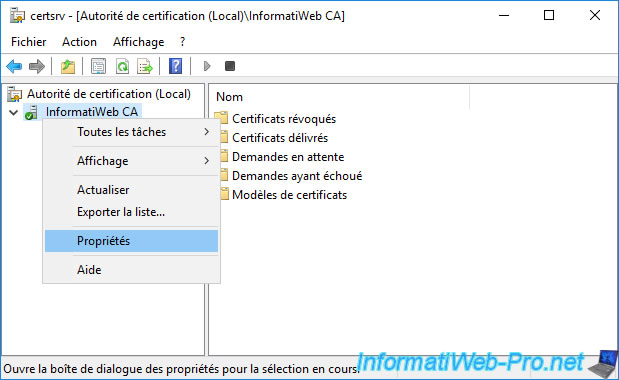
To do this, in the "Certification Authority" console, right-click "Properties" on the name of your certification authority.
In the properties window that appears, go to the "Auditing" tab.
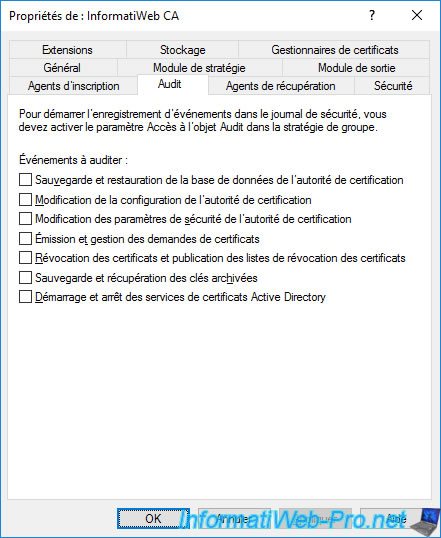
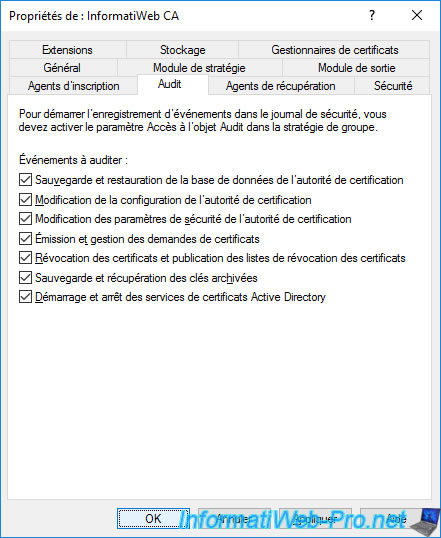
To have all these events recorded, simply check all the boxes.
Then, click OK.
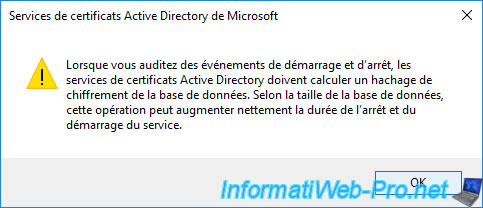
Warning : if you check the last box (Start and stop Active Directory Certificate Services), a warning will be displayed to warn you that the audit of this event requires calculating a hash of your database during startup and stopping your certification authority.
This can greatly increase the startup and shutdown time of the latter depending on the size of the database of your certification authority.
Plain Text
Whenever you audit start and stop events, Active Directory Certificate Services must calculate a cryptographic hash of the database. ...
For these changes to take effect, you will need to restart your CA.
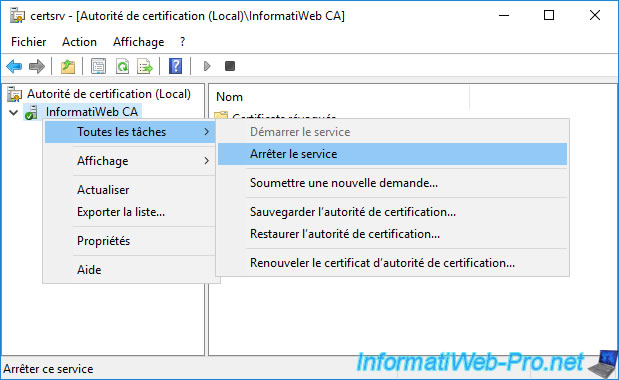
To do this, right-click "All Tasks -> Stop Service" on the name of your CA.
Note : you can also use the "Stop" and "Play" icons present in the toolbar of this console.
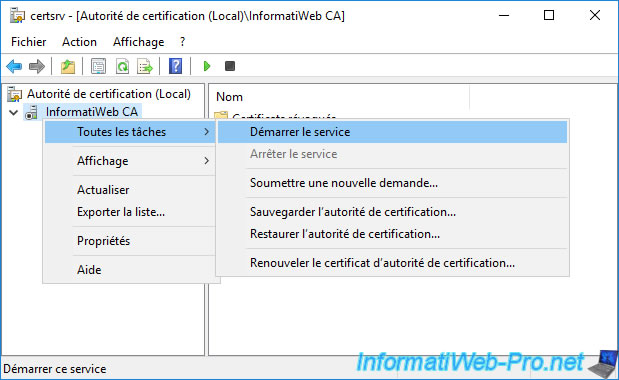
Then, right-click "All Tasks -> Start Service" on your CA name.
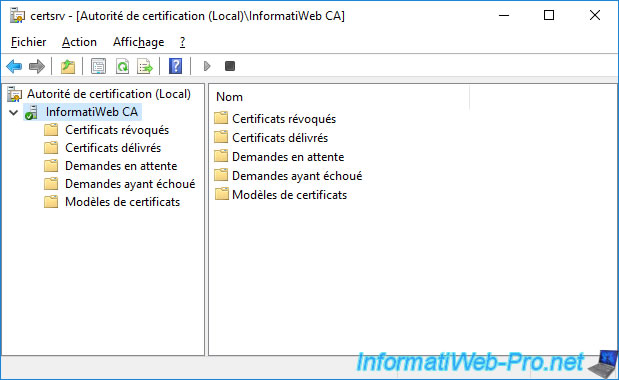
Your CA has been restarted.
8.2. Enable auditing of your certificate authority (CA) from the command line
If you wish, you can also enable the auditing of your certification authority (CA) on the command line using the "certutil" tool.
To enable auditing of all events, use the command below.
Note : to audit only specific events, refer to the page "Securing PKI: Appendix B: Certification Authority Audit Filter" and add the desired values to replace the value "127" (all events) with the one you have calculated.
Batch
certutil –setreg CA\AuditFilter 127
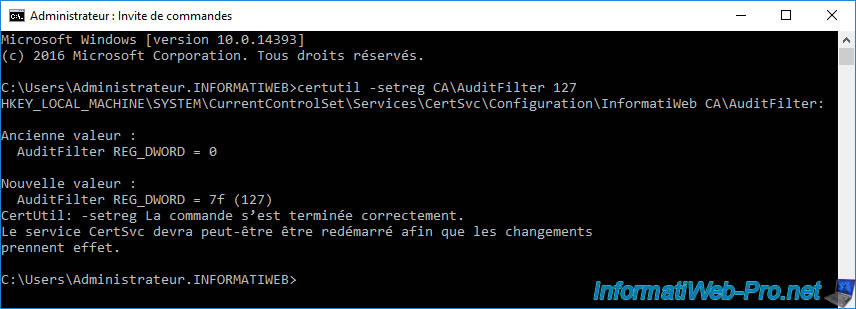
Once the "certutil" command has been executed, don't forget to restart your certification authority for the modification to take effect.
To do this, use the command :
Batch
net stop certsvc && net start certsvc

9. View your CA's certificate
9.1. View your CA's certificate from its console
To begin with, you will be able to very easily see the certificate of your CA from the "Certification Authority" console of this server.
Note : this method only allows you to see the certificate of your certification authority visible to client computers.
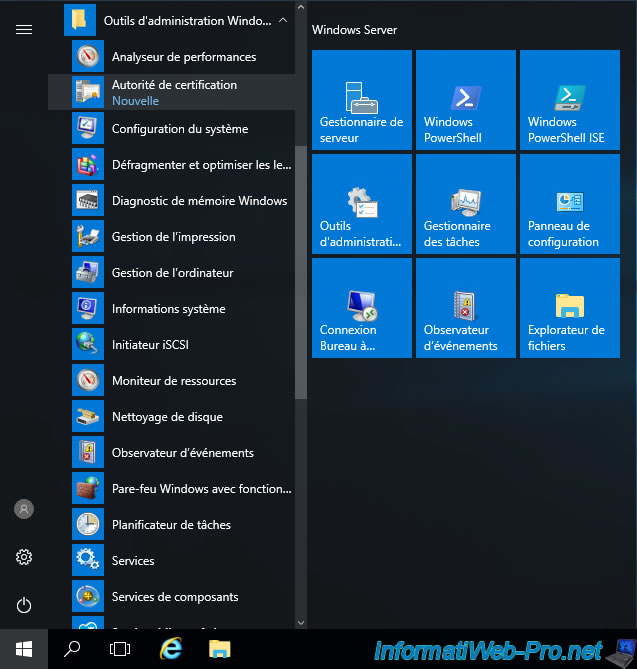
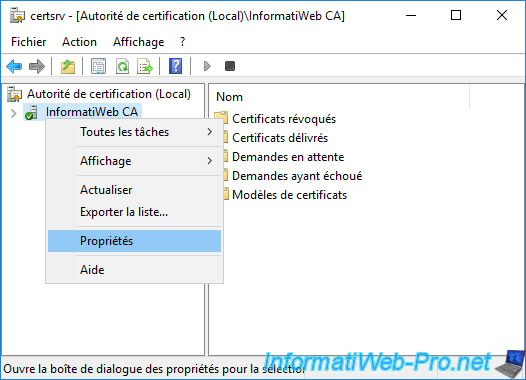
In the "Certification Authority" (certsrv) console that appears, right-click "Properties" on the name of your certification authority.
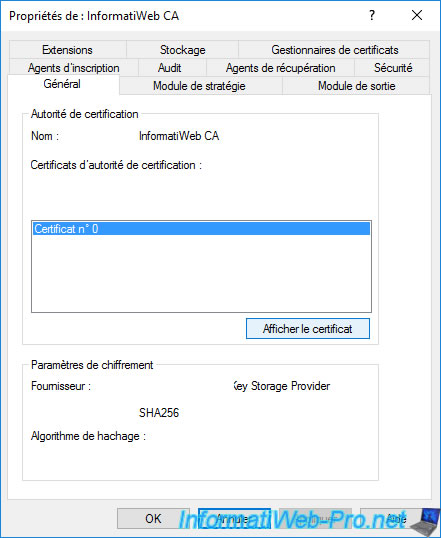
In the "General" tab, you will find the certificate of your certification authority.
By default, there is only one.
Select it and click : View Certificate.
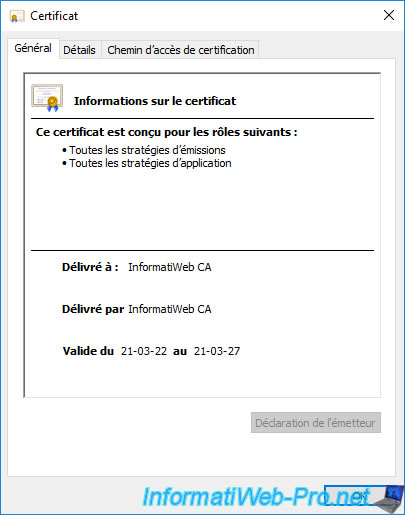
The certificate of your certification authority appears.
As expected, this is a self-signed certificate that your CA issued to itself and it is valid for 5 years (in our case).
If you go to the "Details" tab, you will be able to see which hashing algorithm is used.
In our case : sha256.
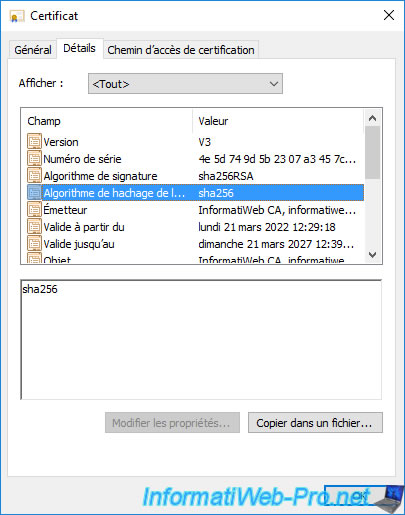
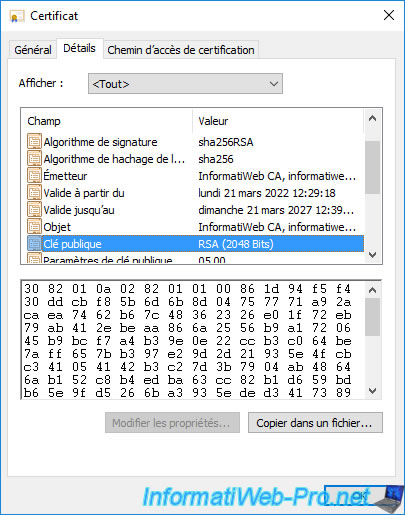
You will also be able to see the public key of your CA certificate.
It's this public key that clients will use to verify the signature of the certificates issued by it.
As a reminder, your certification authority signs the certificates it issues (delivers) using its private key.
Since this is an asymmetric encryption, it's therefore normal that clients can decrypt this signature using this public key.
9.2. View your authority certificate from the mmc console
On this same server, you can also use the "mmc" console to view and export your certificate authority's certificate (if needed).
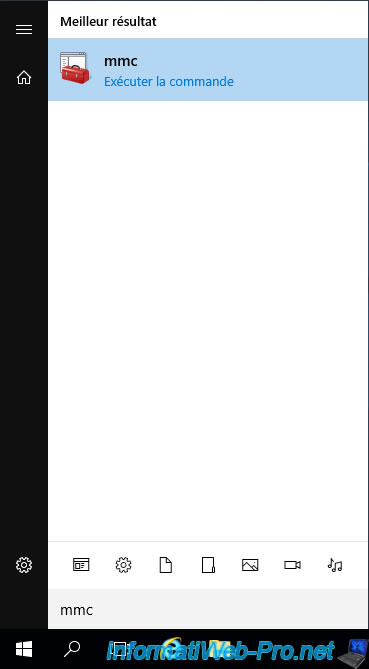
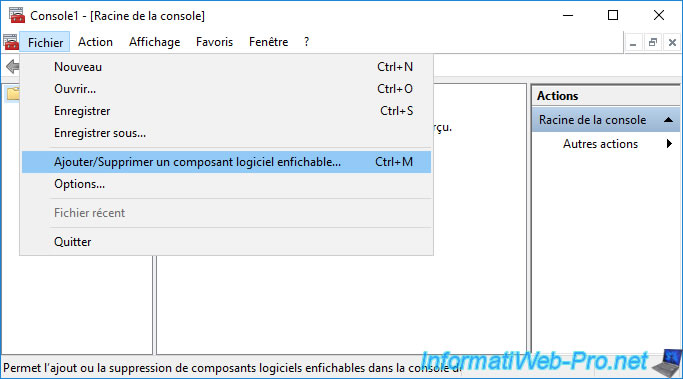
In the "mmc" console that appears, click : File -> Add/Remove Snap-in.
Select the "Certificates" component and click : Add.
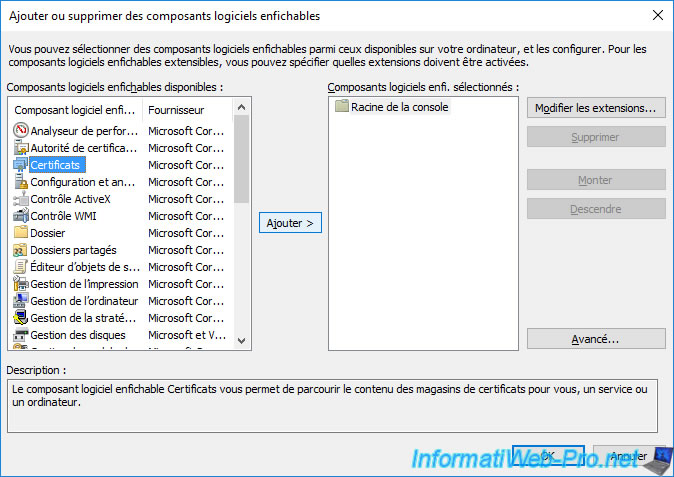
Select "Computer account" and click Next.
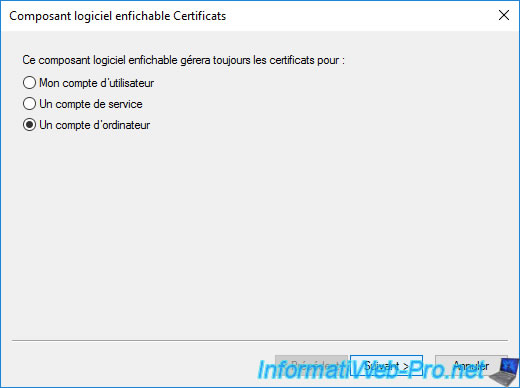
Leave the "Local computer ..." option selected and click Finish.
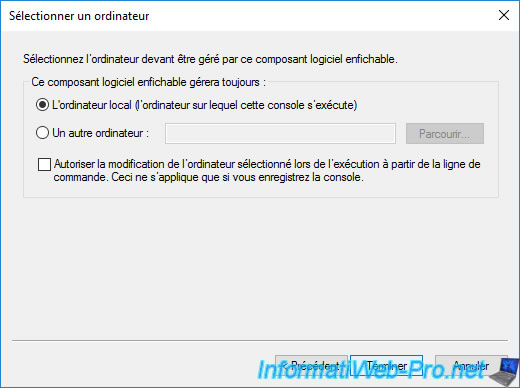
Click OK.
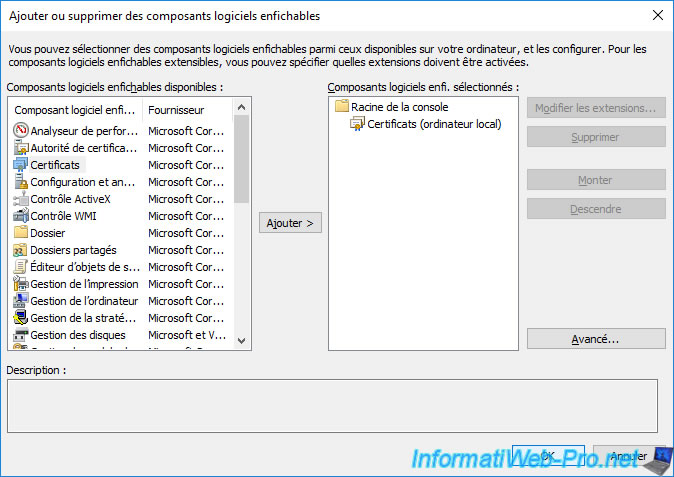
In the "Certificates - Local Computer" component that appears, go to the "Personal -> Certificates" folder and you will see the self-signed and personal certificate of your CA appear.
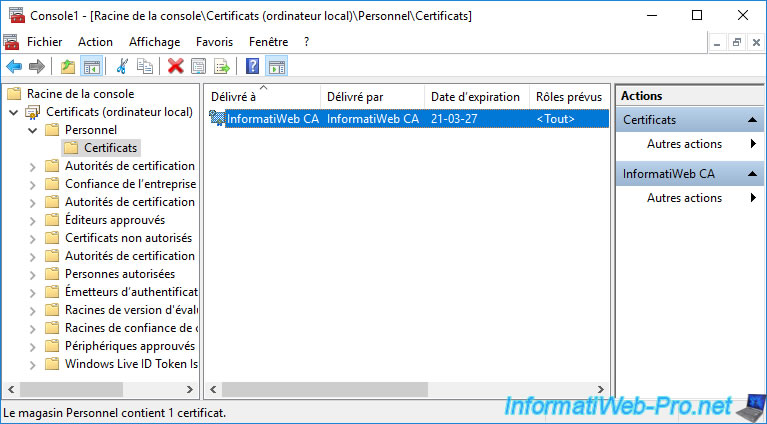
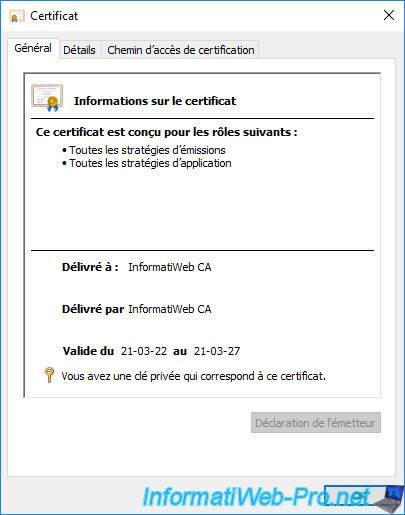
If you double click on it, you will see at the bottom of the certificate window that the private key corresponding to this certificate is present.
Warning : NEVER share this certificate in ".pfx" format, because it contains the associated private key.
If an unauthorized person recovers this private key, he will be able to sign certificates by pretending to be your certification authority.
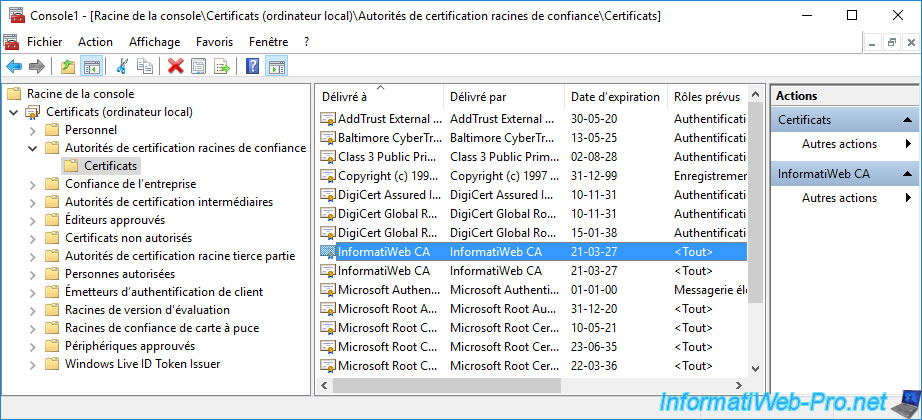
You can also find your CA certificate in the "Trusted Root Certification Authorities" certificate store.
Display this certificate by double-clicking on it.
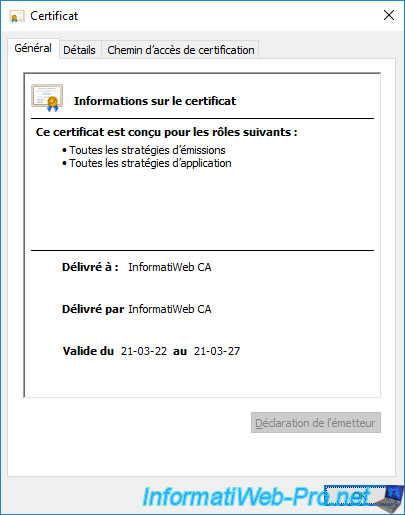
As you can see, this time the associated private key is not present.
It's this public certificate which will also be automatically distributed to the computers and servers of your Active Directory infrastructure thanks to the trust relationships already established.
9.3. View the LDAP version of your CA's certificate from the ADSI Edit console
As explained previously, when you install an enterprise certification authority, it uses features from your Active Directory infrastructure.
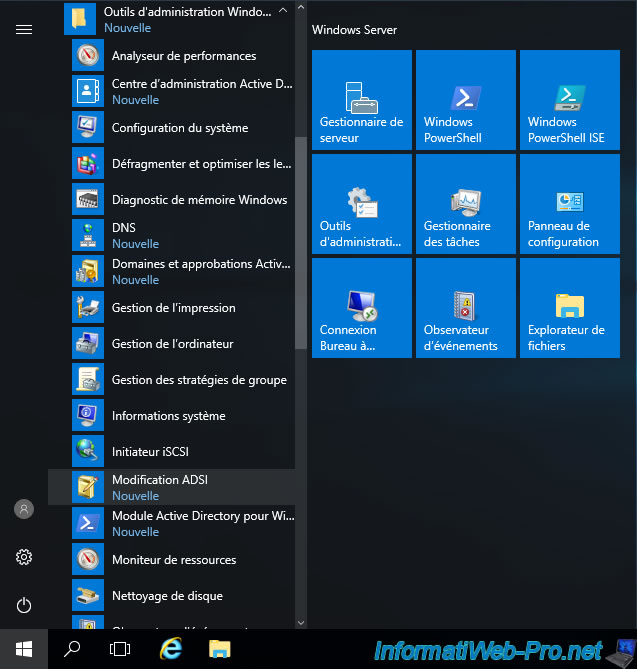
To see it, on your Active Directory domain controller, launch the "ADSI Edit" console.
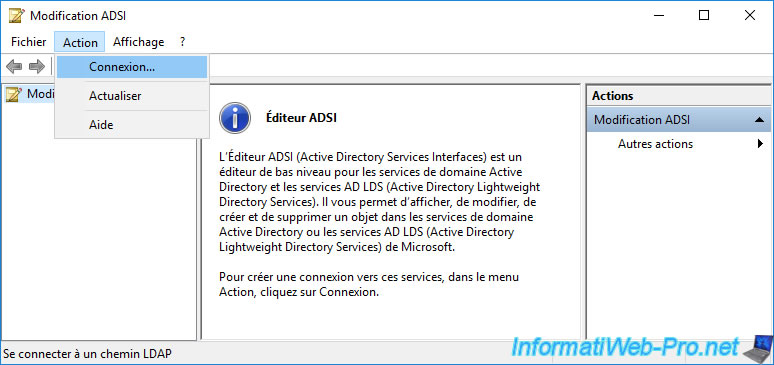
In the "ADSI modification" window that appears, click on : Action -> Connect to.
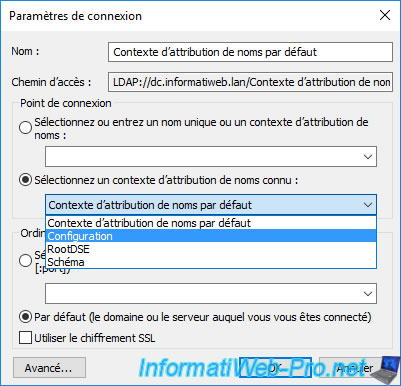
In the "Connection Settings" window that appears, select "Configuration" as the known naming context.
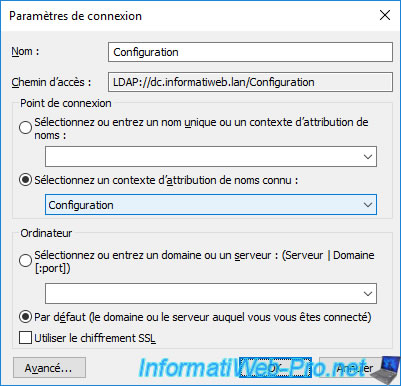
Then, click OK.
In the "Configuration" partition that appears, go to : CN=Configuration,DC=... -> CN=Services -> CN=Public Key Services -> CN=Certification Authorities.
In this folder, you will see an LDAP object appear which simply corresponds to your certification authority.
Indeed, the name corresponds to the name of your certification authority and the LDAP class "certificationAuthority" indicates that it's a certification authority (CA).
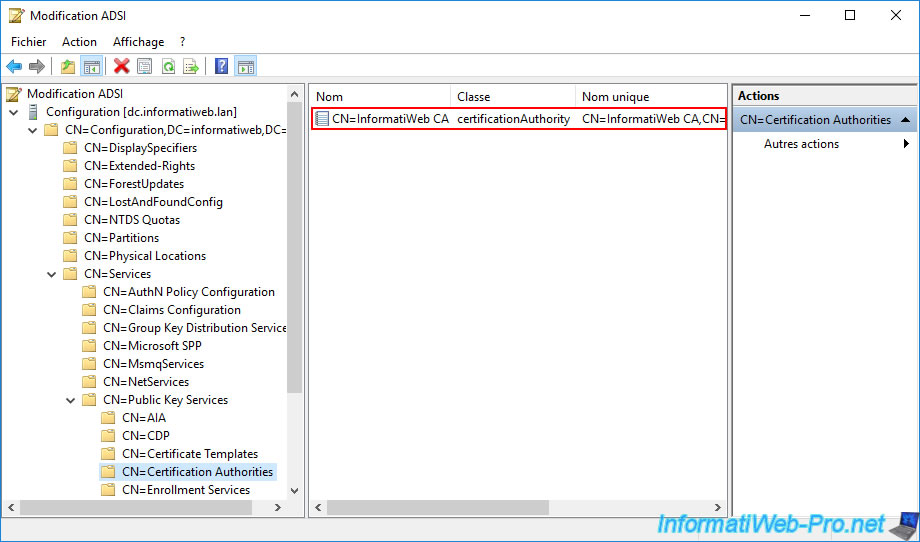
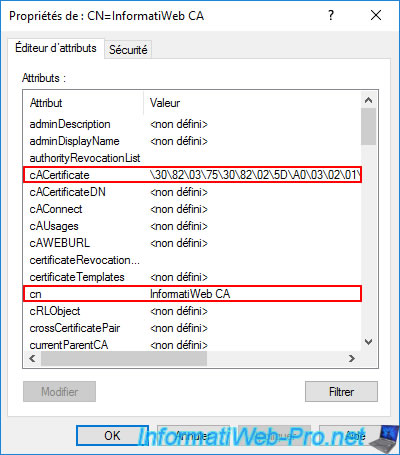
If you double click on this LDAP object, you will see that :
- the "cn" attribute : corresponds to the common name (CN) of your certification authority
- cACertificate : corresponds to the certificate of your certification authority (although it's not readable the way it is displayed here)
However, this explains :
- why the servers and computers that are part of your Active Directory infrastructure will know that a certificate authority is present in your company
- how your servers and computers will know the public key of your certification authority.
Indeed, they will receive the certificate your authority which is in your Active Directory (as you can see here).
Share this tutorial
To see also
-
Articles 1/26/2024
SafeNet Authentication Client (SAC) - Installation and overview
-
Articles 9/8/2023
What is encryption and how does it work ?
-
Windows Server 12/29/2023
WS 2016 - AD CS - Backup and restore a certificate authority (CA)
-

Windows Server 1/19/2024
WS 2016 - AD CS - Buy smart cards and log in via them

No comment