Install and configure an OCSP responder to manage certificate revocation on Windows Server 2016
- Windows Server
- 10 November 2023 at 12:13 UTC
-

- 2/4

3. Create a custom certificate template for OCSP response signing
As indicated in the 1st step of this tutorial, when a client checks with an online responder (OCSP) if a certificate has been revoked, it receives a signed response which indicates whether or not it has been revoked.
In order for this OSCP response to be signed, you will therefore need a suitable certificate template.
In this case, the "OCSP Response Signing" certificate template present by default on your certification authority.
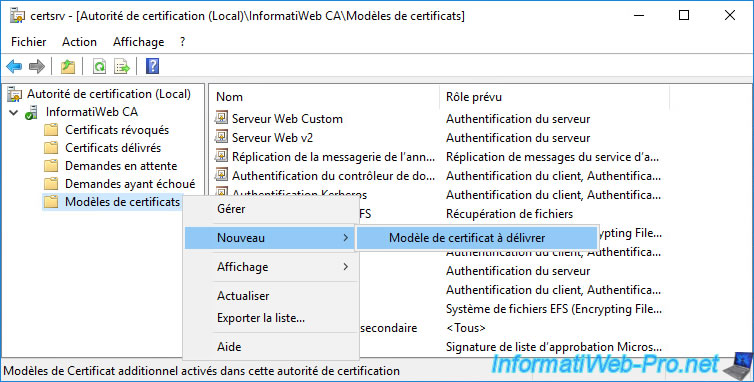
Open the "Certification Authority" console and right-click "Manage" on the "Certificate Templates" folder.
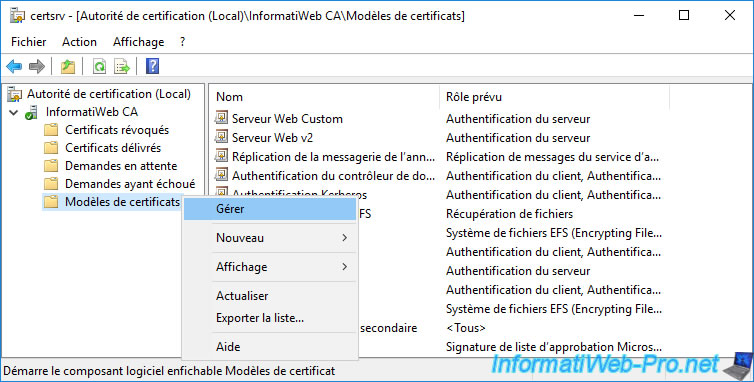
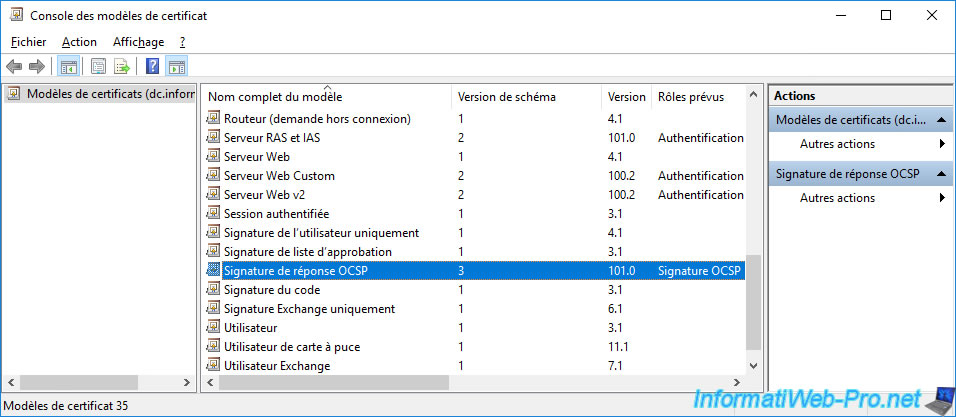
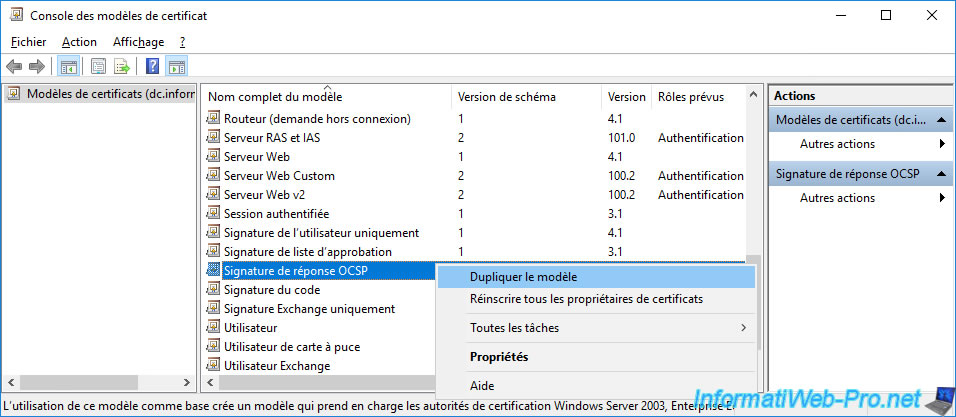
In the list of existing certificate templates, you will find the "OCSP Response Signing" certificate template mentioned above.
Right-click "Duplicate Template" on it.
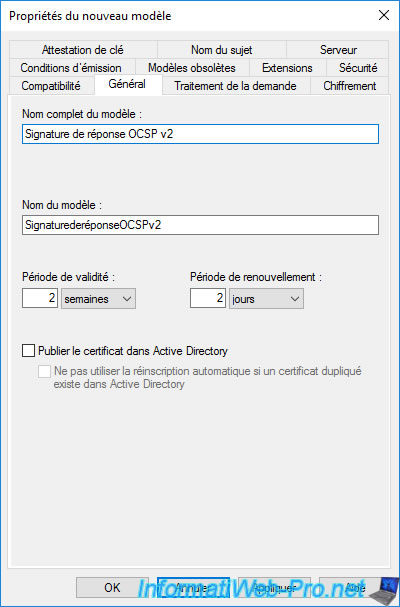
Specify a name for this new certificate template.
In our case : OCSP Response Signing v2.
Important : by default, the validity period is only 2 weeks.
The reason for this very short duration is because the client will never check for revocation of the OCSP signing certificate used by your online responder.
Indeed, you will easily understand that if the client must check the revocation of the 1st OCSP response by sending a second request to the OCSP online responder, the latter should send a 3rd request to check the revocation of the 2nd OCSP response, ...
In the "Request Handling" tab, check the box "Allow private key to be exported" to be able to later export the issued certificate, as well as its private key if you wish.
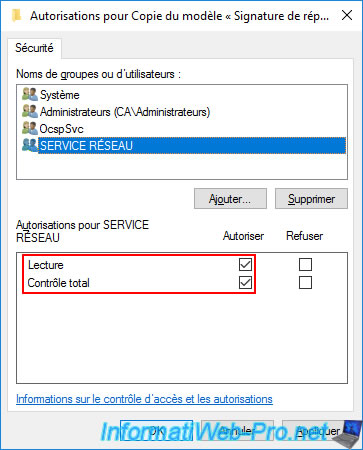
When your online responder wants to sign an OCSP response to send to a client, the client needs access to the certificate's private key as a network service.
So, you need to allow "Network Service" system account to access this private key.
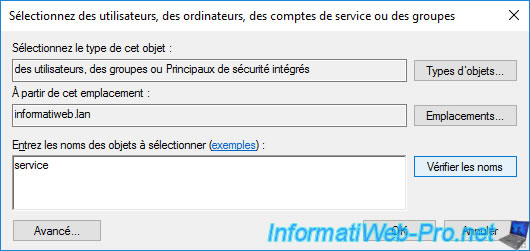
To do this, click on the "Key Permissions" button.

In the authorization window that appears, click on the "Add" button.
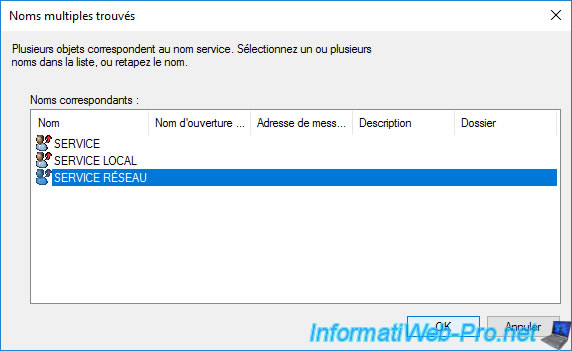
Specify "service" and click the "Check Names" button.
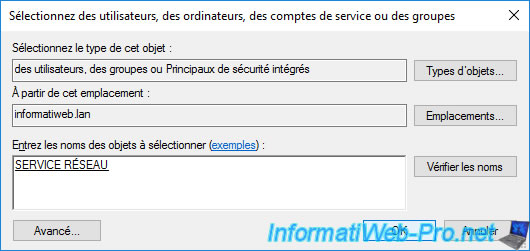
Select the "NETWORK SERVICE" account that appears and click OK.
Click OK.
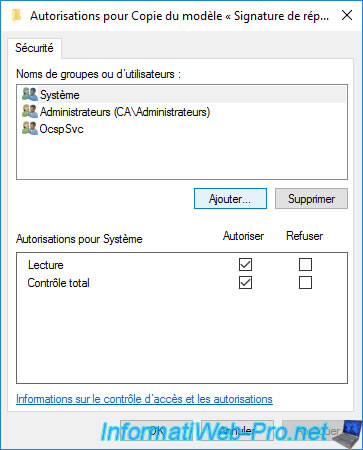
Grant it all permissions : Read and Full Control.
In the "Security" tab, you will see as usual that authenticated users have a Read right.
Without this read right, the certificate template would not be visible and therefore no certificate could be registered via this certificate template.
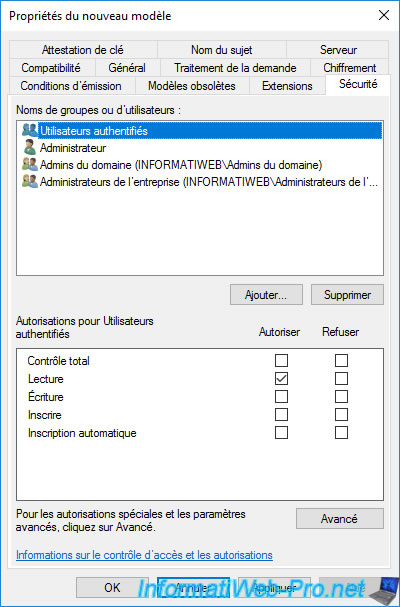
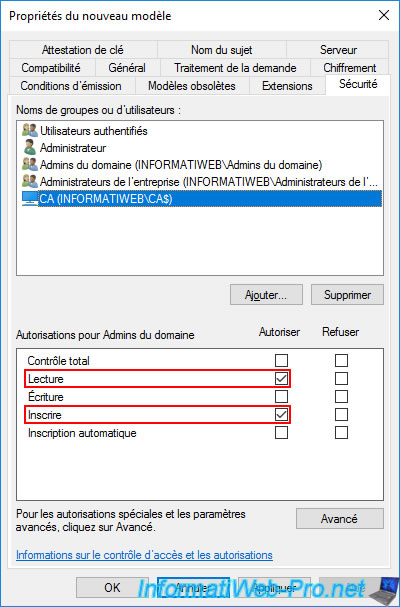
As you can see, domain administrators by default have the right to enroll certificates using this certificate template.
Nevertheless, so that your online responder can obtain an OCSP response signing certificate automatically when you configure it, it's important that the server where it's installed has the right to enroll a certificate using this certificate template.
To do this, click on the "Add" button.
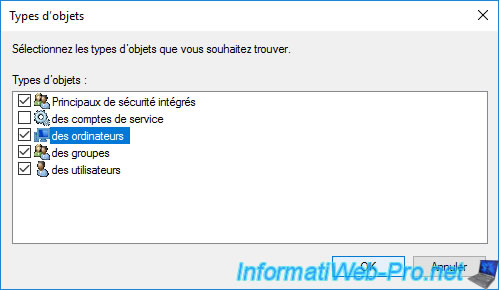
In the small window that is displayed, click on the "Object Types" button.
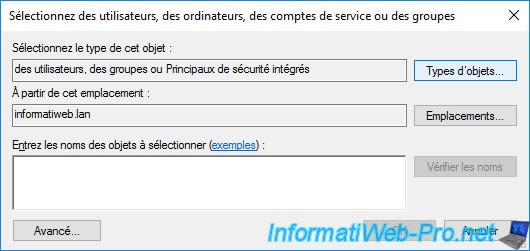
Check the "Computers" box and click OK.
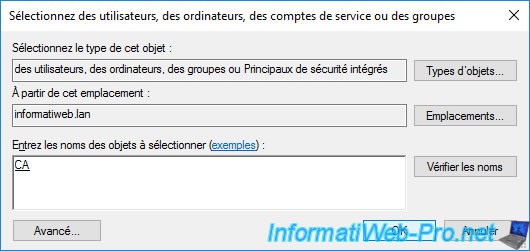
Specify the name of your server where the "Online Responder" role service is installed.
In our case : CA.
Then, click OK.
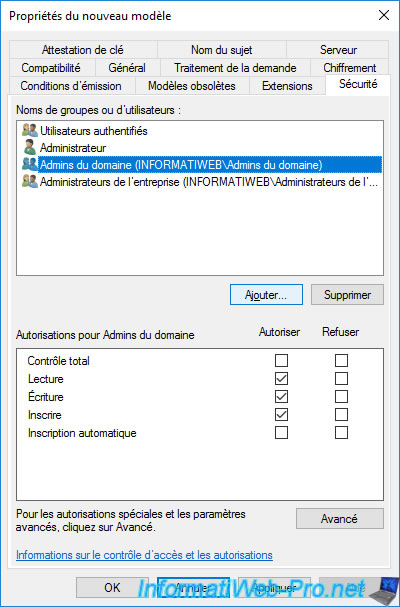
Grant it at least the rights :
- Read : so that this server can see this certificate template
- Enroll : so that this server can obtain (register) an OCSP response signing certificate when requested.
This certificate will be issued when you configure your Online Responder (OCSP).
Then, click OK.
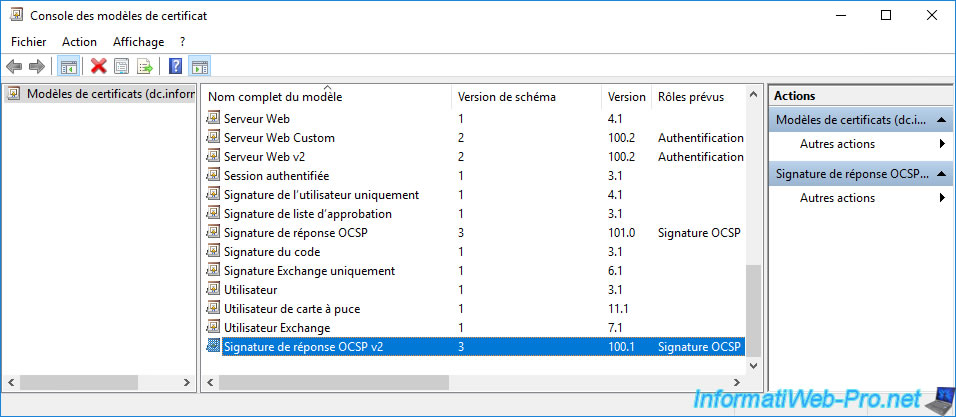
The new certificate template created appears in the list of existing certificate templates.
As usual, in order for a server to obtain a certificate using this certificate template, you will need to add this certificate template to your certificate authority's list of certificate templates to issue.
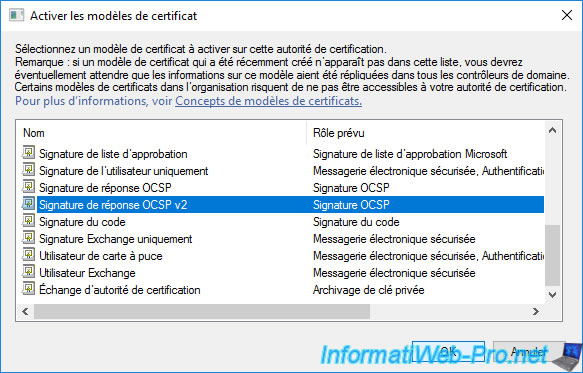
To do this, right-click "New -> Certificate Template to Issue" on the "Certificate Templates" folder.
In the "Enable Certificate Templates" window that appears, select the certificate template you just created (in our case : OCSP Response Signing v2) and click OK.
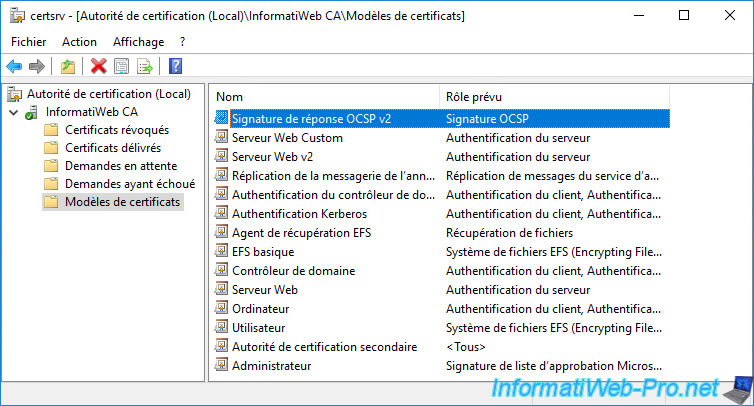
The new certificate template to be issued appears.
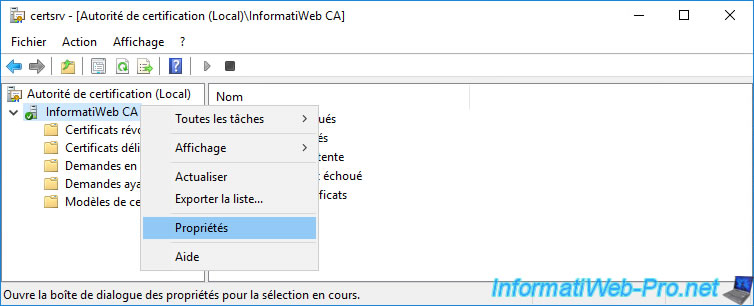
4. Add the online responder (OCSP) path in your certificates
To let your clients know that they can quickly check the validity of a certificate using the OCSP protocol, you must specify the path to your online responder in your certificate information.
To do this, in the "Certification Authority" console, right-click "Properties" on the name of your certification authority.
So that your clients can know the address of your online responder (OCSP), you must specify it in the AIA extension of your certificates.
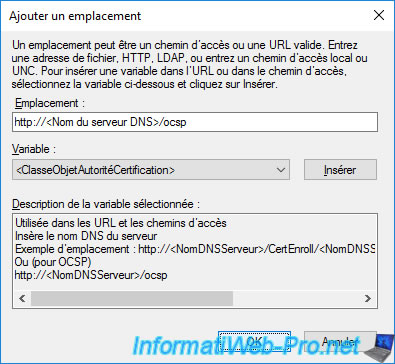
To do this, in the "Extensions" tab, select the "Authority Information Access (AIA)" extension from the list at the top of the window, then click the "Add" button.
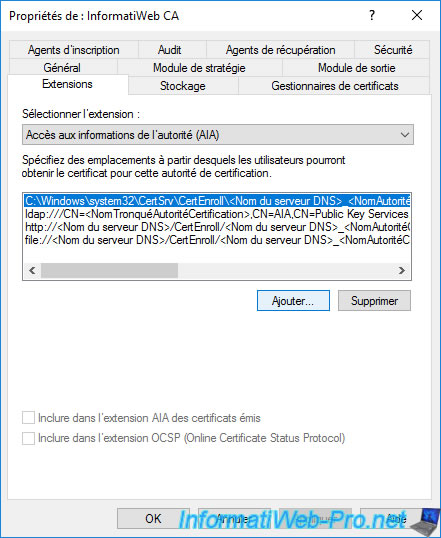
Specify the address of the "ocsp" folder created on the IIS web server where you installed the "Online Responder" role service.
If you have installed the online responder (OCSP) on the same server as your certification authority, you can specify the address : "http://<ServerDNSName>/ocsp".
Note : "<ServerDNSName>" is a variable which will be automatically replaced by the DNS name of the server where your certification authority is installed when this path is added to the AIA extension of your certificates.
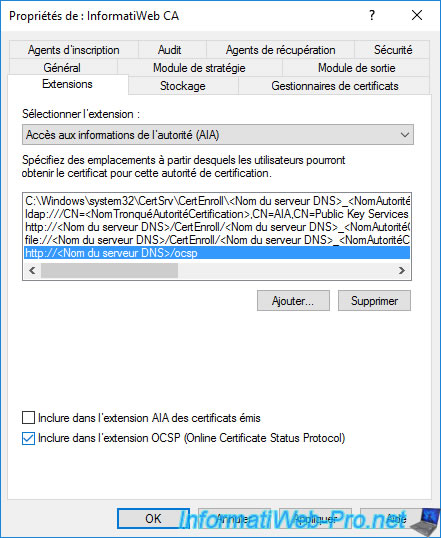
Select the "http://.../ocsp" path that you just added and check the "Include in the online certificate status protocol (OCSP) extension" box so that this path is added in the information of your future certificates.
Then, click OK.
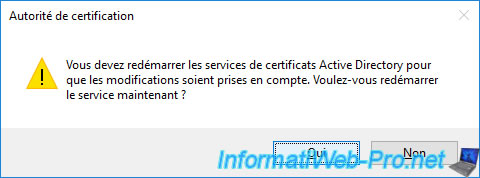
Confirm restarting Active Directory Certificate Services by clicking Yes.
Share this tutorial
To see also
-

Articles 1/26/2024
SafeNet Authentication Client (SAC) - Installation and overview
-

Articles 9/8/2023
What is encryption and how does it work ?
-
Windows Server 12/29/2023
WS 2016 - AD CS - Backup and restore a certificate authority (CA)
-

Windows Server 1/19/2024
WS 2016 - AD CS - Buy smart cards and log in via them
No comment