Export or import a certificate with or without its private key (.pfx/.cer) on Windows Server 2016
- Windows Server
- 22 September 2023 at 08:08 UTC
-

- 2/2
3. Import a certificate
3.1. Import a certificate with its private key (.pfx format)
In case you accidentally erased one of your personal certificates or want to restore it after a system restore or formatting, here's how to do it for a certificate in ".pfx" format.
For this tutorial, we will use the certificate of our web server exported previously with its associated private key in ".pfx" format.
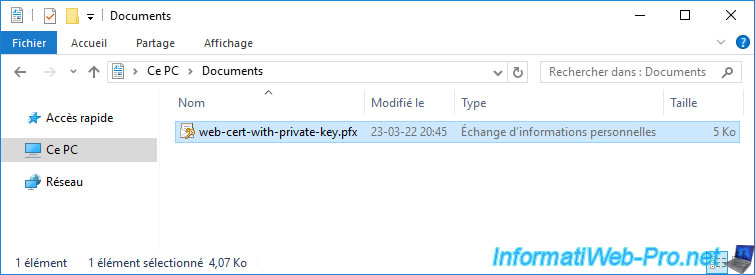
To see what your certificate contains in ".pfx" format, right-click "Open" on it.
Note : double-clicking on a ".pfx" certificate launches the certificate import wizard instead of opening it.

As you can see, at the moment we don't have any personal certificates on this server.
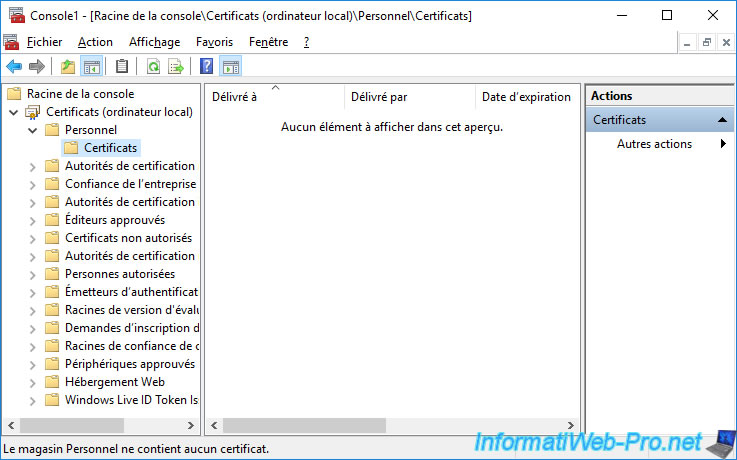
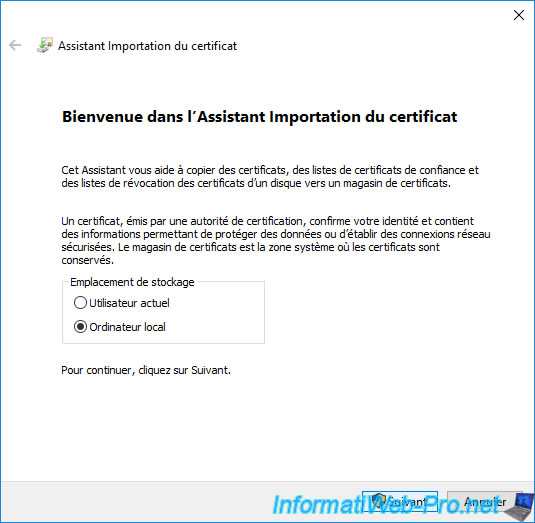
To import your ".pfx" certificate, make sure you are logged in with an account with administrator rights and double-click on it.
In the Import Certificate wizard that appears, select whether you want to import it for the local computer or the current user.
In our case, it's a certificate to protect our IIS web server.
So, we need to import it for the local computer.
On the other hand, if in your case, it's a user certificate, you will have to select "Current User".
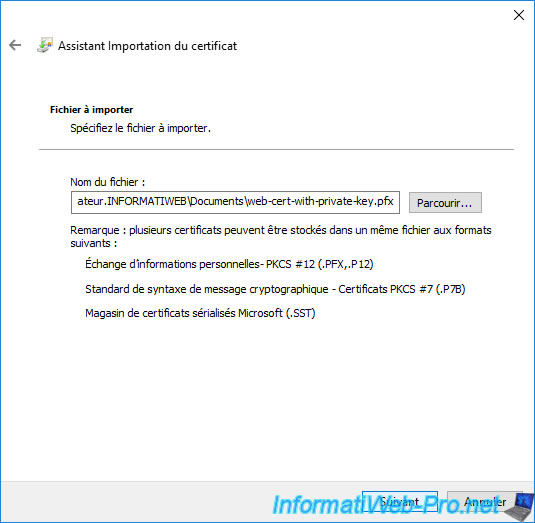
The path to the ".pfx" certificate to import appears automatically.
Click Next.
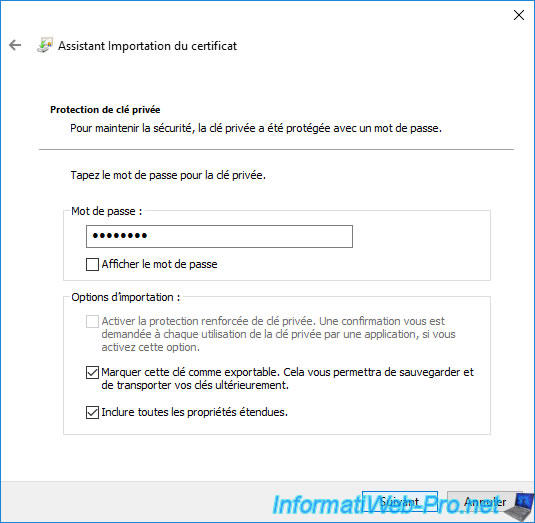
1st possibility : the private key included in the certificate in ".pfx" format is protected only with a password.
In this case, specify the password protecting the private key included with this certificate.
Then, check the "Mark this key as exportable. This will allow you to back up or transport your keys at a later time" box to be able to export this certificate again in ".pfx" format (certificate and associated private key) later from your certificate store if you wish it.
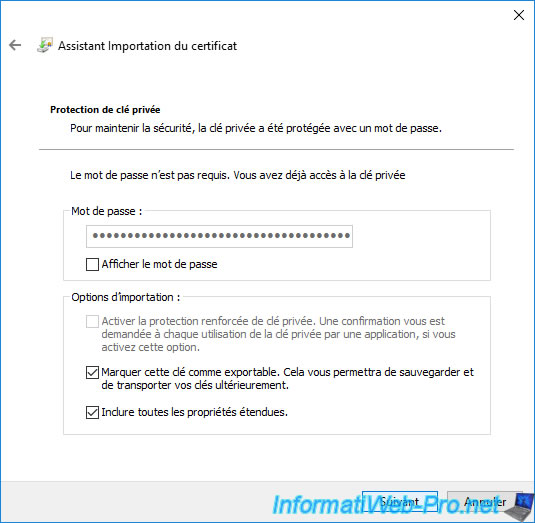
2nd possibility : the private key included in the certificate in ".pfx" format is protected with a user restriction, but you are connected with a user account authorized to access it.
In this case, the message "Password is not required. You already have access to the private key." will appear.
You therefore don't need to enter a password.
Note : check the "Mark this key as exportable..." box if you want to be able to export the certificate and its private key again from your certificate store later.
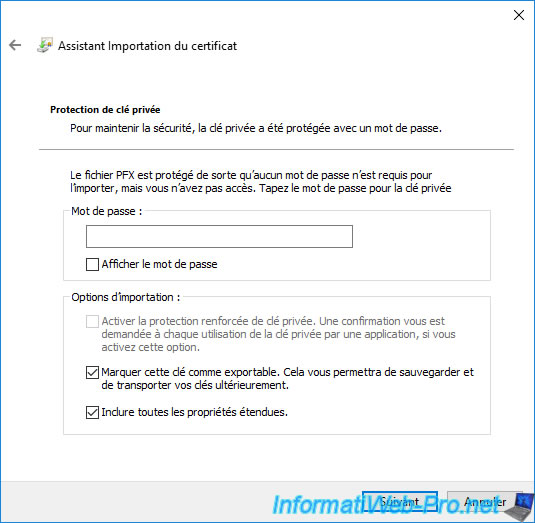
3rd possibility : the private key included in the certificate in ".pfx" format is protected with a user restriction, but you are not connected with a user account authorized to access it.
In this case, this message will appear :
Plain Text
The PFX file is protected such as no password is required to import it, but you do not have access. Type the password for the private key.
In this case, you will have to specify the password protecting the private key included with this certificate indicated during the export of the certificate.
Warning : if the certificate and its private key have been exported in ".pfx" format with a user restriction, but you have not specified a password to protect the private key, you will not be able to import this certificate. The wizard will tell you that the specified password is incorrect, even if you leave the "Password" box blank.
This can be problematic if the user with access to the private key no longer exists.
In other words, we recommend that you always specify a password to protect the private key.
Again : don't forget to check the "Mark this key as exportable ..." box if you want to be able to export the private key of this certificate again in the future from your certificate store.
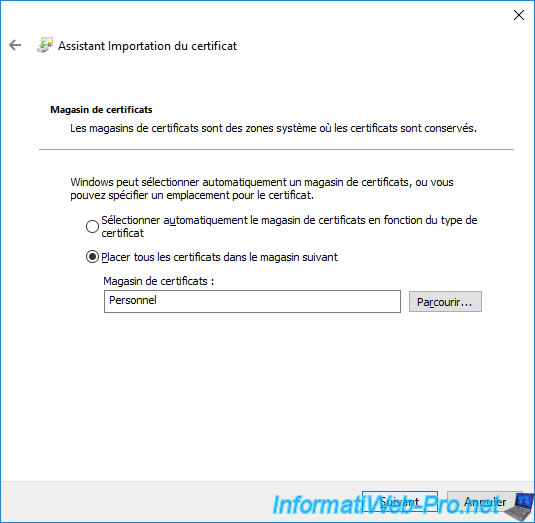
Depending on the certificate you are trying to import, the wizard may be able to find the correct certificate store for it.
However, you can also do it manually by selecting the "Place all certificates in the following store" option, then clicking on the "Browse" button.
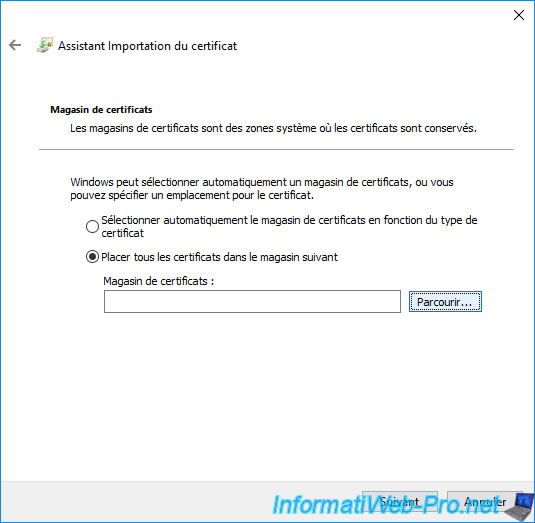
Most of the time, when you import a certificate with its private key, you will store it in the "Personal" certificate store.
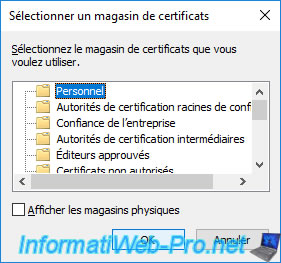
Once the desired certificate store is selected, click Next.
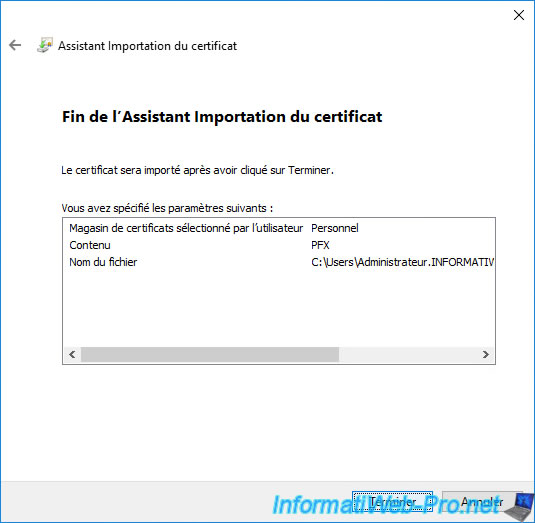
Click Finish to confirm the import of the certificate and its associated private key.
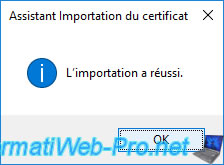
The "The import was successful" message appears.
If you go to the "Personal" certificate store (selected in the wizard), you will see that your certificate has been imported.
Note that it's possible that the certificate of the root certification authority that issued this certificate was also imported (if it was present in the imported ".pfx" file).
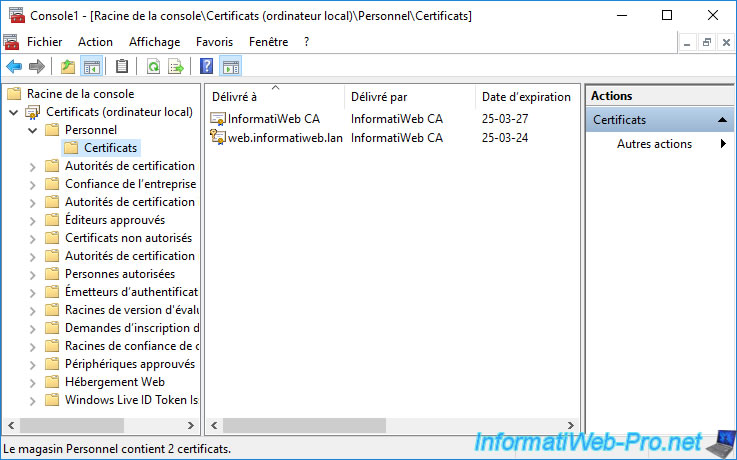
Note that your authority's certificate must not be in the "Personal" store, but in the "Trusted Root Certification Authorities" store for certificates from it to be considered valid by your computer or server.
If it's there, you can delete it from the "Personal" store. If not, export this one and import it into the "Trusted Root Certification Authorities" store.
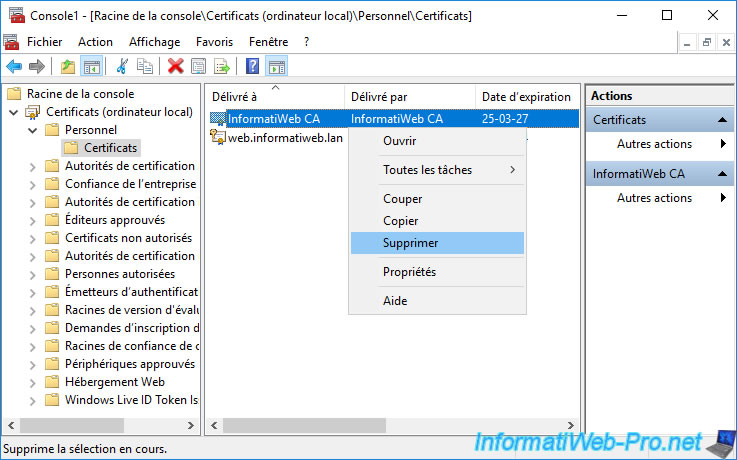
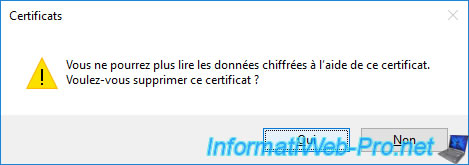
Confirm the deletion of this useless certificate in our case.
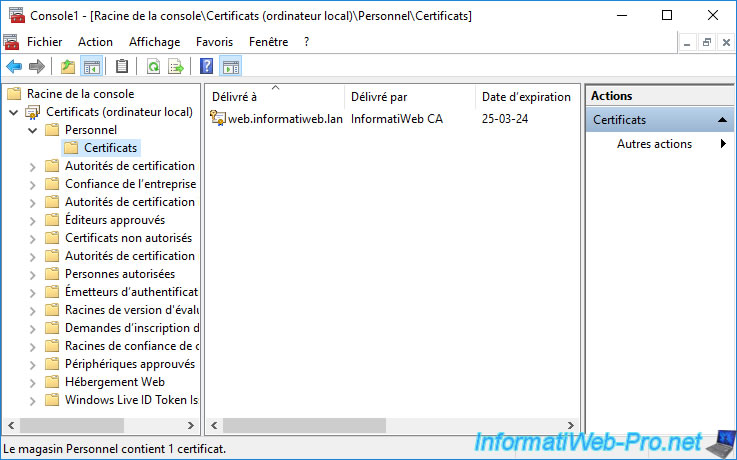
Your certificate and its private key can be found in your "Personal" certificate store.
3.2. Import a certificate without its private key (.cer format)
To import a certificate without its private key (therefore in ".cer" format), simply double-click on it.
Typically, you'll do this to import your own CA's public certificate.
For the example, we are therefore going to import the public certificate of our own certification authority so that our computer trusts the certificates issued by it.
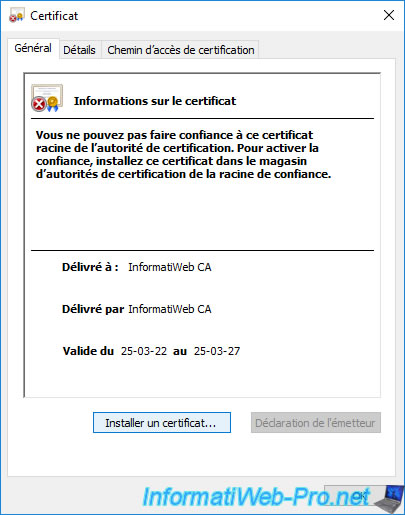
When you open a CA certificate that you have not yet imported as a trusted CA, Windows tells you that you can't trust this root CA certificate.
Indeed, it's your root CA that issued it to itself. This certificate can't therefore be from a trusted CA until you manually import it into your server's "Trusted Root Certification Authorities" certificate store.
Click on : Install Certificate.
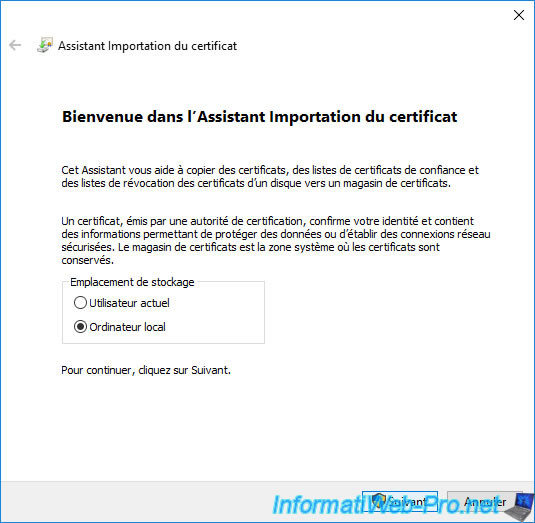
Select whether you want to import this certificate for the current user or for the local computer.
In the case of a root CA certificate, you must select : Local Machine.
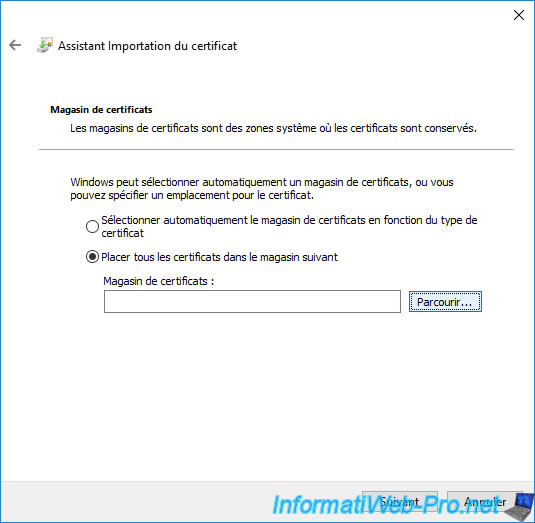
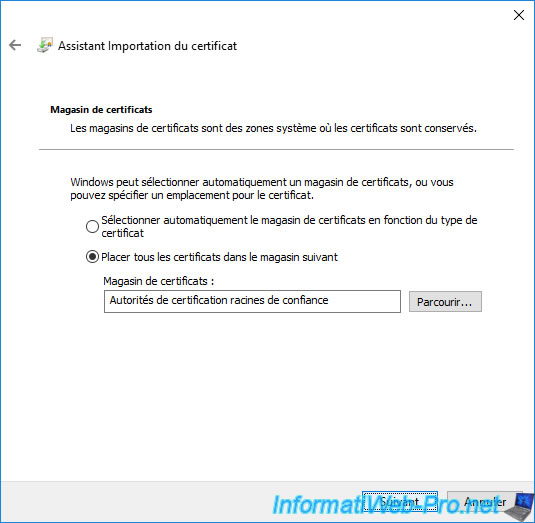
Select "Place all certificates in the following store" and click "Browse" to select the desired certificate store.
In our case, since we want to import the certificate of our CA so that our server can trust the certificates that we will issue through it, we select the "Trusted Root Certification Authorities" certificate store.
Then, click OK.
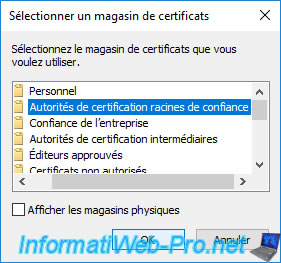
The selected certificate store appears.
Click Next.
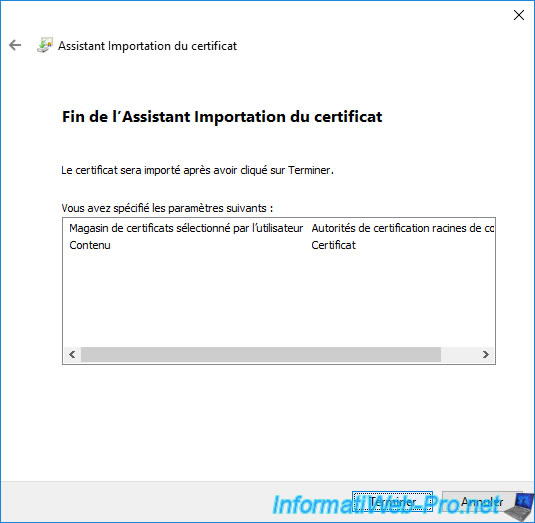
Confirm the certificate import by clicking Finish.
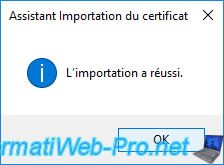
The "The import was successful" message appears.
The imported certificate appears in the desired certificate store.
In our case, the certificate of our "InformatiWeb CA" certification authority appears in the "Trusted Root Certification Authorities" certificate store of our server.
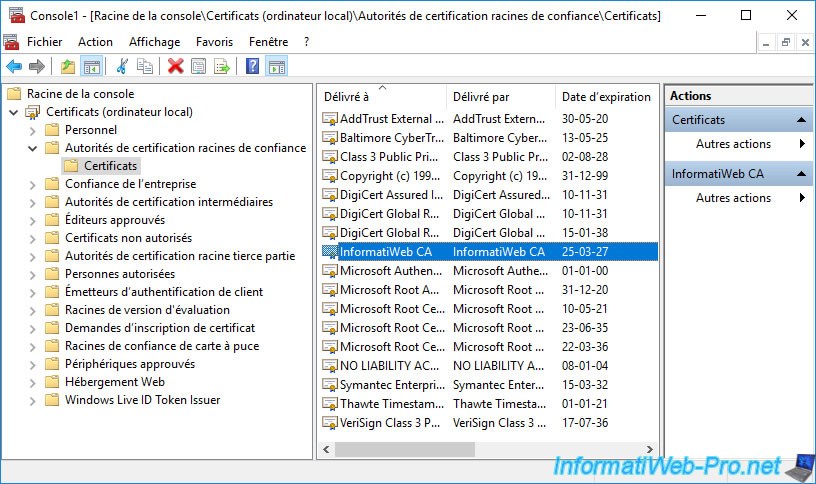
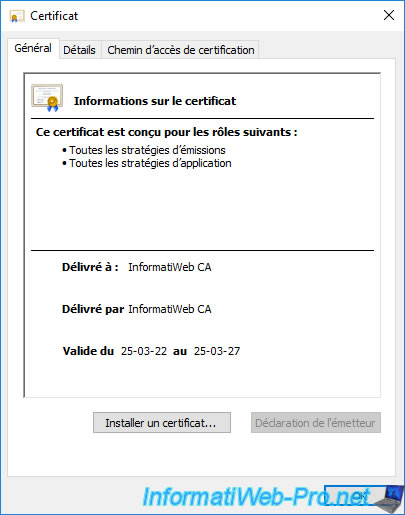
If you double-click on the imported certificate, you will see that Windows (Server) now trusts it (given that the error displayed earlier has disappeared).
Share this tutorial
To see also
-
Articles 1/26/2024
SafeNet Authentication Client (SAC) - Installation and overview
-
Articles 9/8/2023
What is encryption and how does it work ?
-
Windows Server 12/29/2023
WS 2016 - AD CS - Backup and restore a certificate authority (CA)
-

Windows Server 1/19/2024
WS 2016 - AD CS - Buy smart cards and log in via them

No comment