Enable and use automatic computer and/or user certificate enrollment on Windows Server 2016
- Windows Server
- 13 October 2023 at 11:07 UTC
-

- 2/2

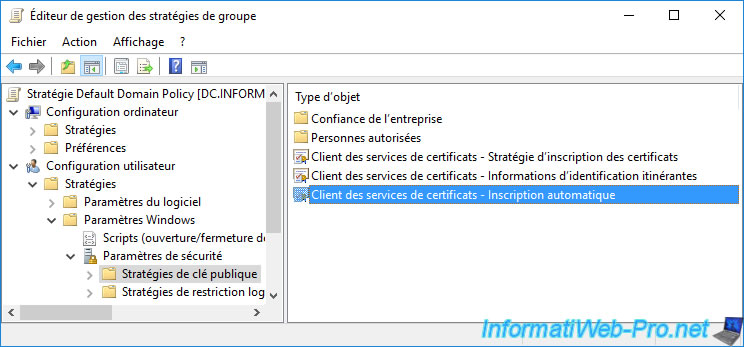
4. Enable automatic certificate enrollment for your users
To enable automatic certificate enrollment for your users, go to "User Configuration -> Policies -> Windows Settings -> Security Settings -> Public Key Policies" and double click on the "Certificate Services Client - Auto-Enrollment" policy.
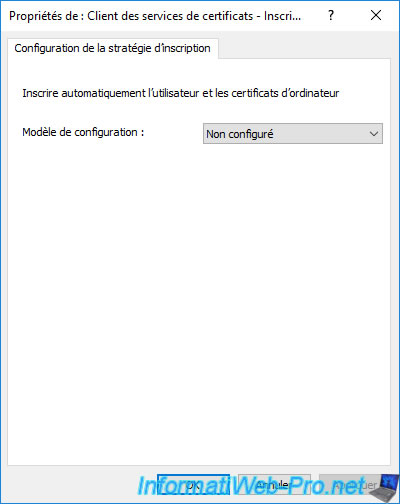
As before, Auto-Enrollment is not enabled by default.
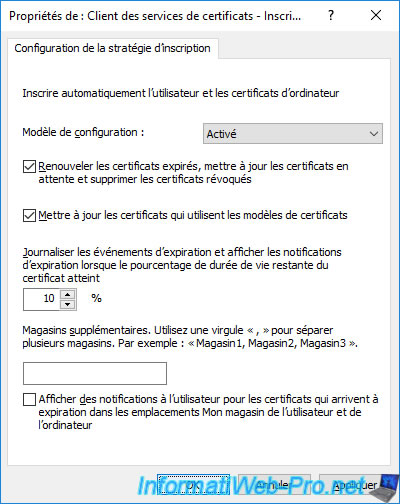
Enable the Auto-Enrollment of user certificates by selecting "Configuration Model : Enabled", then check the first 2 boxes :
- Renew expired certificates, update pending certificates, ...
- Update certificates ...
On the user side, an additional box will allow you to display a notification to the user for certificates that are about to expire in the user and computer certificate store, if desired.
5. Certificates issued
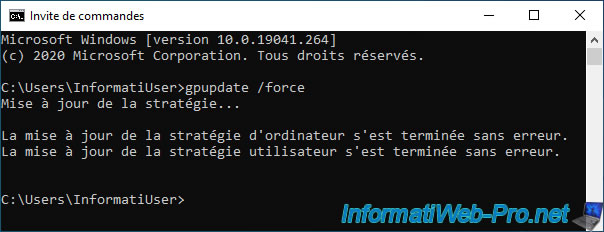
In order for computer and user certificates to be issued (via auto-enrollment), you will first need to force the policy update on the desired computer or server.
Note that in production, this will be done automatically during the periodic automatic update of group policies (GPO).
To do this, log in with a user from your Active Directory domain.
In our case, we will use the "InformatiUser" user created at the beginning of the tutorial.
Then, force update the policy on your computer or server.
Batch
gpupdate /force
Then, launch the "mmc" console.
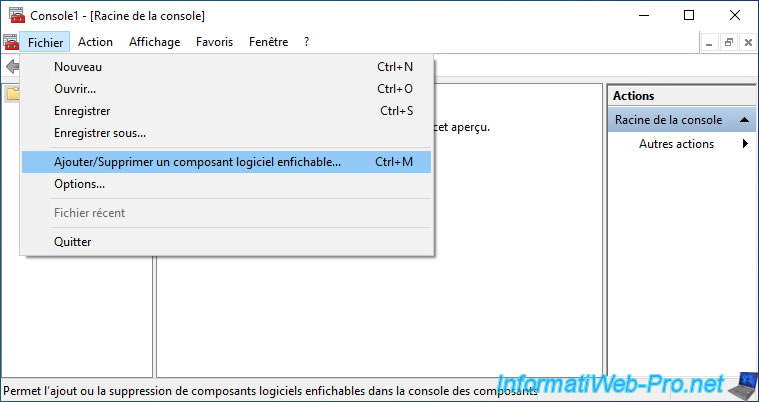
In the "mmc" console that appears, click : File -> Add/Remove Snap-in.
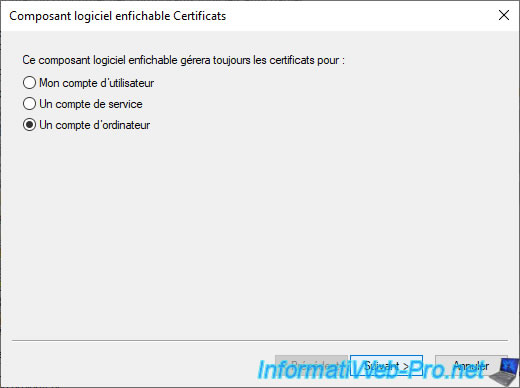
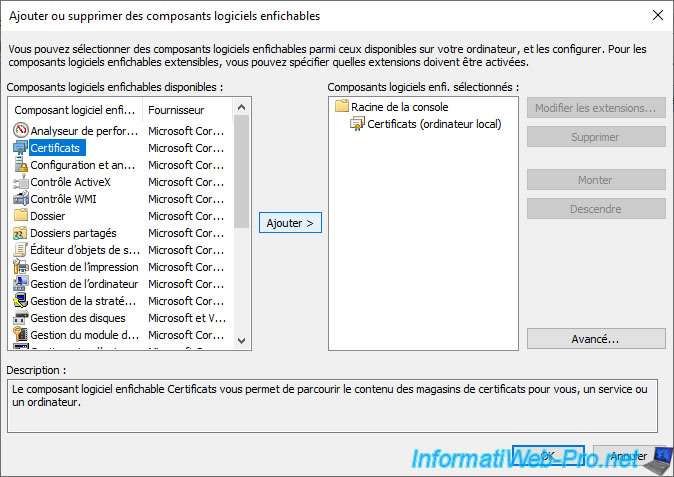
Add the "Certificates" component.

Select "Computer account" to see the certificate issued to your computer or server.
Warning : this is only possible if you have administrator rights on the computer or server to which you are connected.
By default, users belonging to the "Domain Admins" group also have administrator rights on computers and servers linked to your Active Directory domain.
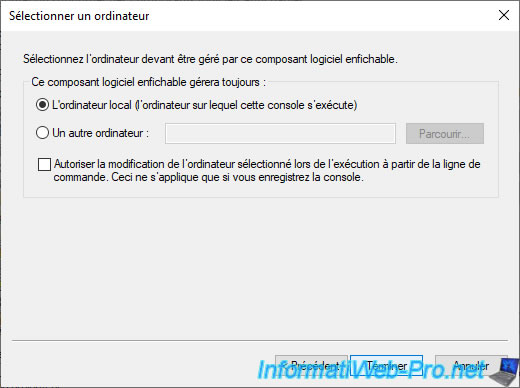
Then, leave the "Local computer" option selected and click Finish.
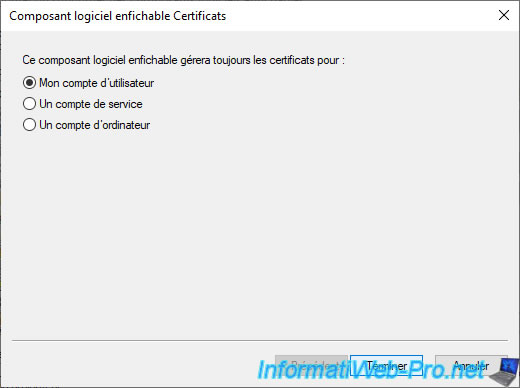
Add the "Certificates" component again.
But, this time, select "My user account" and click Finish.
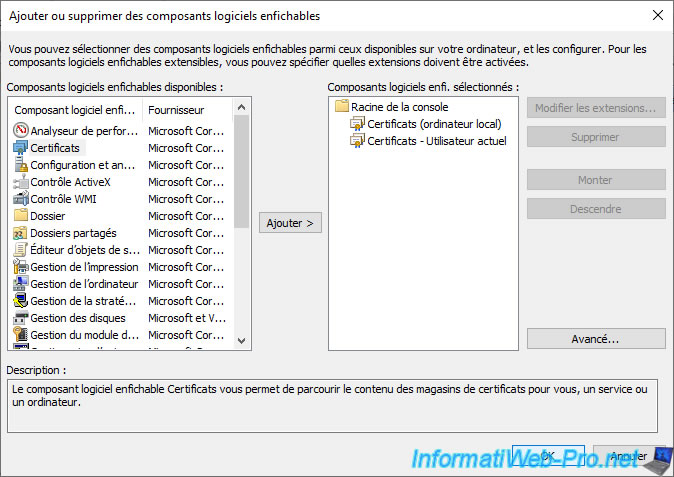
As you can see, the "Certificates" component will be added 2 times : 1 time for the local computer and 1 time for the current user.
Click OK.
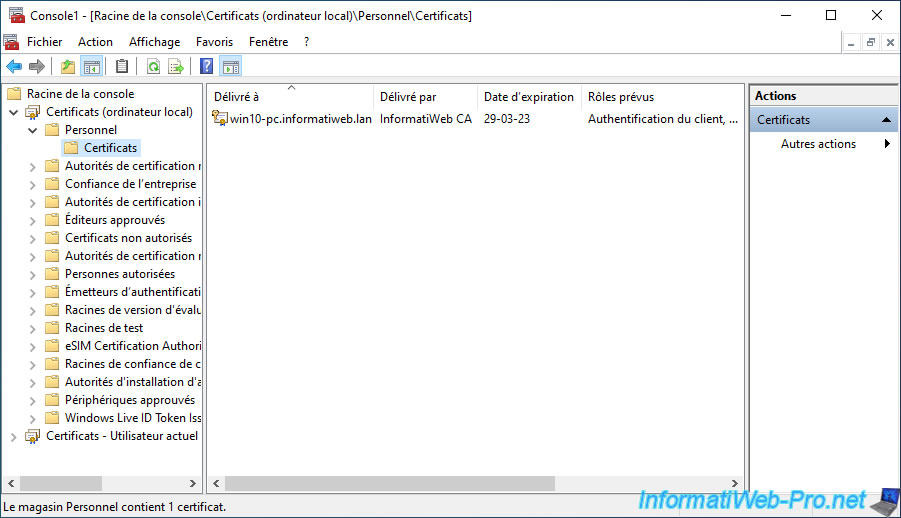
Go to "Certificates - Local Computer -> Personal -> Certificates".
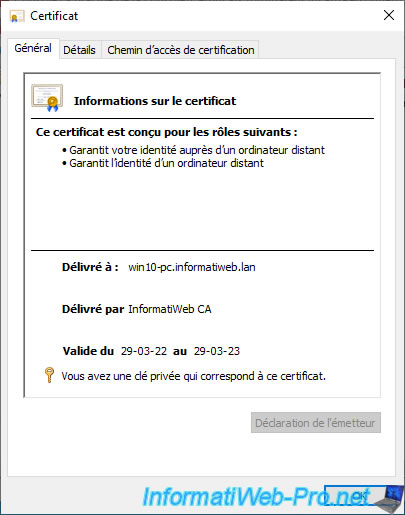
As you can see, a certificate (along with its associated private key) has been automatically issued to your computer or server by your own certificate authority.
In our case, we are connected to our "win10-pc" client computer which is a member of our "informatiweb.lan" domain.
If you double click on this certificate, you will see that this one :
- proves your identity to a remote computer
- ensures the identity of a remote computer
- was issued to your computer or server
- was issued by your certification authority
- is valid for 1 year (default for the "Computer" certificate template used)
- has an associated private key
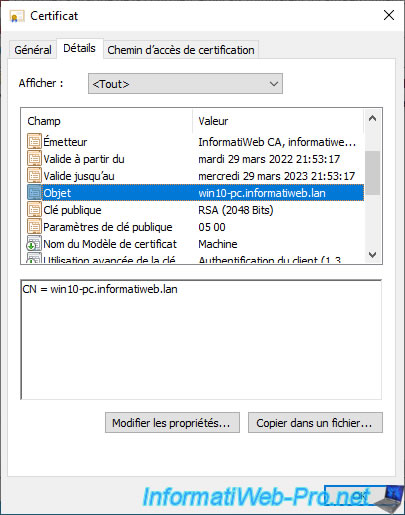
If you select the "Subject" field in the "Details" tab, you will see that the common name (CN) of this certificate corresponds to the full name (DNS name) of the computer or server concerned.
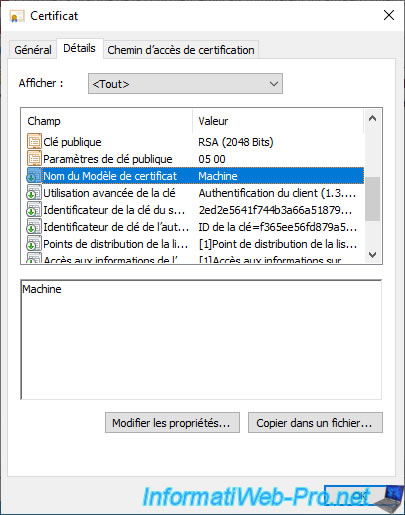
If you select the "Certificate Template Name" field, you will see that the certificate template used is "Machine".
If you select the "Enhanced Key Usage" field, you will see that this certificate can be used for :
- client authentication
- server authentication
This corresponds to the roles visible in the "General" tab.
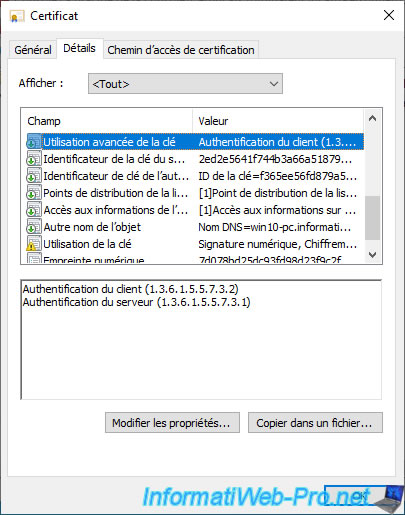
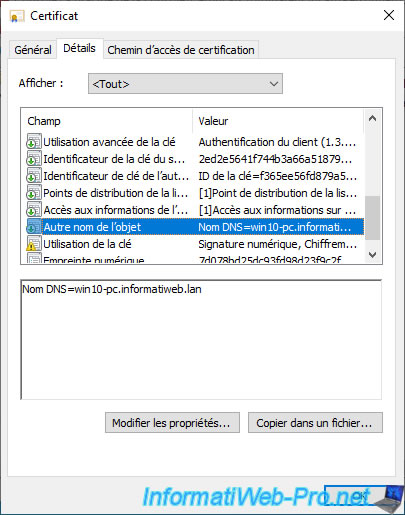
If you select the "Subject Alternative Name" field, you will see that the full name of your computer or server is also included as the DNS name.
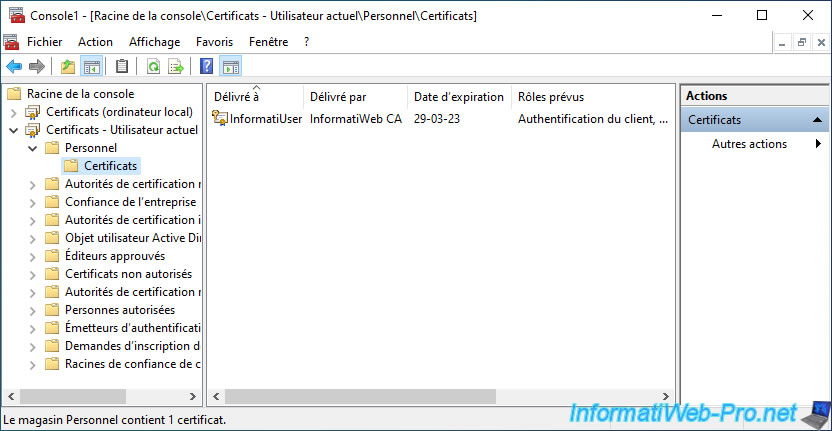
For the user certificate, go to : Certificates - Current User -> Personal -> Certificates.
As you can see, a certificate (along with its associated private key) was also automatically issued for your Active Directory user account by your own certificate authority.
In our case, we are connected as InformatiUser on our "win10-pc" client computer which is a member of our "informatiweb.lan" domain.
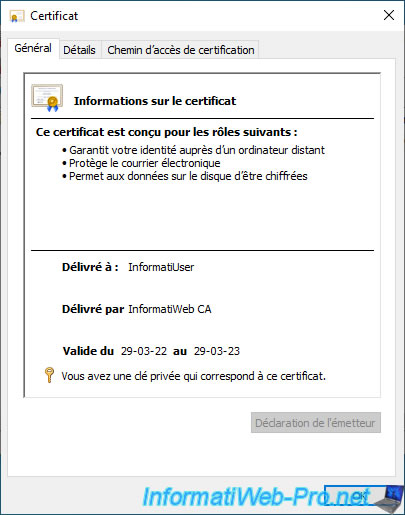
If you double click on this user certificate, you will see that this one :
- proves your identity to a remote computer
- protects e-mail messages
- allows data on disk to be encrypted
- has been issued to your user account
- was issued by your certification authority
- is valid for 1 year (default for the "User" certificate template used)
- has an associated private key
If you select the "Subject" field in the "Details" tab, you will see that the common name (CN) of this certificate corresponds to your user name and that your email address (defined in your Active Directory user account settings) is also present in this certificate.
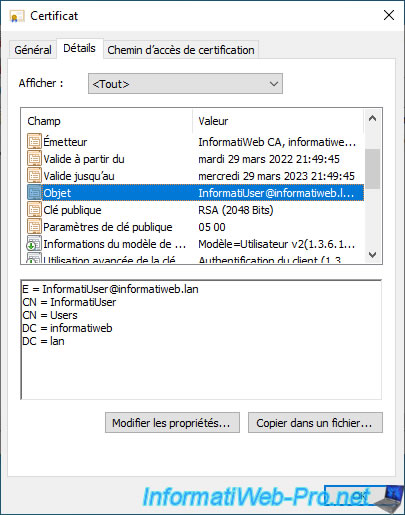
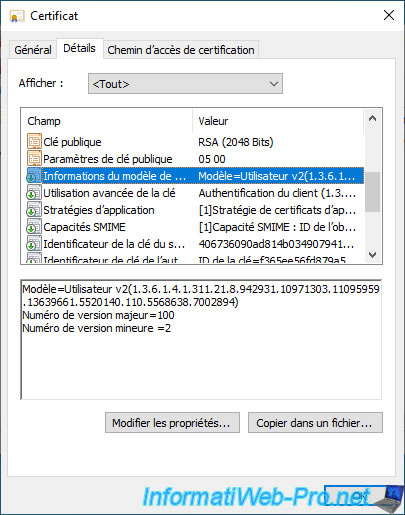
If you select the "Certificate Template Information" field, you will see that the certificate template used is : User v2 (in our case).
That is, the certificate template for which this user has "Enroll" and "Autoenroll" rights.
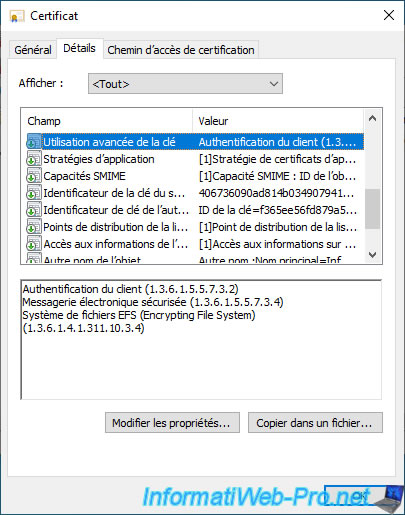
If you select the "Enhanced Key Usage" field, you will see that this certificate can be used for :
- client authentication
- secure email
- Encrypting File System (EFS)
Ce qui correspond aux rôles visibles dans l'onglet "Général".
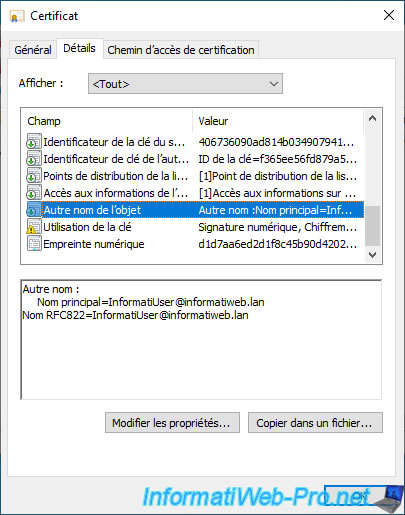
If you select the "Subject Alternative Name" field, you will see that your username will appear there.
Share this tutorial
To see also
-

Articles 1/26/2024
SafeNet Authentication Client (SAC) - Installation and overview
-

Articles 9/8/2023
What is encryption and how does it work ?
-
Windows Server 12/29/2023
WS 2016 - AD CS - Backup and restore a certificate authority (CA)
-

Windows Server 1/19/2024
WS 2016 - AD CS - Buy smart cards and log in via them
No comment