Create a site-to-site (S2S) VPN tunnel via PPTP/L2TP on Windows Server 2022, 2016 and 2012

6.2. Configure routing and remote access (VPN) on site 2 (Paris)
6.2.1. Installation and initial configuration of routing and remote access (VPN) at site 2 (Paris)
On the VPN server (paris-vpn) of site 2 (Paris), install the "Remote Access" role (as you did on site 1 (Brussels)).
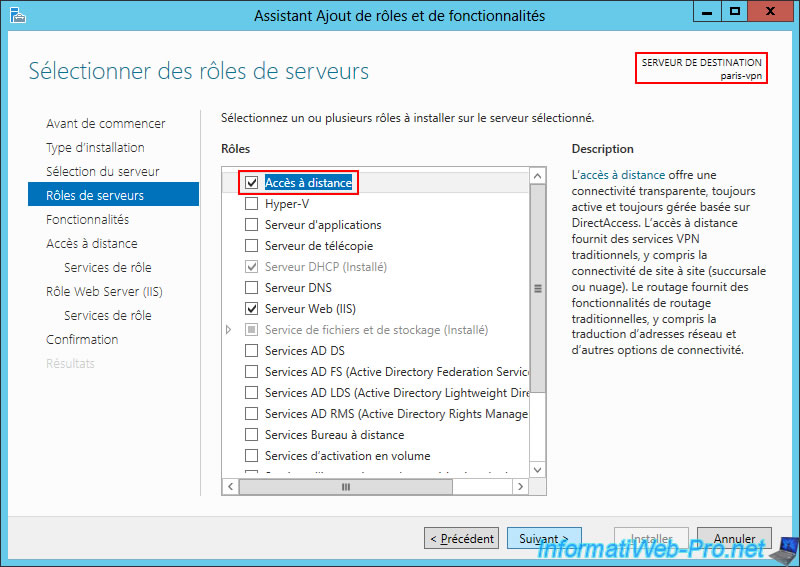
Again, select the 2 role services:
- DirectAccess and VPN (RAS).
- Routing.

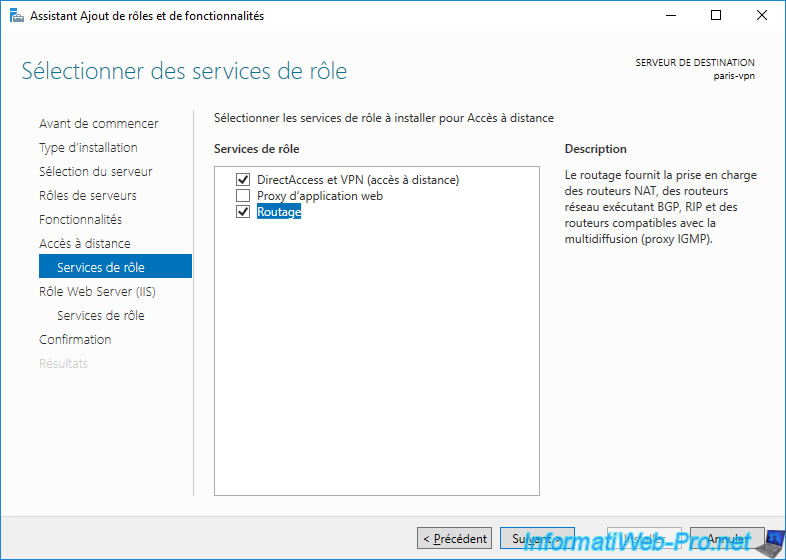
Again, since Windows Server 2016, three role services are available.
But only install the two necessary role services:
- DirectAccess and VPN (RAS).
- Routing.
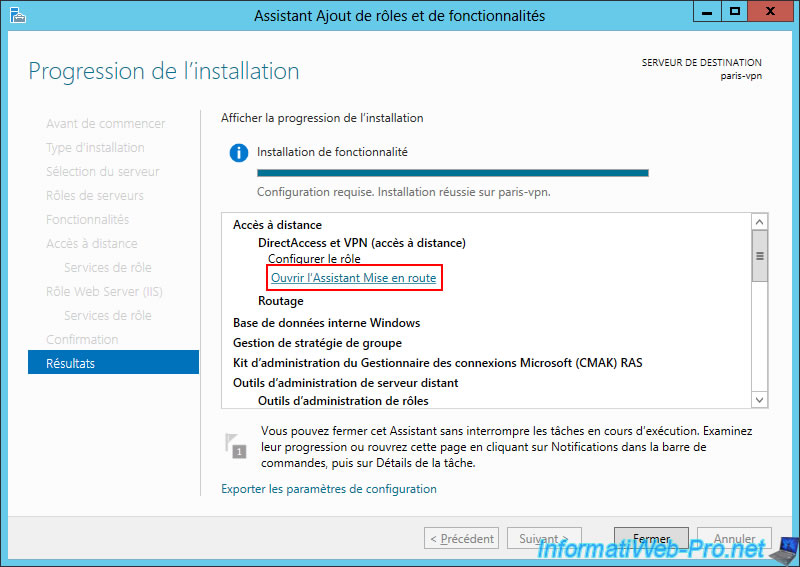
Once this "Remote Access" role is installed on the VPN server of site 2 (Paris), click on the "Open the Getting Started Wizard" link.
Click on the "Deploy VPN only" option.
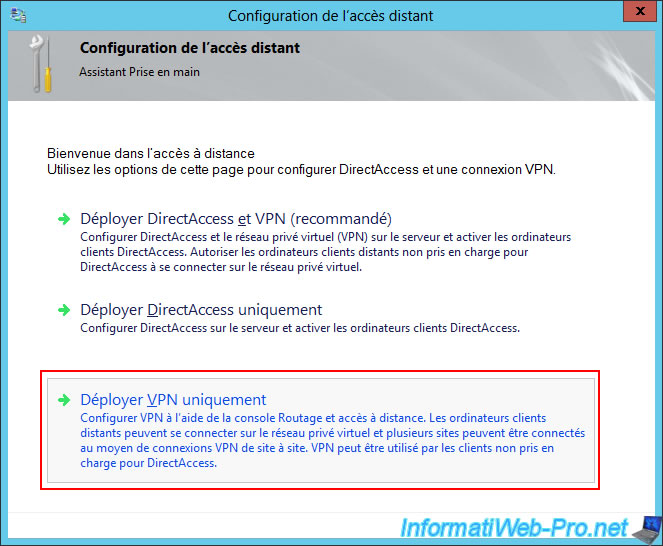
As expected, the "Routing and Remote Access" console will appear.
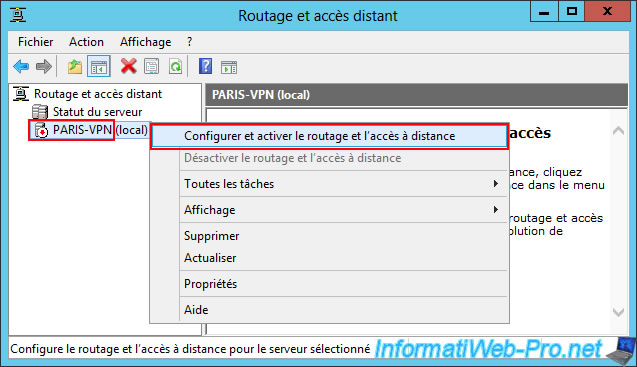
Right-click "Configure and Enable Routing and Remote Access" on this new VPN server (this time installed on site 2 (Paris)).
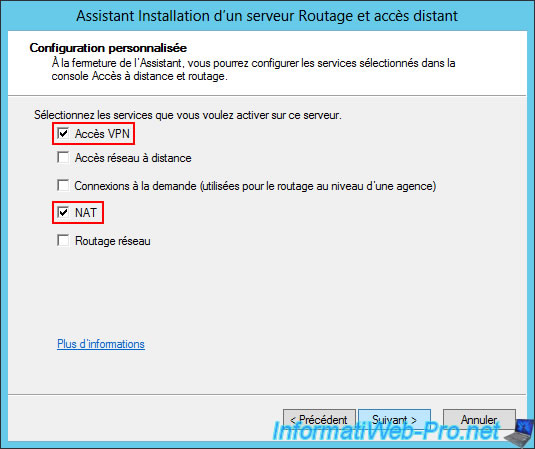
In the wizard, select "Custom configuration" again.
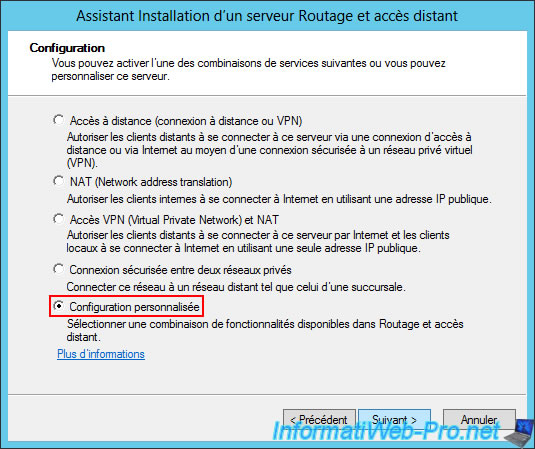
Select the "VPN Access" and "NAT" services again.
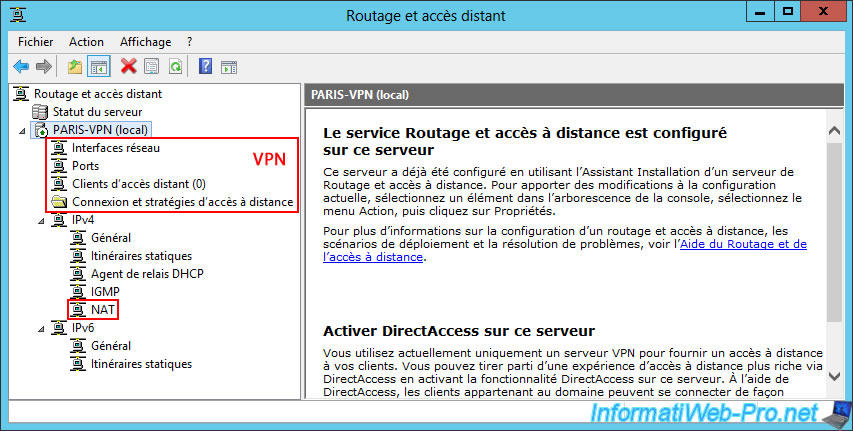
Once the wizard is complete, you will find the same options as on your VPN server at site 1 (Brussels).
6.2.2. Define the IP address range to assign to clients of the VPN server at Site 2 (Paris)
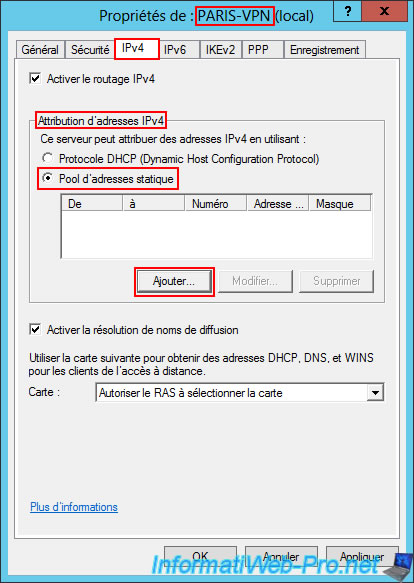
On your VPN server at Site 2 (Paris), right-click on the name of your VPN server (in this case, paris-vpn) on "Properties".
Then, go to the "IPv4" tab and select the "Static Address Pool" option.
Finally, click the "Add" button.
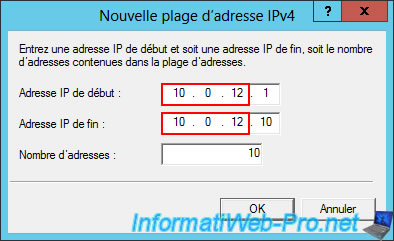
Specify the IP address range to use for clients of your VPN server, this time located at Site 2 (Paris).
In our case, this is the IP address range "10.0.12.1" to "10.0.12.10".
Warning : again, you must use a different ID than those used at Site 1 (Brussels), Site 2 (Paris), and for clients of the VPN server at Site 1 (Brussels).
Now, we use these four networks in our network infrastructure:
- the network ID "10.0.1.0" is for the LAN network at Site 1 (Brussels).
- the network ID "10.0.2.0" is for the LAN network at Site 2 (Paris).
- the network ID "10.0.11.0" is for clients of the VPN server at Site 1 (Brussels).
- the network ID "10.0.12.0" is for clients of the VPN server at Site 2 (Paris).
Important : the IPv4 address range specified here AND the relevant network ID must be different on your two VPN servers.
This will allow your two VPN servers (also acting as routers) to correctly route network traffic through the two VPN tunnels that will be created between your two sites.
In effect, you will have a VPN tunnel for each direction.
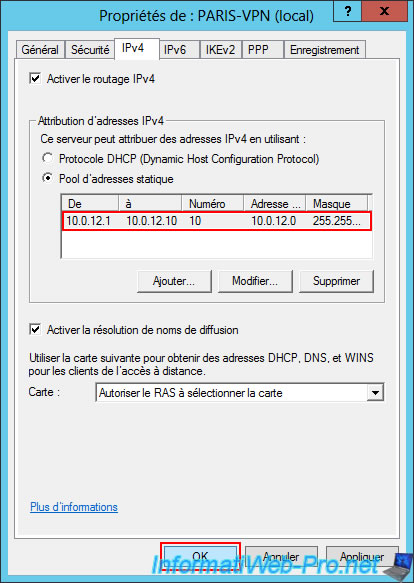
The defined IPv4 address range appears in the "IPv4 Address Assignment" list.
Click OK.
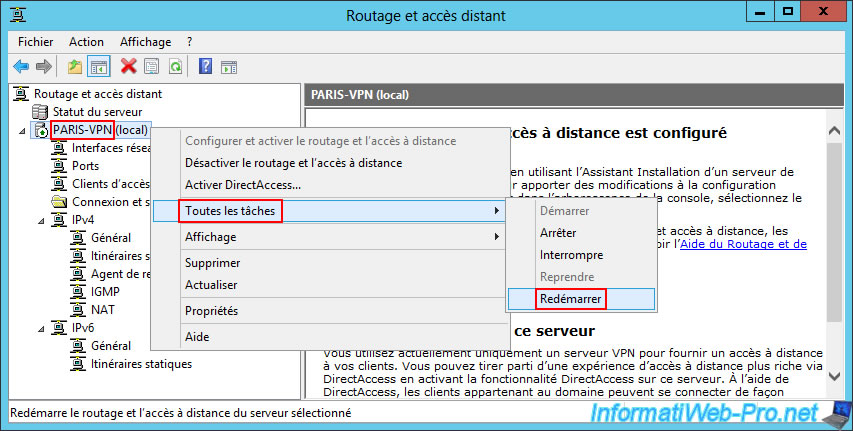
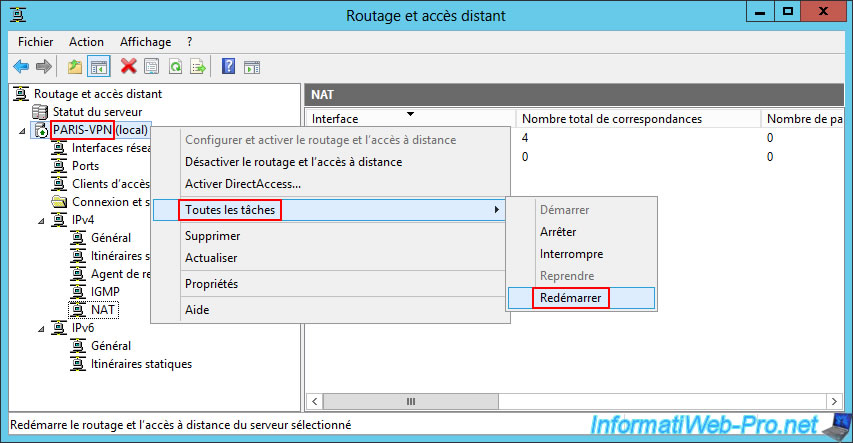
Right click "All Tasks -> Restart" on your VPN server name "PARIS-VPN" of site 2 (Paris).
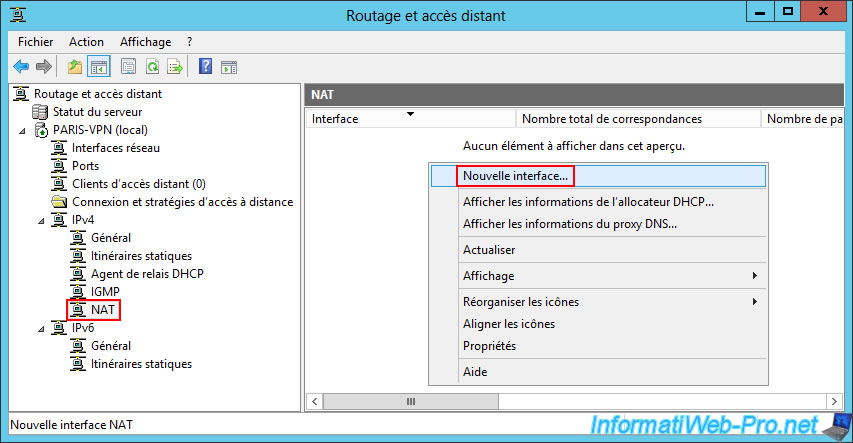
6.2.3. Configure routing (NAT) for the local area network (LAN) and Internet access (WAN) at site 2 (Paris)
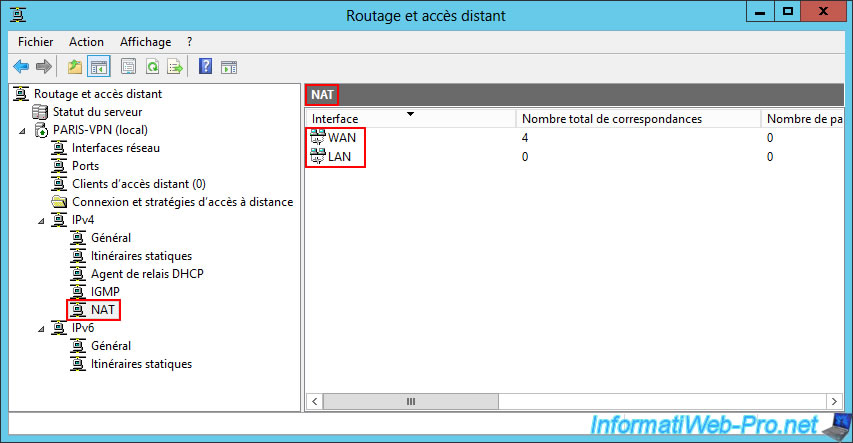
In the "IPv4 -> NAT" section of your VPN server at site 2 (Paris), right-click "New interface".
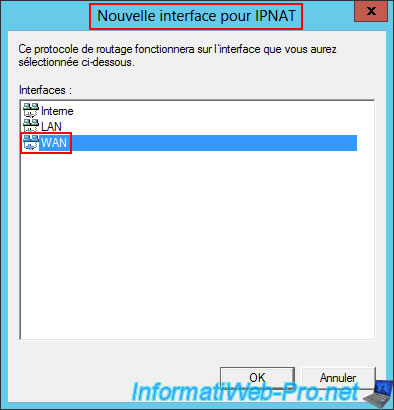
Important : the routing configuration is identical to that on the server at site 1 (Brussels).
So, first select the "WAN" interface.
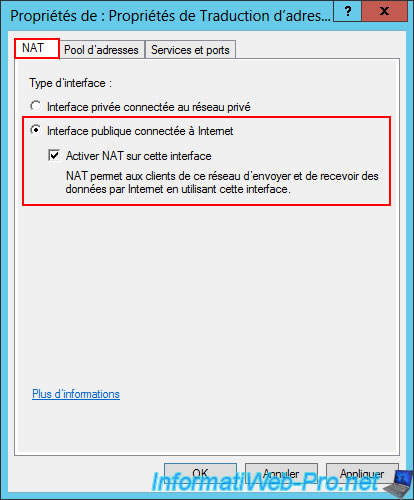
In the "NAT" tab, select "Public interface connected to the Internet" and check the box "Enable NAT on this interface".
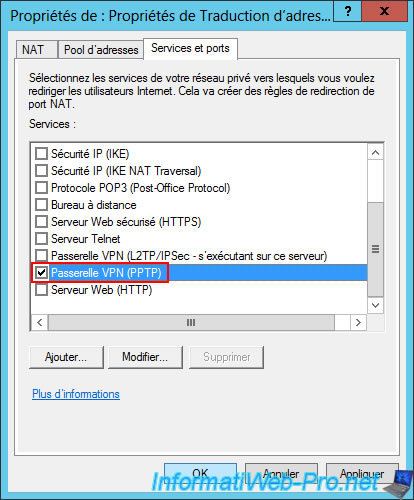
In the "Services and Ports" tab, check the "VPN Gateway (PPTP)" box.
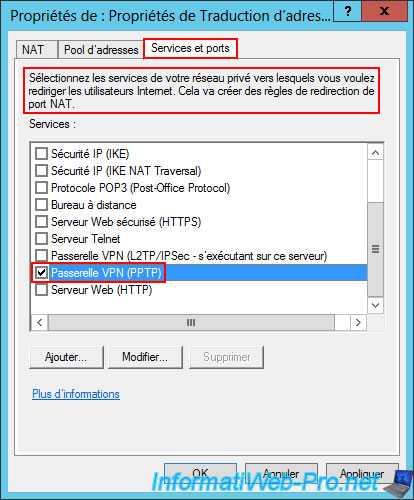
In the "Edit Service" window that appears automatically, enter the private address "127.0.0.1" again (which means that the VPN server using the PPTP protocol is installed on this server and not a local area network (LAN) network).
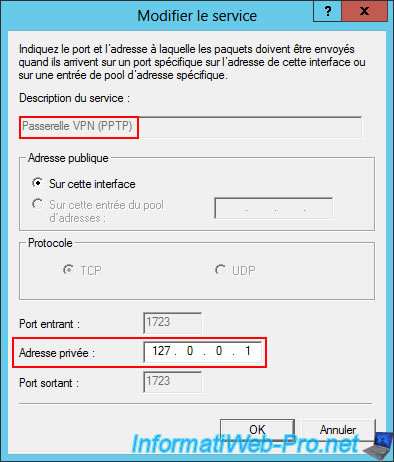
Click OK.
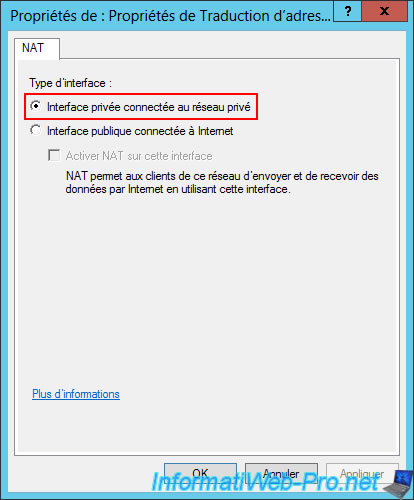
Again, right-click "New Interface" (in the "IPv4 -> NAT" section), then select the "LAN" interface.

Select the interface type "Private interface connected to private network".
As mentioned earlier (for the other physical site), your server (router) now manages routing between the local area network (LAN) and the Internet (WAN).
But it doesn't yet manage routing for sending and receiving packets from the remote site.
Right-click "All Tasks -> Restart" on the name of your VPN server (from site 2 (Paris)).
6.2.4. Configure the VPN server firewall on site 2 (Paris)
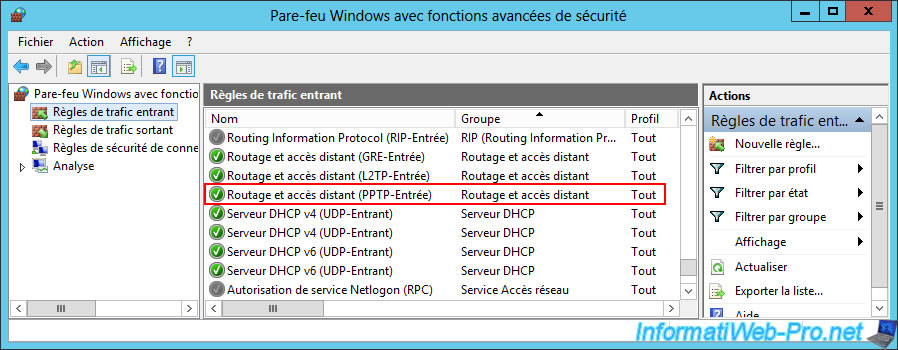
For Site 1 (Brussels) to connect to your VPN server at site 2 (Paris), you must verify that the firewall is correctly configured on the VPN server at site 2 (Paris).
To do this, open the Control Panel again and go to "System and Security -> Windows Firewall -> Advanced Settings".

Next, in the inbound rules, check that the "Routing and Remote Access (PPTP-Inbound)" rule is enabled.
Share this tutorial
To see also
-

Windows Server 8/8/2012
WS 2008 - NAT and network routing
-

Windows Server 4/22/2015
WS 2012 - NAT and network routing
-

Windows Server 12/3/2016
WS 2012 - Routing and VPN server
-
Windows Server 11/23/2017
WS 2012 / 2012 R2 - Dynamic routing (RIPv2)
No comment