Create a site-to-site (S2S) VPN tunnel via PPTP/L2TP on Windows Server 2022, 2016 and 2012

4. Create local users for VPN server authentication
To create the site-to-site VPN tunnel, both servers will need to authenticate with a user account available on the remote VPN server.
Note: we are using local user accounts because in this tutorial, there is no Active Directory domain (either on site 1 (Brussels) or site 2 (Paris)).
4.1. Create a user on site 1 (Brussels) so that site 2 (Paris) can connect to the VPN server of site 1 (Brussels)
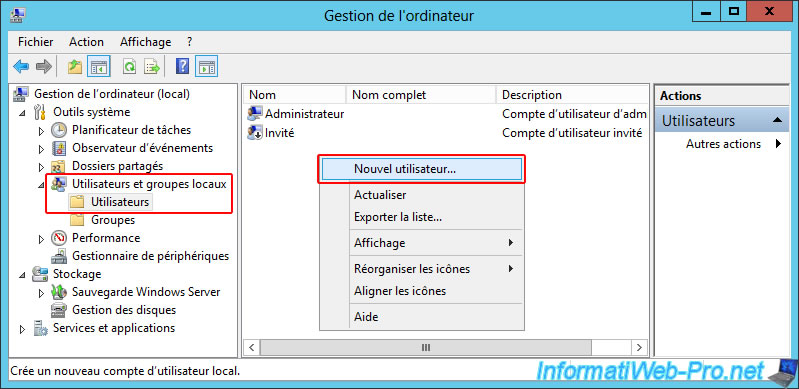
On the "brux-vpn" VPN server at Site 1 (Brussels), open the "Computer Management" console and go to the "Local Users and Groups -> Users" section.
Then, right-click "New User" in the empty space in the center.
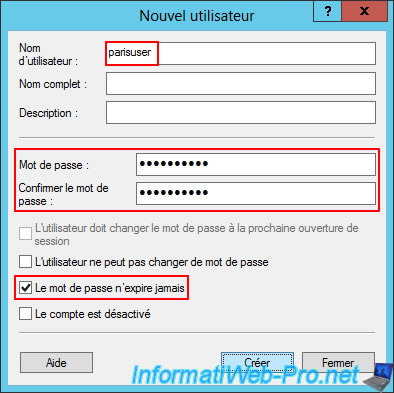
Enter the name of the remote site as the username (e.g., parisuser), then enter a complex password for this user.
Next, uncheck the "User must change password..." box and make sure to only check the "Password never expires" box.
Finally, click "Create".
Important : create one user per site that can access the current site.
This way, each site will authenticate with a different user account and password, and you can block VPN connections from the desired site in case of a problem or password theft.
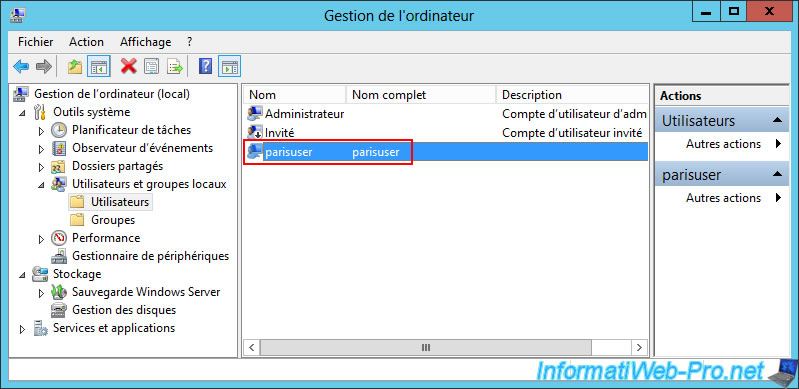
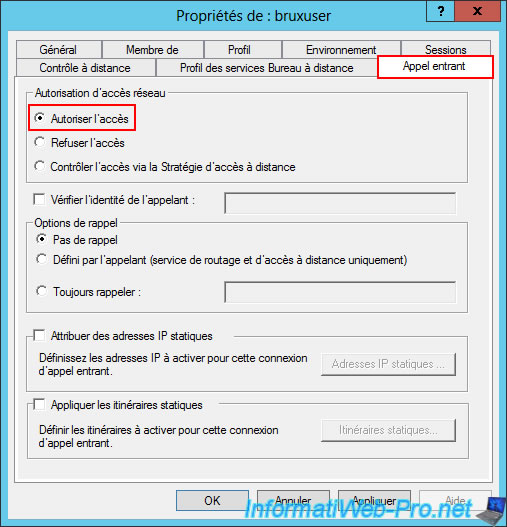
Once the user account is created, double-click on it.
In the "Incoming Calls" tab, select the "Allow Access" option so that this user can be used for authentication on the VPN server you will later install on this server.
Important : in our case, access is simply allowed unconditionally.
In a corporate environment, however, you might prefer to use the "Control Access via Remote Access Policy" option to more precisely manage access to your network resources via the VPN server using NPS.
Source: Step "7. NPS (Network Policy Server)" of our tutorial on configuring a VPN server on Windows Server 2012.

4.2. Create a user on site 2 (Paris) so that site 1 (Brussels) can connect to the VPN server of site 2 (Paris)
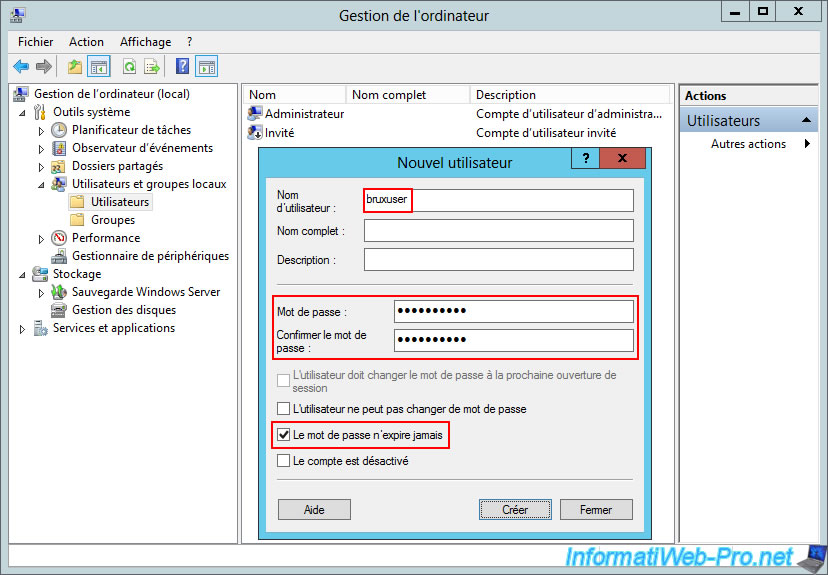
Conversely, on the remote site (i.e., Site 2 (Paris)), create a user so that Site 1 (Brussels) can connect to Site 2 (Paris).
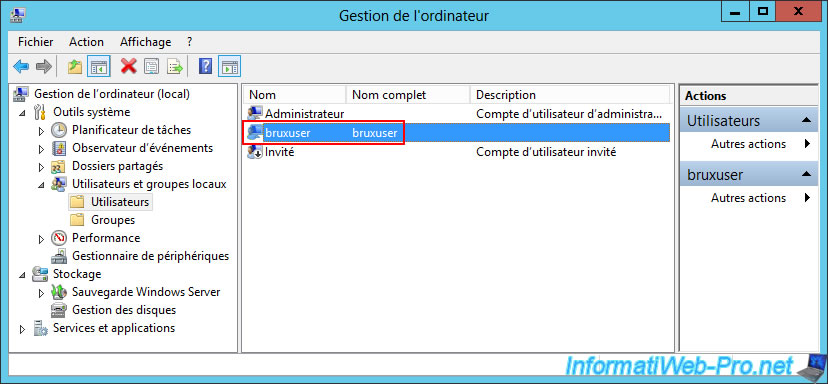
Open the "Computer Management" console again.
Go to the "Local Users and Groups -> Users" section and right-click "New User" in the empty space.
Next, type "bruxuser" as the username and a strong password (for security), and make sure to only check the "Password never expires" box.
In the "Incoming Call" tab, select the "Allow Access" option again so that this user account can be used for authentication on your VPN server at Site 2 (Paris).
The user "bruxuser" has been successfully created on the Paris VPN server (site 2).
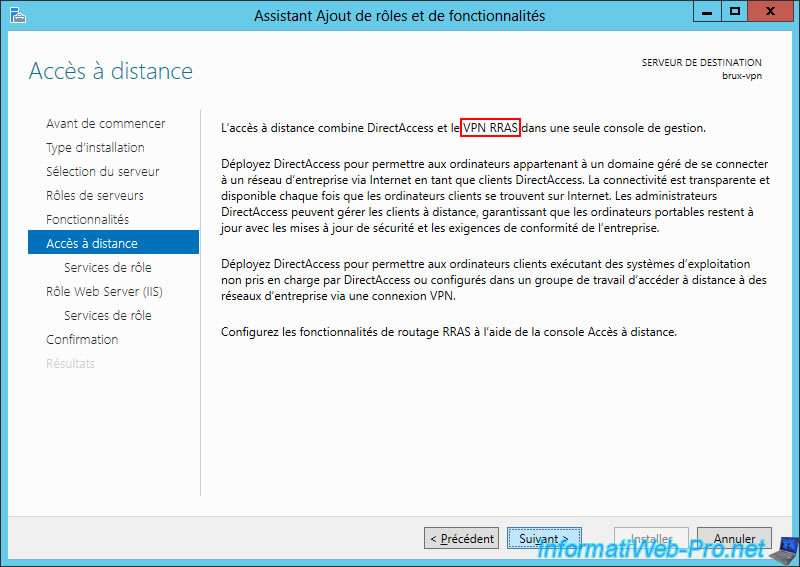
5. Install role: Remote Access (Routing and Remote Access)
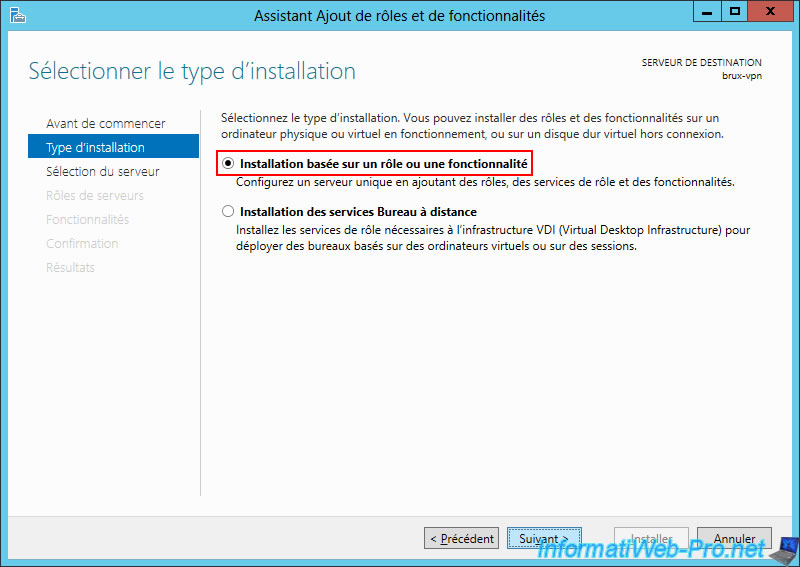
On your VPN server at Site 1 (Brussels), open the Add Roles and Features Wizard and select "Role or Feature Based Installation".
Select the "Remote Access" role.
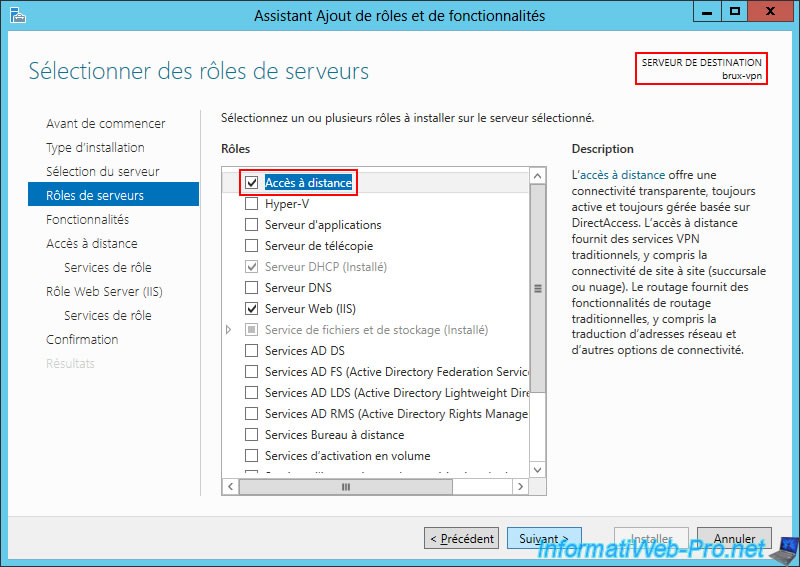
As expected, this "Remote Access" role allows you to use VPN connections.
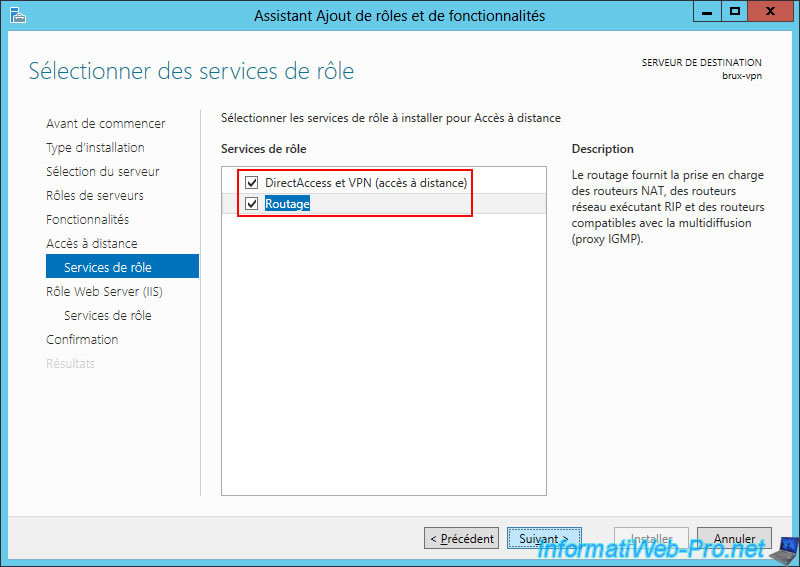
Select the 2 role services available:
- DirectAccess and VPN (remote access): to install the VPN server and create the site-to-site VPN tunnel later.
- Routing: to provide Internet access to your local client machines (LAN) and configure routing between your different networks (WAN for the Internet, LAN for the local network, and VPN for remote site access).
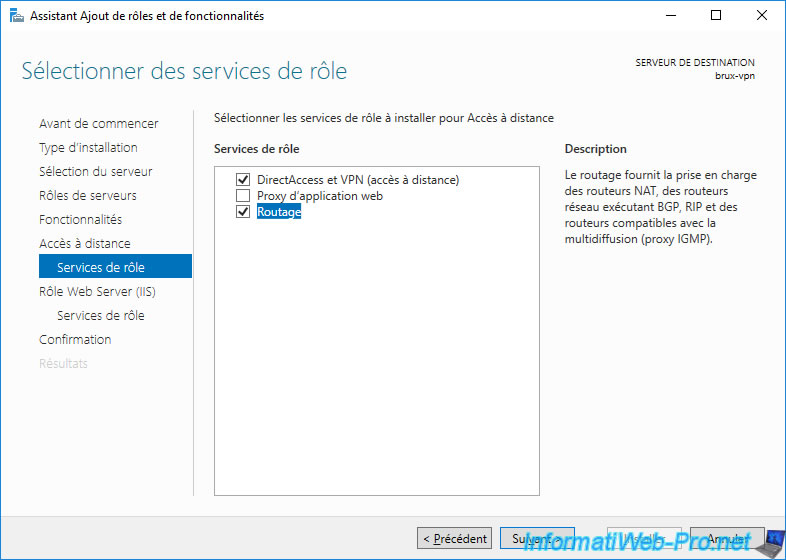
Since Windows Server 2016, you'll see 3 role services available.
However, only install the 2 role services you need here:
- DirectAccess and VPN (remote access).
- Routing.
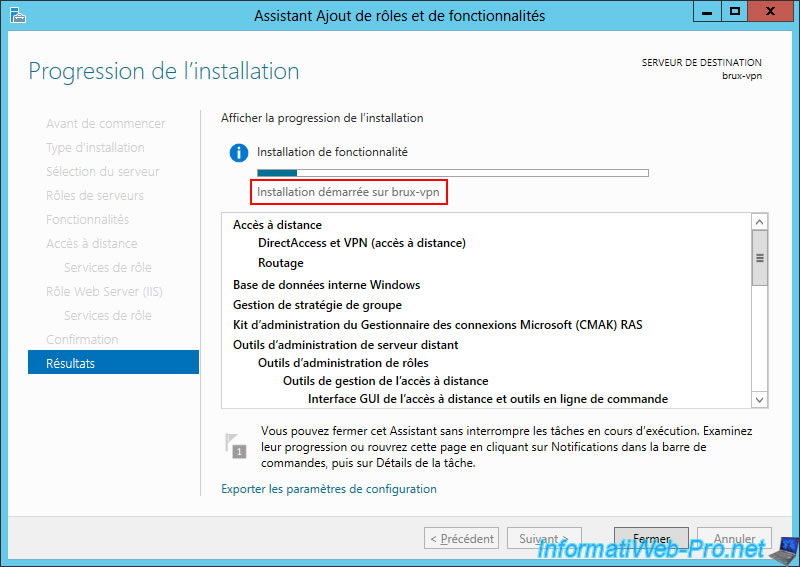
Confirm the installation of the "Remote Access" role.
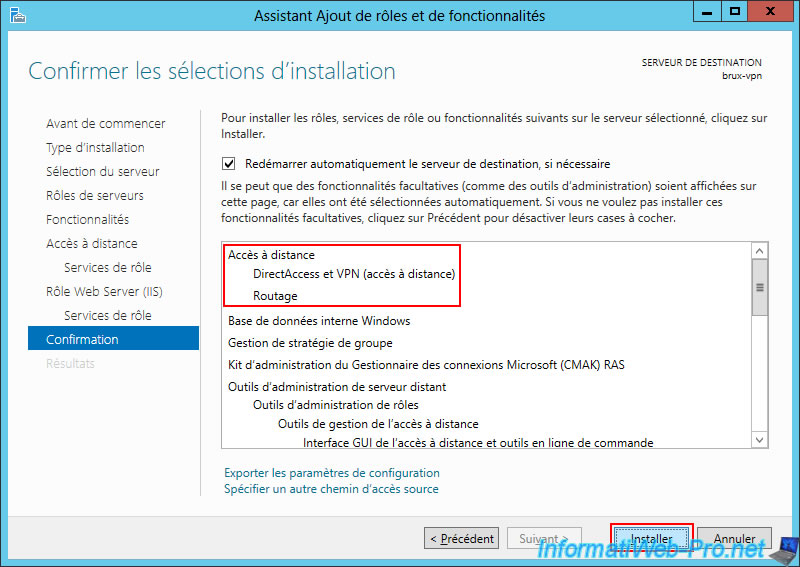
Please wait while the "Remote Access" role is installed.
Share this tutorial
To see also
-

Windows Server 4/28/2012
WS 2003 - NAT and network routing
-

Windows Server 8/8/2012
WS 2008 - NAT and network routing
-

Windows Server 12/3/2016
WS 2012 - Routing and VPN server
-
Windows Server 11/23/2017
WS 2012 / 2012 R2 - Dynamic routing (RIPv2)
No comment