Join a WMS 2012 server to an Active Directory and use roaming profiles on Windows MultiPoint Server 2012
- Windows Server
- 21 February 2018 at 13:16 UTC
-

- 4/4

7. Enabling Roaming Profiles
Since your MultiPoint server is a member of your Active Directory domain, you now manage your users directly on your Active Directory server.
With this, you can easily add an additional MultiPoint server and login on this same server with the same users.
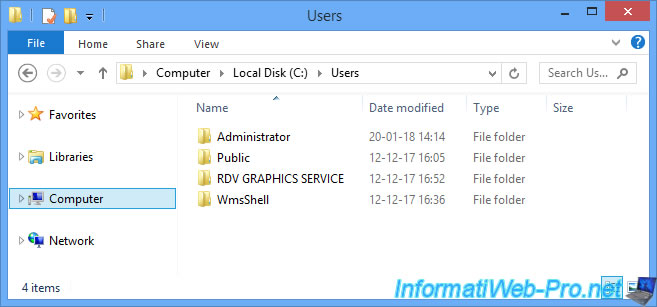
That said, for the moment, documents and settings changed by your users are stored in the "C:\Users" folder of your MultiPoint server.
If you want your users to be able to login on any MultiPoint server without losing their data, you will need to use roaming profiles.
To do this, you will first need to delete the local profiles present on the hard disk of your MultiPoint server.
If you don't delete them, Windows will use the local profile instead of the roaming profile of the user.
To delete these local profiles, log in with the local Administrator account, go to "Control Panel -> System and Security -> System" and click on "Advanced system settings".
Then, go to the "Advanced" tab and click on the "Settings" button in the "Users Profiles" section.
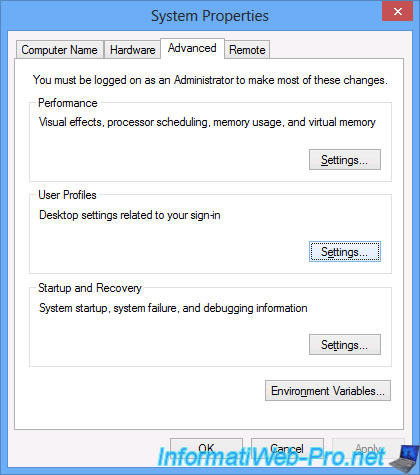
In the "User Profiles" window that appears, delete the profiles for your domain's users.
Note : the affected users must be logged out so that you can delete their user profile.
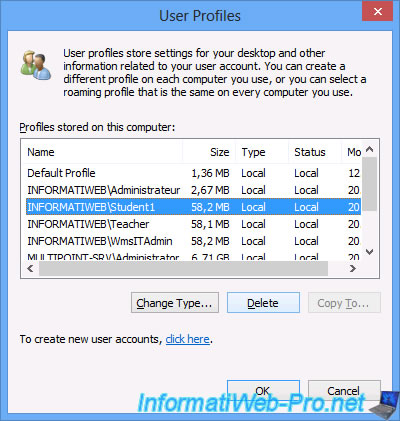
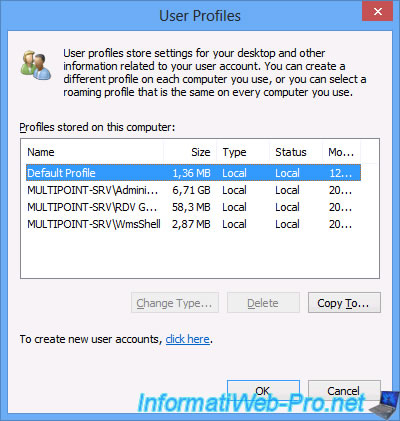
Finally, only the default profile will remain, as well as the local users profiles of the MultiPoint server.
Now, to enable roaming profiles, refer to our tutorial : Windows Server 2008 R2 / 2012 - Roaming profiles, folder redirection and disk quotas
Here are only the steps that differ slightly from the tutorial mentioned above.
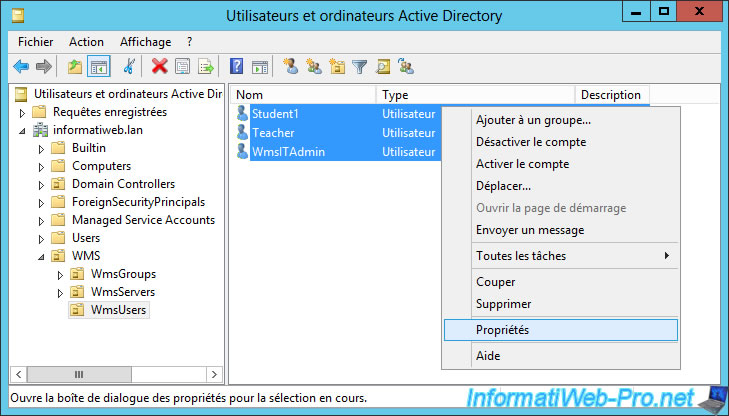
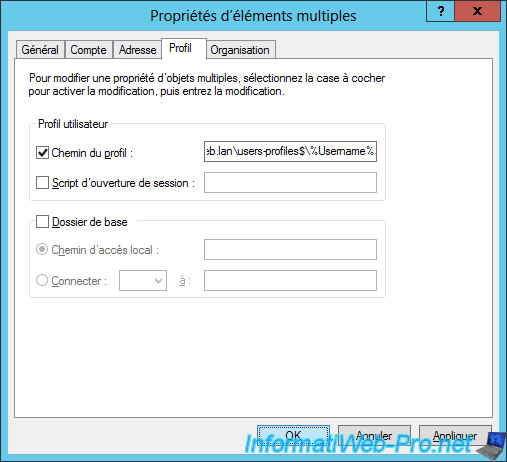
To enable roaming profiles for Active Directory users of your WMS server, select the users in the "WmsUsers" folder and right-click "Properties" on them.
For the profile path, specify this : \\ad.informatiweb.lan\users-profiles$\%Username%
Note : in our case, our Active Directory server has the name "ad". So, his full domain name (FQDN) is : ad.informatiweb.lan
For the GPO that you will need to create (via the tutorial mentioned above), you can create it for the WMS folder.
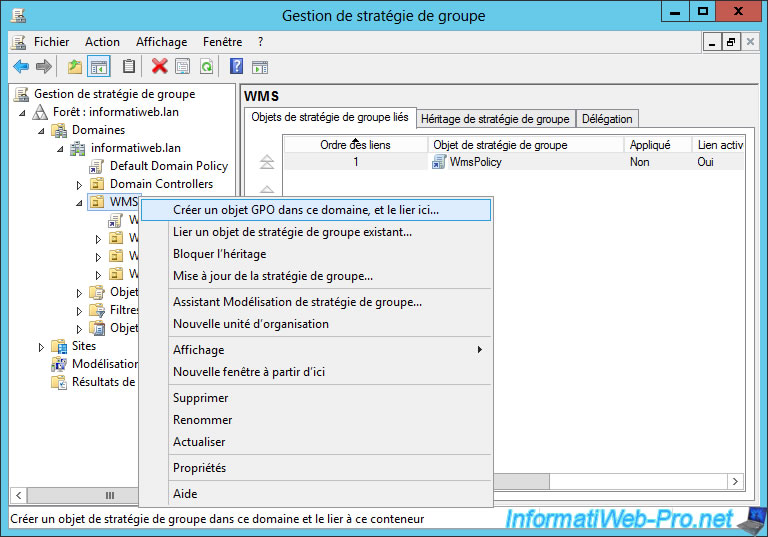
For GPO name, you can use the same name used in the tutorial mentioned above.
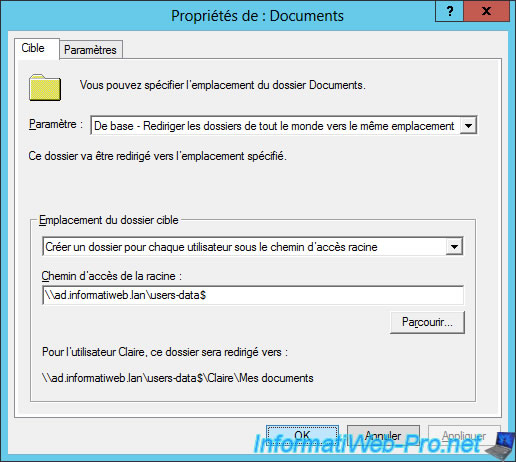
For folder redirection policies, here are the new paths :
- for the Documents folder : \\ad.informatiweb.lan\users-data$
- for the Documents folder : \\ad.informatiweb.lan\users-data$
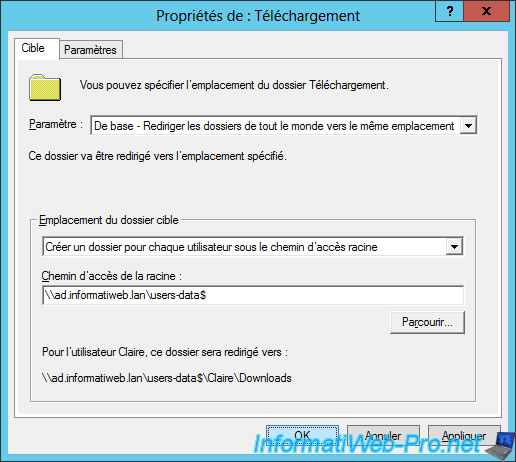
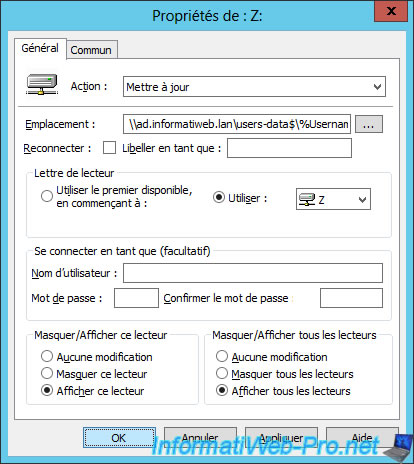
For the network drive mapping, use this location : \\ad.informatiweb.lan\users-data$\%Username%
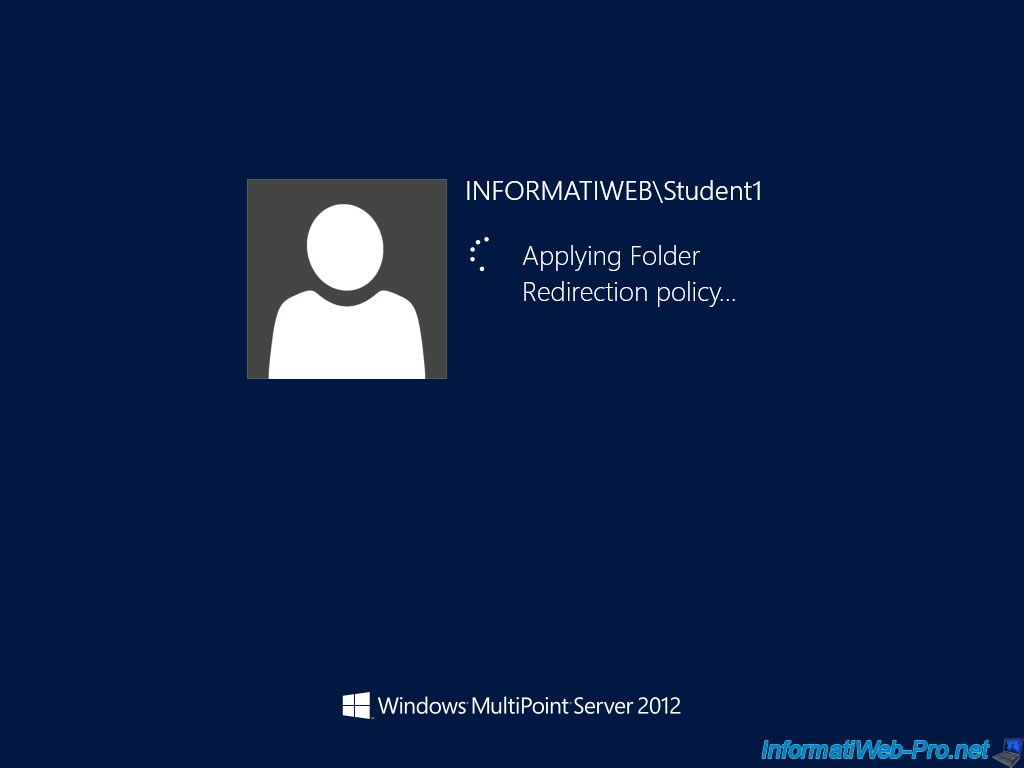
Now, try to connect with one of your Active Directory users on your MultiPoint 2012 server.
If the configuration is correct, the connection will be made without problems.
In addition, you may also see the "Applying Folder Redirection policy" message that confirms the use of group policies for redirecting Documents and Download folders.
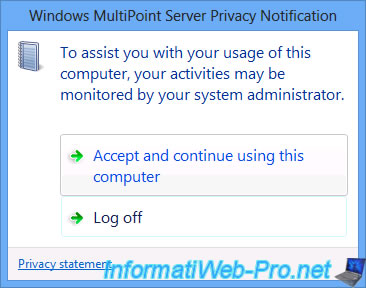
During the first login of the user, the notification concerning the monitoring of his session will appear.
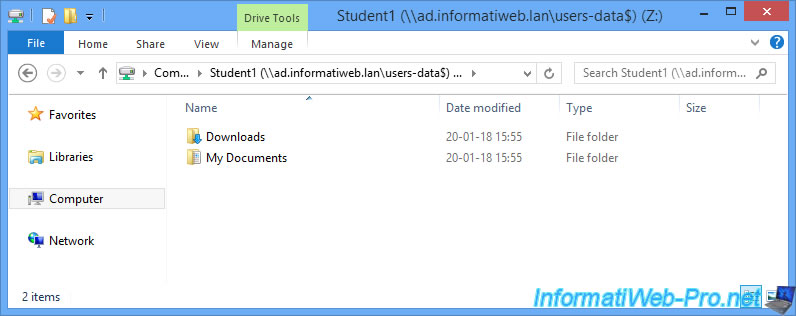
If the folder redirection and the network drive mapping succeeded, a network drive will appear in : Computer.
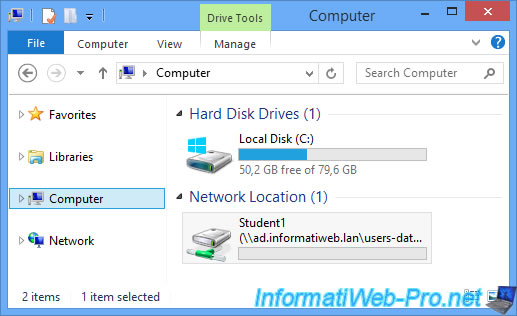
In this network drive, the user will see 2 folders : Downloads and My Documents.
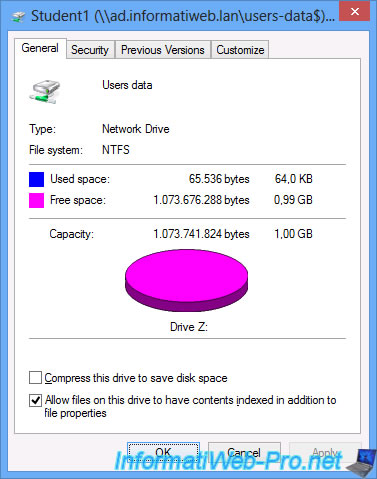
If you have configured the disk quotas as in the tutorial, the user will not be able to store more than 1 GB of data in this network drive or its documents and its "Download" folder.
Enabling roaming profiles will also show a small icon in the taskbar.
This icon allows the user to know which file takes up space in his user profile.
![]()
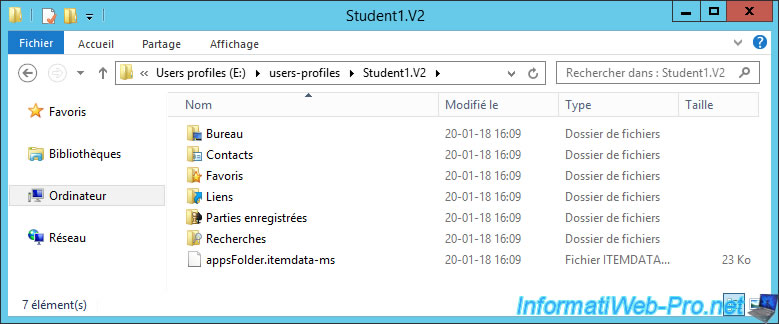
On the server, you will see a new folder in the "user-profiles" folder.
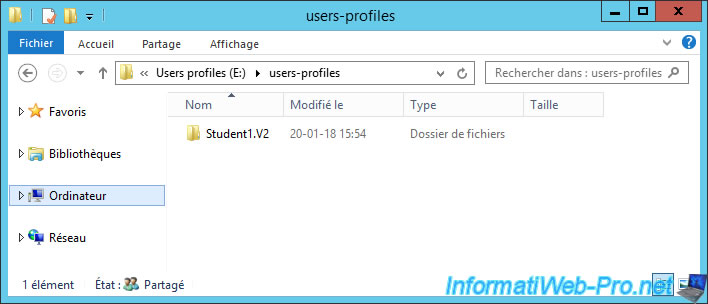
This folder contains the roaming profile of the concerned user, except for his "My Documents" folder and his "Downloads" folder.
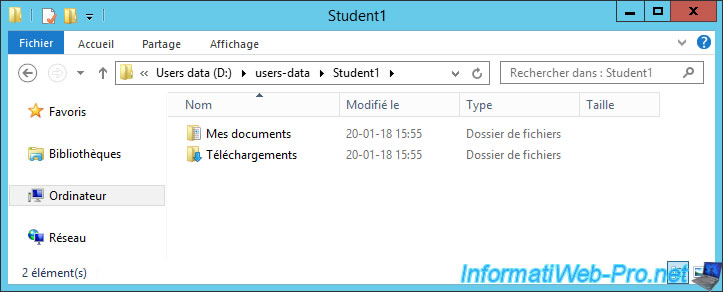
In the server's "users-data" folder, you will also see a new folder with the name of the user previously used on the MultiPoint server.
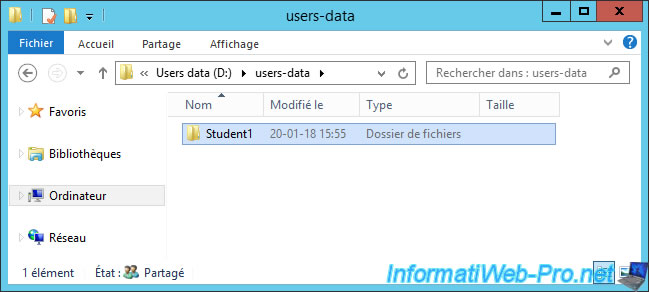
In this folder, you will find the "My Documents" folder and the "Downloads" folder of the concerned user.
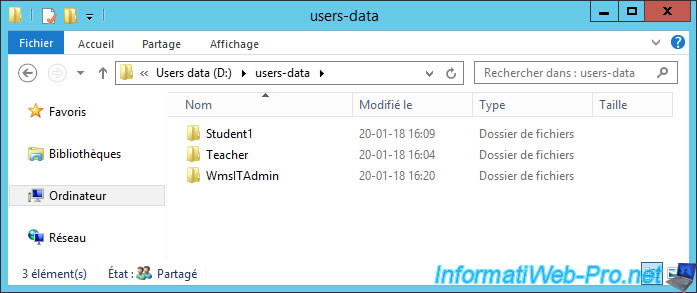
After testing our 3 users, we have the roaming profiles of our 3 users.

As well as their documents and downloads in the "users-data" folder.
By enabling roaming profiles, you will not see any Active Directory profiles in the "C:\Users" folder when your users are logged out.
Share this tutorial
To see also
-
Windows Server 2/12/2018
WMS 2012 - Enable the Disk Protection
-
Windows Server 1/17/2018
WMS 2012 - Install, configure and how works MultiPoint 2012
-
Windows Server 3/24/2018
WMS 2012 - Join virtual desktops to an AD
-
Windows Server 2/3/2018
WMS 2012 - Manage desktop computers with the MultiPoint Connector
No comment