- NAS
- Unraid
- 23 September 2026 at 14:58 UTC
-

- 1/2

Previously, we showed you how to hot-plug USB devices (with the VM running) to your gaming virtual machine.
This allowed you to connect the keyboard and mouse plugged into your physical KVM to your gaming VM while it was running.
The problem was that the plugin we presented didn't support automatic reconnection of connected USB devices when they were unplugged and then plugged back in.
This happens, for example, when you select another PC on your physical KVM.
For more information, refer to the previous tutorial : Unraid 6.9.2 - VMs - Hotplug USB devices (Libvirt Hotplug USB plugin).
Here's a new tutorial that allows you to manually connect USB devices (including the keyboard and mouse plugged into your physical KVM) to your VM, as you could have done with the plugin used previously.
It also allows you to configure the plugin to connect and reconnect USB devices or USB ports from your physical Unraid server to your gaming virtual machine. So, once the plugin is configured, you can change the selected PC on your KVM and return to your gaming virtual machine later without having to reconnect the keyboard and mouse from your KVM to your gaming virtual machine each time.
Source : Libvirt Hot Plugin USB - USB Hot Plugin for VMs - Page 2 - Plugin Support - Unraid.
- Keyboard and mouse not available in the list of USB devices
- Install USB Manager plugin
- Configure USB Manager plugin
- Enable USB Manager plugin
- Manually connect USB devices (keyboard, mouse, ...) to a running VM
- Automatically connect specific USB devices (keyboard, mouse, ...) to a VM
1. Keyboard and mouse not available in the list of USB devices
When using a physical KVM, you connect your physical KVM to your desktop PC, as well as 2 times to your Unraid server:
- the first pair of HDMI/USB cables will be used to control your desktop PC.
- the second pair of HDMI/USB cables will be connected to your physical Unraid server and will be used to control the Unraid console by connecting the HDMI to the internal graphics card (the graphics part of the processor) or a graphics card dedicated to the Unraid console.
- the third pair of HDMI/USB cables will also be connected to your physical Unraid server and will be used to control your virtual gaming machine by connecting the HDMI to the NVIDIA graphics card connected via PCIe that you passed to your virtual machine using GPU passthrough.
Next, to access the Unraid web interface, you selected your desktop PC on your physical KVM and tried to modify the configuration of your gaming virtual machine.
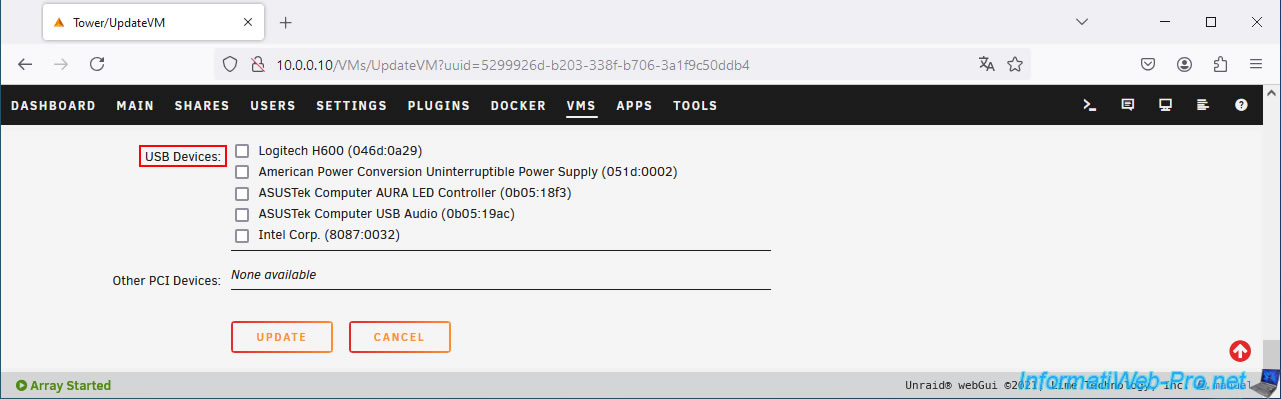
Except, your keyboard and mouse don't appear in the list of USB devices recognized by Unraid.
This is because your physical KVM has currently connected your USB keyboard and mouse to the desktop PC you selected on your physical KVM.
So, your physical Unraid server can't see them.
2. Install USB Manager plugin
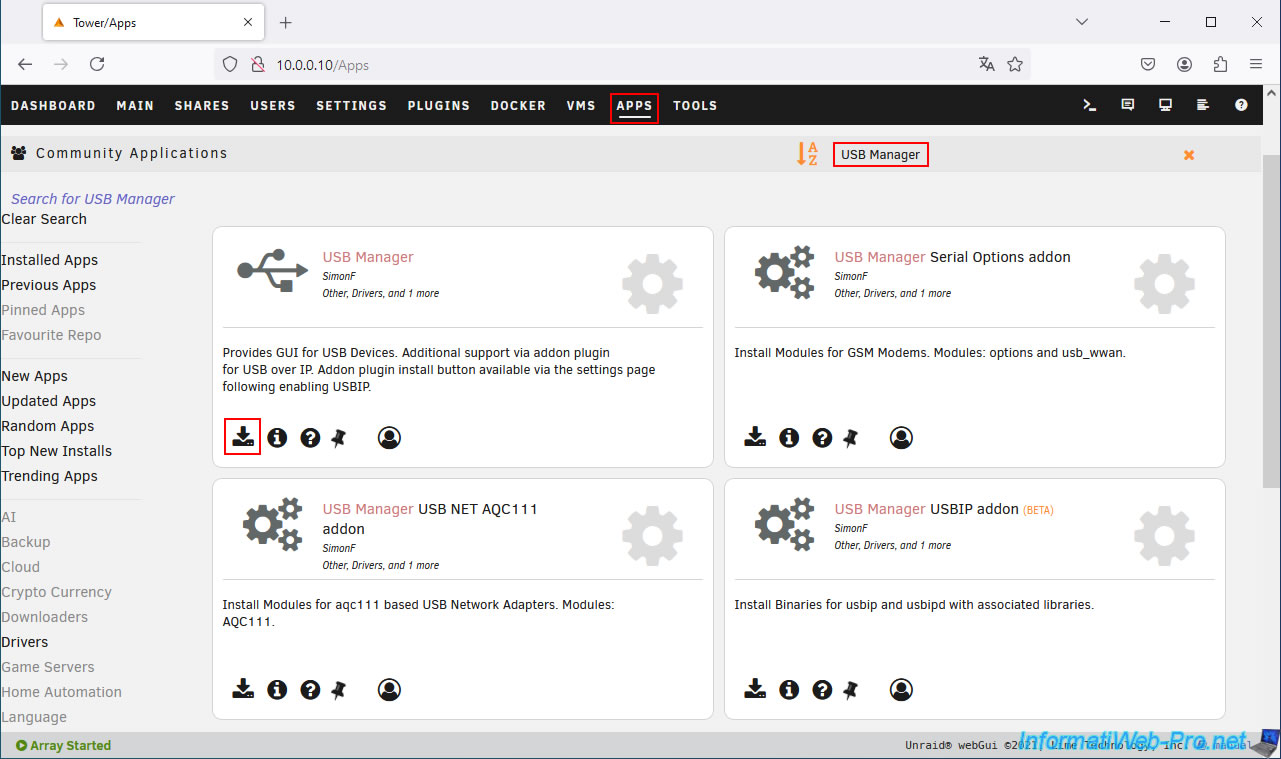
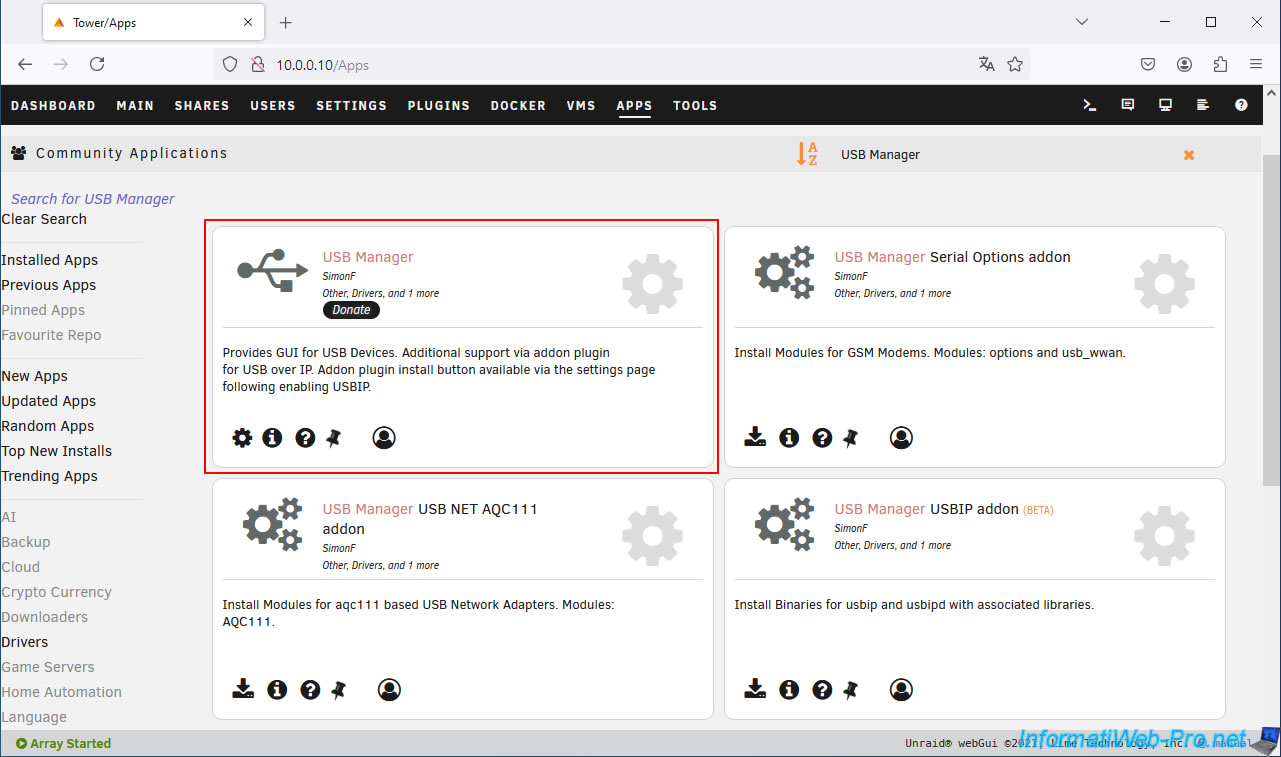
To easily fix the problem, we recommend installing the "USB Manager" plugin, which you can easily find via the "Apps" tab of Unraid.
Once the USB Manager plugin is installed, click "Done".
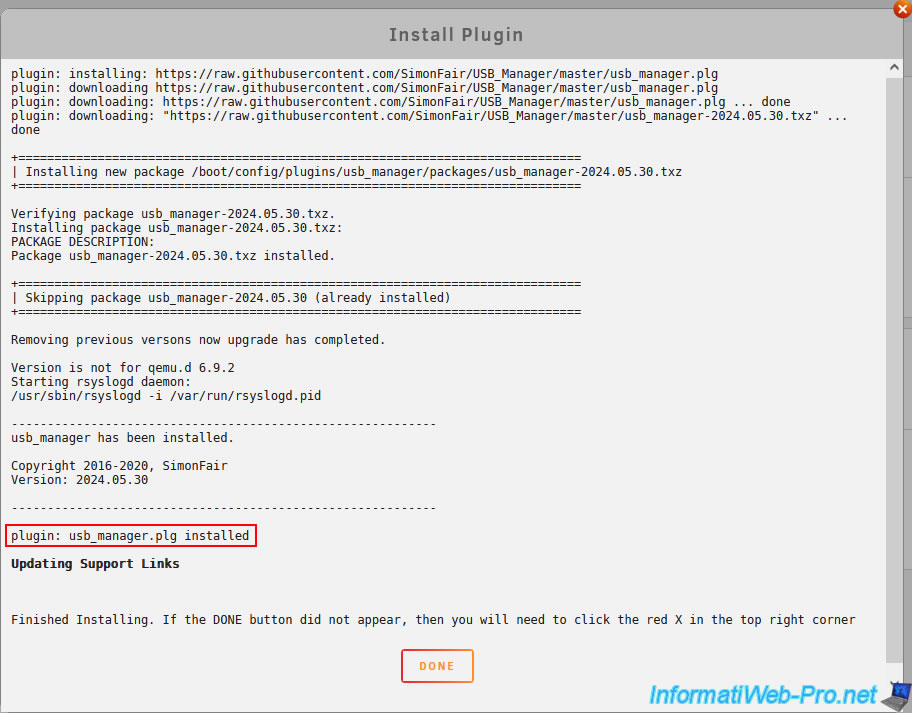
The plugin has been installed.
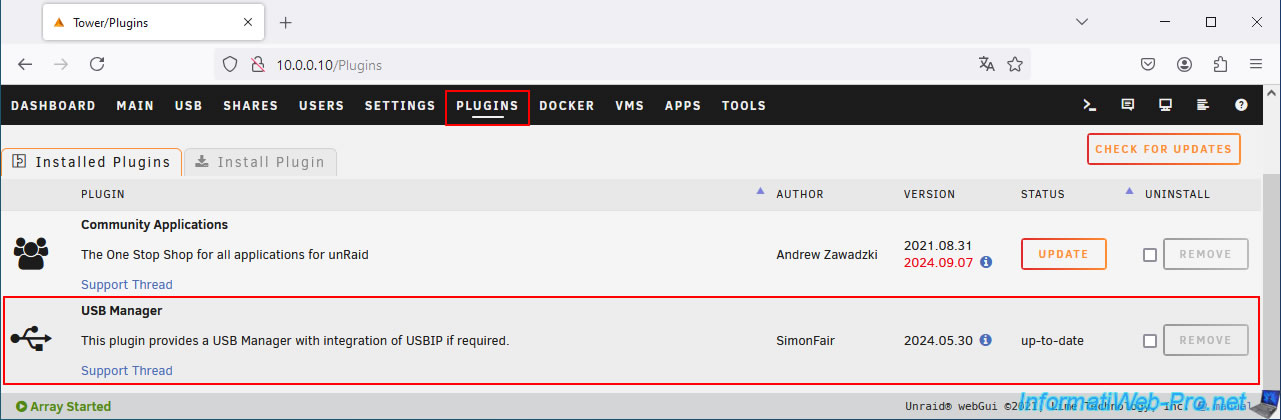
Once the "USB Manager" plugin is installed, you will see it appear in the "Plugins" tab of Unraid.
3. Configure USB Manager plugin
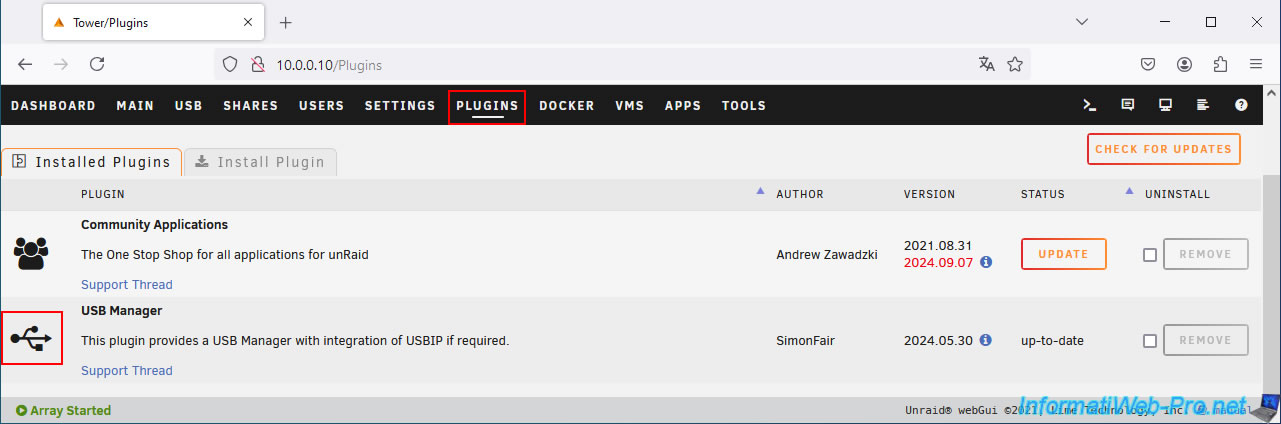
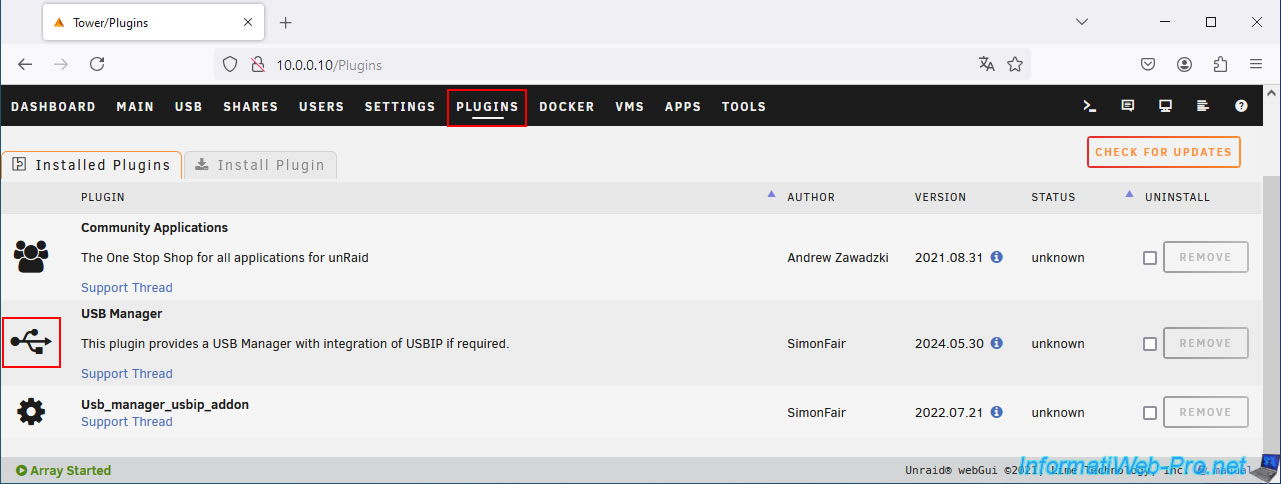
To configure this "USB Manager" plugin, go to the "Plugins" tab and click on the USB icon of this plugin.
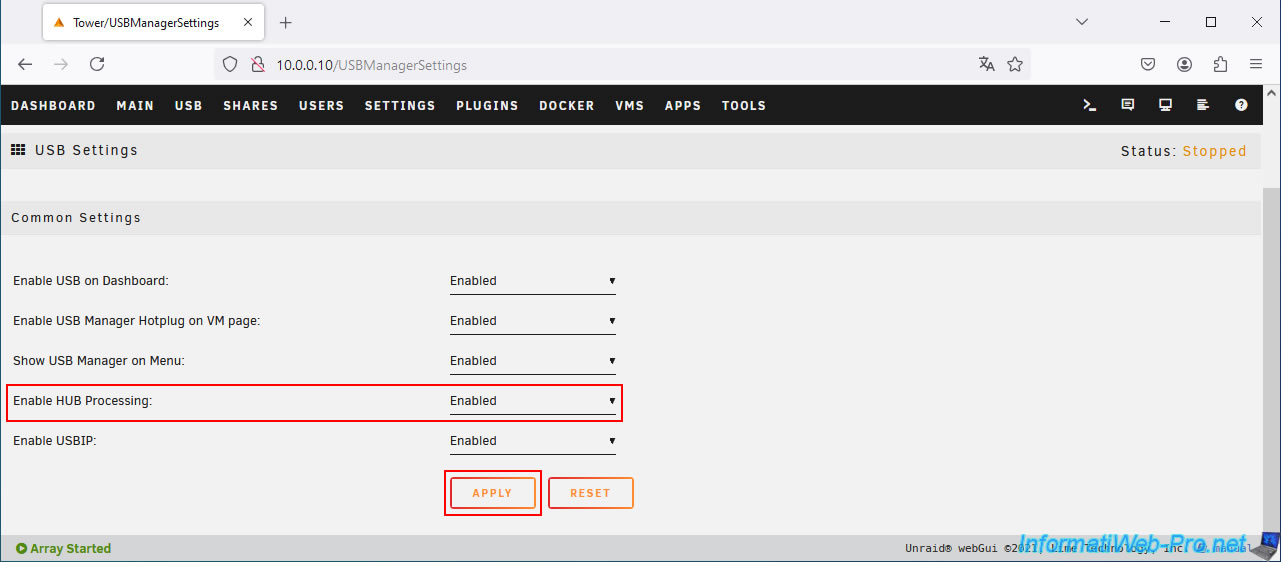
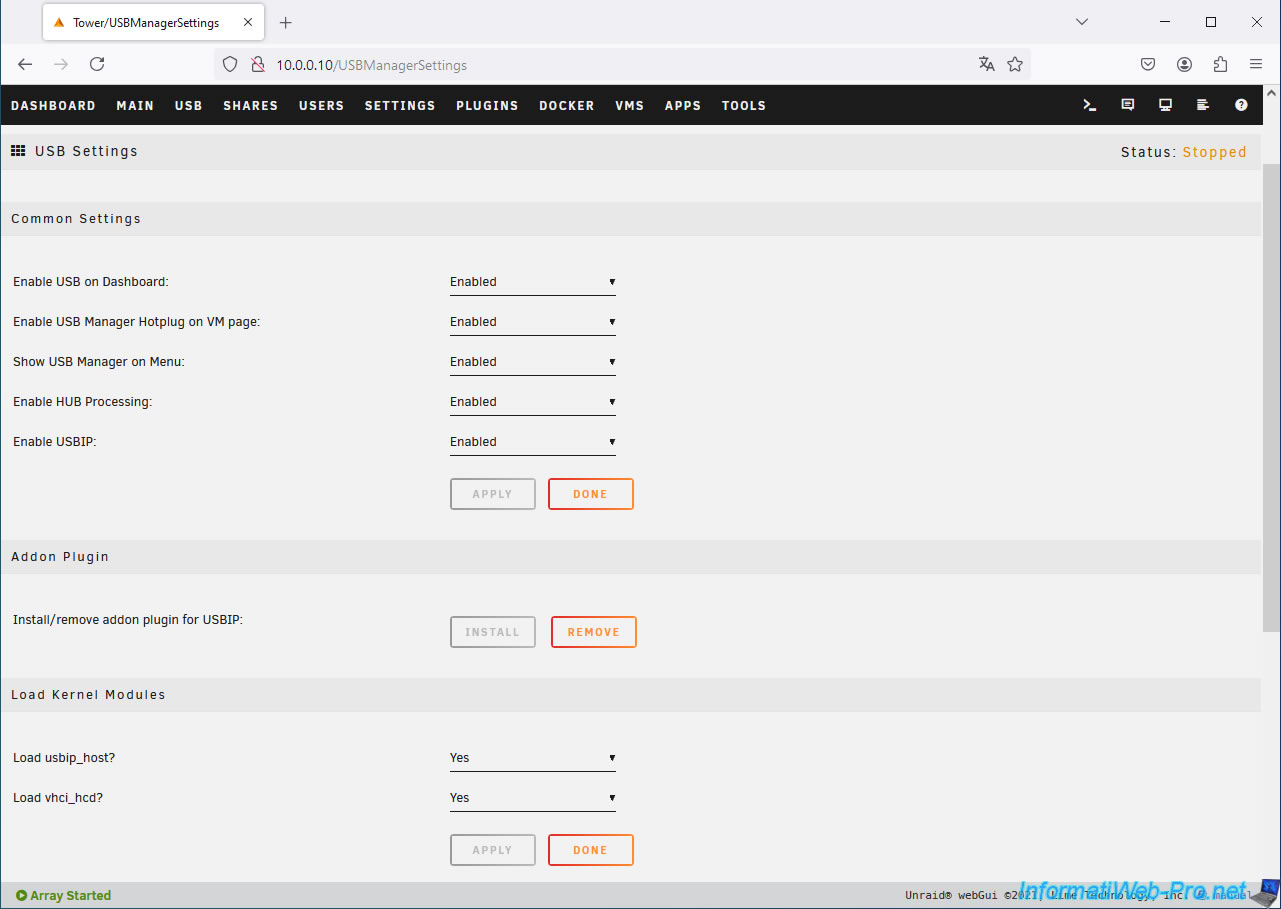
The "USB Settings" page will appear.
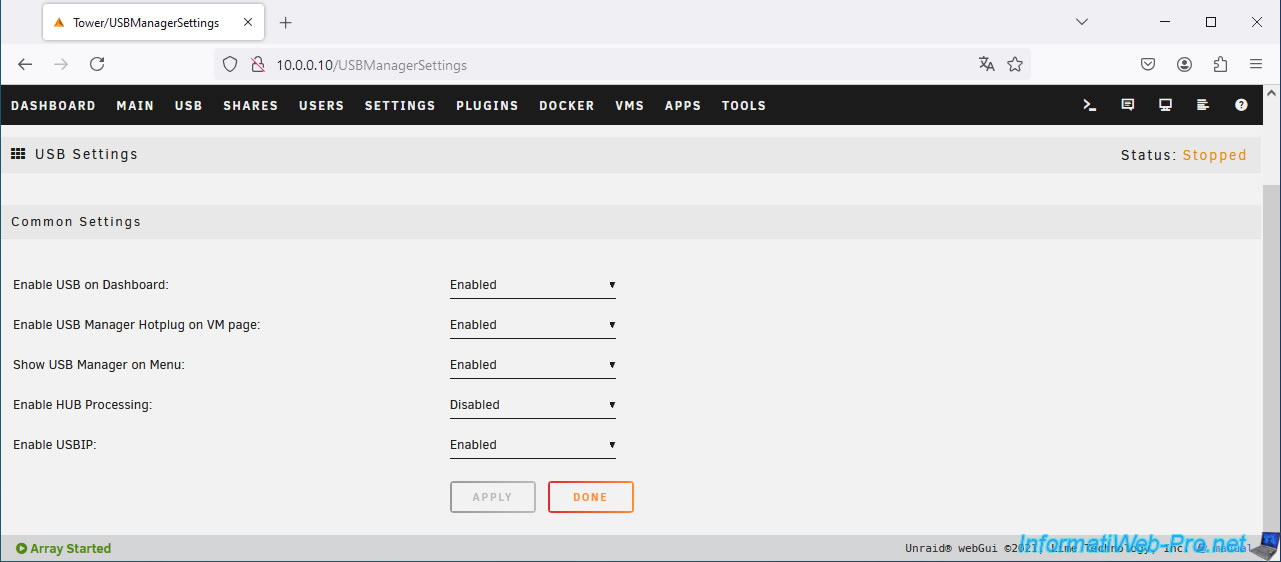
Enable the "Enable HUB Processing" setting by selecting the "Enabled" value, then click "Apply".
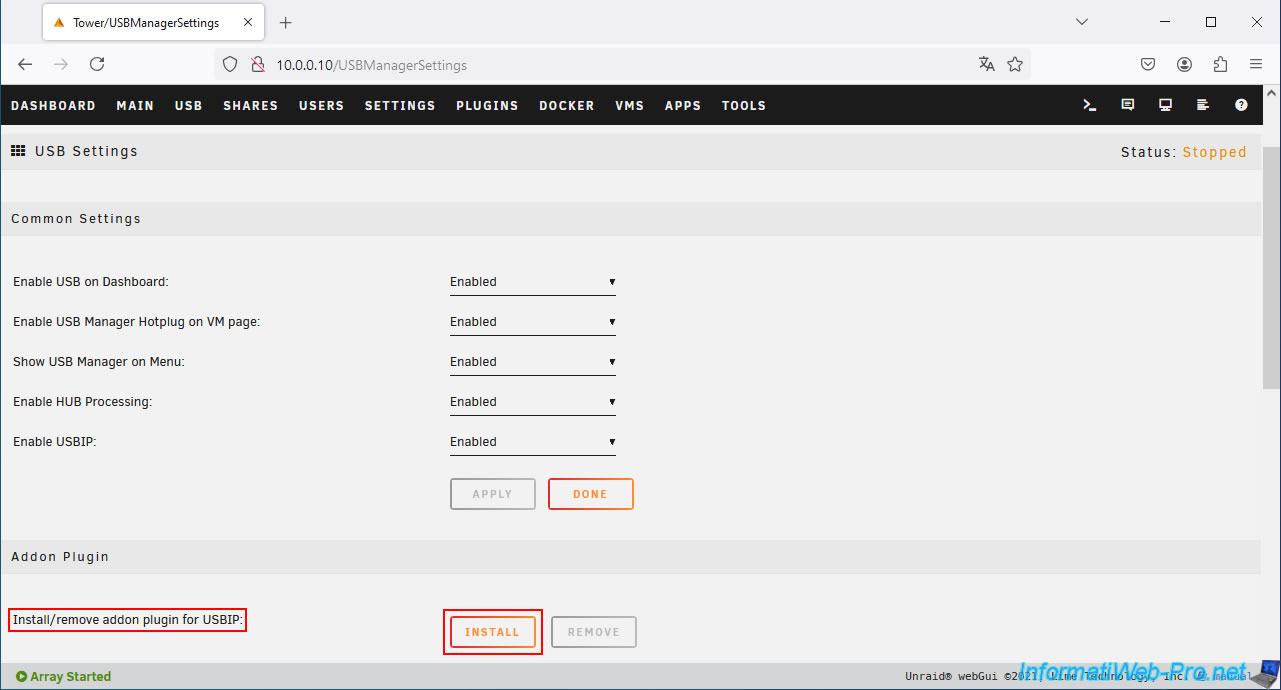
Then, just below, you'll see an option to install the USBIP add-on.
Click "Install" to download and install it automatically.
Plain Text
Install/remove addon plugin for USBIP.
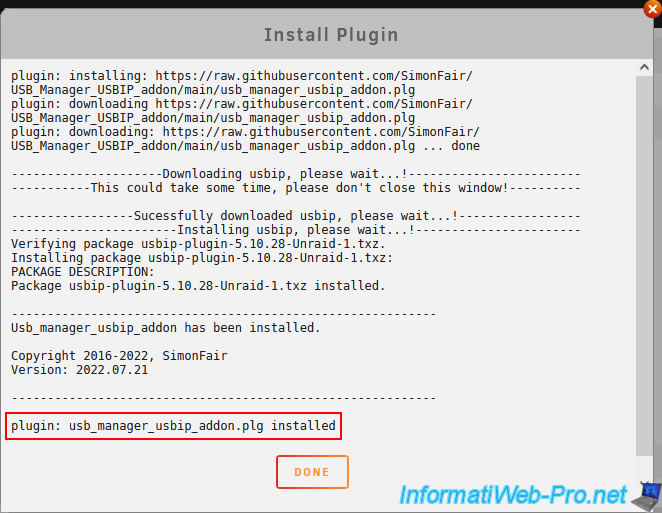
Wait a few seconds while this add-on "usb_manager_usbip_addon.plg" is downloaded and installed, then click "Done".
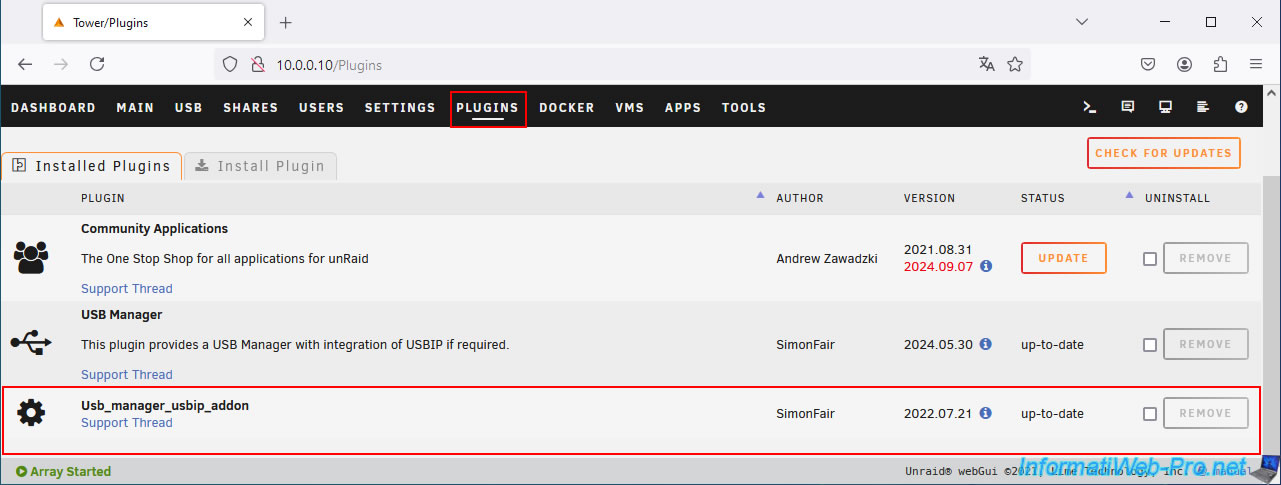
In the "Plugins" tab of Unraid, you will find the "usb_manager_usbip_addon" add-on that you just downloaded and installed.
This plugin cannot be configured, but is required by the "USB Manager" plugin.
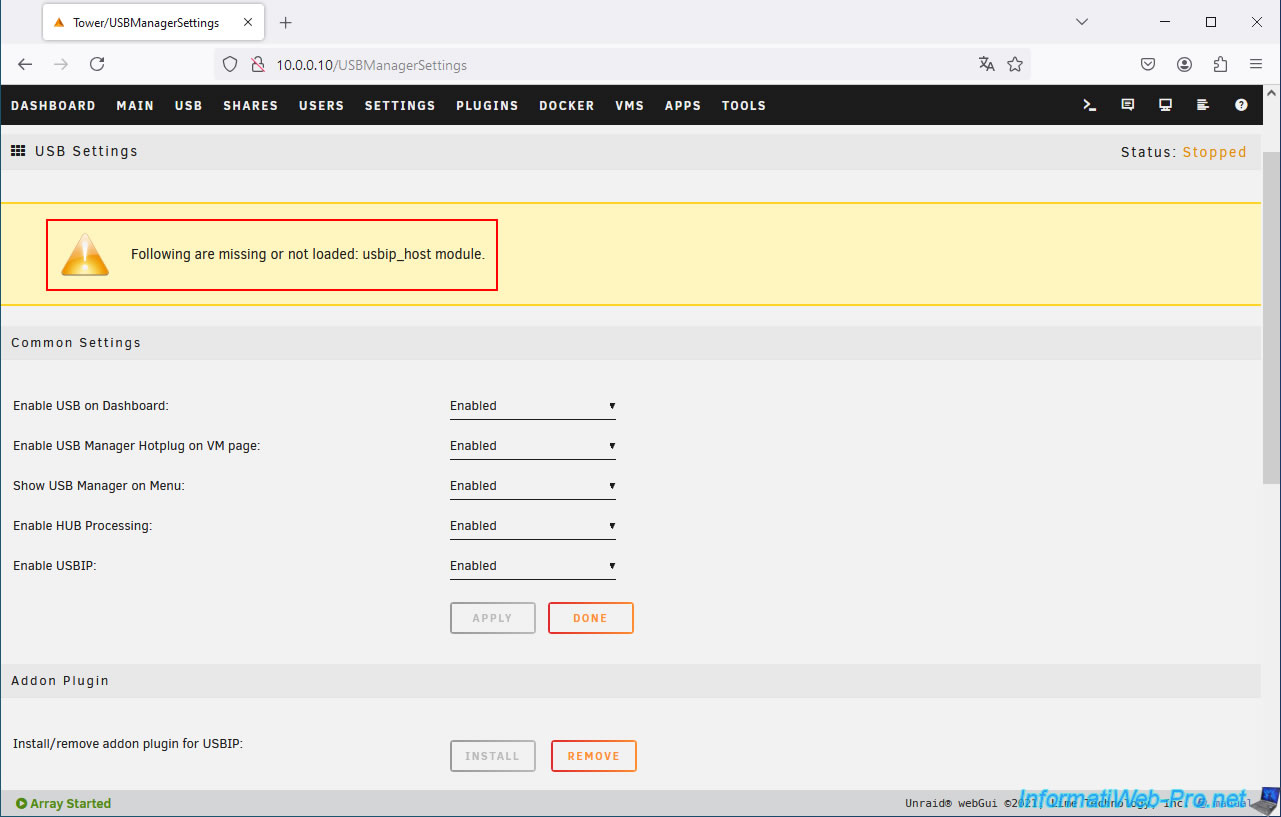
If you click the USB icon in the "USB Manager" plugin, you will return to the "USB Settings" page.
You will now see a warning at the top of this page.
Plain Text
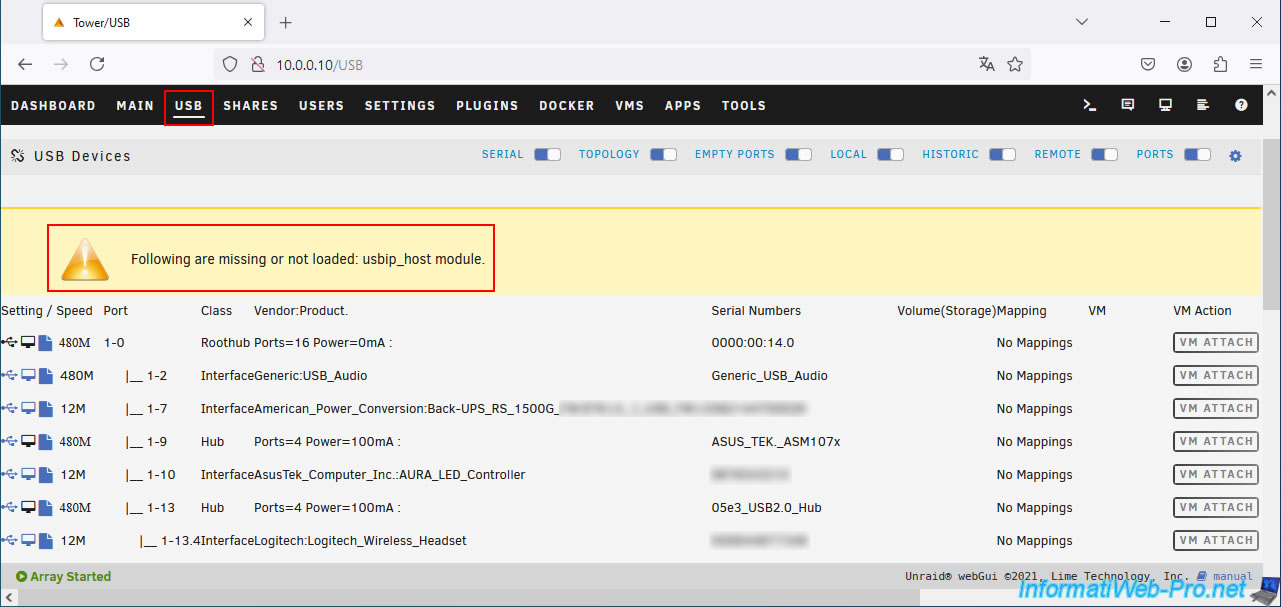
Following are missing or not loaded: usbip_host_module.
Same thing, if you go to the new "USB" tab that appeared at the top left of the Unraid web interface.
If you look at the bottom of page 1 and the top of page 2 of the "[Plugin] USB_Manager - Page 2 - Plugin Support - Unraid" topic on the Unraid forum, you'll understand that the solution to this problem is simply to restart your Unraid server.
Indeed, as indicated on page 2 of this topic on the Unraid forum, the USBIP package depends on the kernel (and this means that once installed, you must restart the operating system (Linux) so that the kernel is reloaded at boot time and therefore the "usbip_host_module" module is also loaded by this Linux kernel).
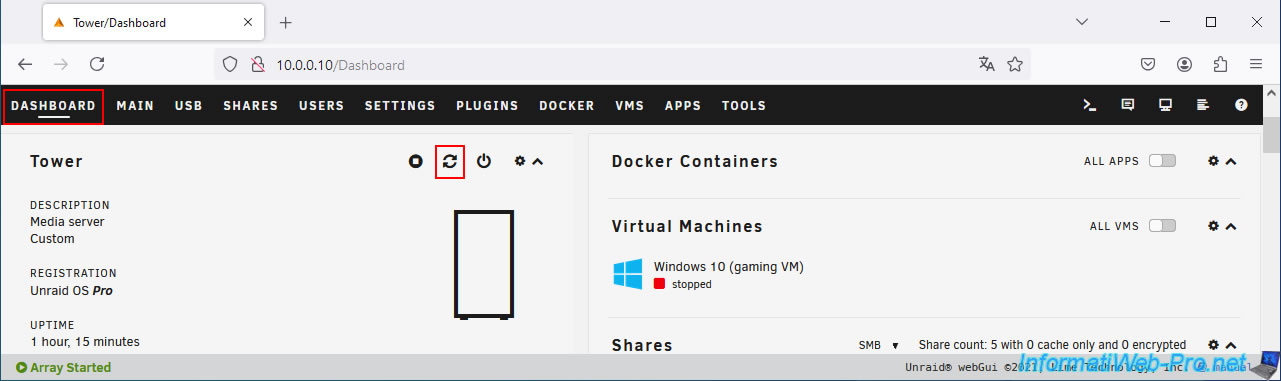
To restart your Unraid server, go to the "Dashboard" tab and click on the 2nd icon.
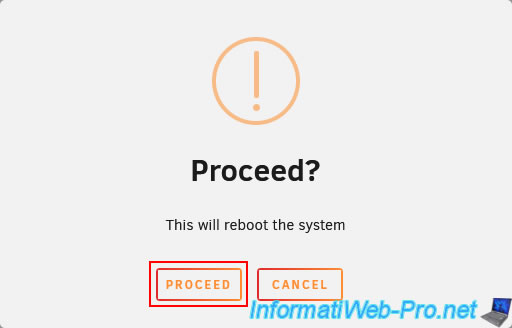
Confirm the restart of Unraid by clicking "Proceed".
4. Enable USB Manager plugin
Now that the necessary components ("USB Manager" and "Usb_manager_usbip_addon") are installed and the "USB Manager" plugin is configured, there's one more step to start using it.
To do this, go to the "Plugins" tab and click the USB icon of the "USB Manager" plugin.
As you can see, the warning at the top of the "USB Settings" page has disappeared.
However, the status is still "Stopped" in the top right corner.
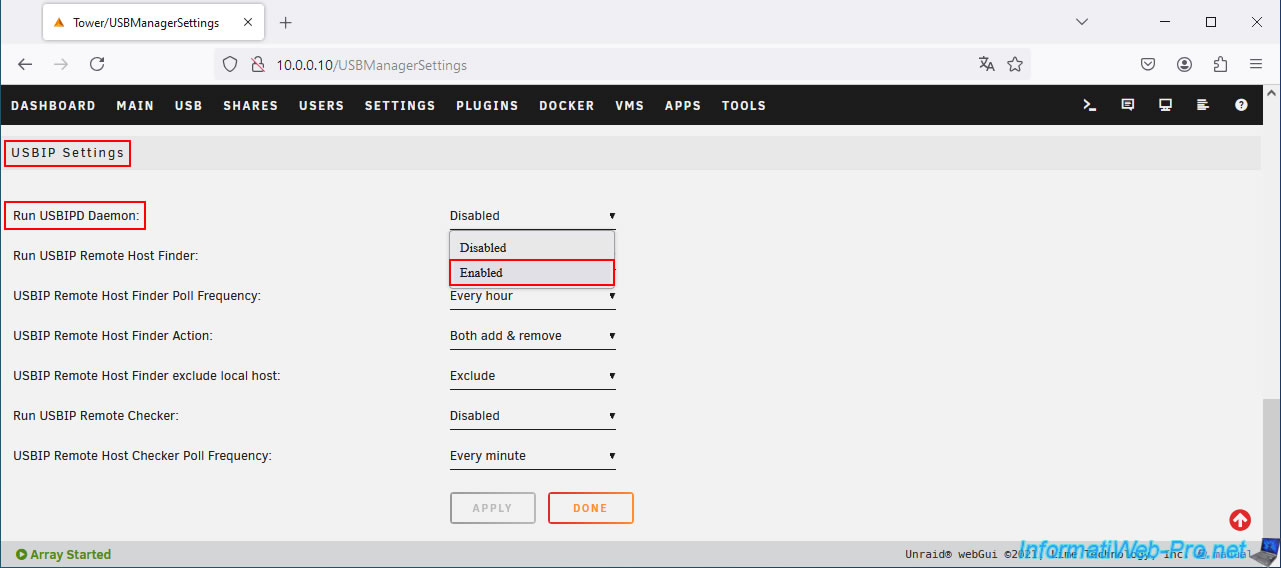
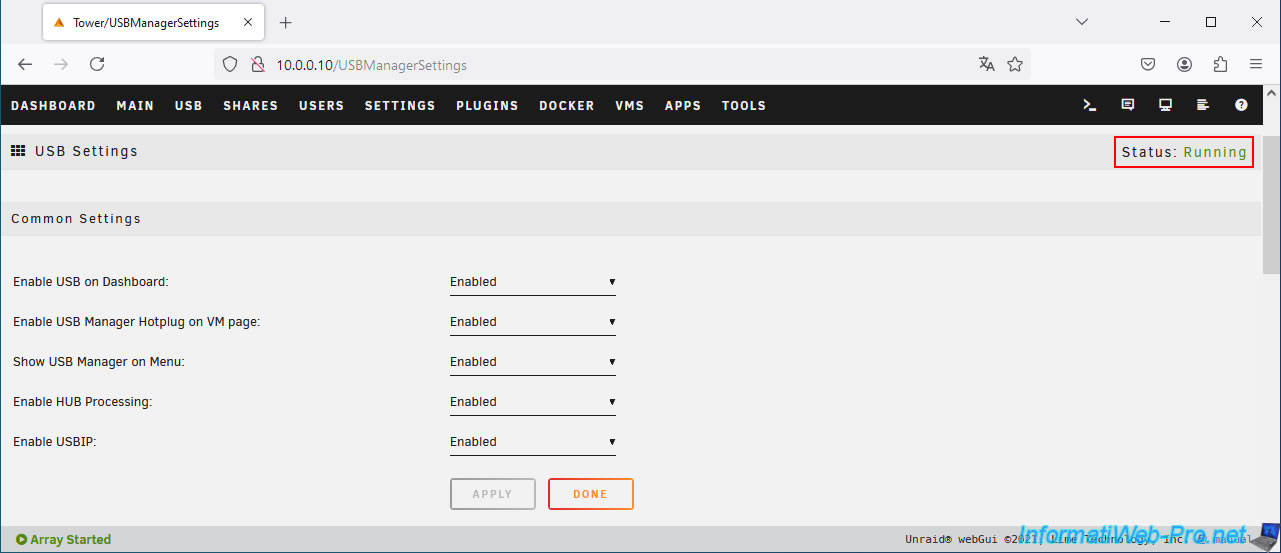
To fix this little problem, just go to the bottom of the page (in the "USBIP Settings" section) and enable the "Run USBIPD Daemon" setting by selecting the "Enabled" value.
Then, click on "Apply".
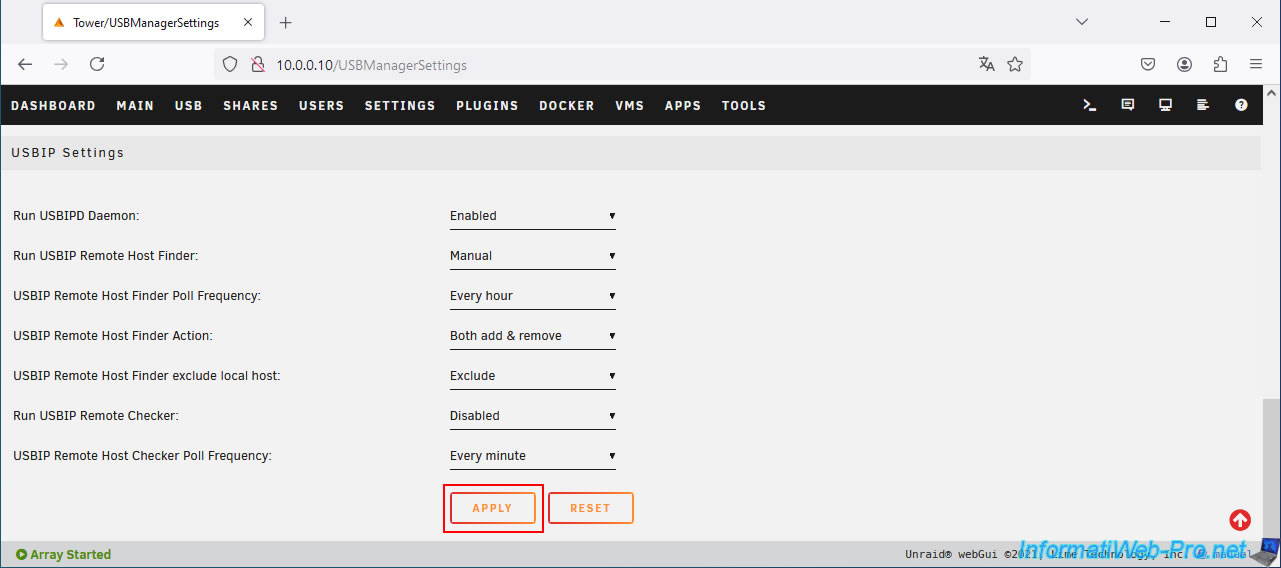
Now, if you look at the top right of this page, you will see that the status is "Running".
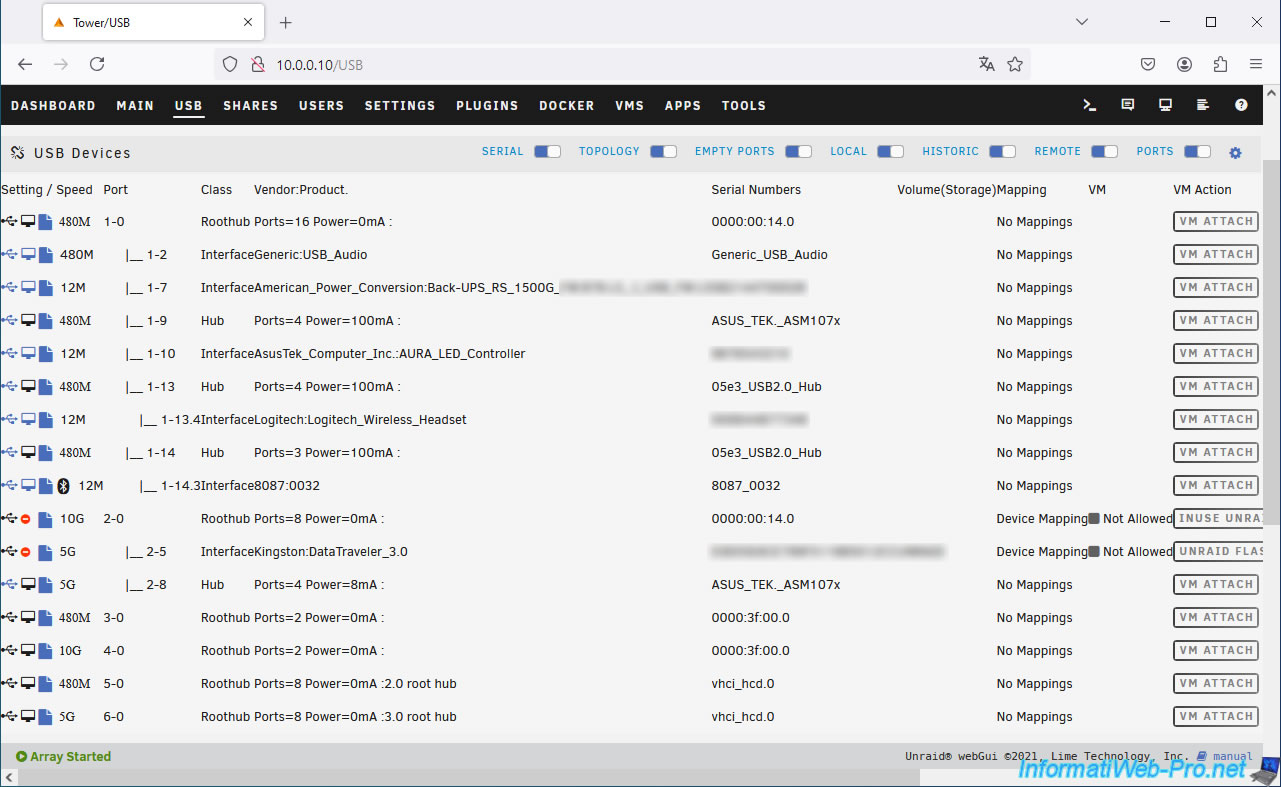
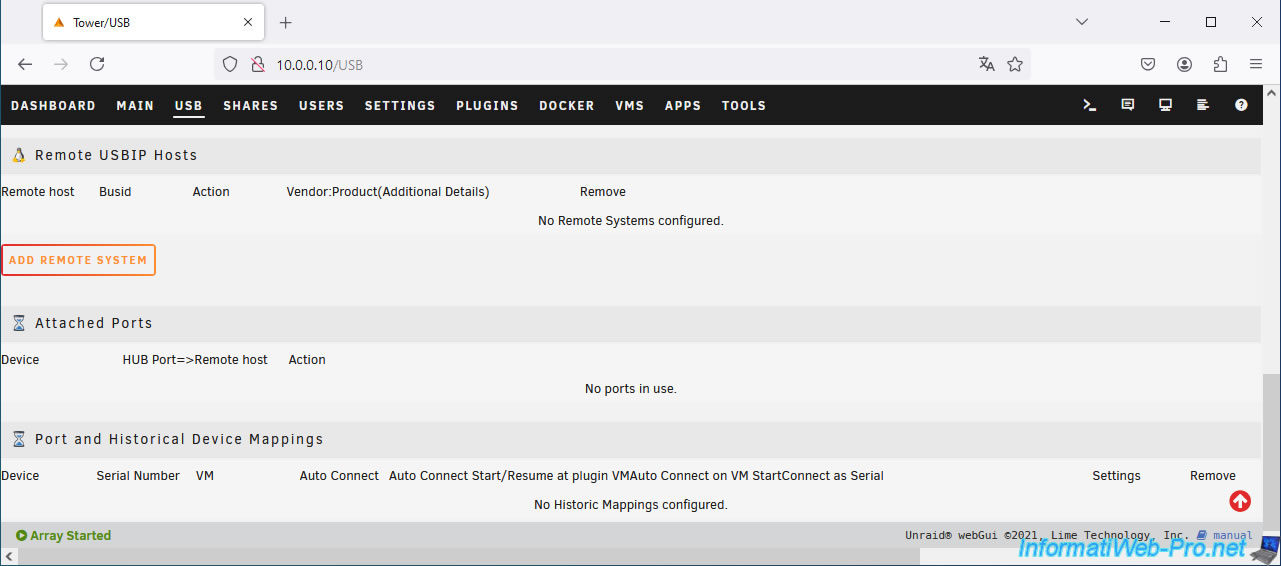
In the "USB" tab, you will also notice that the warning at the top of the page has also disappeared.
Share this tutorial
To see also
-
NAS 4/15/2026
Unraid 6.9.2 - Docker - Install a file server (Nextcloud)
-
NAS 4/23/2026
Unraid 6.9.2 - Docker - Install a media server (Plex)
-
NAS 6/10/2026
Unraid 6.9.2 - SWAG - Access Jellyfin via reverse proxy and personal domain
-
NAS 7/15/2026
Unraid 6.9.2 - VMs - Create a virtual machine
You must be logged in to post a comment