Accessing the reverse proxy (SWAG) locally on Unraid 6.9.2
- NAS
- Unraid
- 13 May 2026 at 08:17 UTC
-

- 4/4

6.4. Distribute your local DNS server IP address via your DHCP server (option 2)
To avoid manually configuring each network device (computer, smartphone, etc.), we recommend configuring your router's DHCP server so that it automatically sends the IP address of your local DNS server as its primary DNS server.
This way, all computers, smartphones, etc. on your network will use your local DNS server as their primary DNS server.
In our case, we didn't have this option, so we used pfSense.
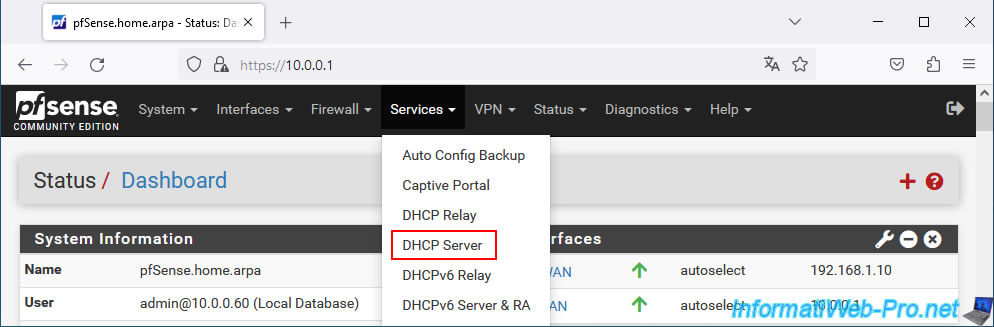
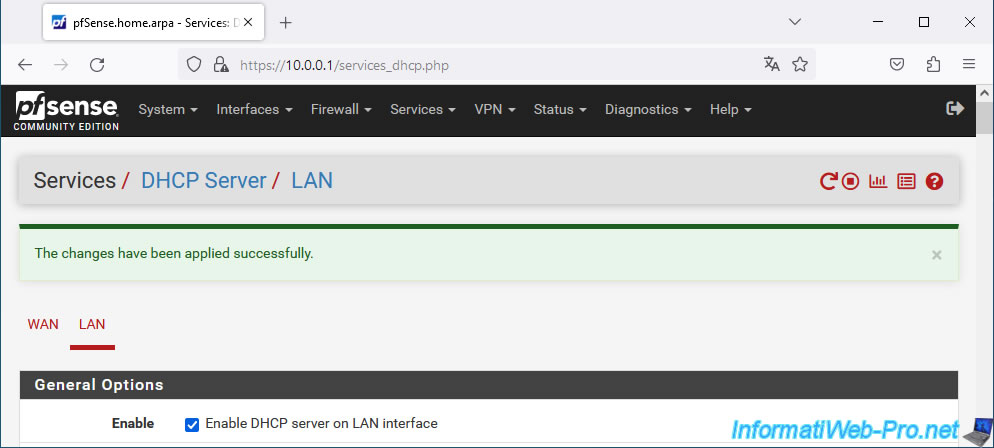
In pfSense, go to the menu: Services -> DHCP Server.
Note: pfSense is a software solution that allows you to transform a computer into a router (or even more), but pfSense is also available as a real box that acts as a router.
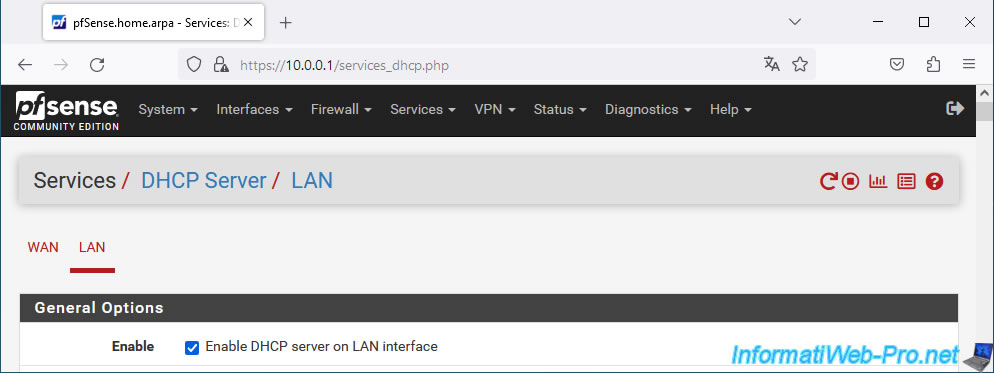
The pfSense DHCP server configuration page for the LAN (local area network) appears.
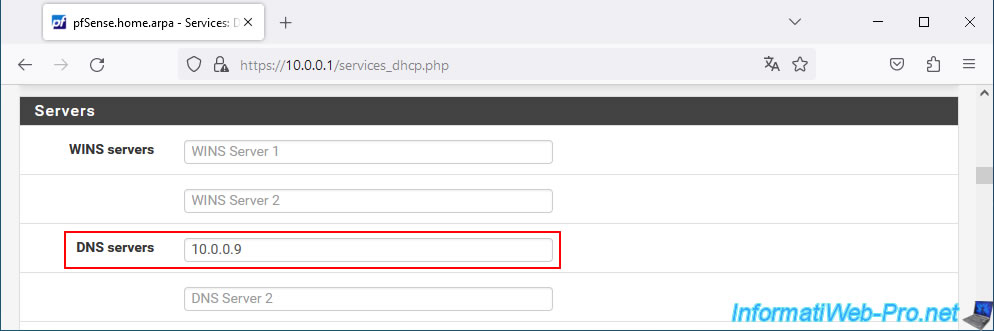
In the "Servers" section, enter Pi-hole's IP address in the first "DNS servers" box.
Then, click "Save" at the bottom of the page.
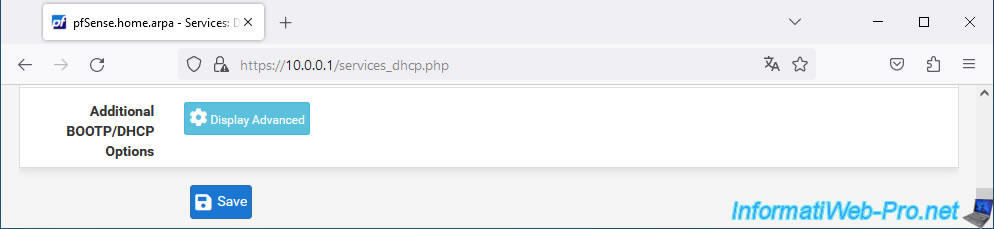
The DHCP server configuration has been successfully updated.
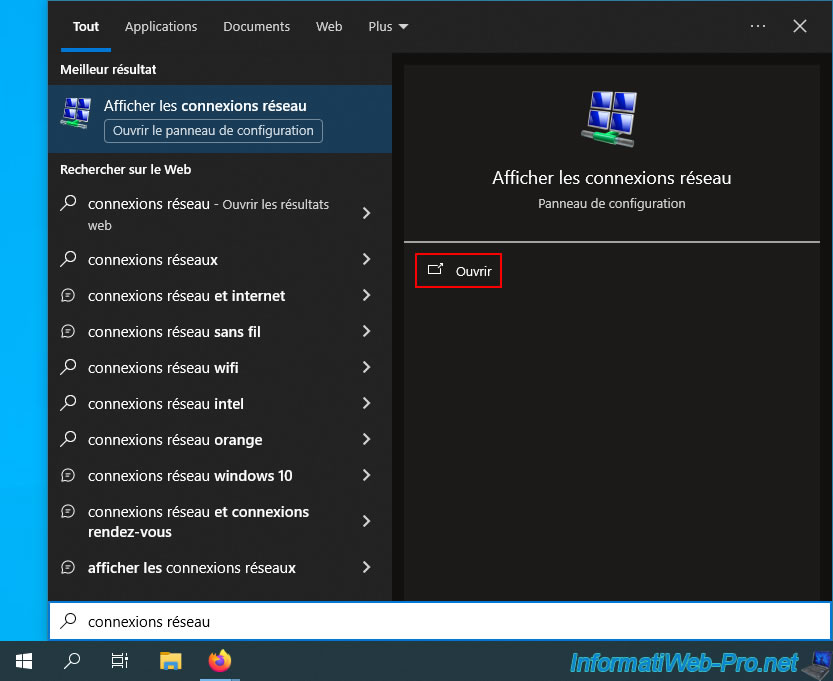
For your computer to be aware of this change, it must request an IP address from your DHCP server again.
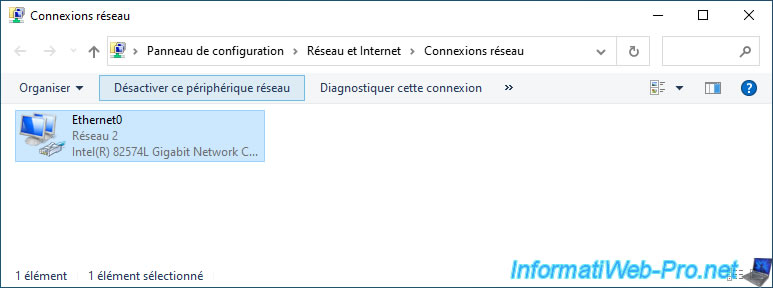
To do this, simply search for the "Network Connections" setting via the Windows Start menu.
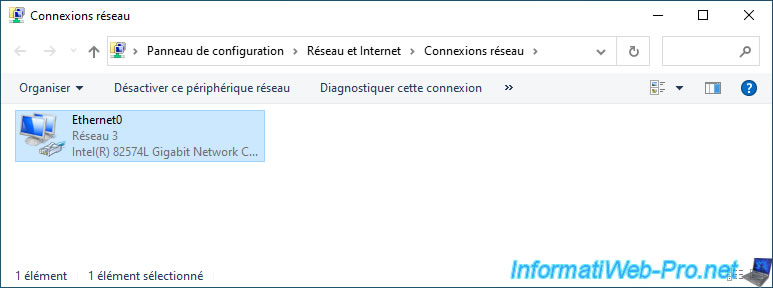
Disable your network card.

Then, re-enable it.
Note that restarting the computer would also work. However, it takes longer.

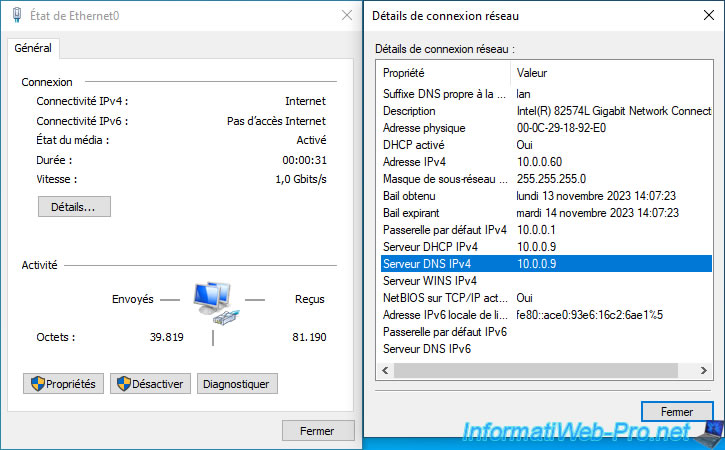
Now, double click on your network card.
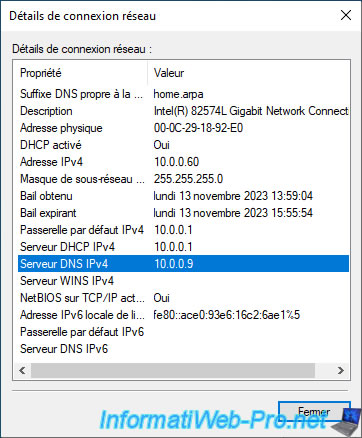
In the "Ethernet0 Status" window that appears, click Details.
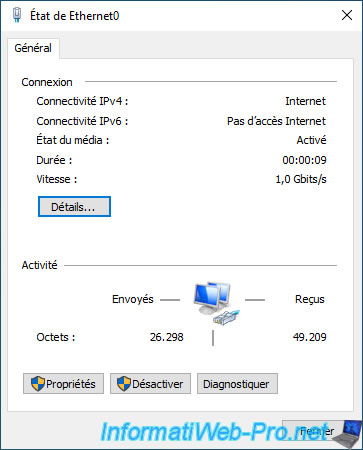
In the "Network Connection Details" window that appears, you will see that the only IPv4 DNS server used is Pi-hole.
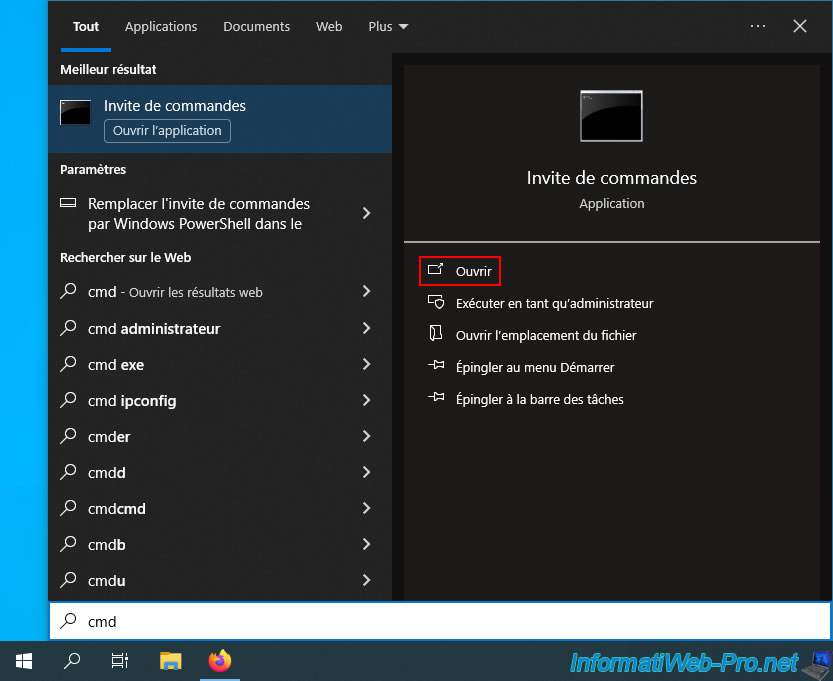
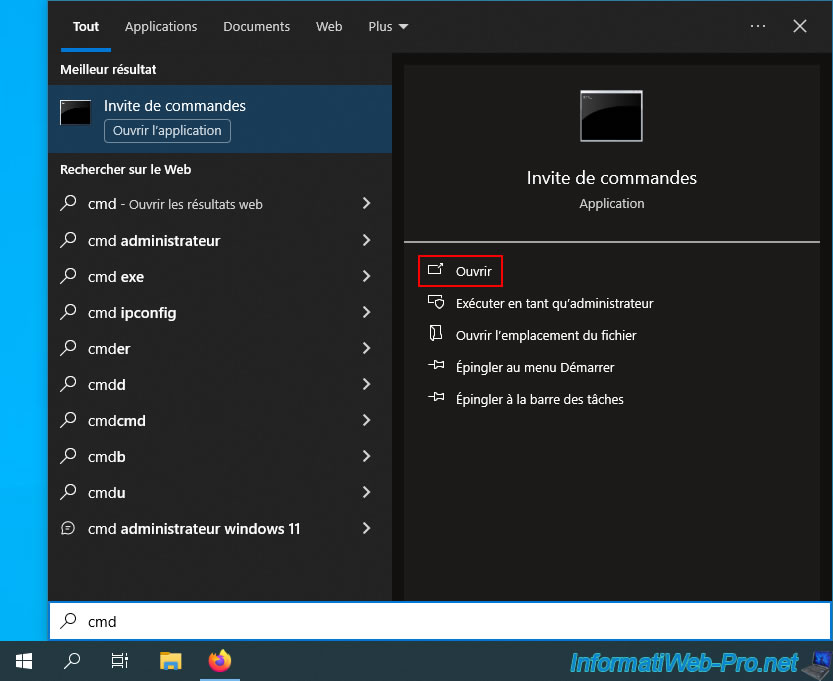
Open a command prompt.
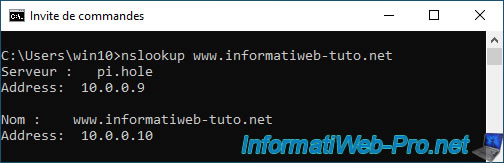
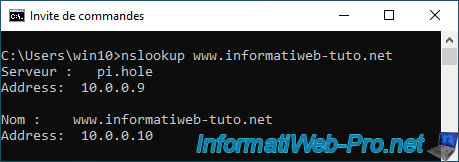
Use the "nslookup" command to verify that the local IP address is returned for your domain name used with SWAG.
Batch
nslookup www.informatiweb-tuto.net
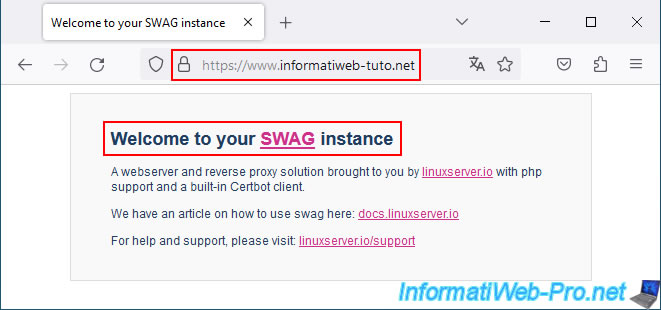
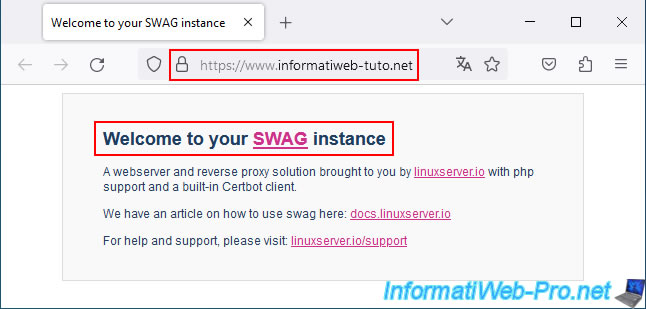
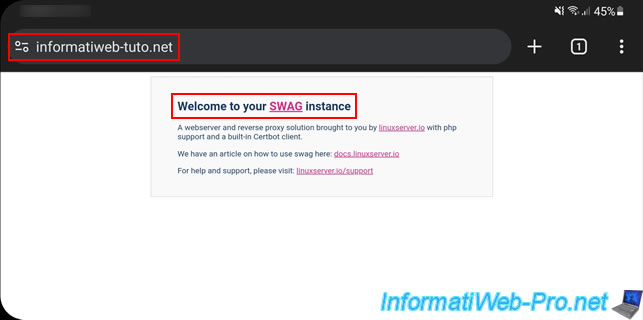
In a web browser, try accessing your domain used with SWAG.
You should see the SWAG page appear.
If it doesn't, type the command "ipconfig /flushdns" at a command prompt to clear your computer's DNS cache, restart your web browser, and try again.
6.5. Distribute your local DNS server IP address via Pi-hole's DHCP server (option 3)
If your router's DHCP server doesn't allow you to send your local DNS server's IP address to your network devices, the solution is to disable your router's DHCP server and enable Pi-hole's.
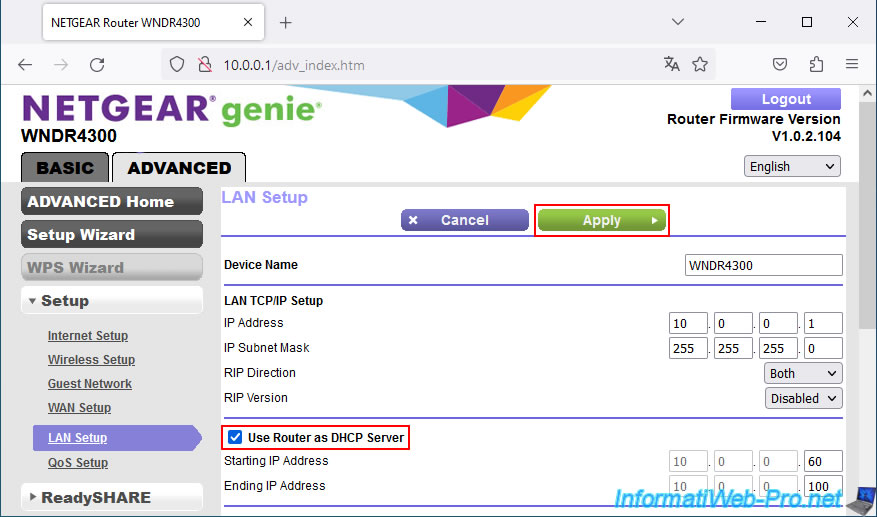
In the case of our Netgear WNDR4300 router, we don't have the option to configure custom DHCP options.
So, we went to the "Advanced -> Setup -> LAN Setup" section and unchecked the "Use Router as DHCP Server" box, then clicked "Apply".
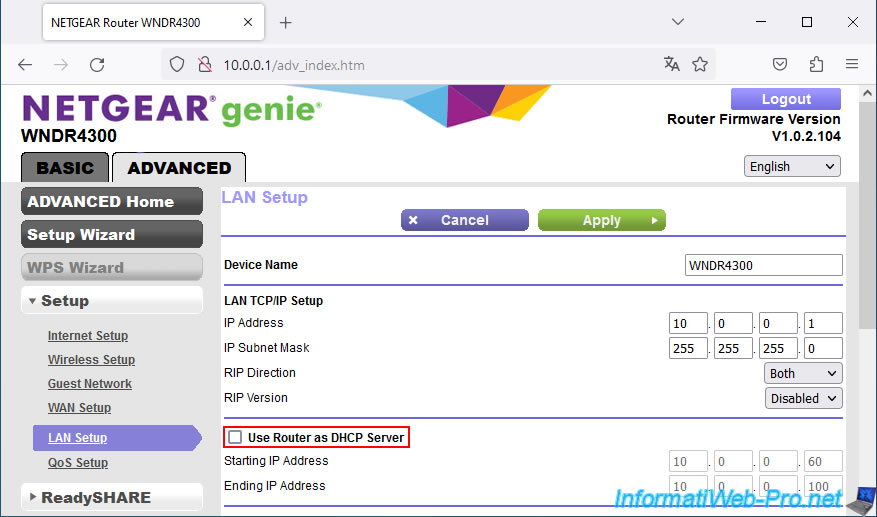
Our router's DHCP server is now disabled.
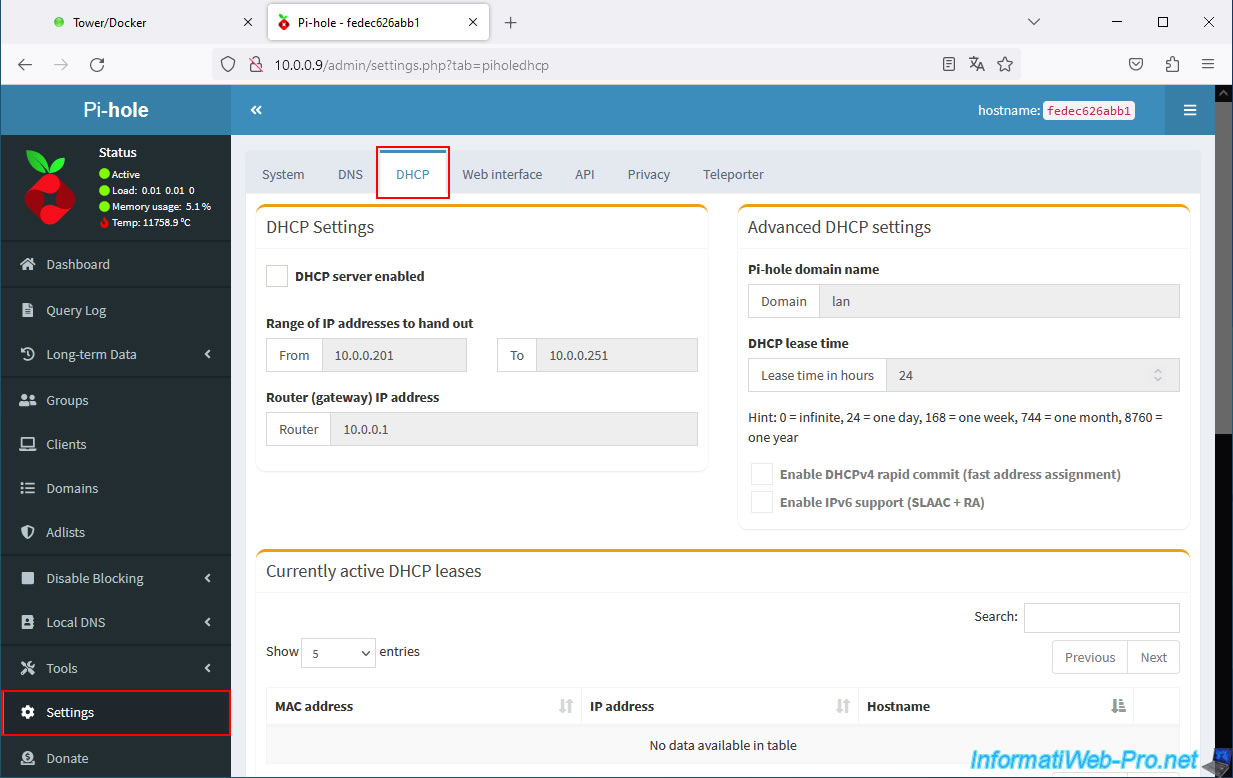
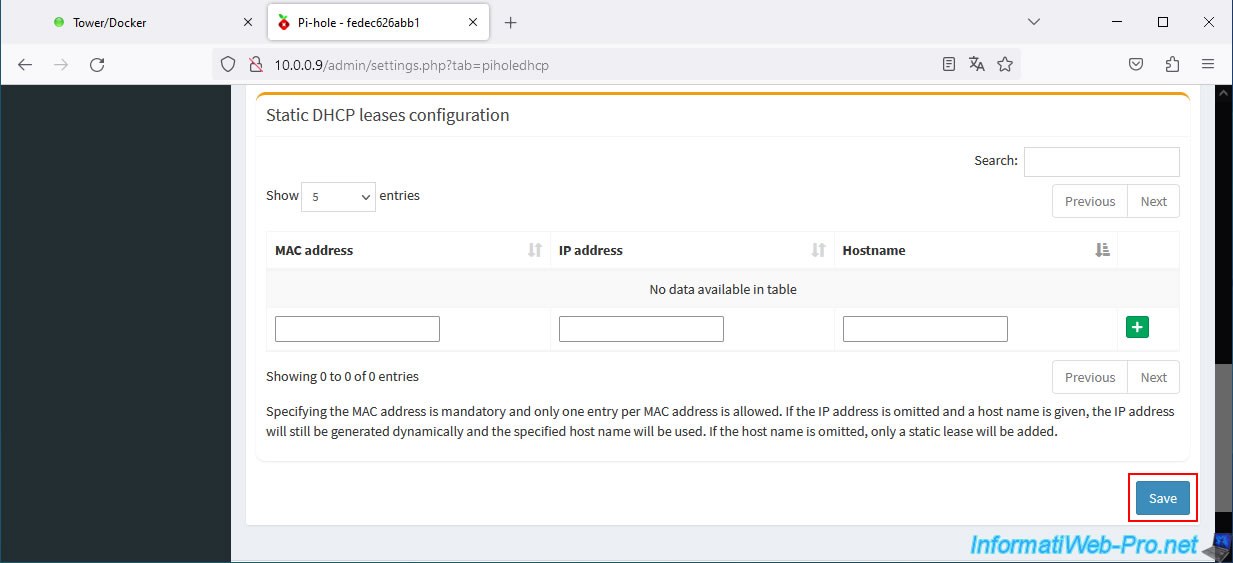
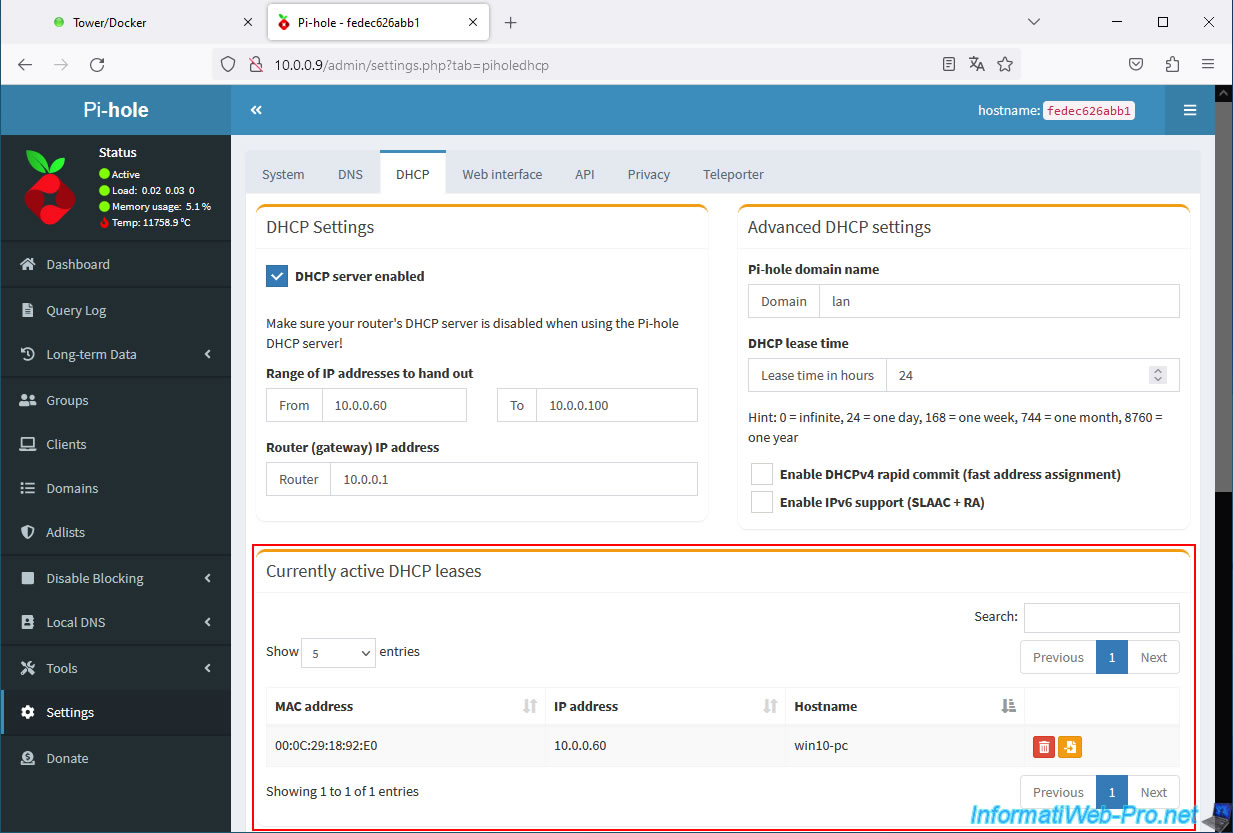
In the Pi-hole web interface, go to "Settings -> DHCP."
As you can see, Pi-hole's DHCP server is disabled by default to prevent IP address conflicts on your network.
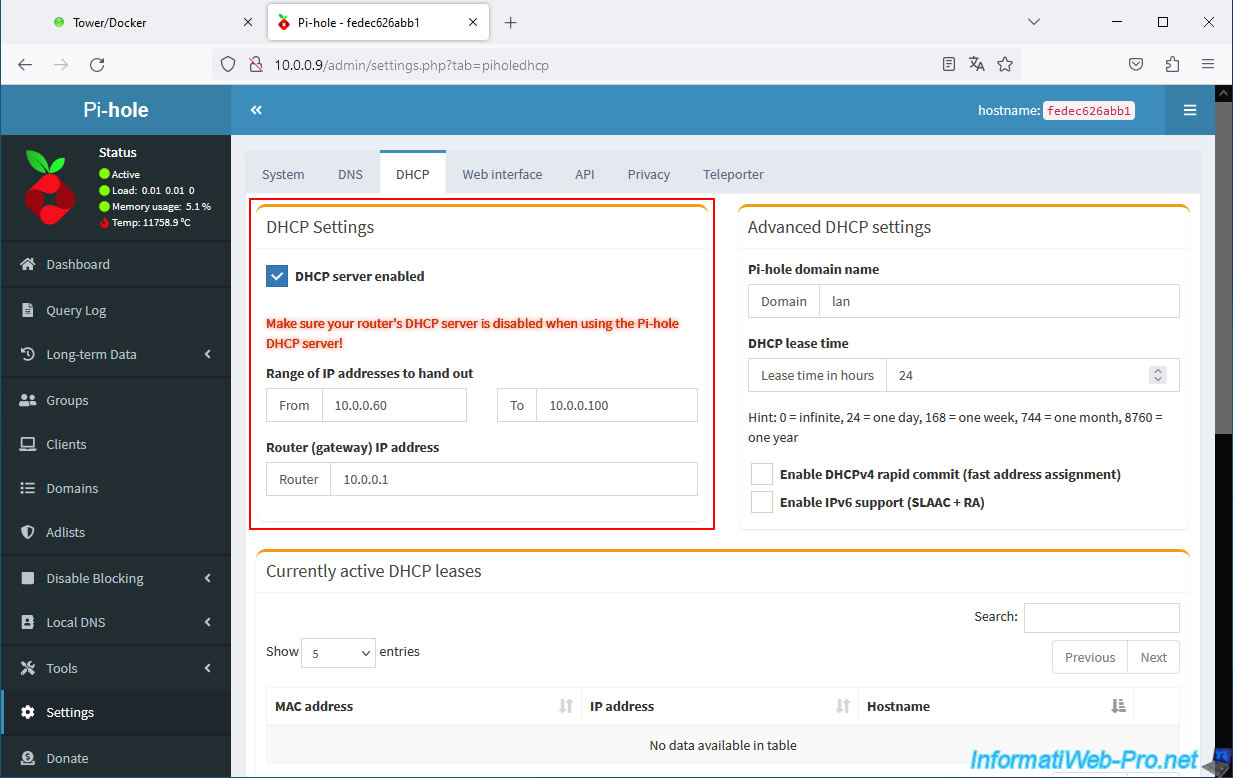
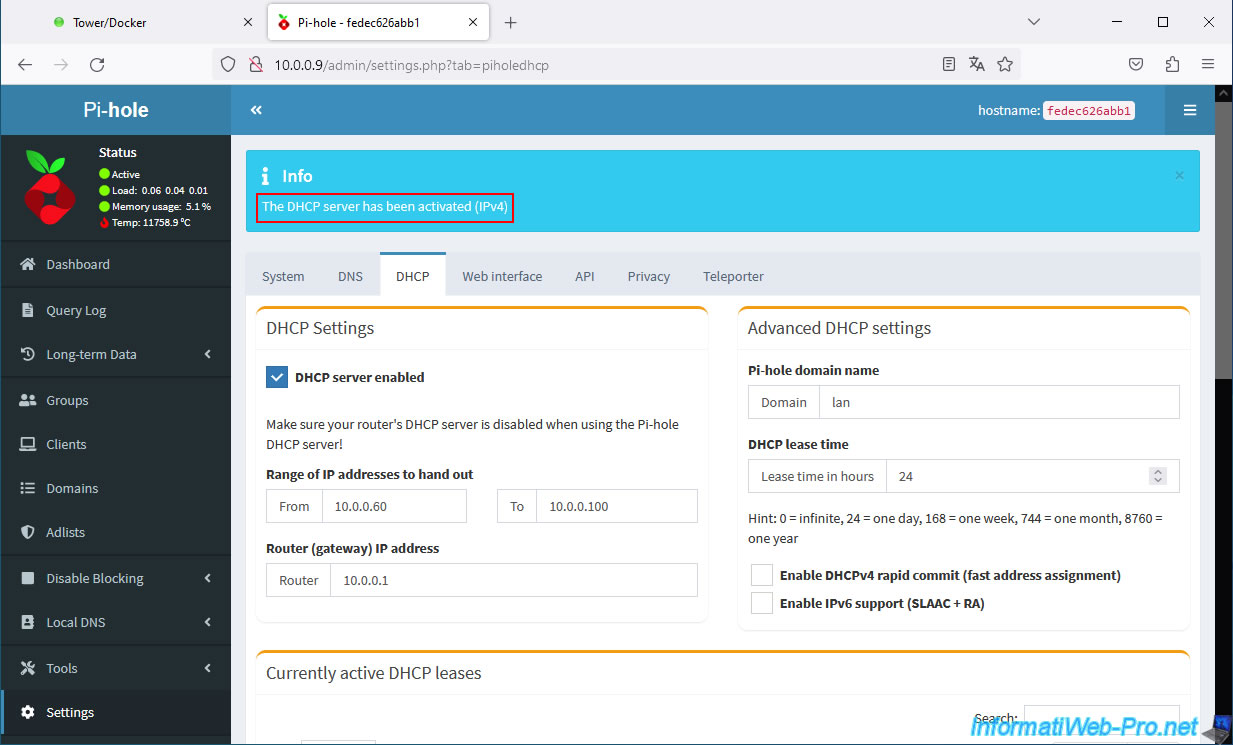
Check the "DHCP server enabled" box to enable Pi-hole's DHCP server. Pi-hole will warn you that your router's DHCP server must be disabled if you wish to use Pi-hole's.
Configure the IP address range to use the same IP addresses as your old DHCP server. This ensures there won't be any conflicts with any IP addresses you may have previously configured (especially those for Unraid and Pi-hole).
For the router (gateway) IP address, leave the IP address of your current router.
This is because Pi-hole will only distribute IP addresses. It does not act as a router.
Important : Pi-hole's DHCP server automatically sends its own IP address as its primary DNS server.
When using Pi-hole's DHCP server, your network devices will therefore use Pi-hole's DNS server, as well as the local DNS configured via Pi-hole's "Local DNS" section.
Once Pi-hole's DHCP server is configured, click the "Save" button at the bottom right of the page.
The message "The DHCP server has been activated (IPv4)" appears at the top of the page.
To enable your computer to use your local DNS server, you must temporarily disable your computer's network card and then re-enable it.
This will ensure your computer receives a DHCP response from Pi-hole's DHCP server.
Now, double click on your network card.

Click the "Details" button and you will see that the IPv4 DNS server IP address matches the Pi-hole IP address.
In the Pi-hole web interface, go back to the DHCP server configuration (or press "F5" if the page has remained open) and you will see that an IP address has been distributed to your computer in the "Currently active DHCP leases" section.
Open a command prompt.
Check the IP address retrieved by your computer for your domain used with SWAG.
Normally, your computer should communicate with your local DNS server (pi.hole) and receive the local IP address corresponding to your Unraid server.
Batch
nslookup www.informatiweb-tuto.net
As expected, if you type your domain name into your web browser, you will see the SWAG page appear.
The same applies to your smartphone connected to Wi-Fi.
Note: if it was already connected to your Wi-Fi network, remember to disable and then re-enable Wi-Fi to receive new network information from Pi-hole's DHCP server.
Share this tutorial
To see also
-

NAS 1/30/2026
Unraid 6.9.2 - Create shares (network / user)
-
NAS 1/1/2026
Unraid 6.9.2 - Disable flash network sharing
-

NAS 11/26/2025
Unraid 6.9.2 - Manually install Unraid 6.9.2
-

NAS 6/17/2026
Unraid 6.9.2 - SWAG - Access Nextcloud via reverse proxy and personal domain
No comment