Monitor your pfSense 2.6 firewall using the SNMP protocol and Zabbix 6
- Firewall
- pfSense
- 16 August 2025 at 07:45 UTC
-

- 3/4

4. Configure Zabbix 6 to monitor pfSense via Zabbix agent and SNMP
Although you can monitor your pfSense machine simply using the SNMP protocol, you can also get more information through the Zabbix agent.
4.1. Install the Zabbix 6 agent on pfSense
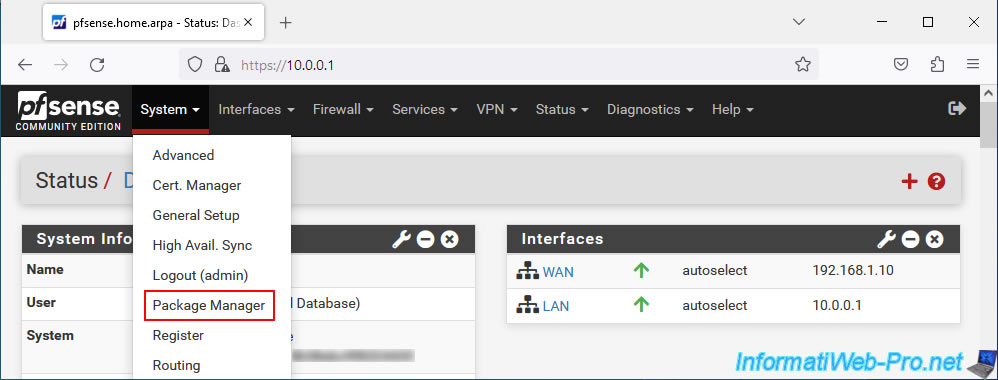
To install the Zabbix 6 agent on pfSense, go to the "System -> Package Manager" menu of pfSense.
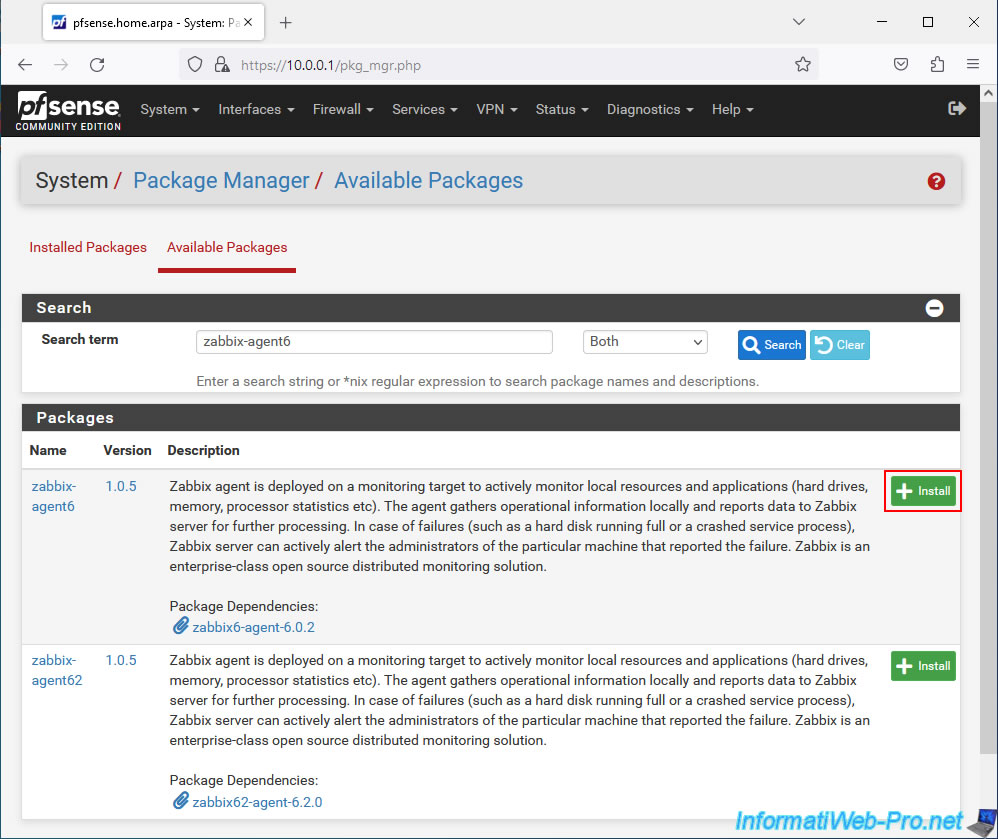
Go to the "Available Packages" tab and install the "zabbix-agent6" package.
Warning : on pfSense, the "zabbix-agent62" package does not work.
If you try to install it, an error will indicate that the package is not installed and the "Zabbix Agent 6" option will not appear in the pfSense "Services" menu.
Hence the use of the "zabbix-agent6" package which works without problem on pfSense.
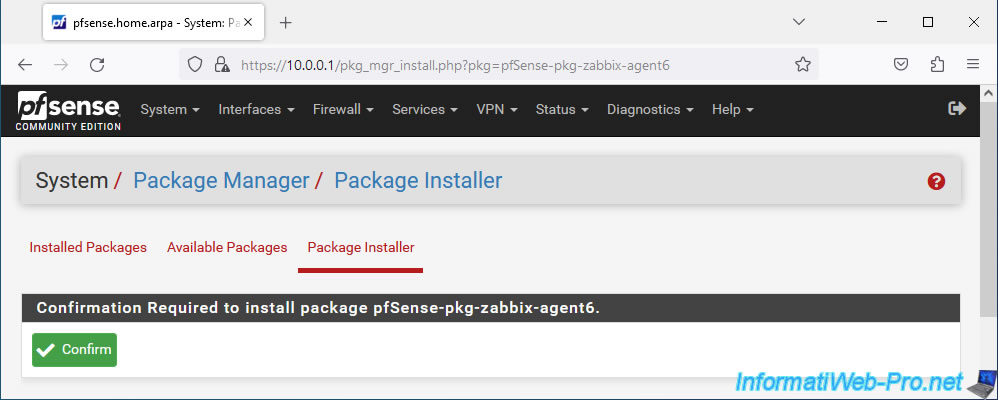
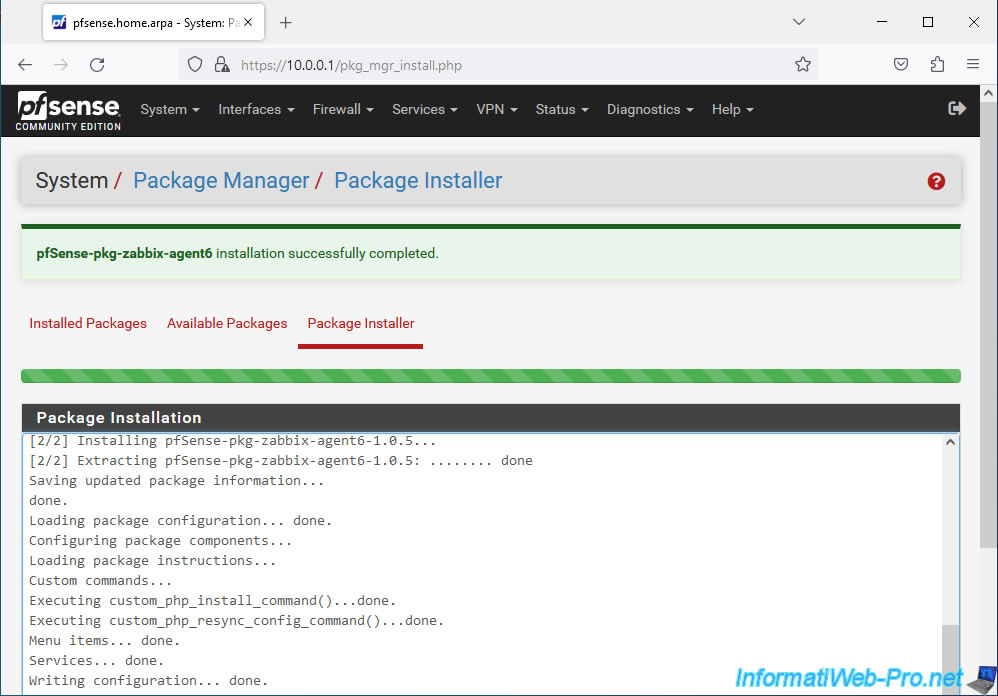
Click "Confirm" on the "Confirmation Required to install package pfSense-pkg-zabbix-agent6" page.
Wait while the "pfSense-pkg-zabbix-agent6" package is installed.
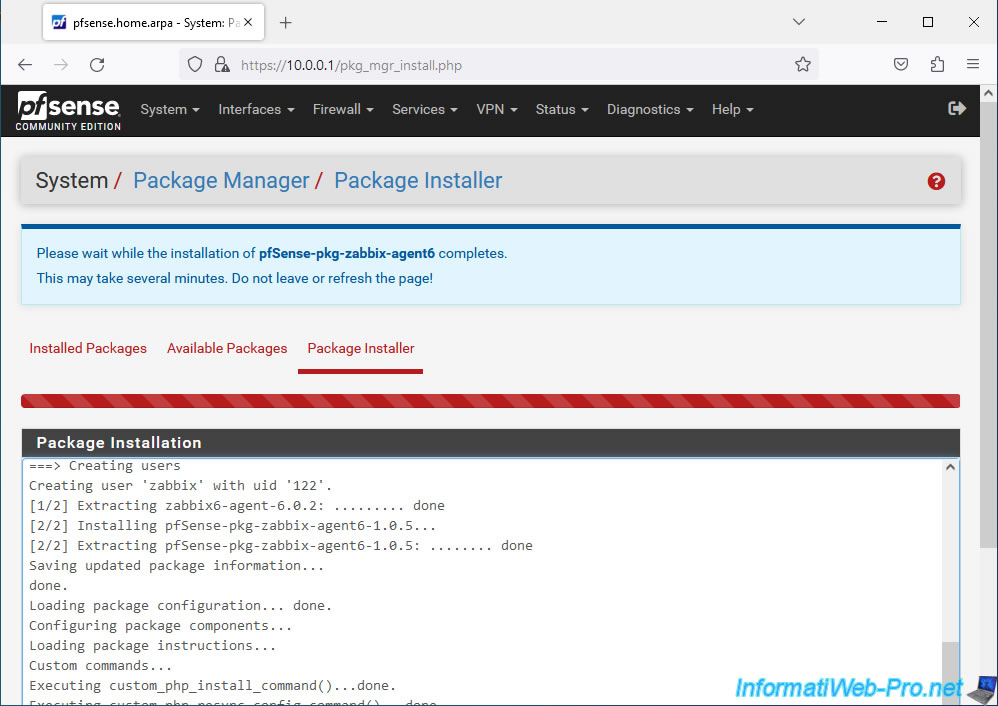
Once the installation of this package is complete, the message "pfSense-pkg-zabbix-agent6 installation successfully completed" will appear.
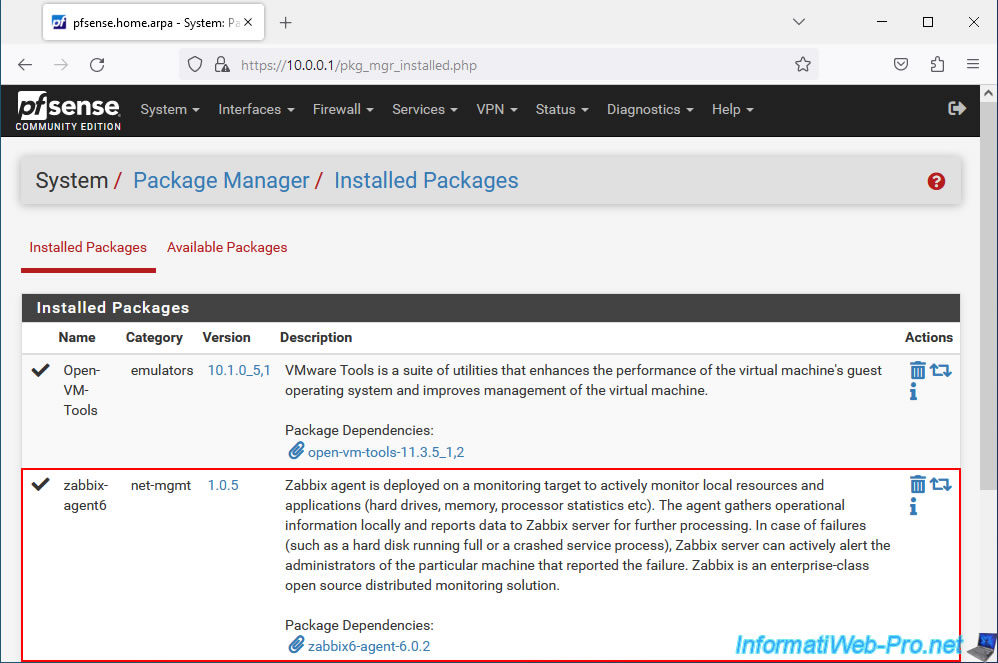
As expected, the "zabbix-agent6" package appears in the "Installed Packages" list.
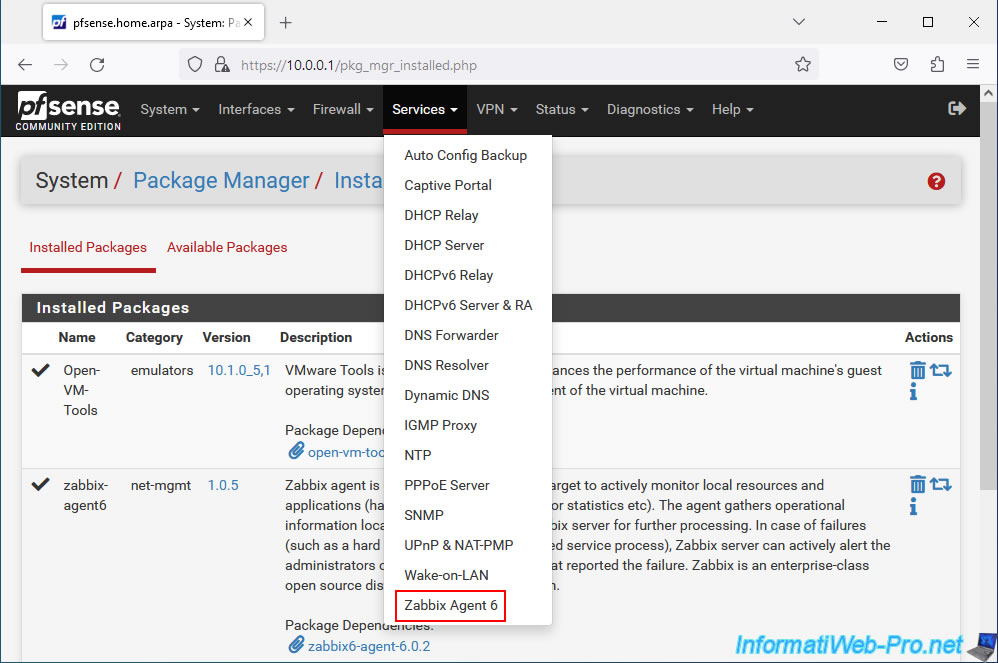
Now, go to: Services -> Zabbix Agent 6.
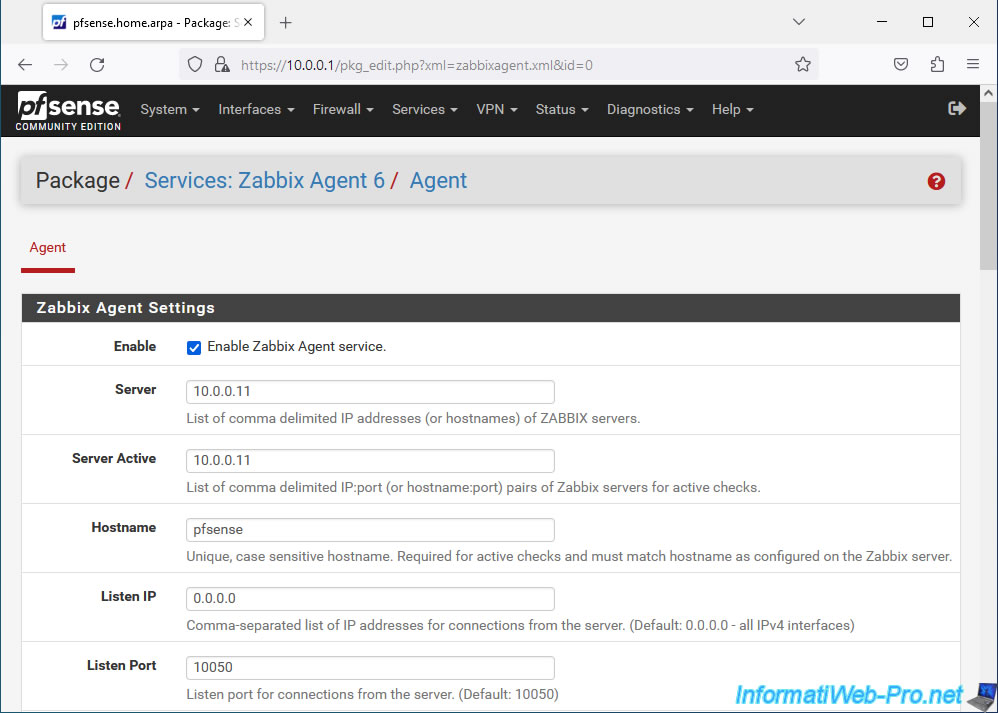
On the page that appears, in the "Zabbix Agent Settings" section, configure the following settings:
- Enable: check the "Enable Zabbix Agent Service" box to activate the Zabbix agent on pfSense.
- Server: enter the IP address or host name of your Zabbix server.
- Server Active: same and concerns active checks.
- Hostname: the pfSense host name which must also correspond to the pfSense host name indicated on the Zabbix server side.
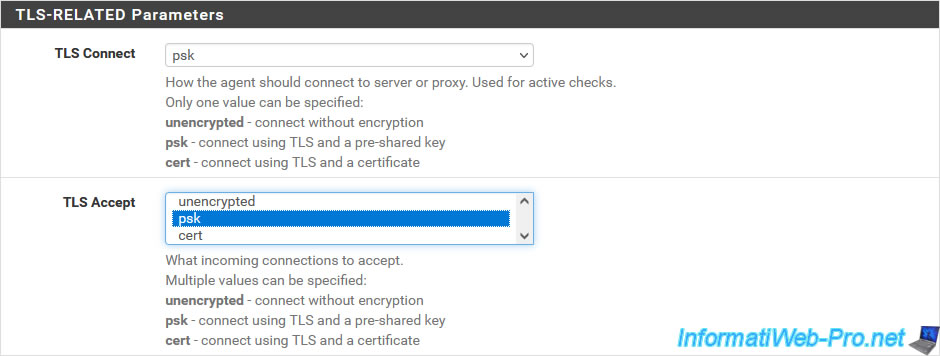
In the "TLS-Related Parameters" section, configure the following settings:
- TLS Connect: psk. Allows you to connect via TLS with a Pre-Shared-Key.
- TLS Accept: psk. Same, but for incoming connections (from Zabbix server to pfSense).
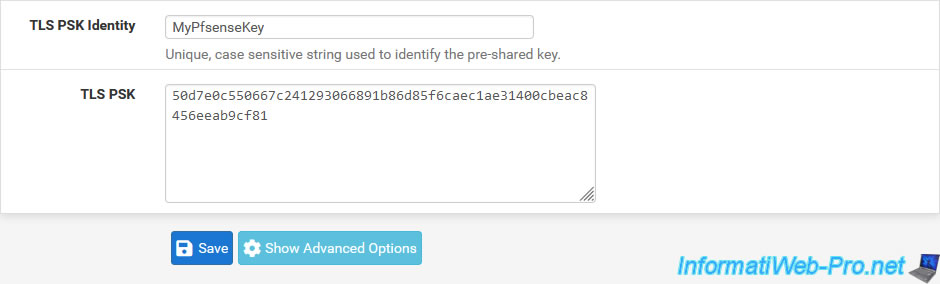
Finally, define:
- TLS PSK Identity: an unique name to identify this pre-shared key.
- TLS PSK: the pre-shared key to use to secure the connection between pfSense and Zabbix.
To generate the pre-shared key, use the command below on Linux or install OpenSSL on Windows to be able to use this command.
Bash
openssl rand -hex 32
Which will give you a value similar to this:
Plain Text
50d7e0c550667c241293066891b86d85f6caec1ae31400cbeac8456eeab9cf81
Sources :
4.2. Configure Zabbix 6 to monitor pfSense using the Zabbix agent
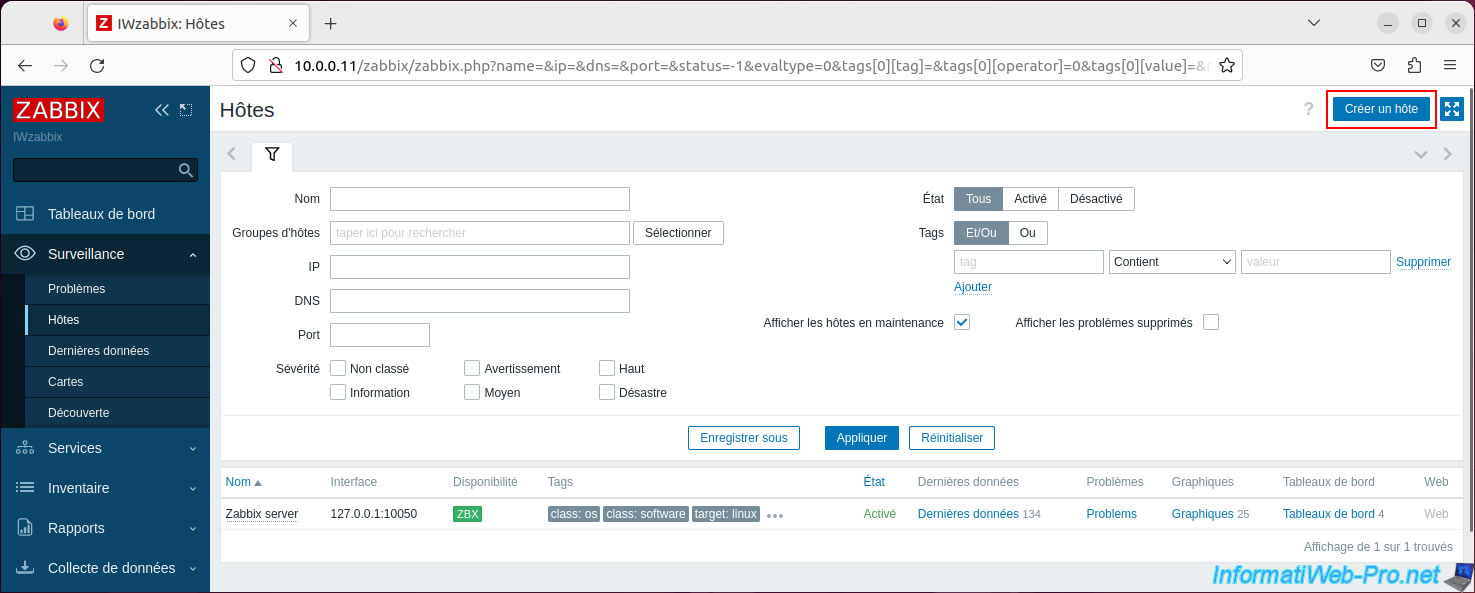
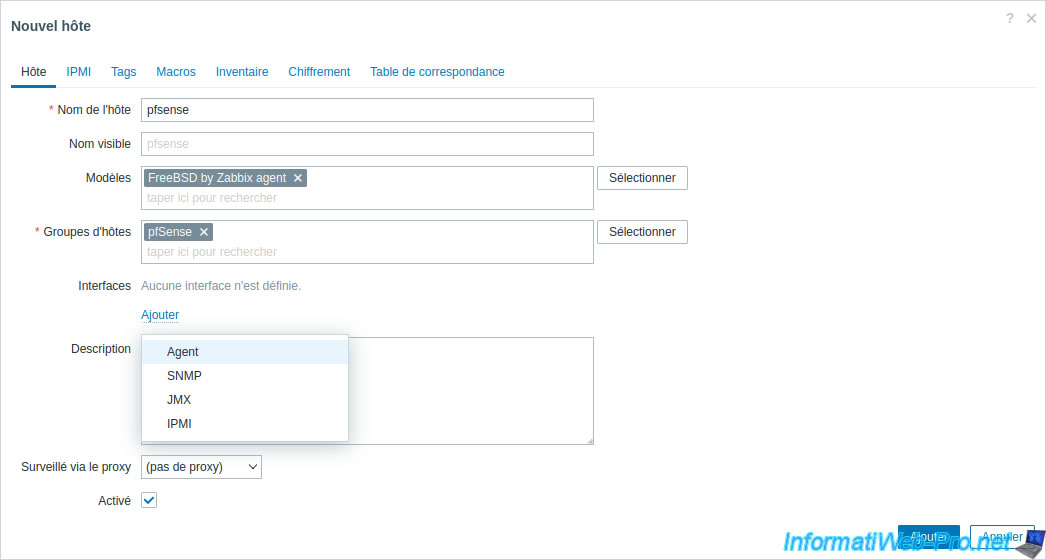
To get started, in the Zabbix web interface, go to "Monitoring -> Hosts" and click "Create host" (top right).
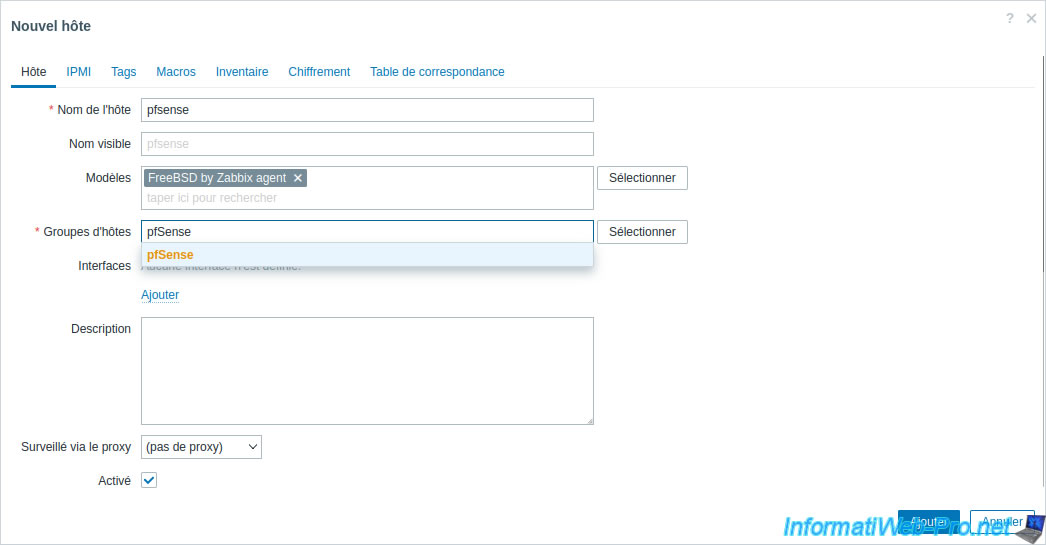
In the "New host" window that appears, indicate the host name defined on pfSense in the "Host name" box and modify the name visible on Zabbix if you wish.
Next, type "FreeBSD" in the "Templates" box and select the "FreeBSD by Zabbix agent" template.

Indicate "pfSense" in the "Host groups" box and click on the "pfSense" group (created previously) which appears.
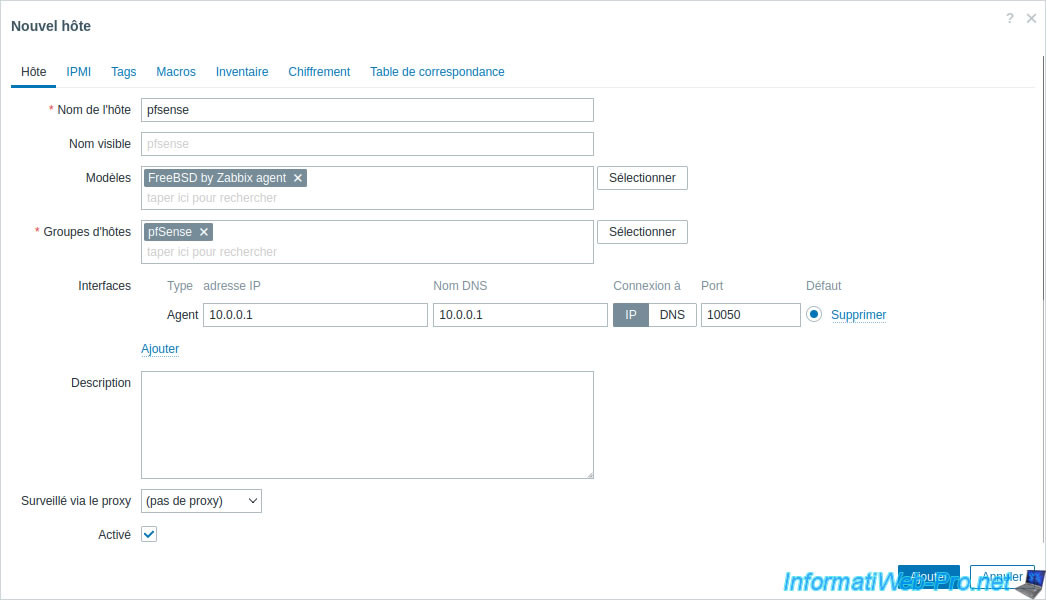
Add the "Agent" interface.
Provide the IP address and DNS name (or again, IP address) of your pfSense machine.
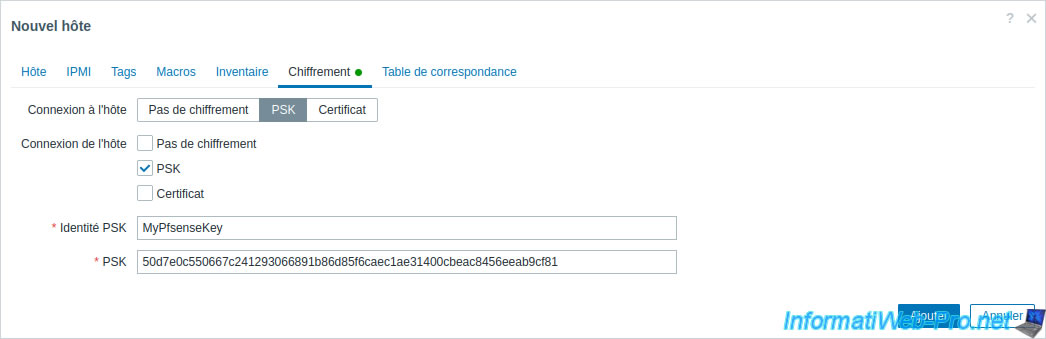
In the "Encryption" tab, select the options:
- Connection to host: PSK.
- Host connection: PSK.
Then, provide the same pre-shared key information configured on pfSense.
- PSK Identity: the name of the pre-shared key.
- PSK: the pre-shared key.
Then, click: Add.
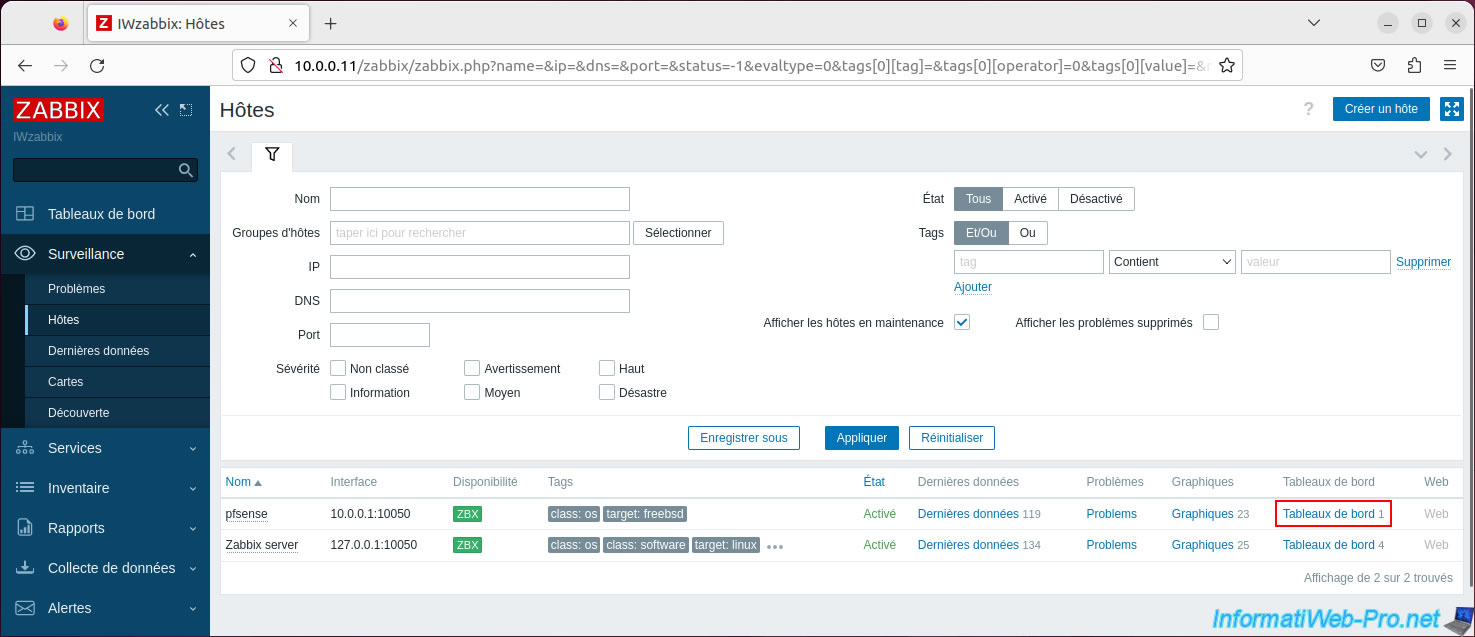
The host has been added and as you can see the "ZBX" availability is grayed out at the moment.
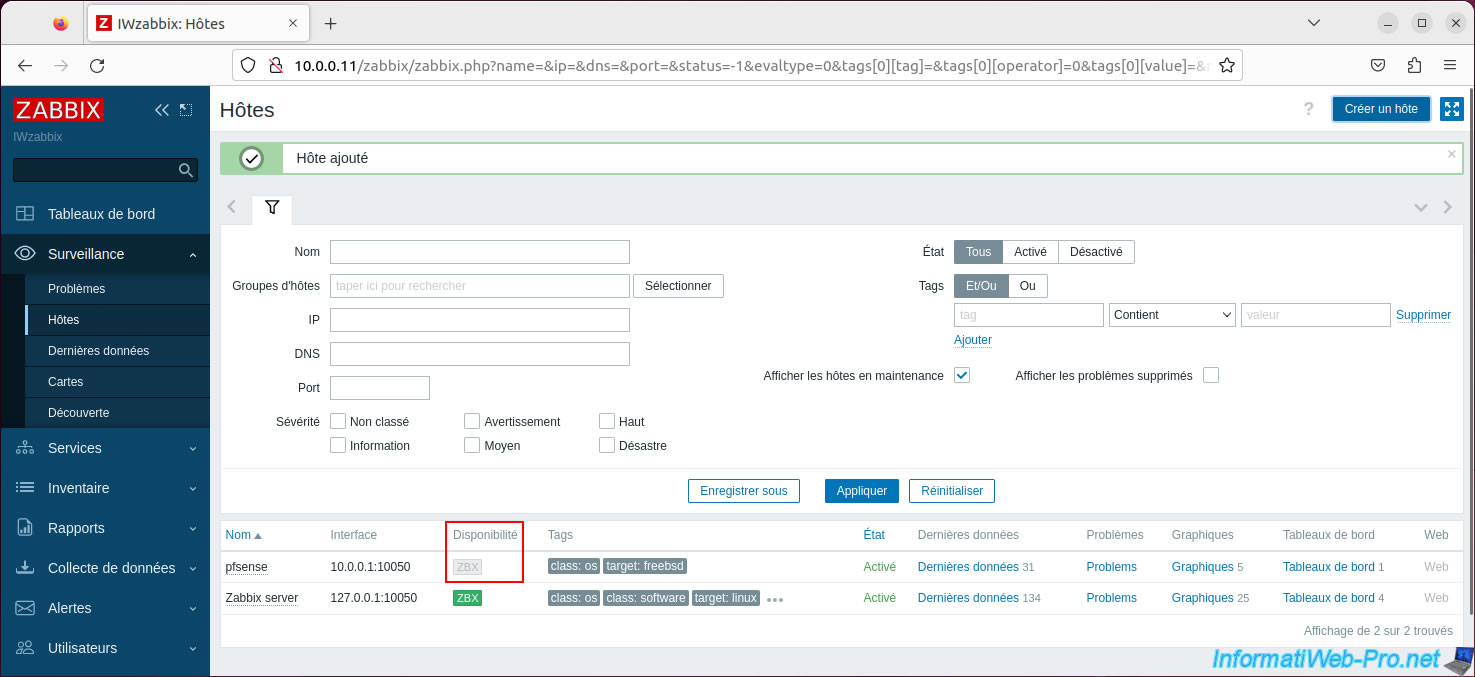
Wait a bit and the "ZBX" availability will turn green.
The delay is due to the exchange of data between the Zabbix agent installed on pfSense and the Zabbix server.
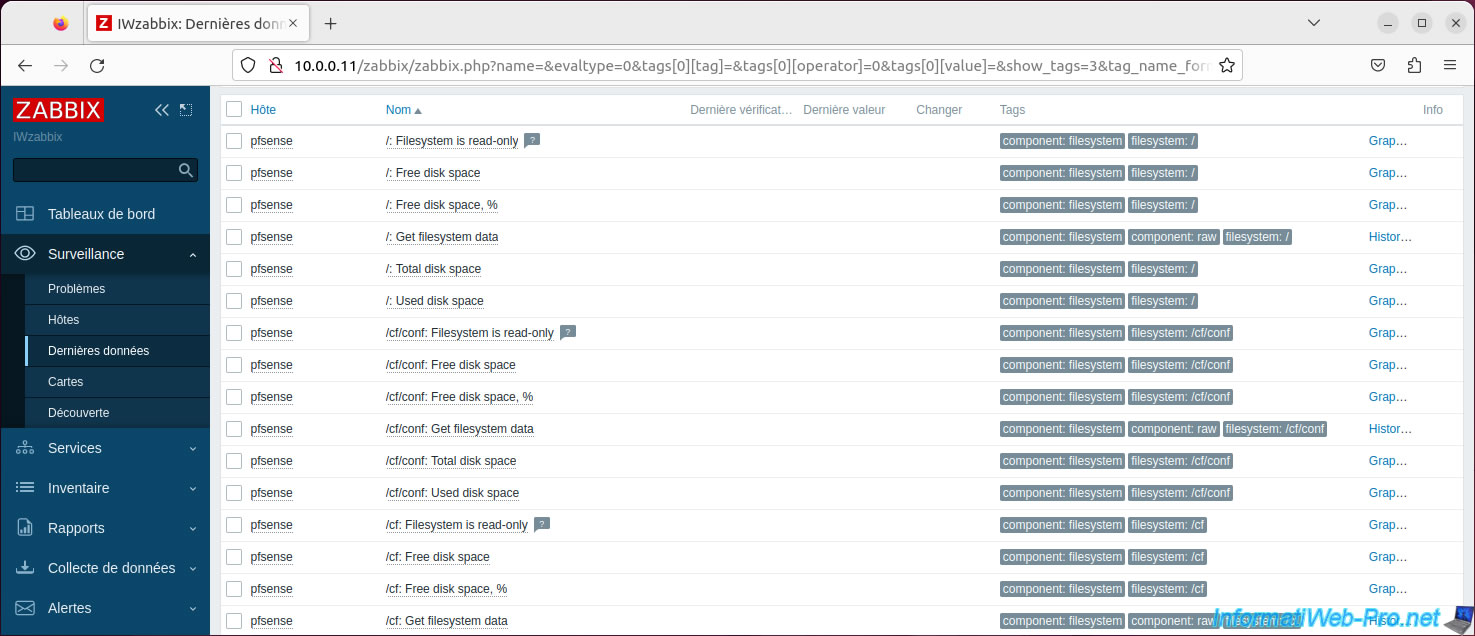
Click on: Latest data.
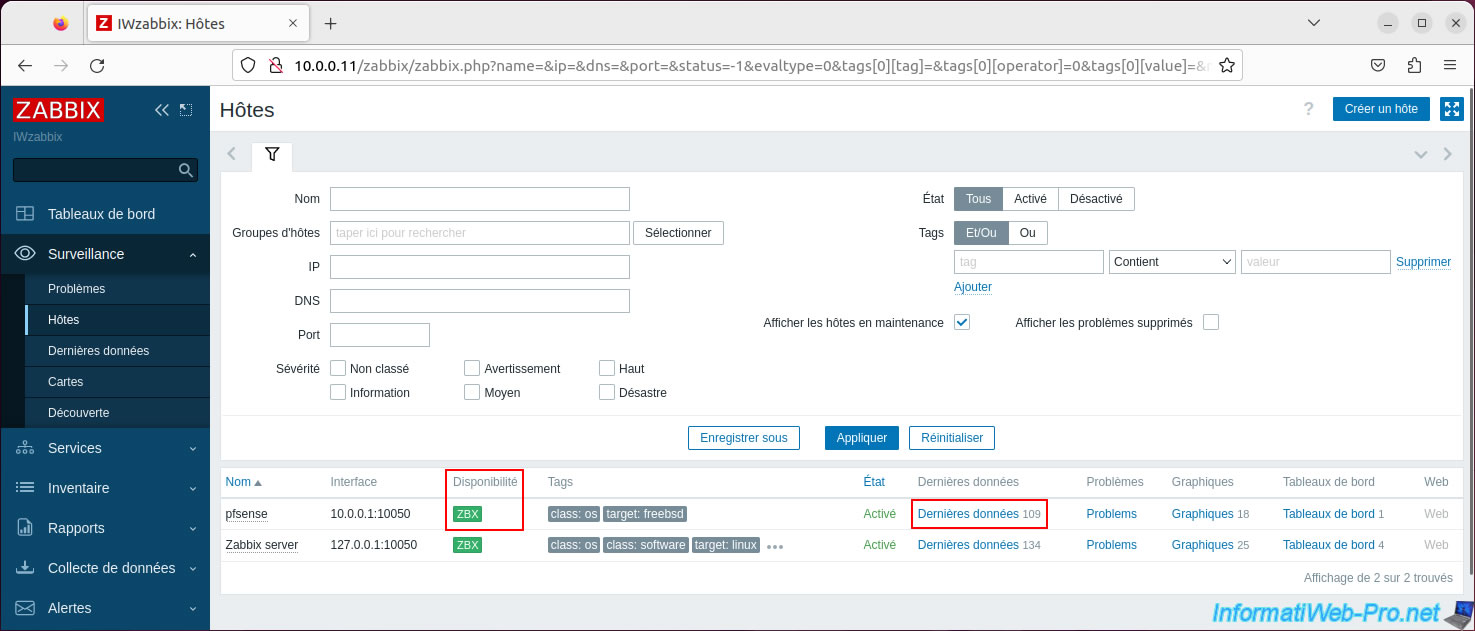
The list of possible data appears.
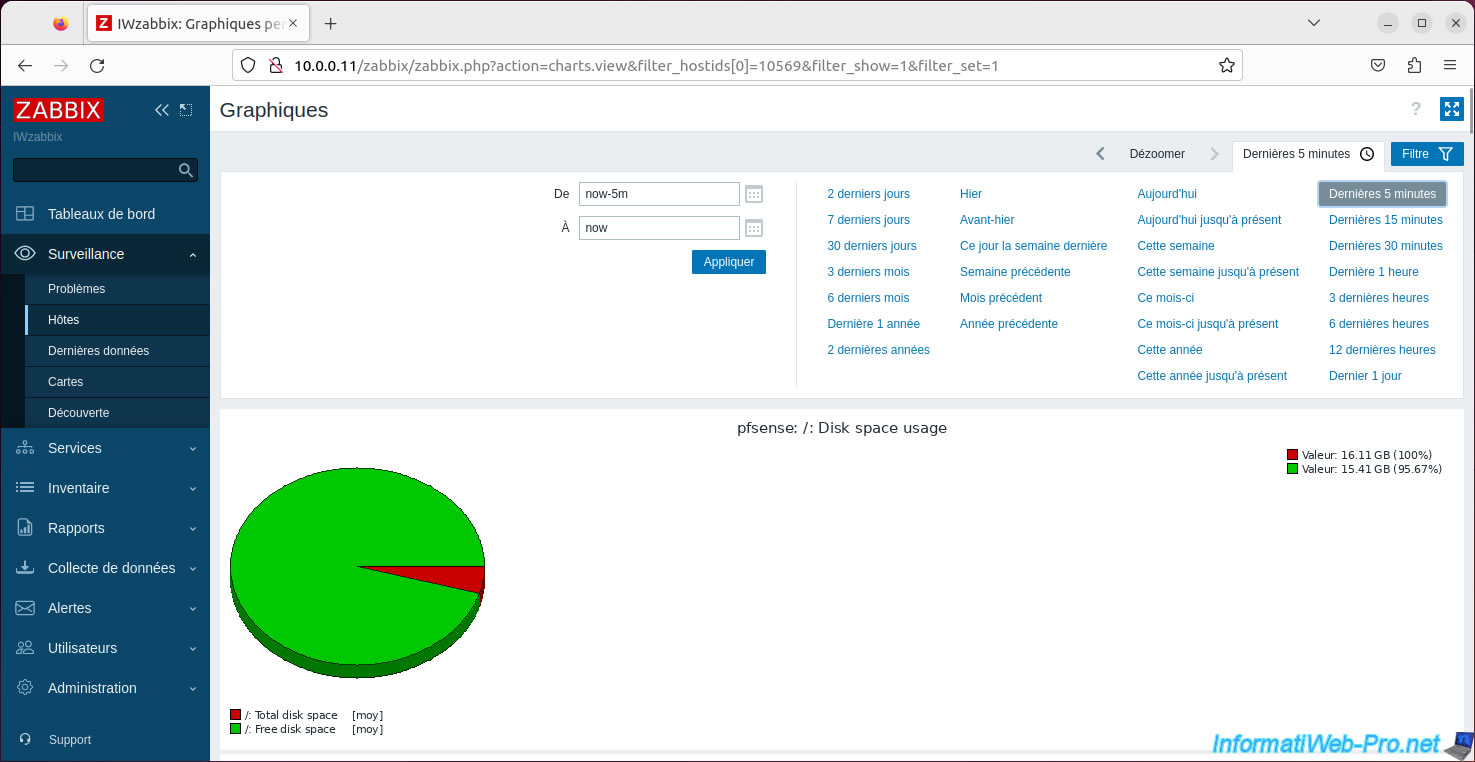
You will also be able to see graphs by clicking on the "Graphics" link.
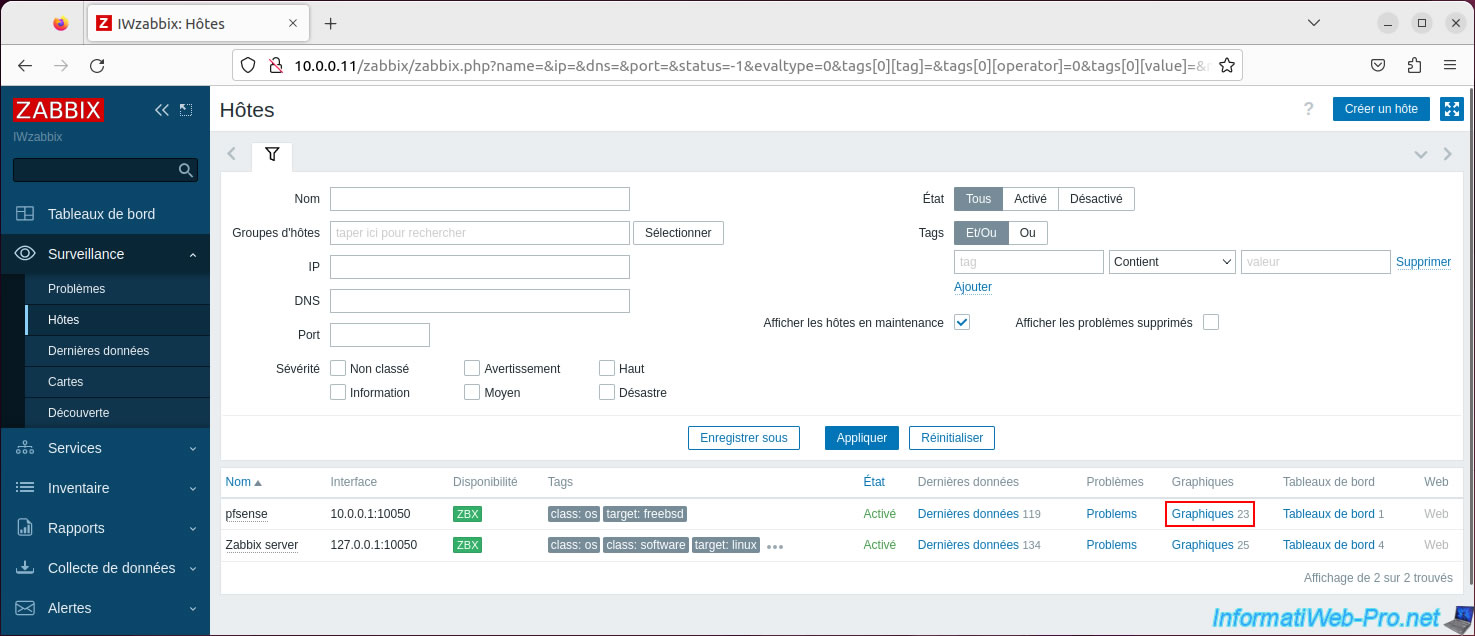
Again, you can choose a specific time period for which to generate charts.
For example, regarding hard disk usage, ...
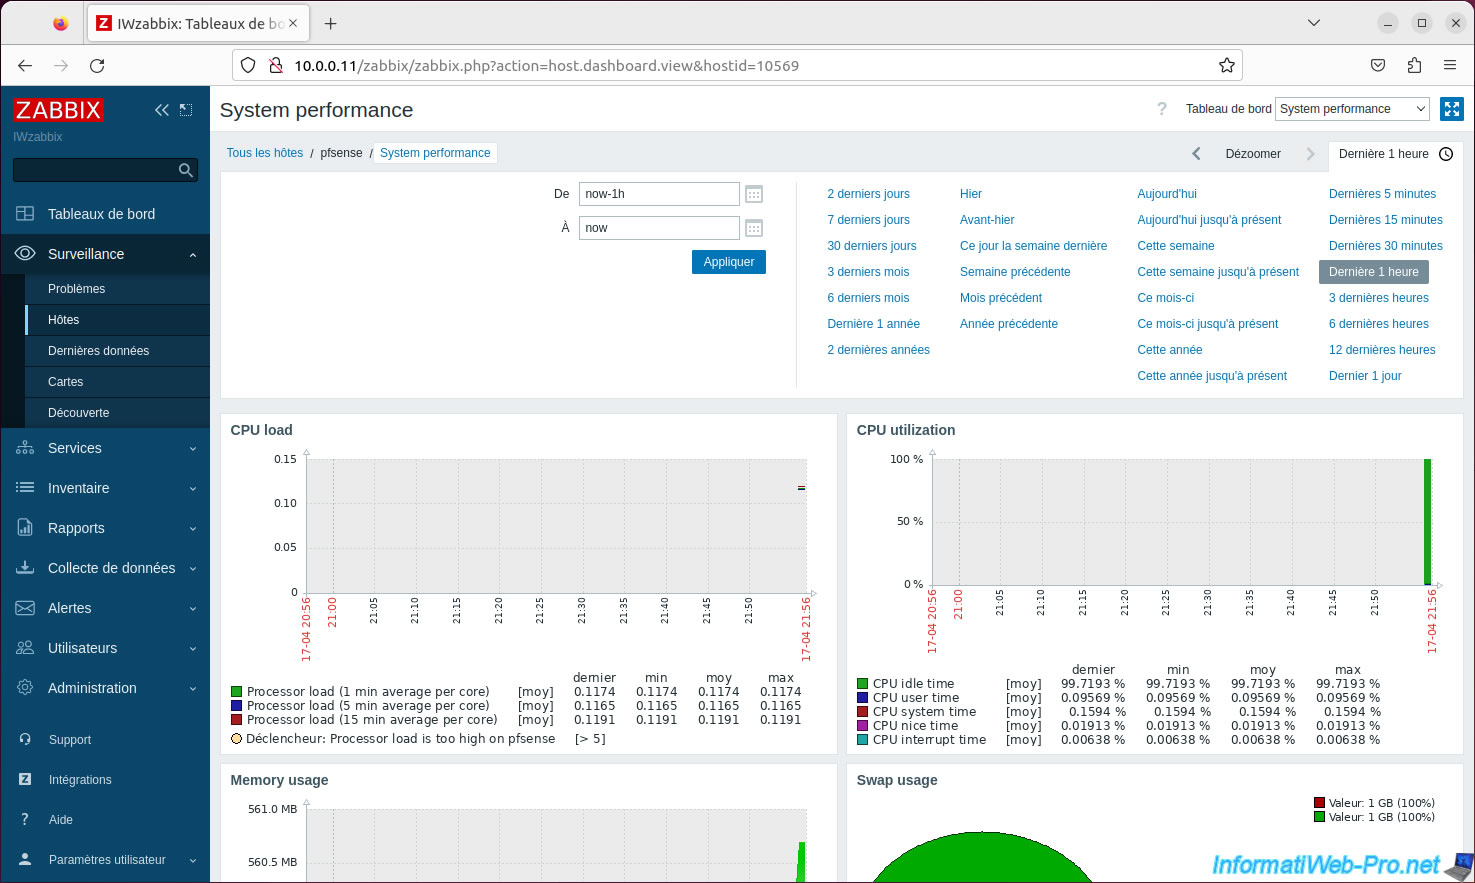
Finally, thanks to the Zabbix agent, you can click on "Dashboards".
On the "System performance" page, you will find graphs regarding: CPU usage, RAM usage and swap usage.
Share this tutorial
To see also
-
Firewall 6/25/2025
pfSense 2.6 - 1:1 NAT (IP address mapping)
-
Firewall 5/9/2025
pfSense 2.6 - Download and installation on VMware Workstation
-
Firewall 8/29/2025
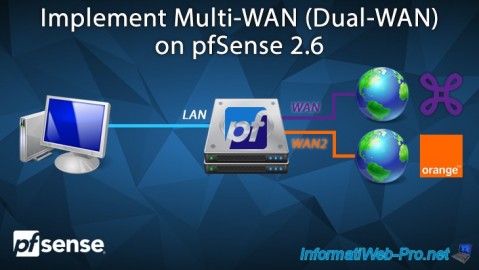
pfSense 2.6 - Implement Multi-WAN (Dual-WAN)
-
Firewall 5/15/2025
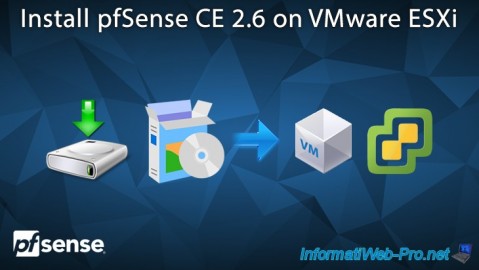
pfSense 2.6 - Installation on VMware ESXi
No comment