Distribute the load on backend servers on pfSense 2.6 via HAProxy
- Firewall
- pfSense
- 27 August 2025 at 13:09 UTC
-

- 2/2

4. Add a frontend server
As said before, to be able to access your background servers, you need to add a front-end server in HAProxy.
It is this server that external clients (present on the Internet or having access to the pfSense WAN interface) will access.
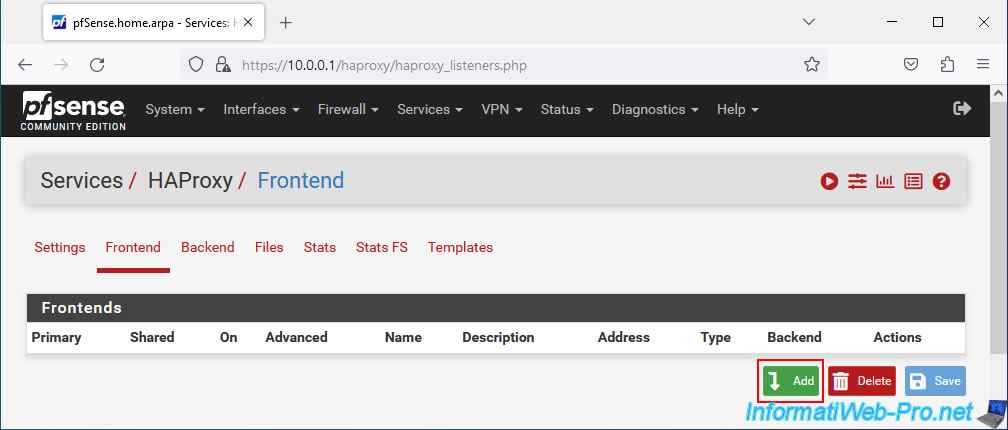
To do this, go to the "Frontend" tab of pfSense and click on: Add.
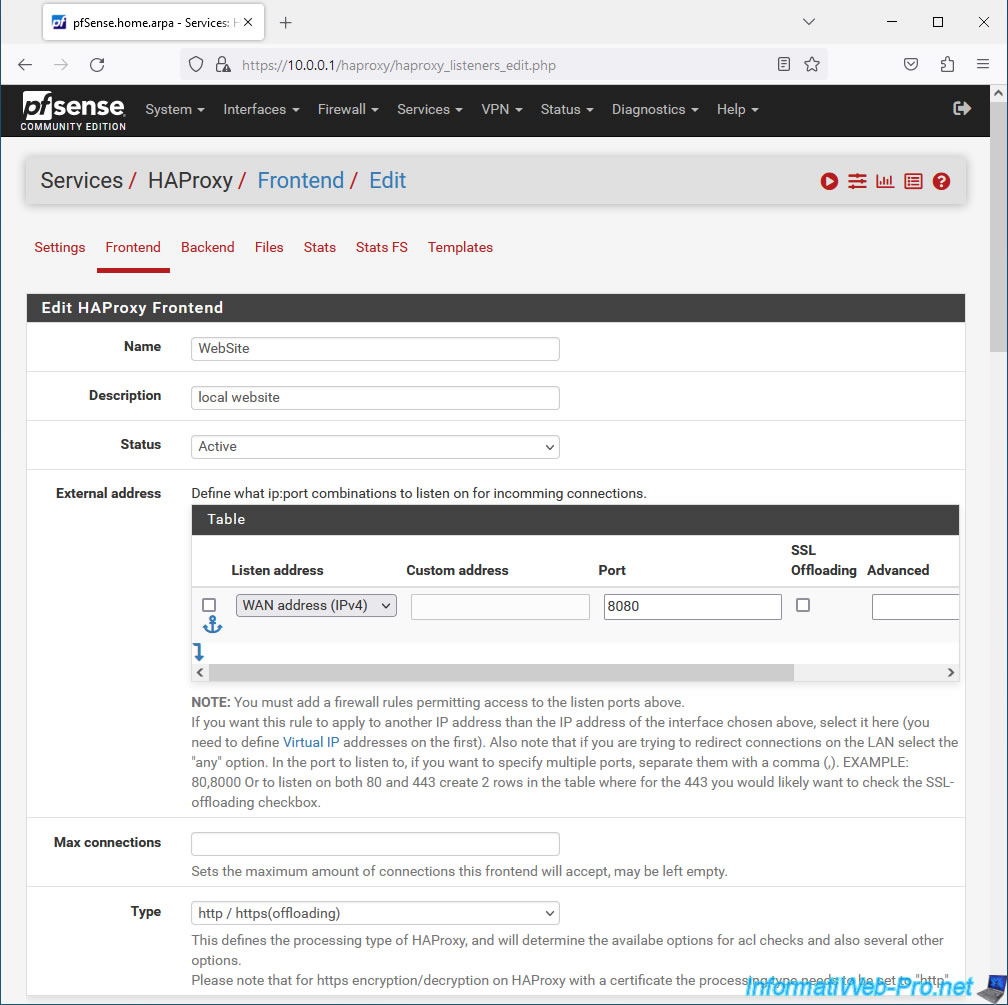
On the "Edit HAProxy Frontend" page that appears, configure these settings:
- Name: an indicative name for this front-end server.
For example: WebSite. - Description: an indicative description for this front-end server.
- Status: Active.
- External address: the external address that your clients will need to use to access your pool of web servers.
- Listen address: the address to which your customers will need to access.
Defaults to the IPv4 address of the pfSense WAN interface.
So, select "WAN address (IPv4)". - Custom address: leave blank. The box is disabled in this case since you selected "WAN address (IPv4)".
- Port: specify the WAN port that this front-end server will listen on.
Since port 80 is used by default by pfSense for access to its web interface, specify another port number.
For example: 8080.
- Listen address: the address to which your customers will need to access.
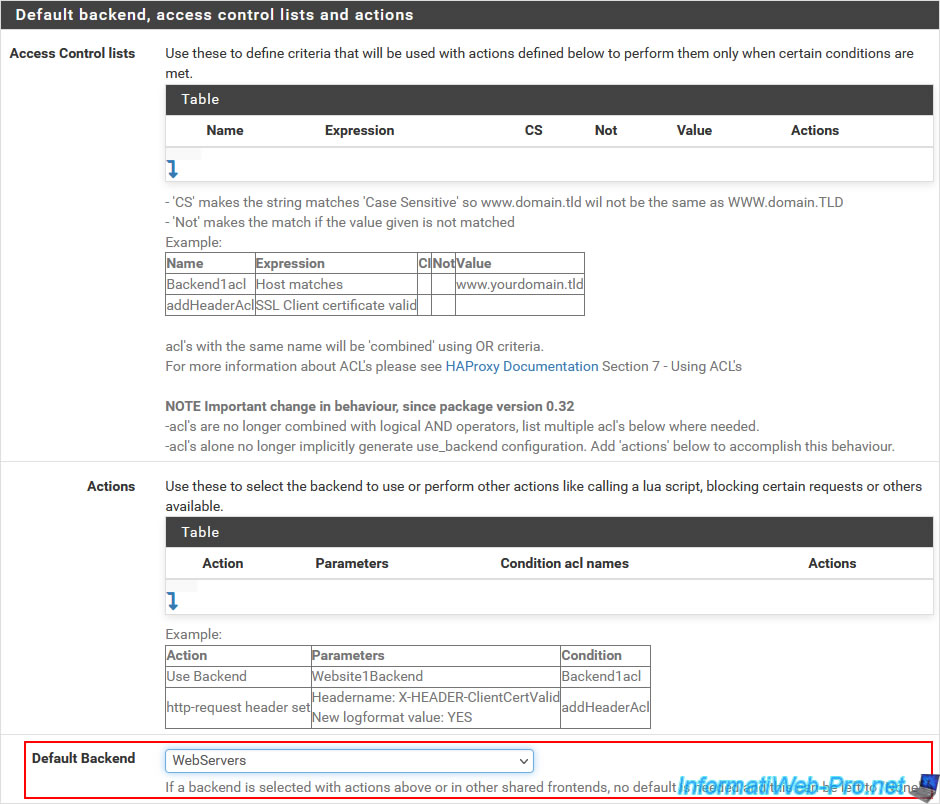
In the "Default Backend, access control lists and actions" section, select the backend server pool to use by default.
In our case, we select "Default Backend: WebServers".
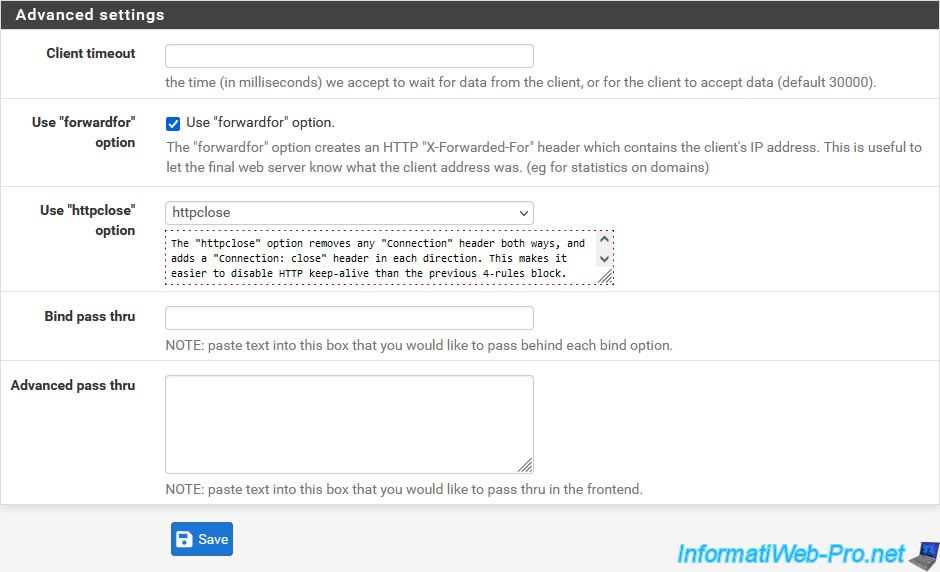
In the "Advanced settings" section, configure these settings:
- Use "forwardfor" option: check the "Use ''forwardfor'' option" box to add the real IP address of the client that requested the desired page in the "X-Forwarder-For" HTTP header.
- Use "httpclose" option: select "httpclose" to ensure that the value that will be indicated in the "X-Forwarder-For" HTTP header is always correct.
Click Save.
Click Apply Changes.
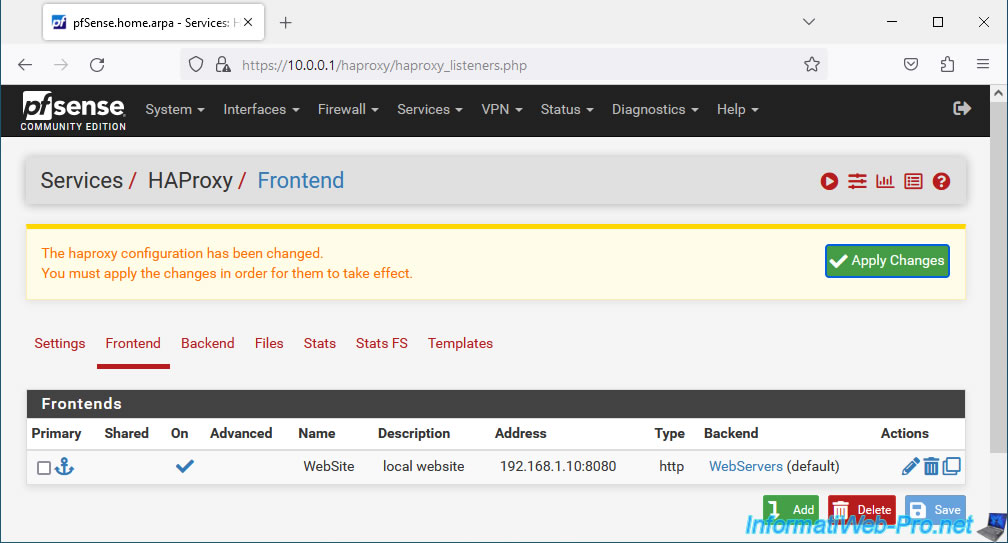
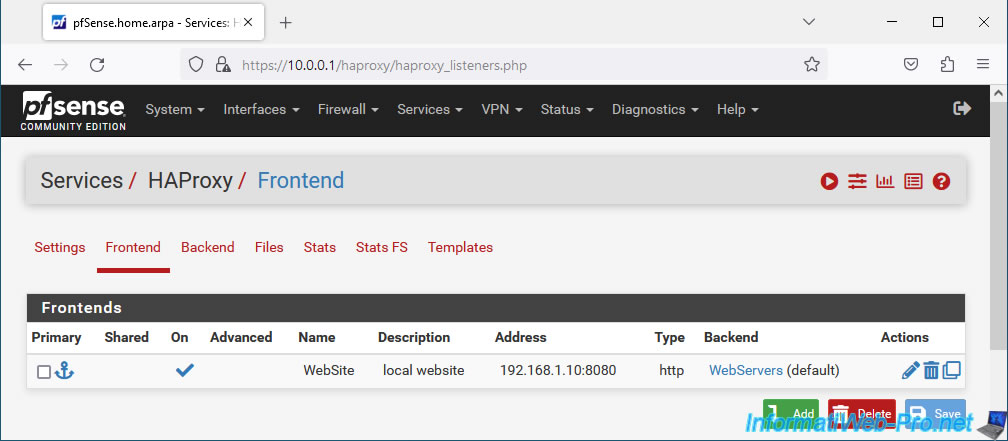
Your front end server appears with:
- On: indicates that this front-end server is enabled.
- Name: the name of this front-end server.
- Description: its description.
- Address: the external address and port that the client must indicate in its web browser to access this front-end server.
- Type: http. Indicates that this is a front-end server providing access to a web server.
- Backend: indicates which server pool will be used in the background.
In our case: WebServers.
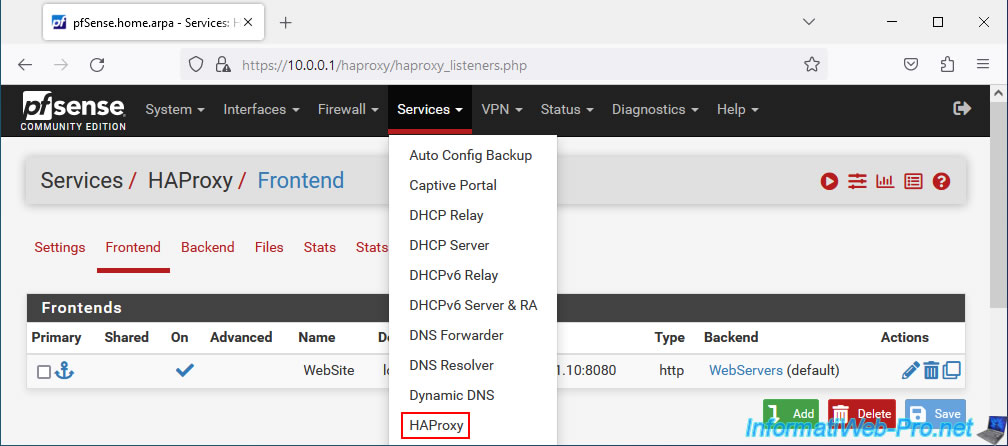
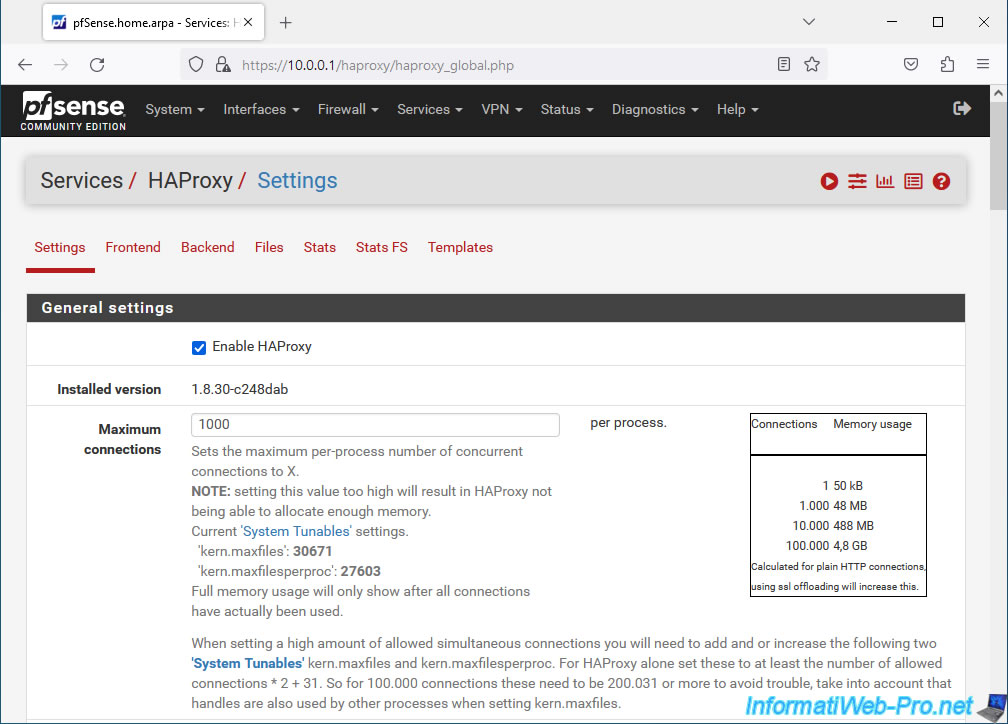
5. Configure HAProxy settings
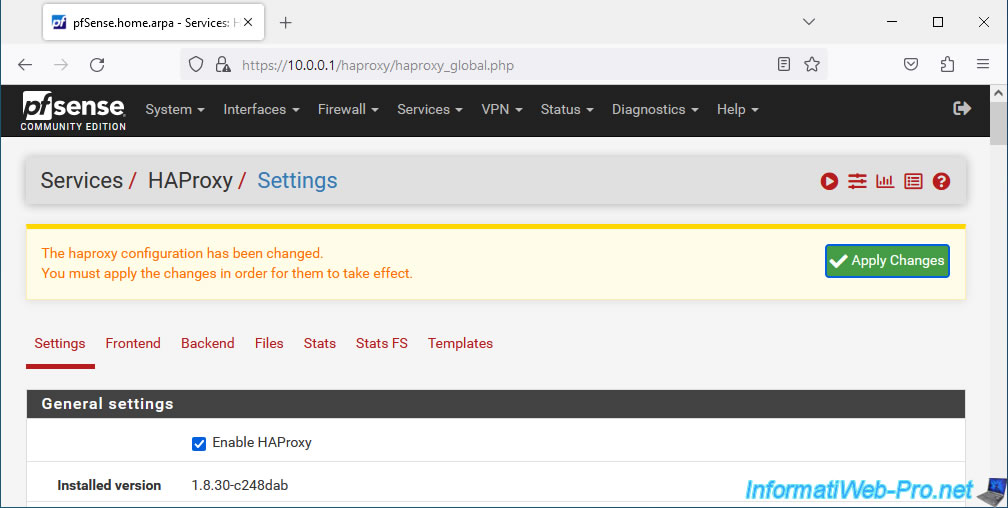
To configure HAProxy settings and enable this HAProxy service, go to: Services -> HAProxy.
In the "General settings" section, check the "Enable HAProxy" box to enable HAProxy and specify the maximum number of connections managed simultaneously per process.
In our case: 1000.
Note that the higher the number of maximum connections, the more memory will be used. (See table displayed by pfSense.)
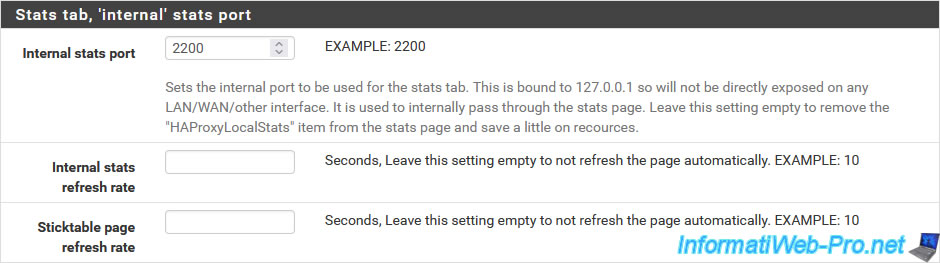
In the "Stats tab, 'internal' stats port" section, indicate the port that will be used for HAProxy statistics.
Default: 2200.
At the bottom of the page, click Save.
Click: Apply Changes.
Plain Text
The haproxy configuration has been changed.
You must apply the changes in order for them to take effect.
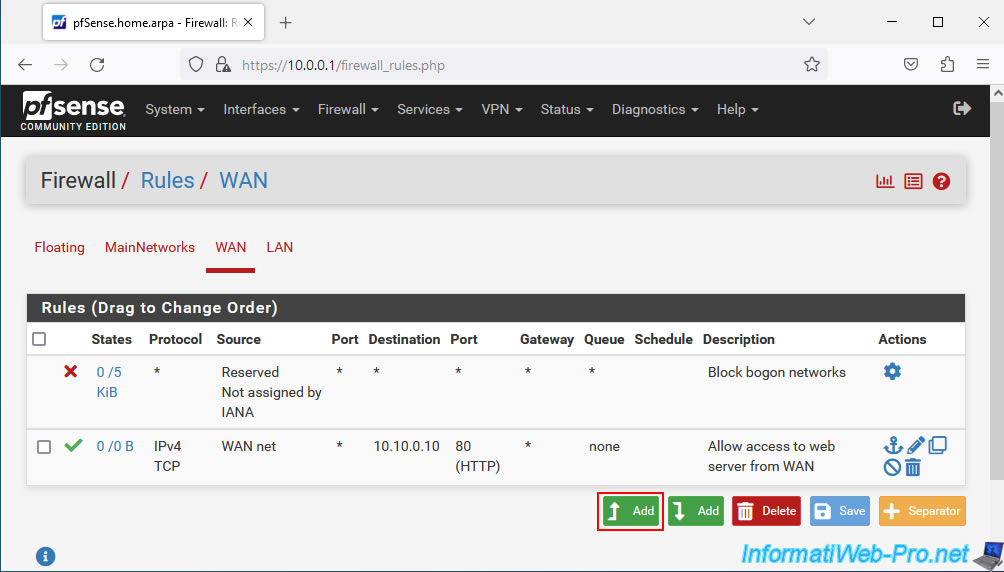
6. Allow access to the HAProxy front-end server
To make your front-end server accessible from the outside (pfSense WAN interface), you need to add a rule in the pfSense firewall.
To do this, go to: Firewall -> Rules.
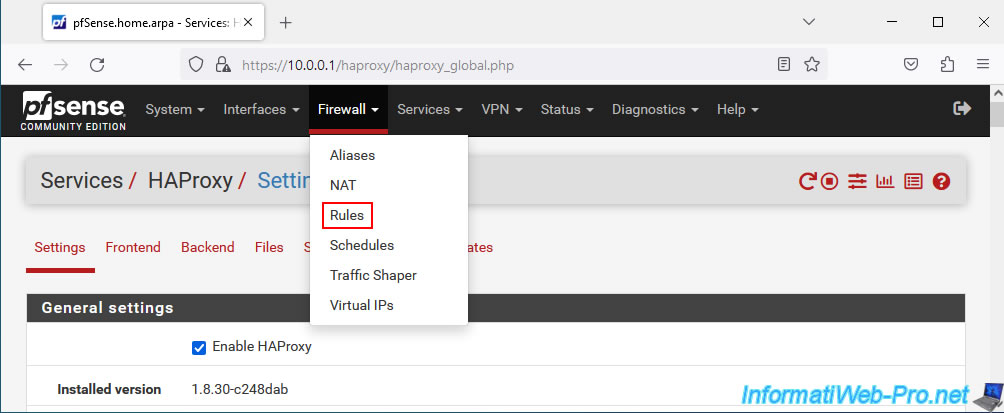
In the "WAN" tab, click: Add.
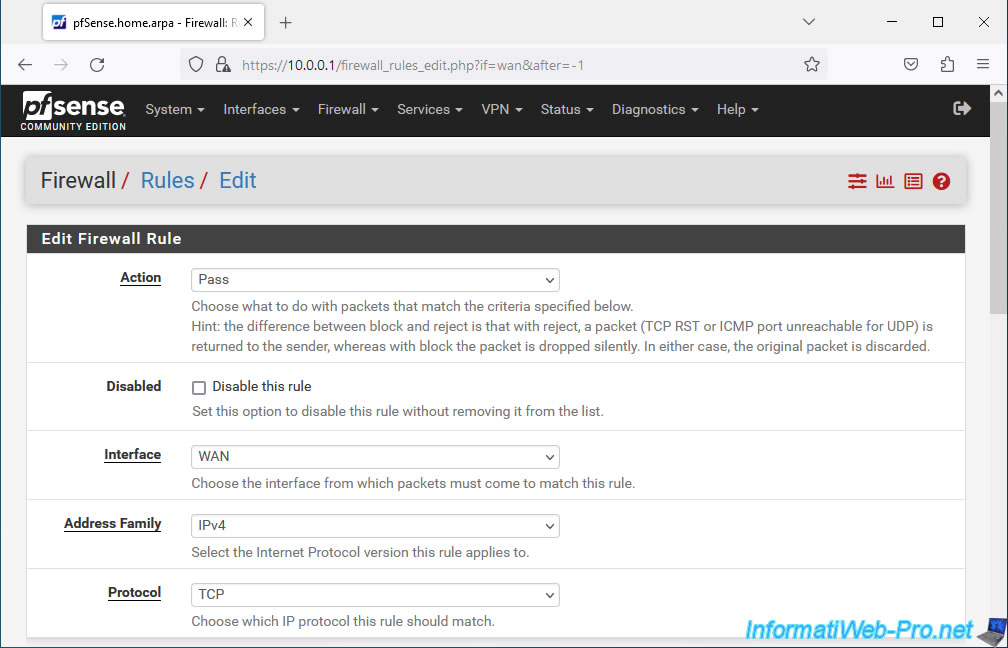
Configure the rule like this:
- Action : Pass. Permet d'autoriser le trafic réseau.
- Interface : WAN. Le serveur frontal sera accessible via l'interface WAN de pfSense (ou depuis Internet).
- Address Family : IPv4. Dans notre cas, nous utilisons seulement l'IPv4 et le serveur frontal est configuré pour être accessible uniquement via l'adresse WAN en IPv4 dans notre cas.
- Protocol : TCP. Un serveur web utilise par défaut le port TCP 80 (HTTP).
Then, configure this:
- Source: unless the external client (present on the Internet) has a static (fixed) public IP address, you will instead allow Anyone as a source.
- Destination: the HAProxy front-end server is configured to be accessible via the pfSense WAN address.
So, select "WAN address". - Destination Port Range: the HAProxy front-end server is configured to listen on port 8080.
- Description: specify "local website access through HAProxy", for example.
Click Save.
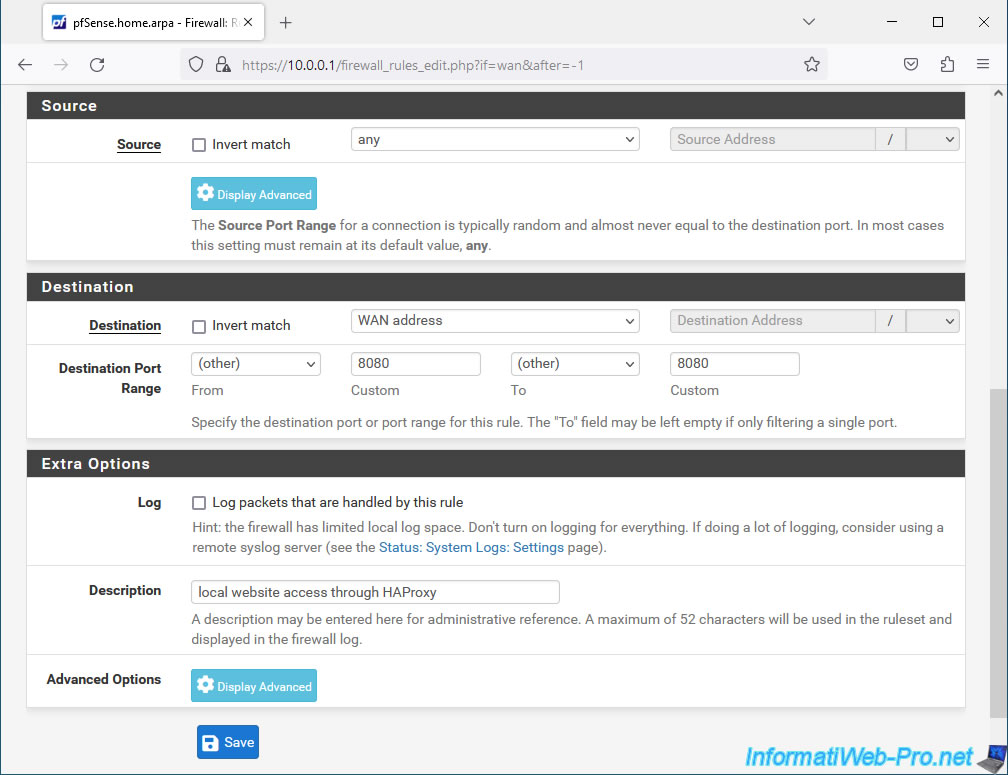
Click: Apply Changes.
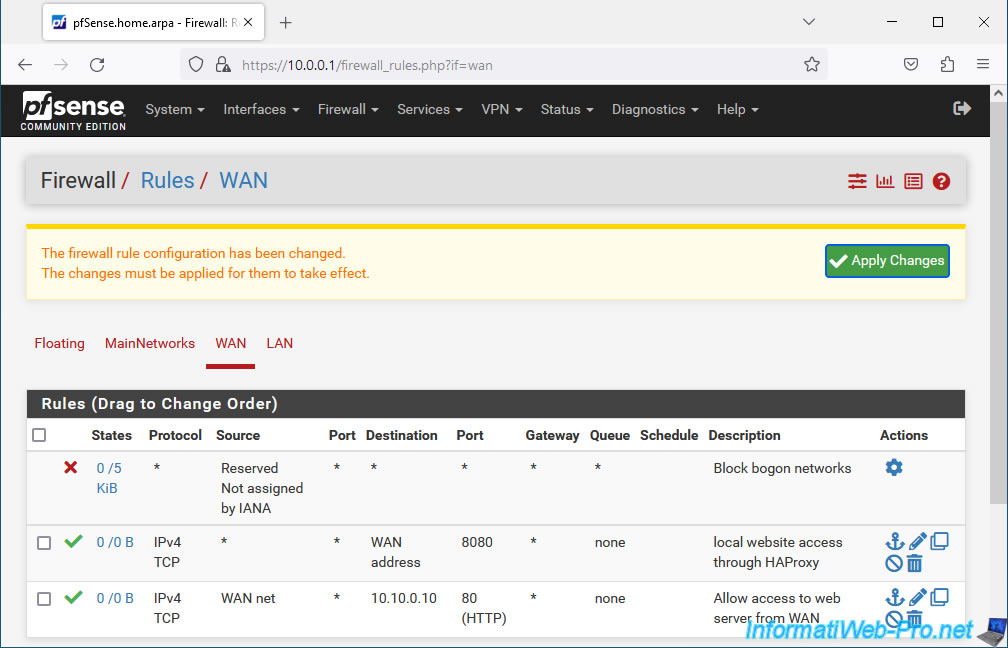
The rule has been created.

7. Test load balancing via front-end server
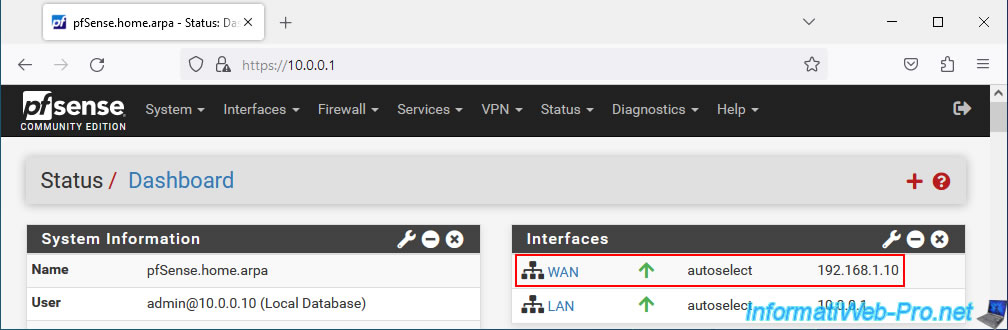
In our case, the WAN IP address of pfSense is "192.168.1.10".
According to information from Netgate, to test load balancing via the front-end server, open a web browser in private browsing and type the address of the front-end web server.
In our case, we arrive at our first web server.
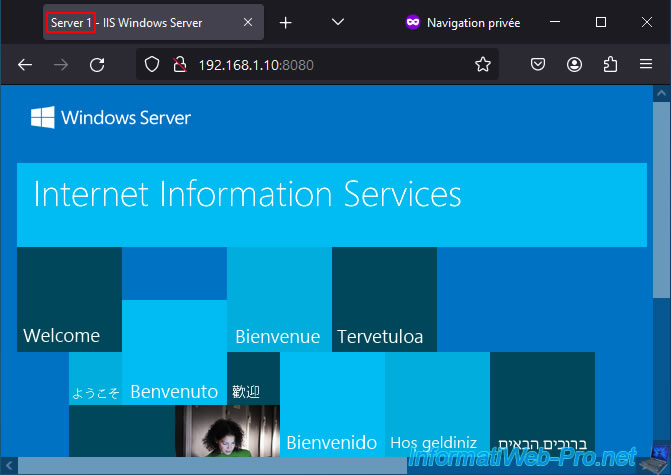
Then press F5 several times and you will see that you will access server 2.
The choice is made randomly each time you attempt to access the HAProxy front-end web server.

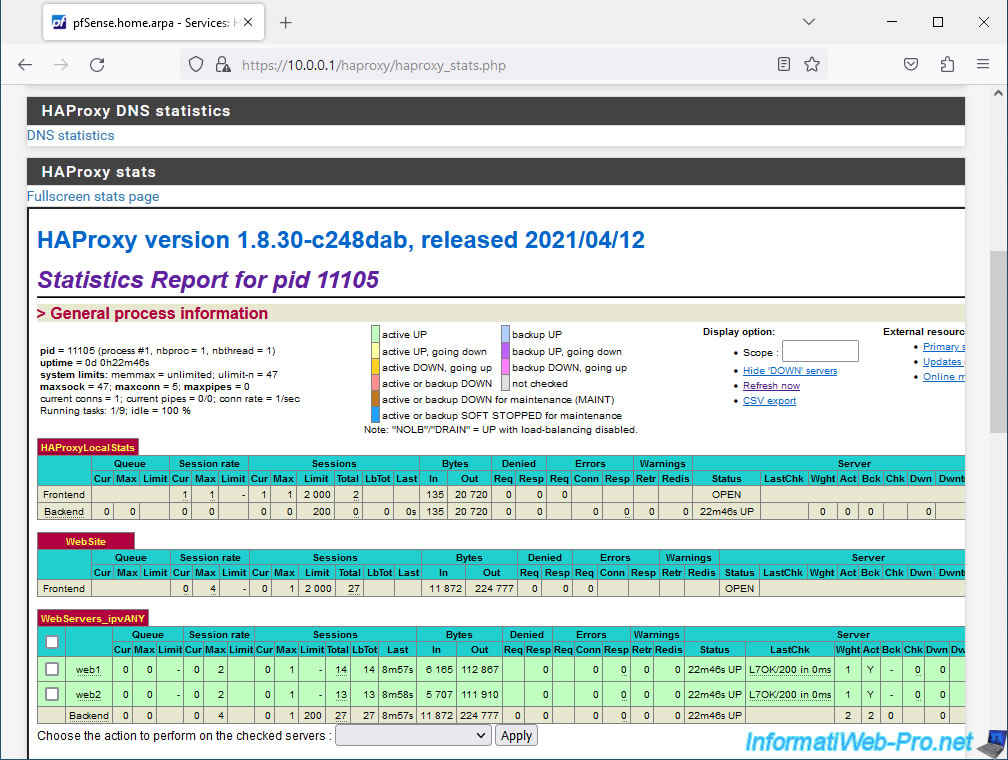
8. View HAProxy statistics
To view HAProxy statistics, go to: Services -> HAProxy.
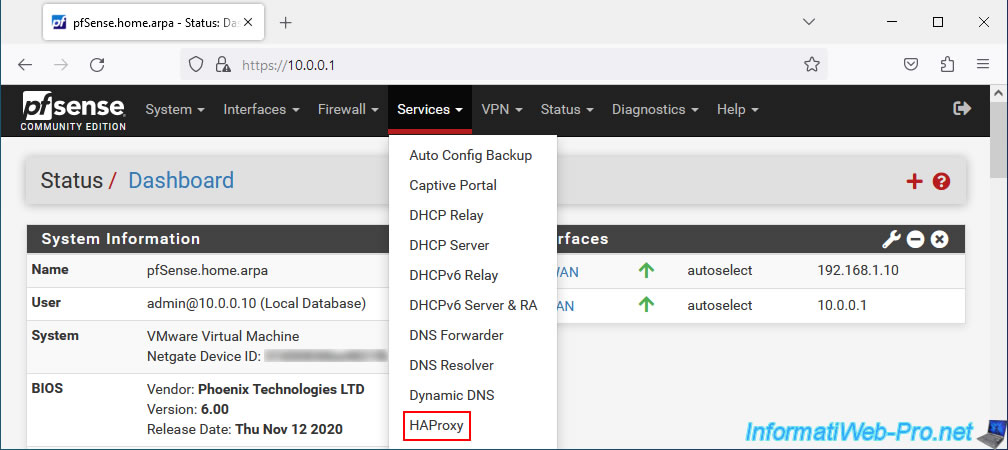
Go to the "Stats" tab.
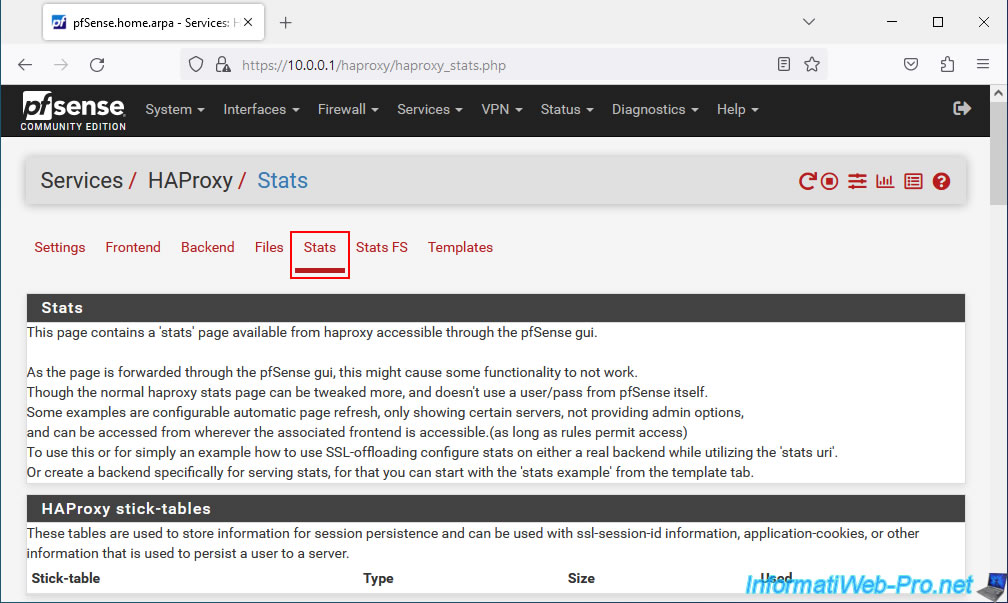
Thanks to this report, you will be able to see the status of the web servers located in the background (backend).
Source : Server Load Balancing on pfSense 2.4 - pfSense Hangout July 2017 (pages 14 to 17).
Share this tutorial
To see also
-
Firewall 9/12/2025
pfSense 2.6 - Create a site-to-site (S2S) VPN tunnel via OpenVPN secured with shared key (PSK)
-

Firewall 9/19/2025
pfSense 2.6 - Create a site-to-site (S2S) VPN tunnel via OpenVPN secured with SSL/TLS (L2 mode)
-
Firewall 6/4/2025
pfSense 2.6 - DNS resolution
-
Firewall 6/18/2025
pfSense 2.6 - Manage quality of service (QoS)
No comment