Create a site-to-site (S2S) VPN tunnel via OpenVPN secured with a shared key (PSK) on pfSense 2.6
- Firewall
- pfSense
- 12 September 2025 at 10:59 UTC
-

- 3/3

3. Check OpenVPN tunnel status
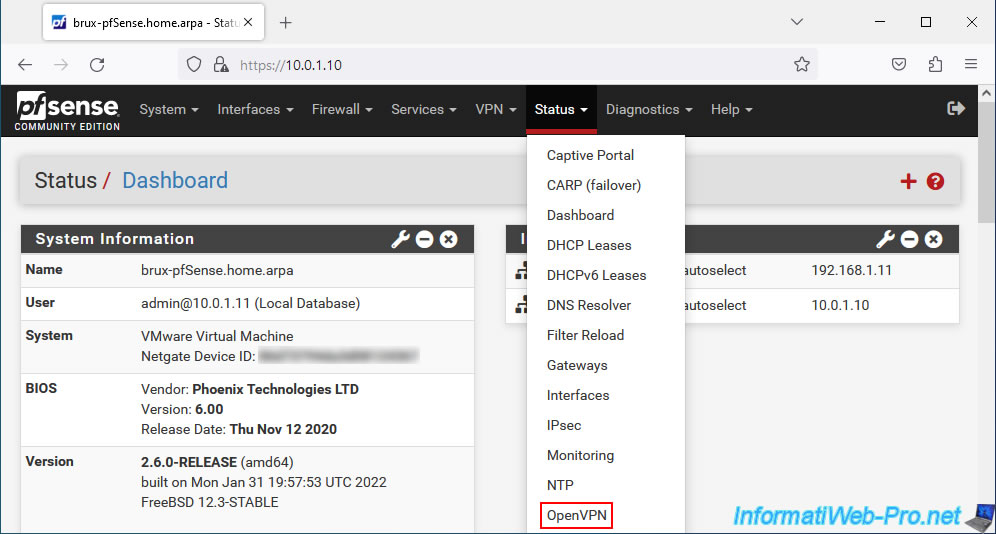
To check the status of your OpenVPN tunnel, go to: Status -> OpenVPN.
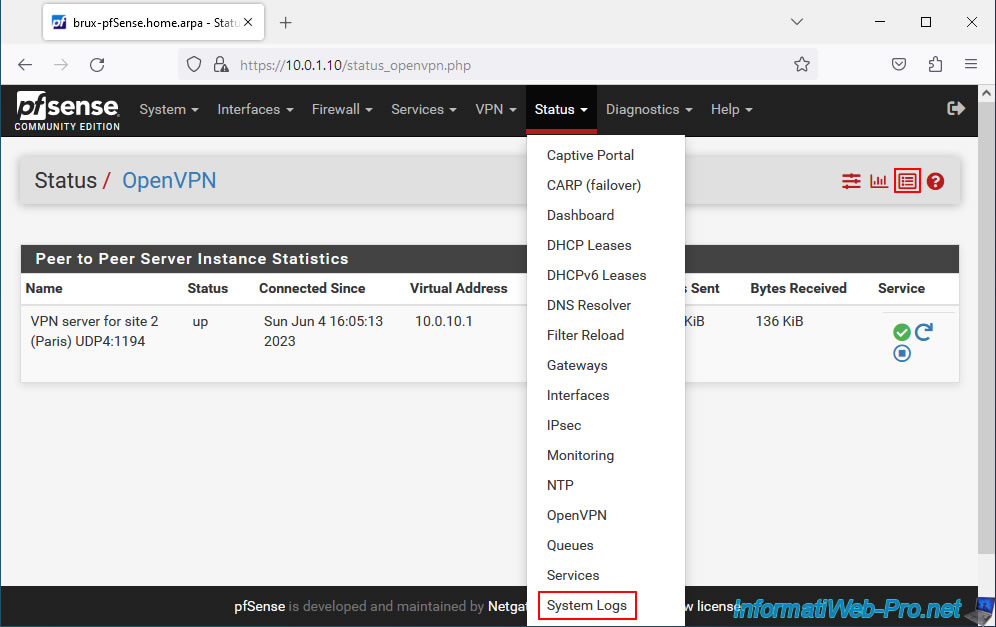
On site 1 (Brussels) where you installed the OpenVPN server, you will see that the list is named "Peer to Peer Server Instance Statistics" and that the status is "up" (if the OpenVPN connection was successful between the server and the client).
- Virtual Address: virtual IP address assigned to the server for the subnet used for the OpenVPN tunnel.
In our case, the subnet used for the OpenVPN tunnel was "10.0.10.0/30". In this case, the OpenVPN server was assigned the IP address "10.0.10.1". - Remote Host: public IP address (or WAN IP address of pfSense on the remote site, in our case) where the OpenVPN client that connected to your OpenVPN server is installed.
In our case, the WAN IP address of pfSense on site 2 (Paris) is "192.168.1.12".

On your remote site, go to: Status -> OpenVPN again.
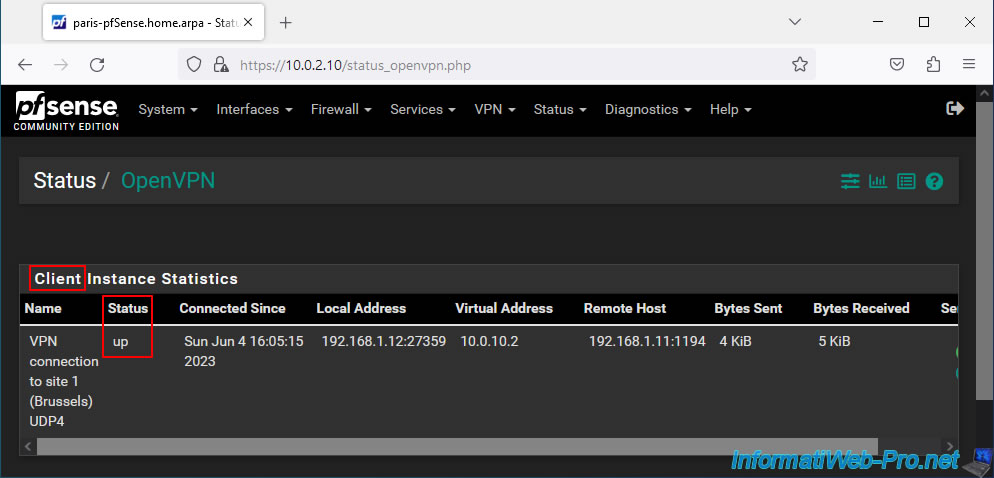
On site 2 (Paris) where you installed the OpenVPN client, you will see that the list is named "Client Instance Statistics" and the status is "up" (if the OpenVPN connection was successful between the client and the server).
- Virtual Address: the IP address assigned to your OpenVPN client for the subnet used for the OpenVPN tunnel.
In our case, the subnet used for the OpenVPN tunnel is "10.0.10.0/30" and the IP address assigned to our OpenVPN client in this case is "10.0.10.2". - Remote Host: external IP address of site 1 where the OpenVPN server is installed. The port being "1194" and corresponds to the port number of the OpenVPN server.
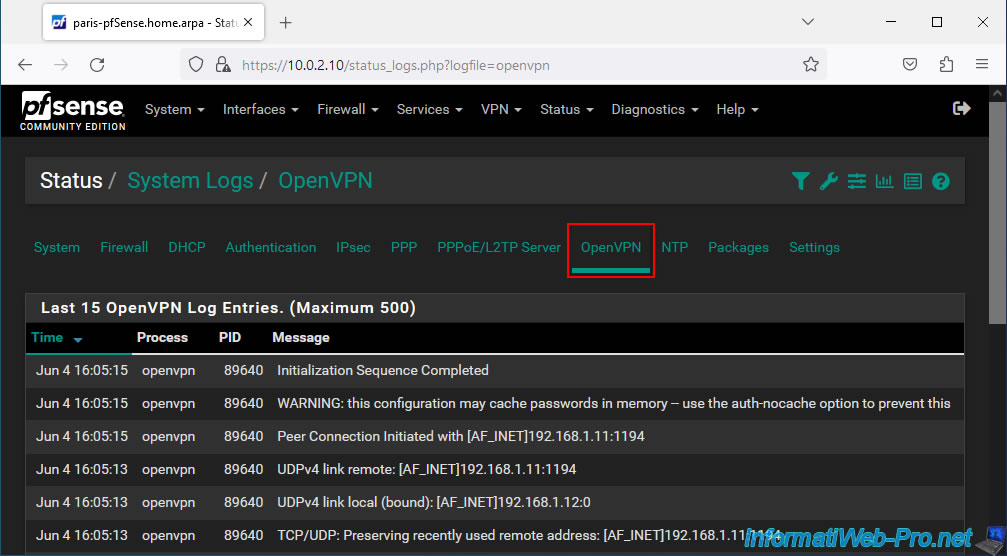
4. View logs for OpenVPN
If there is a problem with OpenVPN, check the OpenVPN logs by going to "Status -> System Logs", then going to the "OpenVPN" tab of the page that will appear.
Otherwise, you can also click on the penultimate red icon at the top right of this page to arrive at the same place.
In the "OpenVPN" tab, sort the list by date/time by clicking on the title of the "Time" column and try to find an error message, warning or other that helps you find the source of the problem.
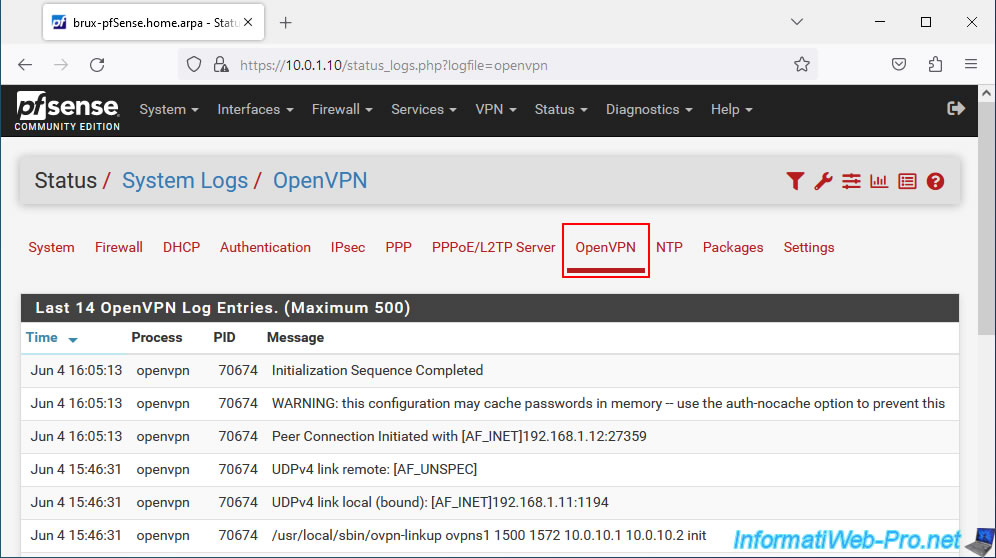
The technique is the same on the other site (although one site has an OpenVPN server and the other has an OpenVPN client).
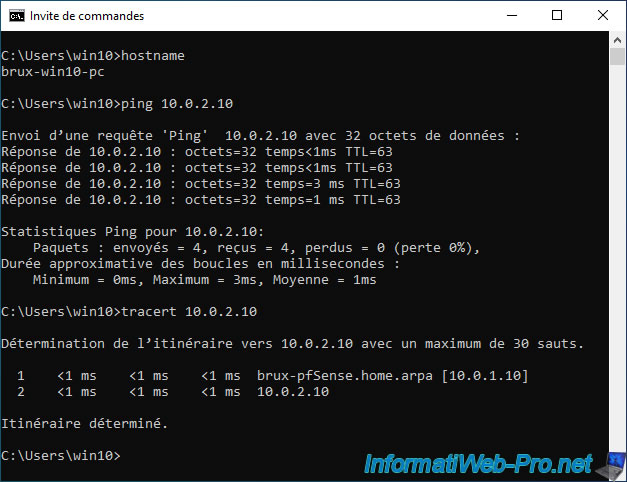
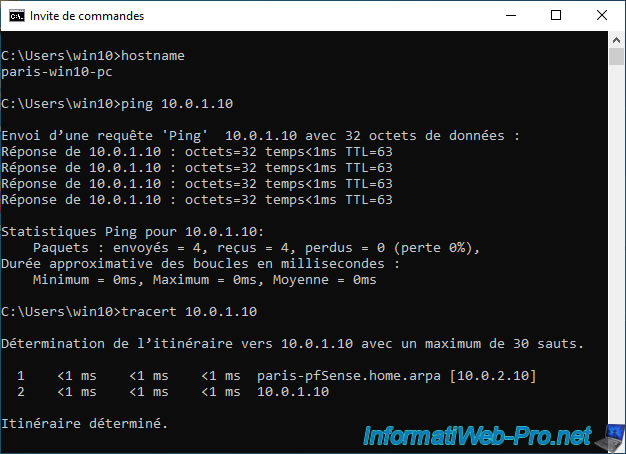
5. Testing ping via the OpenVPN tunnel
Since this is a site-to-site VPN tunnel, any machine on a network will be able to contact a machine on the remote network transparently.
To do this, start by trying to ping the pfSense LAN IP address of the site where you are located, then that of the remote site.
In our case, our computer "brux-win10-pc" manages to contact the pfSense machine in Paris without any problem using its LAN IP address.
Which proves that the tunnel works.
Additionally, you will notice that the "10.0.10.0/30" subnet used for the OpenVPN tunnel will not appear if you attempt to do a "trace" between your computer and the pfSense LAN IP address of the remote site.
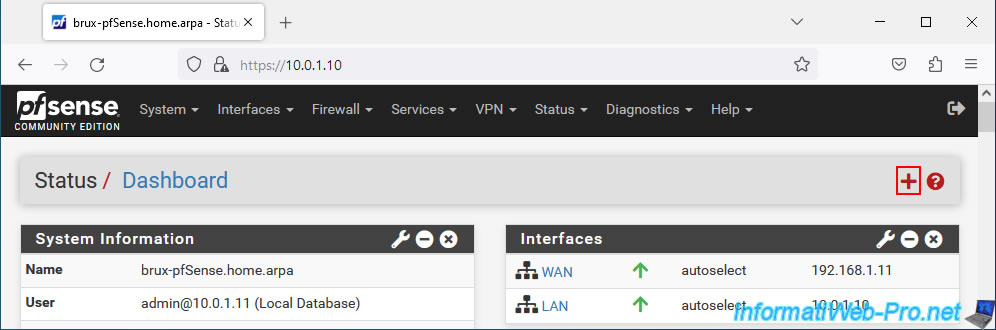
As you can see, our computer at site 1 (Brussels) uses the pfSense machine from Brussels (whose IP is 10.0.1.10) and manages without problem to contact the IP address "10.0.2.10" of the remote site (site 2 from Paris).
Same in the other direction.
Our computer at site 2 (Paris) manages to communicate with the pfSense machine at site 1 (Brussels).
6. Testing access to a website from a remote site
Thanks to this site-to-site OpenVPN tunnel, you will be able to access a web server on the remote site, for example.
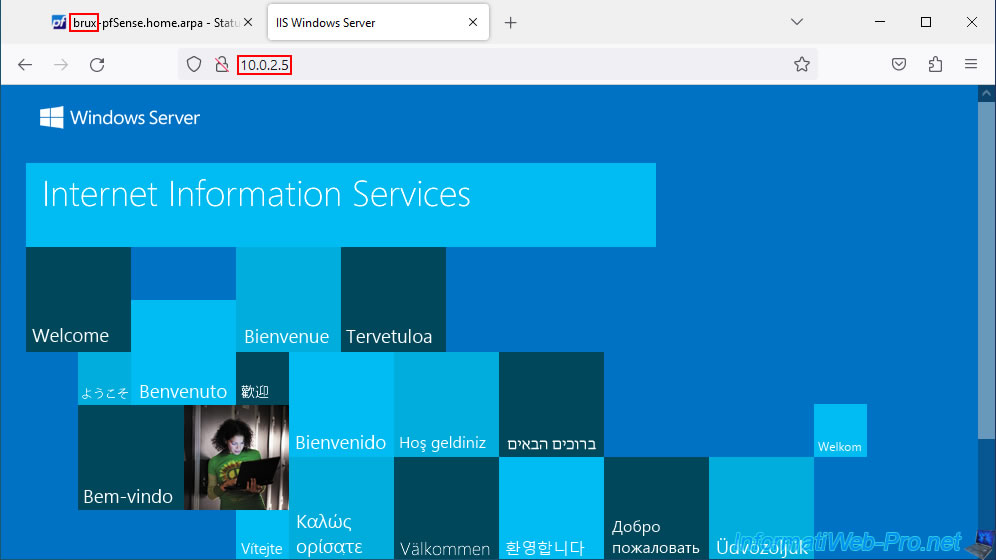
In our case, we are on site 1 in Brussels. So pfSense has the IP address "10.0.1.10".

As expected, we can access our Paris web server whose IP address is "10.0.2.5" from the Brussels network.
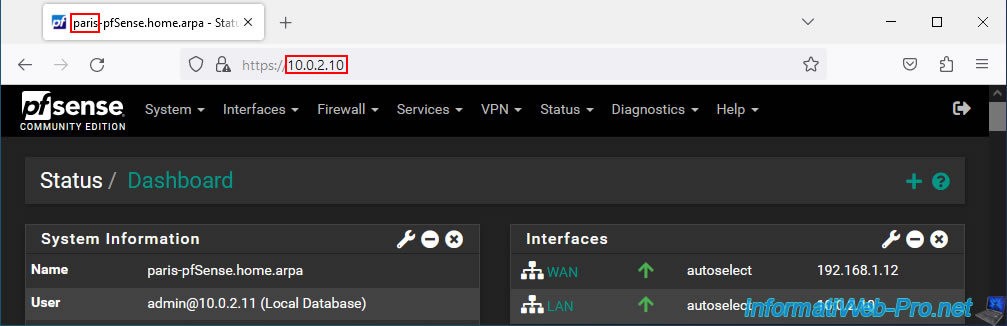
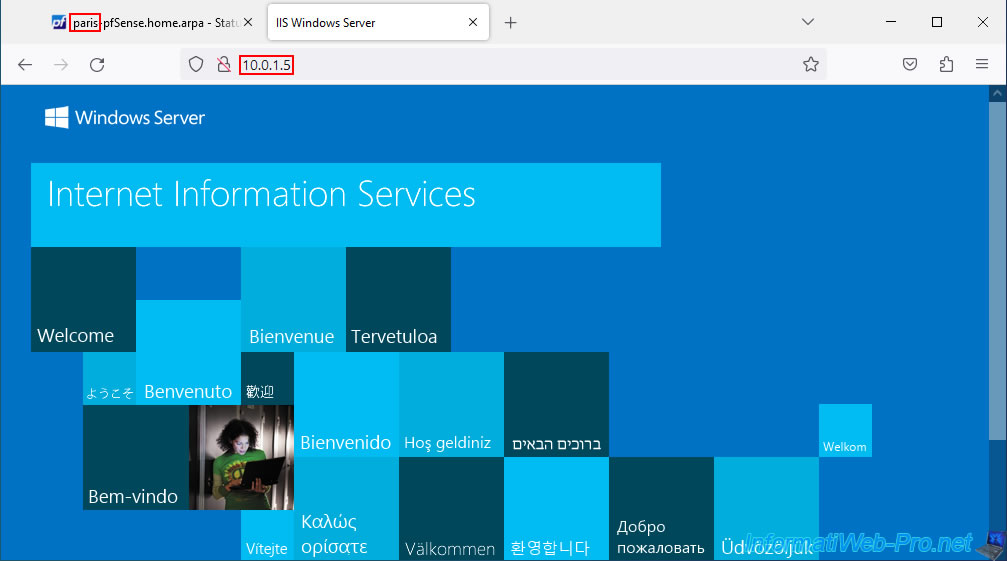
On Paris site 2, the pfSense LAN IP address is "10.0.2.10".
As expected, we can access the Brussels web server from our Paris network.
7. Add the OpenVPN widget to the pfSense dashboard (optional)
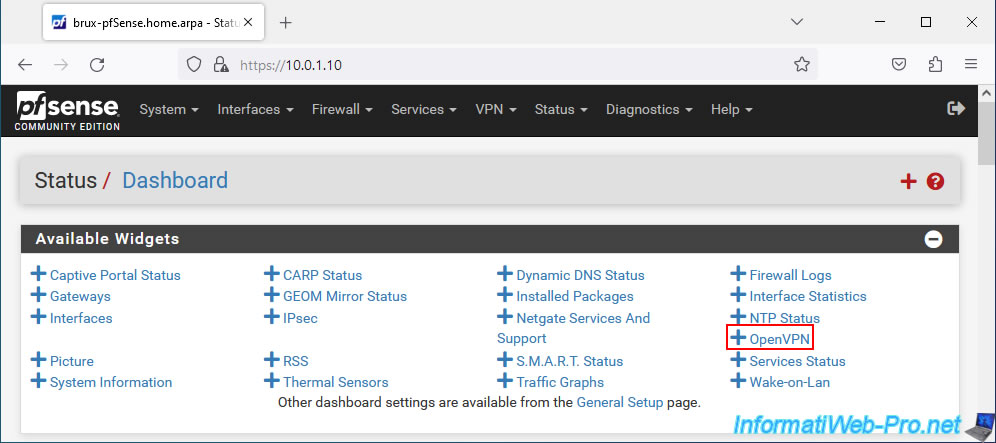
If you wish, you can add the "OpenVPN" widget to the pfSense dashboard to more easily see your OpenVPN tunnels.
To do this, click on the pfSense logo at the top left to access the pfSense dashboard, then click on the red "+" at the top right.
In the "Available Widgets" section that appears, click on: OpenVPN.
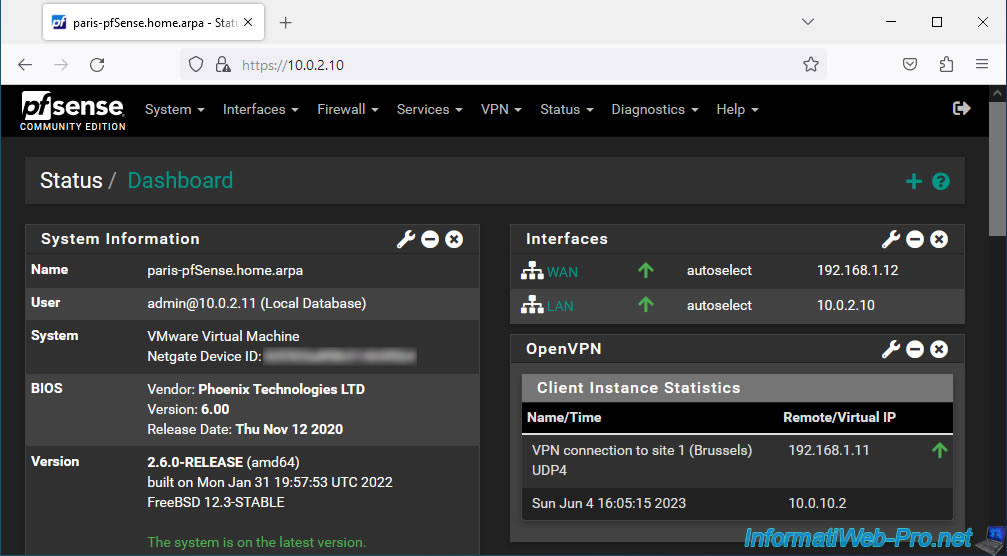
The OpenVPN widget appears with the real (external) IP address of the OpenVPN server on site 1 (Brussels) where you are located, as well as the virtual IP address used for the OpenVPN tunnel.
The green rising arrow indicates that the VPN tunnel is established.
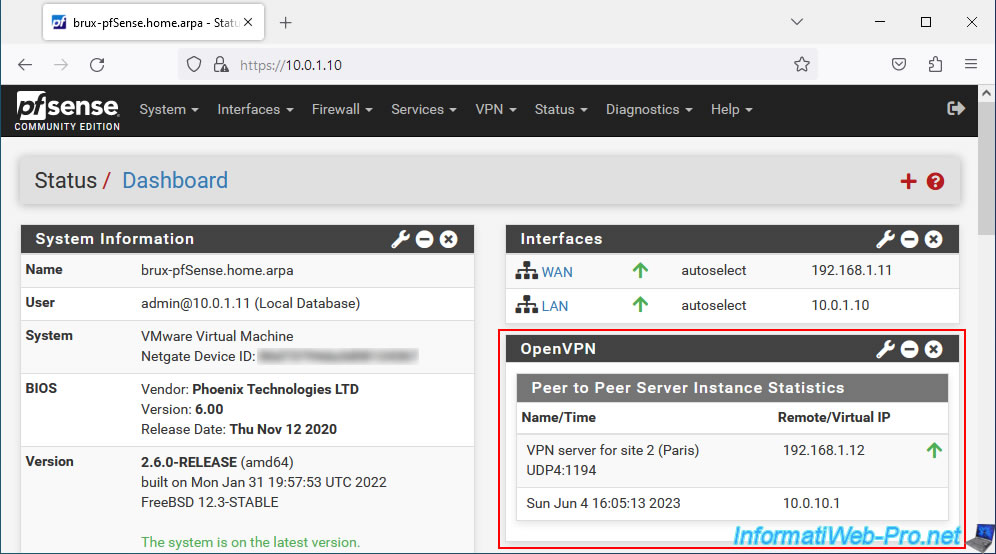
Do the same at the remote site.
Note that on the remote site this will be the OpenVPN client. So the IP address displayed will be the external IP address of the other site (where the OpenVPN server to which your OpenVPN client is connected is located).
Share this tutorial
To see also
-

Firewall 8/13/2025
pfSense 2.6 - Create a captive portal
-
Firewall 6/4/2025
pfSense 2.6 - DNS resolution
-

Firewall 5/30/2025
pfSense 2.6 - Enable and configure DHCP server
-

Firewall 7/23/2025
pfSense 2.6 - Synchronize the clock from a time server (NTP)
No comment