Create a captive portal on pfSense 2.6
- Firewall
- pfSense
- 13 August 2025 at 14:34 UTC
-

- 2/2

Open a new tab or window and go to: Services -> DHCP Server.
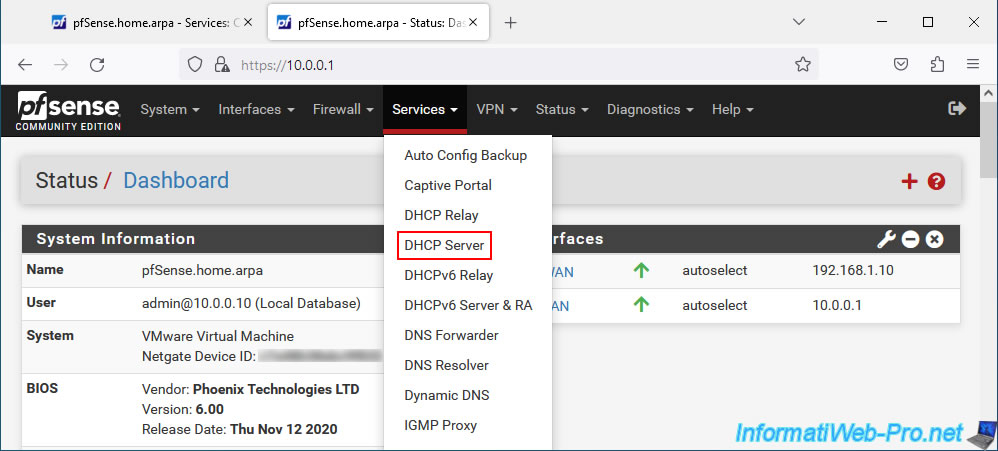
Check that the "Enable DHCP server on LAN interface" box is checked and that the configuration is correct in your case.
If not, check this box, configure the pfSense DHCP server.

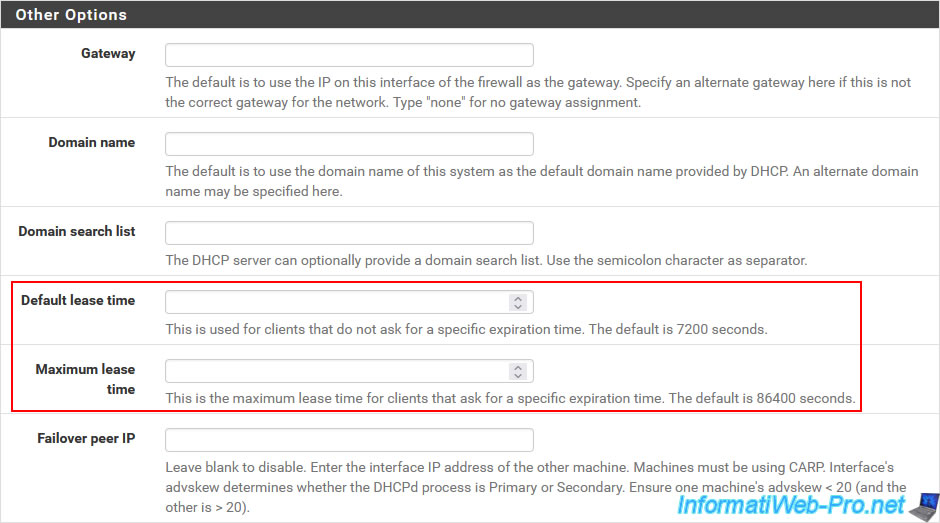
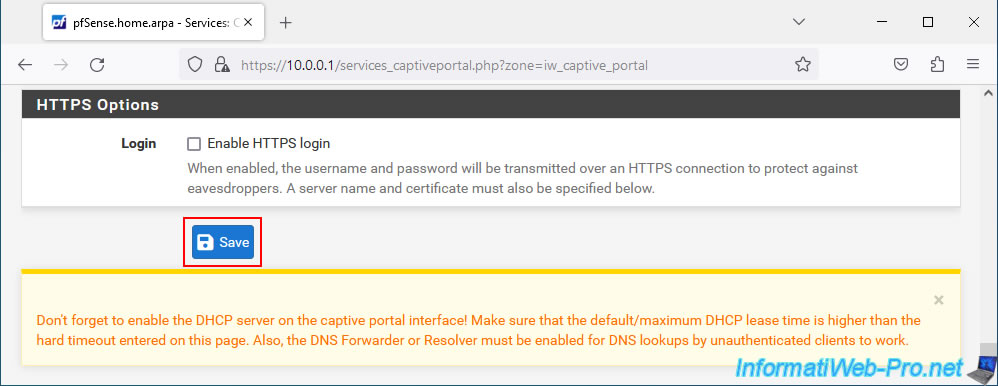
If you have specified a value for the "Hard timeout" setting of your captive portal, make sure that this value is higher than those defined for the "Default lease time" and "Maximum lease time" settings of DHCP server.
Then, don't forget to click "Save" at the bottom of this page (for the DHCP server).
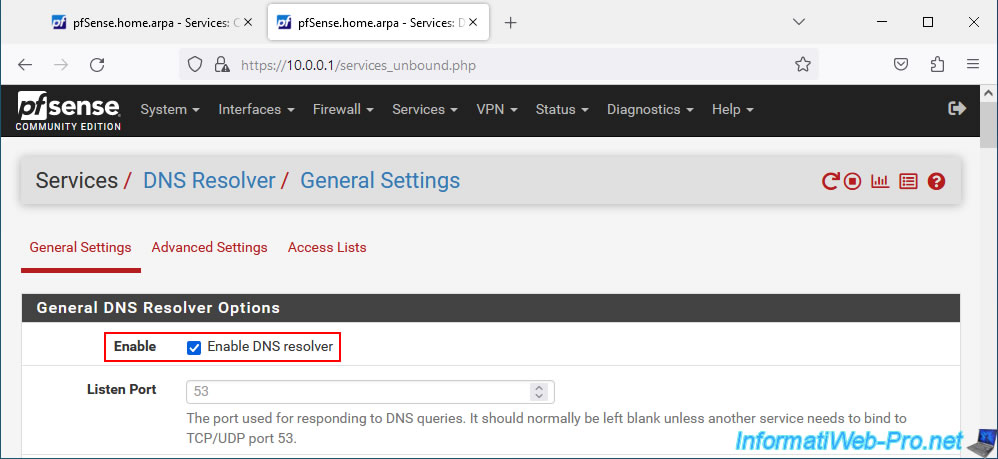
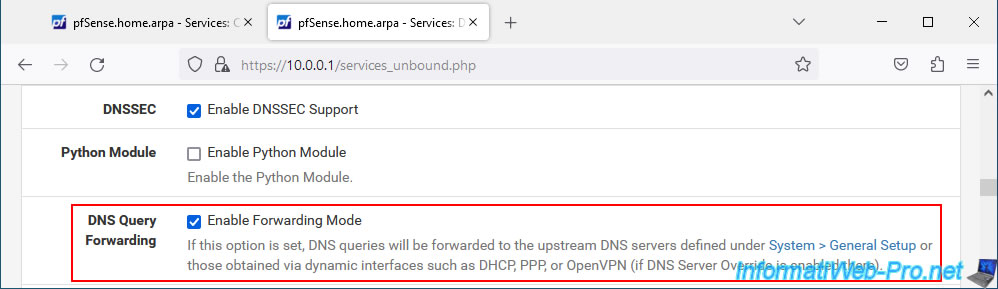
Then, go to: Services -> DNS Resolver.
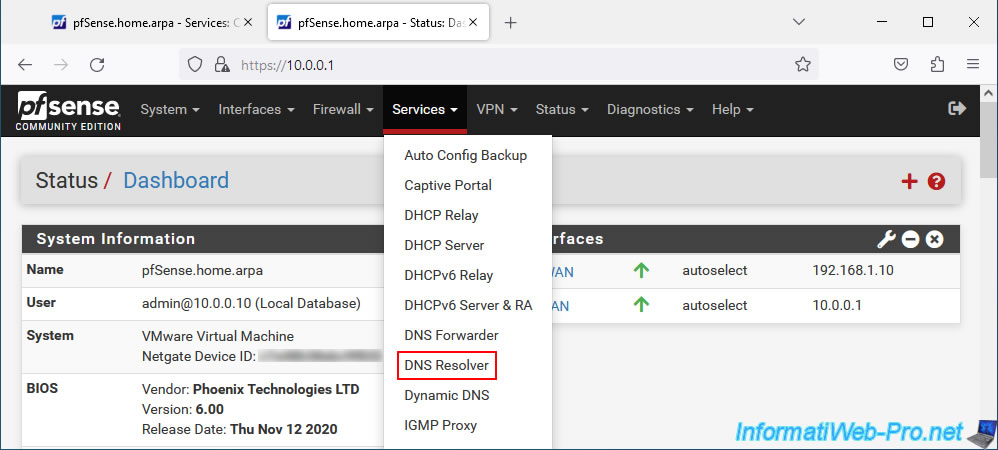
Make sure the "Enable DNS Resolver" box is checked.
In the DNS Resolver configuration page, also make sure to check the "Enable Forwarding Mode" box.
Then, click "Save" at the bottom of the page to save the DNS Resolver configuration.
Now that the DHCP and DNS configuration have been verified, save the configuration of your new captive portal by clicking on "Save".
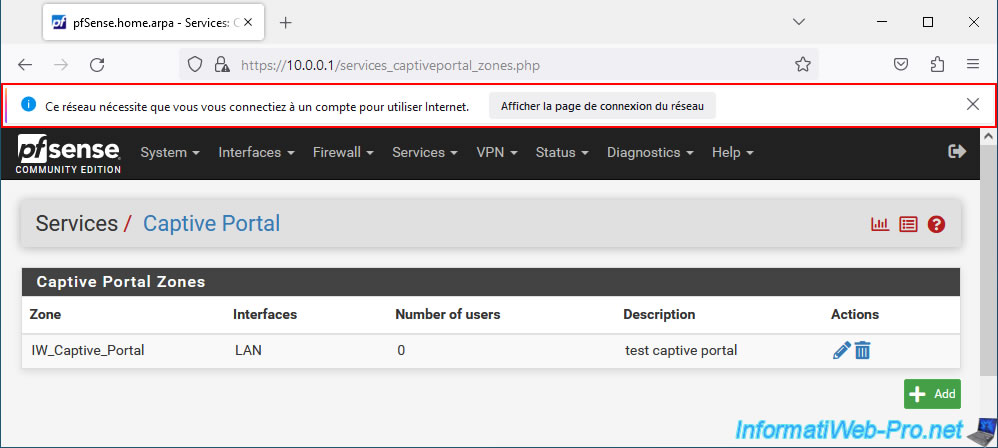
A few seconds later, your web browser (in our case: Mozilla Firefox) will notice that your Internet access requires you to connect.
Click the button: Show network connection page.
Plain Text
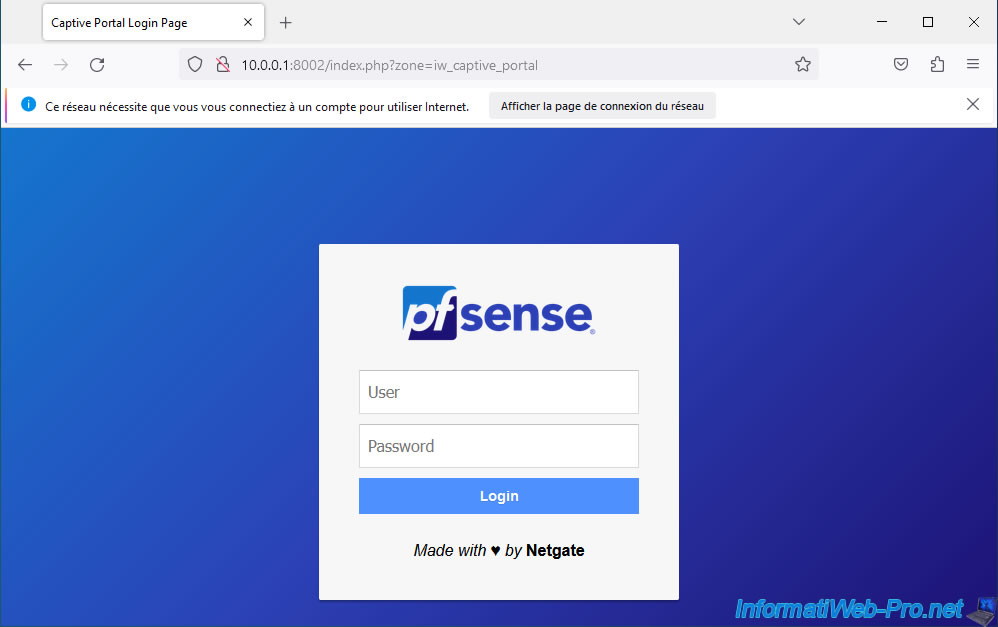
You must log in to this network before you can access the Internet.
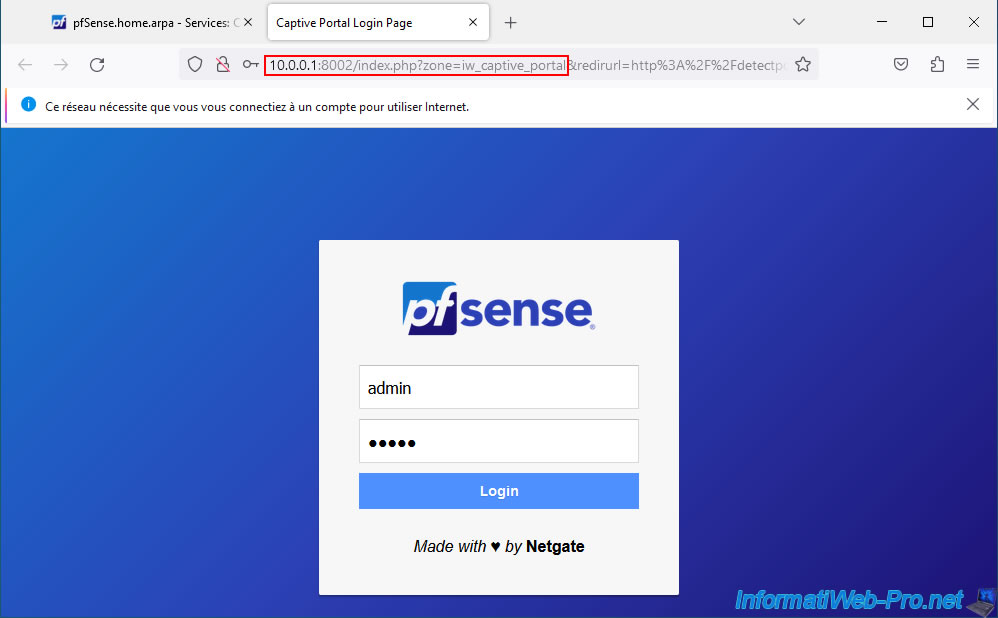
3. Login to the pfSense captive portal
The pfSense captive portal appears.
Log in with an existing user account on your pfSense machine.
In our case, we used the "admin" account, because it exists by default.
As you can see, the pfSense captive portal is accessible on the same IP address, but on a different port (in this case, port 8002).
You will then be redirected to the page you were trying to access.
From now on, Internet access will work seamlessly again for this user.
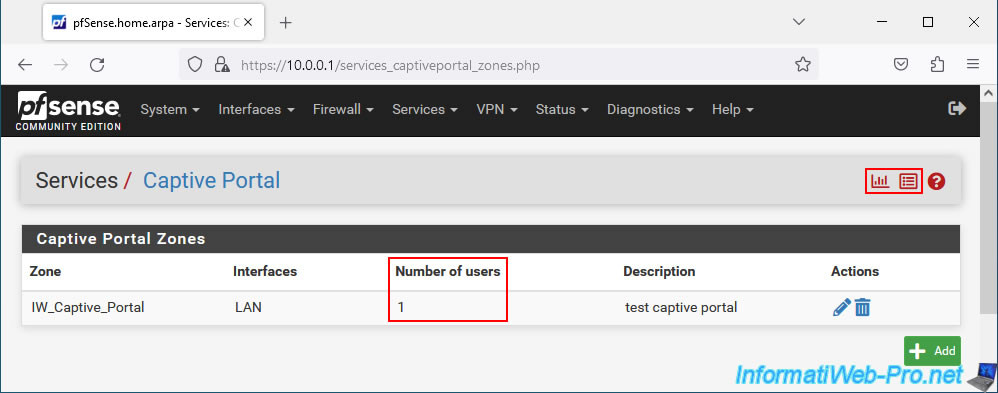
If you refresh the pfSense "Captive Portal" page, you will see that a user is currently logged in.
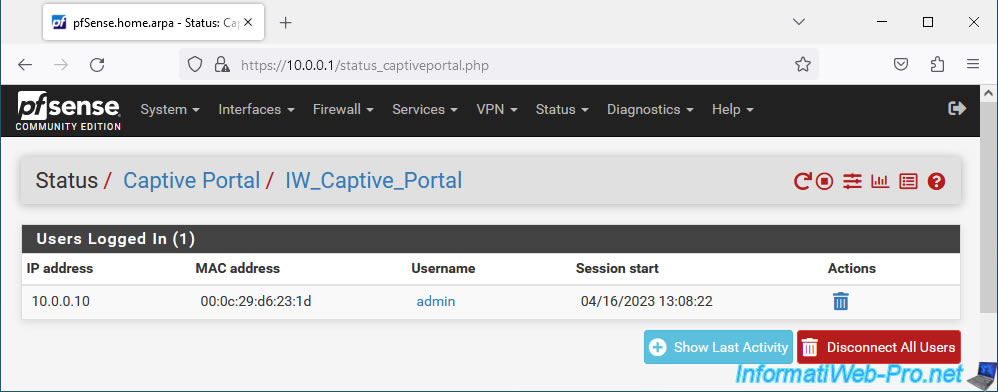
Note that you can see the list of logged in users, as well as the system logs of the captive portals by clicking on the red icons located at the top right of the page.
In the "Users Logged In" section, you will see the list of users currently authenticated on the captive portal with:
- IP address: their IP address
- MAC address: their MAC address
- Username: the username used to authenticate on the captive portal or "unauthenticated" if you have disabled authentication on your captive portal.
- Session start: when the user authenticated on the captive portal.
- Last activity: indicates the date/time of the last activity of each user (visible only by clicking on the "Show Last Activity" button).
- Actions: allows you to force a user to log out by clicking on the trash can icon.
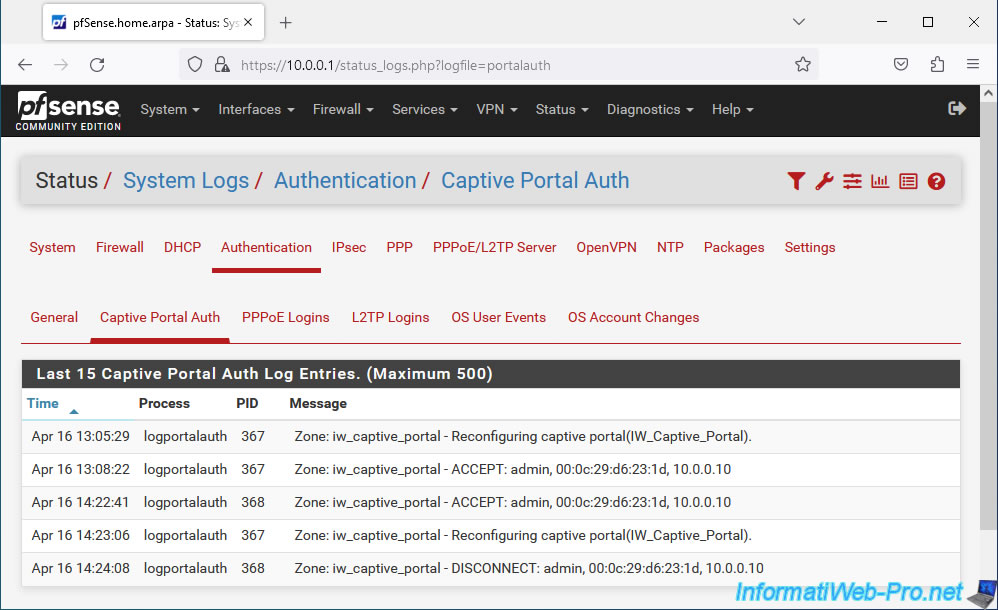
In the captive portal logs, you will see the captive laptop reconfiguration events, as well as successful or unsuccessful logins, user logouts, ...
This page is also accessible via the "Status -> System Logs" menu, then by going to the tabs: Authentication -> Captive Portal Auth.
Plain Text
Apr 16 13:05:29 	logportalauth 	367 	Zone: iw_captive_portal - Reconfiguring captive portal(IW_Captive_Portal).
Apr 16 13:08:22 	logportalauth 	367 	Zone: iw_captive_portal - ACCEPT: admin, 00:0c:29:d6:23:1d, 10.0.0.10
Apr 16 14:22:41 	logportalauth 	368 	Zone: iw_captive_portal - ACCEPT: admin, 00:0c:29:d6:23:1d, 10.0.0.10
Apr 16 14:23:06 	logportalauth 	367 	Zone: iw_captive_portal - Reconfiguring captive portal(IW_Captive_Portal).
Apr 16 14:24:08 	logportalauth 	368 	Zone: iw_captive_portal - DISCONNECT: admin, 00:0c:29:d6:23:1d, 10.0.0.10
4. Log out of the pfSense captive portal
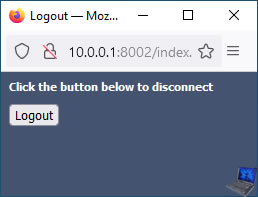
If you have enabled the "Enable logout popup window" option in the configuration of your captive portal, a popup is supposed to appear automatically after authentication on the captive portal.
However, since web browsers block popups by default to block advertising windows that become too invasive, it is very likely that this one will not appear.
If necessary, adapt exceptions for popups on client PCs and provide the URL of the captive portal in the web browser bookmarks so that users can log out of the captive portal.
Note that by returning to your web browser history, you can re-access the captive portal address to log out manually.
Indeed, given that you are already authenticated on it, the "The portal session is connected" message will appear and you can disconnect by clicking on the "Disconnect" button if you wish.
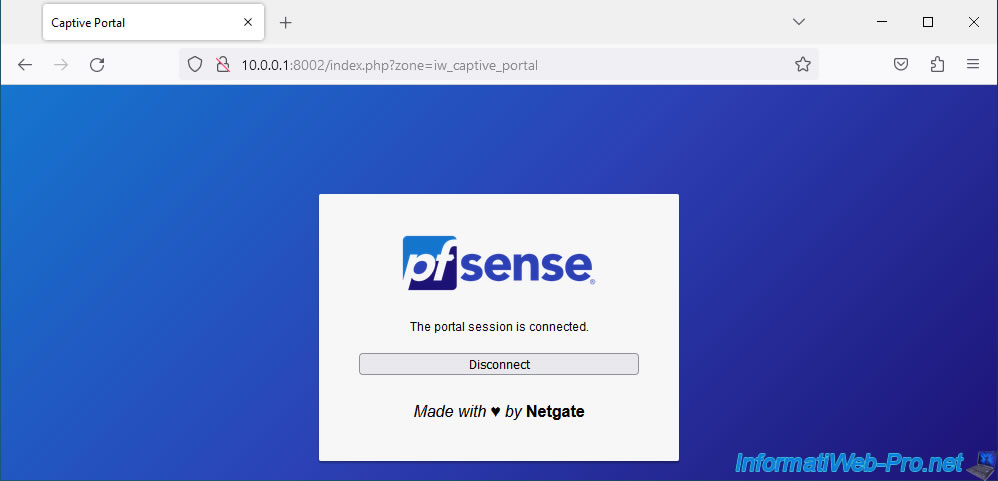
Then, the login page will reappear.
Share this tutorial
To see also
-
Firewall 9/3/2025
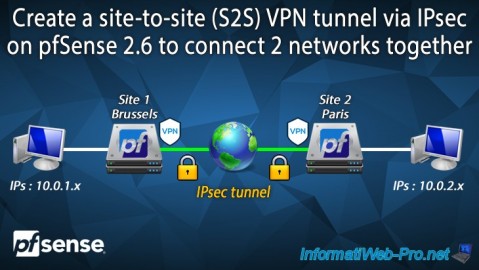
pfSense 2.6 - Create a site-to-site (S2S) VPN tunnel via IPsec
-
Firewall 6/4/2025
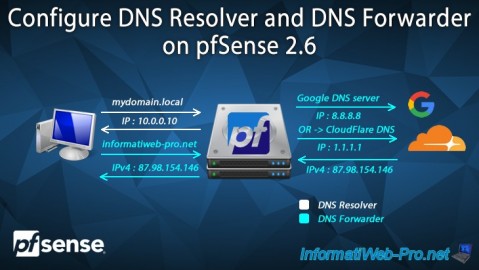
pfSense 2.6 - DNS resolution
-
Firewall 6/20/2025
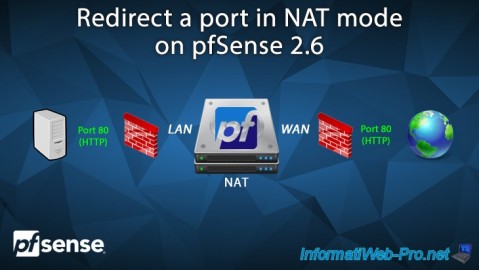
pfSense 2.6 - NAT (port forwarding)
-
Firewall 7/9/2025
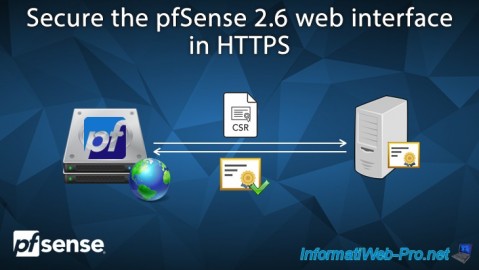
pfSense 2.6 - Secure the web interface in HTTPS
No comment