Unboxing, connecting, and using the Lindy KVM Switch Classic HDMI USB 2.0
- Articles
- 19 November 2025 at 16:00 UTC
-

- 2/3

3. Connect PC 1 to the KVM
To begin, connect your first PC to the "HDMI" and "USB" ports for PC1 on the back of this KVM.
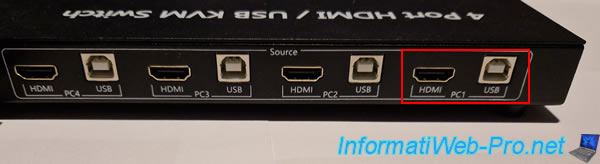
Use one of the 4 special cables and connect the HDMI plug and the USB-B (square) plug to the "HDMI / USB" ports (PC1).
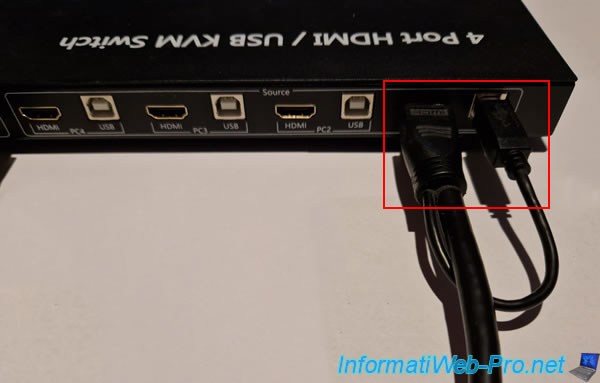
Next, if you have a graphics card in your PC (which is usually connected horizontally), connect the other HDMI port of this cable to it.
Otherwise, connect the HDMI port of this cable to the vertical HDMI port on your computer.
If necessary, purchase an HDMI adapter to the connector you have. However, avoid "HDMI to VGA" adapters (which will cause you to lose quality due to the "digital" to "analog" conversion), unless you absolutely have to.
Note: when a graphics card is installed in your computer, the graphics connector (HDMI, DisplayPort, DVI, ...) is disabled by default.
In our case, we connected the KVM cable to our physical graphics card.
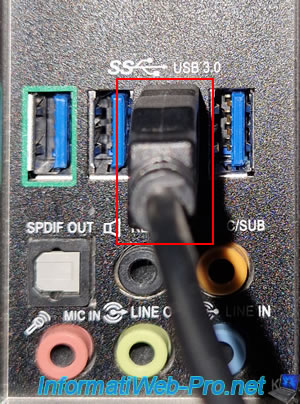
Next, you'll need to connect the small USB-A cable (rectangular plug) to a USB port on your computer.
The USB port you choose doesn't matter, but since the KVM uses USB 2, avoid USB 3 ports (unless you only have this version for your computer's USB ports).
Note: USB 3 is simply faster than USB 2. So, it's best to keep USB 3 ports if possible for transferring data with USB flash drives or external hard drives, for example.
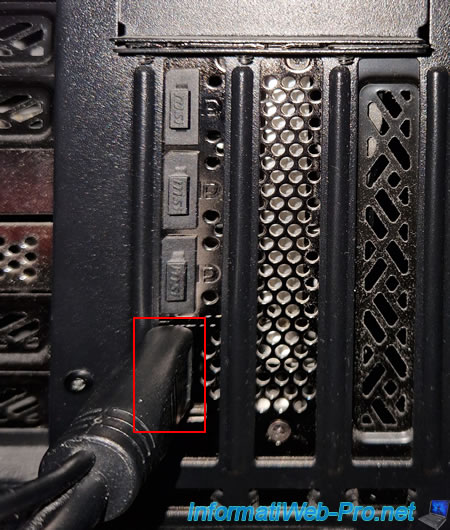
The USB port is plugged into our PC1 which is a desktop gaming PC.
4. Connect PC 2 to the KVM
To connect PC 2, the technique remains the same, except that you will use the "HDMI / USB" ports with the "PC2" label just below.
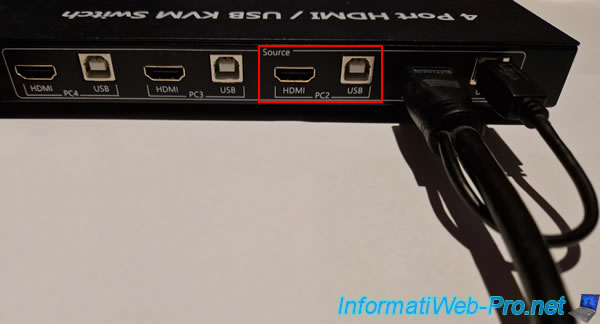
Again, use one of the special cables provided and connect the HDMI connector, as well as the USB-B (square) connector to the "PC2" position.
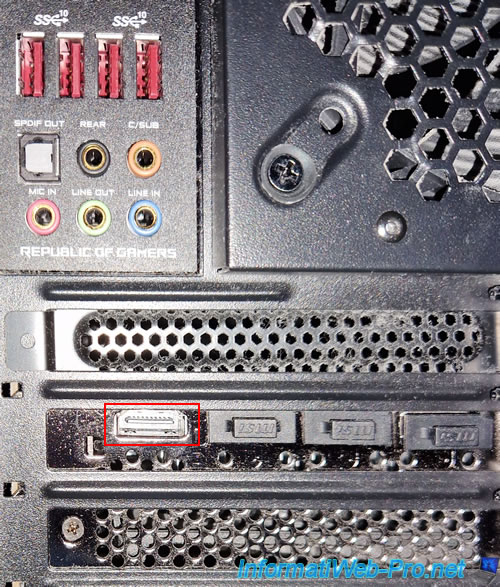
On this second PC, which acts as a server and is more powerful than the first, we have an Nvidia RTX graphics card used primarily for our GPU passthrough tutorials (i.e., passing a graphics card to a virtual machine).
In this case, we have the option of connecting it vertically, hence the fact that it's vertical in this case. You can also see the horizontal PCI ports just to the left in the image below.
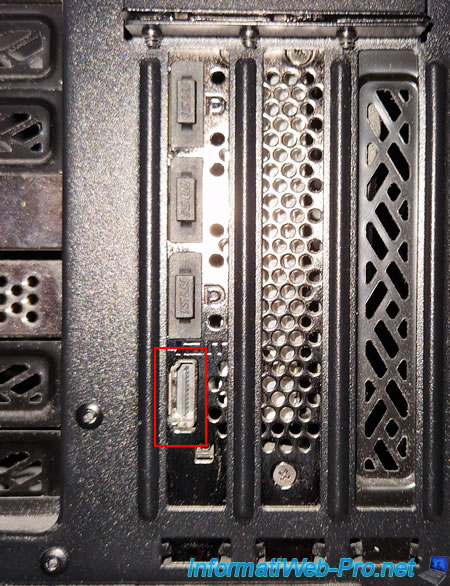
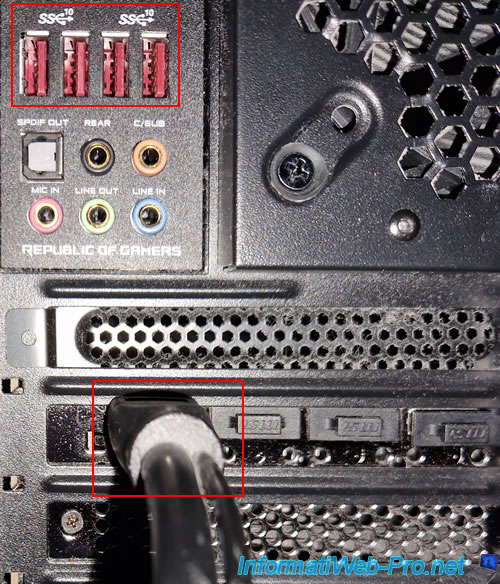
The other side of the KVM cable is plugged into the graphics card vertically.
Again, plug the USB-A connector into one of your computer's USB ports.
Note: as before, avoid plugging this USB connector into a USB 3 port (unless you absolutely have to).
In our case, we only have USB 3 and 3.1 ports on this recent PC.
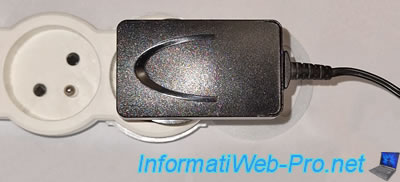
5. Connect KVM power
To power this KVM, you will need to plug the small round connector from the transformer into the "5 V/DV, 2 A" port on the back of the KVM.
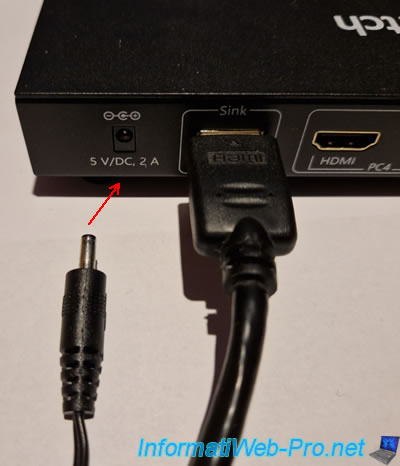
Which gives this.
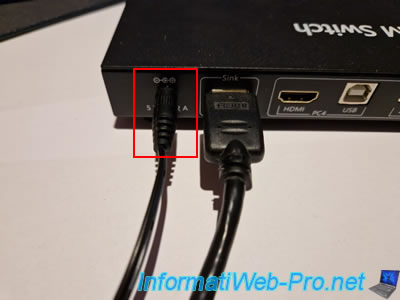
Next, plug the transformer into the power outlet.
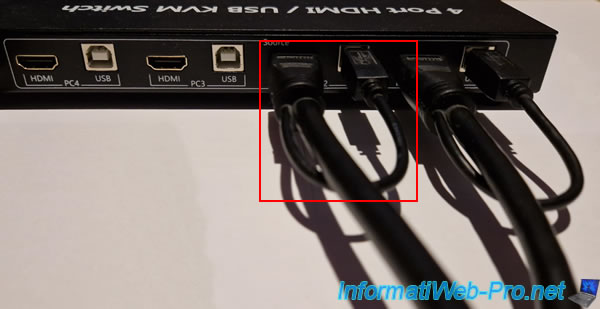
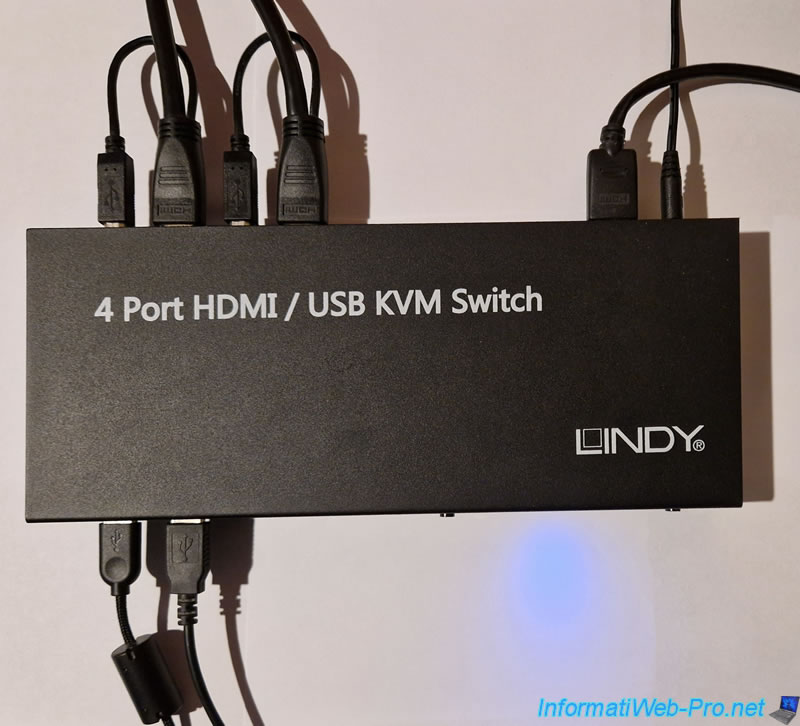
For two PCs, here's what you should have for your KVM cabling.
Note that the blue LED is lit on the front of the KVM.
6. Turn on PC 1
By default, the selected PC is "PC1".
Otherwise, press the "Select" button on the front of the KVM once or more, if necessary, to set the LED to "PC1".
Important : always select the PC you want to power on your KVM before powering on the desired PC.
Otherwise, the computer may not restart due to the missing keyboard.
This is because the KVM virtually connects the mouse, keyboard, and monitor only to the PC currently selected on your KVM.
Once the PC is booted, you can switch PCs without any problems, as this check is performed by your motherboard's BIOS only when the computer starts up.
Otherwise, try disabling this check in your motherboard's BIOS if you have access to this setting.
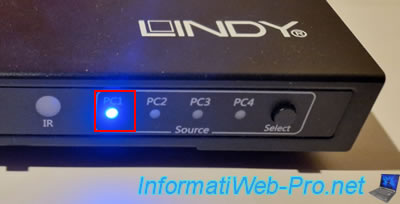
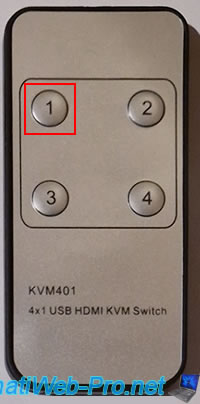
Note that you can also select PC 1 by pressing the number 1 on the remote control supplied with the KVM.
Your motherboard logo appears on your screen.
Important : if the screen remains black in your case, press the "Select" button on the KVM four times.
This will switch PCs and return to the previously selected PC (PC 1 in this case). This will resolve the problem.
Indeed, when you power on the KVM and your PCs, the screen sometimes remains black even though the correct PC is selected on the KVM.
However, this problem only occurs when powering on the KVM. After that, the problem disappears.
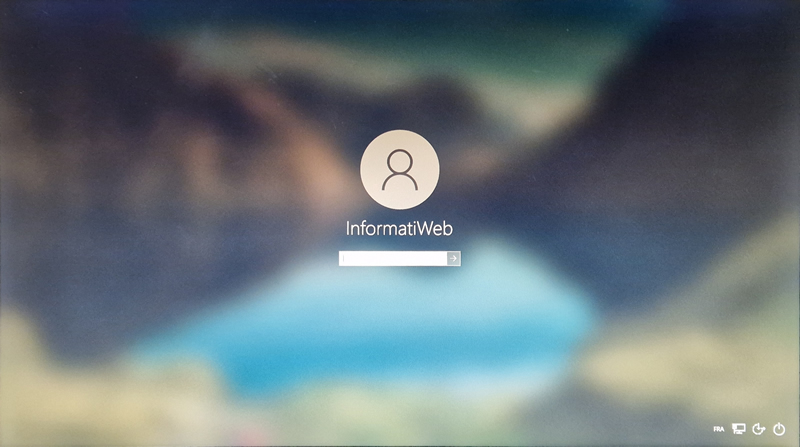
![]()
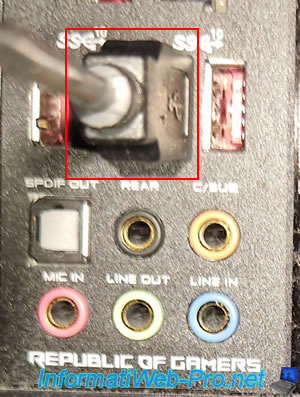
As expected, we see the Windows login screen for our desktop PC (whose motherboard brand is "ASUS ROG" (Republic Of Gamers)).
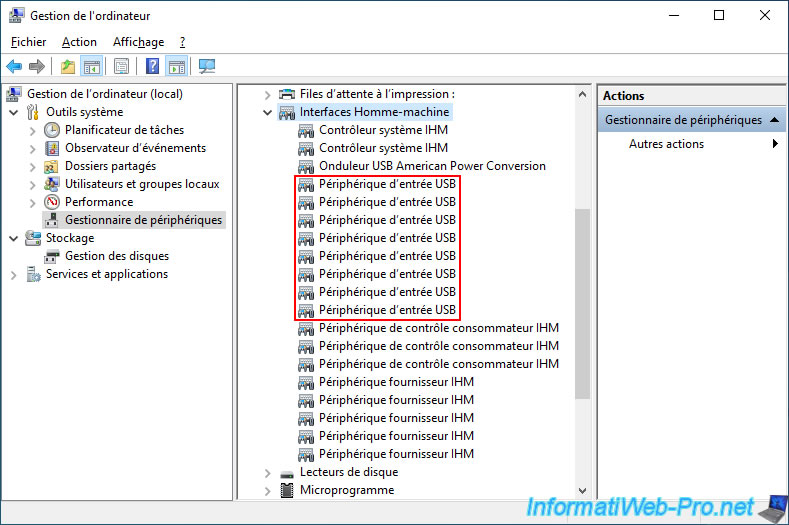
Once you log in to your Windows PC, you will notice that Windows will detect 2 new devices:
- USB Receiver: this corresponds to the KVM's USB port where the mouse is connected.
- USB Keyboard: this corresponds to the KVM's USB port where the keyboard is connected.

If you open Device Manager, you will see that Windows recognizes a generic mouse and 2 keyboards (rather than the ones you actually use):
- Keyboards -> HID Keyboard Devices.
- Mice and other pointing devices -> HID Mice

If you double-click on these devices, you will see that they are simply plugged into a USB input device.
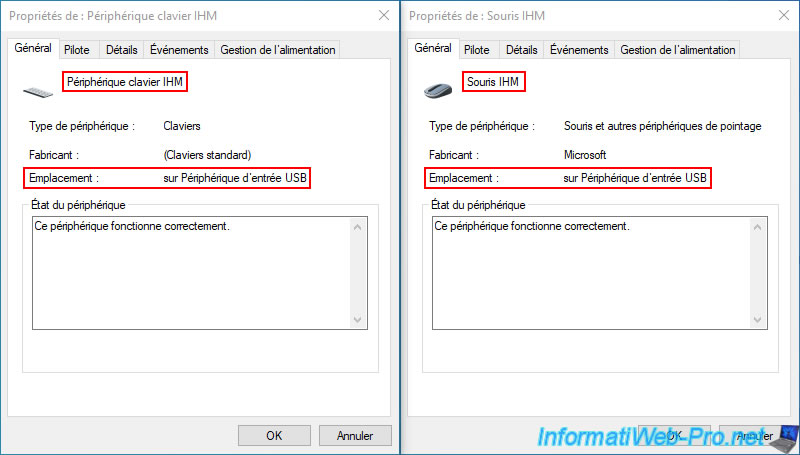
Which corresponds to 2 "USB Input Device" devices from the "Human Interfaces Devices" (= HID) section.
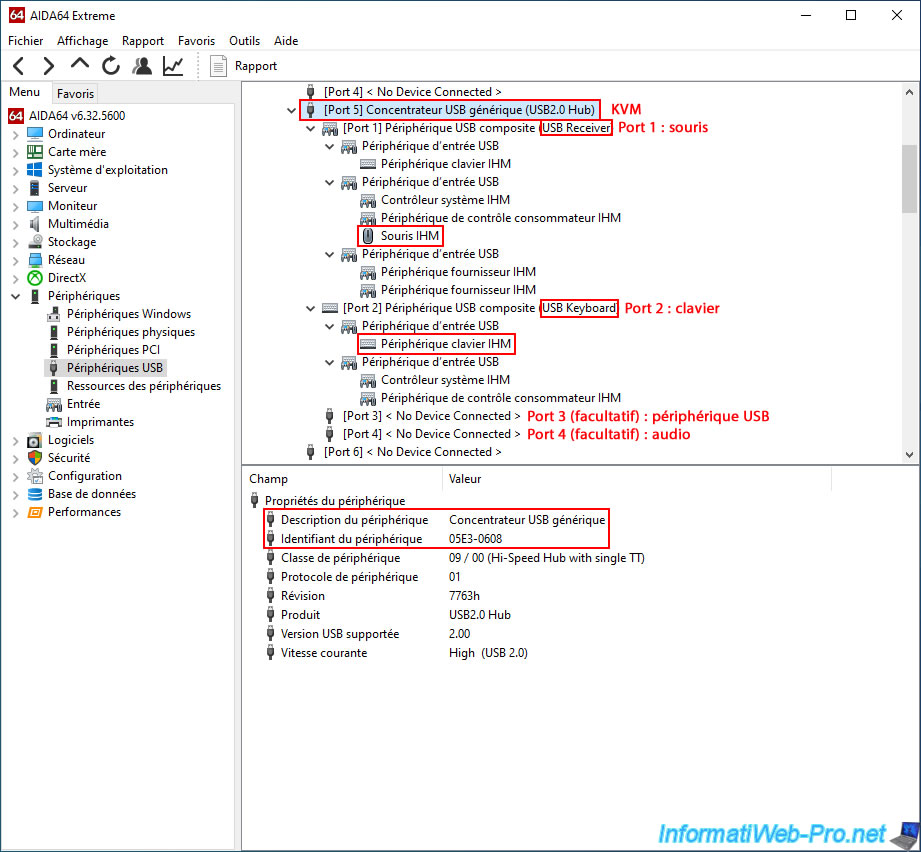
To better understand the inner workings of KVM, if you're interested, we recommend using the "AIDA64" program.
In AIDA64, go to the "Devices -> USB Devices" section and look for the mouse and keyboard.
As you can see in the image below, our KVM is connected to port 5 of our computer and is recognized as a simple USB 2.0 hub.
If you look at the number of ports available on this hub, you can see that there are four:
- Port 1: the USB port located on the left side of your KVM and corresponding to the one used for the mouse.
In Windows, this USB device is recognized as "USB Receiver."
You can also find the "HMI Mouse" device in the sub-devices of this port 1. - Port 2: the second USB port located on the left side of your KVM and corresponding to the one used for the keyboard.
In Windows, this USB device is recognized as "USB Keyboard."
You can also find the "HMI Keyboard Device" device in the sub-devices of this port 2. - Port 3: you may have guessed that this is the third USB port on your KVM (as you'll see later in this article) into which you can connect a USB flash drive, an external hard drive, or other USB devices.
- Port 4: corresponds to the "Audio" feature of the KVM (the 2 3.5mm jacks) which you can activate or not via the button located on the front of the KVM.
If you select the port "[Port X] Generic USB Hub (USB2.0 Hub)", you will be able to see the Device ID: 05E3-0608.
On Windows, the "Generic USB Hub" is located in the "Universal Serial Bus Controllers" section of Device Manager.
Although it's much easier to locate it in the "AIDA64" program than in Windows Device Manager.
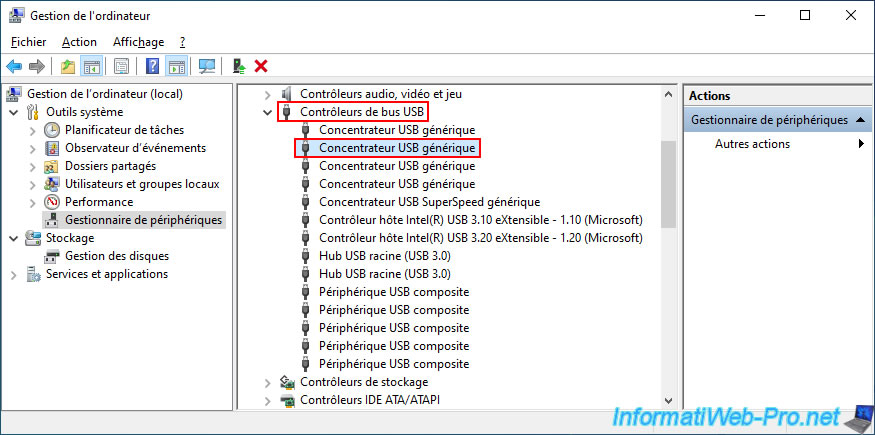
To find the one that matches your KVM, base it on the port number indicated by Windows for the location of this "Generic USB Hub".
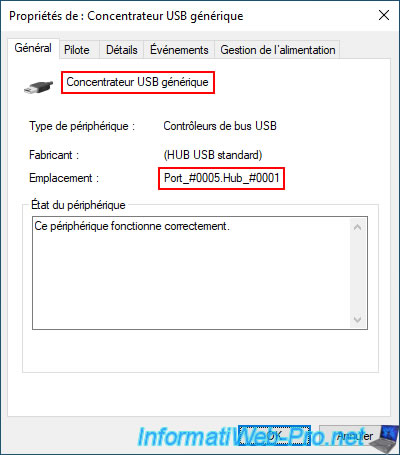
Once you find the correct "Generic USB Hub", go to the "Details" tab, select "Hardware ID Numbers" and you will find the same hardware ID "VID_05E3&PID_0608".
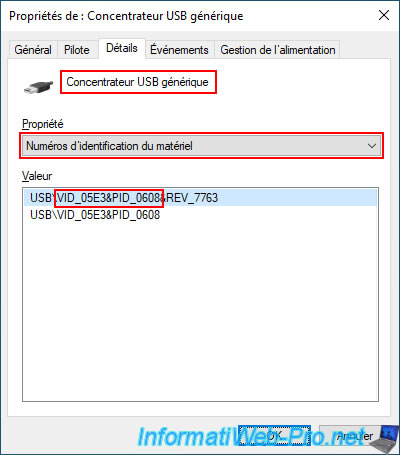
If you Google this hardware ID "VID_05E3&PID_0608," you'll easily find sites listing the manufacturer as "Genesys Logic, Inc."
Warning : never download files from the sites found (hence the fact that we have blurred the name and domain of the site found).
While the information is correct, the files provided are usually malicious.

Share this tutorial
To see also
-
Articles 1/1/2018
Dell Wyse 1010 Zero Client - Unboxing
-

Articles 1/26/2024
SafeNet Authentication Client (SAC) - Installation and overview
-

Articles 9/8/2023
What is encryption and how does it work ?
-

Articles 5/1/2018
Why deploy DNSSEC on your DNS server ?
No comment