Unboxing, connecting, and using the Lindy KVM Switch Classic HDMI USB 2.0
- Articles
- 19 November 2025 at 16:00 UTC
-

- 3/3

7. Turn on PC 2
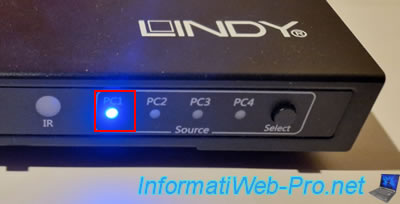
To switch PCs, press the "Select" button on the front of the KVM.
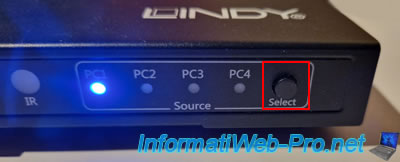
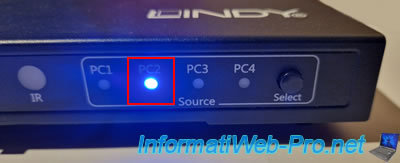
The LED moves to "PC2".
Note: the screen is currently black, as PC2 is currently off.
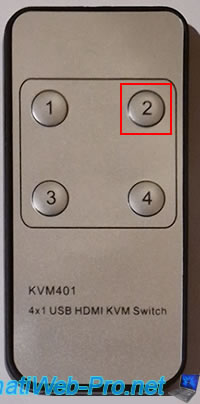
Again, you can select PC2 by pressing button 2 on your remote.
Once PC 2 is selected on your KVM, turn on that PC.
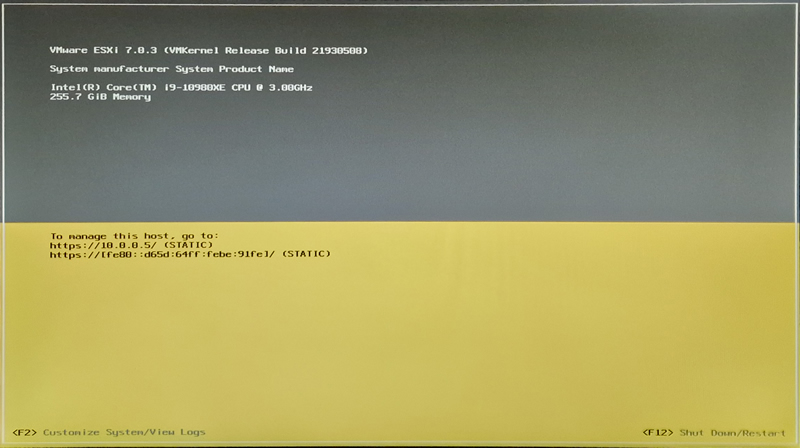
This time, the motherboard brand used is simply "Asus."

As we mentioned earlier, PC 2 is a more powerful PC and is the one used as a server.
We also used it for our comprehensive training courses on VMware ESXi and VMware vSphere.
Note: hence the Intel i9-10980XE processor and 256 GB of RAM (to be able to virtualize multiple VMware ESXi hypervisors and create VMware vSphere clusters without any slowdowns).
Note that there is also a RAID controller for equally powerful storage.
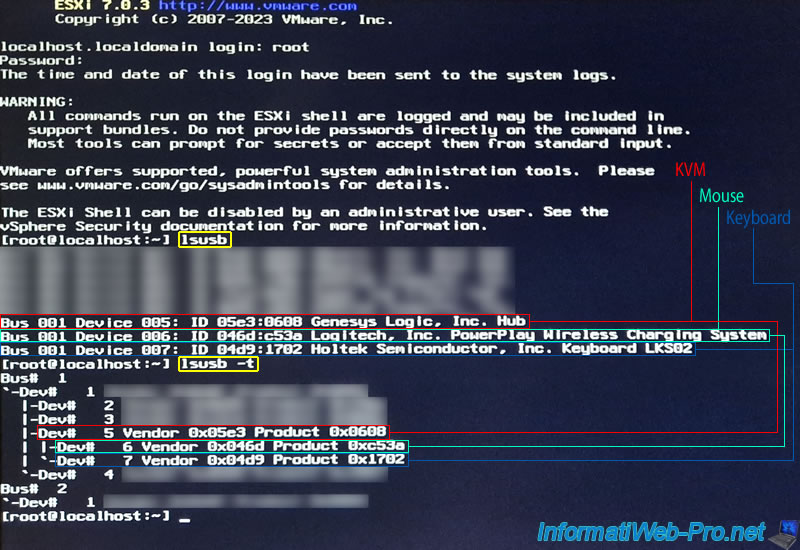
On Linux (or more precisely, in our case: the VMware ESXi console), you simply need to use the "lsusb" and "lsusb -t" commands to better understand how KVM is recognized on Linux.
The "lsusb" command simply lists the USB devices on your computer and provides information on their names, hardware identifiers (xxxx:xxxx), and so on.
Bash
lsusb
In the list of USB devices displayed, you will find at least 3 interesting devices:
- Device 005 - ID 05e3:0608 Genesys Logic, Inc. Hub: your physical KVM is recognized as a USB hub.
- Device 006 - ID 046d:c53a Logitech, Inc. PowerPlay Wireless Charging System: our Logitech mouse pad, which our Logitech wireless mouse communicates with.
However, in your case, you will see your mouse connected via USB to your KVM. - Device 007 - ID 04d9:1702 Holtek Semiconductor, Inc. Keyboard LKS02: the USB keyboard connected to your KVM.
Plain Text
Bus 001 Device 005: ID 05e3:0608 Genesys Logic, Inc. Hub
Bus 001 Device 006: ID 046d:c53a Logitech, Inc. PowerPlay Wireless Charging Systen
Bus 001 Device 007: ID 04d9:1702 Holtek Semiconductor, Inc. Keyboard LKS02
To see the hierarchy of your USB devices, use the "-t" option of the "lsusb" command.
Bash
lsusb -t
With this "-t" option, you will easily see that:
- the KVM (Device 005 = Dev#5) is a hub.
- your mouse (Device 006 = Dev#6) is connected to this hub (= your physical KVM).
- your keyboard (Device 007 = Dev#7) is also connected to this hub (= physical KVM).
Plain Text
|-Dev# 5 Vendor 0x05e3 Product 0x0608
| |-Dev# 6 Vendor 0x046d Product 0xc53a
| `-Dev# 7 Vendor 0x04d9 Product 0x1702
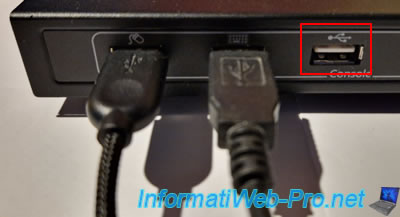
8. Use the 3rd USB port (optional) of the physical KVM
As you've already seen, your KVM has three USB ports.
The first two USB ports allow you to connect your mouse and keyboard respectively (observing the icon above these USB ports).
The third USB port, with the USB icon, allows you to connect a USB device (whether a USB flash drive or other) to the PC currently selected on your physical KVM.
Warning : changing the PC selected on your physical KVM will also disconnect that USB device and connect it only to the next PC.
If you have connected a storage device (USB flash drive, external hard drive, ...), make sure the file transfer is complete before selecting another PC on this physical KVM.
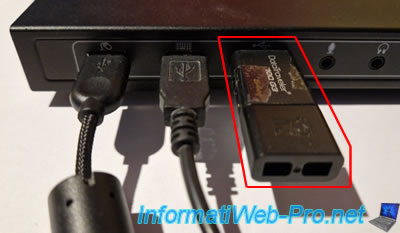
For testing, we selected PC1 on our KVM.
Then, we plugged a USB key into this 3rd USB port.
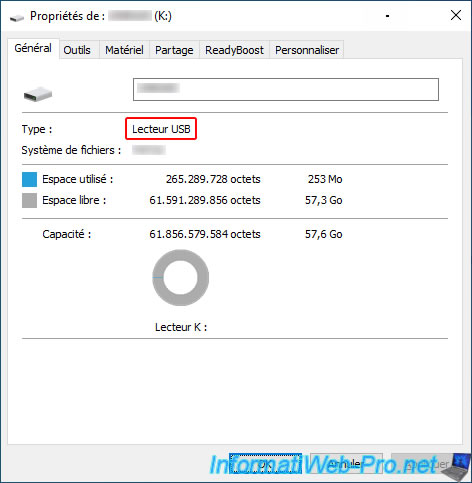
As expected, our USB key appears in Windows File Explorer.
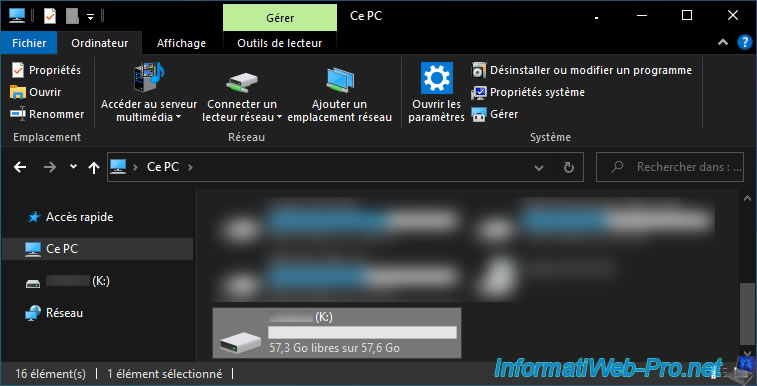
As you can see, the device recognized by Windows is indeed a USB drive (or more precisely an USB key).
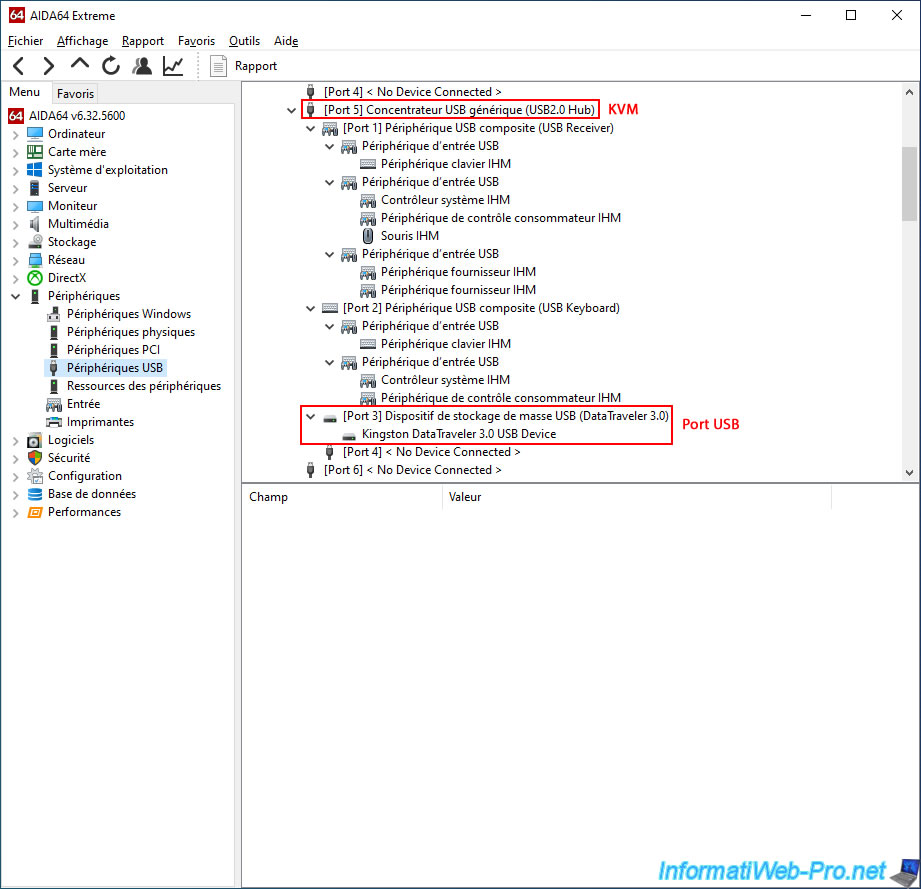
If you return to the "AIDA64" program, you'll notice that our "Kingston DataTraveler 3.0" USB drive is plugged into port 3 of our KVM.
Port 3 of the USB hub therefore corresponds to the third USB port of the physical KVM.
9. Enable audio (optional) from physical KVM
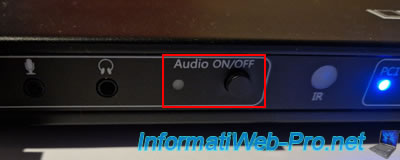
As you can see, in the front, you can see:
- Two 3.5mm connectors for connecting a microphone and speakers (or headphones, earphones, ...).
- a LED.
- an "Audio ON/OFF" button to enable or disable audio transfer via the KVM using 3.5mm connectors.
Note that when audio is disabled on your physical KVM, you can have your computer sound by connecting a wireless headset to a specific PC or via the HDMI cable for the currently selected PC's sound.
Press the "Audio ON/OFF" button to turn on the green LED just to the left of the button.
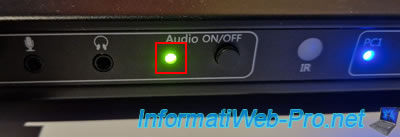
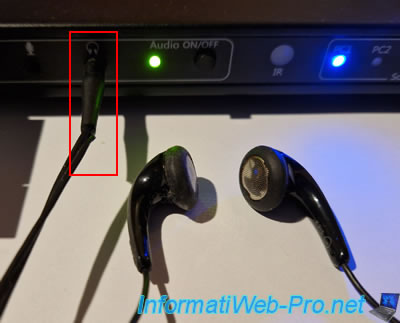
Then, for example, plug headphones into the right 3.5mm jack (with a headphone icon).
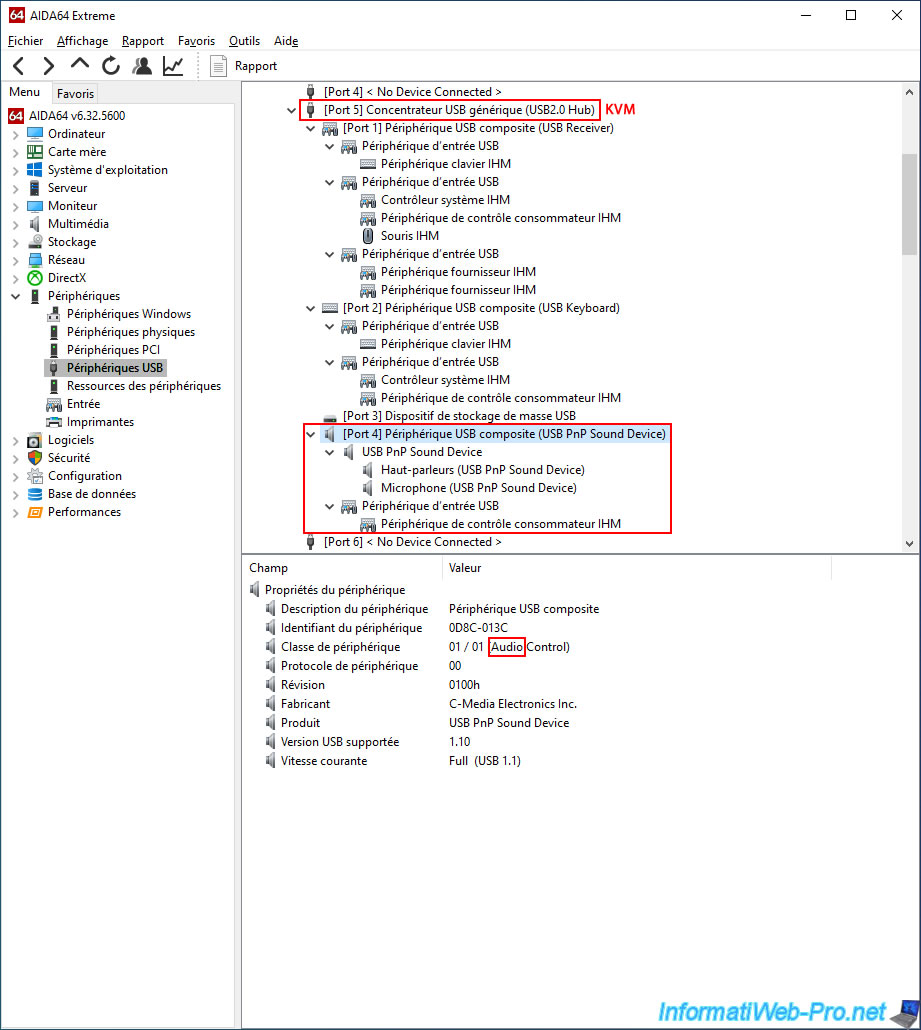
In the "AIDA64" program, you will see that a composite USB device (USB PnP Sound Device) has appeared on port 4 of your USB Hub (= your physical KVM) with in particular 2 audio devices:
- Speakers (USB PnP Sound Device): audio output corresponding to the right 3.5mm jack with the headphone icon.
- Microphone (USB PnP Sound Device): audio input corresponding to the left 3.5mm jack with the microphone icon.
If you select this port 4 of the USB Hub, you will notice that the device class is "Audio Control".
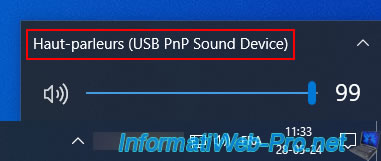
Important : if you want to use your KVM's "Audio" feature, make sure your computer is using the "Speakers (USB PnP Sound Device)" output.
Otherwise, you won't hear any sound from anything connected to your KVM's 3.5mm connector.
Share this tutorial
To see also
-
Articles 1/1/2018
Dell Wyse 1010 Zero Client - Unboxing
-

Articles 12/19/2017
Informations about thin clients
-

Articles 1/26/2024
SafeNet Authentication Client (SAC) - Installation and overview
-

Articles 5/1/2018
Why deploy DNSSEC on your DNS server ?
No comment