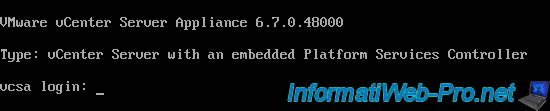
Presentation of the VCSA (VMware vCenter Server Appliance) console in a VMware vSphere 6.7 infrastructure
- VMware
- 01 March 2024 at 13:25 UTC
-

- 2/2

3. Configure the server (Customize System)
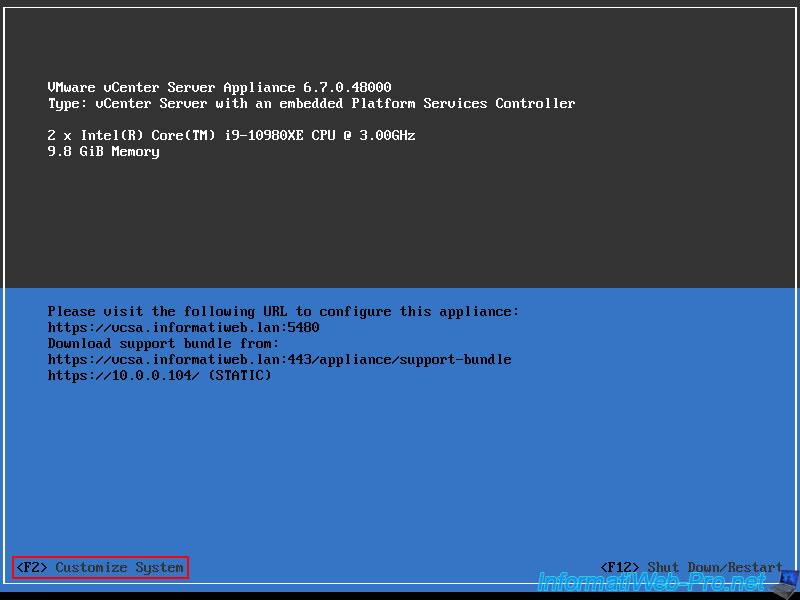
From this VCSA console, you can configure certain parameters using the "<F2> Customize System" option as is also the case with VMware ESXi.
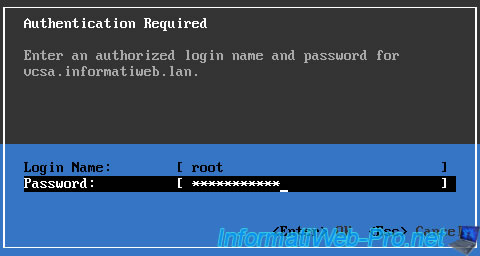
Press F2.
Log in as root.
Warning : the keyboard is configured in QWERTY. This means that if you use an AZERTY keyboard, certain letters (A/Q, Z/W and M/?) will be reversed and certain special characters will change place.
If necessary, use Google Images to find the location of the special characters present in your password (if applicable).
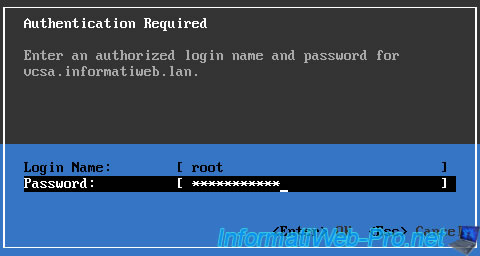
Once authenticated, the "System Customization" screen will appear.

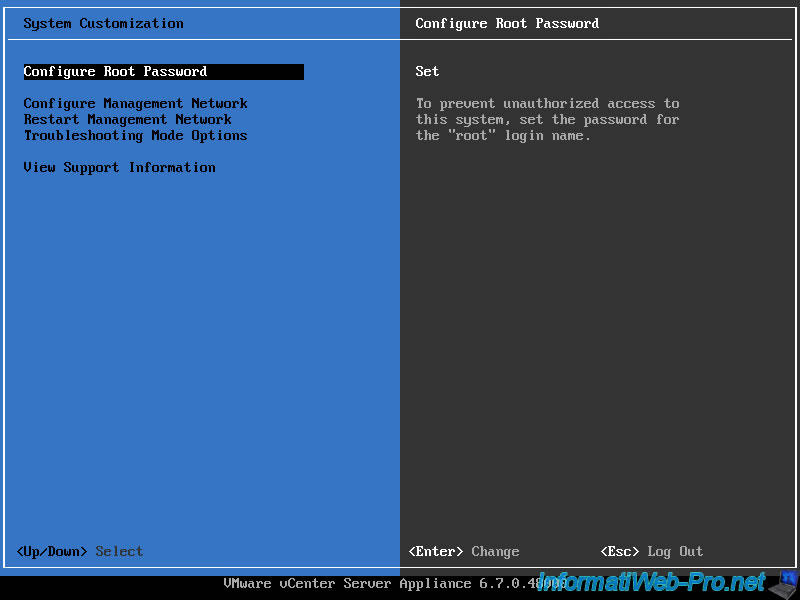
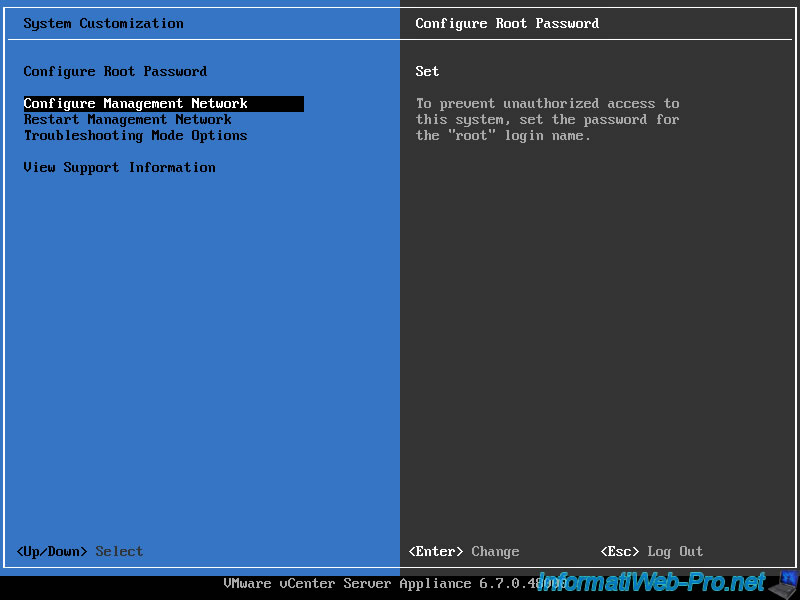
3.1. Change the root account password (Configure Root Password)
To change the password of the "root" account of this "VCSA" virtual machine, select the "Configure Root Password" option and press Enter.
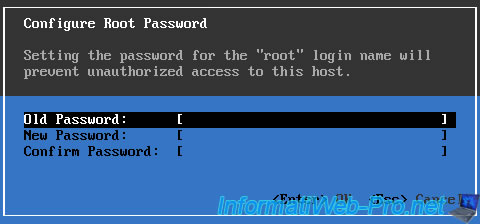
Specify:
- Old Password: the current password of the "root" account
- New Password: the new password to use for this "root" account
- Confirm Password: enter the new password again
Then, press Enter to validate this password change.
3.2. Configure Management Network
To configure the network settings (IP address, DNS, ...) of your "VCSA" virtual machine, select the "Configure Management Network" option and press Enter.
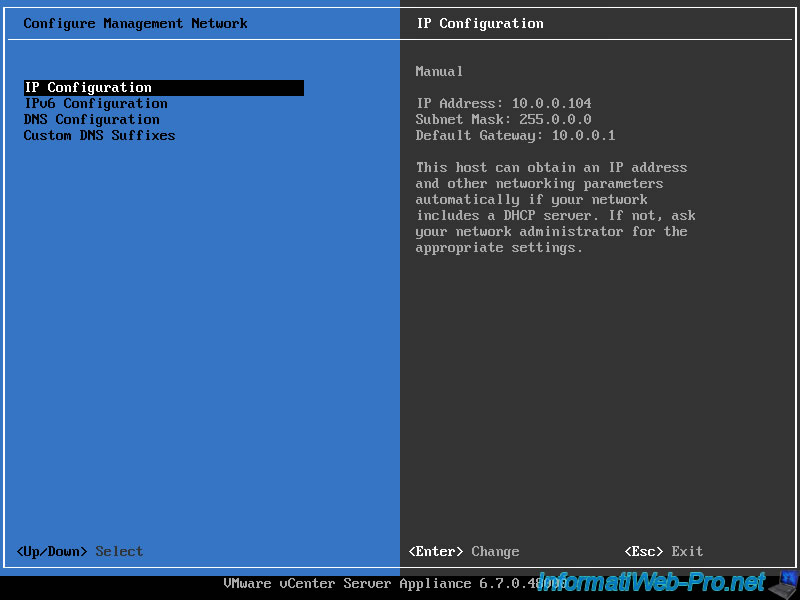
3.2.1. IPv4 configuration (IP Configuration)
To configure the IPv4 network settings of this "VCSA" virtual machine, select the "IP Configuration" option and press Enter.
As you can see in the image below, when you select this "IP Configuration" option, you can see:
- Automatic / Manual: if this VM is configured to automatically receive (Automatic) network settings from a DHCP server or if a static IP address has been defined manually (Manual).
- IP Address: its IPv4 address
- Subnet Mask: its subnet mask
- Default Gateway: its default gateway (router)
As noted by VMware, this VM can automatically obtain its IP address as well as its network settings automatically if a DHCP server is present on your network.
But you already know that.
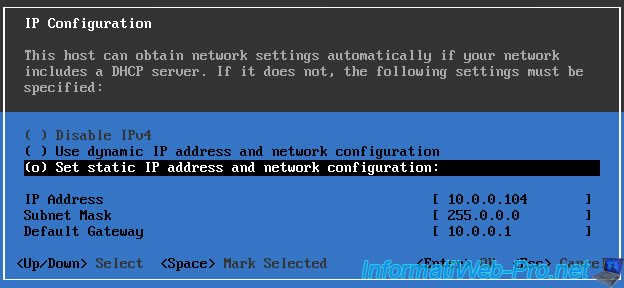
As you can see, you will have the possibility to:
- Disable IPv4: Disable IPv4 if desired (but this is not possible since IPv6 is disabled)
- Use dynamic IP address and network configuration: automatically obtain an IPv4 address and other network parameters (subnet mask, default gateway and DNS servers) from the DHCP server on your network.
- Set static IP address and network configuration: set manually:
- IP Address: an IPv4 address.
- Subnet Mask: the subnet mask to use. Typically, "255.0.0.0" for Class A IP addresses (10.x.x.x) or "255.255.255.0" for Class C IP addresses (192.168.1.x).
- Default Gateway: the IP address of the default gateway (or router or Box) to use.
Important : if you set a static IP address here, your "VCSA" virtual machine will no longer be able to obtain the IP address of the DNS servers to use.
Indeed, this information was part of the response sent back by your DHCP server.
To set them manually, follow step "3.2.3. DNS Configuration" in this tutorial.
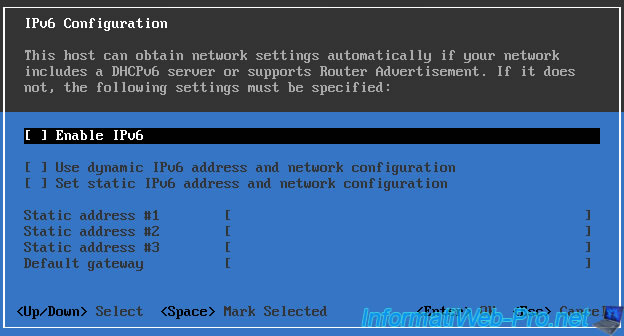
3.2.2. IPv6 configuration (IPv6 Configuration)
If you select the "IPv6 Configuration" option, you will see that:
- IPv6 is disabled: the IPv6 protocol is disabled by default.
- This host can be configured to support IPv6: VCSA can be configured to support IPv6.
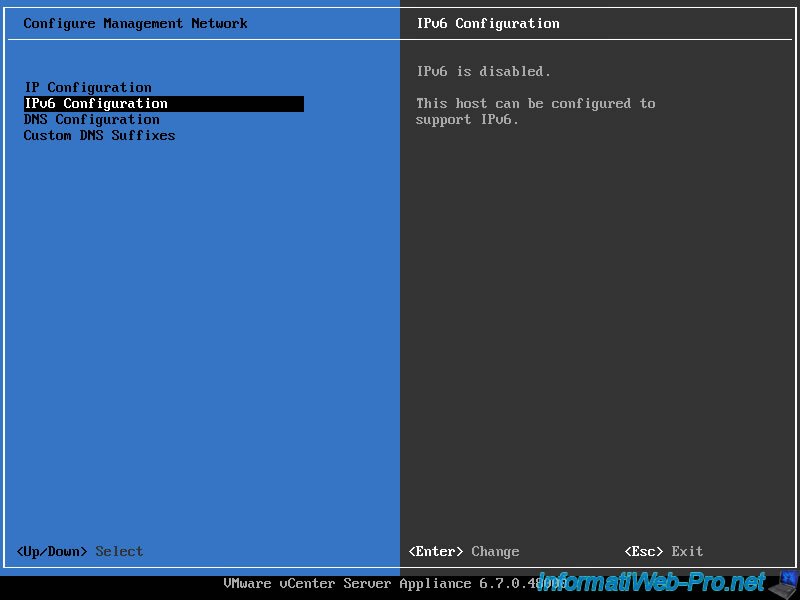
If you want to enable IPv6 support for VCSA, check the "Enable IPv6" box by pressing the space bar on your keyboard.
Then select:
- Use dynamic IPv6 address and network configuration: obtain an IPv6 address automatically from a DHCPv6 server (DHCP server for IPv6)
- Set static IPv6 address and network configuration: define a static IPv6 address (Static address #1, #2 and #3) as well as the IPv6 address of the default gateway to use.
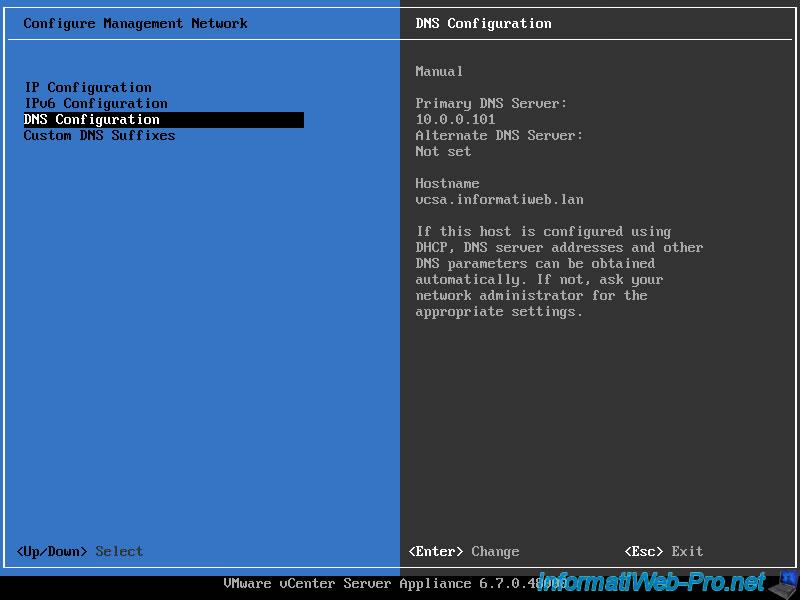
3.2.3. DNS Configuration
If you select the "DNS Configuration" option, you will be able to see:
- Automatic / Manual: whether the IP addresses of the DNS servers to use are retrieved automatically from a DHCP server (Automatic) or not (Manual).
- Primary DNS Server: IP address of the primary DNS server (to be used first)
- Alternate DNS Server: IP address of the secondary DNS server (to be used 2nd, if the 1st does not respond to the DNS request)
- Hostname: the name of your "VCSA" VM
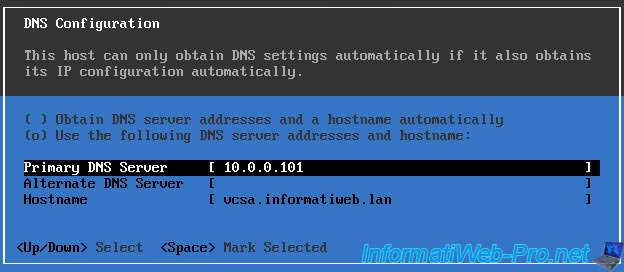
As noted by VMware, these DNS settings can be obtained automatically from a DHCP server.
However, this is only possible if the IP configuration is also obtained automatically from a DHCP server. Otherwise, you will have to manually define the DNS servers to use via this "DNS Configuration" option.
Choose :
- Obtain DNS server addresses and a hostname automatically: automatically obtain the IP addresses of DNS servers to use from a DHCP server.
This is only possible if the IP configuration is also obtained automatically from a DHCP server. - Use the following DNS server addresses and hostname: set manually:
- Primary DNS Server: the IP address of the primary DNS server. If you have an Active Directory infrastructure, you will probably use the IP address of your domain controller (on which a DNS server is automatically configured).
- Alternate DNS Server: the IP address of the secondary DNS server
- Hostname: the host name of your VCSA virtual machine
3.2.4. Custom DNS Suffixes
If you have an Active Directory infrastructure on your network, all servers and client workstations that are members of your Active Directory domain have an FQDN domain name with the same root (e.g. informatiweb.lan).
So that VCSA can automatically resolve short names to IP addresses, you can configure the list of suffixes to use.
To do this, select the "Custom DNS Suffixes" option and press Enter.

If your Active Directory domain is "informatiweb.lan", enter that domain name here.
Using this suffix, VCSA will be able to obtain the IP address of the "ad" server (short name) by automatically adding this suffix (informatiweb.lan).
In this case, VCSA will send a DNS query to obtain the IP address of the server "ad.informatiweb.lan" without you having to provide this fully qualified domain name.

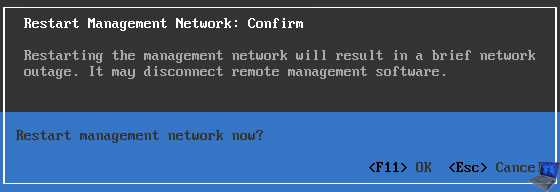
3.3. Restart Management Network
In the event of a network problem with your VCSA virtual machine, you can restart its network services using this "Restart Management Network" option.
Important : if VCSA is configured to automatically receive an IP address from your DHCP server, restarting VCSA network services may cause this IP address to change.
Which means that remote management software may be disconnected. In addition, this reboot will cause a small network outage. This can disconnect users currently connected to it (via SSH or via the web client).
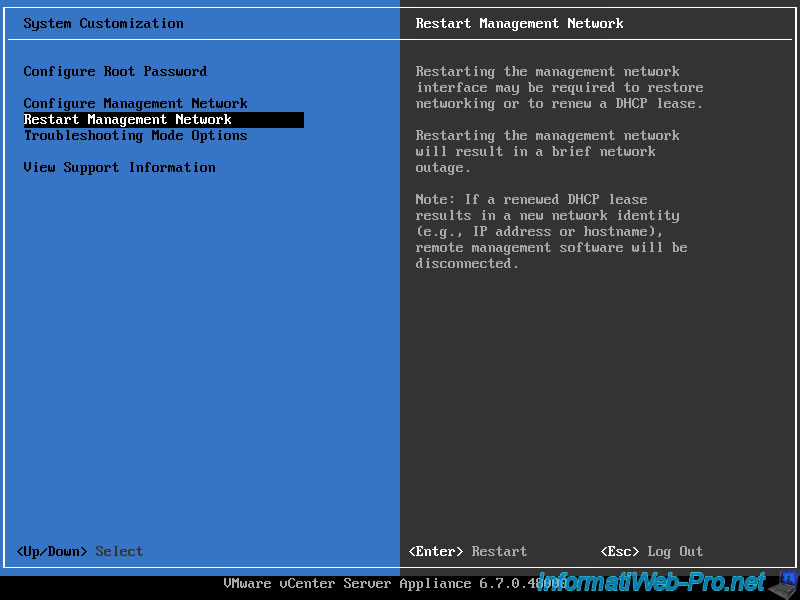
Confirm restarting VCSA network services by pressing F11.
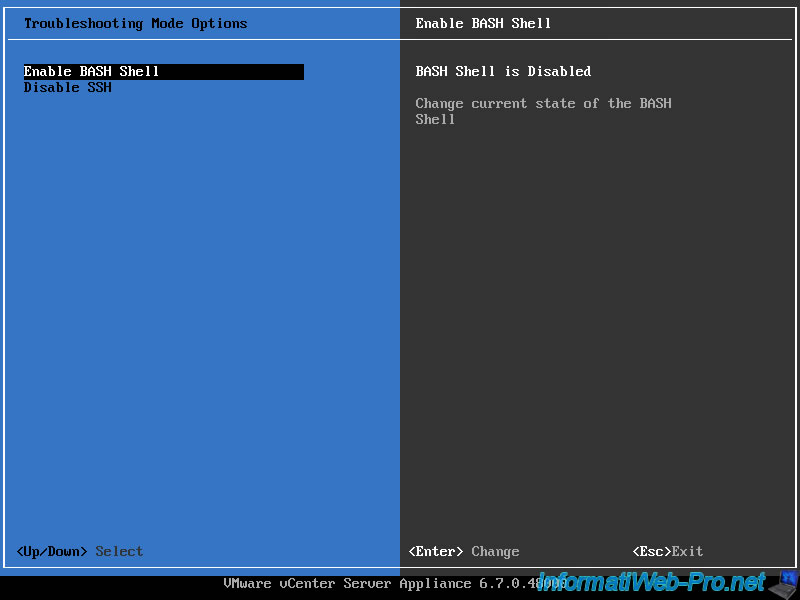
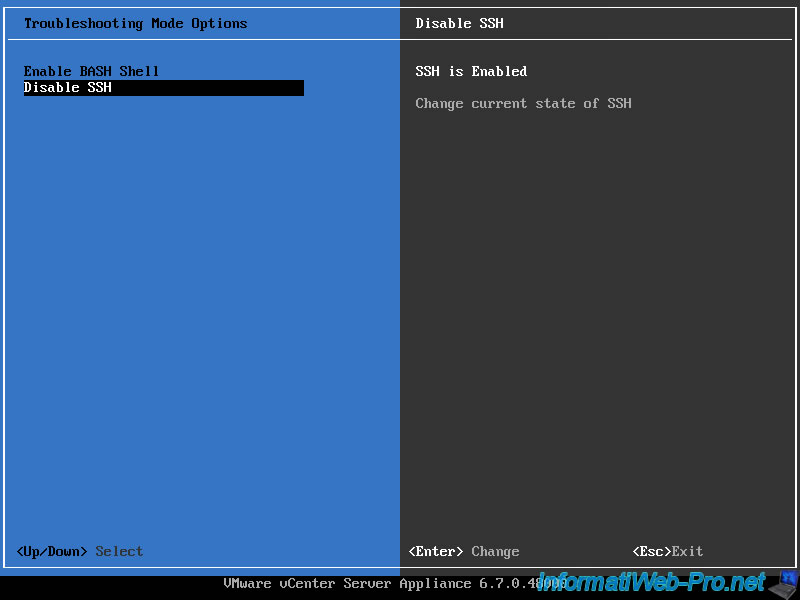
3.4. Troubleshooting Mode Options
In the "Troubleshooting Mode Options" menu, you can enable or disable the bash or SSH shell.
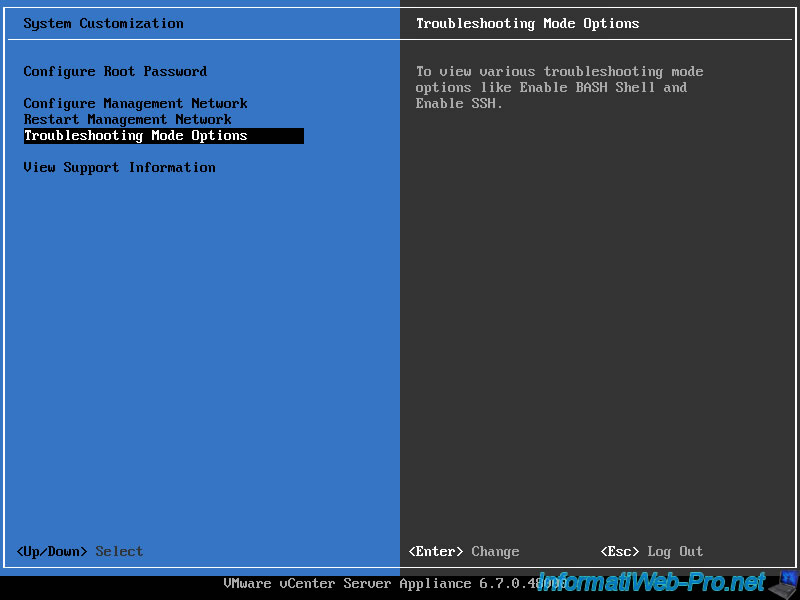
To enable the "BASH" shell, select the "Enable BASH Shell" option and press Enter.
To enable the "SSH" protocol to be able to manage your VCSA VM remotely from the command line, select the "Enable SSH" option and press Enter.
In our case, SSH is already enabled (SSH is Enabled). The option displayed is therefore the opposite one (Disable SSH).
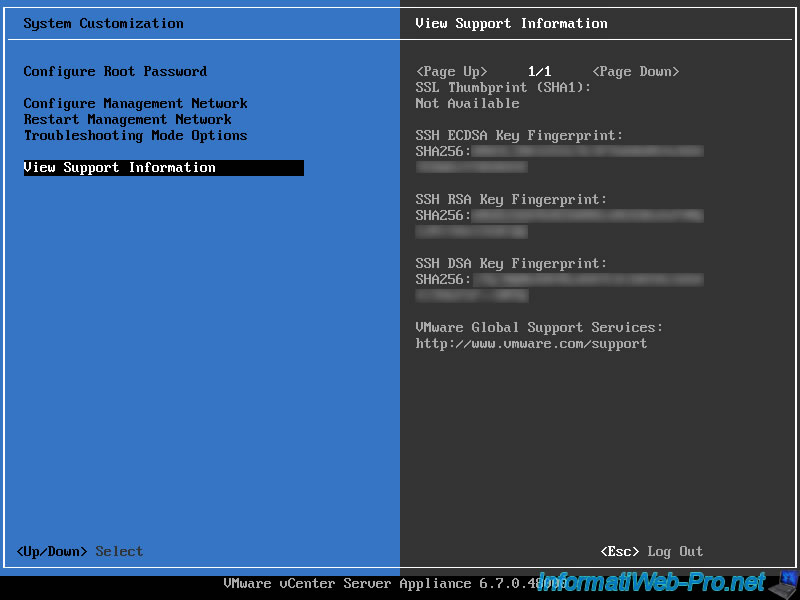
3.5. View Support Information
To obtain system information about SSL fingerprint (SHA1) and SSH key fingerprints, select "View Support Information".
The information available for VCSA is:
- SSH ECDSA Key Fingerprint - SHA256: the SSH ECDSA key fingerprint.
- SSH RSA Key Fingerprint - SHA256: the SSH RSA key fingerprint.
- SSH DSA Key Fingerprint - SHA256: the SSH DSA key fingerprint.
- VMware Global Support Services: VMware support address.
3.6. Shutdown/restart the server (Shut Down/Restart)
From this console, you can shut down or restart this VCSA virtual machine using the "<F12> Shut Down/Restart" option.
Press F12.
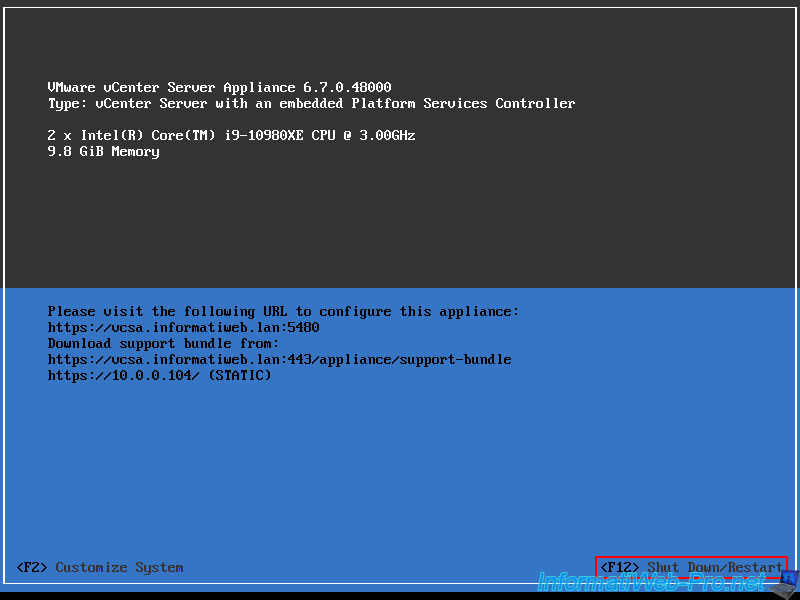
Log in as root.
As noted here, it is best to use remote management software (or in other words the VCSA web interface) to shut down or restart this VCSA virtual machine.

3.7. Access the hidden shell in the VCSA console
By default, you see the blue and gray VCSA console.
But, thanks to a small keyboard shortcut, you will be able to manage this virtual machine from the command line (without using SSH).
To do this, press the "ALT + F2" keys.
A black screen appears and asks you to connect:
Plain Text
VMware vCenter Server Appliance 6.7.0.48000

Type: vCenter Server with an embedded Platform Services Controller

vcsa login:
Log in as root.
Warning : again, the keyboard is configured in QWERTY for this shell. Think about this when you type your password.
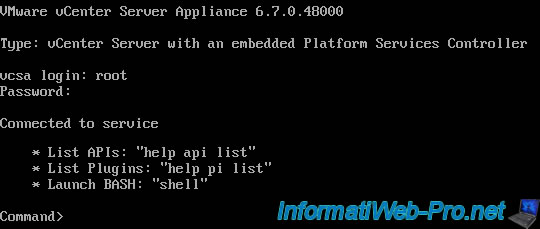
Once logged in, this will display:
Plain Text
Connected to service

    * List APIs: "help api list"
    * List Plugins: "help pi list"
    * Launch BASH: "shell"

Command>
Note that the default shell is that of the Appliance, hence the presence of the "Command>" line.
To use the BASH shell, type "shell" as instructed by this console.
Note: to log out of this shell, type "exit" and press Enter.
The login screen reappears.
To return to the original blue and gray console, press the "ALT + F1" keys.

Share this tutorial
To see also
-
VMware 3/13/2024
VMware ESXi 6.7 - Synchronize the clock of ESXi hosts from a time server (NTP)
-
VMware 3/8/2024
VMware ESXi 6.7 - Synchronize the clock of VCSA from a time server (NTP)
-
VMware 7/31/2024
VMware vSphere 6.7 - Add an Active Directory identity source
-
VMware 5/22/2024
VMware vSphere 6.7 - Change default console
No comment