Migrate VMs via vMotion between different sites using the same subnet (L2) with a vDS on VMware vSphere 6.7
- VMware
- VMware vCenter Server (VCSA), VMware vSphere
- 26 September 2025 at 11:25 UTC
-

- 2/2
2. Enable VMware vSphere vMotion
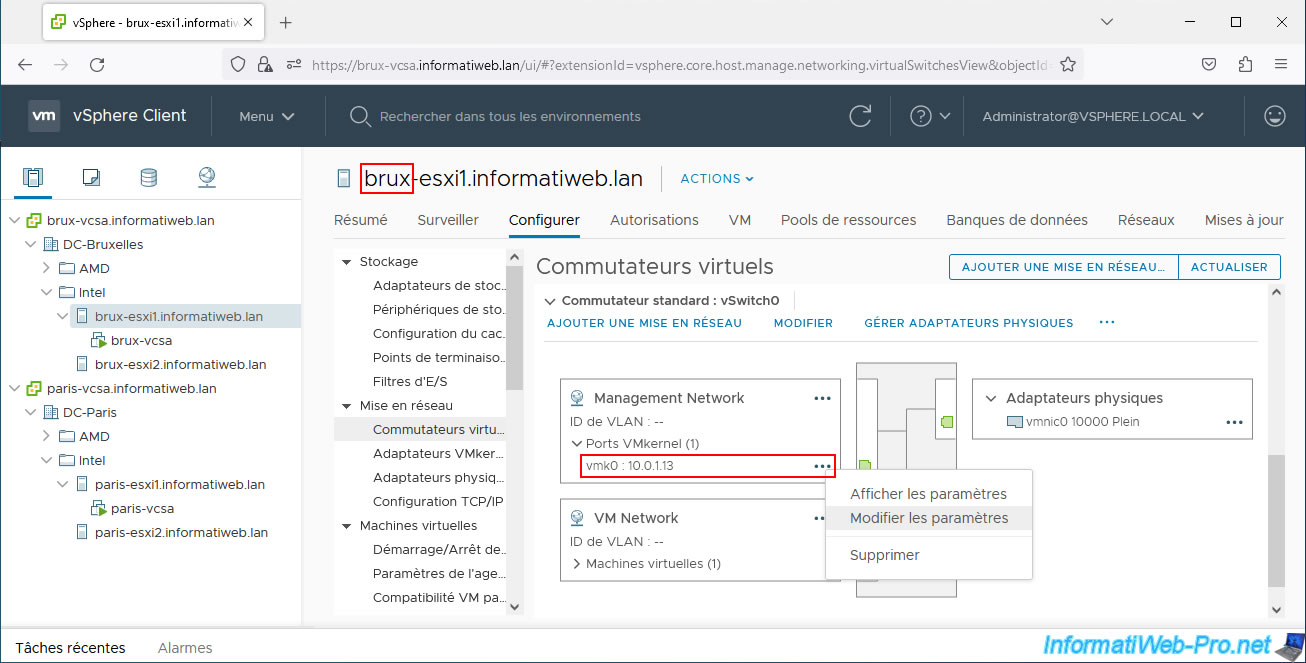
To simplify this tutorial, we will enable the "vMotion" service on the VMkernel port "vmk0" existing by default on all your VMware ESXi hosts and used by default for managing your hosts.
Do this on all hosts of the source site (in our case: Brussels).
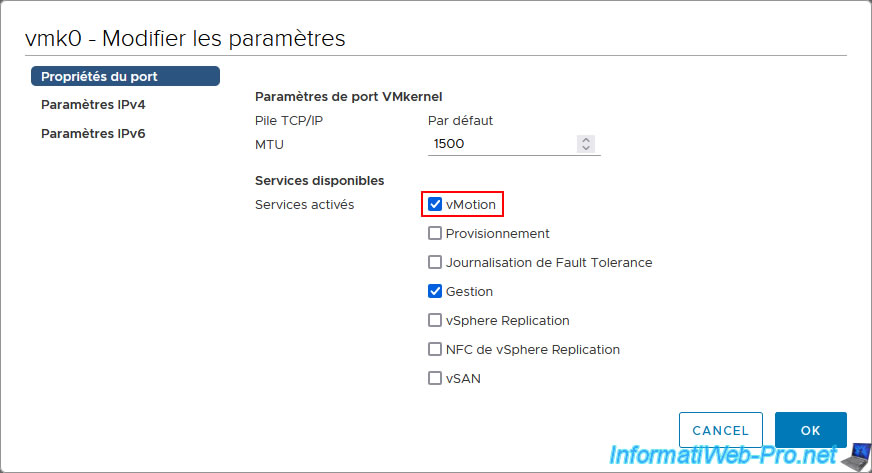
Check the "vMotion" box and click OK.
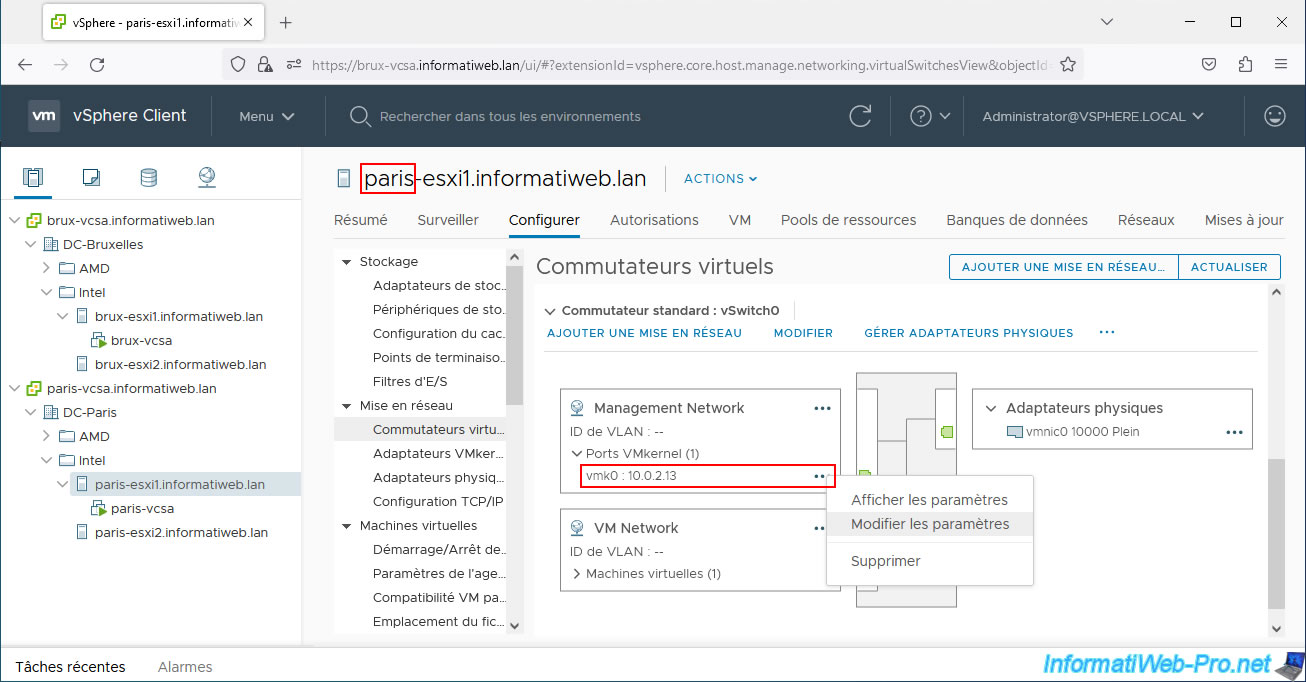
Then, do the same on the hosts of the remote site (in our case: Paris).
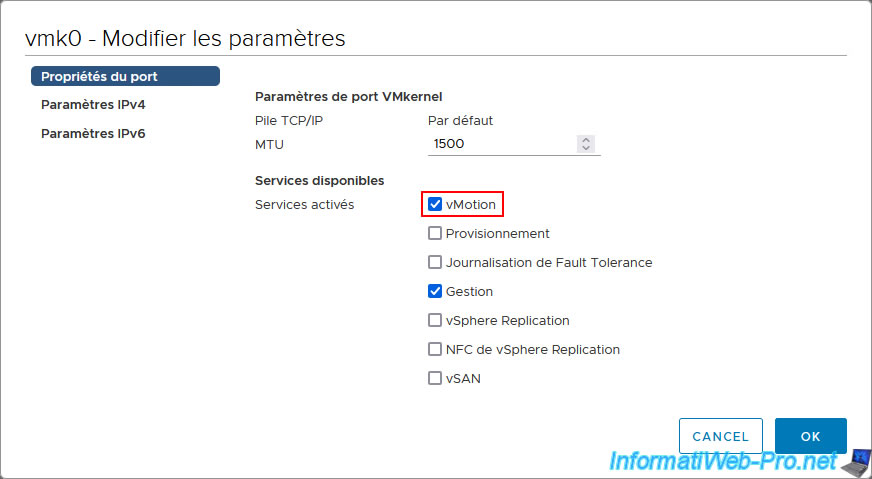
Again, check the "vMotion" box and click OK.
3. Migrate a VM connected to a network with L2 connectivity
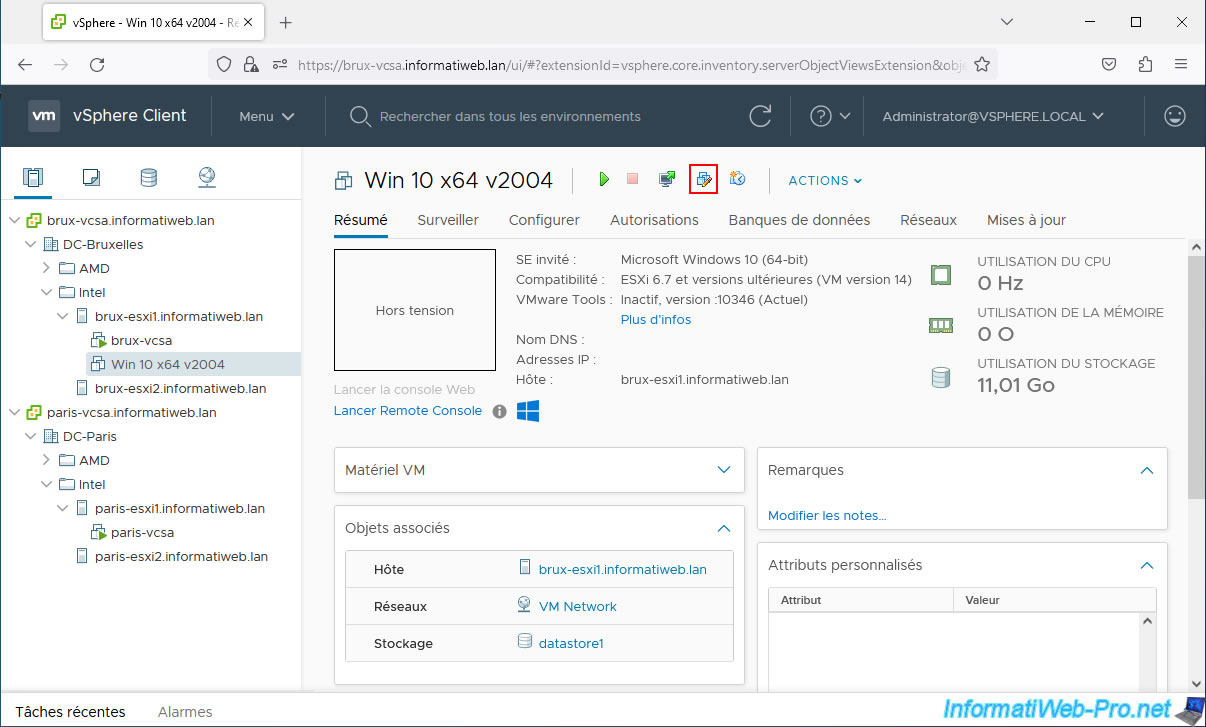
For this tutorial, we created a new virtual machine "Win 10 x64 v2004" which we connected (during its creation) to the default virtual network "VM Network".
Change your virtual machine settings.
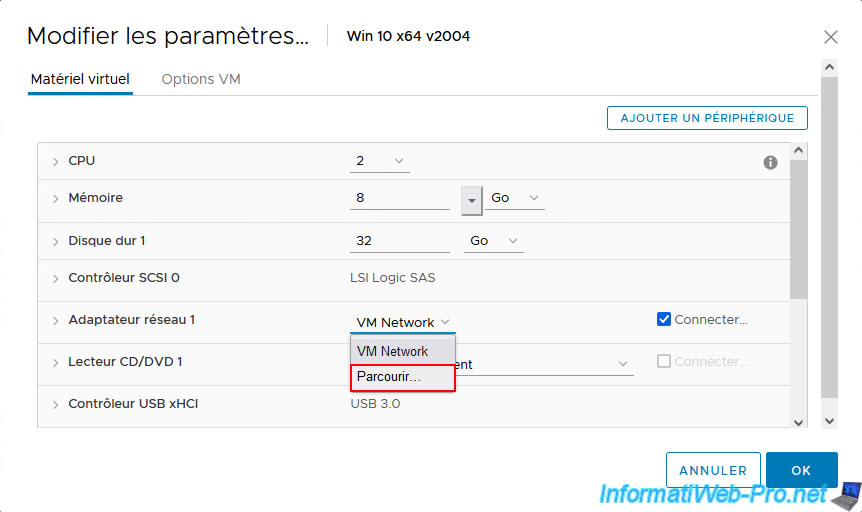
For this virtual machine's network adapter, choose "Browse" from the list that appears.
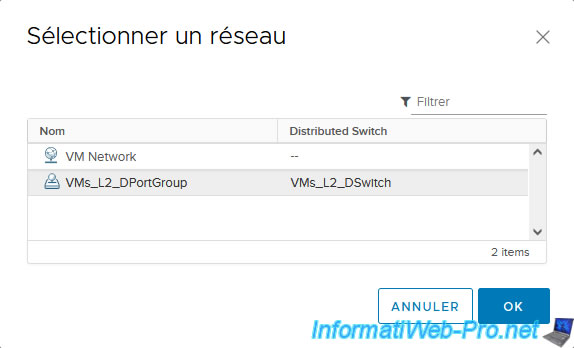
Select your previously created virtual network (port group) "VMs_L2_DPortGroup" on your virtual distributed switch (vDS) "VMs_L2_DSwitch" and click OK.
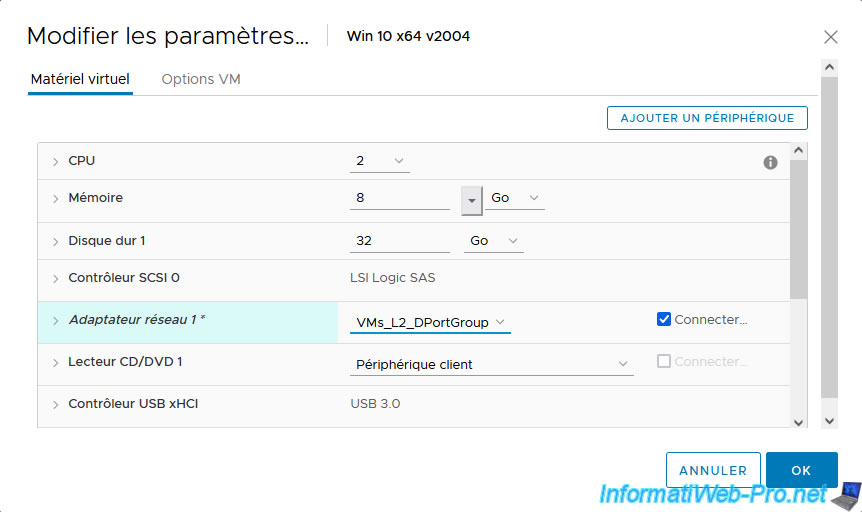
Once your virtual network is selected, click OK.
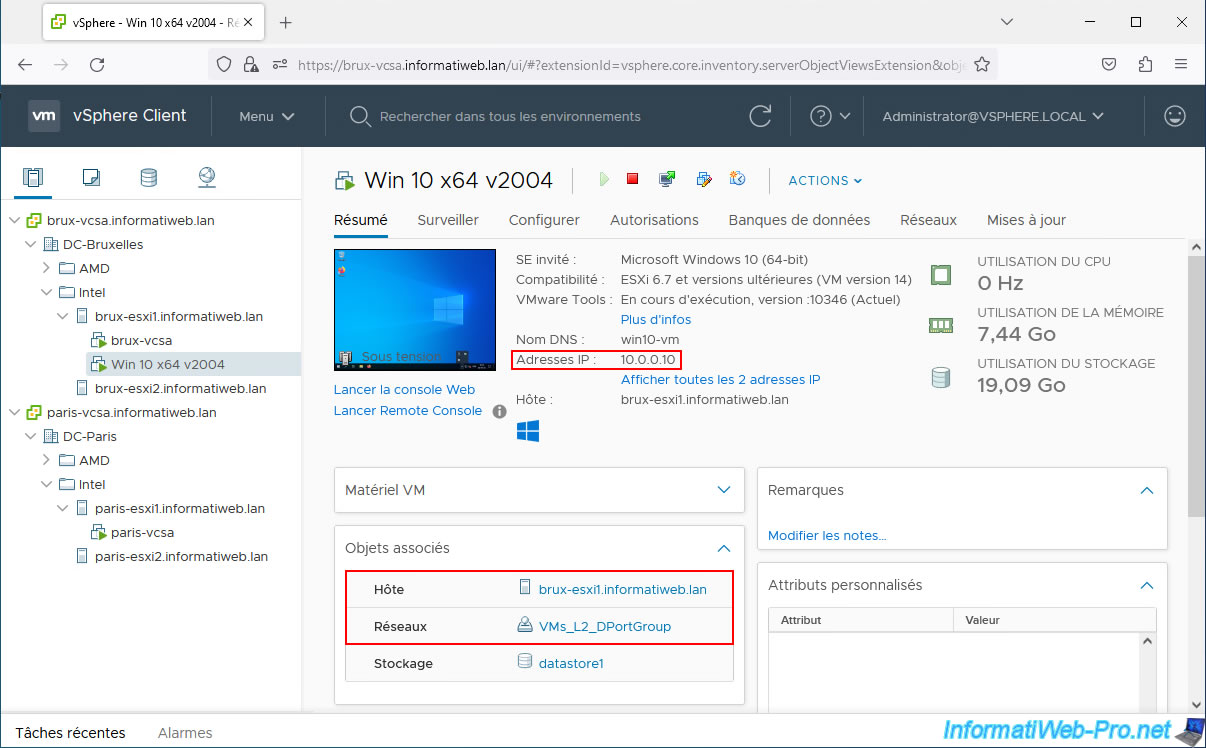
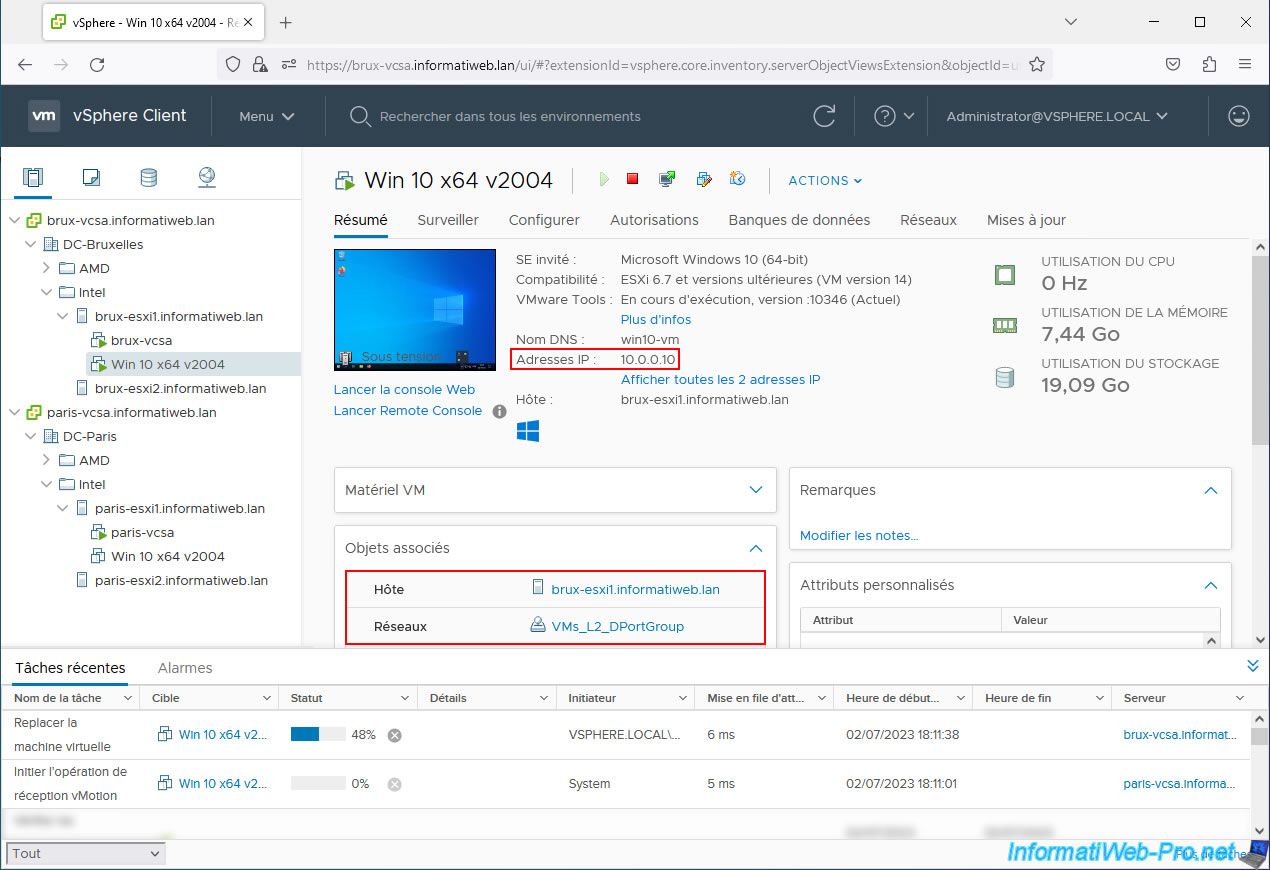
As you can see, at the moment our virtual machine is started:
- has the local IP address "10.0.0.10".
- is located on the host "brux-esxi1" of the physical site of Brussels.
- is connected to the virtual network "VMs_L2_DPortGroup" of our vDS switch in Brussels.
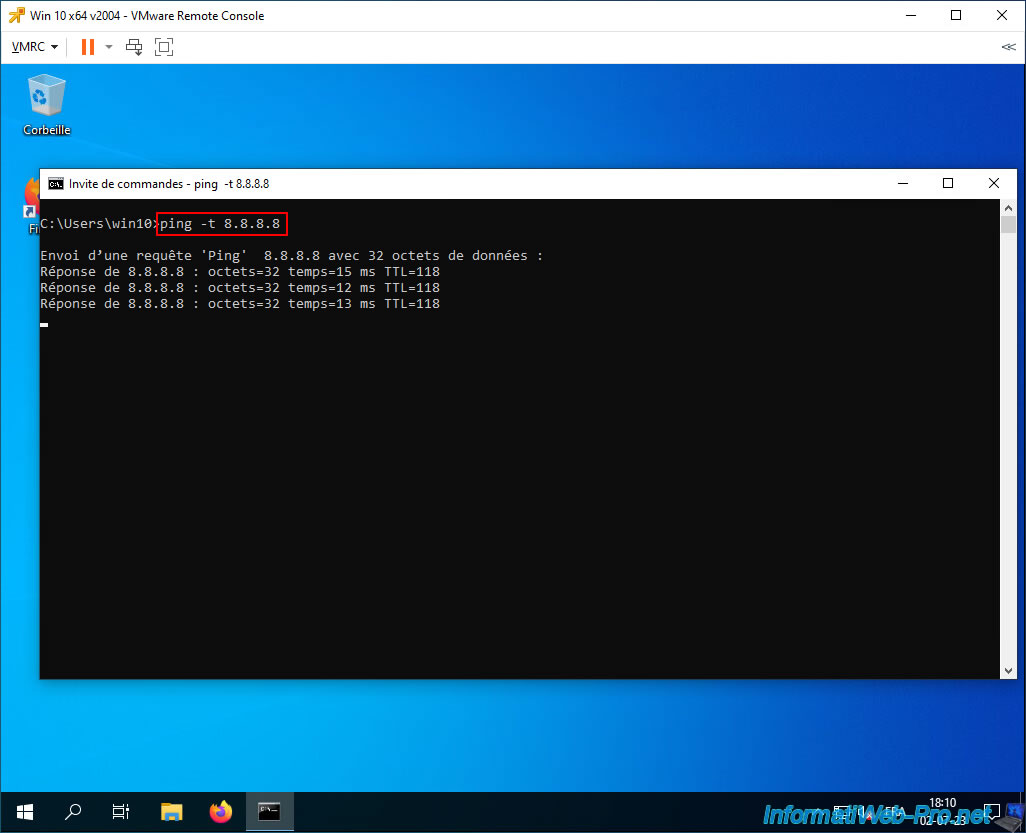
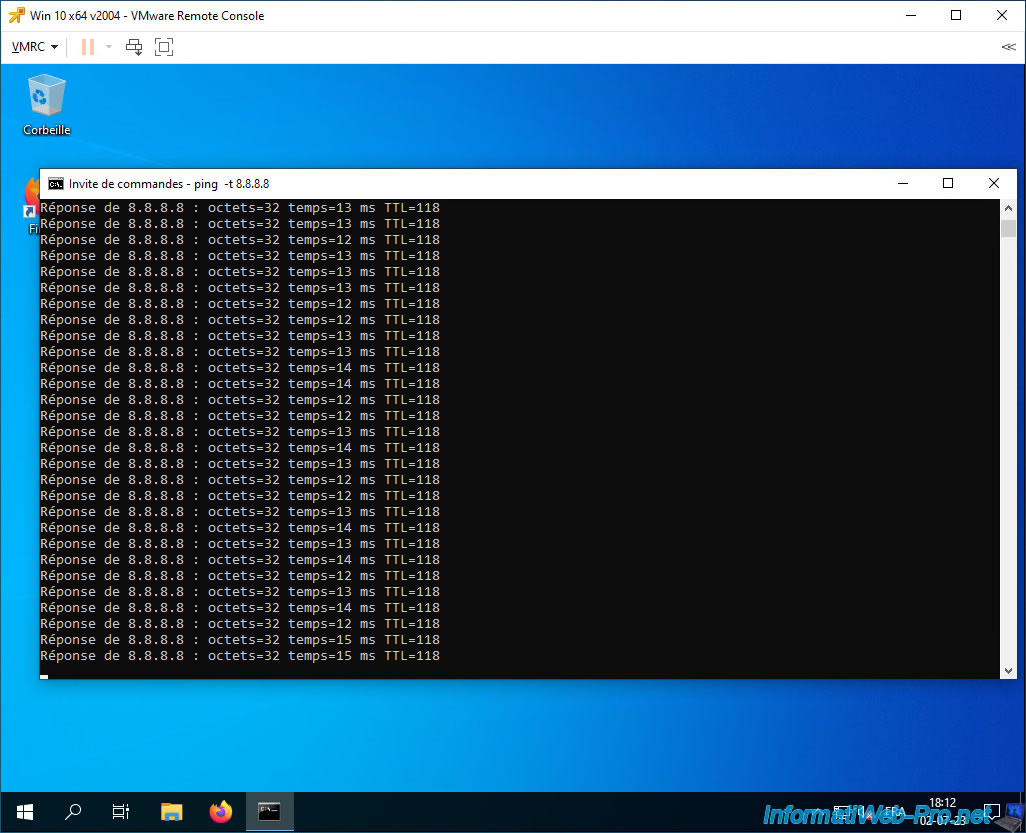
So that you can see that the network access and Internet access of this virtual machine will never be lost, we have launched an infinite "ping" to a server present on the Internet using the "-t" parameter.
Batch
ping -t 8.8.8.8
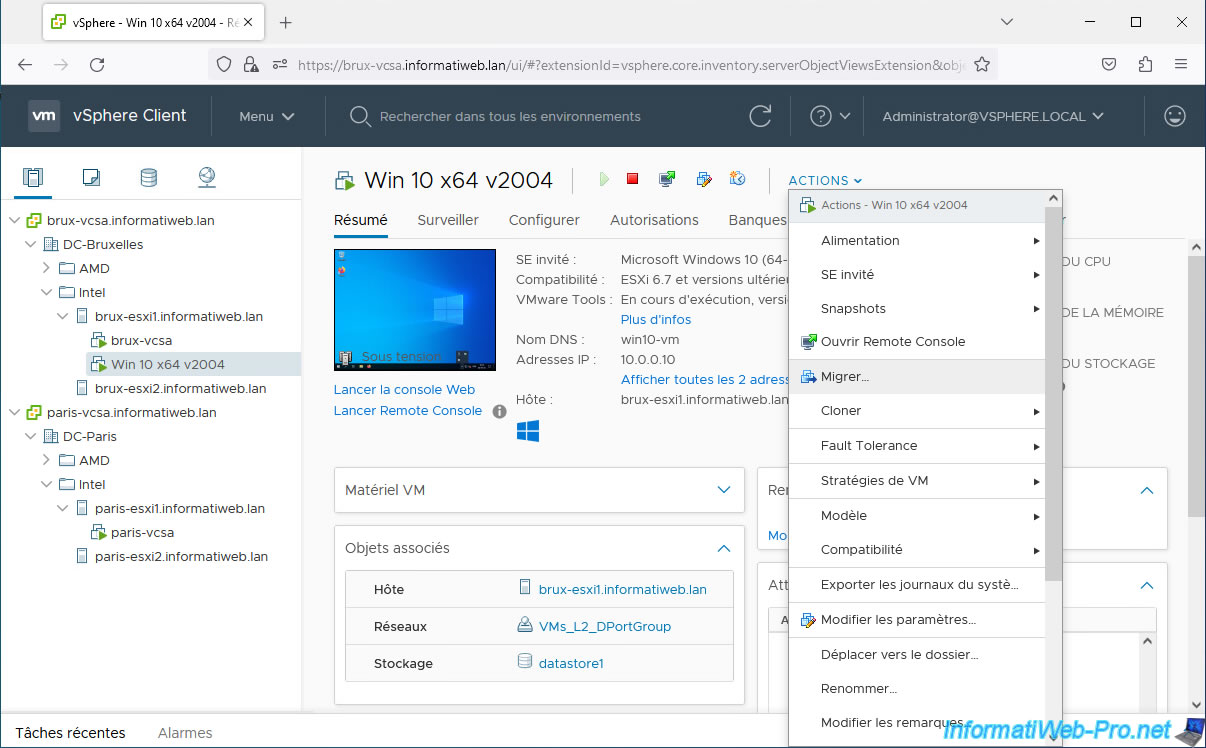
Now that the "ping" command is launched in the virtual machine, go to: Actions -> Migrate.
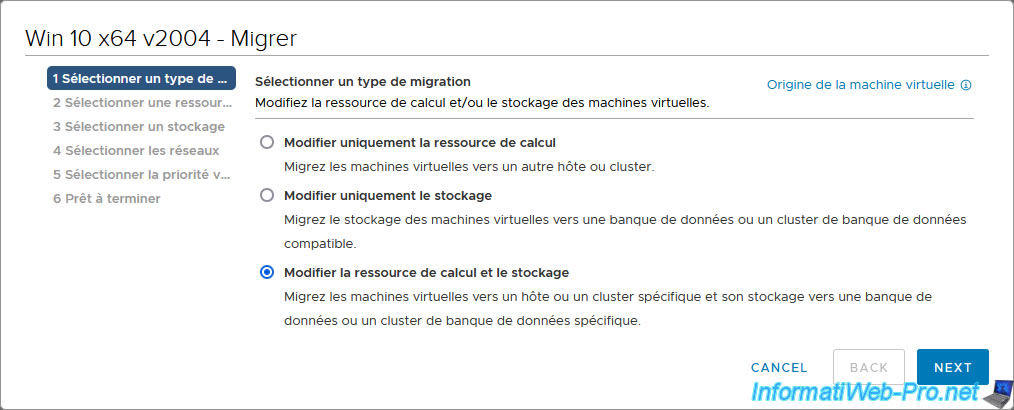
Select "Change both compute resource and storage" to migrate this VM's execution and its files.
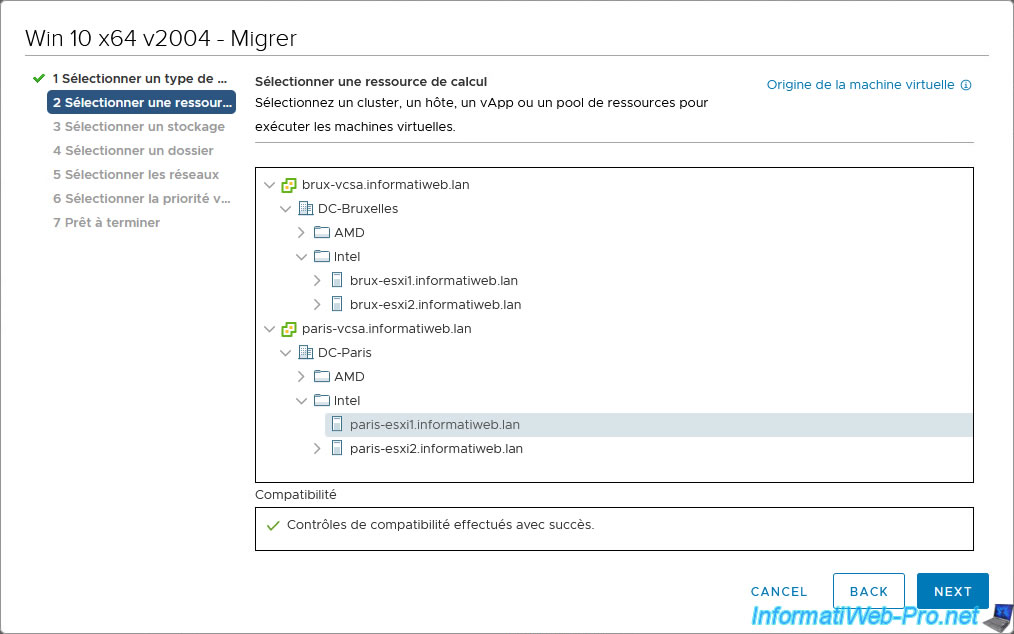
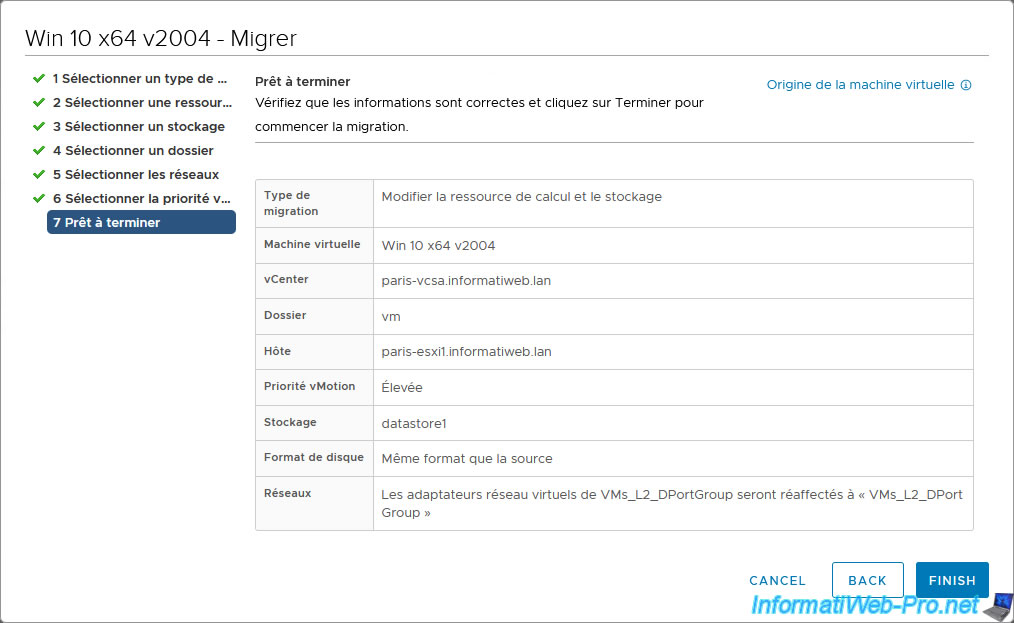
Select a VMware ESXi host located on the remote site (in our case, the "paris-esxi1" host from Paris).
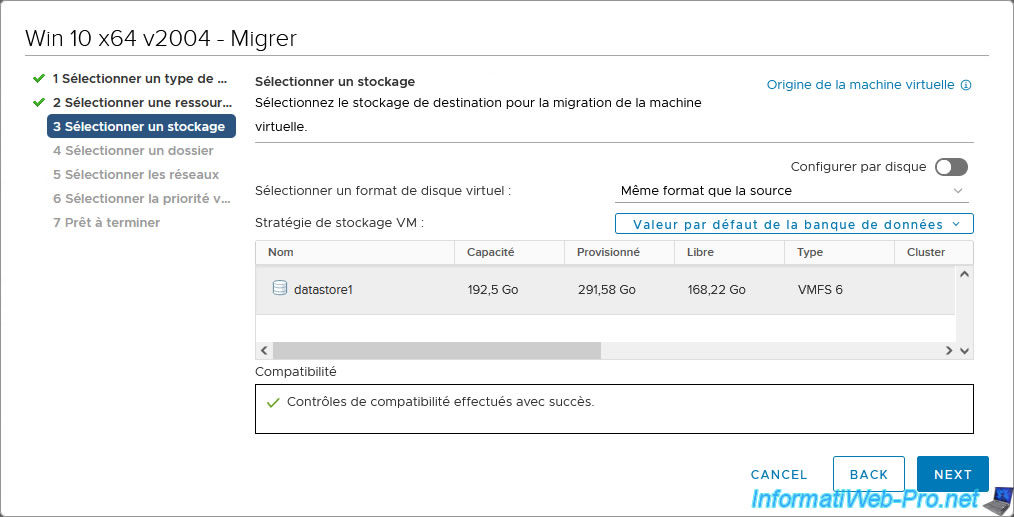
Select the datastore where you want to store this VM on the remote host.
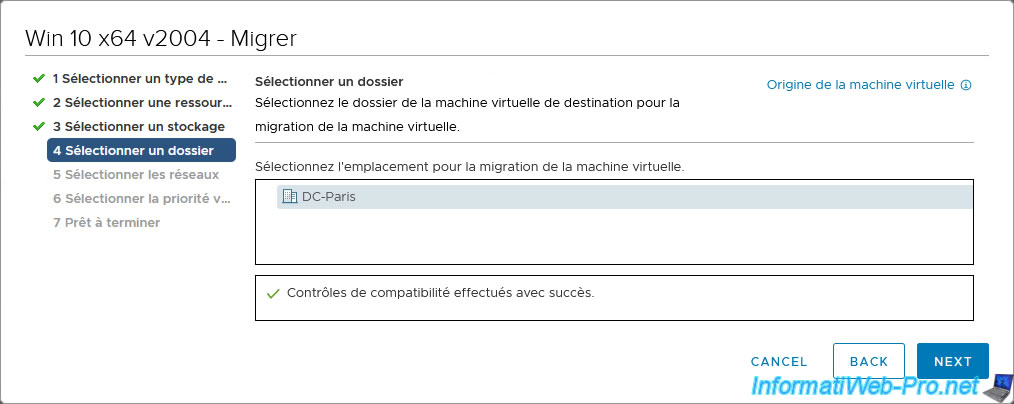
Select the data center and/or remote site folder where you want to move this virtual machine.
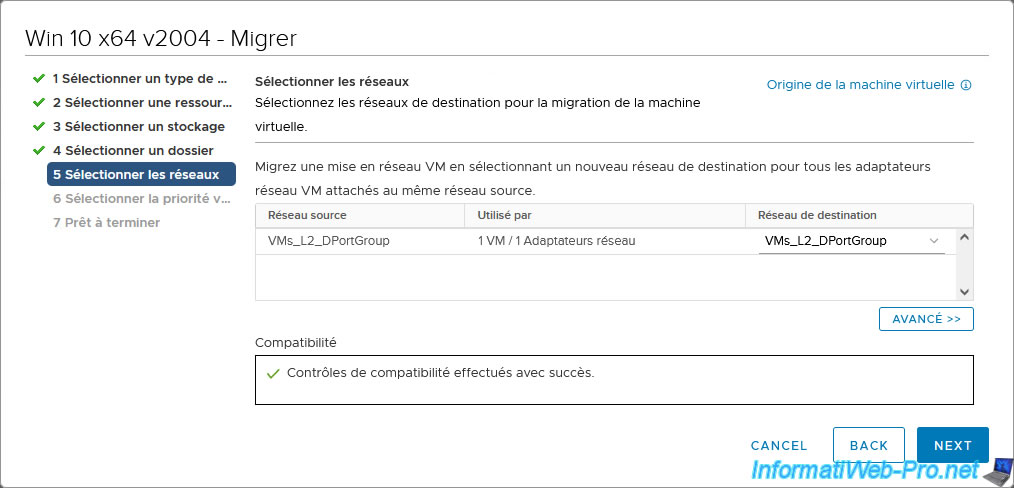
Select the destination network (which in this case will be the same as the source network).
Namely: VMs_L2_DPortGroup.
Note that no warning appears. Unlike using standard virtual switches (vSS) where a warning appeared here regarding networks that could be different on the source and destination host.
The priority for vMotion does not matter, so select the option you want.
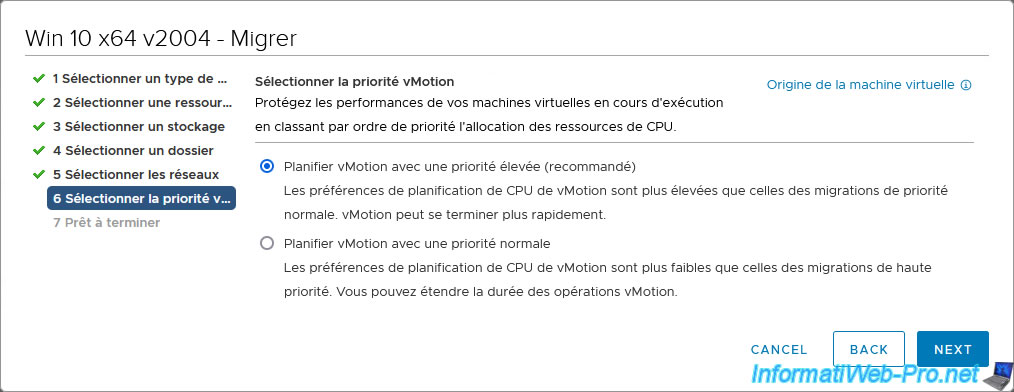
Click "Finish" to start migrating your virtual machine.
The migration of our virtual machine currently located in Brussels begins.
In the virtual machine, the "ping" continues to work.
The VM migration continues and the "Initiate vMotion receive operation" task is reaching around 50%.
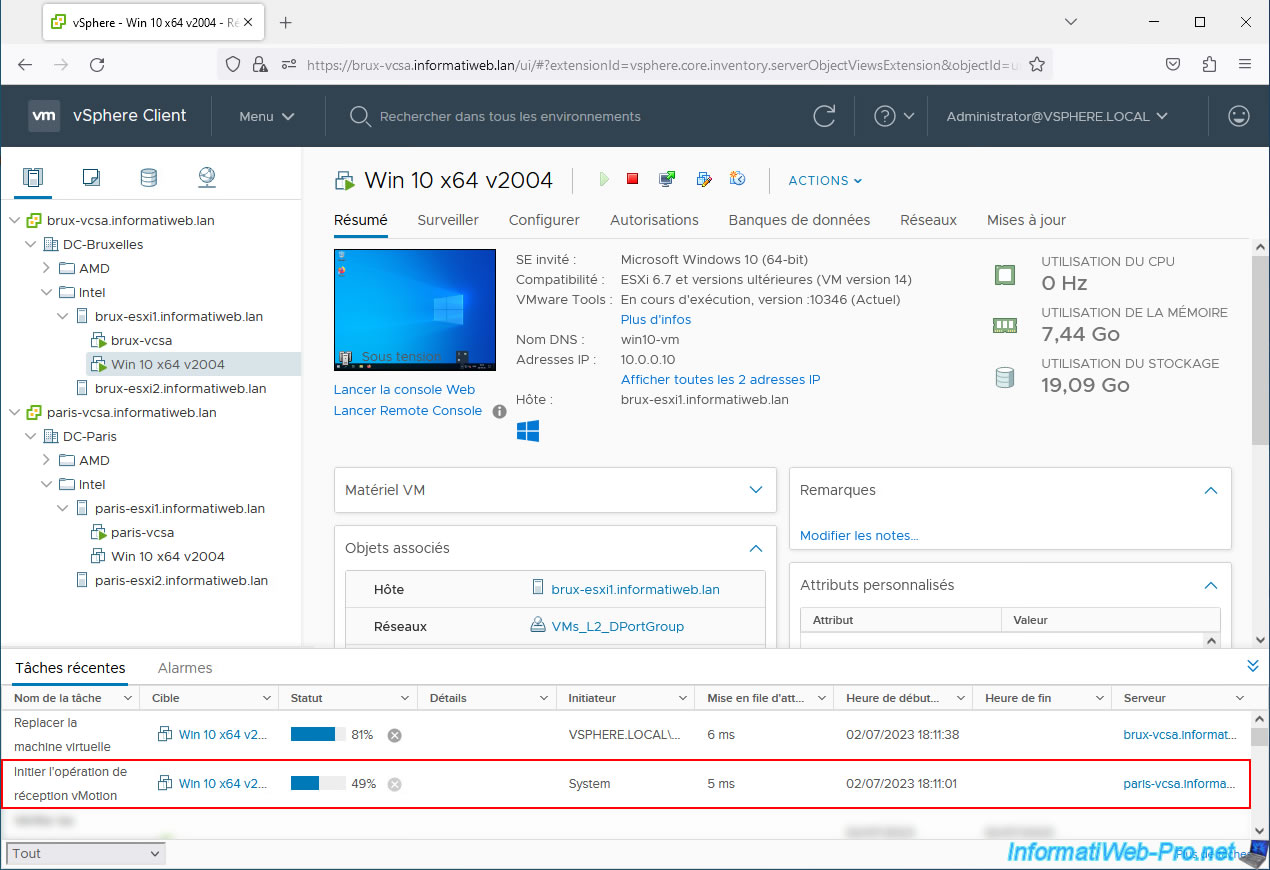
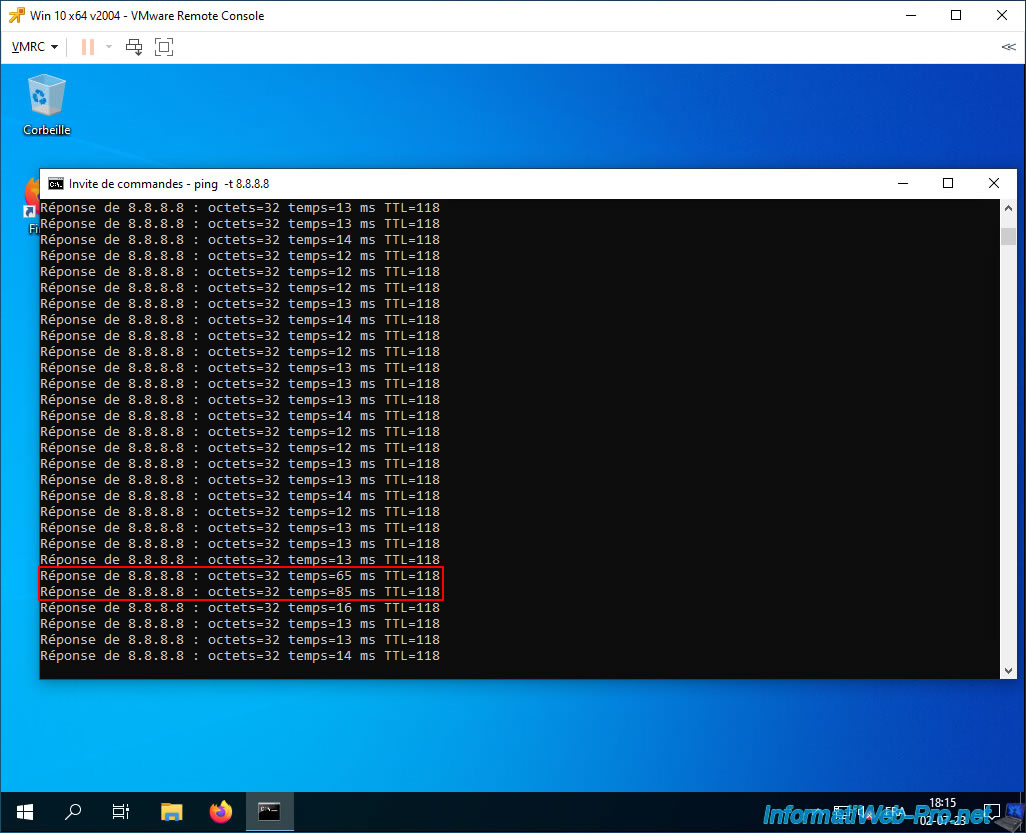
About halfway through the "Initiate vMotion receive operation" task, a small latency may appear briefly.
However, your virtual machine continues to access the network and the Internet normally.
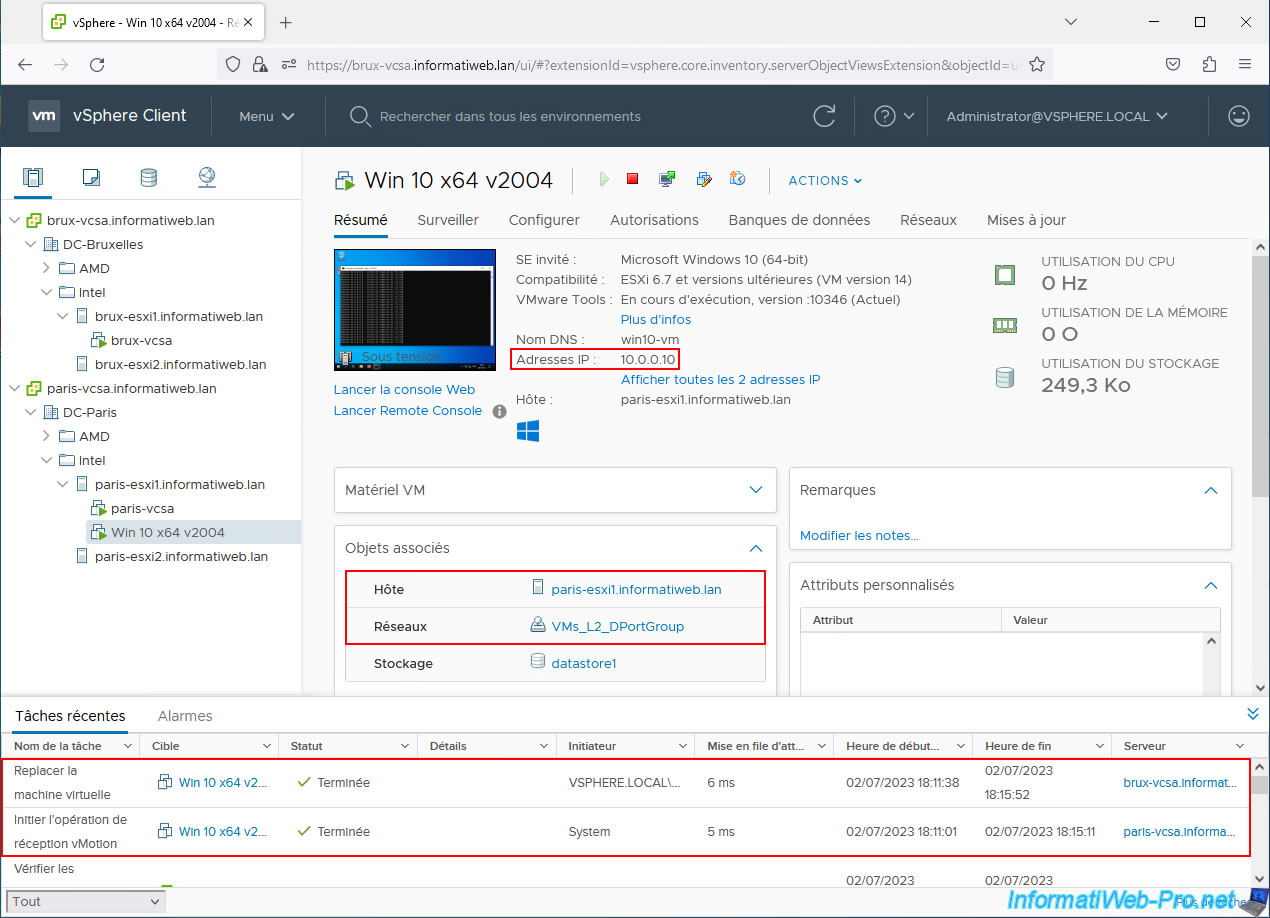
Once the virtual machine migration is complete, you will see that the virtual machine still has the same IP address (in our case: 10.0.0.10).
Although this virtual machine is now in Paris (on our host "paris-esxi1") and is connected to the virtual network "VMs_L2_DPortGroup" (but from the vDS switch of the Paris site).
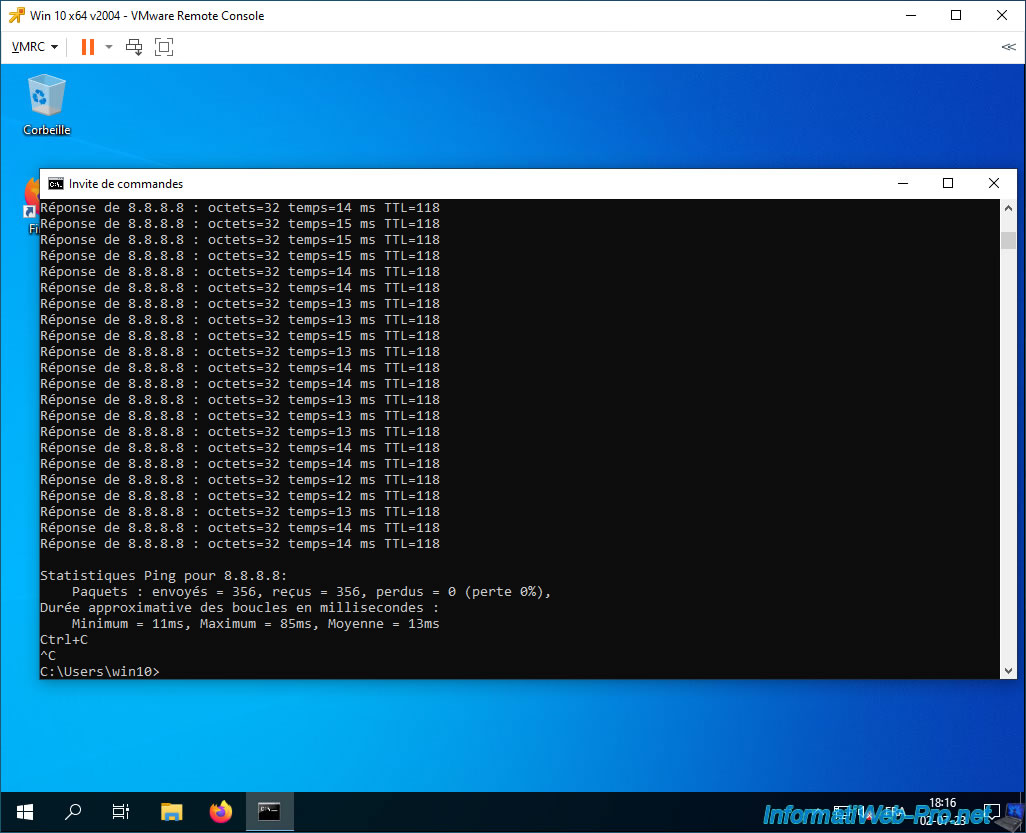
Despite the migration of this virtual machine from Brussels to Paris, you can see that it never lost access to the network or the Internet.
Note: to view statistics and stop this "ping" command, press the "CTRL + C" keys.
Share this tutorial
To see also
-
VMware 5/26/2023
VMware ESXi 6.7 - Virtualize Windows XP
-
VMware 7/29/2022
VMware ESXi 7.0 / 6.7 - Create a NFS datastore
-
VMware 4/3/2024
VMware vSphere 6.7 - Customize guest OS (Windows and Linux) automatically
-

VMware 12/25/2024
VMware vSphere 6.7 - Virtual Distributed Switches (vDS)

No comment