Migrate VMs via vMotion accross datacenters on VMware vSphere 6.7
- VMware
- VMware vCenter Server (VCSA), VMware vSphere
- 27 November 2024 at 13:43 UTC
-

- 2/2
4. Migrate a virtual machine between 2 data centers
With vMotion, you can hot or cold migrate virtual machines, even if they are in different data centers.
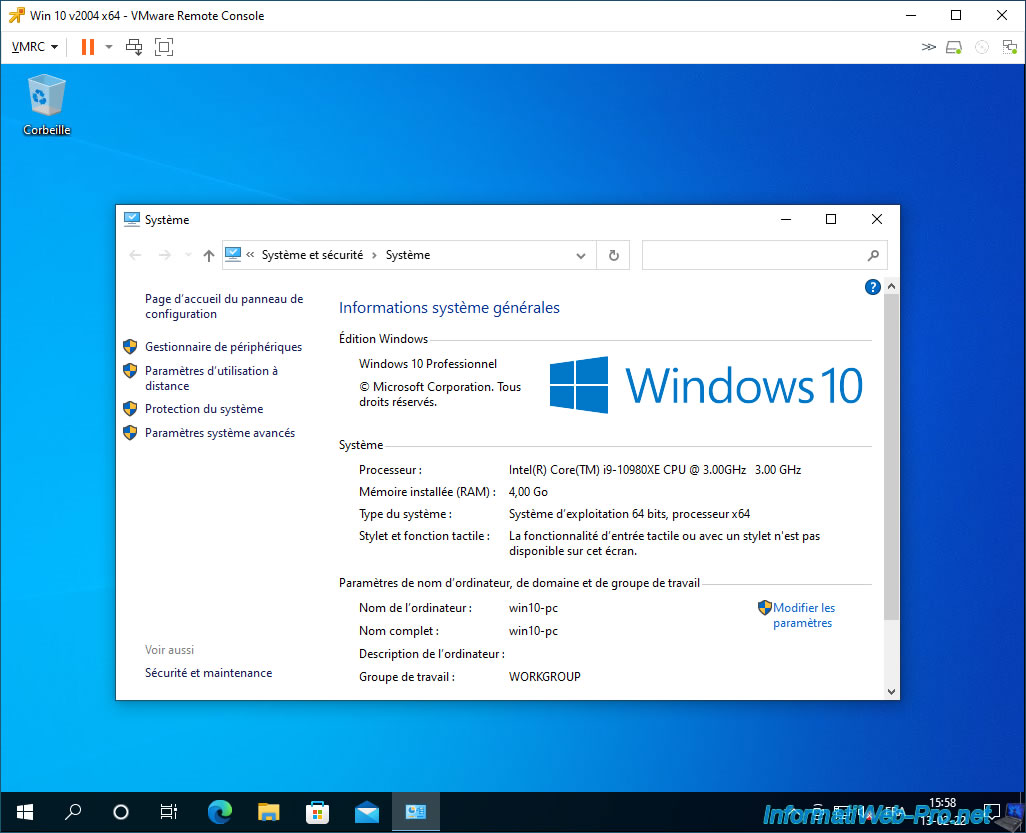
As you can see, our "Win 10 v2004 x64" virtual machine is currently powered on and a window is currently open in it.
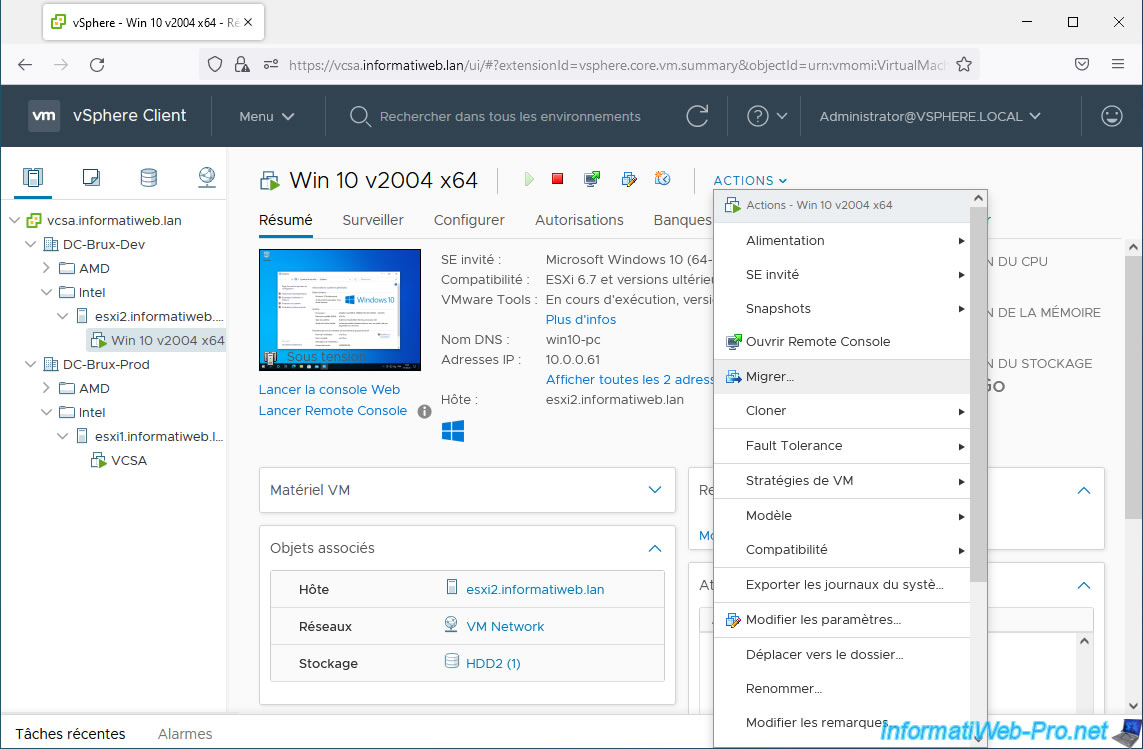
To migrate a virtual machine, select it and click: Actions -> Migrate.
Note: in our case, we are going to migrate our "Win 10 v2004 x64" virtual machine from the "DC-Brux-Dev" data center to the "DC-Brux-Prod" data center.
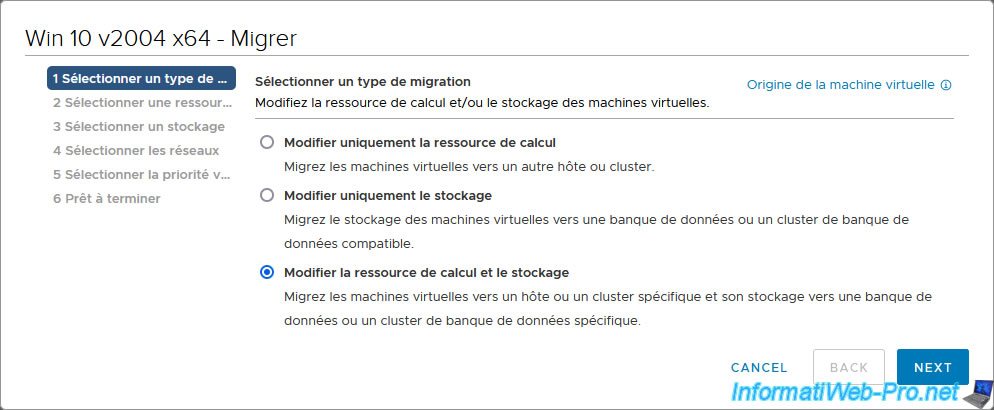
In the "[virtual machine name - Migrate]" window, select "Change both compute resource and storage" to move the execution (RAM) of the virtual machine, as well as its files.
Note: for more information regarding the different options of the migration assistant, refer again to our vMotion tutorial.
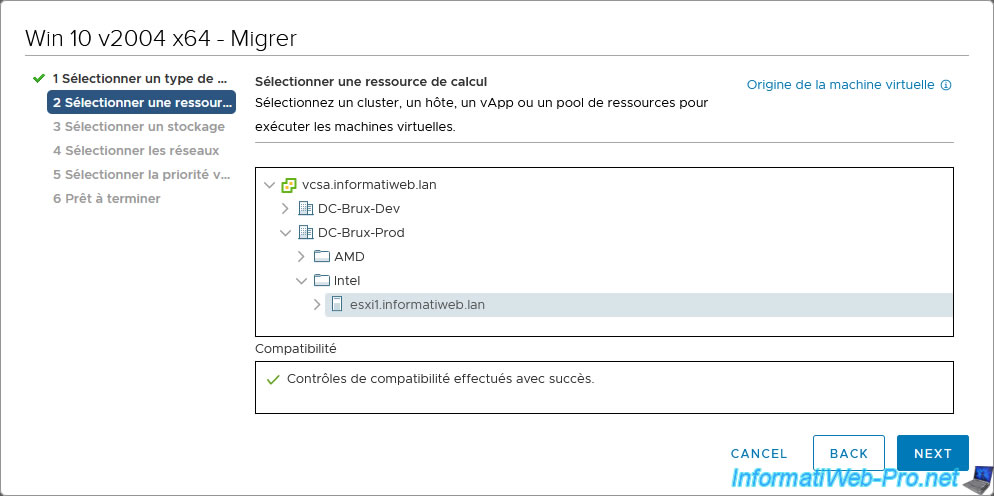
Select the remote host that is in another data center.
Select the remote host datastore where you want to store this virtual machine.
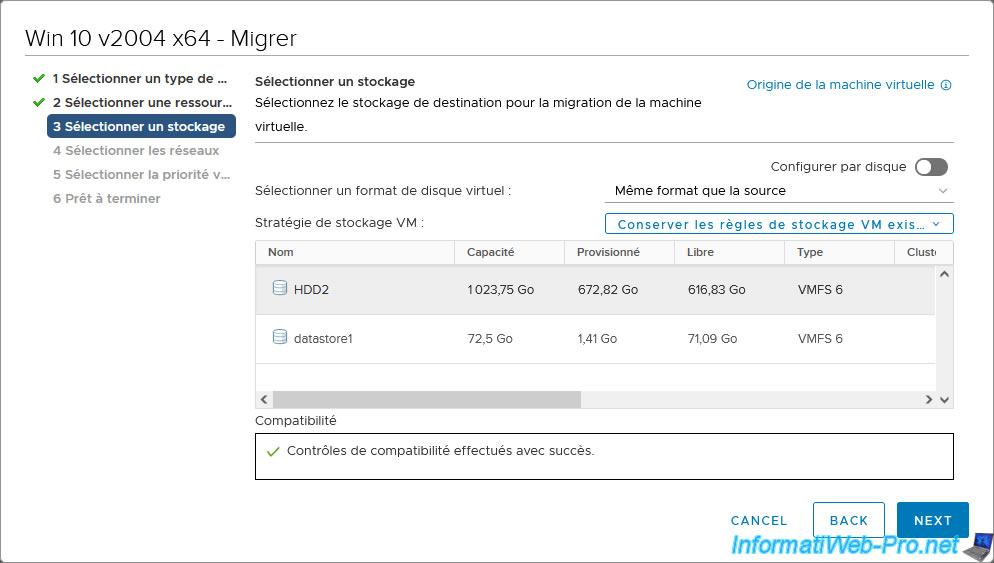
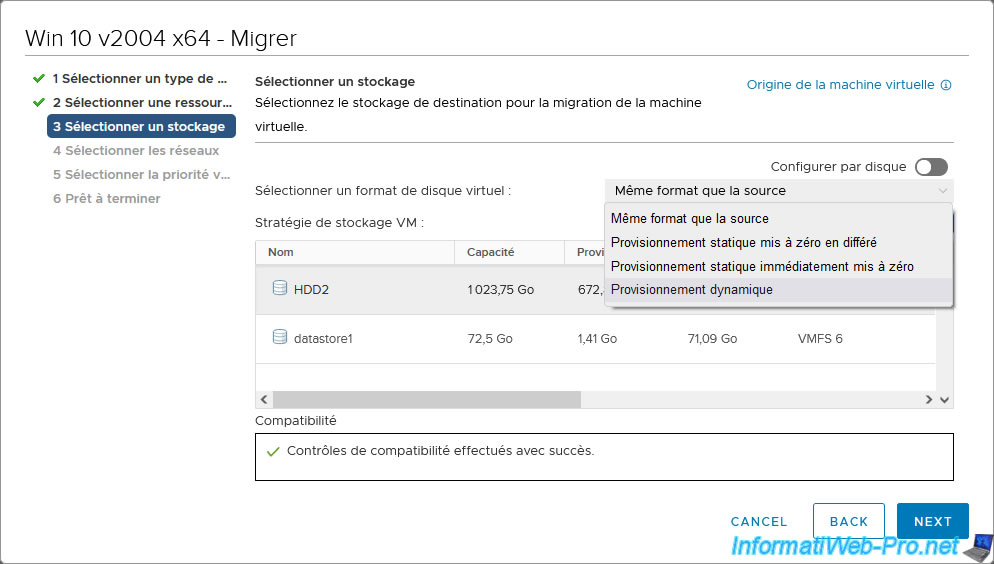
Note that it is possible to change the virtual disk format if you wish.
By default, the same format (thick or thin provision) will be used.
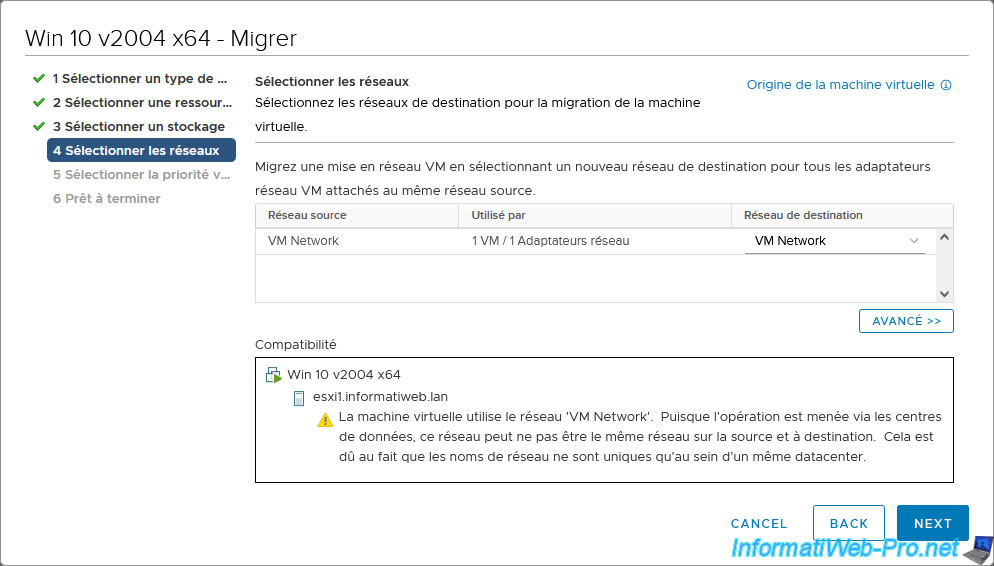
Select the virtual network to which this virtual machine should be connected.
In our case, we have a virtual network "VM Network" whose name is identical in the 2 data centers.
However, as the VMware vCenter Server migration wizard tells you, virtual networks are considered unique only within a single data center.
Plain Text
The virtual machine uses network 'VM Network'. Since the operation is being conducted across datacenters, this network may not be the same network on the source and destination. This is because network names are only unique within a datacenter.
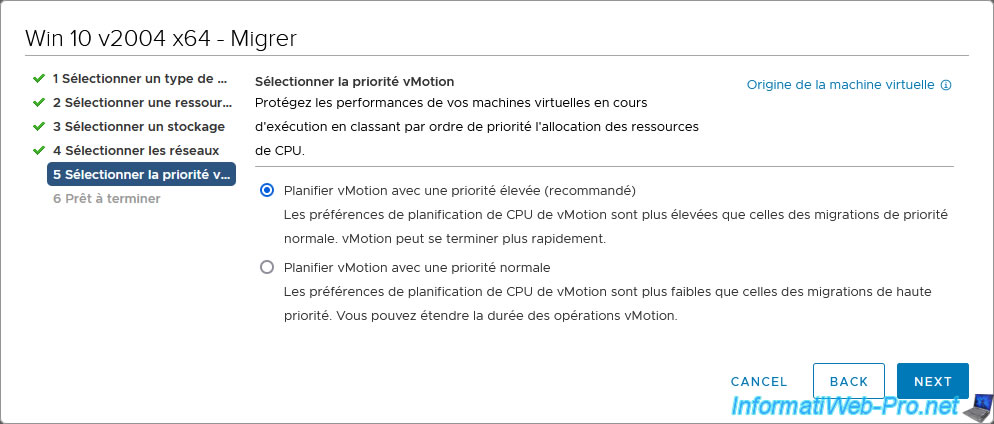
For vMotion priority, you can choose any option.
Indeed, the "Schedule vMotion with high priority (recommended)" option allows you to prioritize this vMotion migration over other migrations that are potentially already in progress at the moment.
However, if no migration is currently in progress, choosing either option here will not change anything. In both cases, the vMotion migration will begin directly at the end of this wizard.
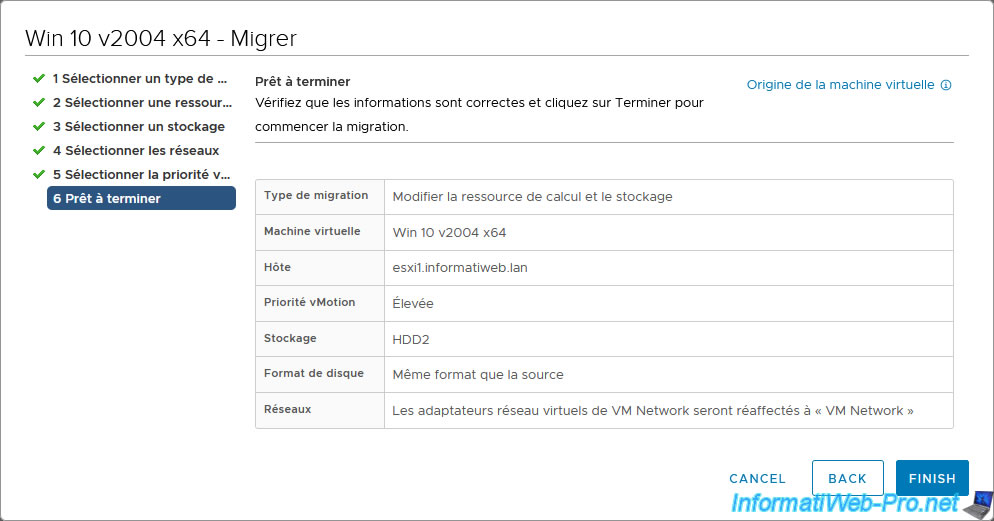
A summary of the configuration of this vMotion migration appears.
Click "Finish" to start the vMotion migration of this virtual machine.
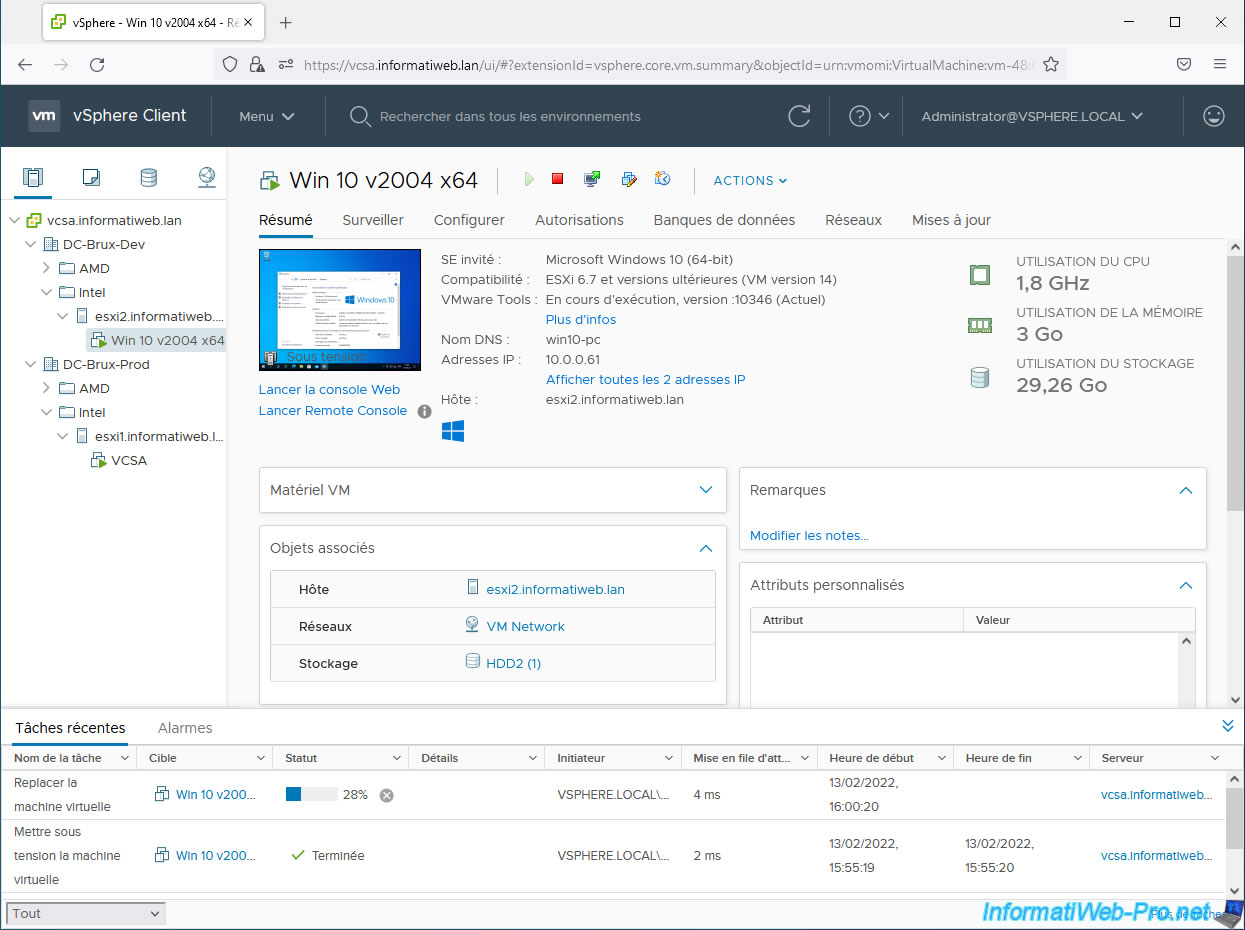
Once the virtual machine migration has started, you will see a "Replace virtual machine" task appear at the bottom of the window.
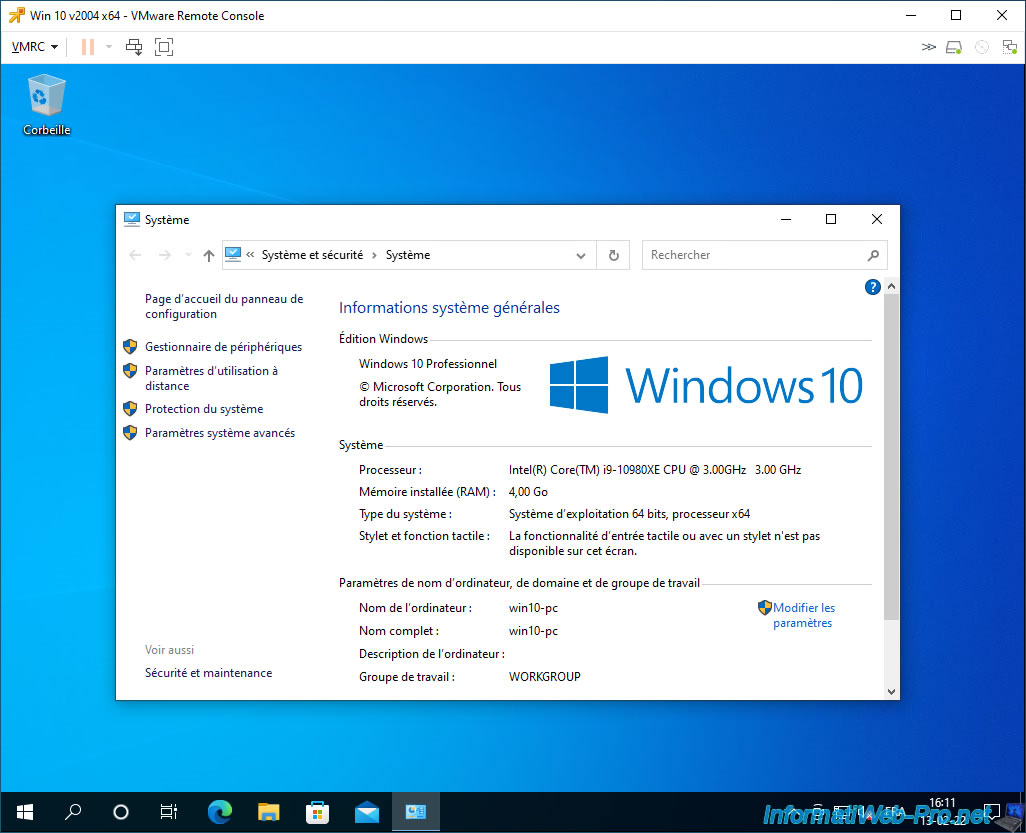
As you can see, your virtual machine will remain usable even while it is being migrated. This makes it possible to migrate virtual machines from one host to another without making it inaccessible for a certain time.
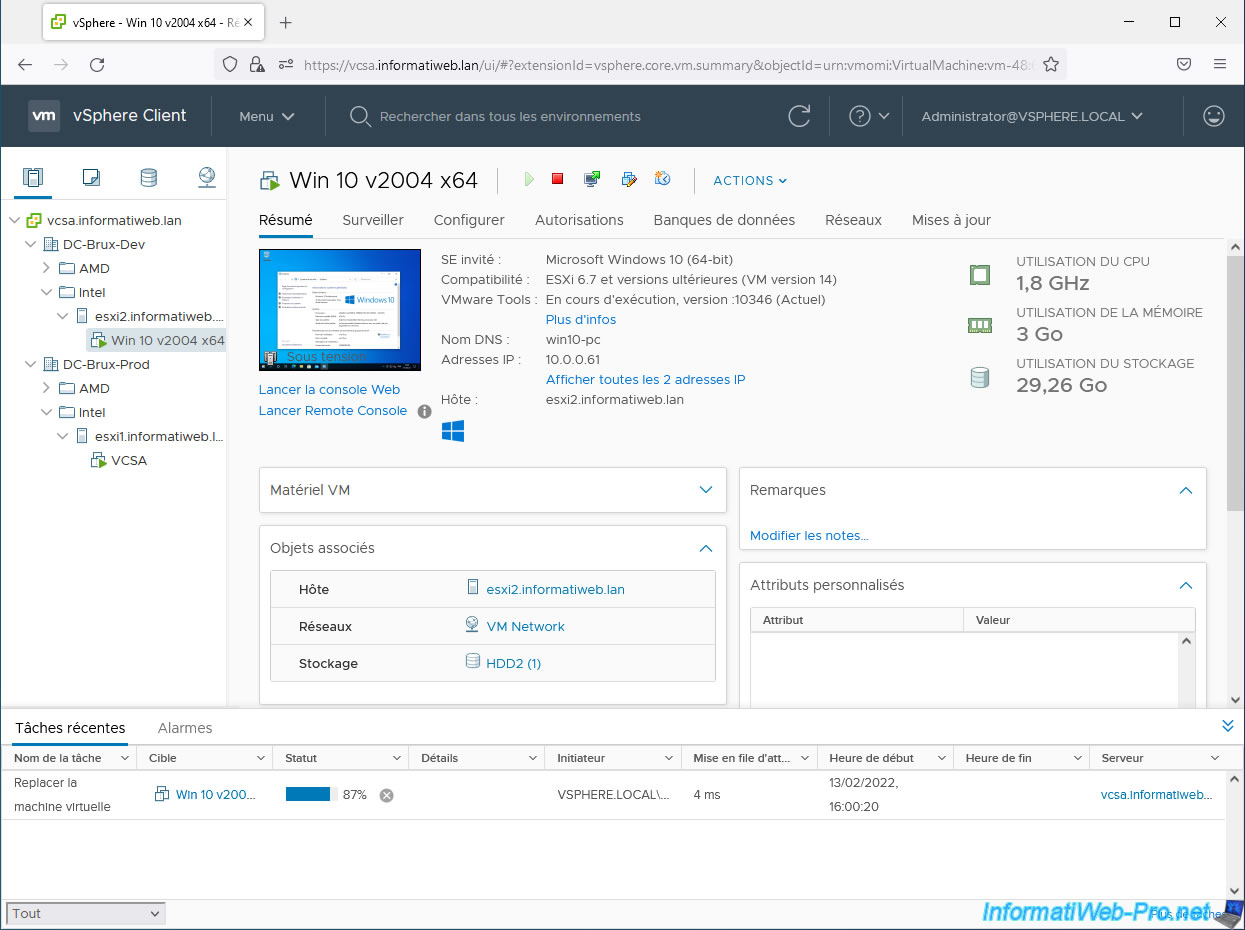
The migration continues.
Once the migration is complete, you will see that the virtual machine is now on the destination host.
In our case, this was migrated from host "esxi2" (which is located in the "DC-Brux-Dev" data center) to host "esxi1" (which is located in the data center "DC-Brux-Prod").
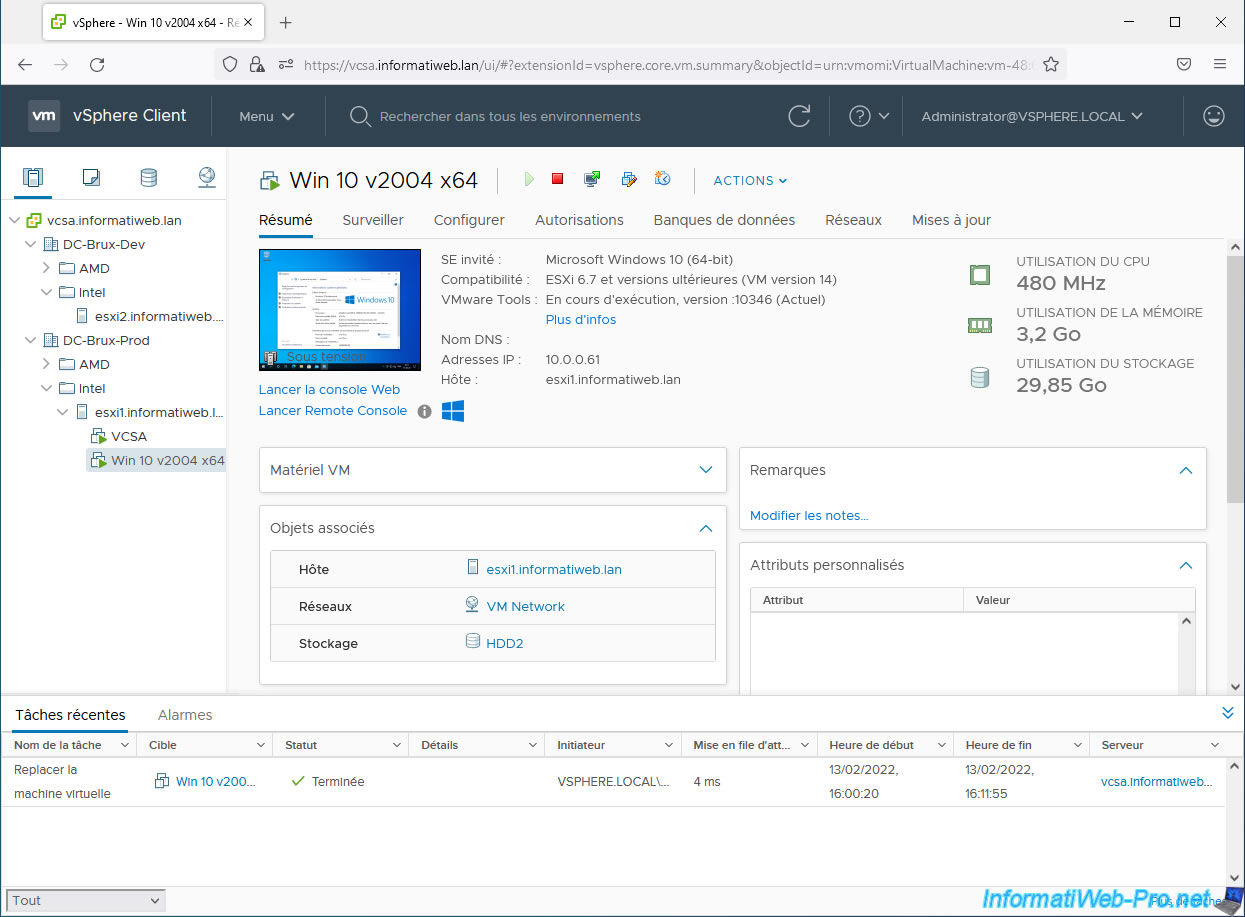
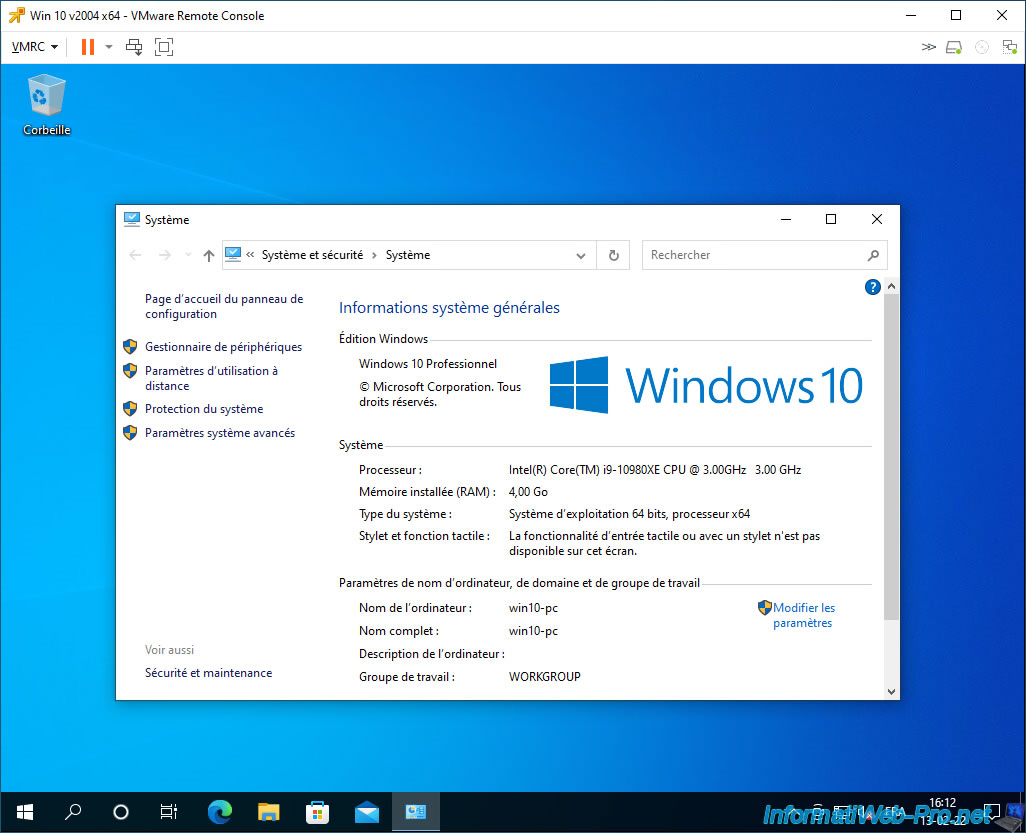
As expected, despite the migration of this virtual machine, its state was preserved.
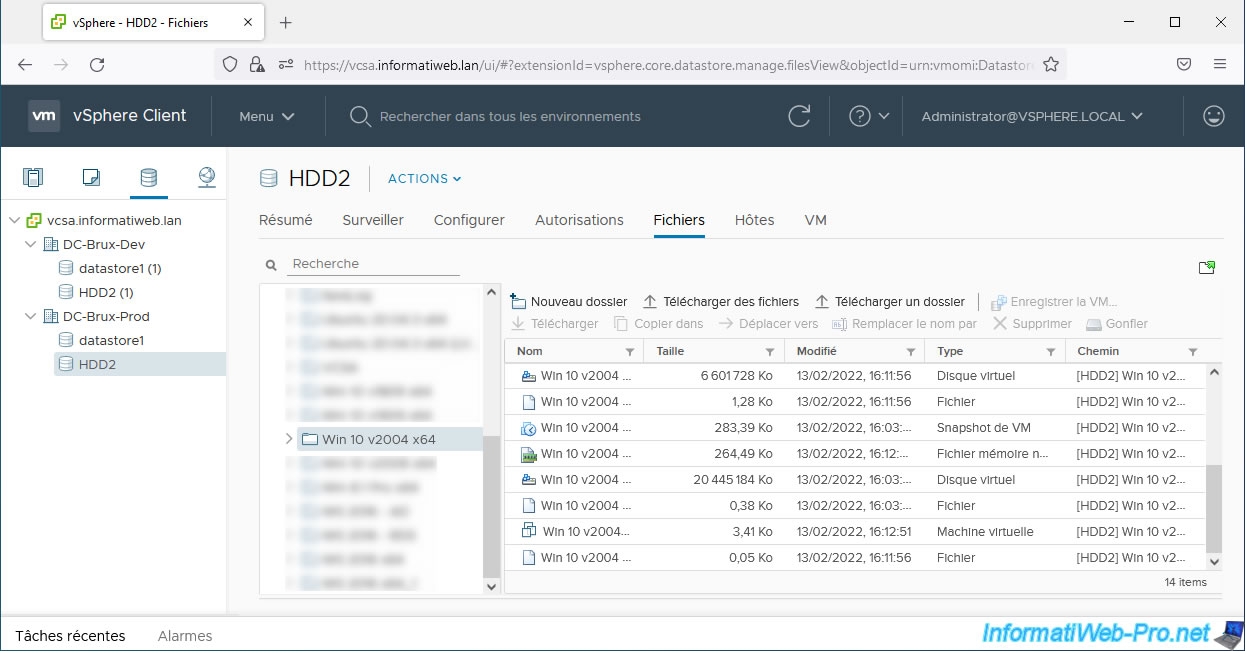
As expected, the files comprising this virtual machine were also migrated to the desired datastore on the destination VMware ESXi host.
Share this tutorial
To see also
-
VMware 7/8/2022
VMware ESXi 7.0 / 6.7 - Create a bootable USB key to install VMware ESXi 6.7
-
VMware 5/22/2024
VMware vSphere 6.7 - Change default console
-
VMware 2/12/2025
VMware vSphere 6.7 - Create a datastores cluster and enable SDRS
-
VMware 3/12/2025
VMware vSphere 6.7 - Enable VMCP on a VM in a cluster

No comment