Migrate virtual machines (VMs) via vMotion on VMware vSphere 6.7
- VMware
- 08 November 2024 at 12:24 UTC
-

- 3/4

4.4. Dedicated virtual switch topology for vSphere vMotion on VMware vCenter Server (VCSA)
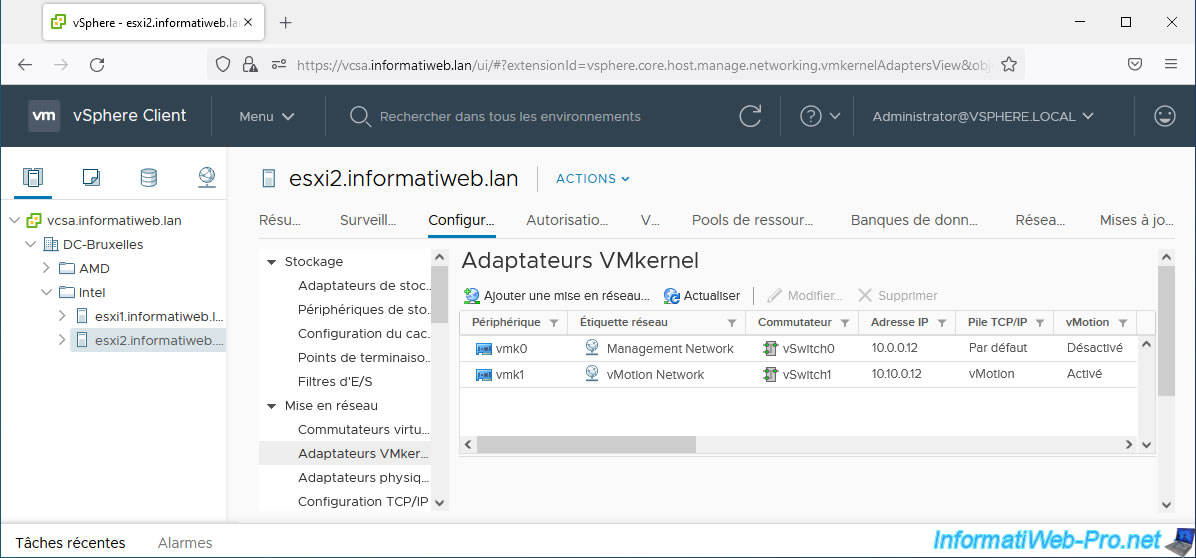
To see the different virtual switches present on your VMware ESXi host, go to: Configure -> Networking -> Virtual switches.
As you can see, you have a standard switch "vSwitch0" which is used by the VMware ESXi "vmk0" management interface, as well as your virtual machines.
Traffic from this virtual switch vSwitch0 goes through the physical network adapter: vmnic0.

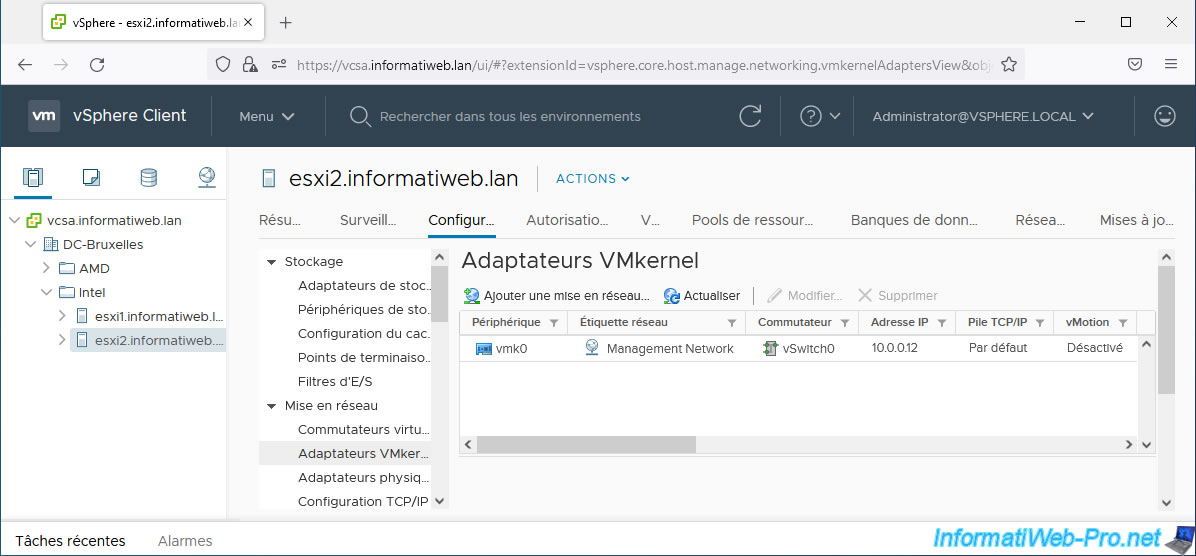
If you scroll down a little on this page you will also find your new standard switch "vSwitch1" which will be used by vMotion via the VMkernel interface "vmk1" of VMware ESXi.
The migration of virtual machines will therefore be done via the vmnic1 physical network card of this VMware ESXi host.

4.5. Configuring the destination VMware ESXi host for vSphere vMotion on VMware vCenter Server (VCSA)
From the VMware vCenter Server web client, select your destination VMware ESXi host and do the same thing again.
On the other hand, you will obviously assign a different IP address for the VMkernel "vmk1" interface that you will create and this IP address must be in the same subnet as the IP address assigned to the source host.
As before, you will also need an additional physical network adapter for this destination VMware ESXi host for vMotion traffic to pass over your dedicated subnet.
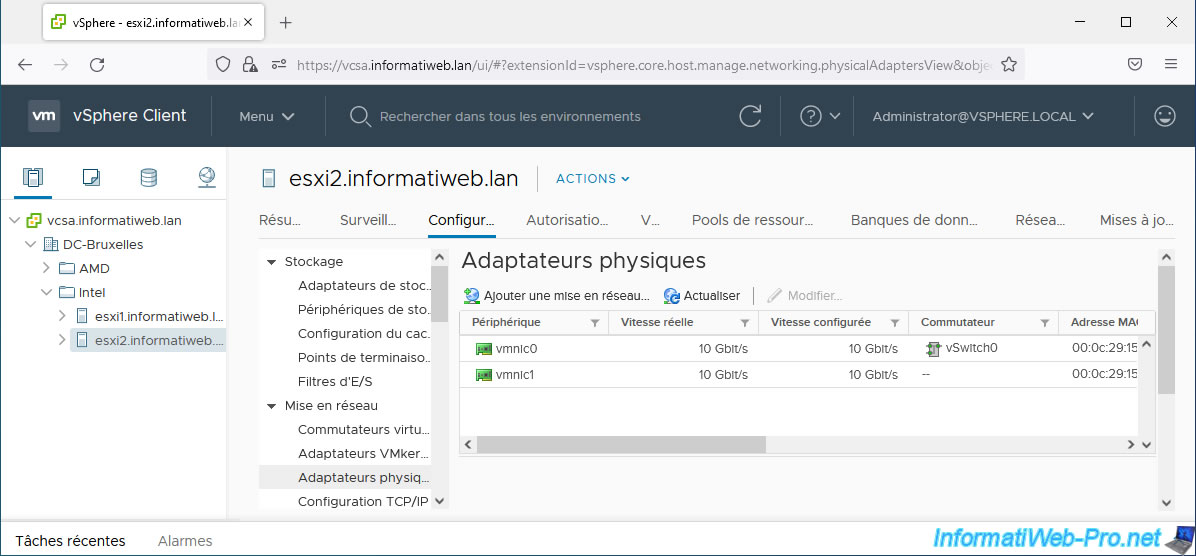
Once the physical network card is added and the server restarted, you will see it appear in the "Networking -> Physical NICs" section of your VMware ESXi host.
In our case, this is named "vmnic1".
To get started, go to "Configure -> Networking -> VMkernel adapters" and click: Add Networking.
Select "VMkernel Network Adapter" and click Next.
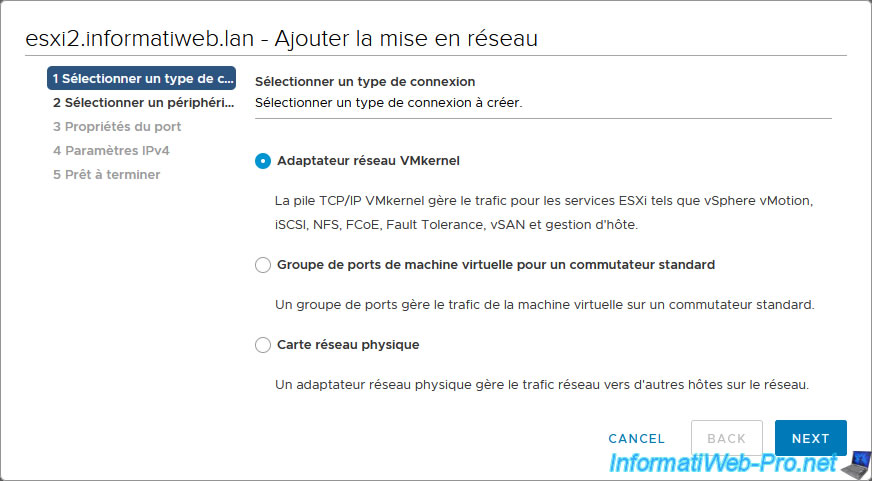
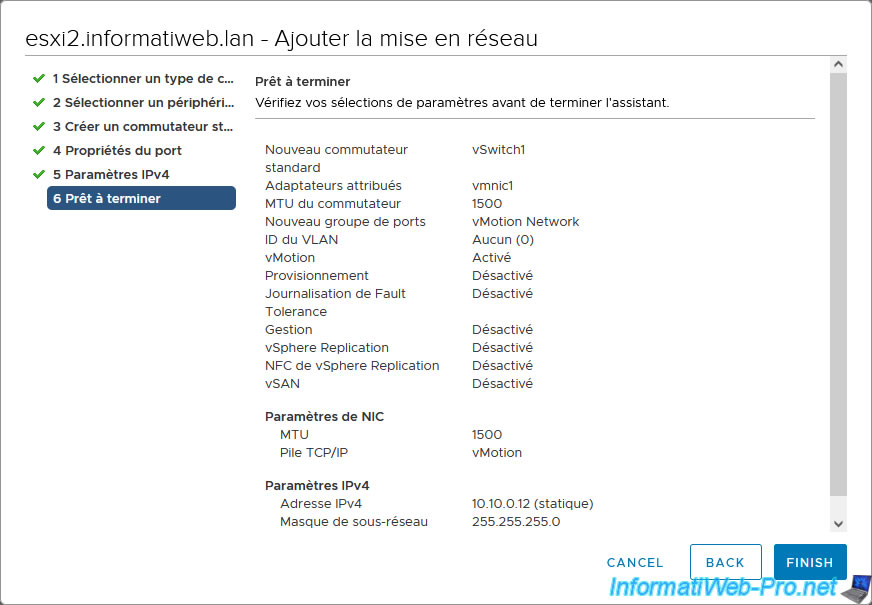
As before, specify "vMotion Network" as the network label, select the TCP/IP stack "vMotion" (preferred) or "Default" (on versions prior to vSphere 6.0).
Make sure only the "vMotion" box is checked for enabled services.

For IPv4 settings, select "Use static IPv4 settings" and specify:
- IPv4 Address: an IP address that is part of the same subnet used on your source VMware ESXi host.
In our case "10.10.0.12" for this destination VMware ESXi host. - Subnet mask: the subnet mask used in your case for the vMotion dedicated network.
In our case: 255.255.255.0. - Default gateway: check the box if you have a default gateway on this separate network and its address is different from the default TCP/IP stack on your VMware ESXi host.

A summary of the configured networking appears.
Click Finish.
The new VMkernel adapter "vmk1", as well as its dependencies (network label, switch, ...) have been added.
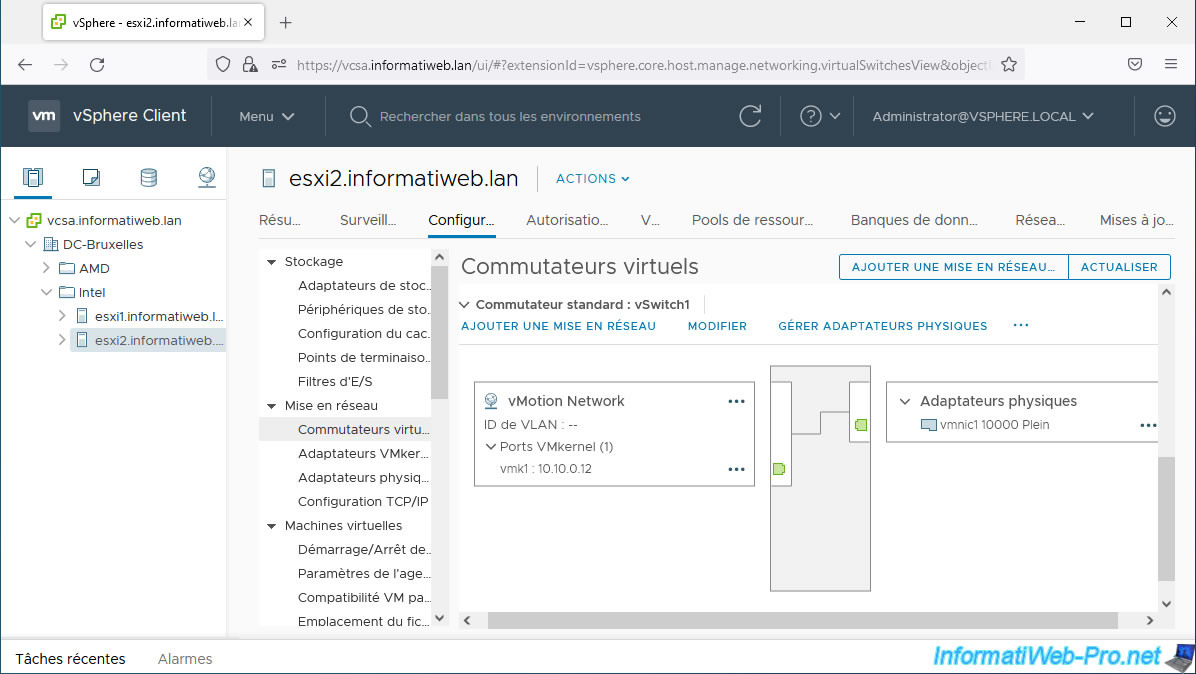
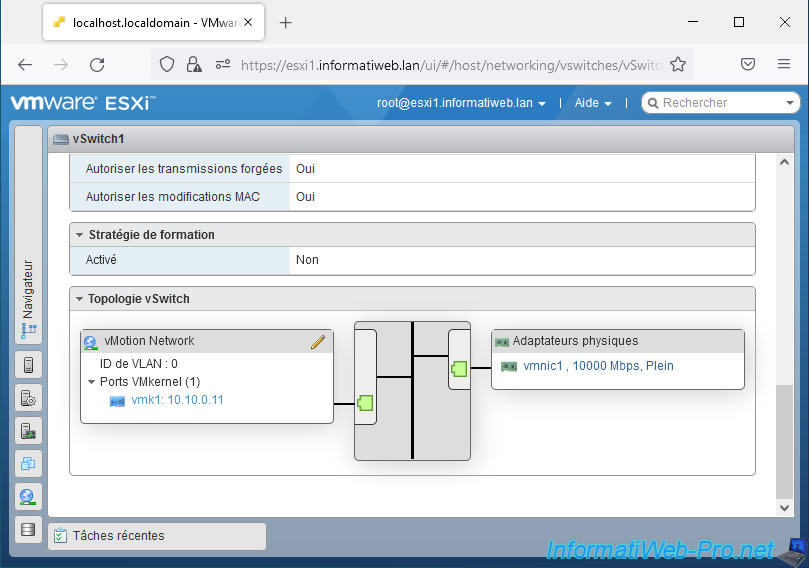
If you go to the "Configure -> Networking -> Virtual switches" section, you will see a new standard switch "vSwitch1" appear.
As you can see, this new virtual switch is made up of:
- a port group: vMotion Network.
- a VMkernel interface "vmk1", whose associated IP address is that for the subnet dedicated to vMotion traffic.
- a physical network card (physical adapter): vmnic1.
5. Add a physical failover network card for vMotion on VMware ESXi
In accordance with the prerequisites mentioned at the beginning of this tutorial, it is recommended to separate vMotion traffic from usual network traffic.
Which is the case thanks to the physical network card you added previously.
However, in these prerequisites, VMware also indicates that it is preferable to use at least 2 physical network cards for vMotion traffic.
The 1st NIC is used to pass vMotion traffic and the 2nd NIC will need to be configured for use in the event the 1st fails or causes a problem.
In other words, the 2nd physical network card will be a backup network card (failover).
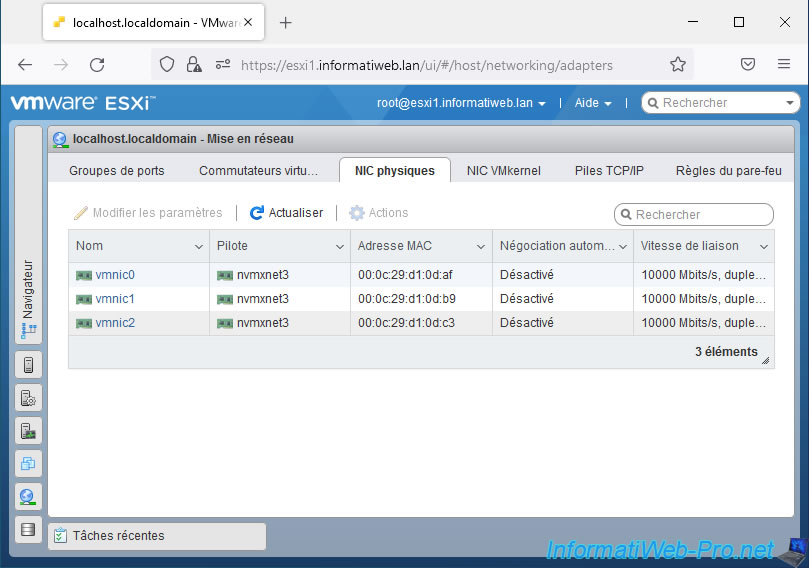
For this tutorial, we therefore added a 3rd network card. To see it appear in the web client of your VMware ESXi host, go to: Networking -> Physical NICs.
In our case, this appears under the name: vmnic2.
Warning : this is best done on your 2 VMware ESXi hosts.
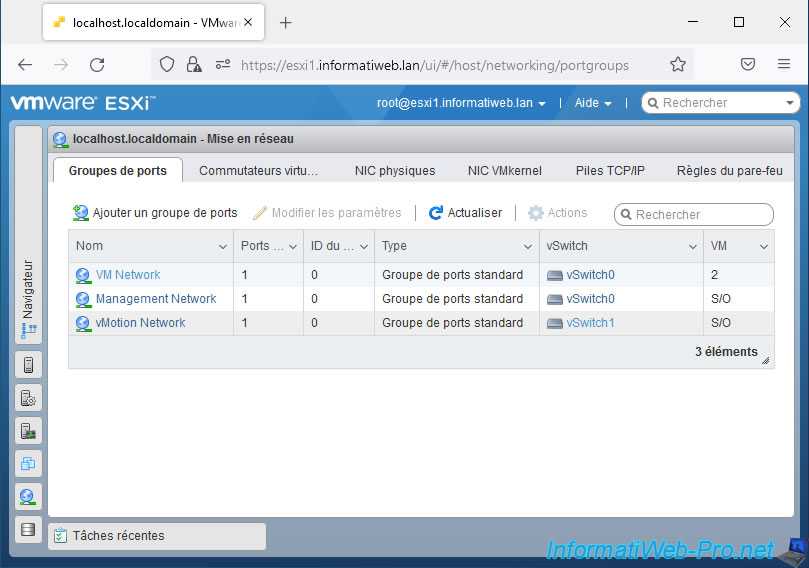
To configure it as a failover network card for your VMware ESXi host's vMotion traffic from this web client "VMware Host Client", go to: Networking -> Port groups.
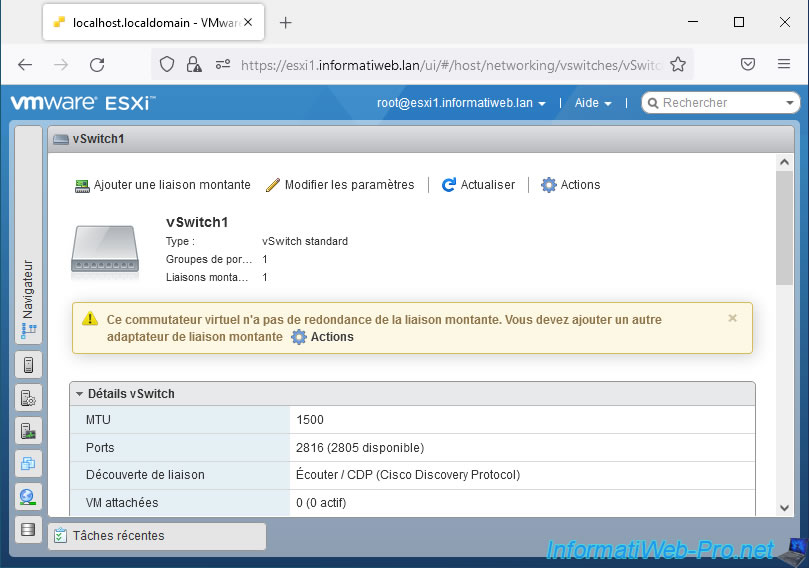
In the list that appears, locate the port group created previously for vMotion traffic (in our case: vMotion Network) and click on the name of the associated virtual switch (in our case: vSwitch1).
At the bottom of the page, you will see that only one physical adapter is currently used by this virtual switch (vSwitch1).
As you can see, by default, VMware warns you that your virtual switch is tied to a single network adapter:
Plain Text
This virtual switch has no uplink redundancy. You should add another uplink adapter.
To add a failover NIC to this virtual switch (vSwitch1), click: Add uplink.
In the "Edit standard virtual switch - vSwitch1" window that appears, you will see that VMware ESXi automatically adds your new physical network adapter "vmnic2" (currently unassigned) as "Uplink 2".
However, as you can see, both uplinks are in "Active" state. This means that your VMware ESXi host will distribute the network load between these 2 network cards using the technique selected in the "Network card association" section.
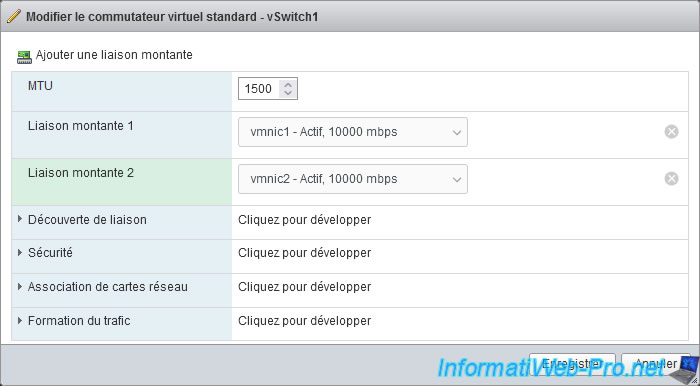
To make the additional physical network adapter (in our case: vmnic2) used only as a failover network adapter, deploy the "NIC teaming" node.
Next, select this additional physical network adapter (vmnic2) and click: Mark standby.
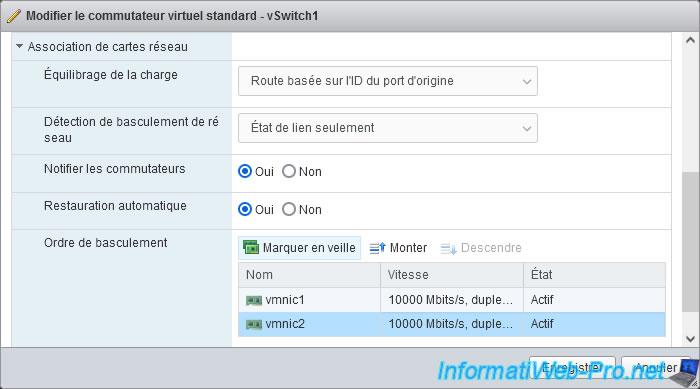
As you can see :
- the state of the physical network card "vmnic1" is "Active".
- the state of the physical network card "vmnic2" is "Standby".
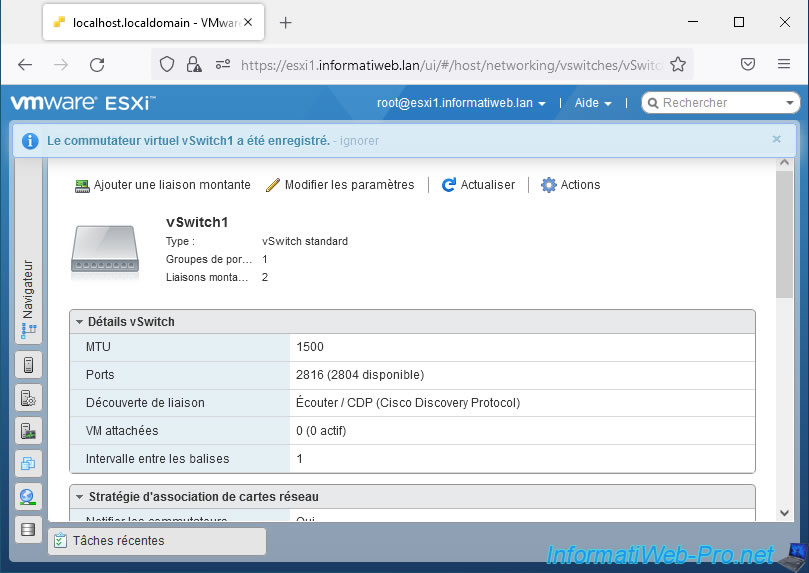
Click: Save.
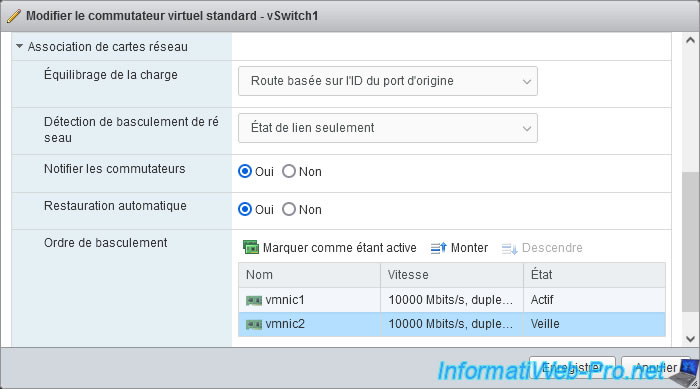
The message "Virtual switch vSwitch0 was successfully saved" appears.
Note that the warning about uplink redundancy is gone.
Important : don't forget to do the same on the other VMware ESXi host.
6. Add a physical failover network card for vMotion on VMware vCenter Server (VCSA)
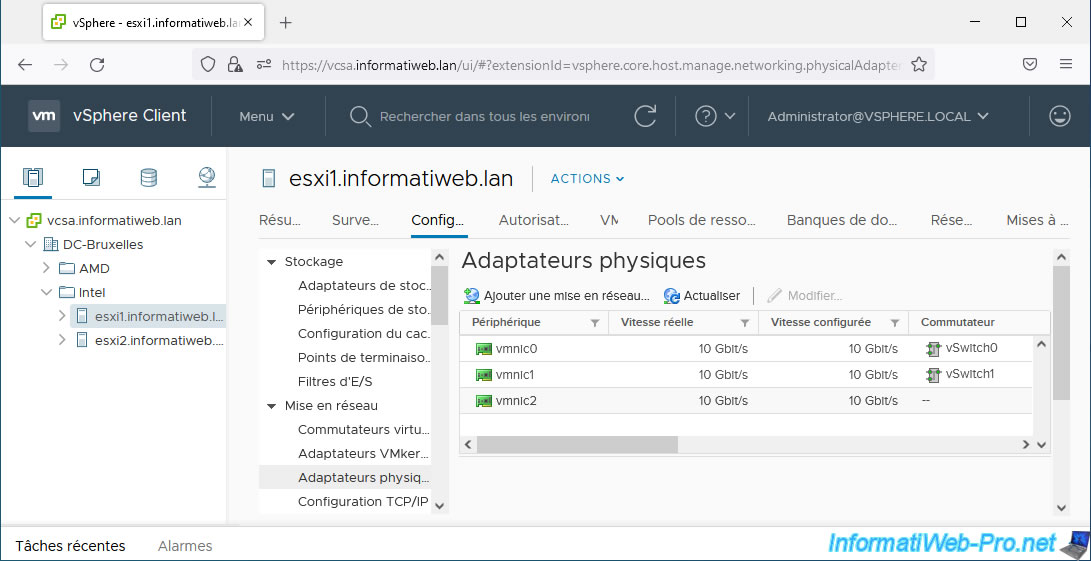
If you want to add the additional physical network adapter for vMotion from the "VMware vSphere Client" client of your VMware vCenter Server (VCSA), select the desired VMware ESXi host and go to: Configure -> Networking -> Physical adapters .
As you can see, for this tutorial, we added a 3 network card and this appears in our case under the name: vmnic2.
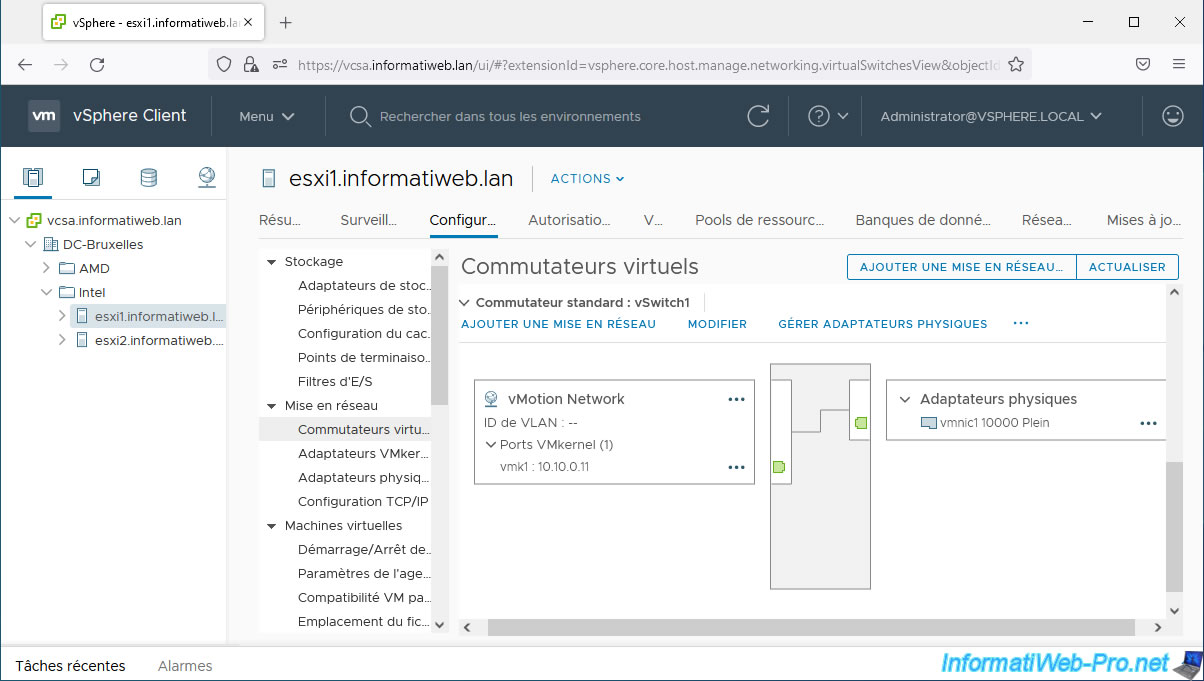
To add this physical failover adapter to your vMotion dedicated virtual switch, go to: Configure -> Networking -> Virtual switches.
Next, locate your virtual switch dedicated to vMotion and click: Manage physical adapters.
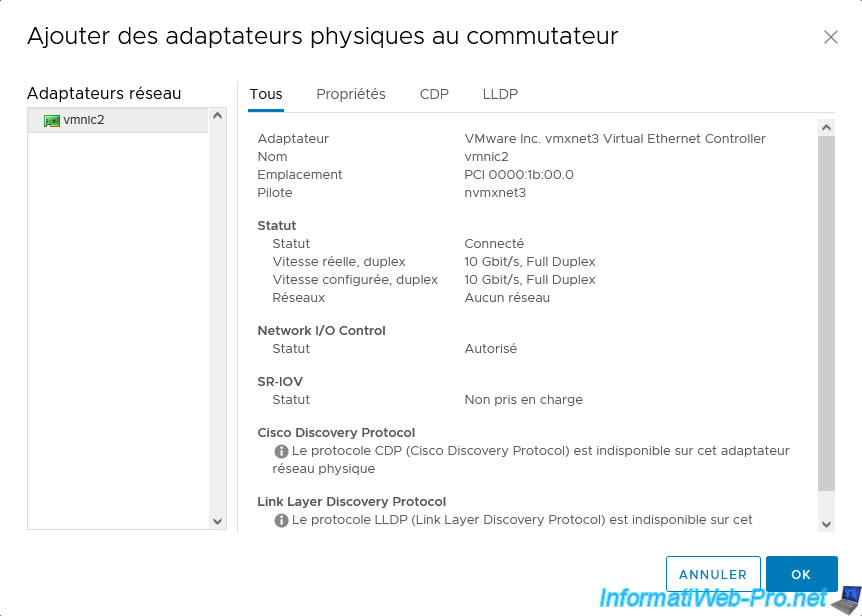
In the "Manage Physical Network Adapters" window that appears, click on the "+" icon.
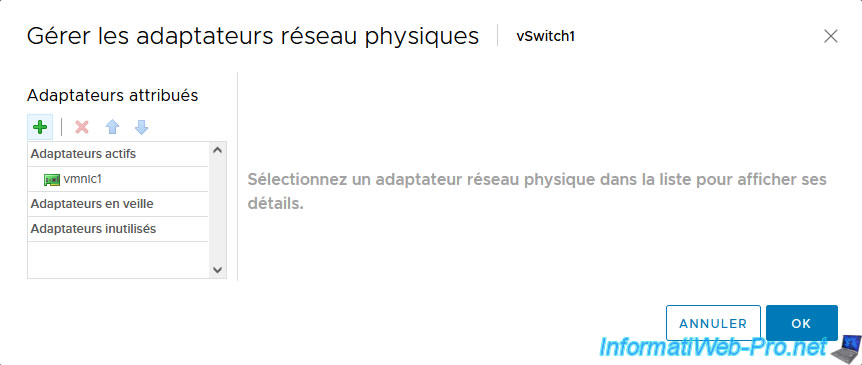
Select your new network card "vmnic2" and click OK.
Note that only network adapters not currently in use by your VMware ESXi host appear here.
By default, both physical network cards will be active.
To use the 2nd physical network card (vmnic2) only as a failover network card, select it and click the down arrow.

As you can see :
- the physical network card "vmnic1" will be active.
- the physical network card "vmnic2" will be asleep.
In other words, it will only be used when the "vmnic1" network card poses a problem.
Click OK.
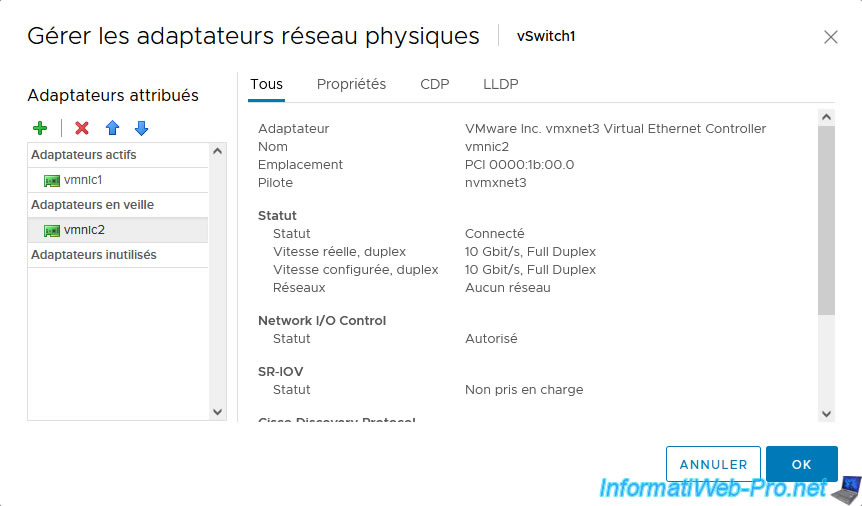
Now, 2 physical NICs (vmnic1 and vmnic2 in our case) are assigned to your dedicated virtual switch (vSwitch1) for vMotion.

Share this tutorial
To see also
-
VMware 3/5/2025
VMware vSphere 6.7 - Cluster admission control
-
VMware 2/14/2025
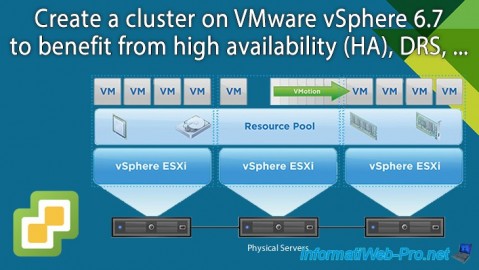
VMware vSphere 6.7 - Create a cluster
-
VMware 2/19/2025
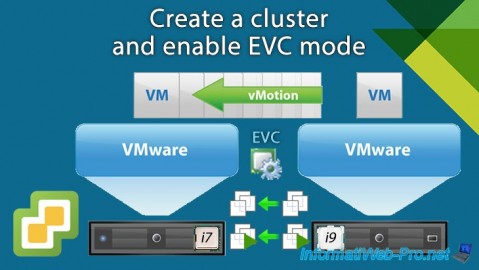
VMware vSphere 6.7 - Create a cluster and enable EVC mode
-
VMware 2/12/2025
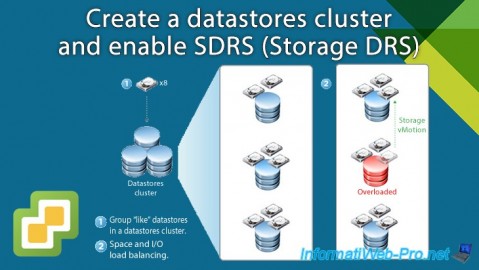
VMware vSphere 6.7 - Create a datastores cluster and enable SDRS
No comment