Deploy SexiGraf on VMware vSphere 6.7 to generate graphics for your ESXi hosts and VCSA
- VMware
- 14 August 2024 at 12:02 UTC
-

- 2/3

3. SexiGraf console
To begin, start your "sexigraf" virtual machine.
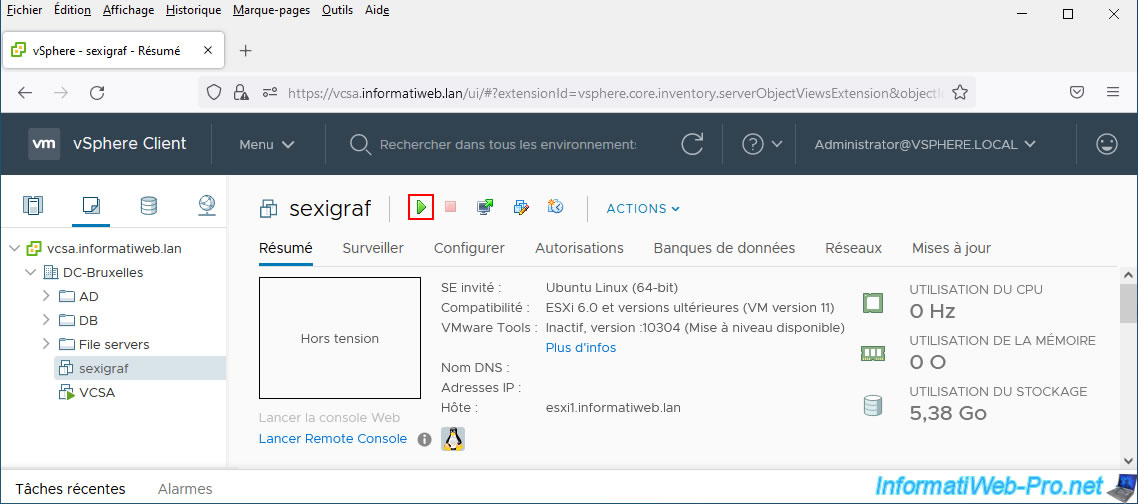
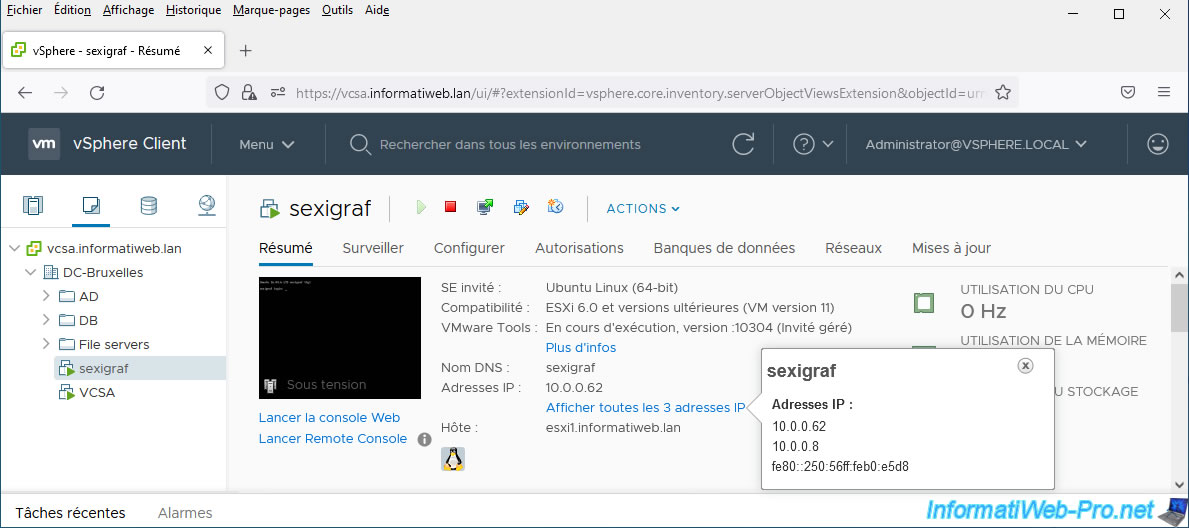
After a minute or two, refresh the page and you will see the DNS name and IP address of your "sexigraf" virtual machine appear.
Next, click on the "View all 3 IP addresses" link to also see the static IP address you specified in the OVF deployment wizard (if applicable).
Note: retrieving this information is possible thanks to the pre-installed VMware Tools (via the "open-vm-tools" packages) in the "Ubuntu" Linux distribution on which "SexiGraf" is based.
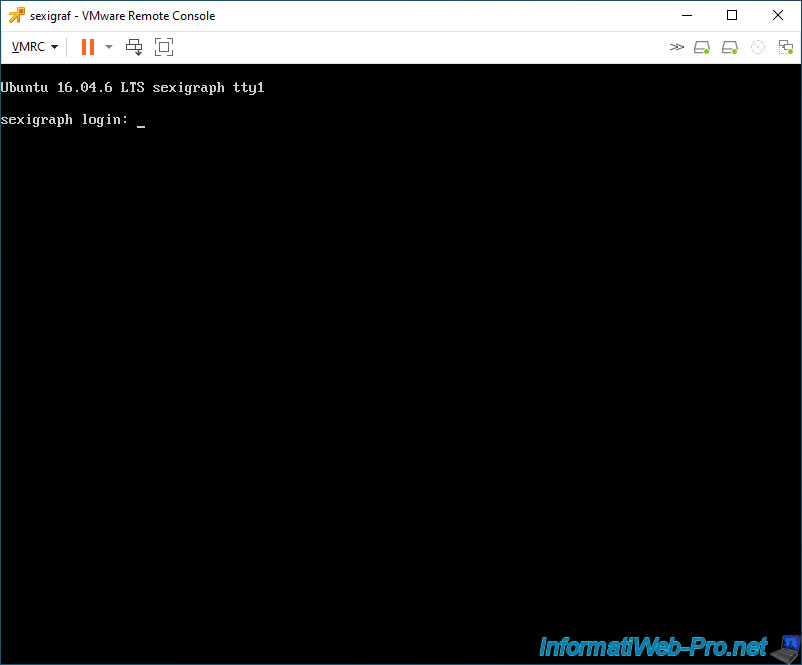
You will arrive on a connection screen also telling you that SexiGraf is based on a Linux distribution: Ubuntu 16.04.6 LTS (for version 0.99g of SexiGraf).
So, in the event of a problem, all you need to do is refer to the Ubuntu documentation.
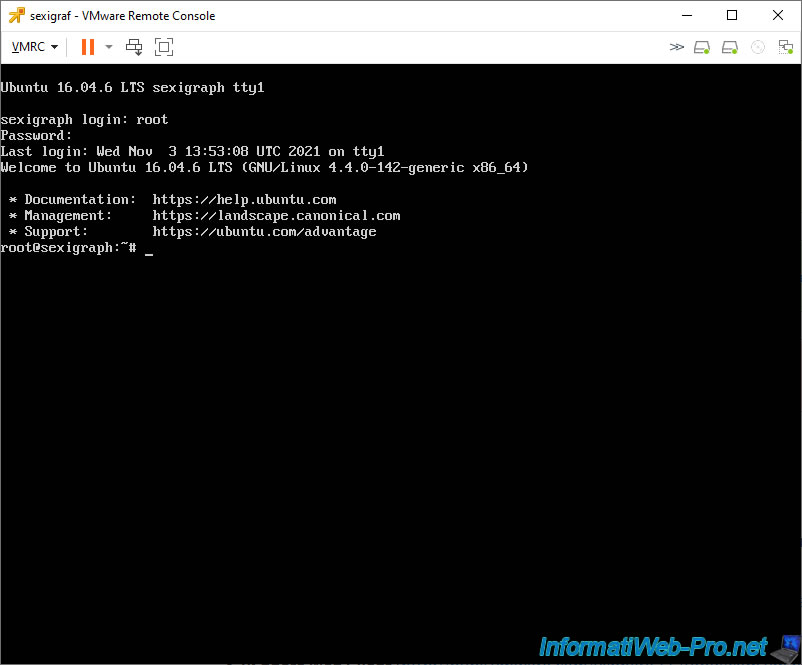
To connect to this Linux console, you will need to use the "root" account, whose default password is: Sex!Gr@f
Note that these identifiers are indicated on the "QuickStart" page of the official SexiGraf website.
Important : the keyboard is configured by default in QWERTY. Think about it while typing the password.
If you have an AZERTY keyboard (in France or Belgium), the character "!" is found as an uppercase letter on the "1" key and the character "@" on the "2" key (at the top of the keyboard).
Once logged in as root, you will see that the "SexiMenu" which was present with SexiLog is not present on SexiGraf.
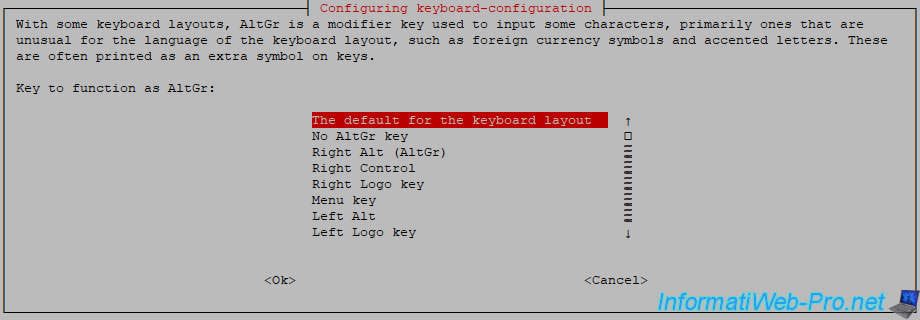
3.1. Change the keyboard to AZERTY instead of QWERTY
To change the keyboard layout from QWERTY to AZERTY, use an SSH client such as PuTTY so that the keyboard layout used is yours and not the QWERTY keyboard defined for the local console of the "sexigraf" virtual machine.
Additionally, this will allow you to copy/paste the commands offered below.
Which will not be the case if you access the sexigraf console from your VMware vCenter Server (or VCSA).
Log in as "root" with the password "Sex!Gr@f" (remembering that the special characters will have changed places).

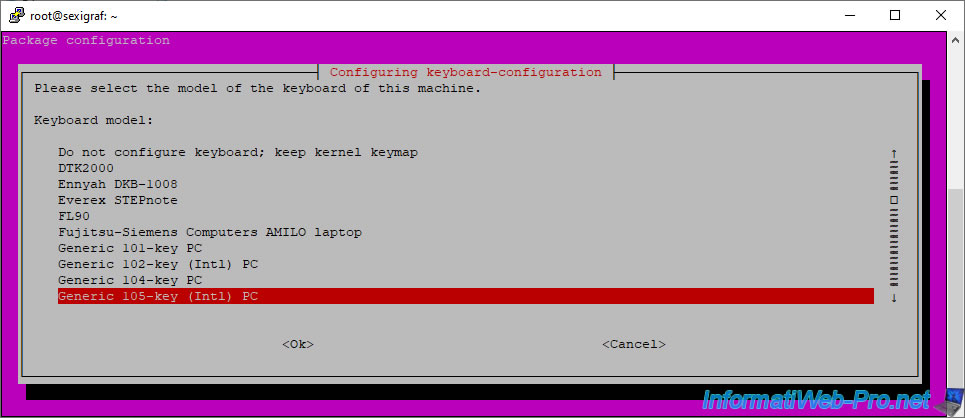
Once logged in as root, use the command:
Bash
dpkg-reconfigure keyboard-configuration
In the "Configuring keyboard-configuration" screen that appears, leave the default choice for the 1st question (Keyboard model) and simply press Enter.
Then, you will see that the keyboard layout used by SexiGraf by default is: English (US).
Hence the fact that the keyboard is configured in QWERTY for the moment.
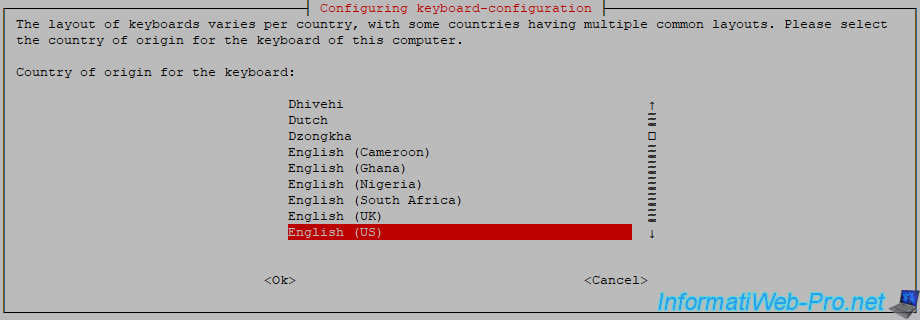
In this list, select "French" if you have a French keyboard (French - France).
Note: on this AZERTY keyboard, the "@" character is located on the 0 key at the top of the keyboard.
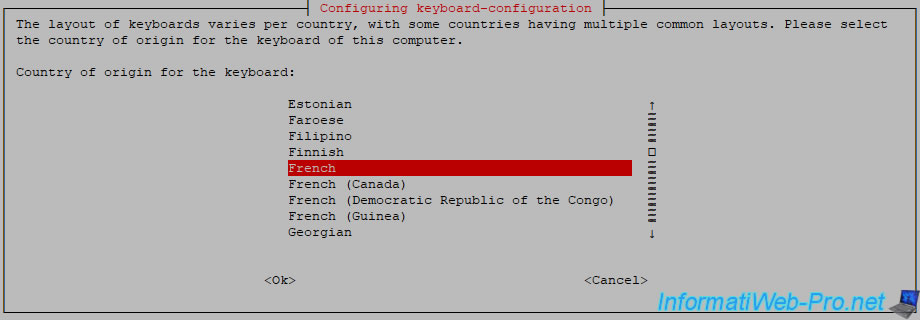
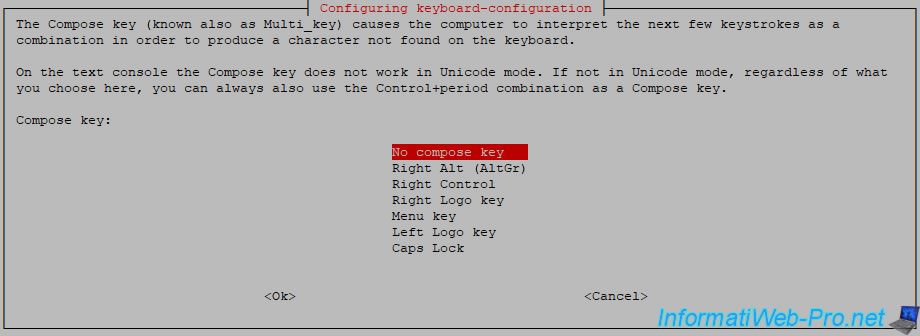
Then leave the default option for the next option.
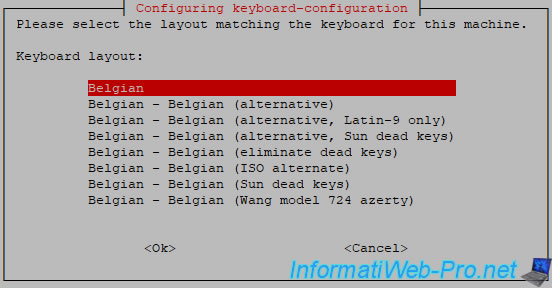
For the rest of the questions, simply confirm by pressing Enter.
The "Configuring keyboard-configuration" wizard will disappear and this will be displayed in the console:
Plain Text
update-rc.d: warning: start and stop actions are no longer supported; falling back to defaults
update-initramfs: deferring update (trigger activated)
Processing triggers for initramfs-tools (0.122ubuntu8.14) ...
update-initramfs: Generating /boot/initrd.img-4.4.0-142-generic
After about ten seconds, you will have access to the Linux Shell again.
Now, check that the keyboard layout has been changed using the command:
Bash
cat /etc/default/keyboard
Which will give this.
The important information being the value of "XKBLAYOUT", which in our case is "be" (which means: French - Belgium).
Plain Text
# KEYBOARD CONFIGURATION FILE

# Consult the keyboard(5) manual page.

XKBMODEL="pc105"
XKBLAYOUT="be"
XKBVARIANT=""
XKBOPTIONS=""

BACKSPACE="guess"
For this change to be taken into account, you will then need to use this command (for the "French - Belgium" keyboard):
Bash
loadkeys be
Or this command (for the "French - France" keyboard).
Bash
loadkeys fr
For other countries, specify the value of "XKBLAYOUT" (previously retrieved) as a parameter:
Bash
loadkeys [valeur de XKBLAYOUT sans les crochets]
Now the desired layout will be used in all cases.
Whether you connect via SSH or from the console accessible from your VMware vCenter Server (or VCSA).
If you were already logged in to SexiGraf's local console, log out by typing the "exit" command, then log in again as "root".
Now the keyboard layout is as desired.
3.2. Change root account password
If you want to change the password of the SexiGraf "root" account, use the command:
Bash
passwd root
Then, enter the new password to use for it twice.
Plain Text
Enter new UNIX password:
Retype new UNIX password:
passwd: password updated successfully
3.3. Change the default time zone
To better navigate the Linux console of this SexiGraf virtual machine, you can also change the time zone used by default.
To do this, check the time zone currently used by typing:
Bash
date
As you can see, the time zone used by default is: UTC.
Plain Text
Wed Nov 3 16:19:22 UTC 2021
To list the available time zones for Europe, use the command:
Bash
ls /usr/share/zoneinfo/Europe/
Plain Text
Amsterdam   Busingen     Kiev        Moscow      Saratov     Vatican
Andorra     Chisinau     Kirov       Nicosia     Simferopol  Vienna
Astrakhan   Copenhagen   Lisbon      Oslo        Skopje      Vilnius
Athens      Dublin       Ljubljana   Paris       Sofia       Volgograd
Belfast     Gibraltar    London      Podgorica   Stockholm   Warsaw
Belgrade    Guernsey     Luxembourg  Prague      Tallinn     Zagreb
Berlin      Helsinki     Madrid      Riga        Tirane      Zaporozhye
Bratislava  Isle_of_Man  Malta       Rome        Tiraspol    Zurich
Brussels    Istanbul     Mariehamn   Samara      Ulyanovsk
Bucharest   Jersey       Minsk       San_Marino  Uzhgorod
Budapest    Kaliningrad  Monaco      Sarajevo    Vaduz
Save the time zone currently used.
Bash
mv /etc/localtime /etc/localtime.old
Then, use the "Paris" time zone if you live in France.
Bash
cp /usr/share/zoneinfo/Europe/Paris /etc/localtime
Then, check that the new time zone has been taken into account by reusing the command:
Bash
date
As you can see, the time zone used in our is now "CET" instead of "UTC".
Plain Text
Wed Nov 3 17:20:10 CET 2021
4. Add your VMware vCenter Server in SexiGraf configuration
So that SexiGraf can generate graphs concerning the use of different resources (CPU, RAM, etc.) and different servers (VMware ESXi, VMware vCenter Server, clusters, ...), SexiGraf needs access to your VMware vCenter Server.
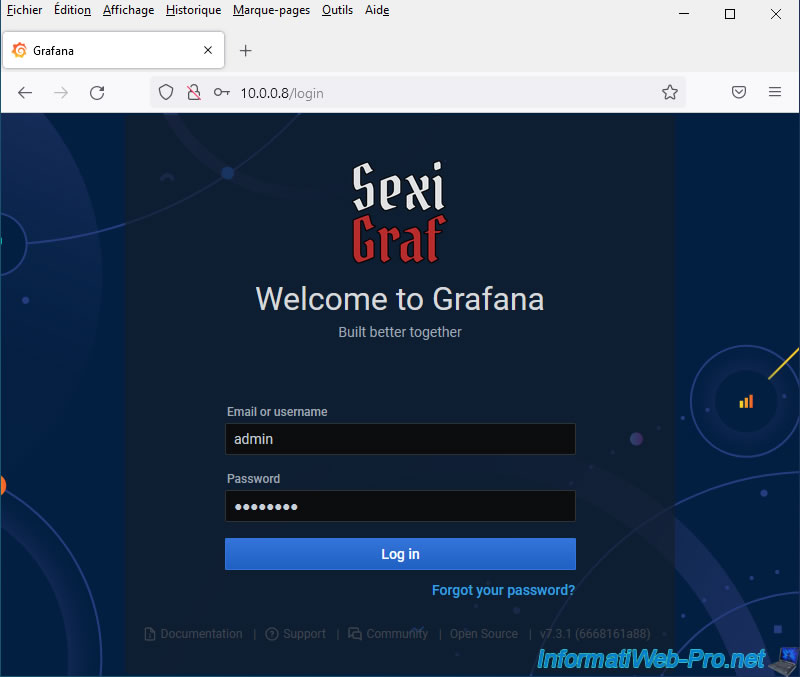
To do this, access the SexiGraf web interface via the address "http://[IP address of SexiGraf]/" and use the default account: admin / Sex!Gr@f
Warning : the web interface is accessible with the "admin" account (reserved for the web interface) and not the "root" account (reserved for the Linux console).
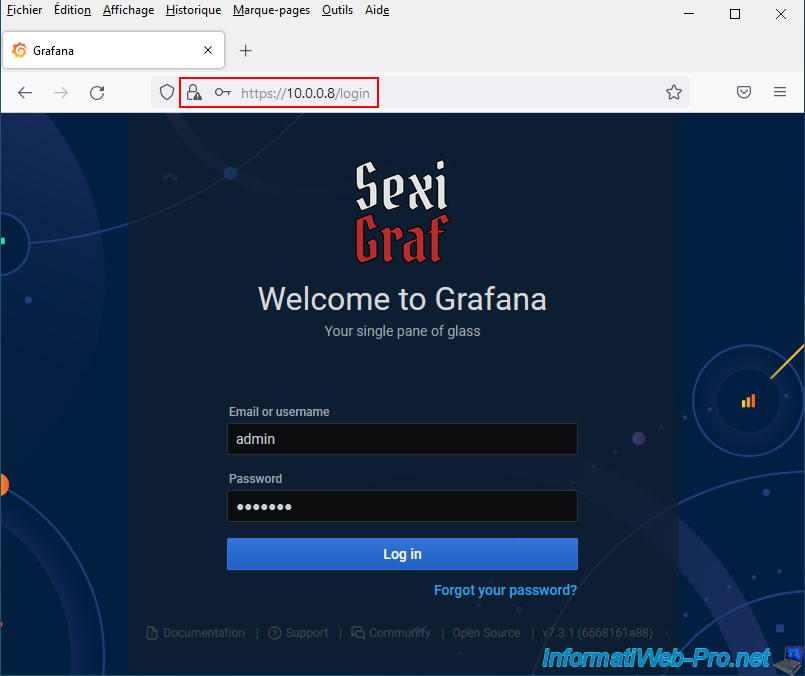
Note that the SexiGraf web interface is also available securely via the HTTPS protocol thanks to a pre-installed and pre-configured self-signed SSL certificate.
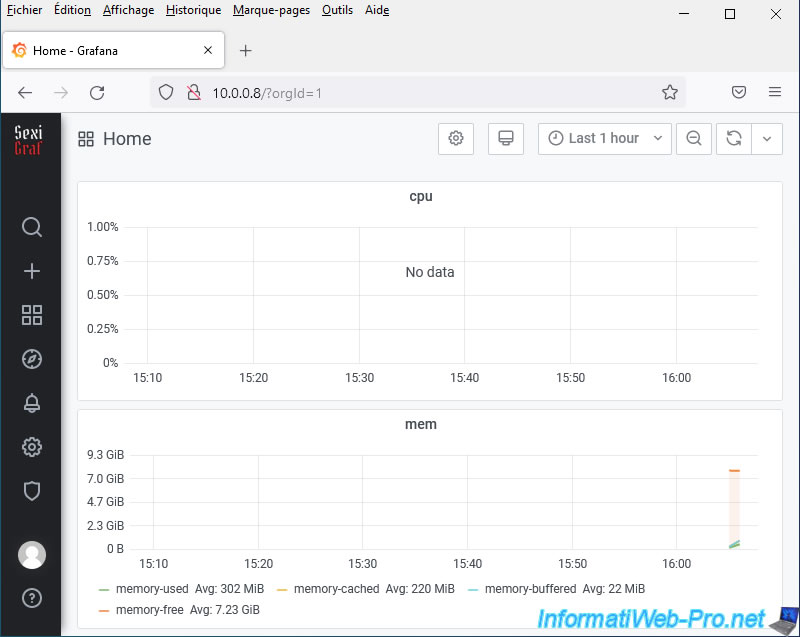
Once logged in as "admin" to SexiGraf, you will see some graphics regarding the "SexiGraf" virtual machine.
Since we just started it, there isn't enough information to display yet.
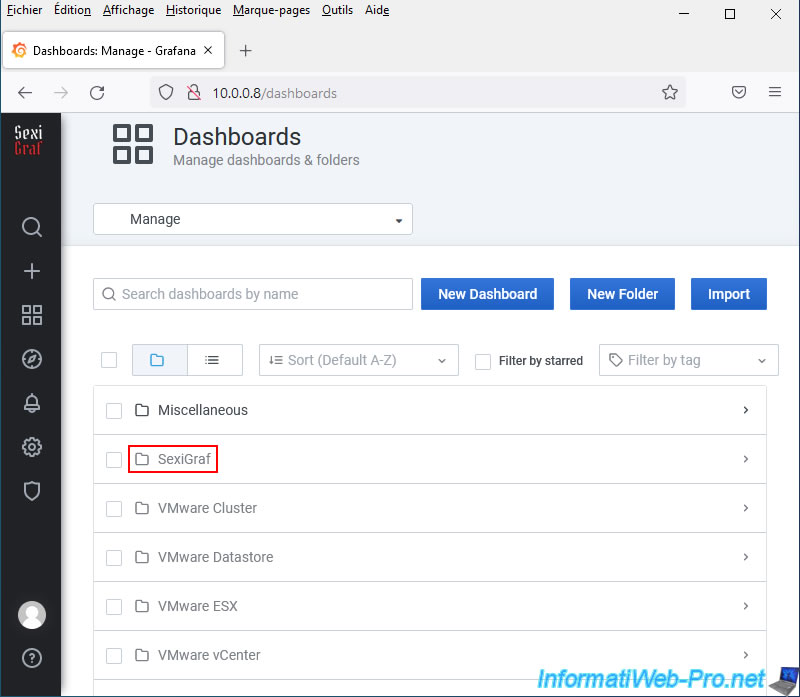
So that SexiGraf can also generate graphs concerning your VMware vCenter Server, you must add it via the "Dashboards -> Manage" menu.
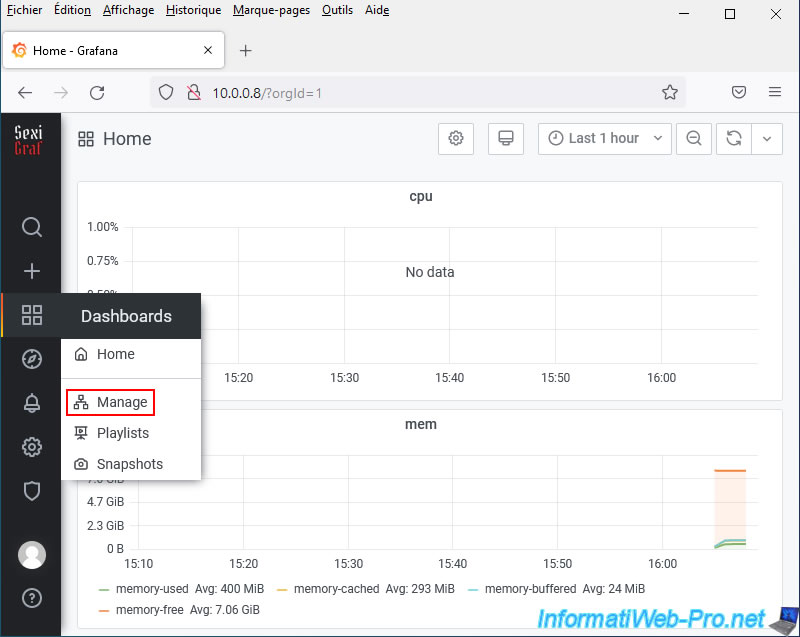
Next, click on the "SexiGraf" folder.
Then, click on the dashboard: SexiGraf Web Admin.
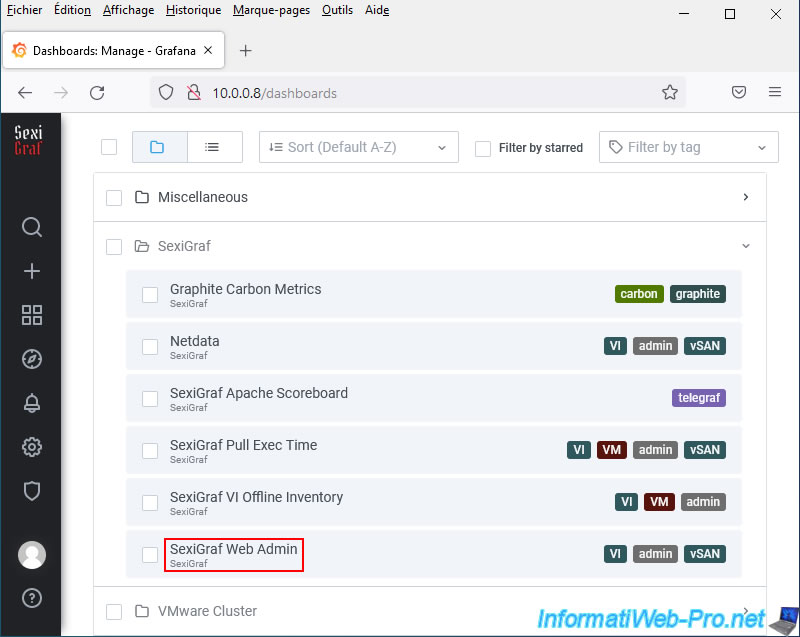
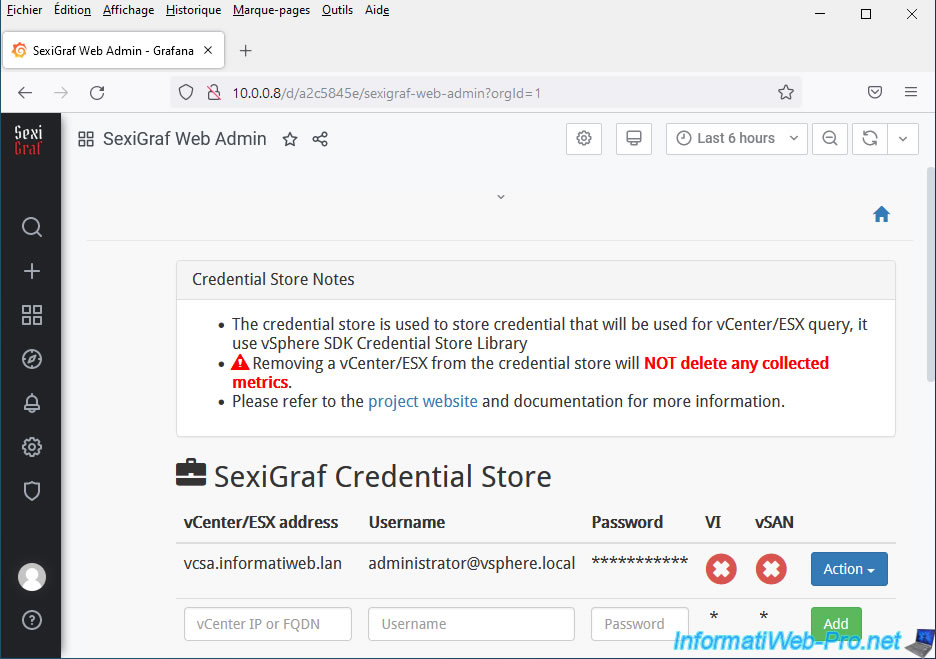
Then click on: Credential Store.
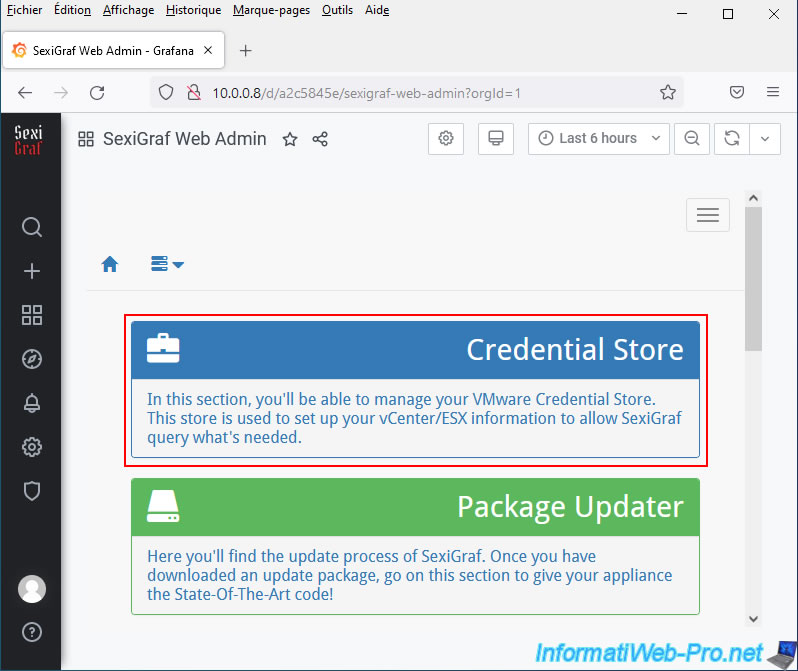
Thanks to this "SexiGraf Credential Store" page, you will be able to add your different VMware vCenter Server or VMware ESXi servers (if they are not linked to a vCenter server).
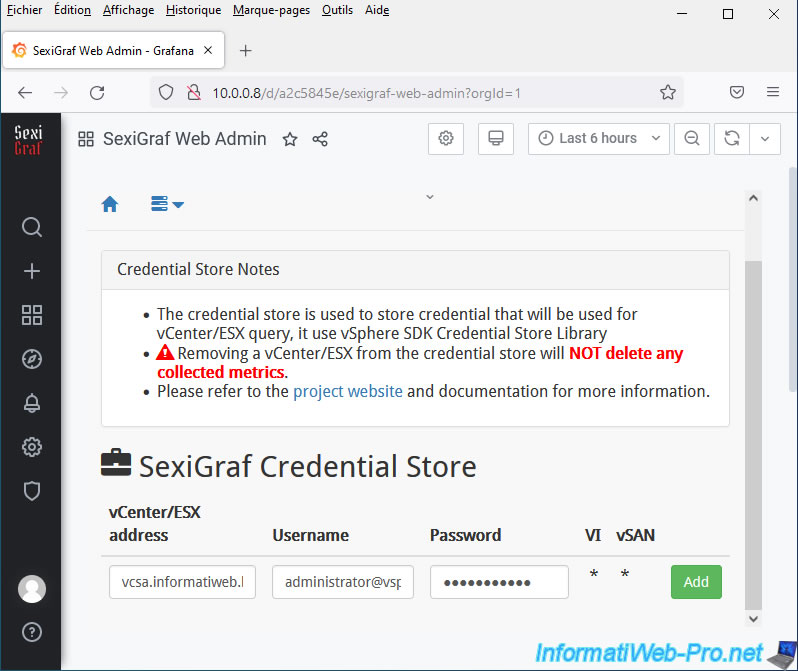
As you can see on this page, SexiGraf uses the vSphere SDK Credential Store library which helps automate the process of connecting to your VMware vCenter Server or VMware ESXi server in a secure manner.
This is useful for being able to execute scripts on a regular and/or scheduled basis without having to store the password in clear text in a script and without requiring user intervention.
Source: Credential Store Overview - vSphere Perl SDK Online Documentation.

Add your VMware vCenter Server (or VCSA) by specifying:
- vCenter/ESX address: the domain name or IP address of your VMware vCenter Server (or VCSA).
In our case: vcsa.informatiweb.lan. - Username: the username to use to log in.
For example, the account: administrator@vsphere.local. - Password: his password.
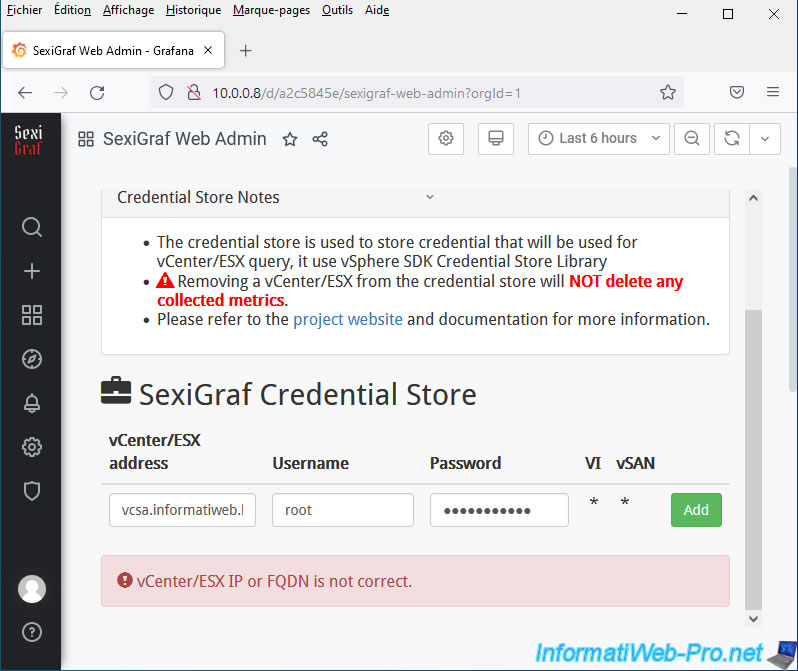
If you see a "vCenter/ESX IP or FQDN is not correct" error, verify that the information provided is correct.
If this is the case, the simplest solution is to indicate the IP address of the desired server instead of its domain name.
Otherwise, connect to the SexiGraf console and open the "/etc/resolv.conf" file (which is an automatically generated file and therefore cannot be modified).
As you can see, our local DNS server (10.0.0.101) which corresponds to the IP address of our Active Directory domain controller is located as the last domain server (nameserver).
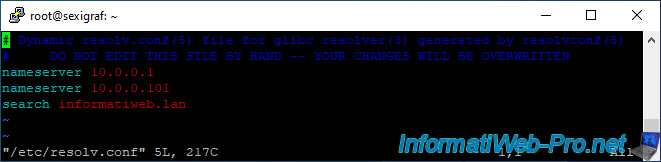
To solve the problem, we had to put the IP address of our local DNS server (= our AD domain controller in our case) in 1st.
Then, indicate the IP address of our router in 2nd so that SexiGraf can also have access to the Internet.
Note that you can also indicate the IP address of your ISP's DNS server or that of Google (8.8.8.8) as the 2nd DNS server if you wish.
However, for your changes to be taken into account, you must indicate these "nameserver" lines in the "/etc/resolvconf/resolv.conf.d/head" file and not in the "/etc/resolv.conf" file cited previously.
In short, open the file "/etc/resolvconf/resolv.conf.d/head":
Bash
vim /etc/resolvconf/resolv.conf.d/head
Then indicate this:
Plain Text
# IP address of your local DNS server (for domain names used on your intranet)
nameserver 10.0.0.101
# IP address of your router or a public DNS server
nameserver 10.0.0.1

Then restart the virtual machine.
Note: restarting the network service poses a problem in the case of SexiGraf. Only restarting the virtual machine will work in this case.
Bash
reboot
Try adding your VMware vCenter Server (or VCSA) server again on the "SexiGraf Credential Store" page by providing the domain name of this server and you will see that it will work.
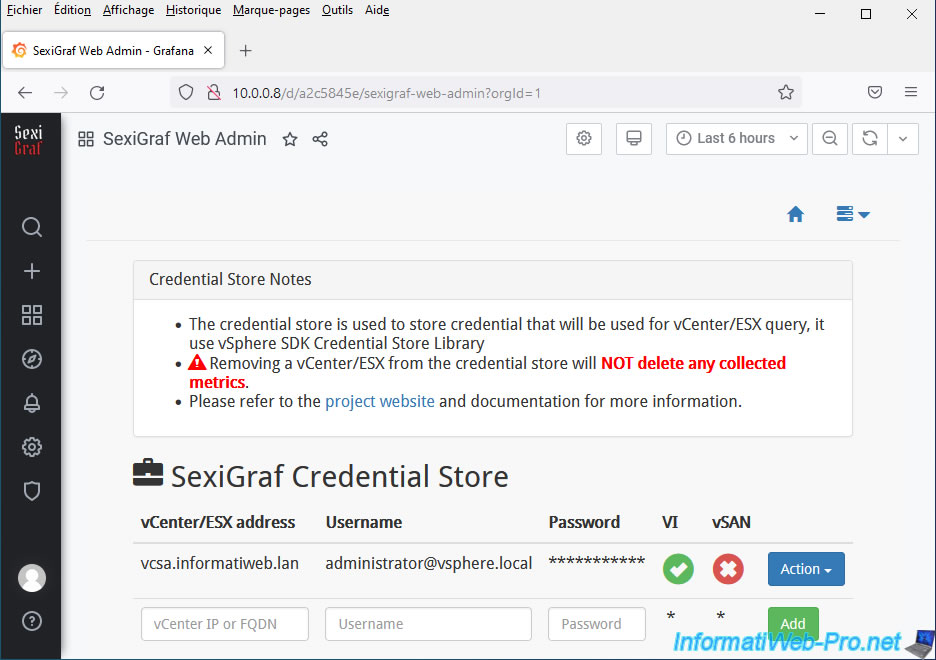
Once you have added your VMware vCenter Server (or VCSA) on this page, you must click on the "Actions" button and enable the desired feature(s):
- VI: in the case of a VMware vCenter Server (or VCSA) server.
- vSAN: if it is part of a vSAN cluster.
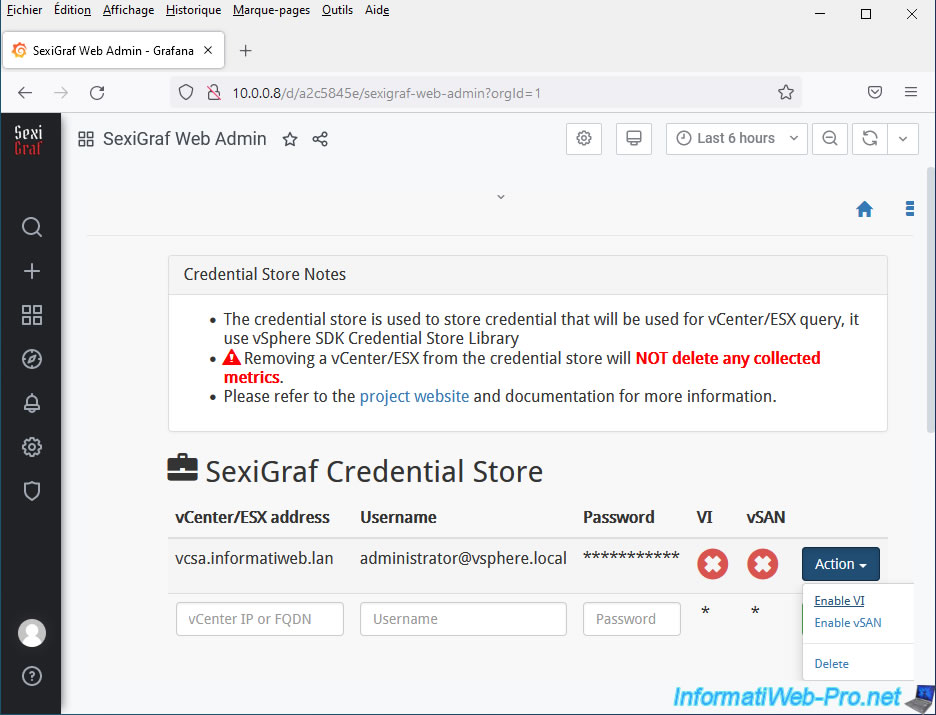
A green icon will display for the enabled feature.
Share this tutorial
To see also
-
VMware 8/21/2024
VMware vSphere 6.7 - Add a VMkernel interface
-
VMware 8/2/2024
VMware vSphere 6.7 - Collect logs with SexiLog
-
VMware 8/9/2024
VMware vSphere 6.7 - Collect logs with VMware Aria Operations for Logs
-

VMware 1/10/2025
VMware vSphere 6.7 - Create a LACP link (LAG)
No comment