Create a VMware vSphere 6.7 infrastructure by deploying VCSA (vCenter Server Appliance)
- VMware
- 21 February 2024 at 09:18 UTC
-

- 2/3

5. Configure the VMware VCSA (vCenter Server Appliance)
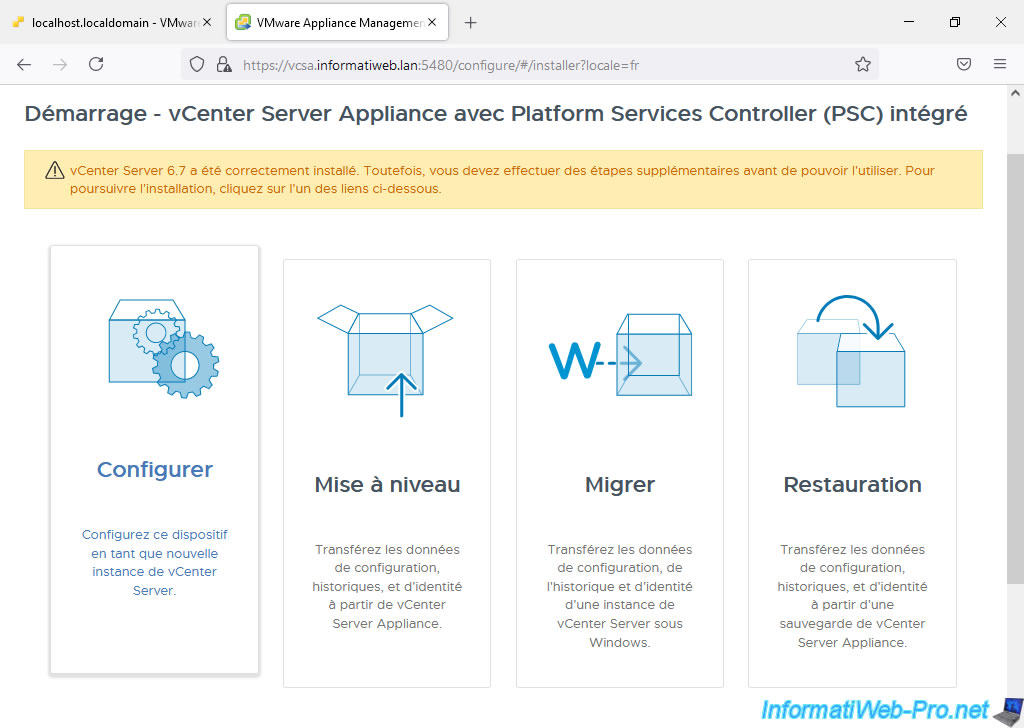
If you clicked the "Continue" button at the end of the vCenter Server Appliance (VCSA) deployment, you will see the "Setup vCenter Server Appliance with an Embedded Platform Services Controller" wizard.

If you have already closed the deployment wizard for this VCSA appliance, you can launch the same VCSA configuration wizard by going to: https://vcsa.informatiweb.lan:5480/
On the page that appears, click Configure.
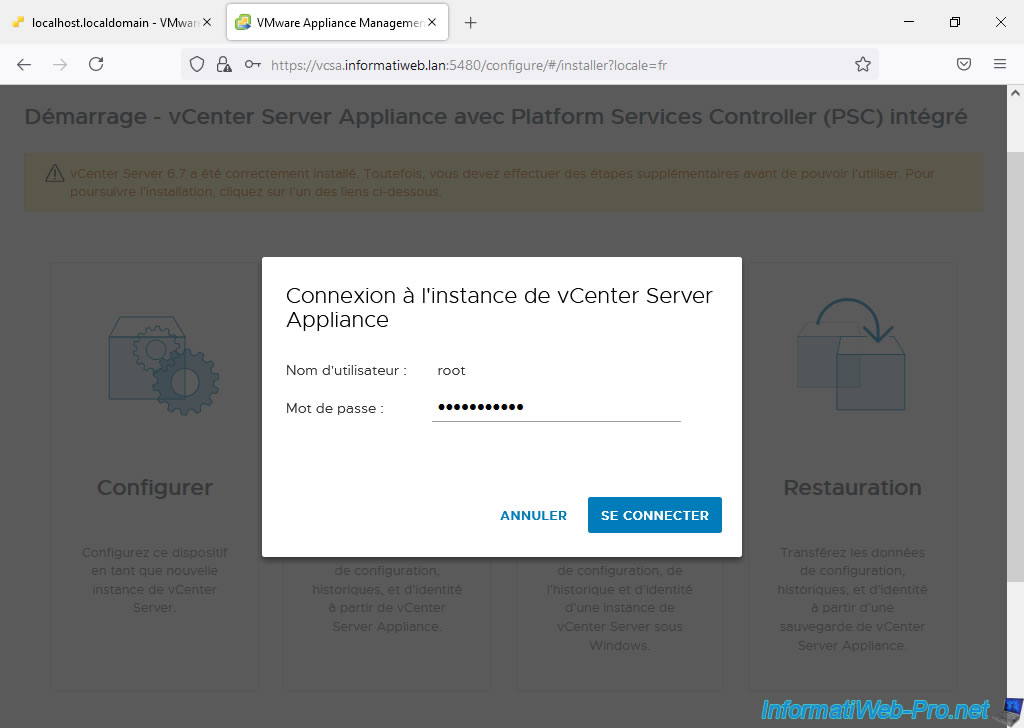
If you used the web version, you will need to provide the password for the root account of the VCSA virtual machine.
Then click: Connect.
As expected, you find exactly the same VCSA configuration wizard.
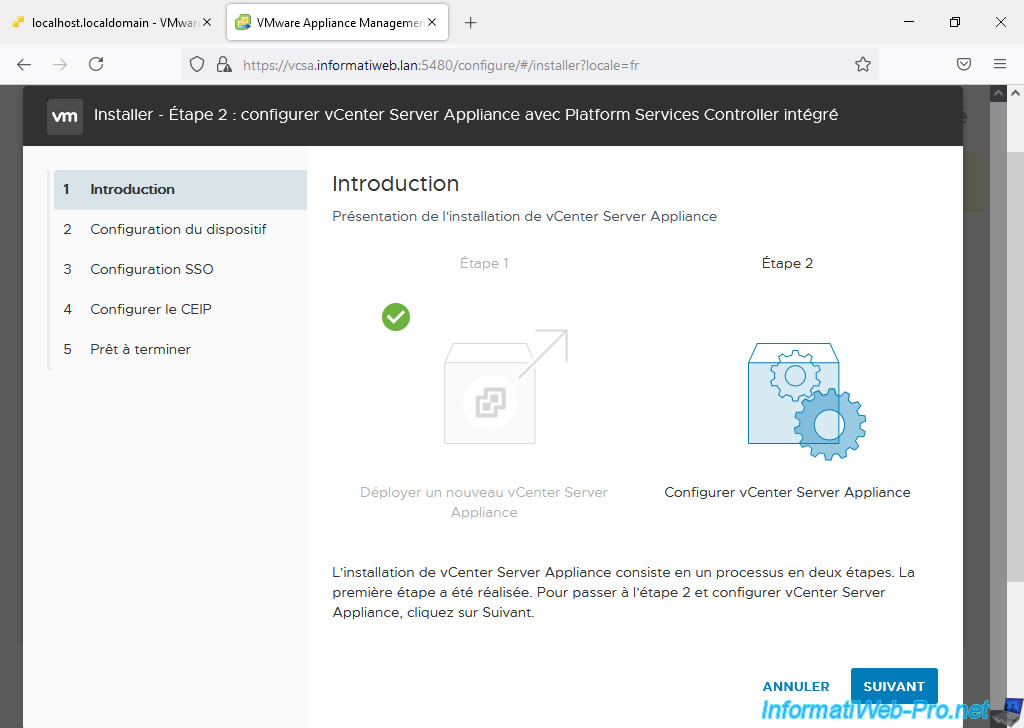
Click Next.
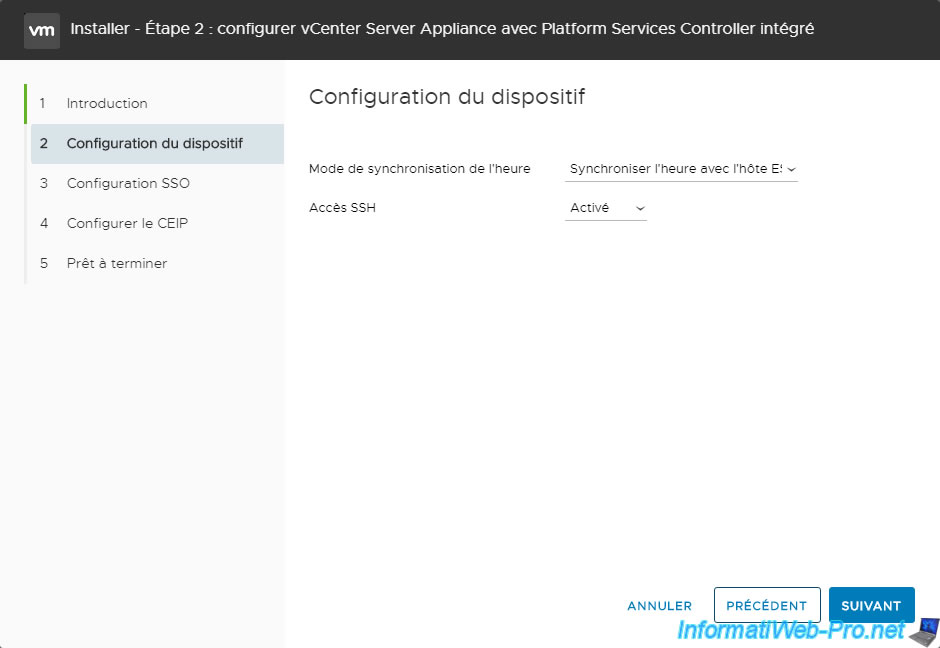
To get started, you can configure:
- time synchronization mode
- SSH access
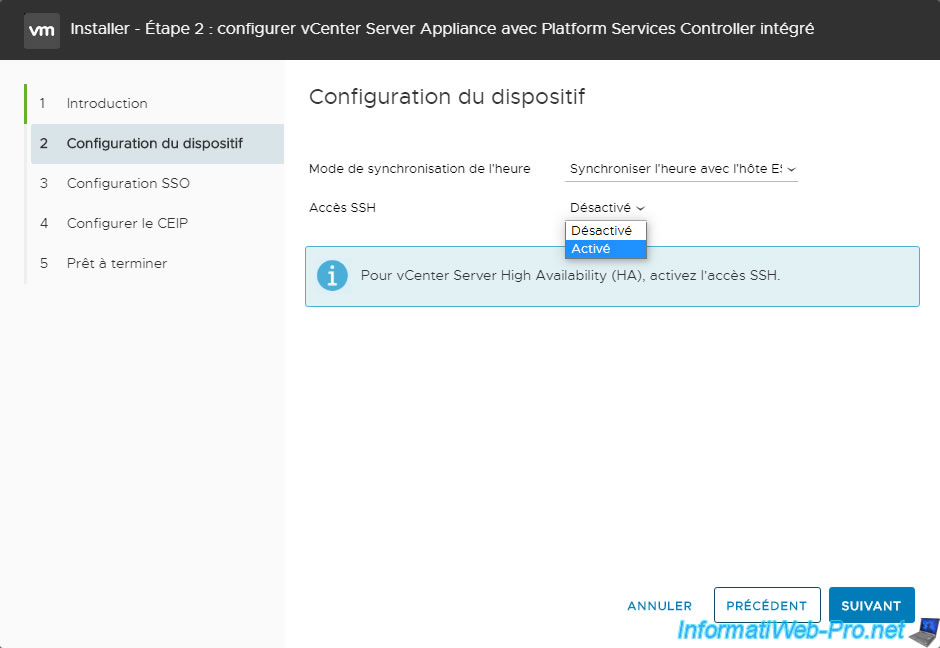
As noted by this wizard, if you want your vCenter Server to be highly available in the future, you will need to enable SSH access.
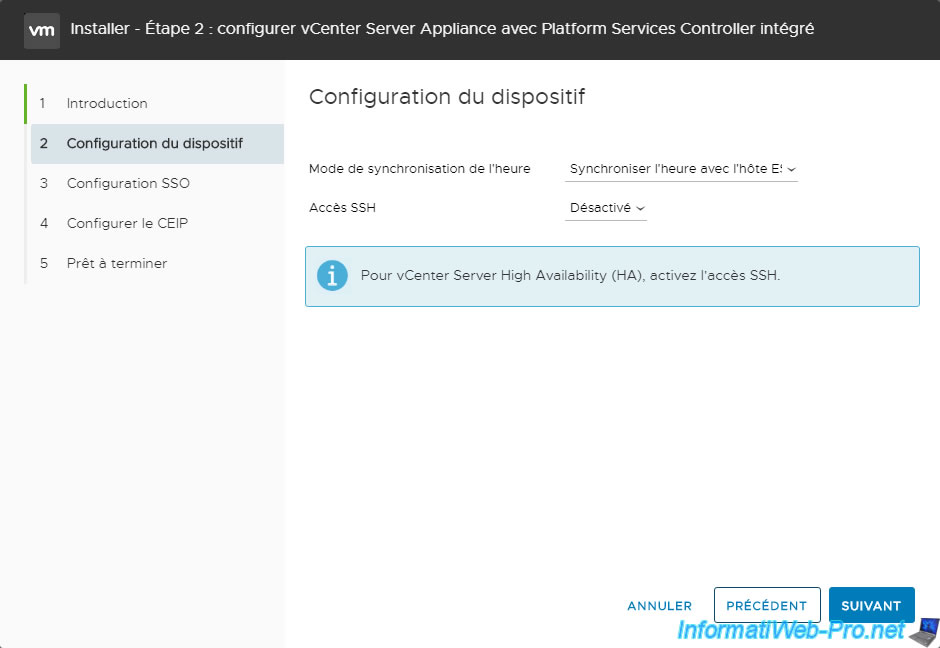
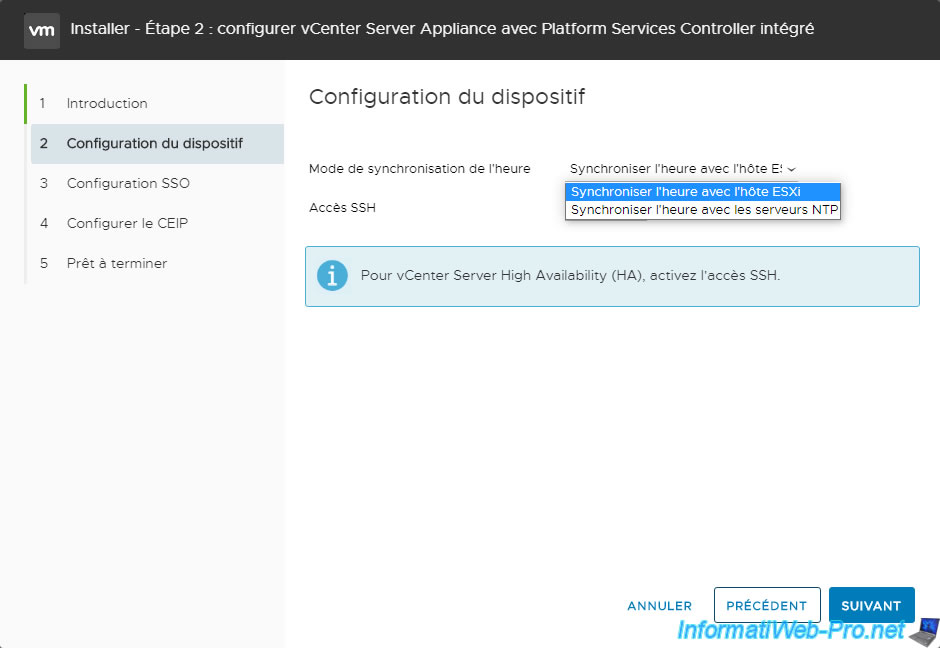
Since our VMware ESXi servers are already synchronized from our NTP server (the one automatically present on your domain controller), we can choose any of these options:
- Synchronize time with ESXi host
- Synchronize time with NTP servers
However, in production, we still recommend that you select the "Synchronize time with NTP servers" option to ensure that the clock on your VCSA device is properly synchronized.
For SSH access, you can choose to enable it or not. This doesn't matter for this tutorial.
However, to secure your VCSA server, you will need to connect via SSH to retrieve the generated private key (for example).
Then click Next.
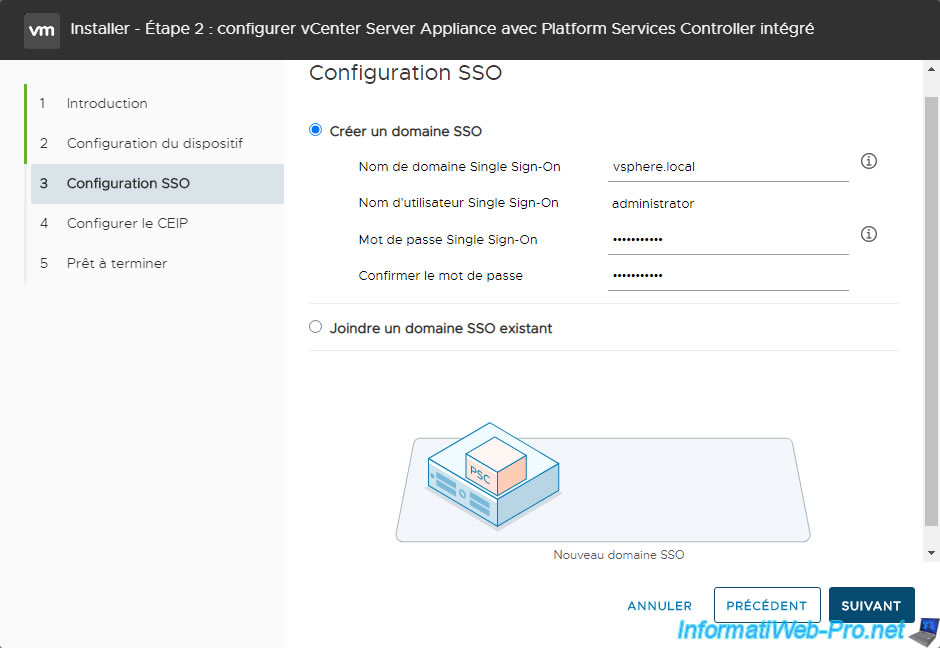
To avoid the need for users to authenticate to each component of your vCenter Server Appliance (VCSA) with Platform Service Controller (PSC), VMware has created a component called VMware vCenter Single Sign-On (SSO) for which you must indicate :
- a Single Sign-On (SSO) domain name: by default "vsphere.local"
- a password for the "administrator" account which will become by default the "administrator@vsphere.local" account.
The message "Saving settings" appears for a few seconds.

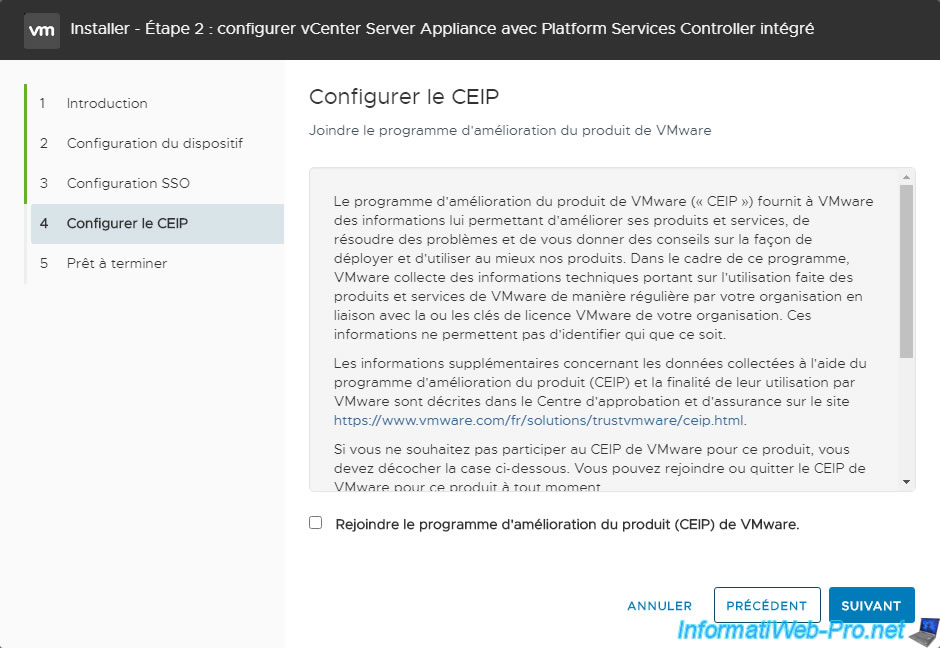
Opt out of VMware's Product Improvement Program (CEIP) as most companies do for privacy reasons.
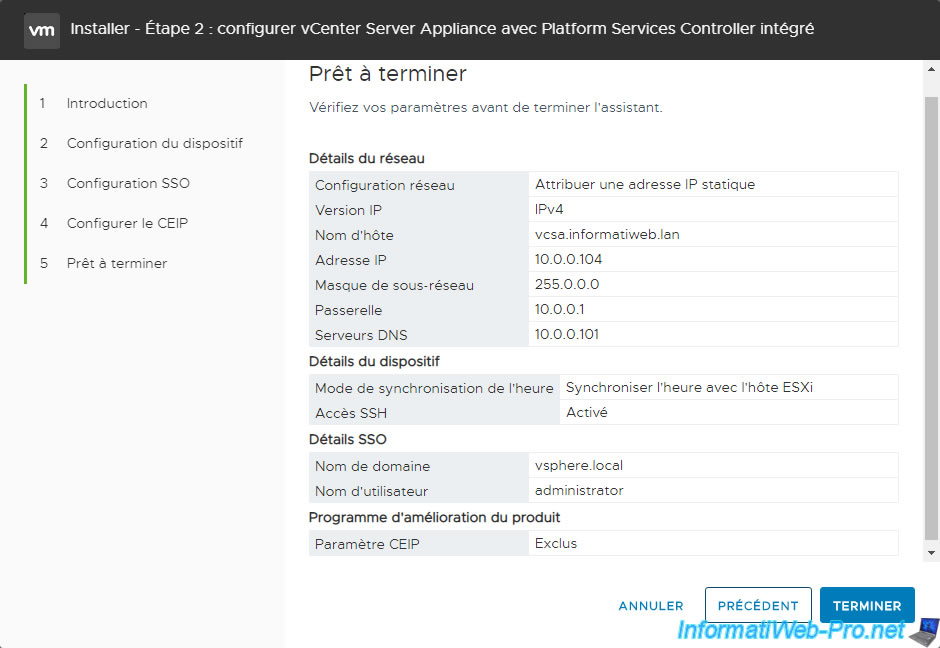
A summary of the configuration of your VCSA virtual machine appears.
Click Finish.
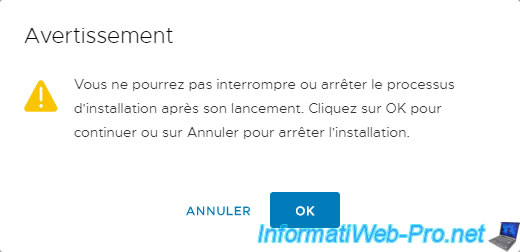
As indicated by this warning, you will not be able to interrupt its installation process after it is launched.
Click OK to continue.
The message "Configuration is about to begin" appears.

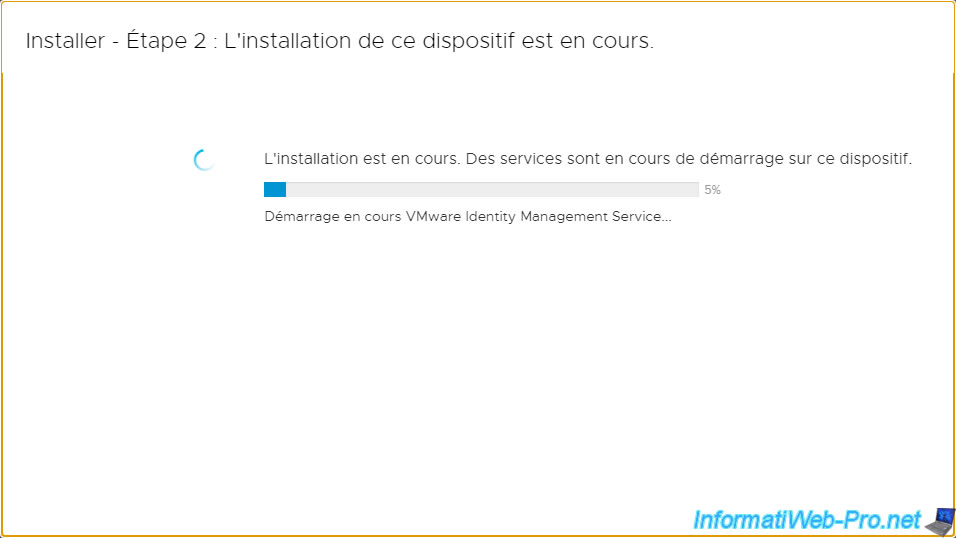
An "Install – Step 2: The installation of this device is in progress" window appears.

Wait while the installation takes place.
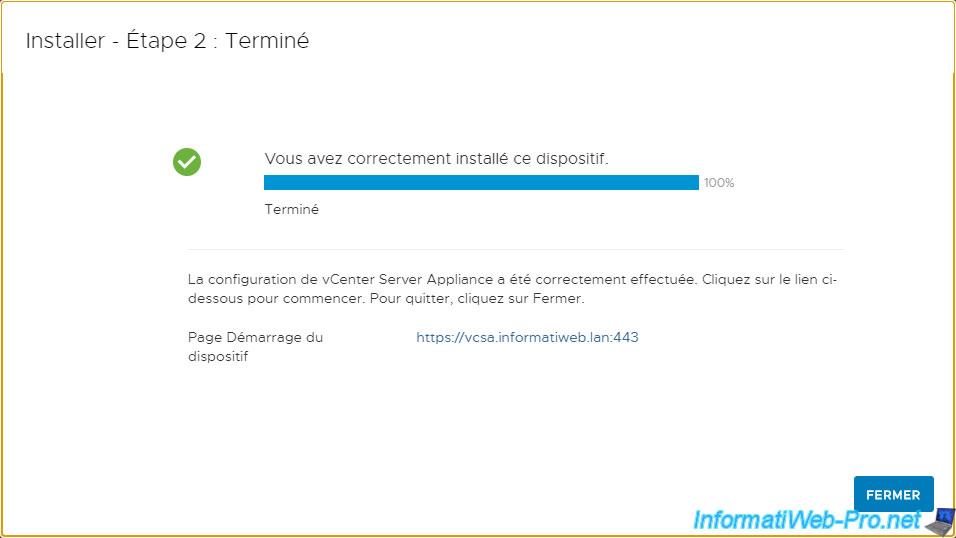
Once the vCenter Server Appliance setup is complete, the message "You have successfully setup this Appliance will appear.
To connect to it, go to: https://vcsa.informatiweb.lan:443
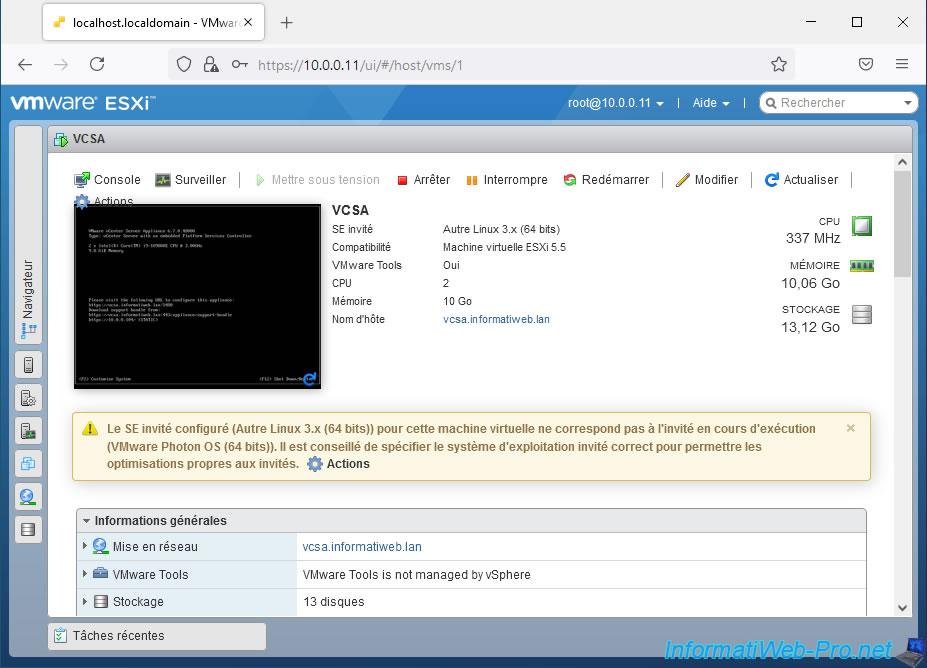
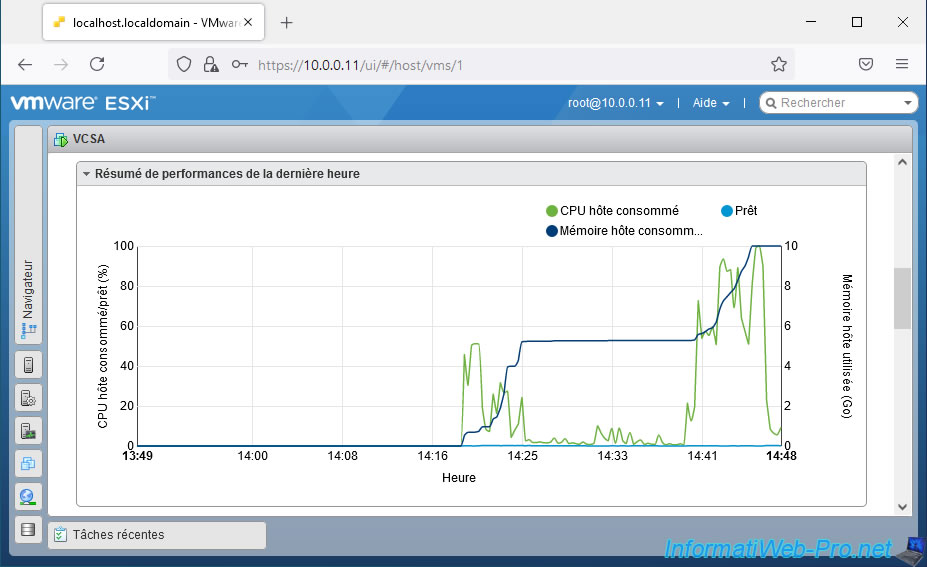
As you can see, your VCSA virtual machine is now using more system resources, including more RAM.
Indeed, in our case, it now uses 10 GB of RAM instead of the 5 GB of RAM earlier.
If you look at the storage of this virtual machine, you will see that it has several virtual hard disks.
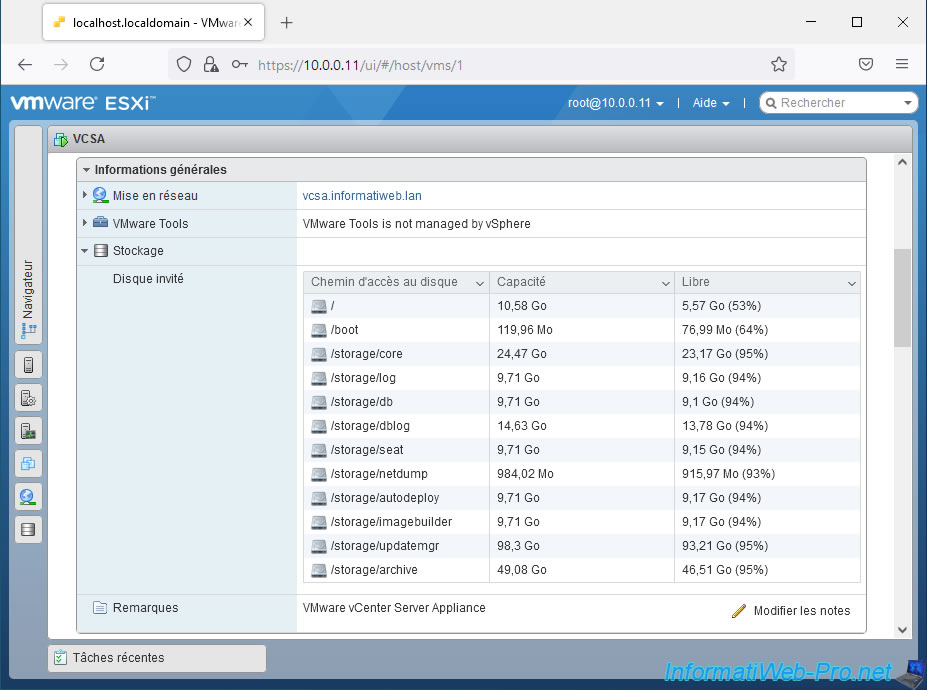
If you look a little further down on the same page, you will see that the consumption of system resources (and in this case: RAM) has significantly increased following its configuration.
6. Console and web interfaces
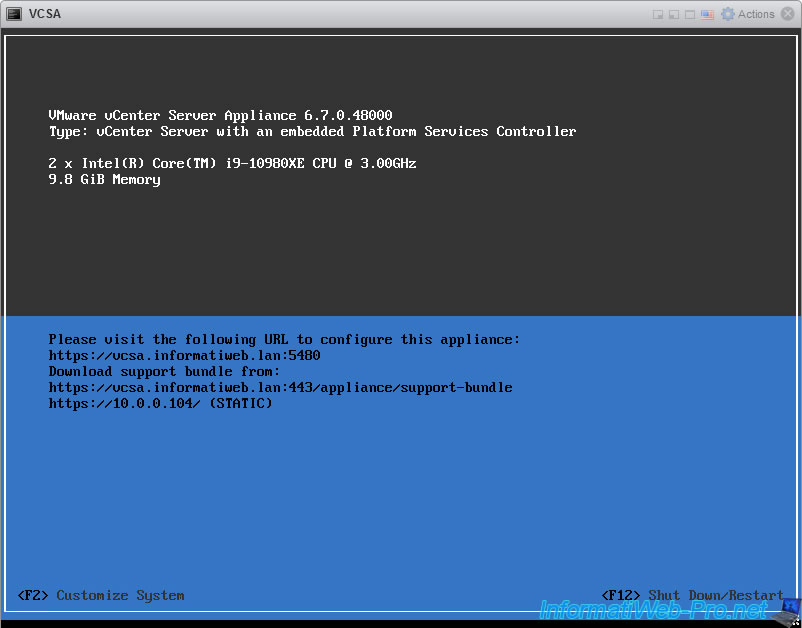
If you view the console of this VCSA virtual machine again, you will see that additional information has appeared on it.
Indeed, you can now see:
- the name of this VM: VMware vCenter Server Appliance
- its version: 6.7.0.48000
- the type of deployment used: vCenter Server with an embedded Platform Services Controller
- information regarding the host processor and the number of cores allocated to this VM: 2 x Intel(R) Core(TM) i9-10980XE CPU @ 3.00GHz
- the amount of RAM allocated to this VM: 9.8 GiB Memory
You will also be able to see different addresses pointing to this virtual machine:
- https://vcsa.informatiweb.lan:5480 : to configure this VCSA device
- https://vcsa.informatiweb.lan:443/appliance/support-bundle : to generate and download a support bundle that you can send to VMware support in the event of a problem
- https://10.0.0.104/ : the IP address of this virtual machine
To access the web interface of your VCSA device, go to: https://vcsa.informatiweb.lan/
Next, click on the "Launch vSphere Client (HTML5)" button since the old version (vSphere Web Client - Flex) is Flash-based and this is outdated.
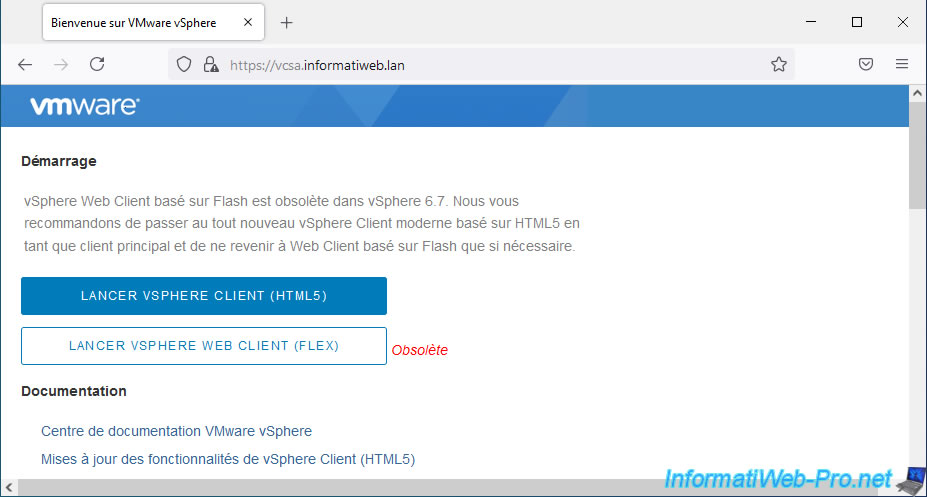
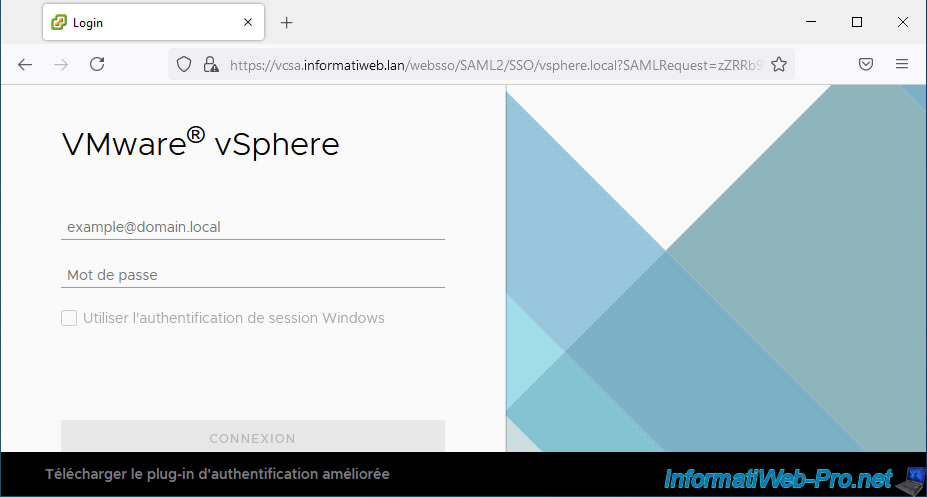
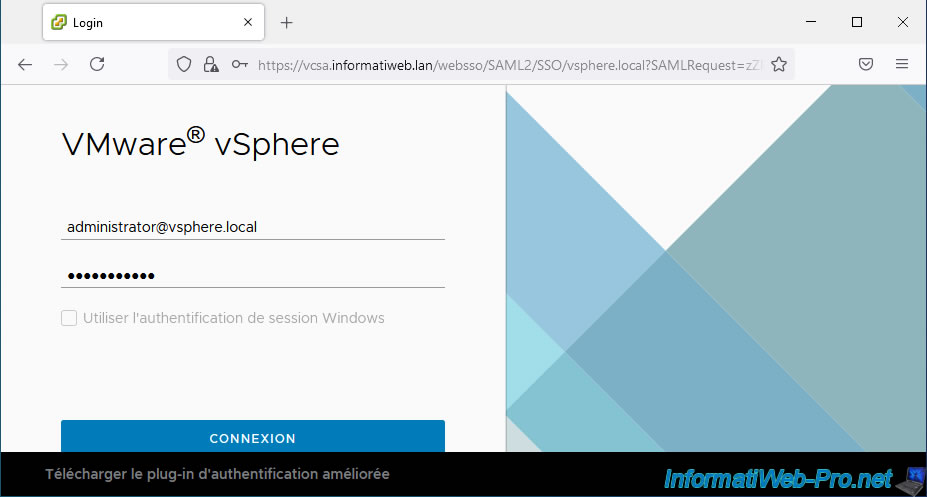
The "VMware vSphere" login page appears.
6.1. VMware vSphere Client
Through this VMware vSphere login page, you will be able to access the "VMware vSphere Client" interface by logging in as "administrator@vsphere.local".
The domain name "vsphere.local" being the vCenter Single Sign-On domain name configured when configuring the VCSA appliance.
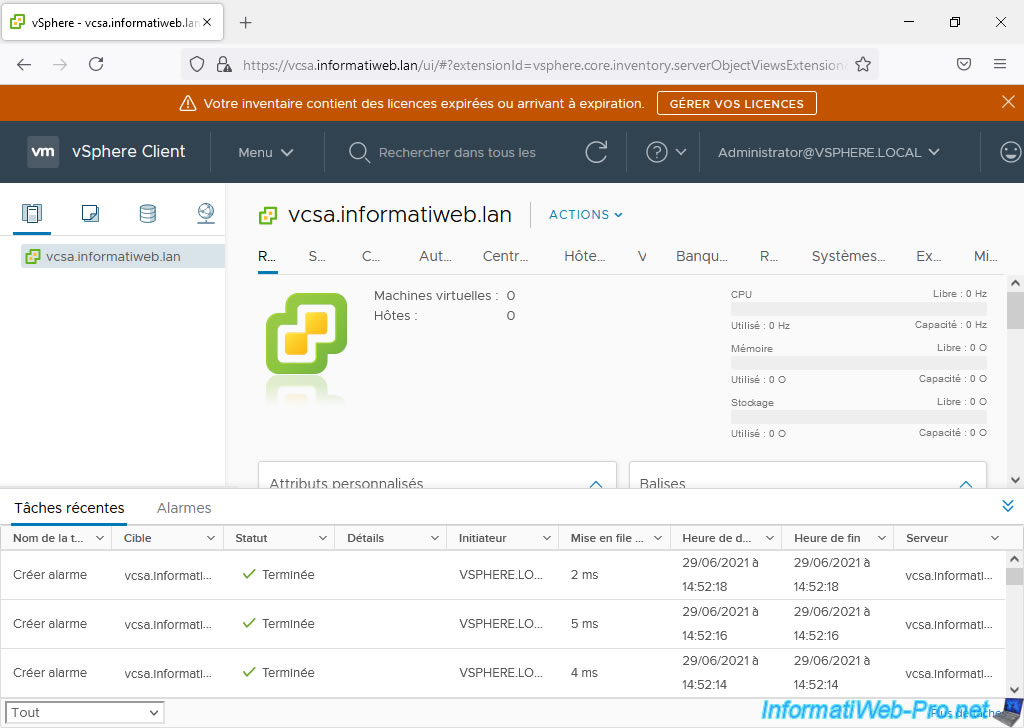
As expected, you have access to the "VMware vSphere Client" interface allowing you to manage your VMware ESXi hosts.
6.2. VCSA appliance management
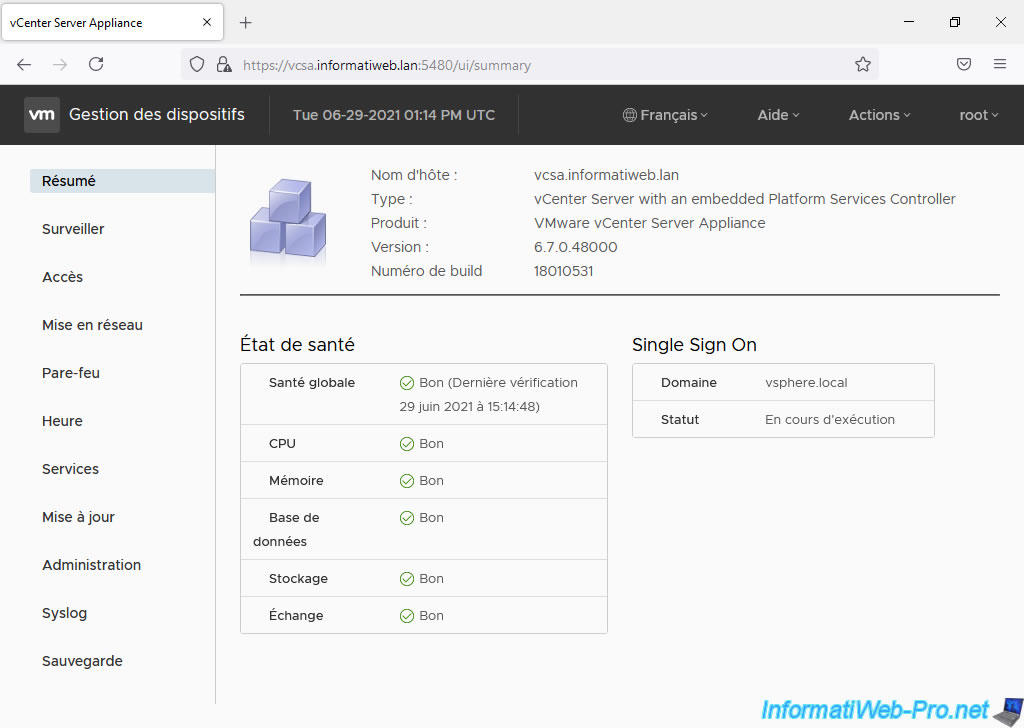
If you connect to port "5480" of your VCSA virtual machine (via the address "https://vcsa.informatiweb.lan:5480"), you will be able to manage your VCSA device by logging in as root.
Warning : this is the root account of your VCSA device and not that of your VMware ESXi server.
You defined the password for this root account when deploying your VCSA device.

This time, you arrive on a "VMware - Appliance Management" page which allows you to obtain a lot of information about your VCSA device and configure many settings.
Share this tutorial
To see also
-
VMware 3/13/2024
VMware ESXi 6.7 - Synchronize the clock of ESXi hosts from a time server (NTP)
-
VMware 3/8/2024
VMware ESXi 6.7 - Synchronize the clock of VCSA from a time server (NTP)
-
VMware 7/31/2024
VMware vSphere 6.7 - Add an Active Directory identity source
-
VMware 5/22/2024
VMware vSphere 6.7 - Change default console
No comment