- VMware
- 21 February 2024 at 09:18 UTC
-

- 1/3

To manage multiple VMware ESXi 6.7 hosts, you can use the VMware vCenter Server solution which allows you to manage all your hosts from a single web interface.
This VMware vCenter Server solution is available in 2 versions: a virtual appliance called VCSA (which we will deploy in this tutorial) and a Windows version that you can install on a server running Windows Server.
- Use the VCSA virtual appliance or the Windows version of VMware vCenter Server?
- Prerequisites for deploying VCSA
- Configuring the DNS server
- Deploy the VMware VCSA (vCenter Server Appliance) virtual machine
- Configure the VMware VCSA (vCenter Server Appliance)
- Console and web interfaces
- Overview of the VCSA appliance management interface
1. Use the VCSA virtual appliance or the Windows version of VMware vCenter Server?
To begin with, from version 6.7 of VMware vSphere, the Windows version is deprecated and it therefore no longer exists in version 7.0 of VMware vSphere.
So we recommend using the VCSA Virtual Appliance instead.
Then, using this VCSA virtual appliance also has other advantages:
- ease of deployment. Just follow the wizard and it takes care of the rest (deployment of the VM, automatic configuration of it, ...).
- no need for an additional expensive license for the Windows Server on which you have installed VMware vCenter Server
- no need to install an external database server (such as Microsoft SQL Server or its free version "Express"), nor to create a user, a SQL database and an ODBC source required when deploying the Windows version of VMware vCenter Server.
Indeed, VCSA will use an integrated PostgresSQL database which supports up to 1000 hosts and 10,000 virtual machines. - VMware recommends virtualizing everything and since VCSA will be deployed on your VMware ESXi servers as a VM, this respects VMware's desire to virtualize everything.
Sources :
- Farewell, vCenter Server for Windows
- 11.2 Physical or Virtual vCenter Server
- vCenter Server Appliance Database Requirements
2. Prerequisites for deploying VCSA
As noted on the VMware Knowledge Base page "Minimum requirements for the VMware vCenter Server 6.x Appliance (2106572)", the VCSA virtual machine can only be deployed on a VMware ESXi 5.x or later host.
You therefore cannot use this VM on other virtualization solutions, such as VMware Workstation or other competing solutions.
For the system resources required by VCSA, the minimum requested is:
- 120 GB of disk space on the host where the VCSA VM will be deployed, if you use an integrated deployment (vCenter Server + PSC). Which is recommended since the use of an external PSC has been deprecated since VCSA version 6.7.
- 8 GB of RAM for the VCSA VM if all components (vCenter Server + PSC) are installed in a single VCSA VM
- 1 processor with 2 cores for the VCSA VM
For configuration requirements for deployments larger than 10 hosts with 100 virtual machines, refer to VMware KB2106572 cited above.
Note: we recommend that you deploy VCSA from a client computer running Windows 10, rather than from a server running Windows Server 2016 to avoid an error occurring during its deployment.
3. Configuring the DNS server
Before deploying your VCSA virtual machine on your VMware ESXi host, you must create a new DNS record of type "A" or "AAAA" on your company's DNS server.
However, before creating it, make sure you have created the corresponding reverse lookup box on it.
To do this, refer to step "3. Creating the reverse lookup zone on your DNS server" of our "VMware vSphere 6.7 - Install vCenter Server with SQL Server database" tutorial.
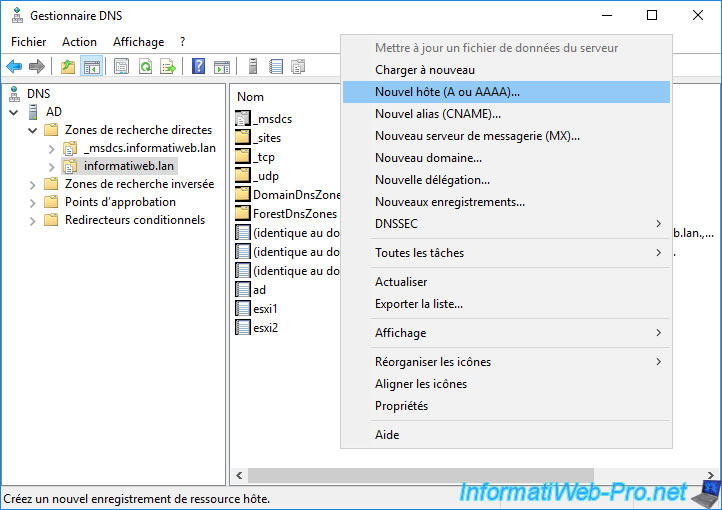
Once the reverse lookup zone is created and updated (to create the necessary pointers to it), select your forward lookup zone and right-click "New Host (A or AAAA)".
Important : in our case, we had already created the DNS records for our 2 VMware ESXi hosts (esxi1 and esxi2).
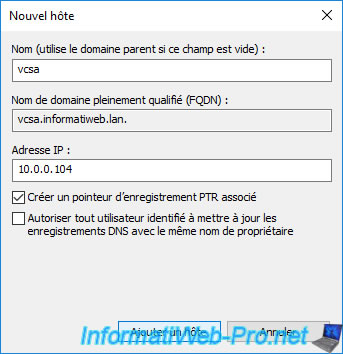
Specify "vcsa" as the name and indicate the IP address you want to use for your future VCSA virtual machine.
Also check the box "Create associated pointer (PTR) record" so that the associated (PTR) pointer is also created in your reverse lookup.
Indeed, without this pointer, it is possible that the deployment or configuration of the VCSA VM will fail at some point.
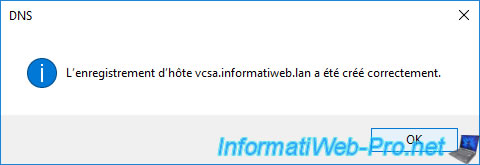
The vcsa.informatiweb.lan host record was created successfully.
4. Deploy the VMware VCSA (vCenter Server Appliance) virtual machine
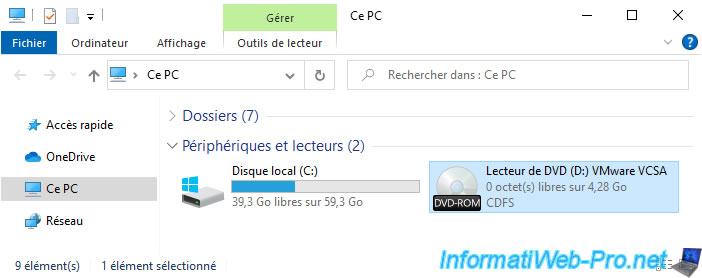
Download VMware VCSA from the VMware website, then mount the ISO file (VMware-VCSA-all-6.7.0-17028579.iso) in a CD/DVD drive by double-clicking it.
This is possible natively since Windows Server 2012.
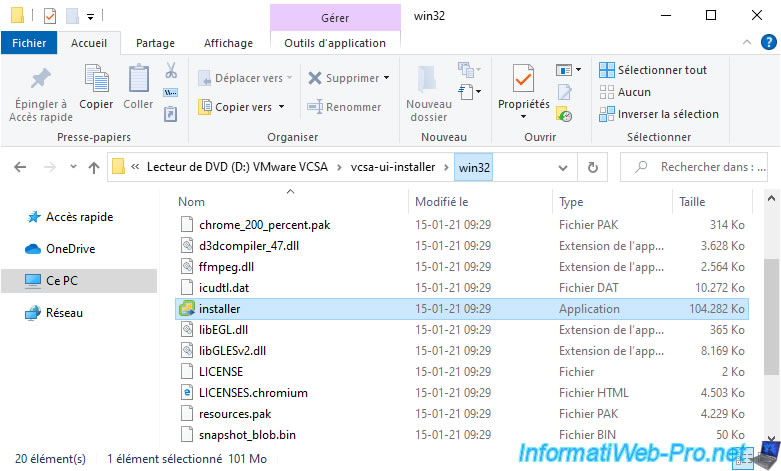
Then, enter this installation DVD and launch the "installer.exe" program which is located in the "vcsa-ui-installer\win32" folder.
By default, the VCSA (vCenter Server Appliance) 6.7 installer appears in English.
To use another language, click on "English" (top right) and select the desired language.
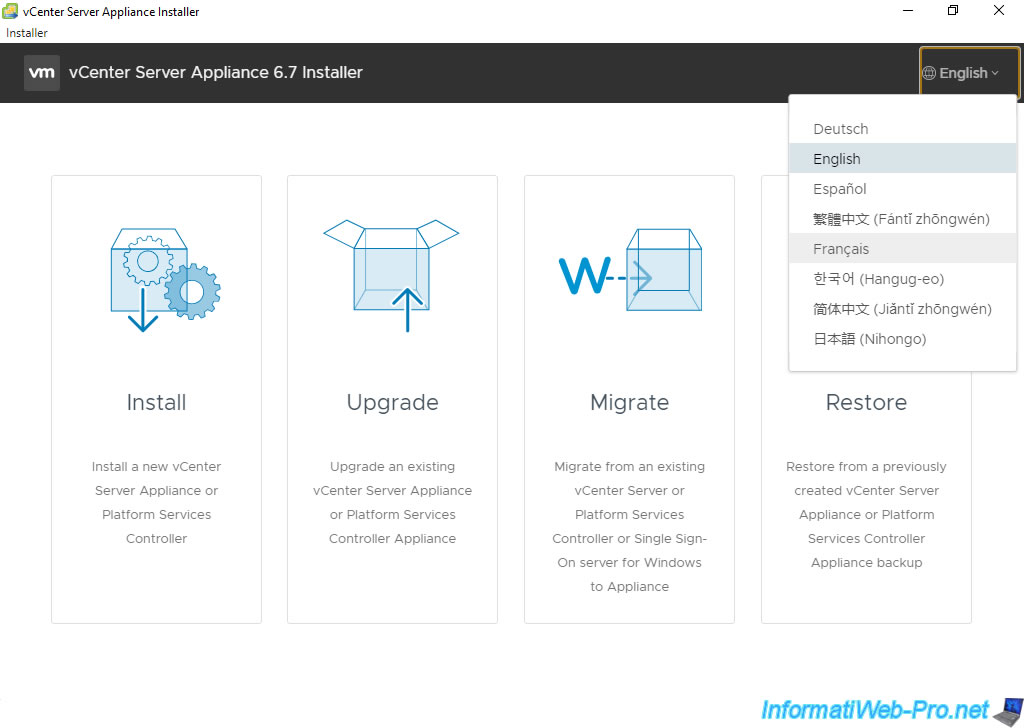
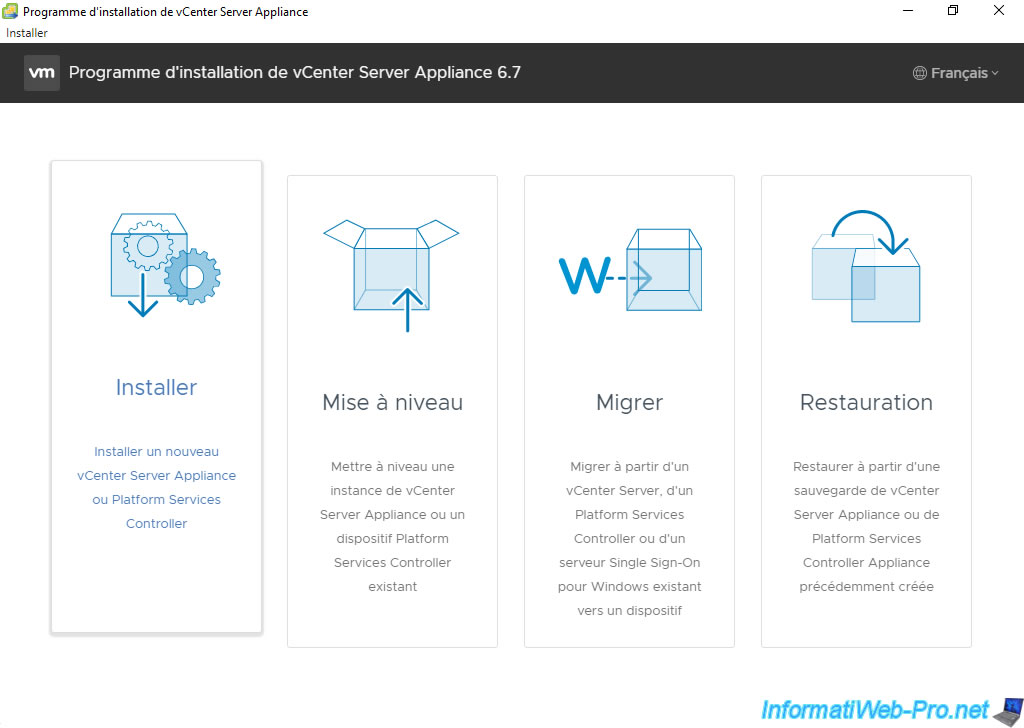
Now the vCenter Server Appliance 6.7 installer is displayed in your language.
Choose the "Install" option.
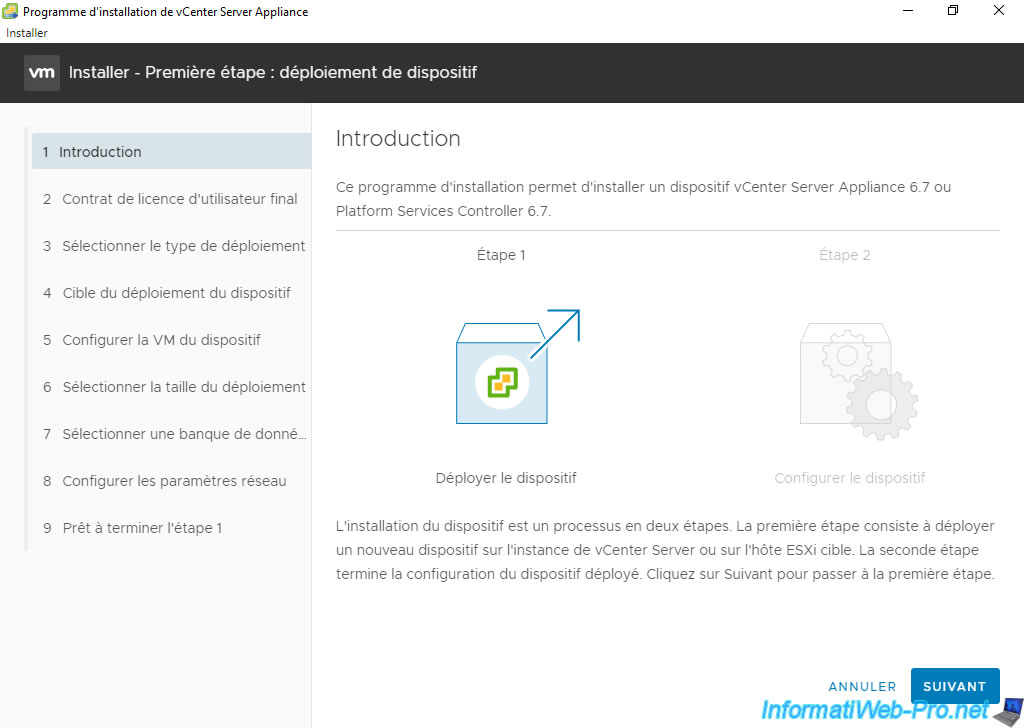
The vCenter Server Appliance 6.7 Deployment Wizard appears.
Click Next.
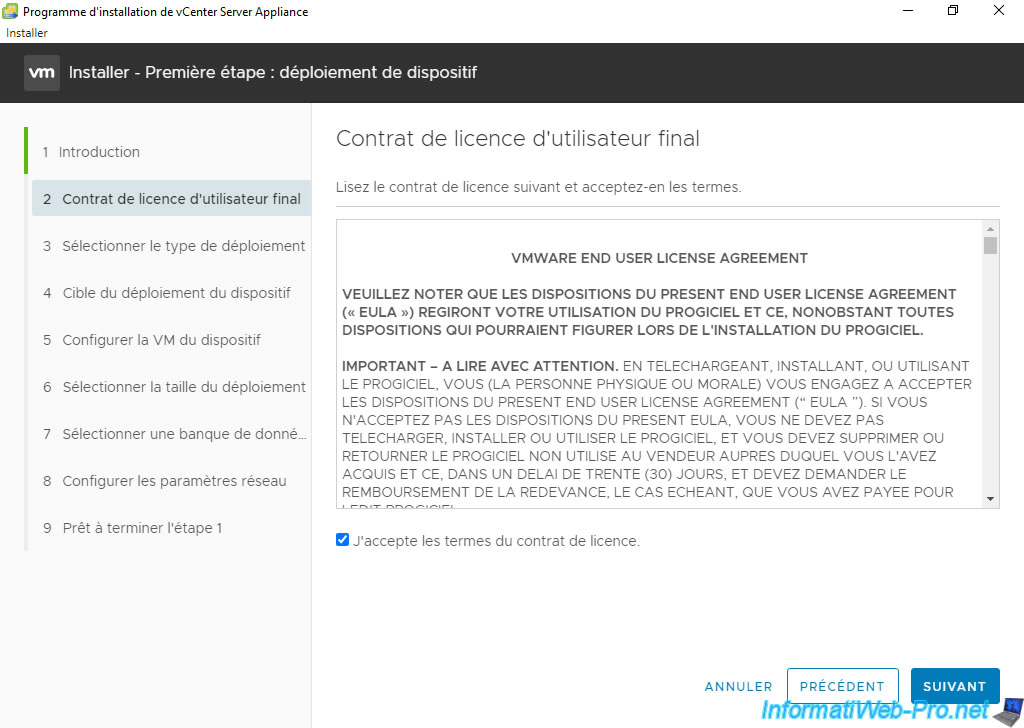
Accept the VMware license terms and click Next.
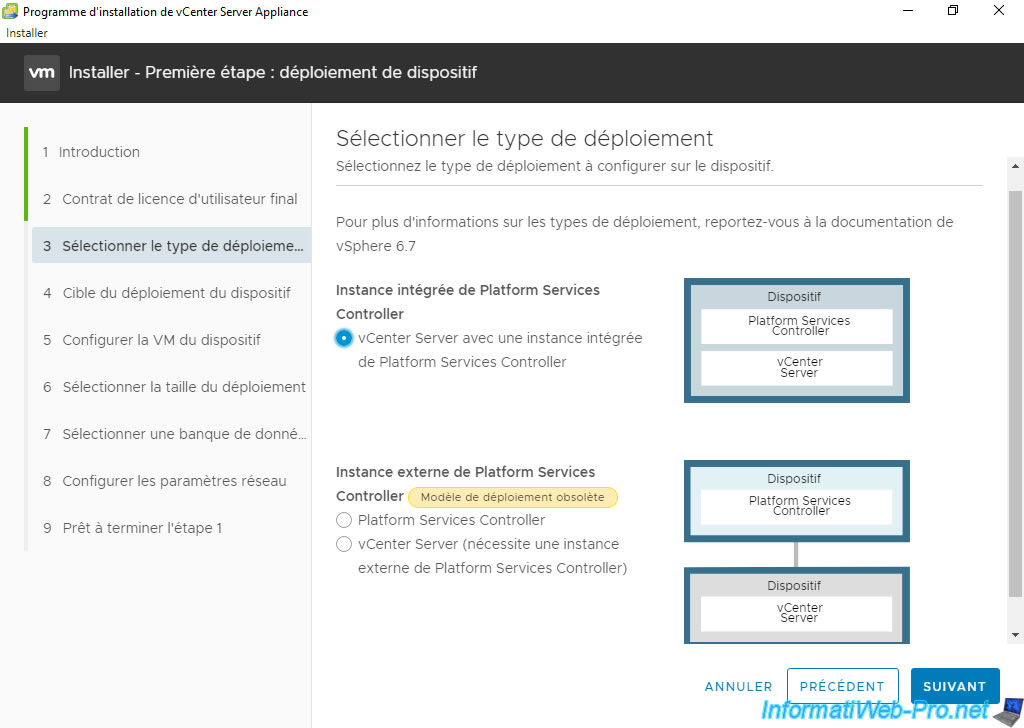
Select "vCenter Server with an Embedded Platform Services Controller" since the use of an external Platform Services Controller (PSC) is now deprecated.
Specify the address of the VMware ESXi host (5.x minimum) on which you want to deploy your vCenter Server Appliance (VCSA), as well as the name of a user and the password of an account with rights required.
In our case, we will use the root account of our VMware ESXi 6.7 host.
Note: the account used must have administrator rights on the target VMware ESXi host.

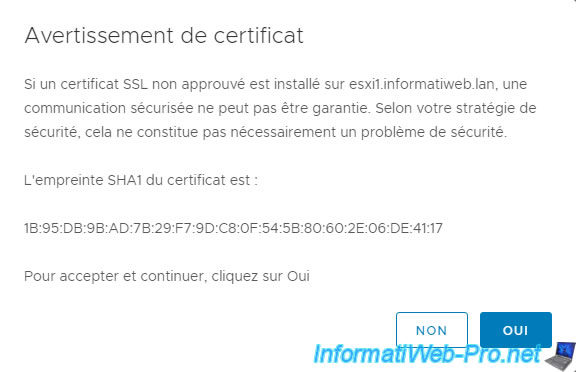
If you have not yet configured a valid certificate on your VMware ESXi host, a certificate warning will appear since the one used by default is self-signed.
In this case, ignore this warning by clicking Yes.
The "Validation" message appears for a few seconds.

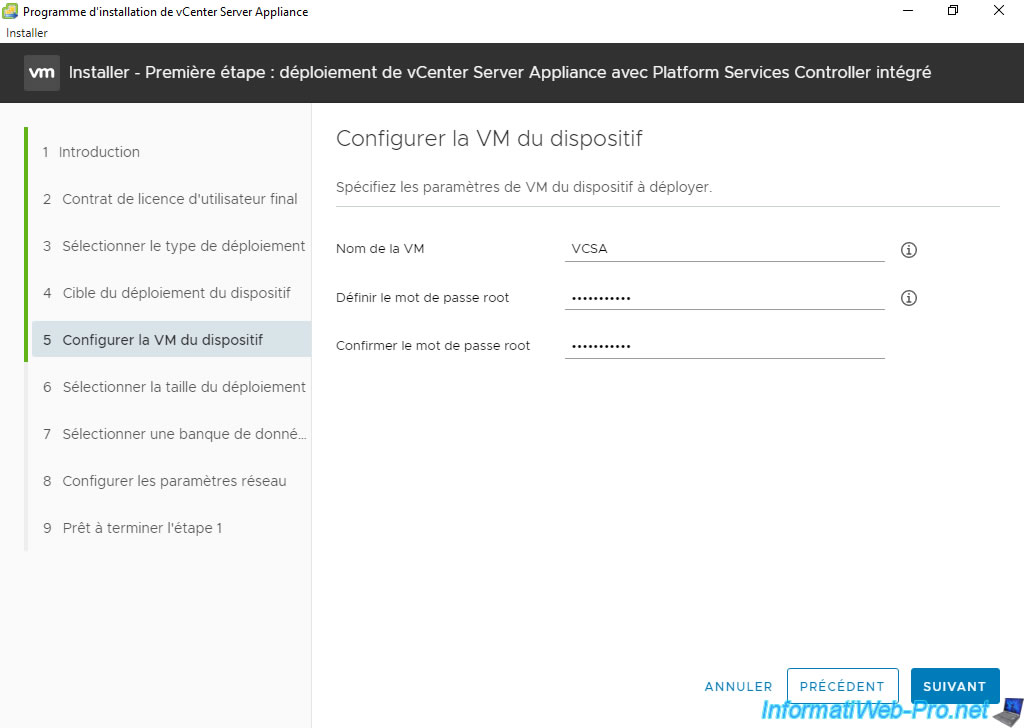
By default, the installer is configured to deploy the virtual machine under the name "VMware vCenter Server Appliance".
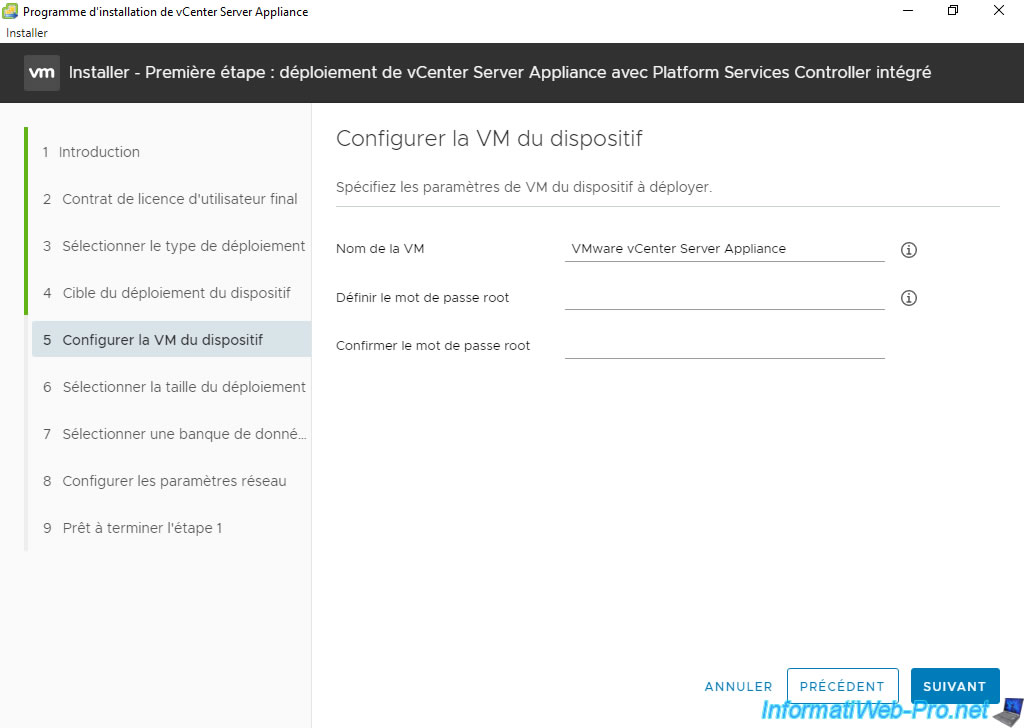
However, to find it more easily, we will name it: VCSA.
Next, set a password for the root account of this VCSA virtual machine.
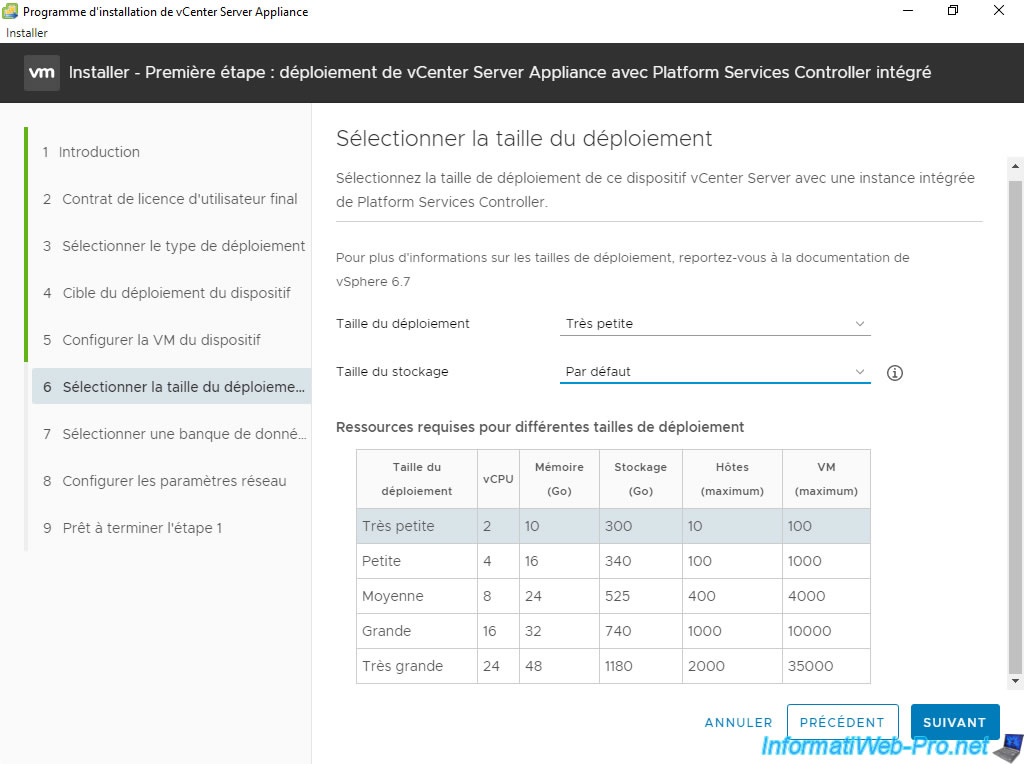
Select the size of your deployment based on the number of VMware ESXi hosts and the number of virtual machines you want to manage from this VCSA instance.
This choice will automatically adapt the resources required for processor (vCPU), RAM (Memory) and storage.
For this tutorial, we installed 2 VMware ESXi hosts, so we selected "Tiny" for the deployment size.
Which will require in our case:
- a processor with 2 cores
- 10 GB of RAM
- 300 GB of storage space
Note that the VCSA virtual machine will only use a portion of the RAM specified here for its deployment.
However, once its configuration is complete, the system resources used will increase and the 10 GB of RAM (in our case) will actually be used.
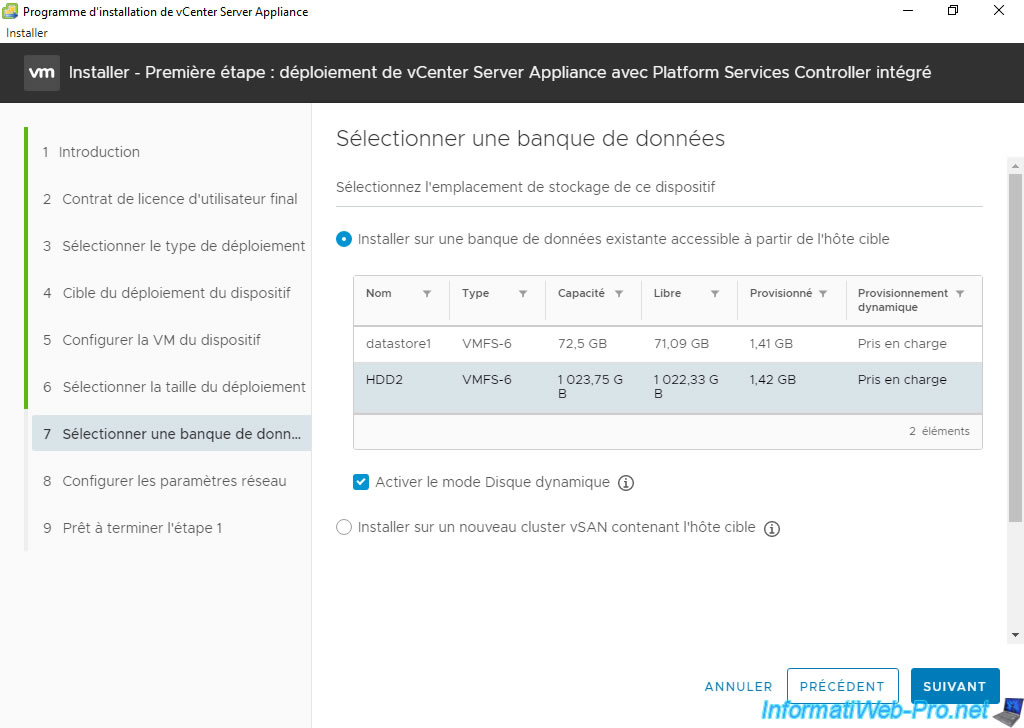
Select the target VMware ESXi host datastore where you want to deploy this VCSA VM.
In our case, we select our 2nd hard drive (around 1 TB) on which we had previously created a datastore.
If you want to save disk space, don't forget to check the "Enable Thin Disk Mode" box.
However, if you check this box, then make sure to regularly check the disk space used on your datastore to avoid that your datastore is one day filled to the maximum and that the virtual machine (as well as the other VMs stored on this datastore) are not automatically frozen by your VMware ESXi host.
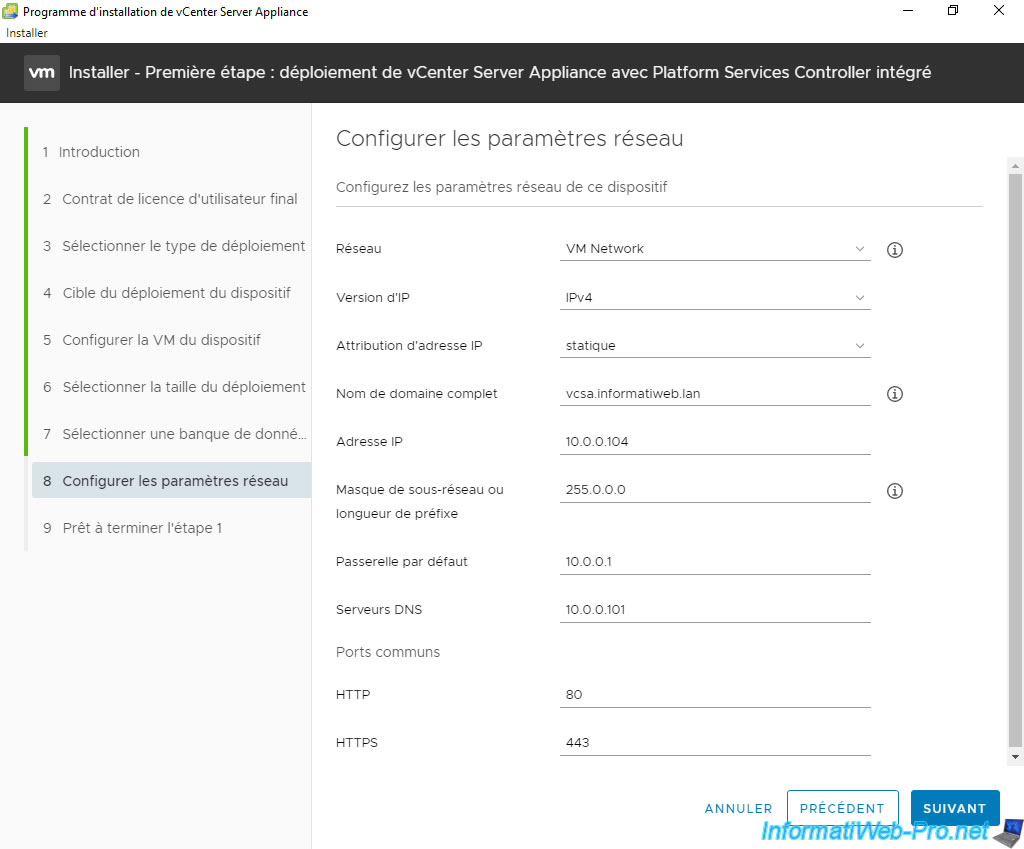
For network settings:
- Network: choose the port group to which to connect your future VCSA VM. Default: VM Network.
- IP version: IPv4 or IPv6 (your choice). But, when in doubt, choose IPv4.
- IP assignment: static. To prevent the VCSA VM from changing its IP address from time to time.
- FQDN: The fully qualified domain name (FQDN) previously configured for your VCSA VM on your DNS server.
In our case: vcsa.informatiweb.lan. - IP address: The IPv4 or IPv6 address previously specified for the DNS "vcsa" record on your DNS server.
- Subnet mask or prefix length: The subnet mask to use. Typically, "255.255.255.0" for Class C IP addresses (192.168.1.x) or "255.0.0.0" for Class A IP addresses (10.x.x.x).
- Default gateway: IP address of your router
- DNS servers: IP address of the DNS server where you created your DNS "vcsa" record. Typically, your DNS server is on the same server as the Active Directory domain controller.
- Common Ports (HTTP / HTTPS): leave the values indicated as default (80 / 443).
Then click Next.
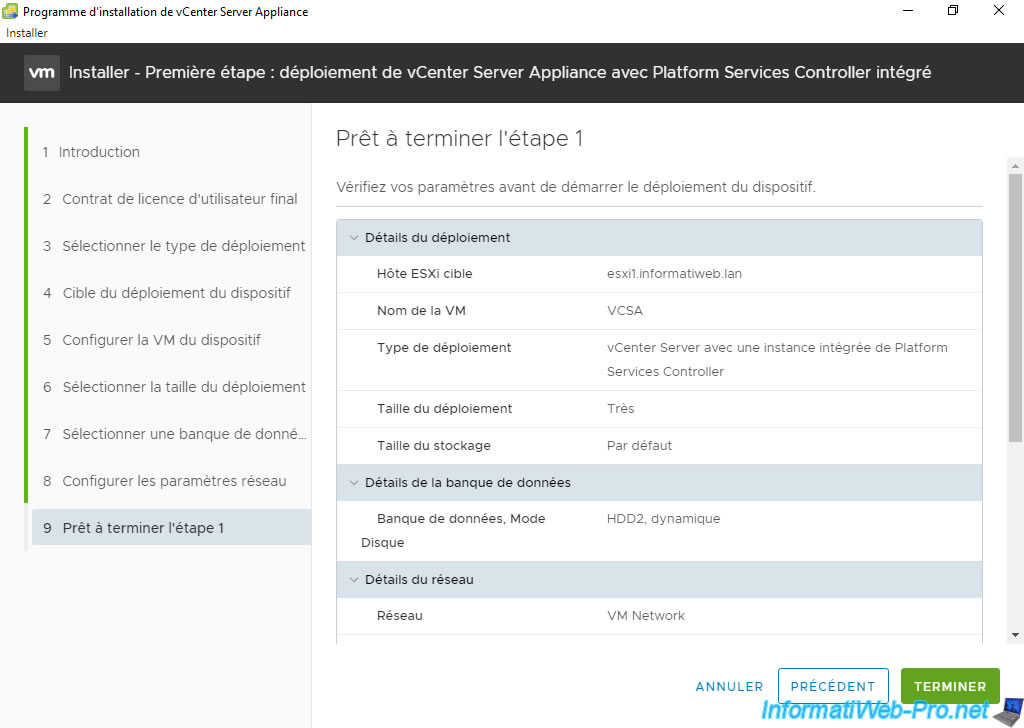
A summary of your VMware vCenter Server Appliance (VCSA) deployment configuration appears.
Click Finish.
Wait while deploying vCenter Server Appliance with integrated Platform Services Controller.
Note: if the deployment of VCSA (vCenter Server Appliance) fails from a server running Windows Server 2016, try again from a client workstation running Windows 10.
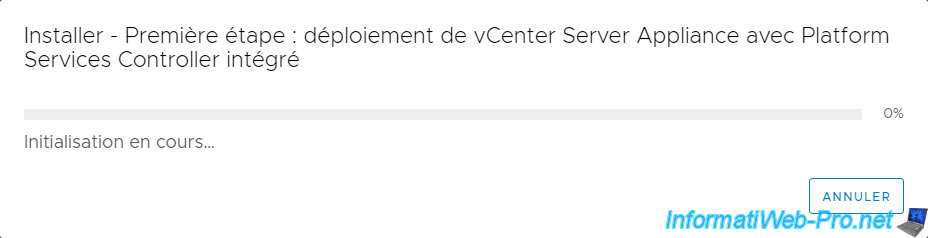
The deployment of the device begins.
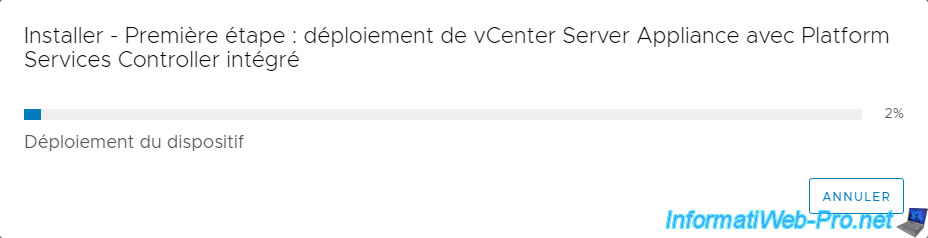
If you log in to the target VMware ESXi host, you will see that an "Import VApp" task is running.
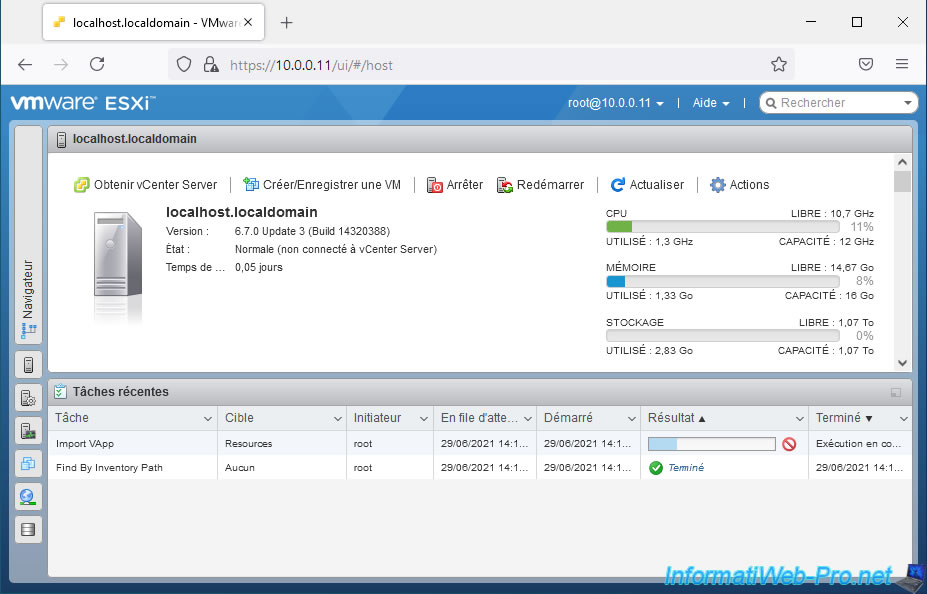
And indeed, a VCSA virtual machine appeared on it.

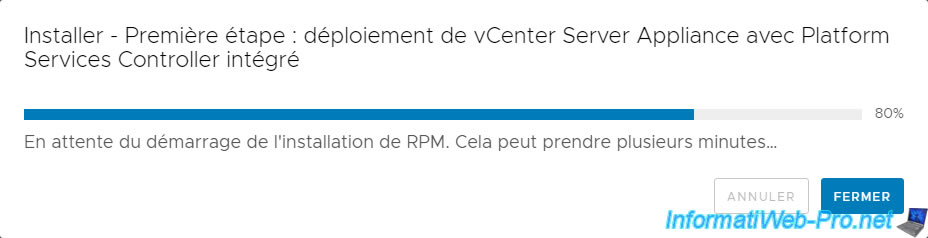
Then the message "Waiting for RPM installation to start. This may take several minutes" will appear.
Wait a little longer.
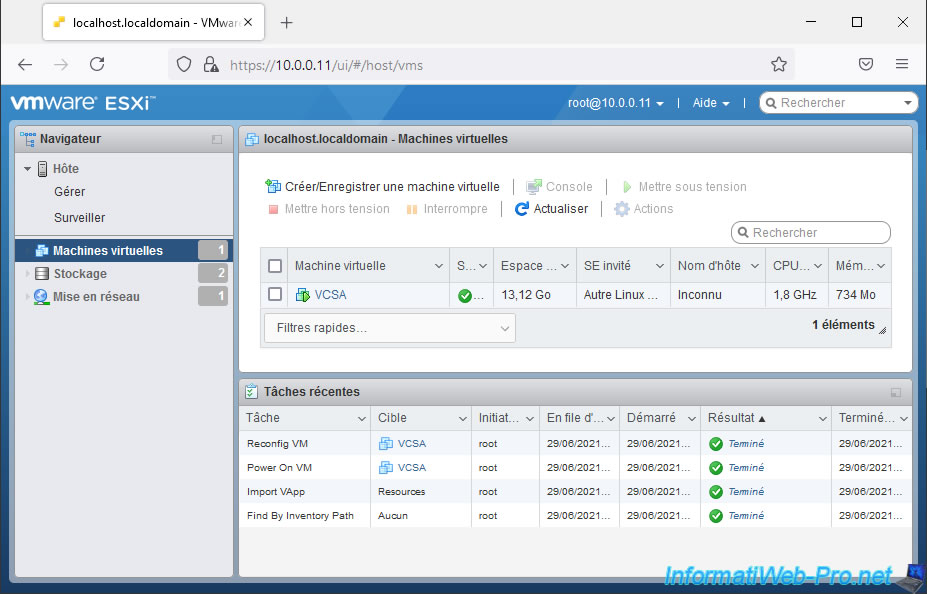
If you return to your target VMware ESXi host, you will see that the VApp import is complete and that 2 other tasks have also been executed (Reconfig VM and Power On VM).
Hence the fact that the VCSA virtual machine was started automatically on your VMware ESXi host.
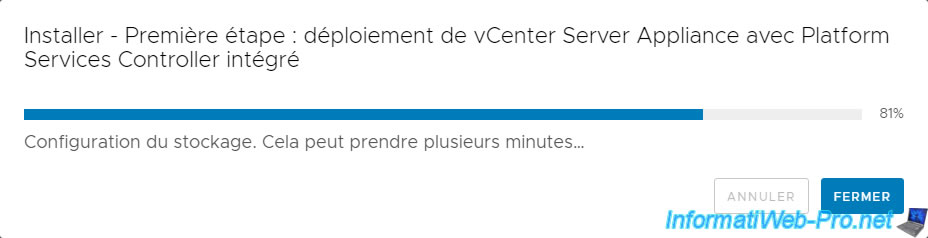
Finally, the VCSA deployment wizard will configure its storage.
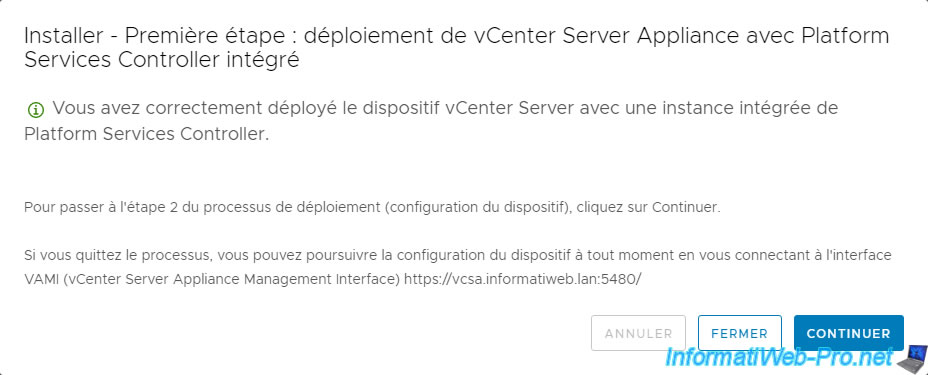
Once the VCSA deployment is complete, the message "You have successfully deployed the vCenter Server appliance with an embedded Platform Services Controller" will appear.
However, it's not over.
Indeed, as shown here, you will now need to proceed to step 2 of the deployment process to configure this VCSA appliance.
To do this, click Continue to configure it now or log in later at "https://vcsa.informatiweb.lan:5480/".
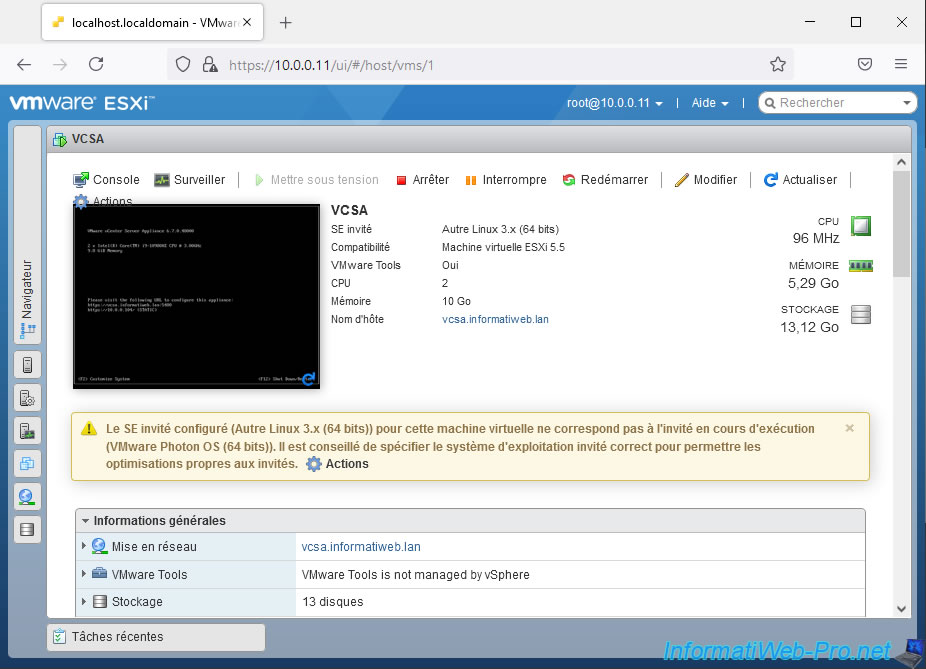
If you view your VCSA virtual machine information on your VMware ESXi host, this is what it looks like.
As you can see, it's not using many resources at the moment. In fact, currently, it only uses around 5 GB of RAM in our case.
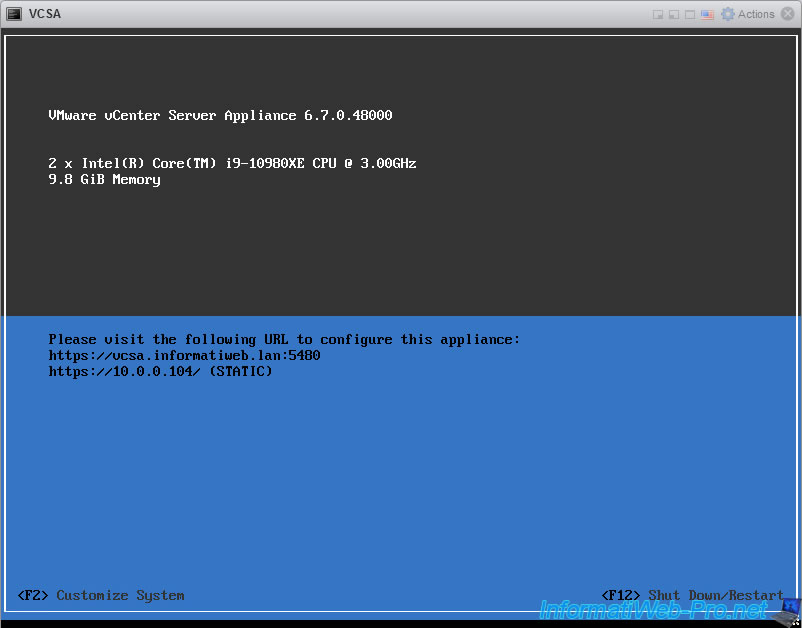
If you view the console of this VCSA virtual machine, you will see that the interface closely resembles that of your VMware ESXi hypervisor.
Except that the yellow stripe has turned blue.
Share this tutorial
To see also
-
VMware 3/13/2024
VMware ESXi 6.7 - Synchronize the clock of ESXi hosts from a time server (NTP)
-
VMware 3/8/2024
VMware ESXi 6.7 - Synchronize the clock of VCSA from a time server (NTP)
-
VMware 7/31/2024
VMware vSphere 6.7 - Add an Active Directory identity source
-
VMware 5/22/2024
VMware vSphere 6.7 - Change default console
You must be logged in to post a comment