- VMware
- 20 December 2024 at 12:10 UTC
-

- 1/3
With vApps, you can easily group together multiple virtual machines. But, you can also clone vApps in one go from the vSphere Client.
- Clone a vApp
- Delete a vApp
- Clone a vApp to a local content library
- Create a new vApp from an OVF template stored in the content library
1. Clone a vApp
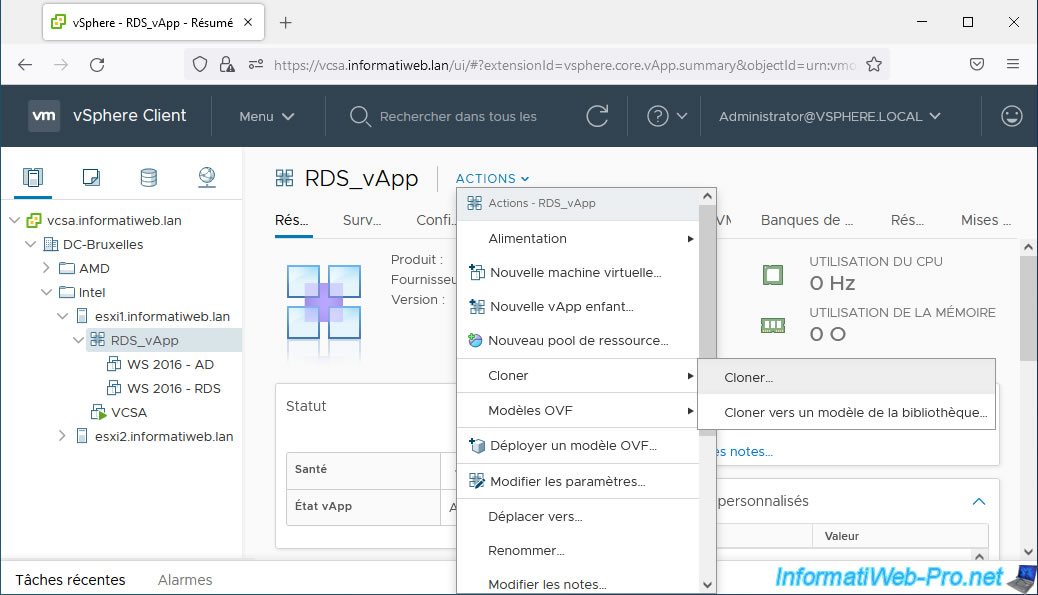
To clone a vApp, right-click on it or select it, click on "Actions", then click on: Clone -> Clone.
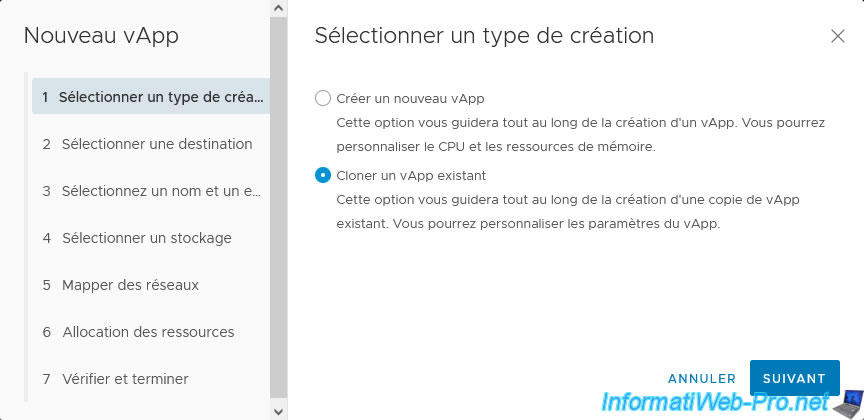
In the "New vApp" wizard that appears, the creation type selected by default will be "Clone an existing vApp".
Click Next.
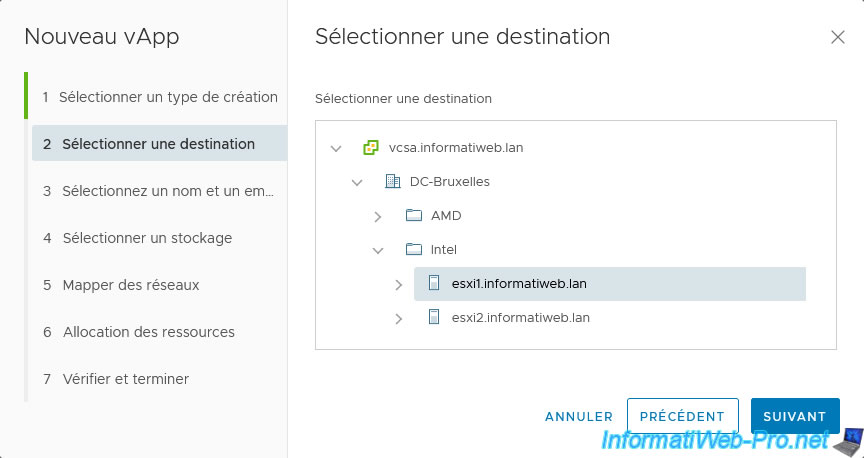
Select the host where you want the copied vApp to run after cloning is complete.
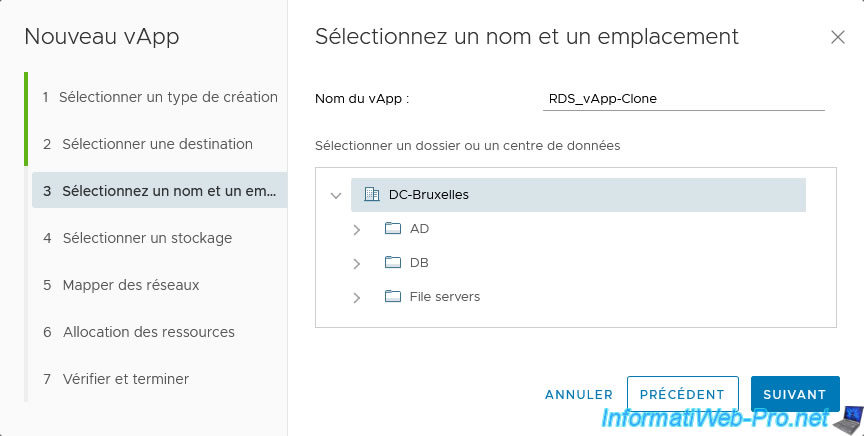
Provide a name for the destination vApp and select the datacenter or folder where you want to add it.
Select the datastore where you want to store this vApp.
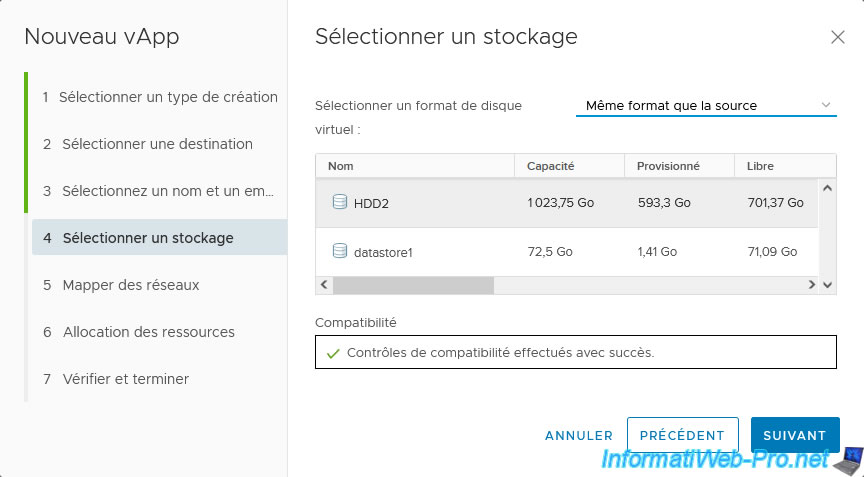
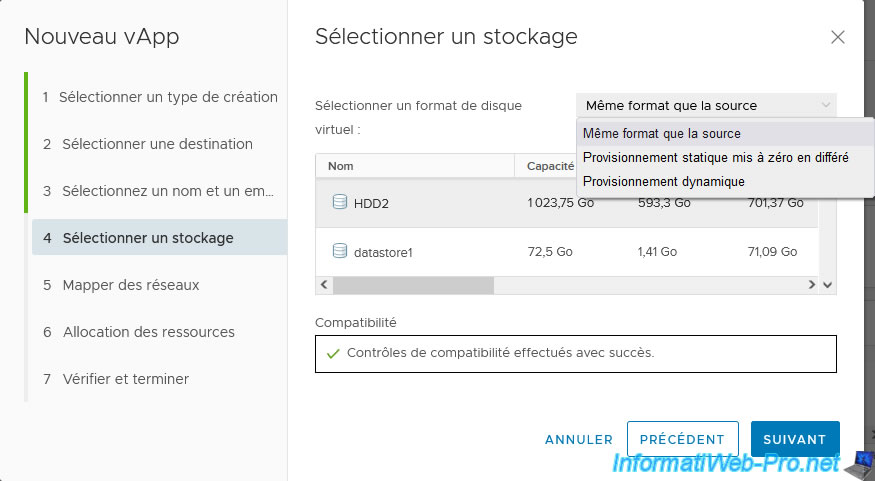
By default, the virtual disk format will be the one used on the original vApp.
However, if you wish, you can force the use of deferred zeroed static provisioning (pre-allocated space) or dynamic provisioning (non-pre-allocated space) to save disk space and reduce the time required for cloning this vApp.
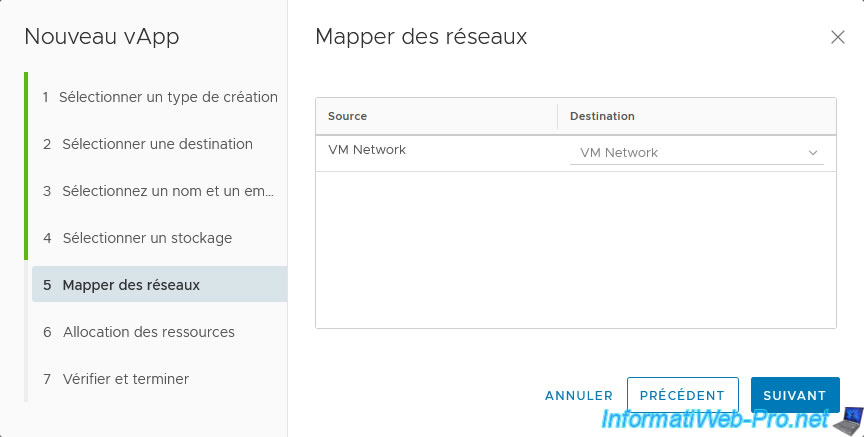
Map the vApp networks to your own virtual networks.
In our case, this vApp only uses the default virtual network "VM Network".
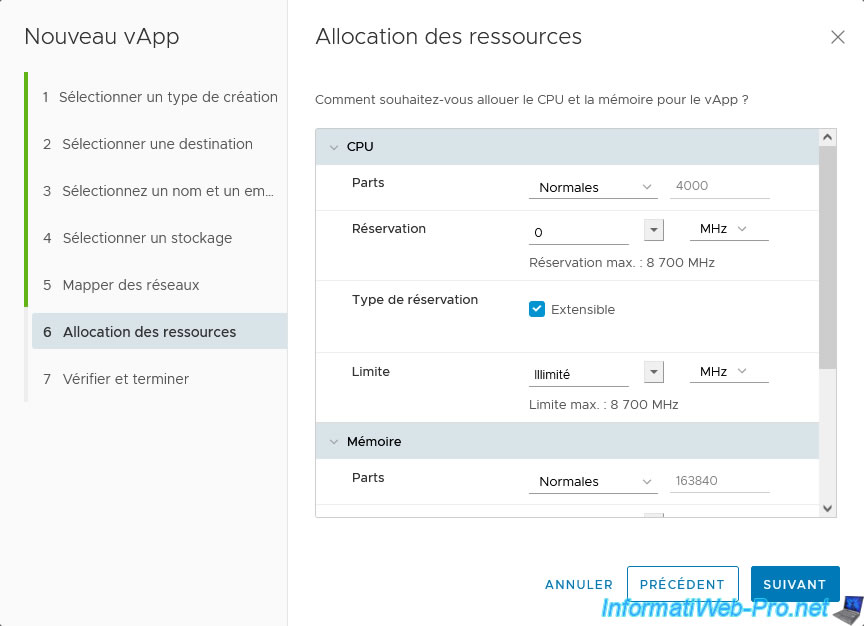
As when creating a vApp, you can adapt the allocation of resources (CPU and memory) if you wish.
For more information about these settings, refer to our tutorial: VMware vSphere 6.7 - Create a vApp.
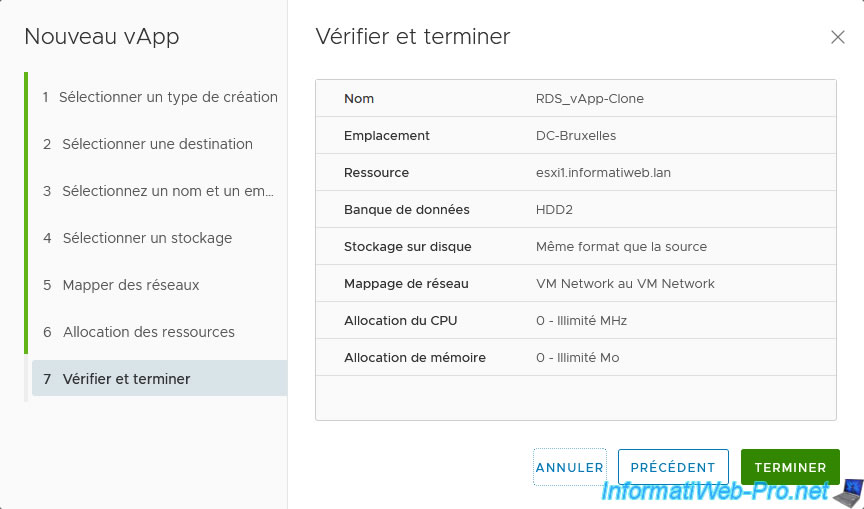
A summary of the information provided during the wizard is displayed.
Click Finish.
A new vApp appears and a "Clone vApp" task appears in the list of recent tasks.
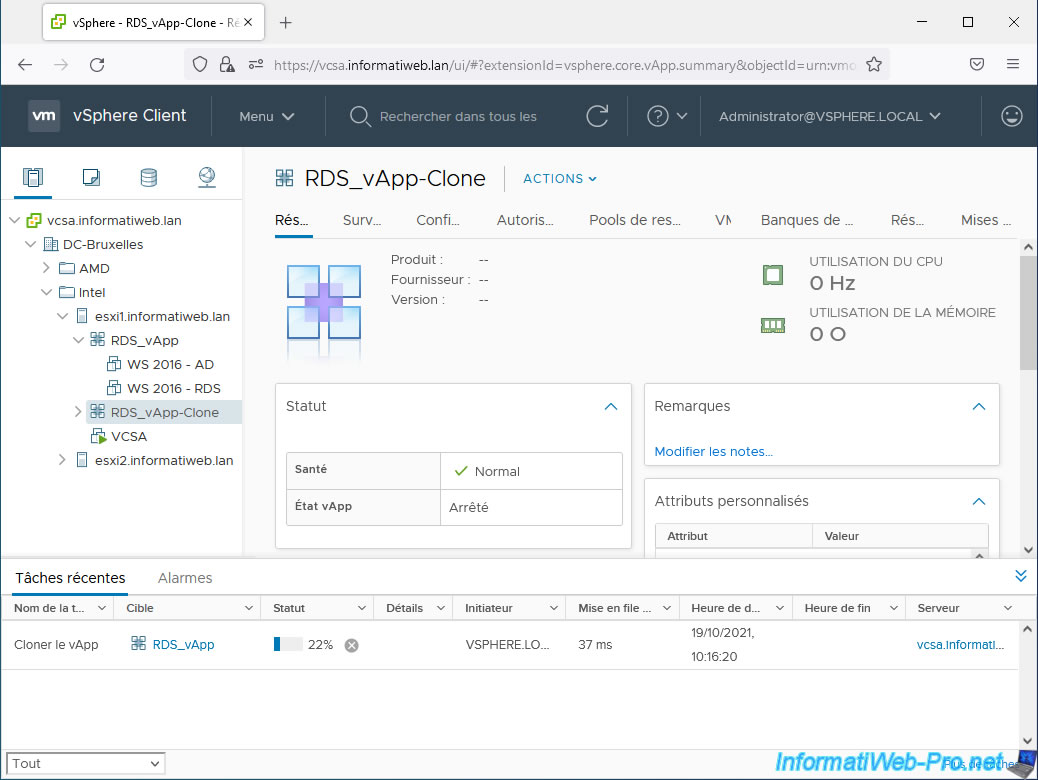
At the start of cloning, you will see that a first virtual machine has appeared (in the left column) in the new vApp.
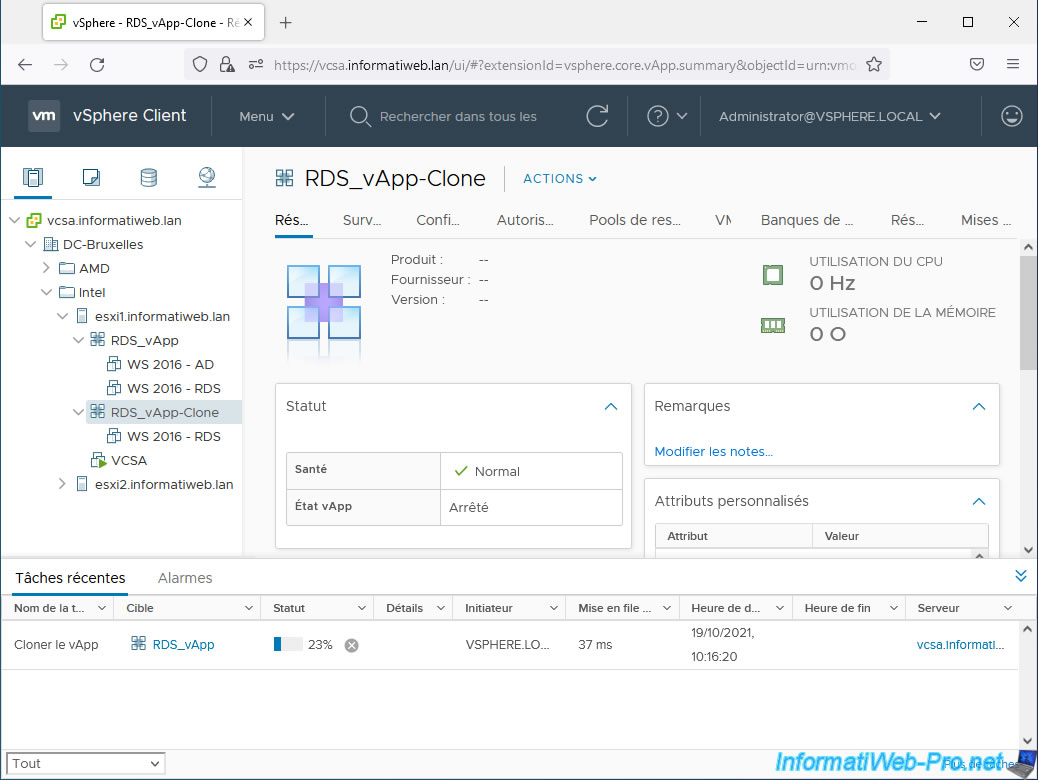
A little later, a 2nd virtual machine will appear (and so on, depending on the number of VMs present in the source vApp).
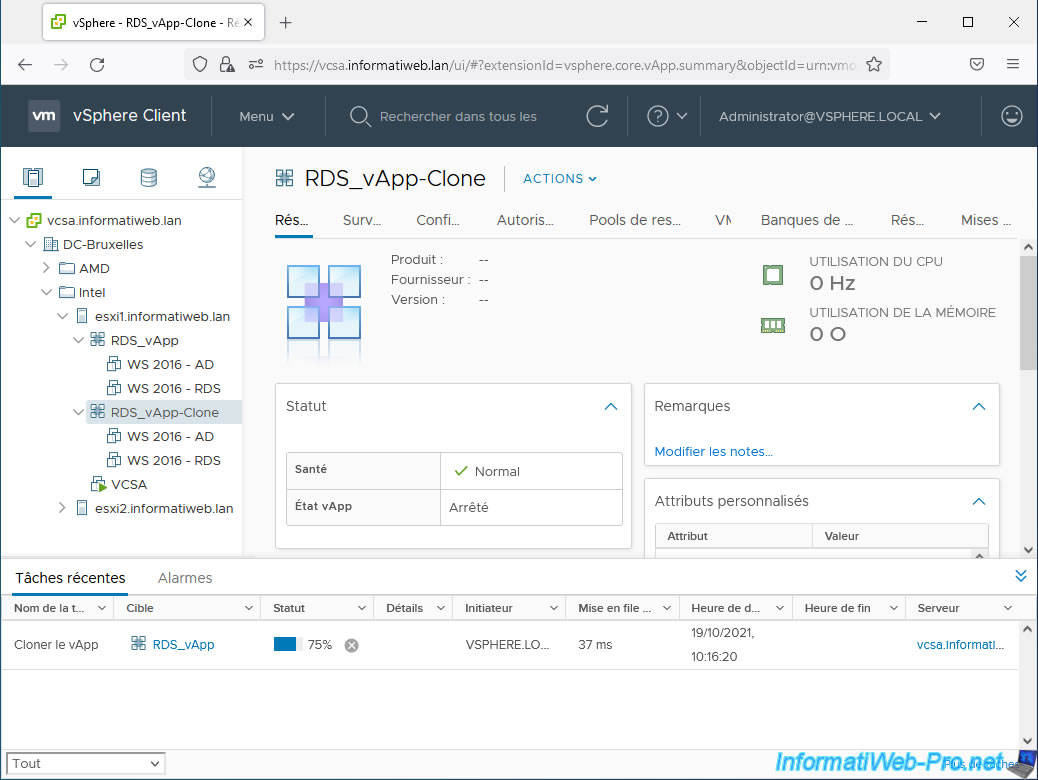
Once vApp cloning is completed, the "Clone vApp" task will be completed and a copy of all virtual machines in the source vApp will also be available in the destination vApp.
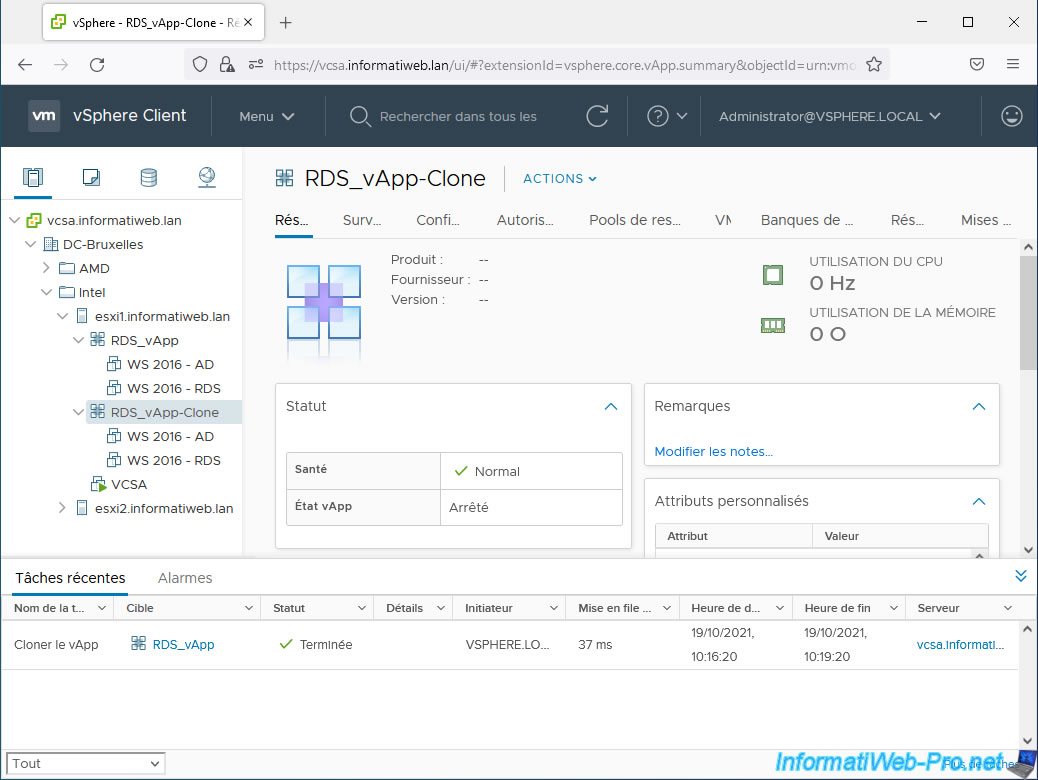
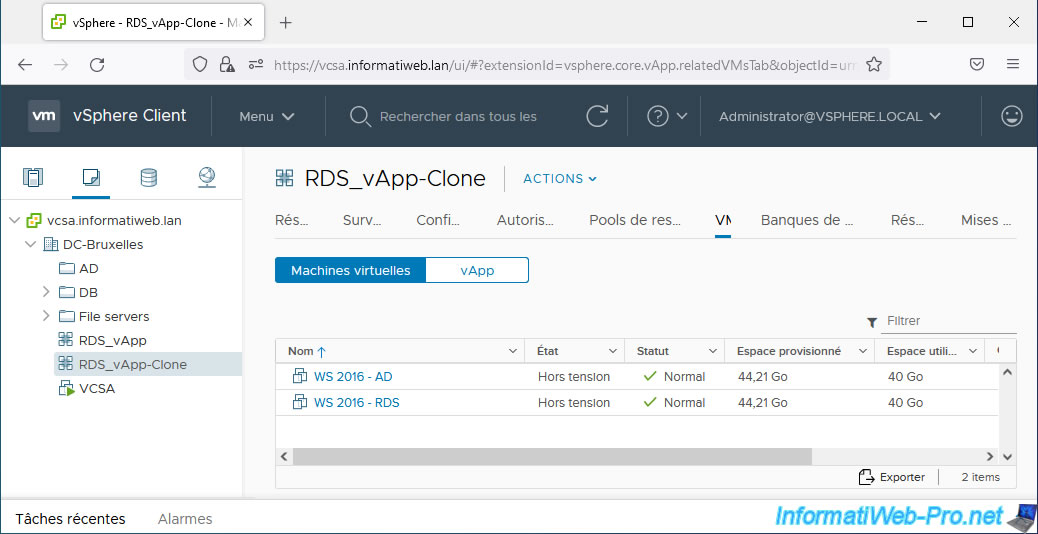
As expected, the destination vApp will also appear in the "VMs and Templates" tab and you will be able to see the virtual machines located there by selecting it, then going to the "VM" tab.
2. Delete a vApp
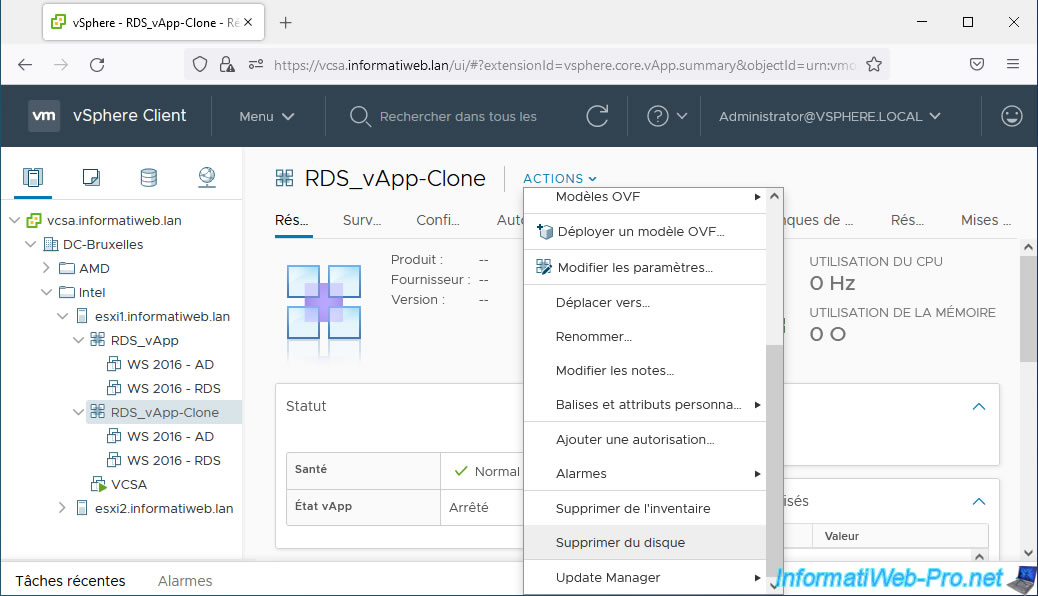
To delete a vApp, the procedure is the same as for virtual machines.
You select the vApp to delete, then you click: Actions -> Delete from Disk.
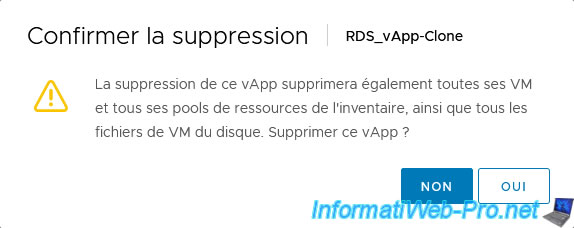
As noted in the warning that appears, deleting this vApp will also delete all of its VMs and resource pools from inventory, as well as all VM files from disk.
Confirm this deletion by clicking Yes.
Share this tutorial
To see also
-
VMware 10/4/2024
VMware vSphere 6.7 - Clone virtual machines
-
VMware 10/9/2024
VMware vSphere 6.7 - Clone virtual machines to a content library
-
VMware 10/11/2024
VMware vSphere 6.7 - Convert a Hyper-V virtual machine to a VMware VM
-
VMware 12/13/2024
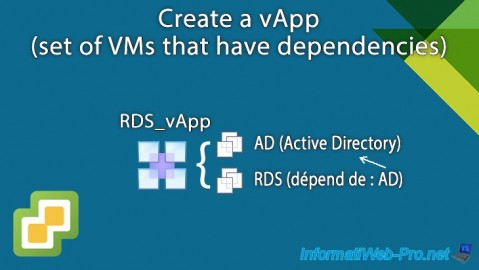
VMware vSphere 6.7 - Create a vApp


You must be logged in to post a comment