- VMware
- 28 February 2024 at 15:29 UTC
-

- 1/2

Officially, VMware VCSA (vCenter Server Appliance) must be deployed on a VMware ESXi hypervisor using the deployment program on the VMware VCSA DVD.
However, in a test environment, you may want to deploy this VMware vCenter Server Appliance (VCSA) virtual machine on VMware Workstation Pro.
Indeed, if you only have one computer at your disposal, you certainly already have a VMware ESXi hypervisor virtualized on VMware Workstation Pro.
Deploying VMware VCSA in a virtualized VMware ESXi hypervisor can take a long time (even many hours depending on the performance of your computer and how you have allocated your CPU and RAM resources to your virtualized hypervisor).
Important : although it will work, deploying VMware VCSA (VMware vCenter Server Appliance) on VMware Workstation Pro is not officially supported by VMware.
1. Import the VCSA virtual machine into VMware Workstation Pro
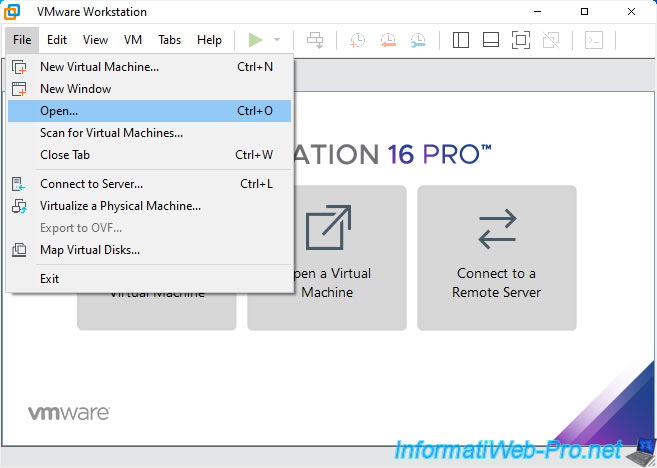
To deploy the VMware vCenter Server Appliance (VCSA) virtual machine on VMware Workstation Pro, you must use the VMware Workstation Pro OVF format virtual machine import system.
To do this, go to the "File -> Open" menu in VMware Workstation Pro.
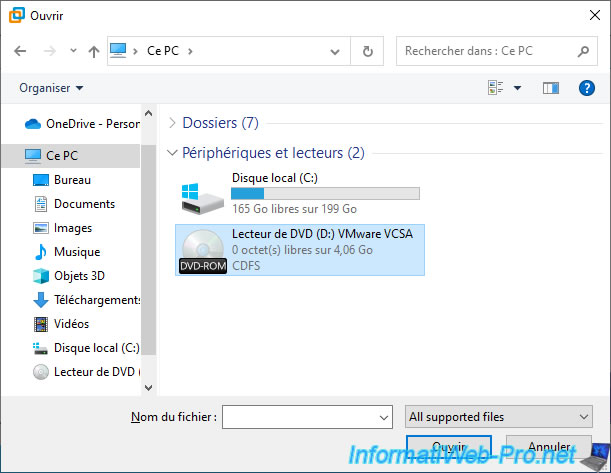
Then, enter the VMware VCSA DVD, whose corresponding ISO file is "VMware-VCSA-all-6.7.0-17028579.iso" in our case.
Note: if you have a recent version of Windows, simply double-click on the VMware VCSA ISO file and Windows will automatically mount it in a new virtual DVD drive.
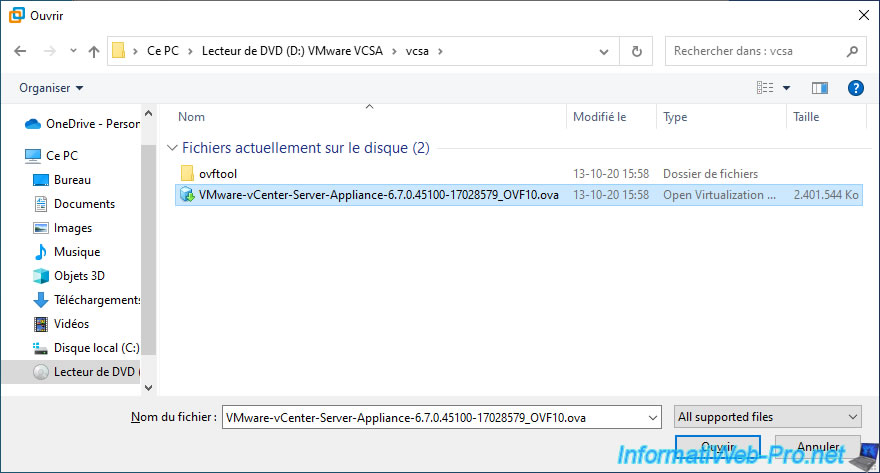
Go to the "vcsa" folder of this "VMware VCSA" DVD, select the "VMware-vCenter-Server-Appliance-6.7.0.45100-17028579_OVF10.ova" file there, then click Open.
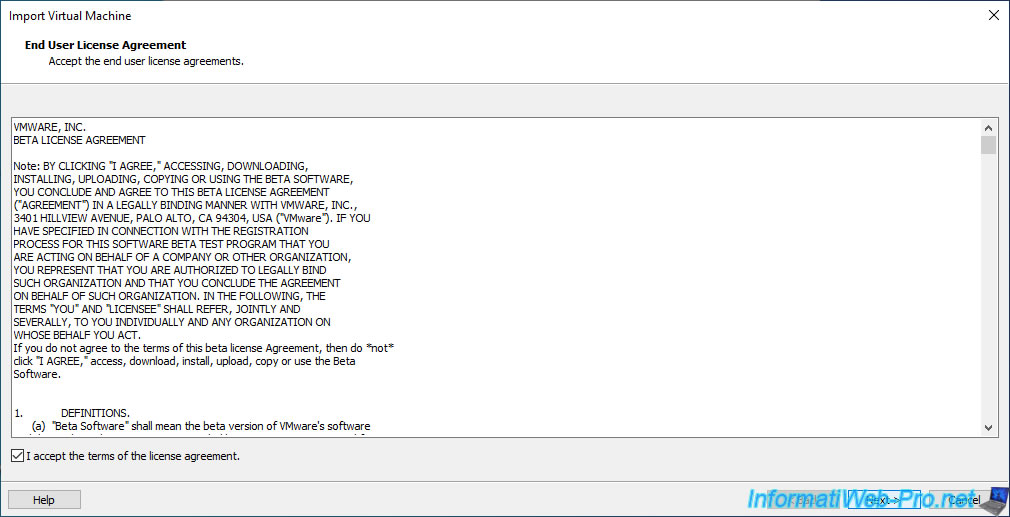
An "Import Virtual Machine" wizard will appear and you will have to accept the VMware license agreement by checking the "I accept the terms of the license agreement" box.
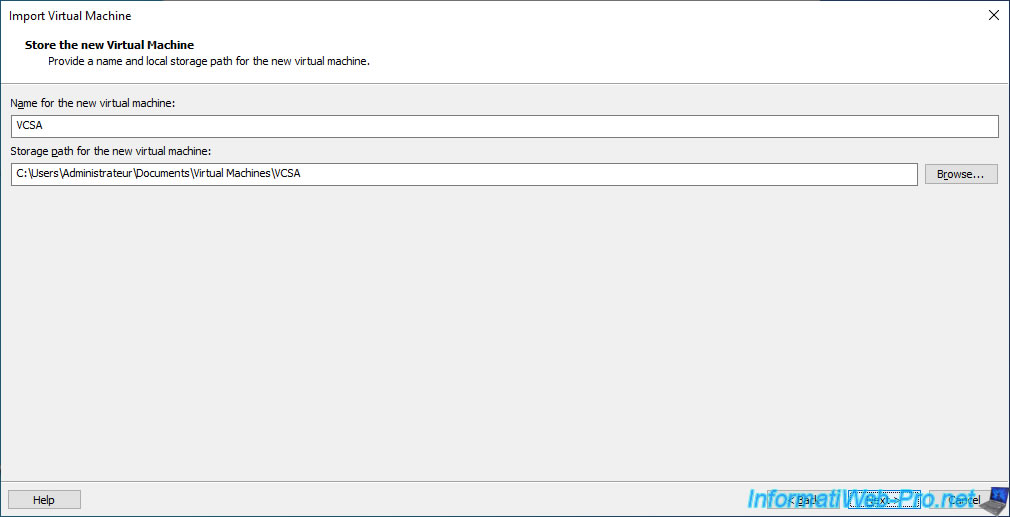
Indicate under what name you want to import this virtual machine and where you want to store it.
In our case, we simply named it: VCSA.
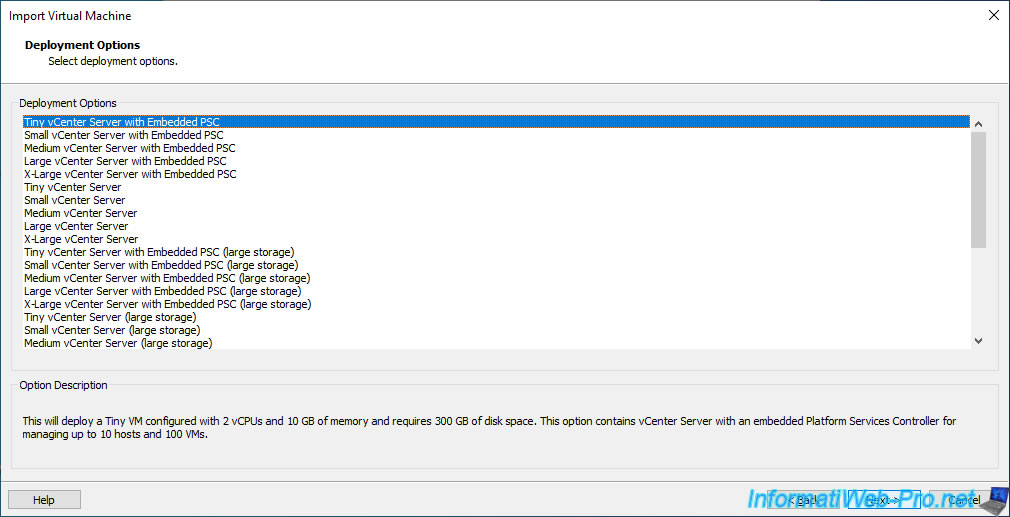
Select the desired deployment option for VCSA
Which allows you to define the size of the deployment:
- Tiny (very small)
- Small
- Medium
- Large
- X-Large (Extra Large)
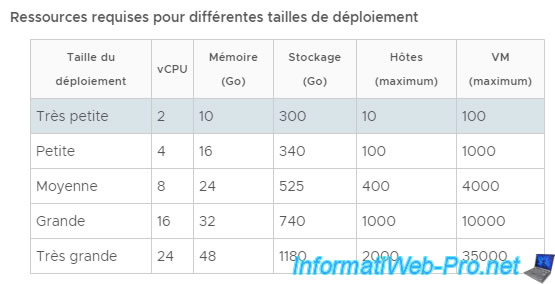
The deployment size will influence the number of virtual processors (vCPUs), amount of random access memory (RAM), and disk space required for that VCSA virtual machine.
For more information on these deployment sizes, refer to the table available in the following image.
As well as the type of deployment to use:
- ... vCenter Server with Embedded PSC: deploy a vCenter Server with an Embedded PSC
- ...vCenter Server: deploy only vCenter Server. The PSC will therefore not be deployed, because this deployment type is used to attach a second vCenter Server to an existing external PSC.
However, this has been deprecated since VCSA version 6.7. - Platform Services Controller: deploy the PSC (Platform Services Controller). This allows you to deploy an external PSC in case you want to link multiple vCenter Servers together.
However, once again, the use of an external PSC has been deprecated since version 6.7 of VCSA.
Since deploying VMware VCSA on VMware Workstation Pro is not officially supported by VMware, you should only use this solution in a test environment.
Which means the smallest deployment type will be sufficient in your case.
So, choose "Tiny vCenter Server with Embedded PSC" option and click Next.
To help you choose the deployment size, here is the table provided by the wizard when you deploy VMware VCSA on a VMware ESXi hypervisor and not on VMware Workstation Pro.
Several configuration sections appear.
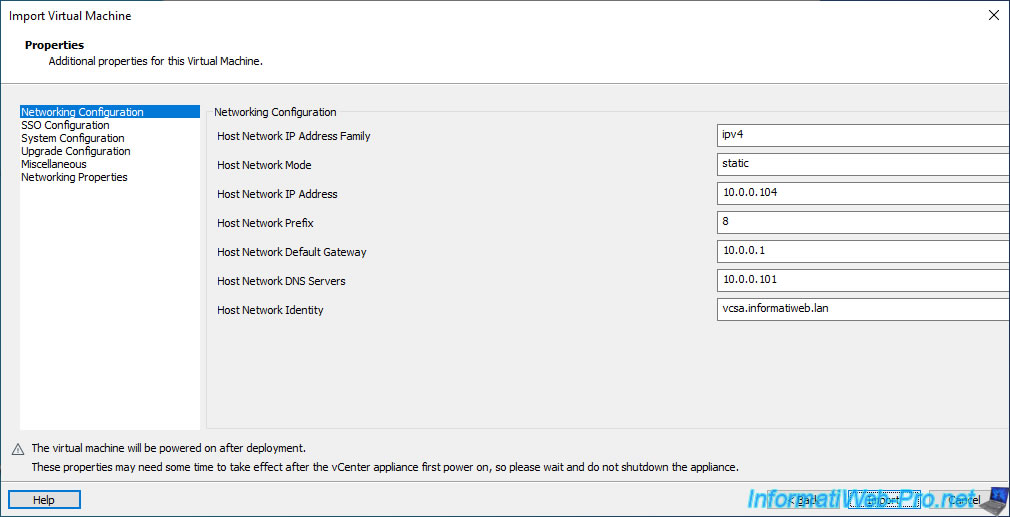
To begin, you can define the network configuration (Networking Configuration) of your future VCSA virtual machine:
- Host Network IP Address Family: version of the IP protocol to use.
Specify "ipv4" to use an IPv4 address or "ipv6" for IPv6. - Host Network Mode: allows you to define whether VCSA should use a dynamic or static IP address.
Specify "static" to use a static IP address. - Host Network IP Address: the IP address you want to assign to this virtual machine.
Warning: this must not be in the range of IP addresses distributed by your DHCP server (in general, it is in your physical router). Otherwise, an IP address conflict may occur one day and your VCSA virtual machine will become inaccessible from the network. - Host Network Prefix: the CIDR mask corresponding to the subnet mask used on your network.
For example "8" for subnet mask "255.0.0.0" or "24" for subnet mask "255.255.255.0". - Host Network Default Gateway: the IP address of your default gateway.
In other words: the IP address of your router. - Host Network DNS Servers: the IP address of the local DNS server that your VCSA virtual machine should use.
Preferably, the IP address of your local DNS server which generally corresponds to the address of your Active Directory domain controller.
If you want to specify more than one, separate them with a comma. - Host Network Identity: the domain name (previously created on your local DNS server) which points to the IP address you defined in the "Host Network IP Address" box of this wizard.
Important : once you have completed this network information, click "SSO Configuration" in the left column to proceed to the next step.
Indeed, if you click on "Import" at the bottom of the wizard, the import will start directly without you being able to configure the rest of the available options.
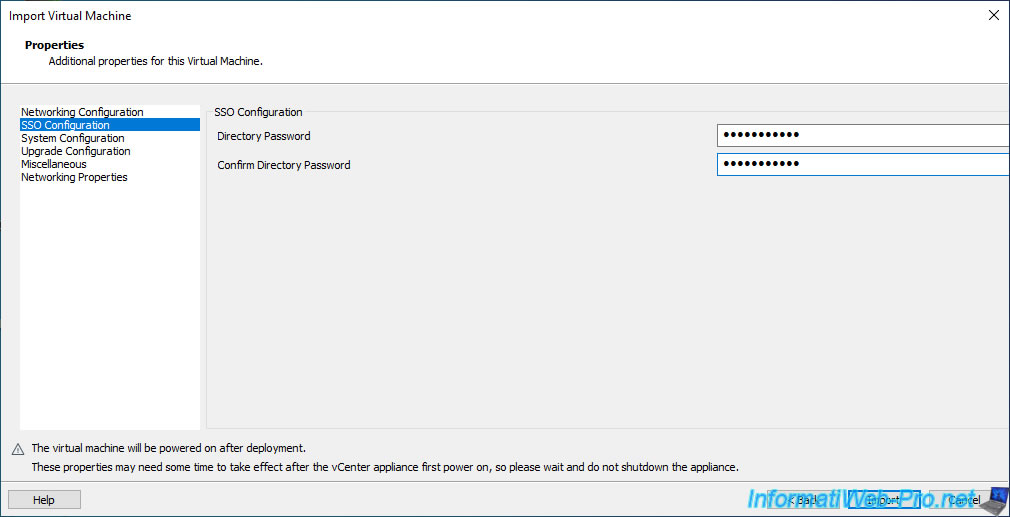
In the "SSO Configuration" section, you can indicate the SSO domain password of your VMware vCenter Server twice.
If this is the first time you are deploying a VMware vCenter Server on your network, this is the password that will be defined for the "administrator" user of your SSO domain under VMware vCenter Server.
If you want to join an existing SSO domain on another VMware vCenter Server, this is the password for the "administrator" account present on the SSO domain of the existing VMware vCenter Server you want to join.
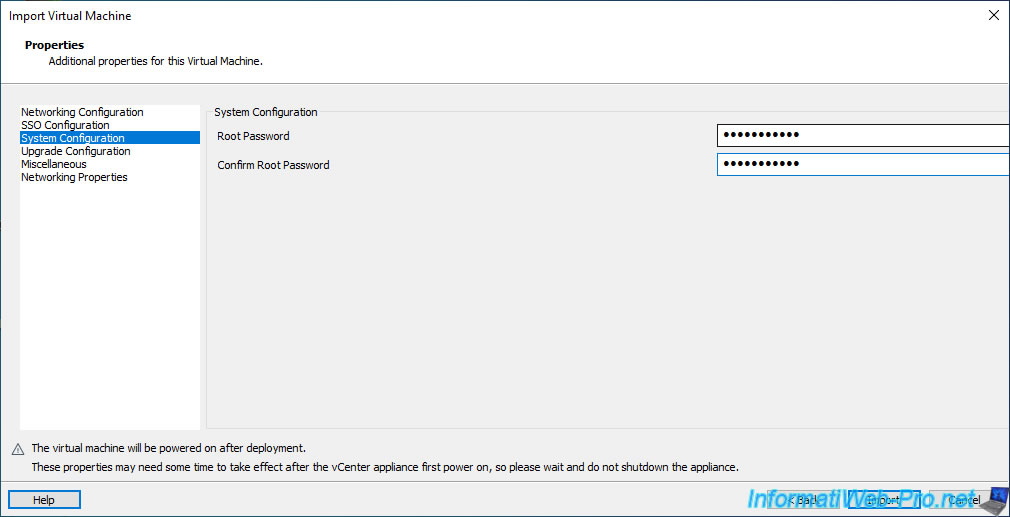
In the "SSO Configuration" section, you can indicate the password to use for the root account of the "VCSA" virtual machine.
This "root" account will be necessary to connect by SSH to your VCSA virtual machine and to access the configuration web page of this VCSA device on port 5480.
Skip the "Upgrade Configuration" section which is about upgrading the VCSA appliance.
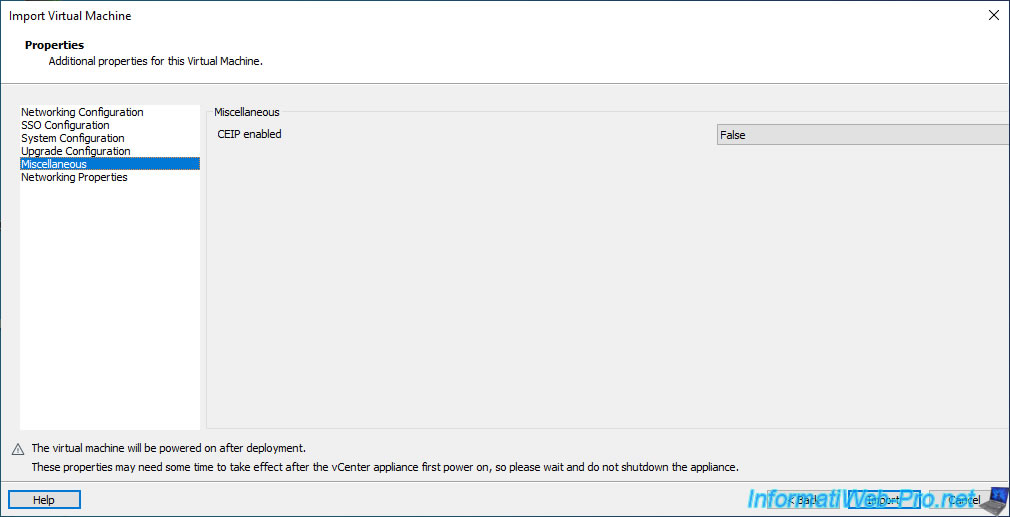
In the "Miscellaneous" section, you will be able to choose whether or not you want to join the VMware Customer Experience Improvement Program for VCSA.
Select "CEIP enabled: False" if you do not want to join.
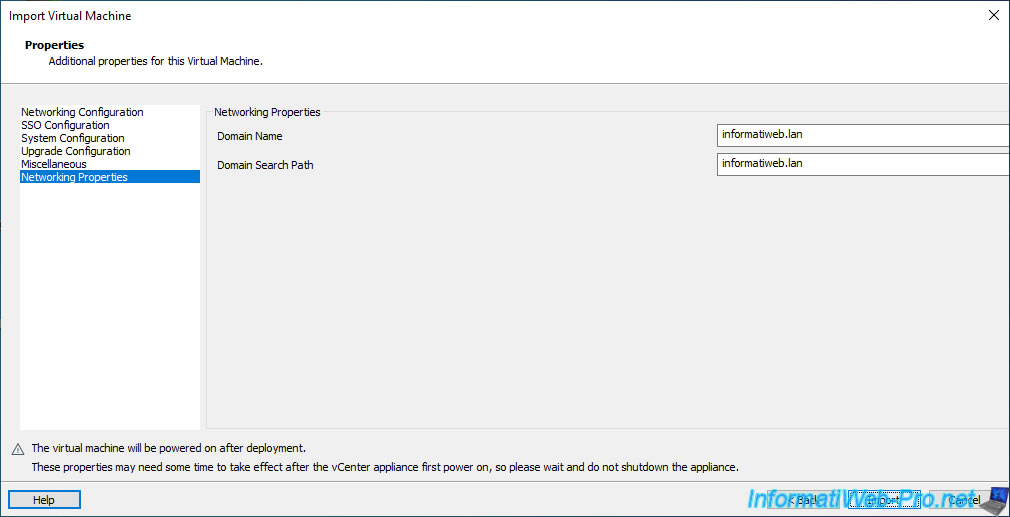
Finally, in the "Networking Properties" section, you can specify:
- Domain Name: the domain name of which VCSA will be part.
- Domain Search Path: the domain in which VCSA will search for short names (if applicable) for DNS resolution.
For example, if you attempt to resolve the name "dc" to an IP address, VCSA will automatically attempt to resolve the fully qualified domain name (FQDN) "dc.informatiweb.lan".
Now, to start importing this VCSA virtual machine, click on the "Import" button located at the bottom of the window.
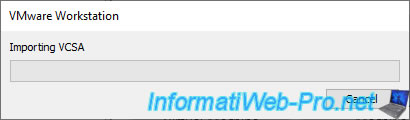
Wait while the VMware vCenter Server Appliance (VCSA) virtual machine is imported.
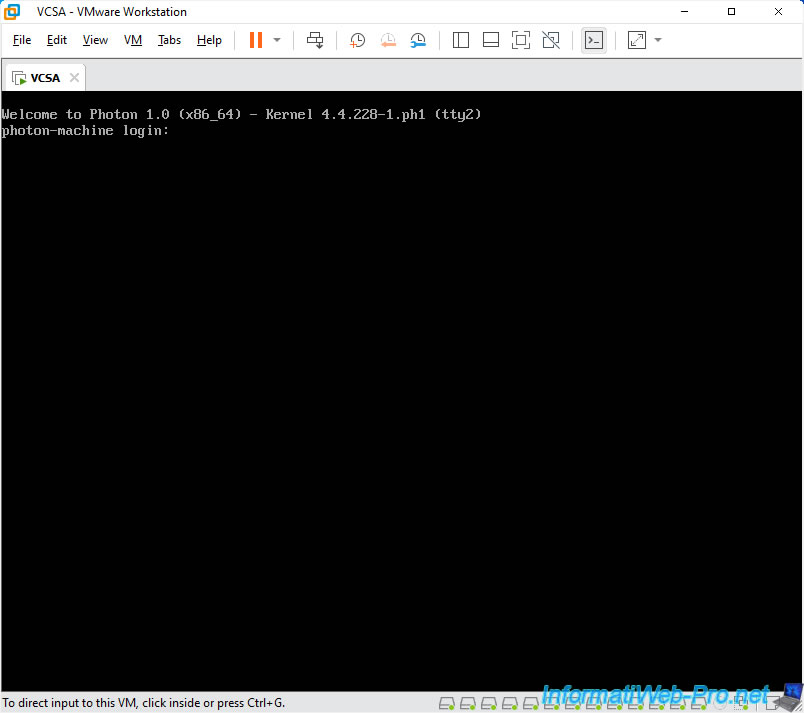
Once the import is complete, start the virtual machine and you will see the VMware Photon screen appear.
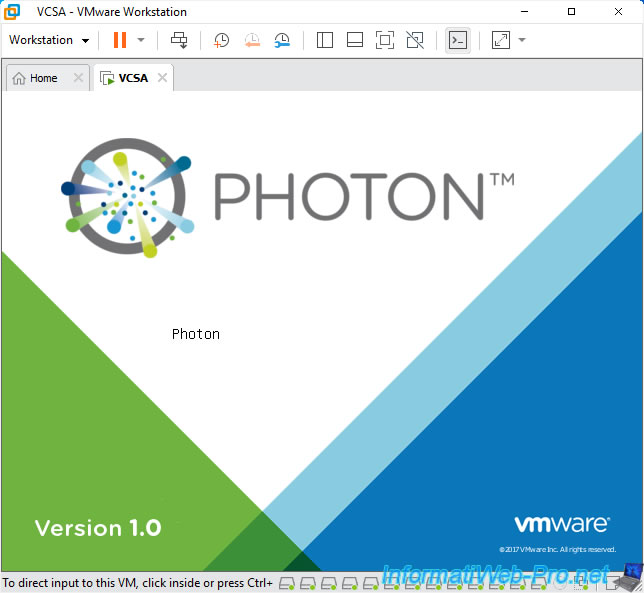
Then the screen will turn black and may stay black for a few seconds or even 1 minute.
This is due to the background configuration of this virtual machine using the information you just provided in the wizard.
At one point you will see this:
Plain Text
Welcome to Photon 1.0 (x86_x64) - Kernel 4.4.228-1.ph1 (tty2)
photon-machine login:
Next, you will see several lines appear regarding stopping and starting the VCSA appliance service and its DCUI (Direct Console User Interface) console.
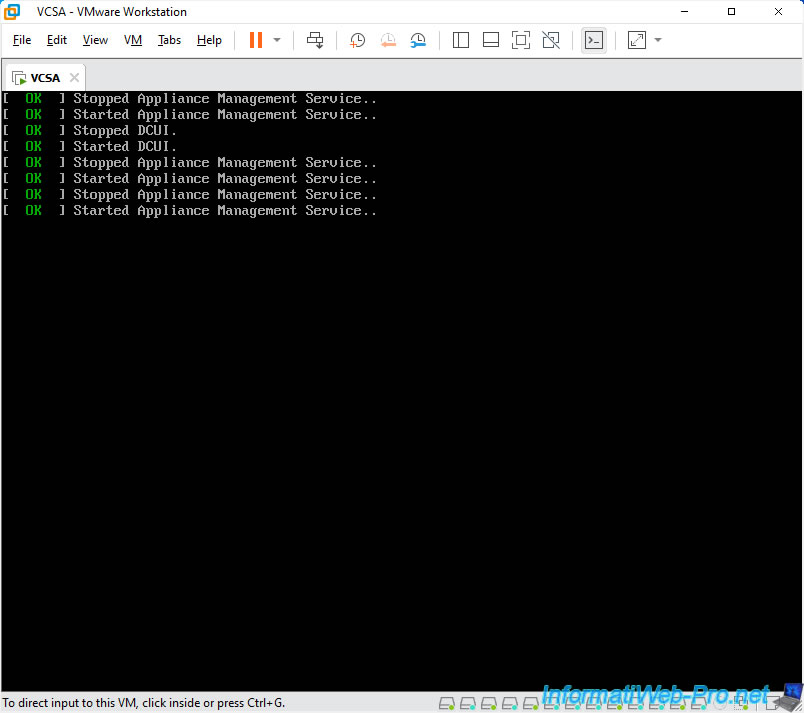
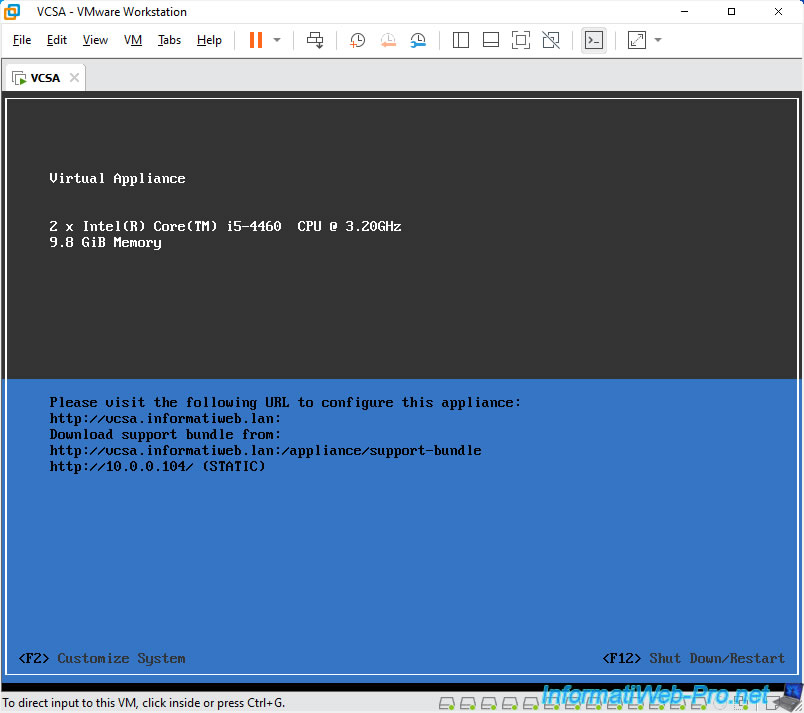
Once booting is complete, you will see the gray and blue VCSA console appear.
Share this tutorial
To see also
-
VMware 3/13/2024
VMware ESXi 6.7 - Synchronize the clock of ESXi hosts from a time server (NTP)
-
VMware 3/8/2024
VMware ESXi 6.7 - Synchronize the clock of VCSA from a time server (NTP)
-
VMware 7/31/2024
VMware vSphere 6.7 - Add an Active Directory identity source
-
VMware 5/22/2024
VMware vSphere 6.7 - Change default console
You must be logged in to post a comment