Create and manage your VMware vSphere 6.7 infrastructure inventory
- VMware
- 22 March 2024 at 07:39 UTC
-

- 2/3
4. Manage permissions on data centers and folders
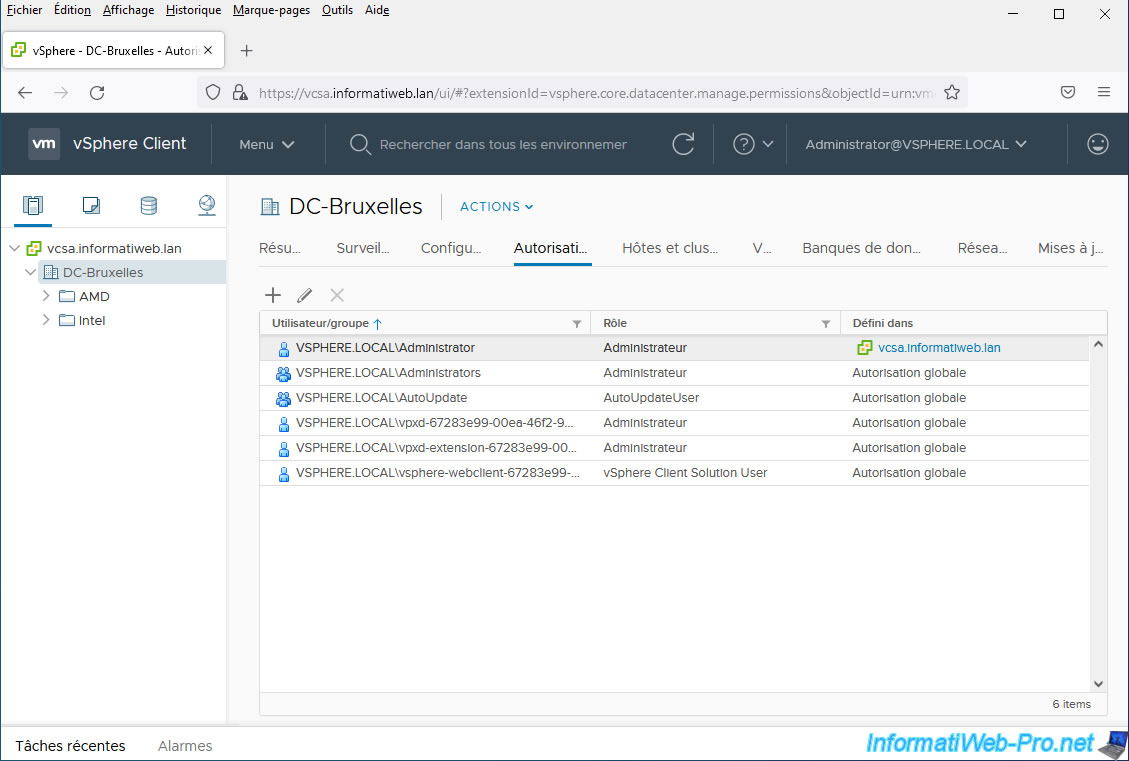
Once the data centers and folders have been created, you will see that you can manage the authorizations on these different data centers by selecting one of them, then going to the "Permissions" tab.
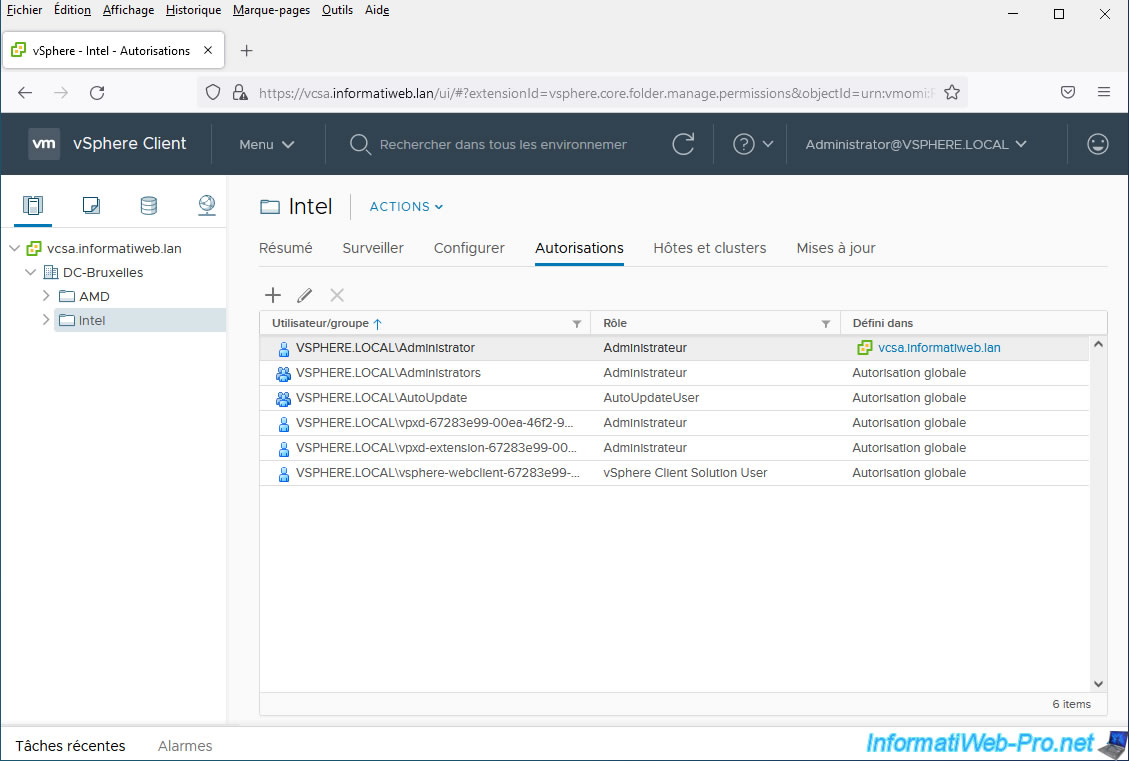
Same for the hosts and clusters folders.
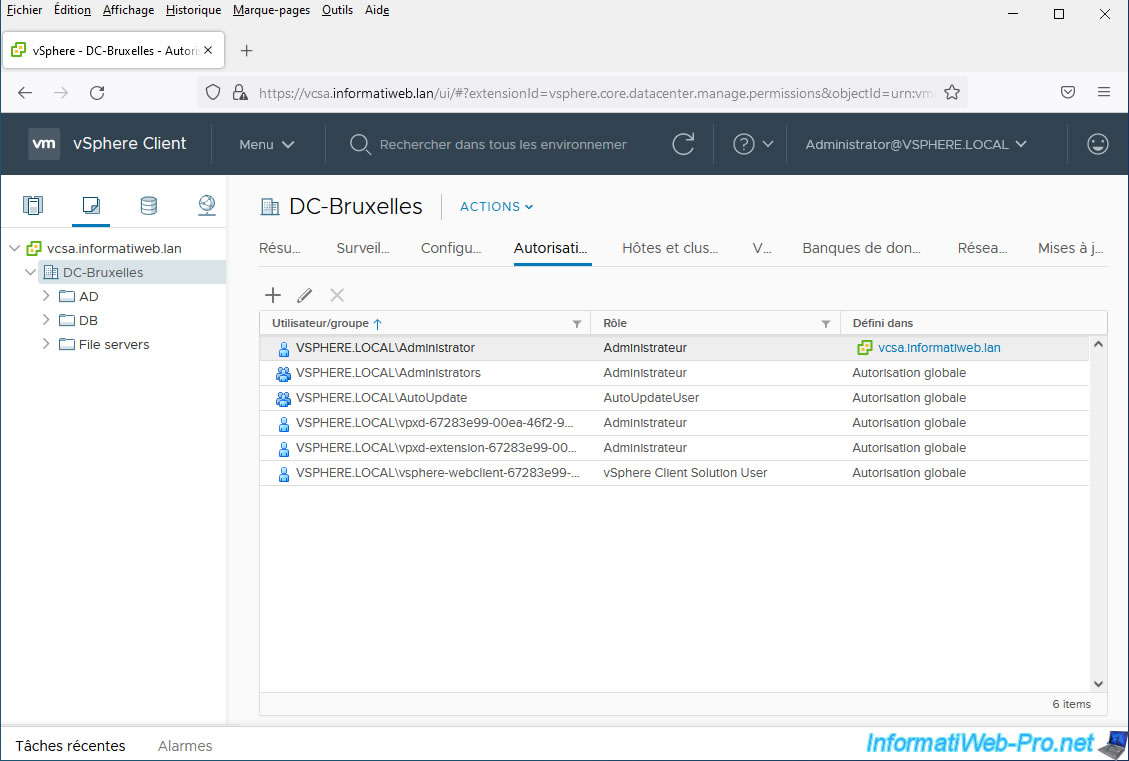
In the "VMs and Templates" tab, you will be able to manage permissions again from the "Permissions" tab of the selected data center.
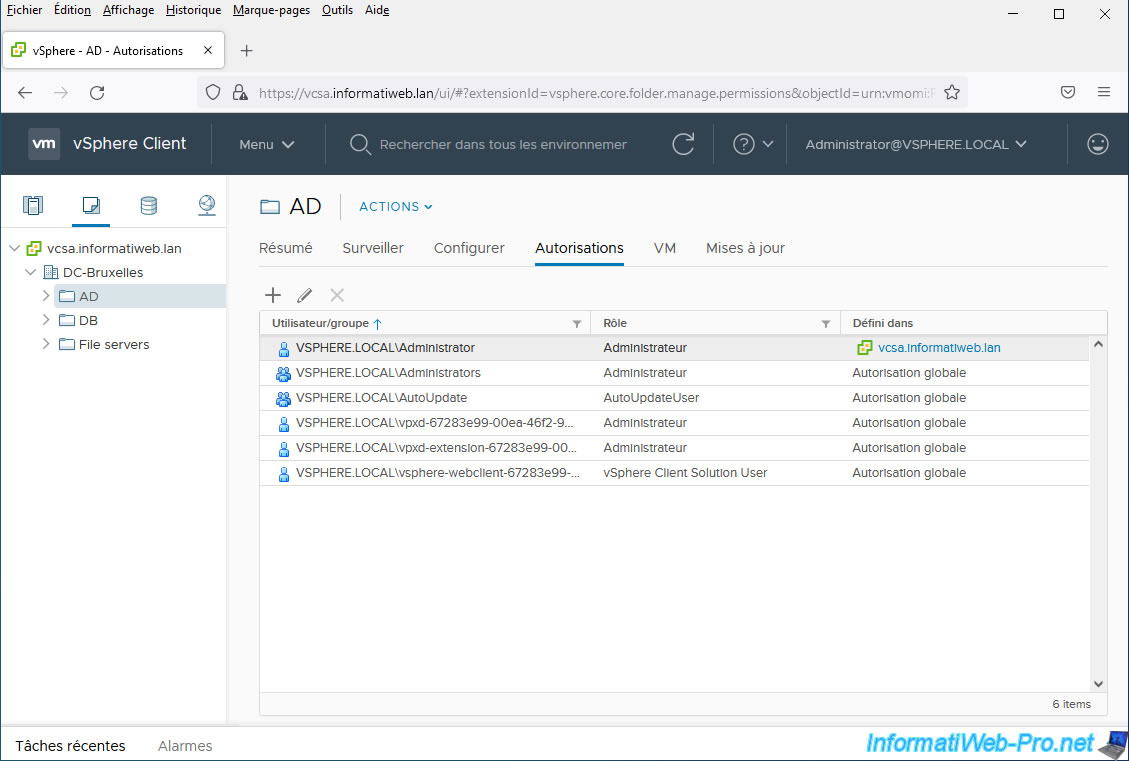
The same goes for the folders created in this tab: VMs and Templates.
5. Synchronize the clock of your VMware ESXi hypervisor with an NTP server
Before you can add your VMware ESXi hosts to your VMware vCenter Server inventory, you must ensure that the clock on your VMware ESXi hosts and your VCSA appliance are synchronized.
Otherwise, adding your VMware ESXi host may fail or be unstable. Your host could be added, then disconnect and reconnect randomly for no apparent reason. This will be due to the excessive difference between the clock of your VMware ESXi host and that of your VCSA device.
In our case, we have an Active Directory infrastructure, so we will be able to use the IP address of our domain controller as an NTP server.
Important: if you have an Active Directory infrastructure with several domain controllers for the same domain, you will need to indicate the IP address of the domain controller which is designated as master for the FSMO role "PDC emulator (Primary Domain Controller emulator)".
Indeed, it is this domain controller that will be chosen as the best source of time in your Active Directory infrastructure.
To synchronize the clock of your VMware ESXi hypervisor from an NTP server, log in as "root" to the server's "VMware Host Client" web interface and go to: Host -> Manage -> System - > Time & date.
Next, click "Edit Settings".
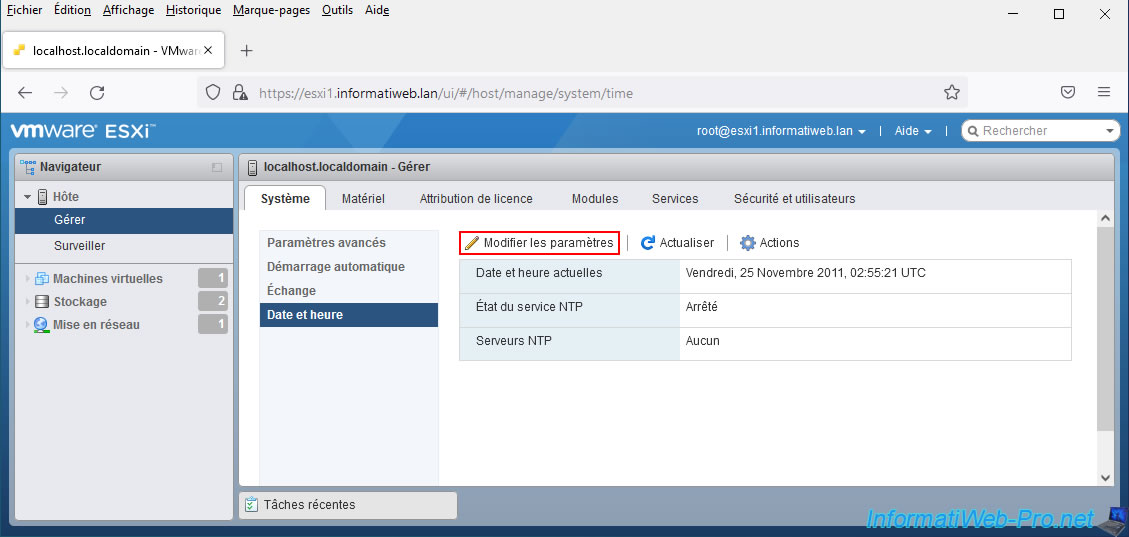
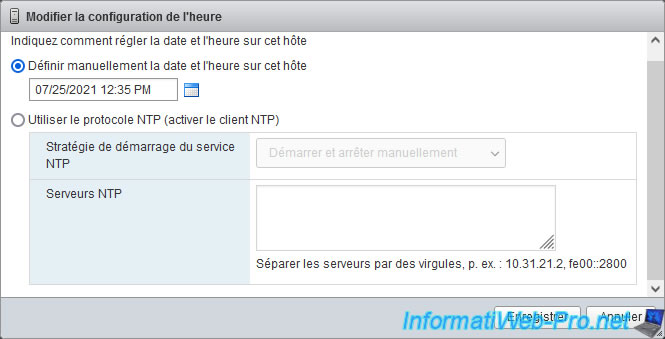
Since synchronization from an NTP server is not instantaneous, it is recommended to set the clock of this host manually the first time.
Additionally, the greater the time gap between your VMware ESXi host and your VMware vCenter Server (or VCSA), the longer the delay before the 1st time synchronization will be.
Select "Manually configure the date and time on this host" and set the time manually to match that of your NTP server (in our case: our Active Directory domain controller).
Then, click Save.
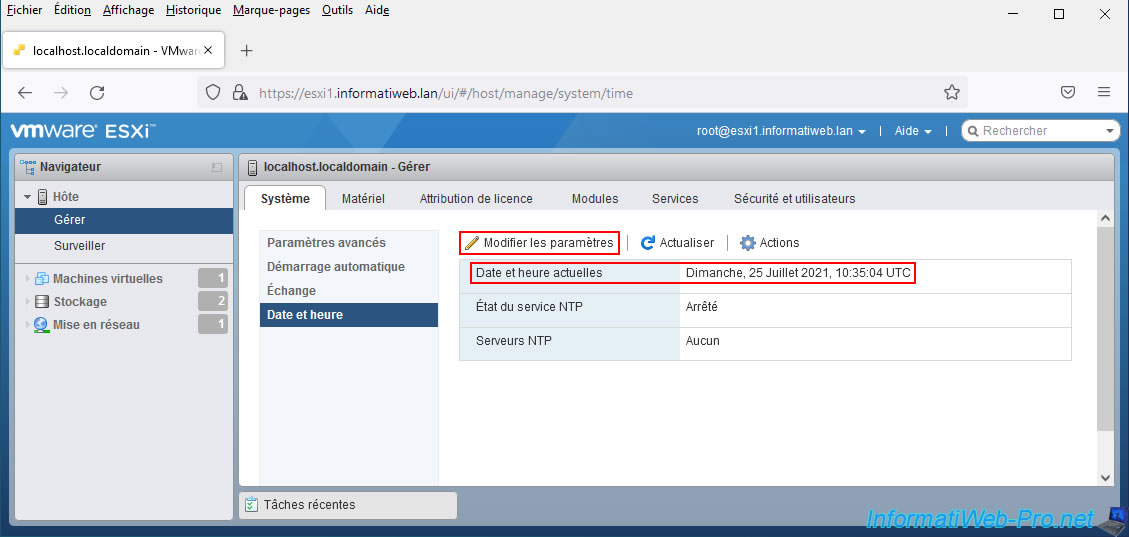
The current date and time has been modified.
Click again: Edit settings.
This time, select "Use Network Time Protocol (enable NTP client)", then:
- select "NTP service startup policy: Start and stop with host".
- enter the IP address of your NTP server (or domain controller, if applicable) in the "NTP servers" box.
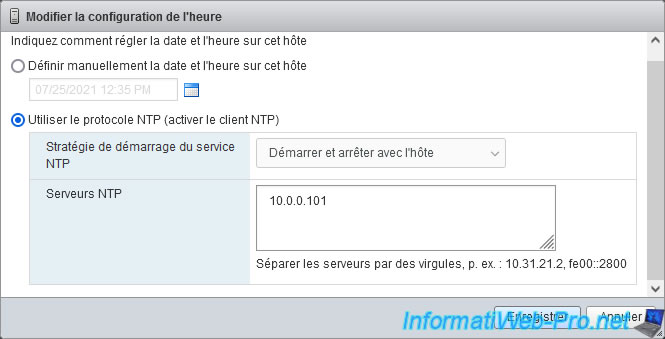
The NTP server has been set.
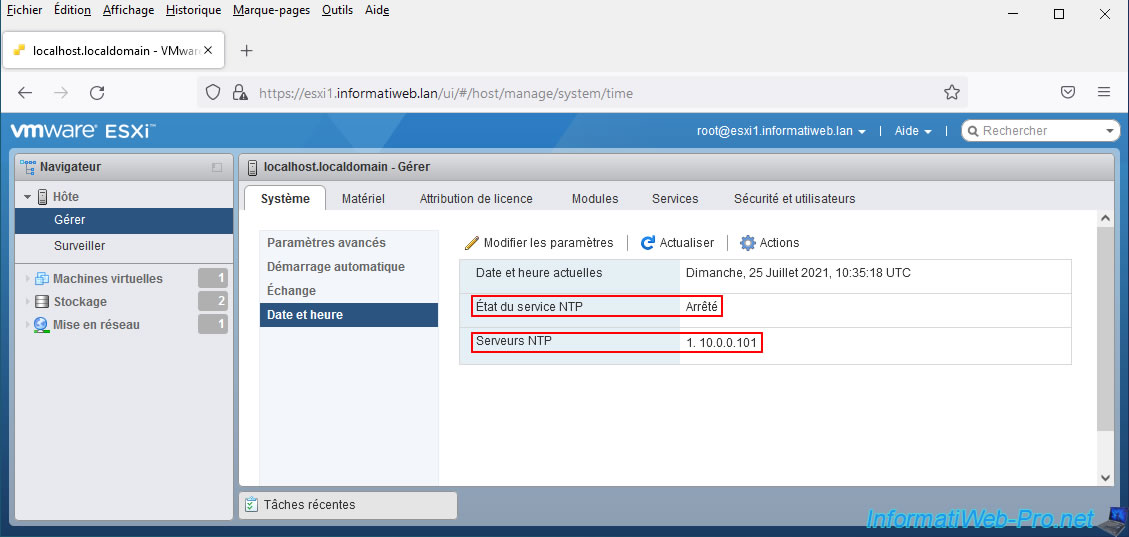
However, as you can see, the NTP service is still stopped.
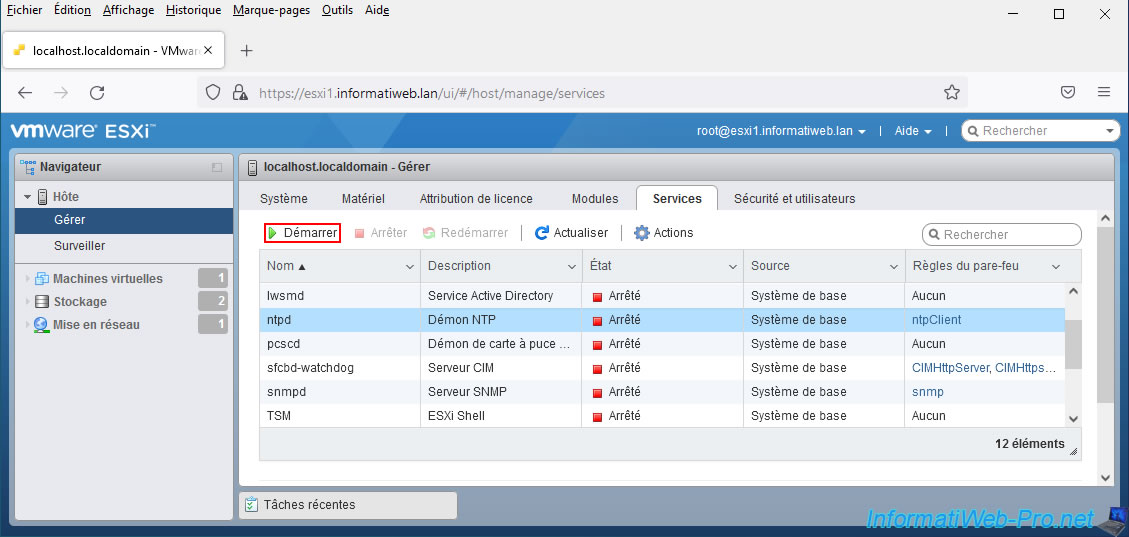
To start the NTP service, go to the "Services" tab, select the "ntpd (NTP Daemon)" service and click Start.
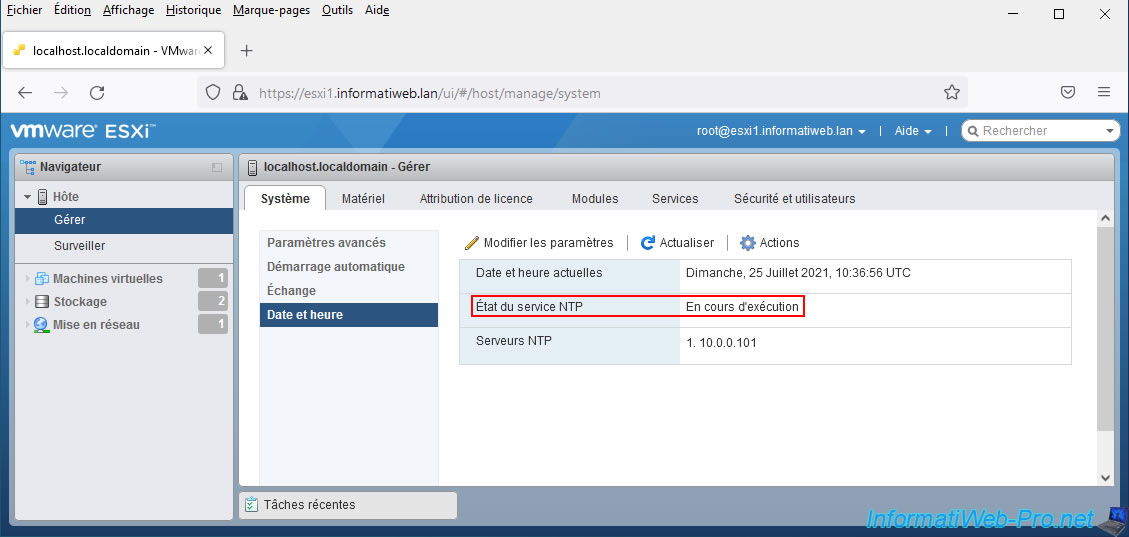
Go back to the "System -> Time & date" tab and you will see that the NTP service is now running.
6. Synchronize your VCSA device's clock with an NTP server
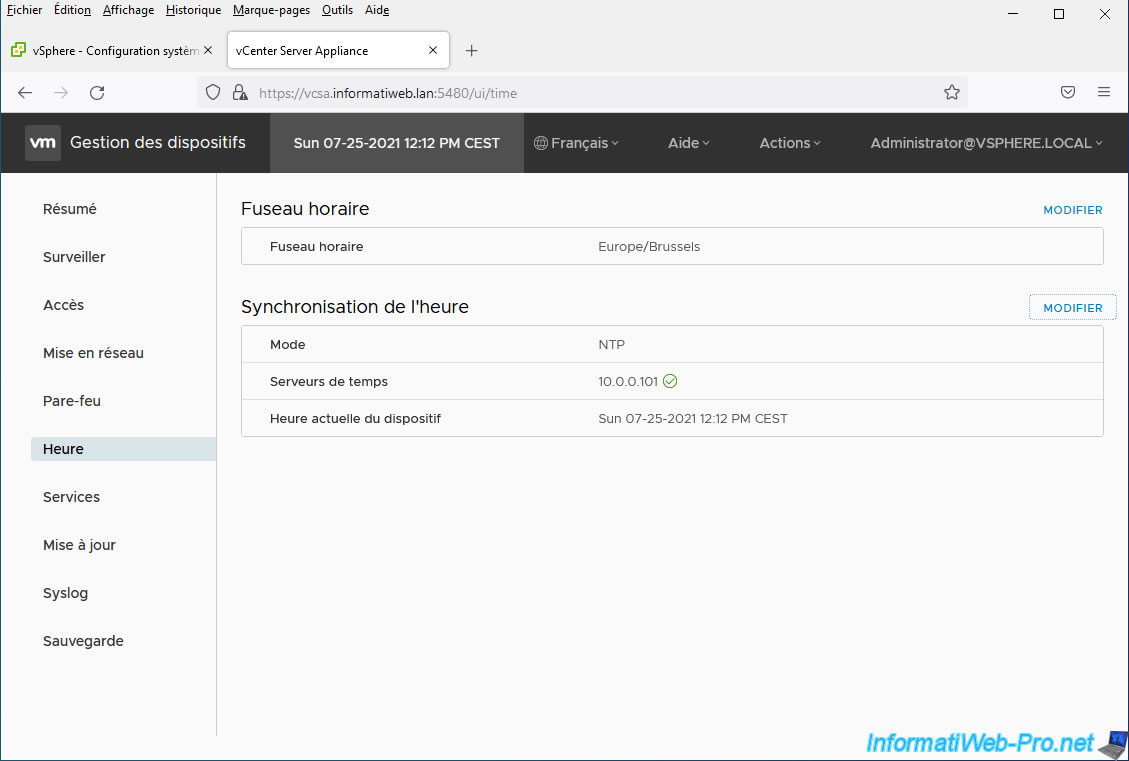
To synchronize your VCSA appliance's clock from the same NTP server used by your VMware ESXi host, connect via HTTPS to port 5480 on your VCSA appliance.
Go to "https://vcsa.informatiweb.lan:5480/" and log in as "root" or "administrator@vsphere.local" (your choice), then refer to our tutorial: VMware ESXi 6.7 - Synchronize the clock of VCSA from a time server (NTP).
Note: if you are using the Windows version of VMware vCenter Server, this interface does not exist.
In this case, you will have to go to the Windows clock settings to synchronize it from the desired NTP server.
However, if it is a member of your Active Directory domain, its clock is already automatically synchronized with the correct Active Directory domain controller.
Share this tutorial
To see also
-
VMware 3/13/2024
VMware ESXi 6.7 - Synchronize the clock of ESXi hosts from a time server (NTP)
-
VMware 3/8/2024
VMware ESXi 6.7 - Synchronize the clock of VCSA from a time server (NTP)
-
VMware 7/31/2024
VMware vSphere 6.7 - Add an Active Directory identity source
-
VMware 5/22/2024
VMware vSphere 6.7 - Change default console

No comment