Create a vApp (set of VMs that have dependencies) on VMware vSphere 6.7
- VMware
- 13 December 2024 at 08:45 UTC
-

- 2/3

3. Edit vApp settings
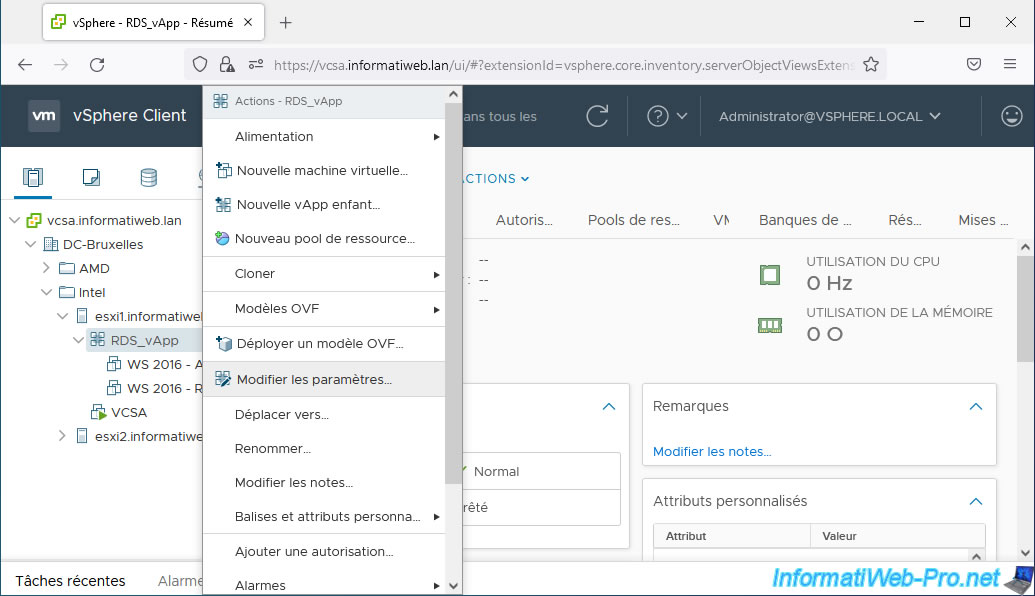
To modify the settings of a vApp, right-click "Edit Settings" on it.
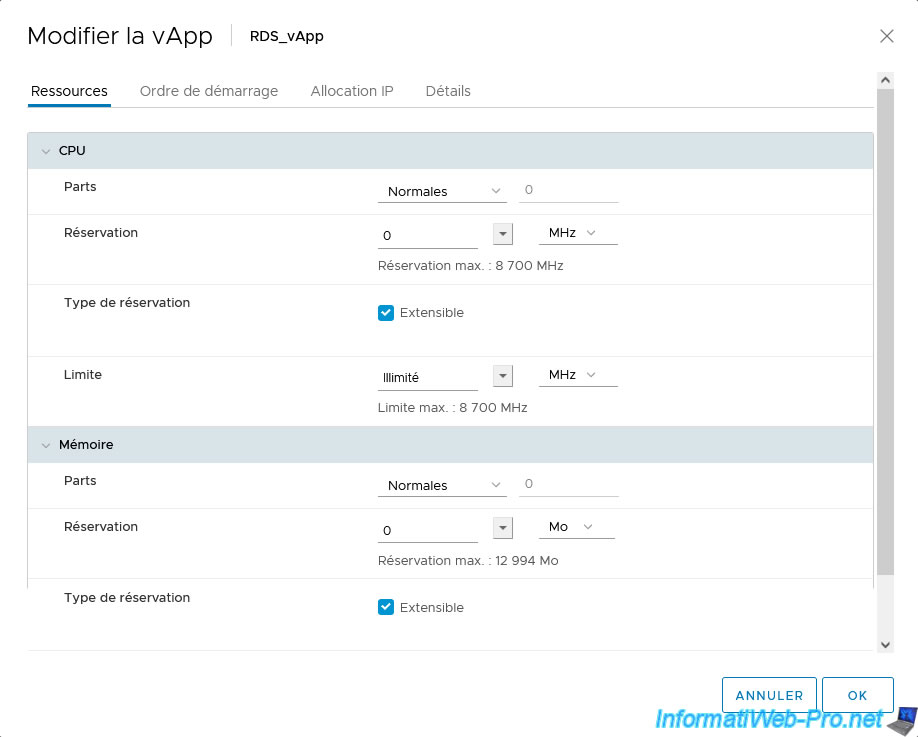
In the "Edit vApp" window that appears, you will be able to manage the allocation of resources for the use of the processor (CPU) and random access memory (RAM) by reserving resources, limiting their use, etc. .
For more information regarding these parameters, refer to the explanations given previously when creating this vApp (since they are exactly the same settings).
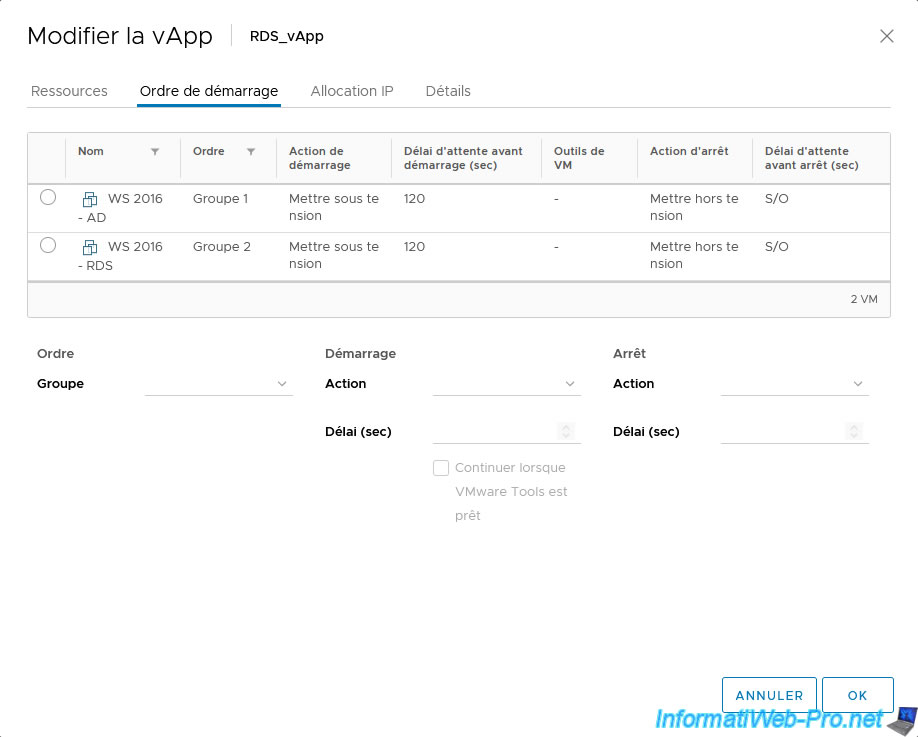
In the "Start Order" tab, you can:
- manage the startup order of the different virtual machines that are part of this vApp
- manage the actions to use for starting and stopping them
- the time to wait before switching to the virtual machine for starting and stopping them
To manage the startup order of your virtual machines, you can first use groups: Group 1, Group 2, Group 3, ...
Knowing that when starting a vApp, the virtual machines in group 1 will be started first, then those in group 2 in 2nd, then those in group 3 in 3rd, ...
When shutting down a vApp, the reverse order will be used: shutting down group 3 virtual machines, then stopping group 2 virtual machines, then stopping group 1 virtual machines.
In our case, we only have 2 virtual machines and the "WS 2016 - RDS" virtual machine depends on the "WS 2016 - AD" virtual machine.
The "WS 2016 - AD" virtual machine must therefore be part of group 1 and the "WS 2016 - RDS" virtual machine must be part of group 2.
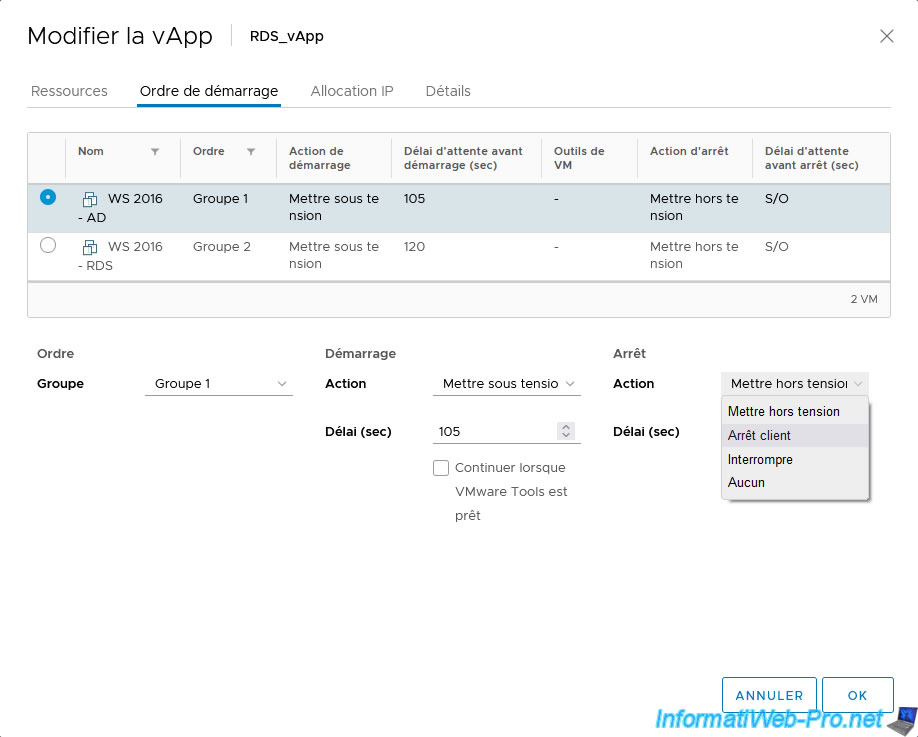
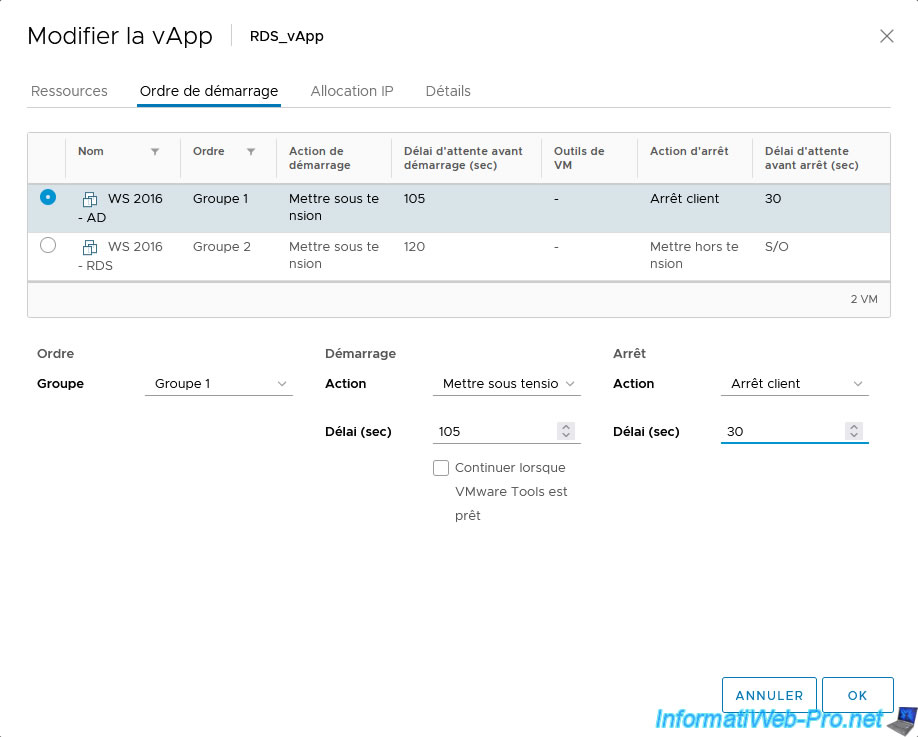
To begin, select the virtual machine that should start first (in our case: WS 2016 - AD) and indicate:
- Order: Group 1. Group 1 represents the virtual machines to start first and therefore to stop last.
- Startup - Action: Power on. This allows you to start the virtual machine.
The other option being "None" to do nothing for this virtual machine when you start your vApp. - Startup - Delay (s): allows you to specify a delay in seconds. However, contrary to what the translation "Waiting time before startup (sec)" may make you think at the top of the table, it is not the time to wait before starting this virtual machine, but the time to wait before to start the next virtual machine.
In other words, you must indicate here the time that this virtual machine normally takes to start completely (taking into account the start of your services present in the guest operating system).
In our case, this virtual machine takes 1 min 45 minutes to fully start (taking into account the start of the domain services installed there).
So, we indicate a start delay of 105 seconds (= 1 min 45). - Shutdown - Action: by default, the selected value is "Power Off". Which amounts to virtually unplugging the power plug from the virtual machine. Which is strongly discouraged.
We recommend that you choose "Guest Shutdown" as your shutdown action so that your VMware vCenter Server will gracefully shut down the virtual machine's guest operating system (using VMware Tools) when you attempt to gracefully shut down your vApp. - Shutdown - Delay (s): corresponds to the time to wait before stopping the virtual machine.
In other words, you must indicate the time in seconds that your virtual machine approximately takes to shut down.
As you may have understood, given that our "WS 2016 - AD" virtual machine is the 1st to start when starting our vApp, it will also be the last to stop when stopping the vApp. vApp.
Which means the shutdown delay could be 0 since we don't need it.
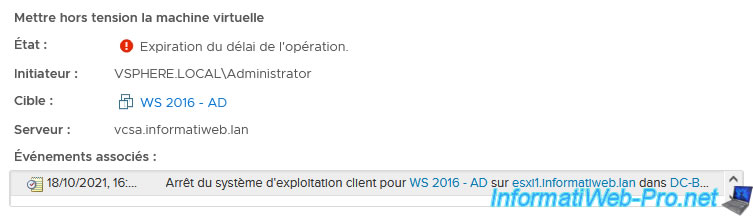
That said, if you specify 0 for this virtual machine, it is possible that an error will occur at the end of your vApp shutdown.
We have therefore indicated a delay of 30 seconds, which corresponds to a delay a little longer than the time necessary for this virtual machine to completely shut down.
So the error no longer occurred.
In this case, in our case, if we indicated a shutdown delay of 0 seconds for this virtual machine, an "Operation timed out" error was displayed each time the vApp was stopped for this virtual machine and for the vApp concerned.
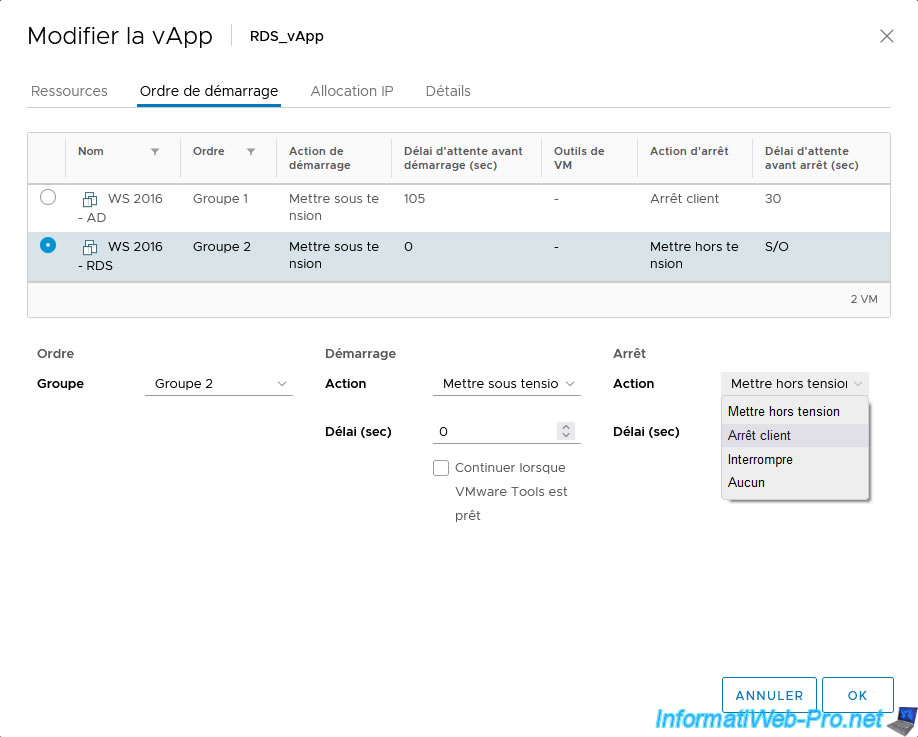
For the 2nd virtual machine (WS 2016 - RDS) which depends on the 1st virtual machine "WS 2016 - AD", we indicated:
- Order - Group: Group 2. Indeed, this virtual machine must start after the virtual machine located in group 1.
- Startup - Action: Power On. So that starting the vApp also causes this virtual machine to start (after the 105 second delay defined on the group 1 virtual machine has elapsed).
- Startup - Delay (s): 0. Since there is no other virtual machine to start after this one in our case, there is no need to indicate how long this virtual machine takes usually to start completely.
- Shutdown - Action: Guest Shutdown. This will allow VMware vCenter Server to correctly shut down this virtual machine using VMware Tools when you want to shut down your vApp.
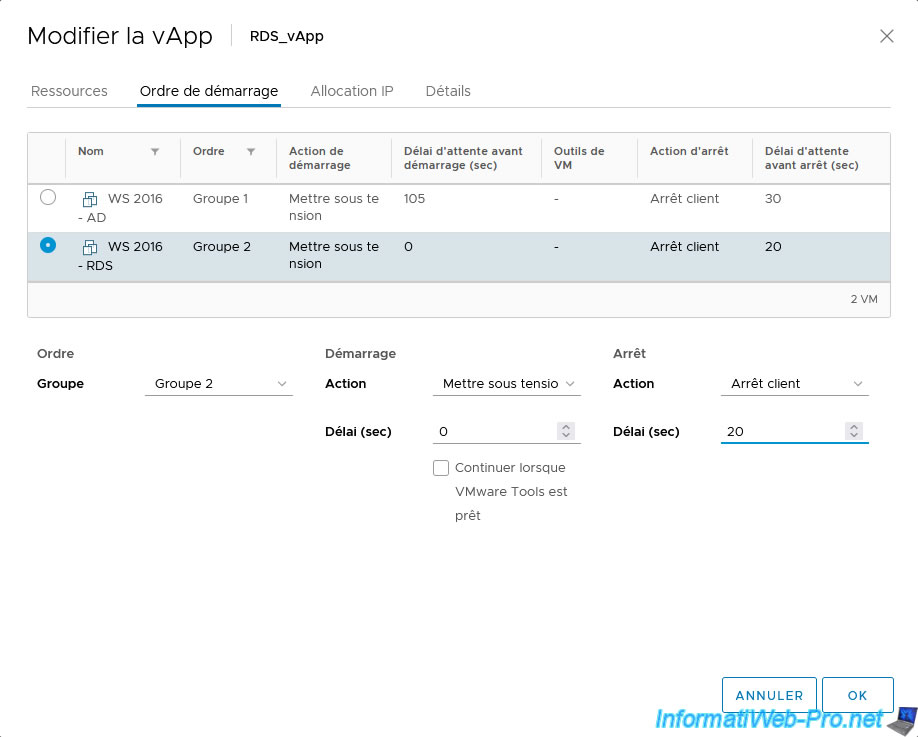
- Off - Delay (s): 20 seconds. Which corresponds to the approximate time that this virtual machine takes in our case to completely shut down.
Note that when stopping the vApp, VMware vCenter Server will cleanly shut down this "WS 2016 - RDS" virtual machine (from group 2), then it will cleanly shut down the other "WS 2016 - AD" virtual machine (from group 1) 20 seconds later.
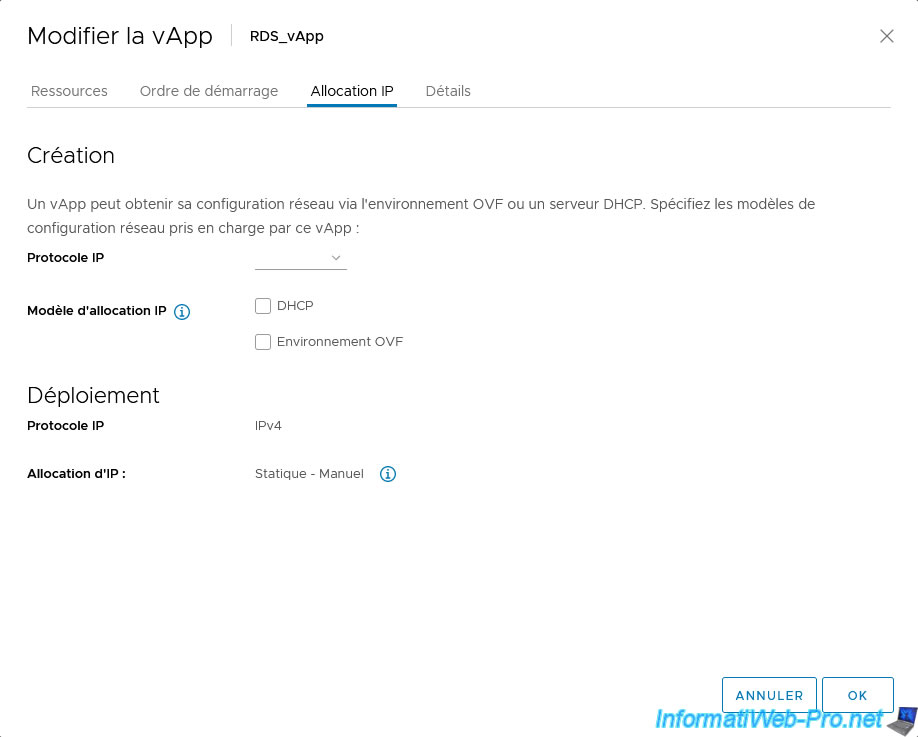
In the "IP Allocation" tab, you can manage how this vApp should obtain its network configuration: via the OVF environment or from a DHCP server.
You can also choose to use the IPv4 protocol, the IPv6 protocol or both.
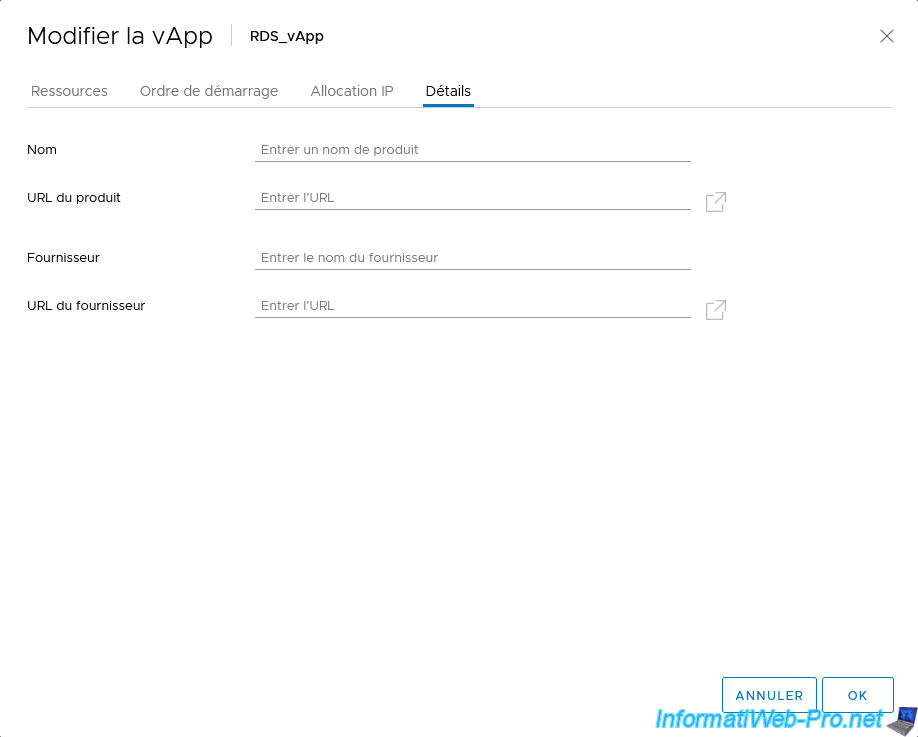
Finally, in the "Details" tab, you can indicate:
- Name: the name of the product. Useful if you want to share your virtual appliance over the Internet or with others
- Product URL: the URL of your website where you talk about your virtual appliance
- Vendor: your brand name or website name
- Vendor URL: the base URL of your website
This information will be displayed on the vApp page and will also be exported in case you want to export your vApp in OVF format.
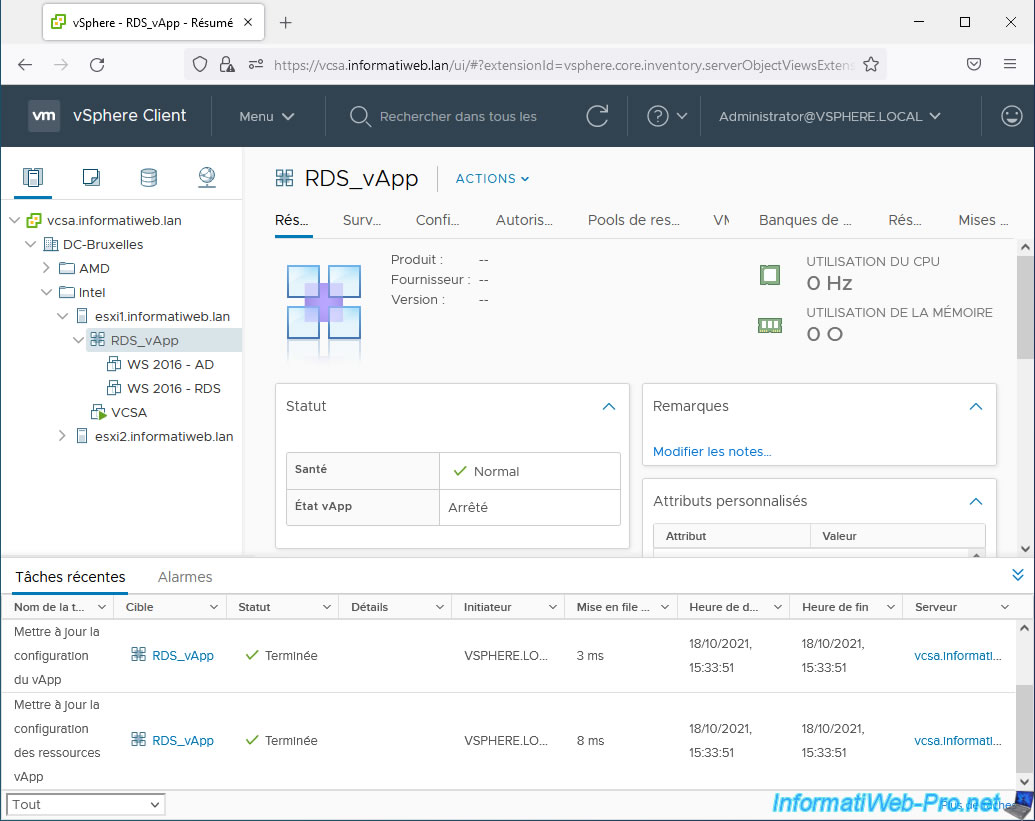
After changing your vApp settings, you will see this in recent tasks:
- Update vApp configuration
- Update vApp resource configuration
Share this tutorial
To see also
-

VMware 12/20/2024
VMware vSphere 6.7 - Clone vApps
-
VMware 10/4/2024
VMware vSphere 6.7 - Clone virtual machines
-
VMware 10/9/2024
VMware vSphere 6.7 - Clone virtual machines to a content library
-
VMware 10/11/2024
VMware vSphere 6.7 - Convert a Hyper-V virtual machine to a VMware VM
No comment