Use VMware vSphere (6.7) APIs array integration (VAAI)
- VMware
- 27 September 2024 at 11:14 UTC
-

- 4/7

7.6. Create a cluster
To get started, select your HPE server.
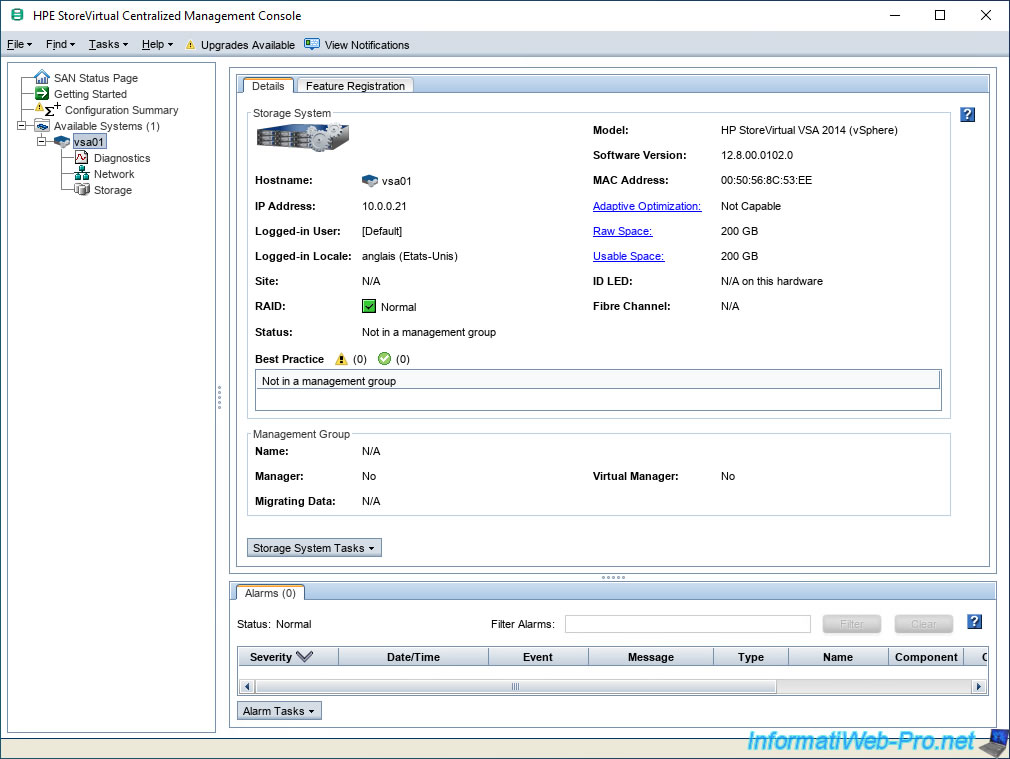
Then go to: Tasks -> Management Group -> New Management Group.
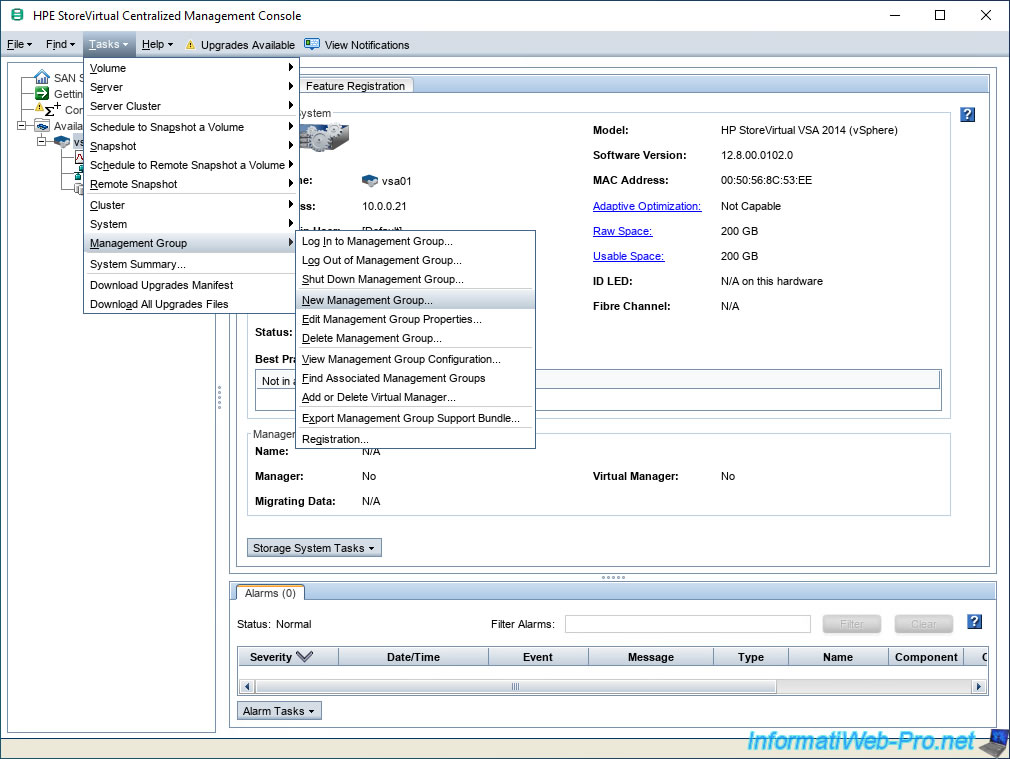
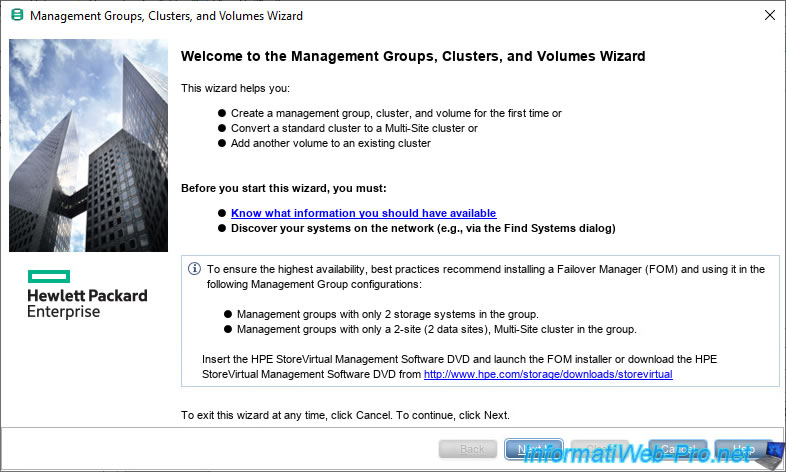
A "Management Groups, Clusters, and Volumes Wizard" window appears.
Click Next.
Select "New Management Group" and click Next.
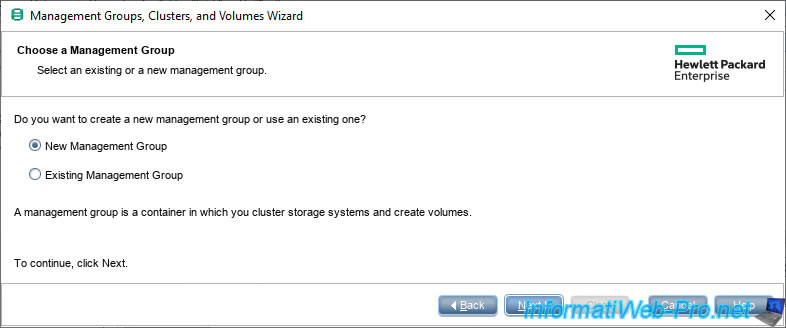
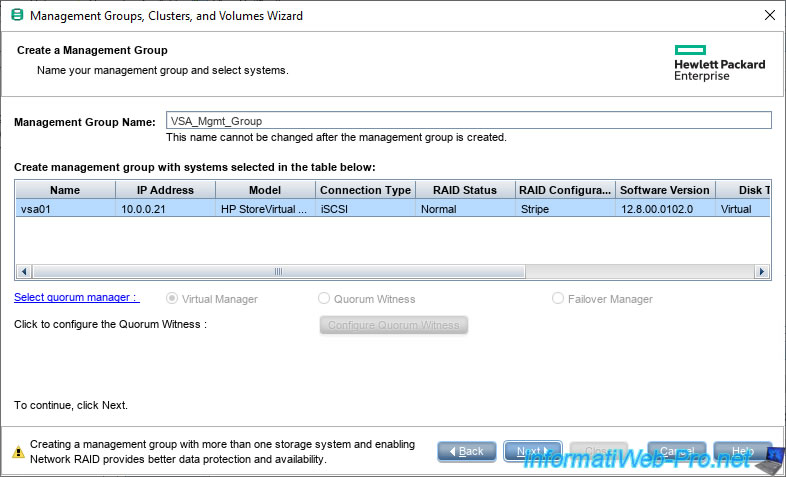
Provide a name for this new management group (for example: VSA_Mgmt_Group) and click Next.
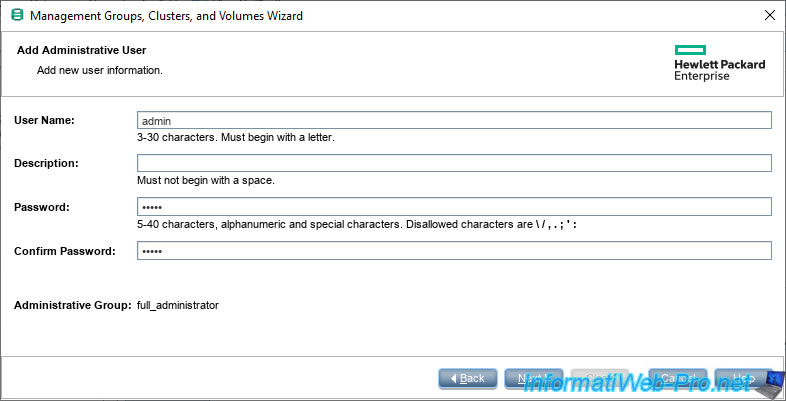
Specify the login information for the administrator account that will be created.
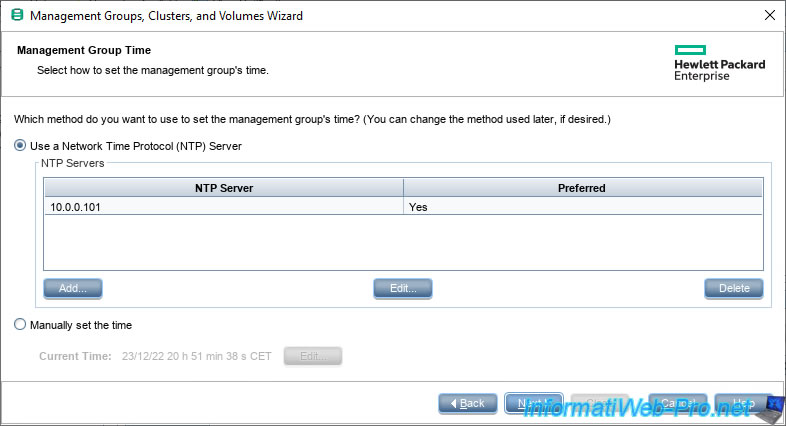
If you have a time server (which you do if you have a domain controller), select "Use a Network Time Protocol (NTP) Server" and click Add.
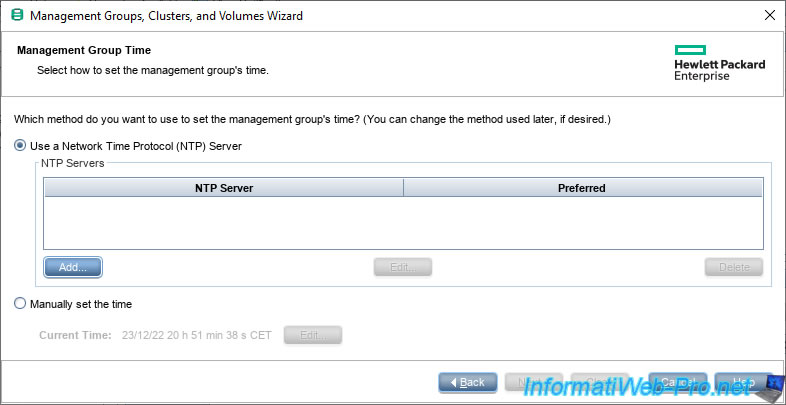
Provide the IP address of your time server (NTP) or Active Directory domain controller (if applicable).
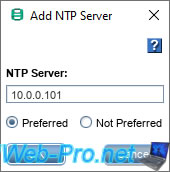
Your time server appears in the list.
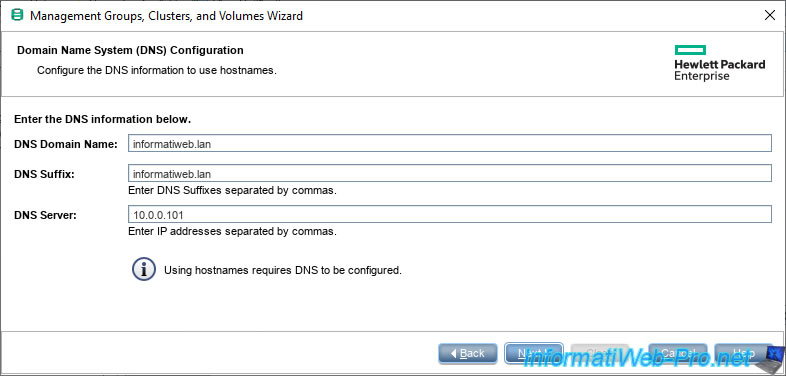
In the "Domain Name System (DNS) Configuration" step, indicate:
- DNS Domain Name: your local domain name. In general: your Active Directory domain name.
- DNS Suffix: indicate the same. This allows short names (NETBIOS) to be resolved to FQDN domain names (DNS).
- DNS Server: the IP address of your local DNS server. Typically the IP address of your Active Directory domain controller.
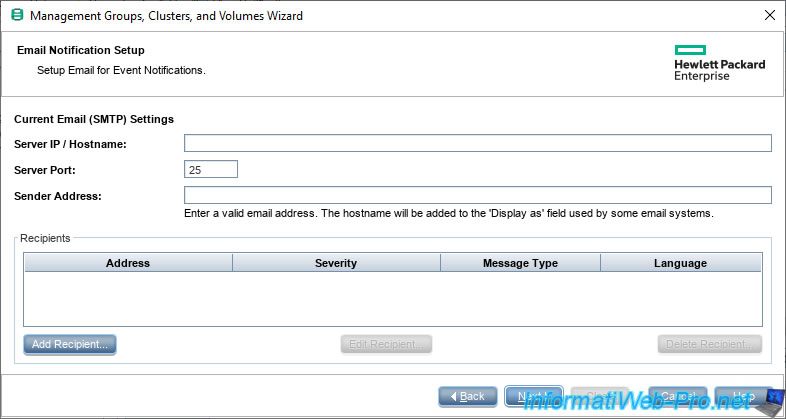
Skip the step about sending email notification, as this requires an SMTP email server.
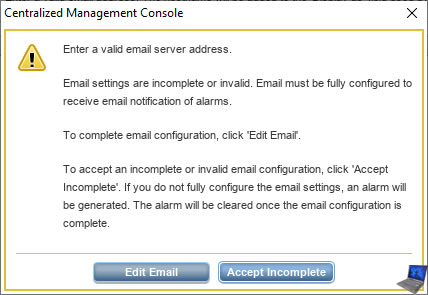
Ignore the warning that appears by clicking "Accept Incomplete."
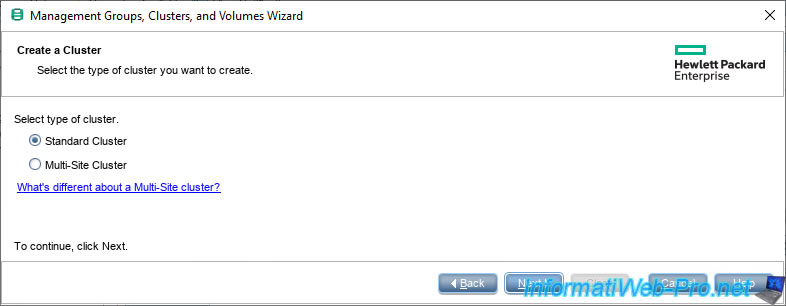
Select "Standard Cluster" and click Next.
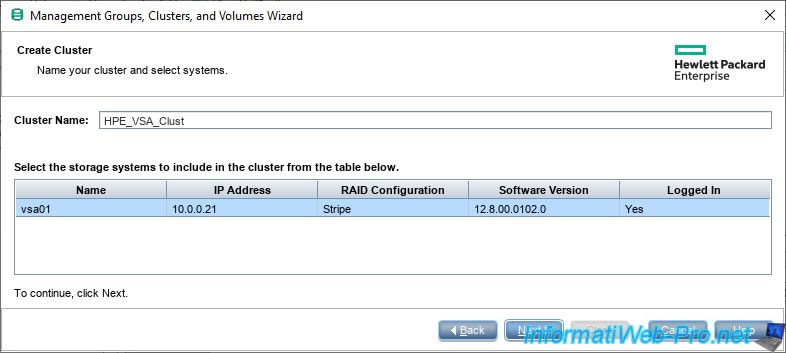
Provide a name for your cluster (for example: HPE_VSA_Clust) and click Next.
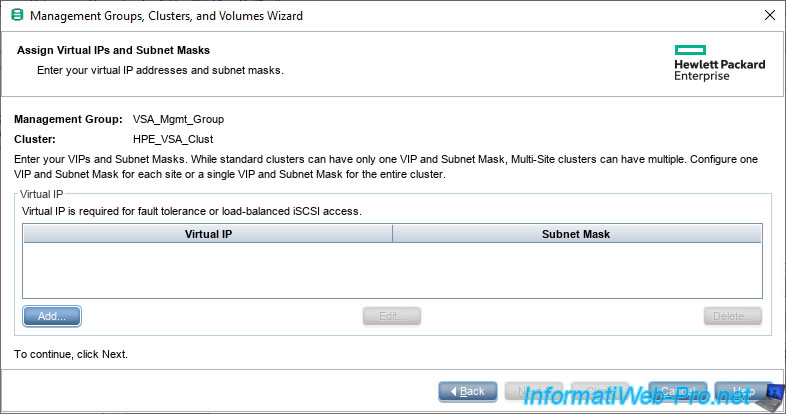
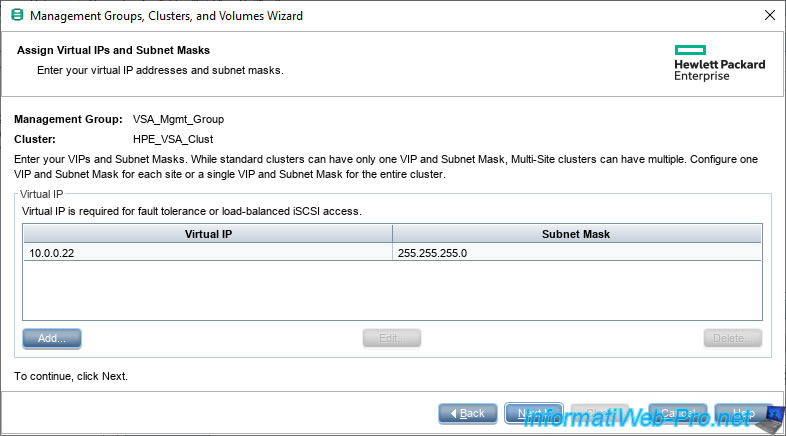
To access your cluster, it must have at least one IP address.
Click on: Add.
Specify:
- Virtual IP Address: the IP address to assign to your cluster.
- Subnet Mask: the subnet mask to use.
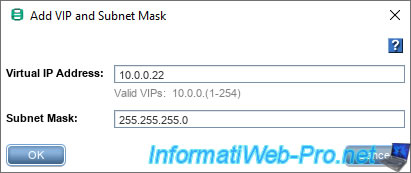
The defined IP address appears.
Click Next.
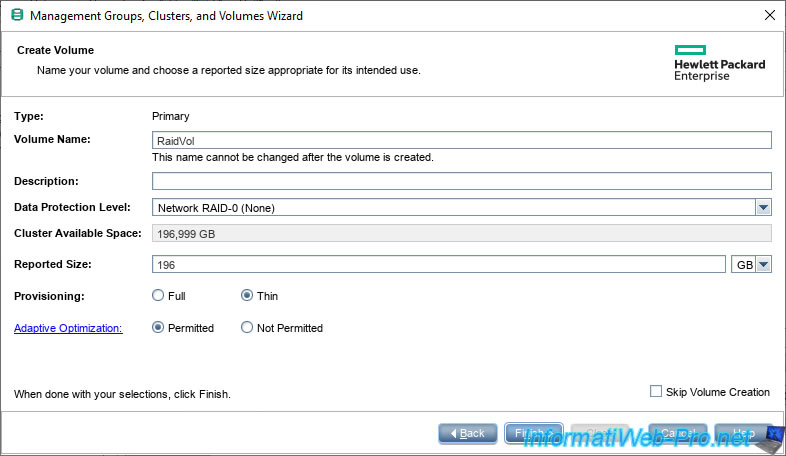
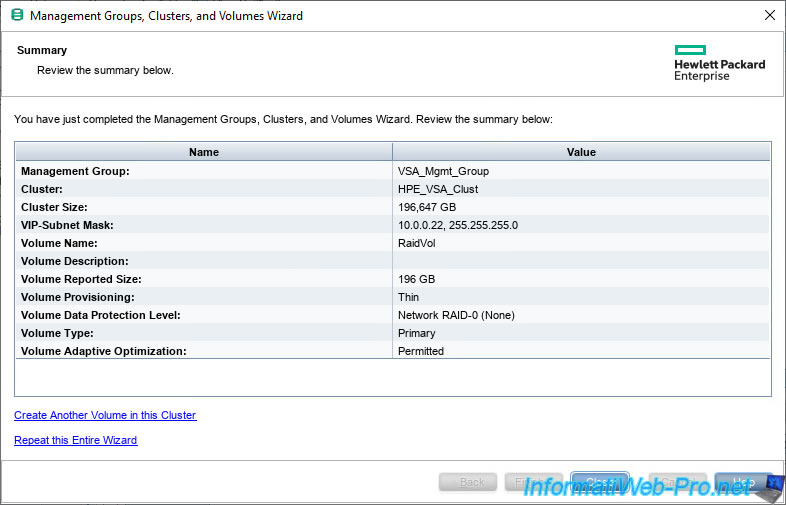
In the "Create Volume" step, indicate:
- Volume Name: the name you want to use for your new volume.
- Description: a description (optional)
- Data Protection Level: the RAID level to use.
In our case, since we only added one disk to our server, we can only use "Network RAID-0 (None)".
Which means that RAID technology will not be used. The disk will be used as is. - Reported Size: indicate the size under which this volume should appear, in our case, we have indicated the size of our disk.
- Provisioning: select "Thin" to use dynamic provisioning and therefore be able to benefit from the recovery of free space later via UNMAP
Click Finish.
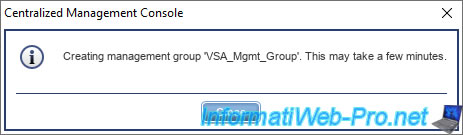
Wait while the Management Group is created.
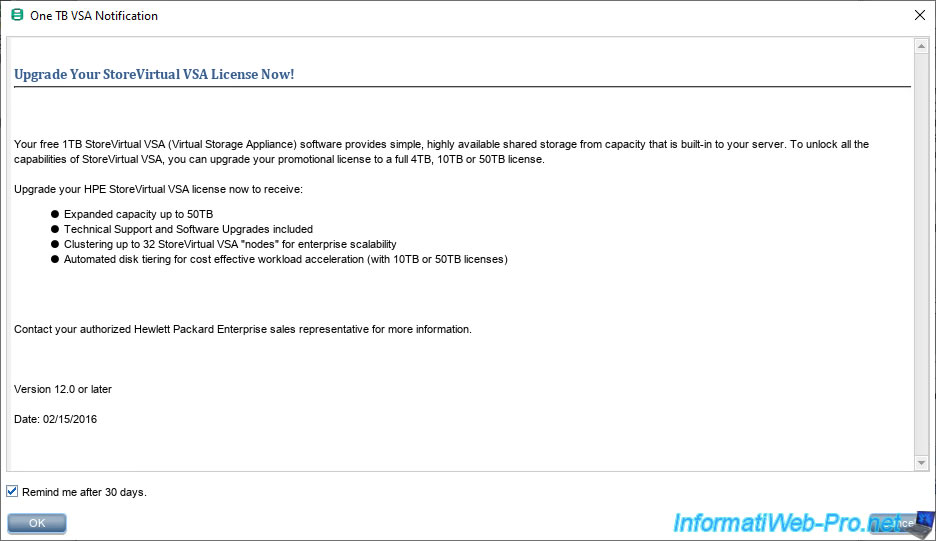
A "One TB VSA Notification" window will appear, because you are using the free version of StoreVirtual VSA which is limited to 1 TB of storage.
Paid licenses allowing you to use up to 4 TB, 10 TB or even 50 TB.
Check the "Remind me after 30 days" box and click OK.
Note: if you do not check this box, this window will reappear much more quickly.
A summary of your management group, cluster, and volume configuration appears.
Click Close.
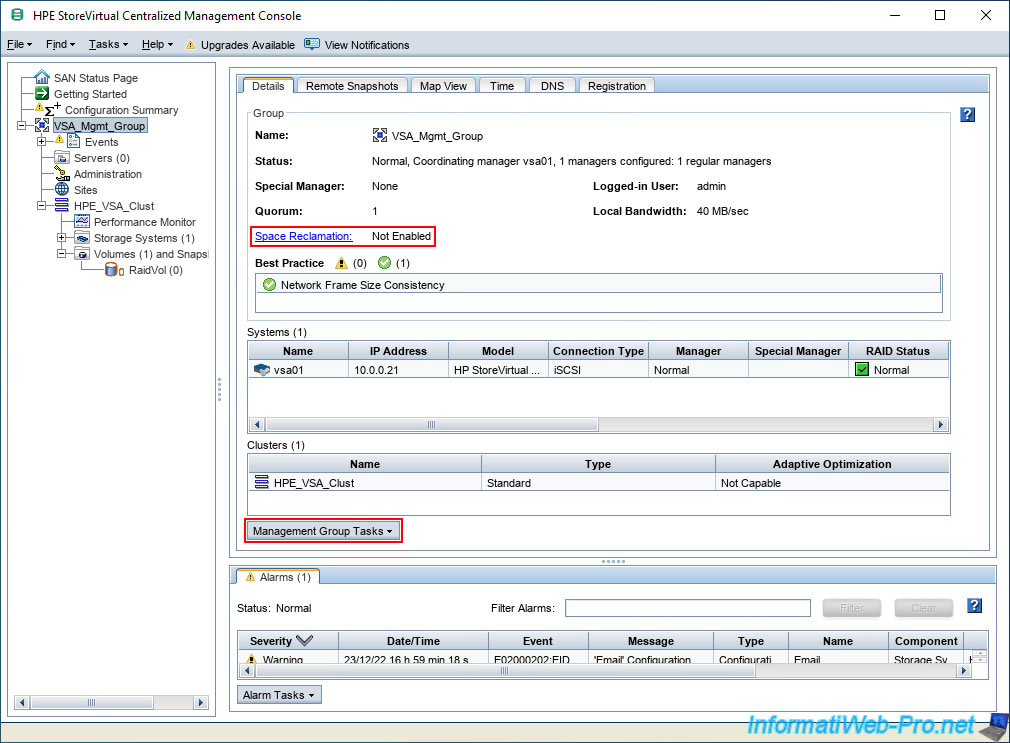
In your CMC console you will see this.

7.7. Enable space reclamation
To get started, enable space reclaiming on your management group.
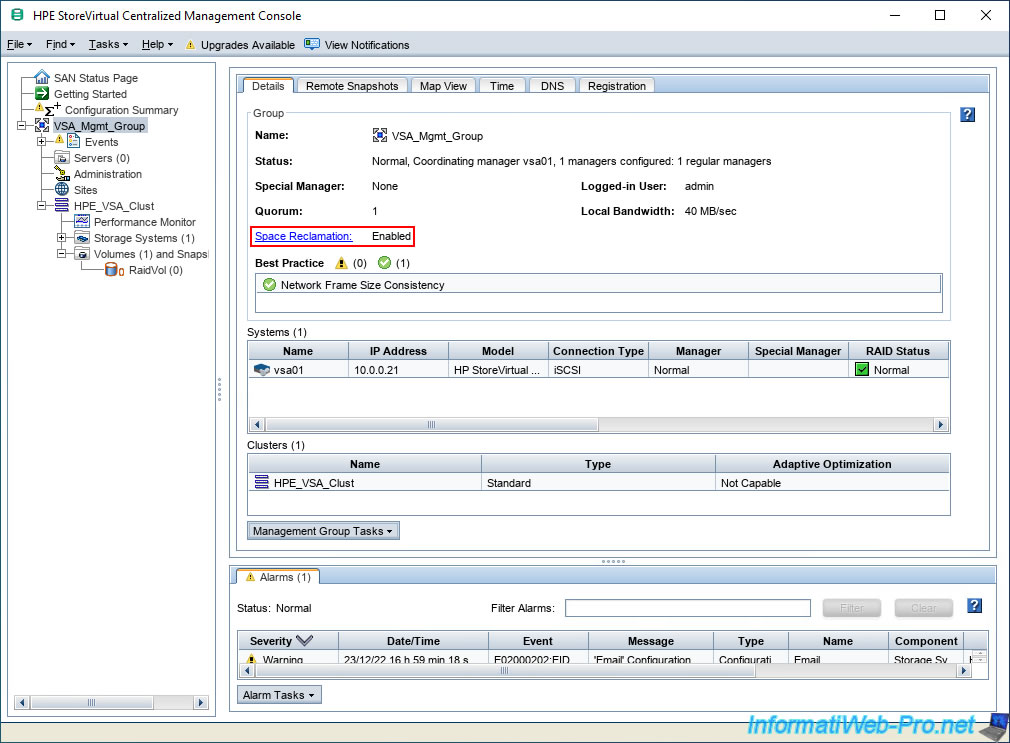
Indeed, if you select your management group in the left column, you will see that the "Space Reclamation" option is disabled (Not Enabled) by default.
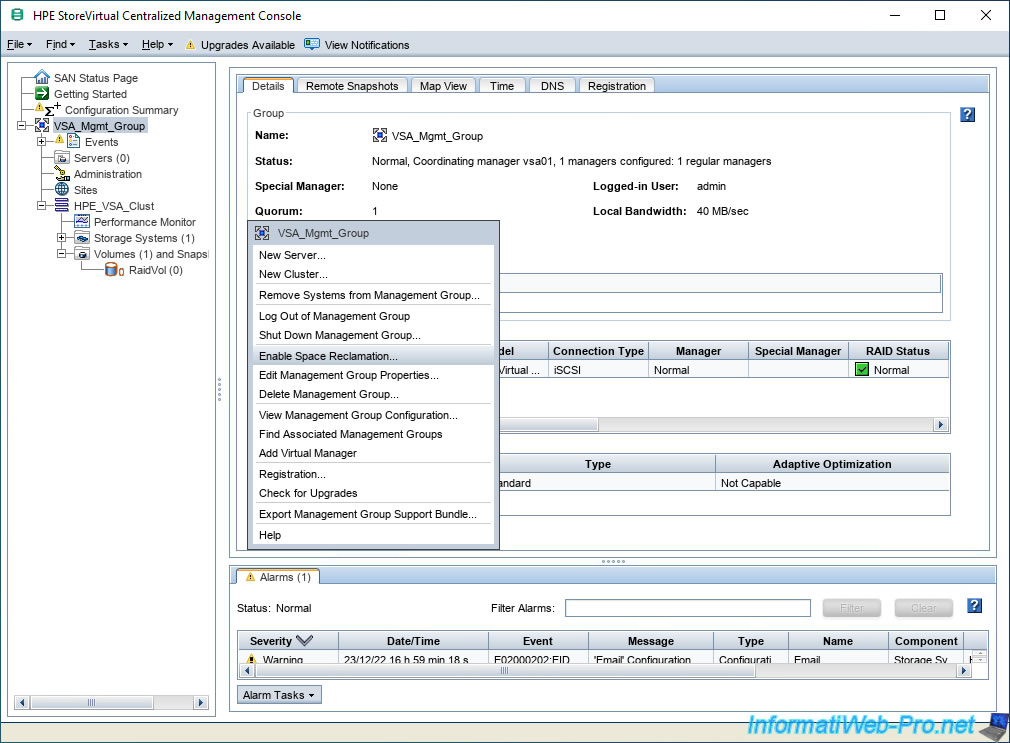
Click the "Management Group Tasks" button at the bottom of the window.
Important : it is recommended that you enable this option before using your volume from your VMware ESXi host.
Otherwise, UNMAP may not work.
Source : Enabling Space Reclamation - Hewlett Packard Enterprise Community.
Next, click "Enable Space Reclamation".
In the "Enable Space Reclamation" window that appears, you will see a warning telling you that enabling this option will prevent you from downgrading this management group later to a version of LeftHand OS that does not support space reclamation. space.
To confirm the activation of this "Space Reclamation" option:
- Provide the name of your management group.
- Check the box "I understand that future downgrades to versions of the LeftHand OS that do not support Space Reclamation will be prevented".
- Click: Enable Space Reclamation.
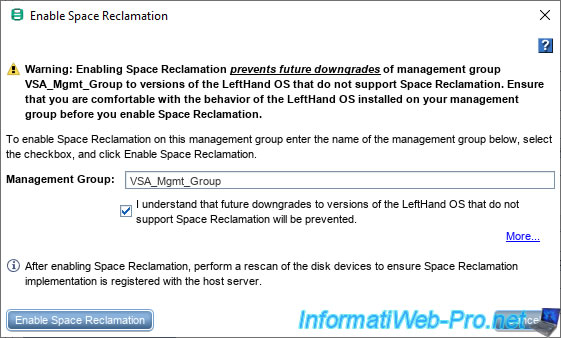
Now, the Space Reclamation option is Enabled.
Share this tutorial
To see also
-

VMware 5/15/2024
VMware vSphere 6.7 - Add a physical disk to host
-

VMware 9/6/2024
VMware vSphere 6.7 - Configure port binding (iSCSI traffic)
-

VMware 6/13/2024
VMware vSphere 6.7 - Configure Virtual Flash (SSD cache)
-
VMware 12/4/2024
VMware vSphere 6.7 - Create a content library
No comment