Complete presentation of the VMware Host Client web client of VMware ESXi 6.7
- VMware
- 10 February 2023 at 19:22 UTC
-

- 4/4

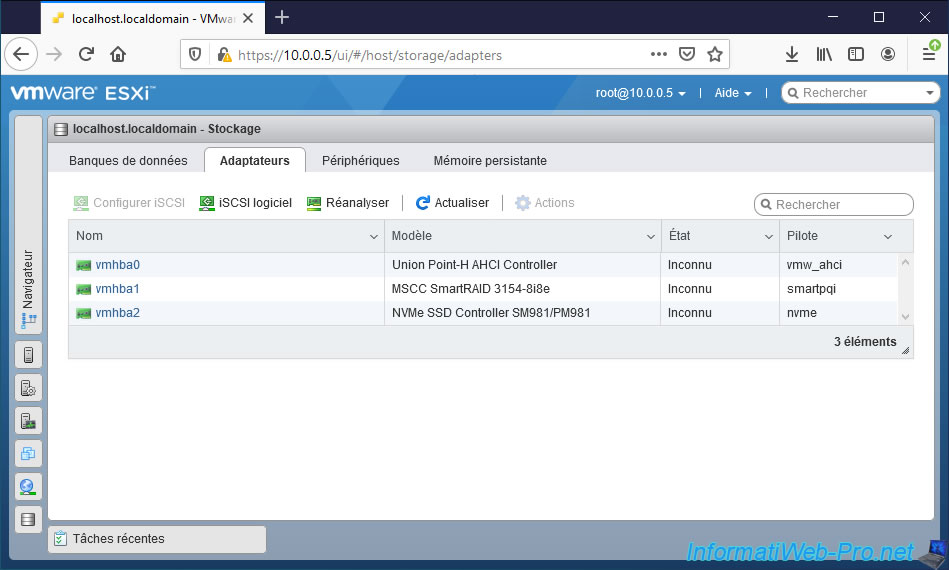
4.2. Adapters
In "Storage -> Adapters", you will find the list of storage controllers present in your computer or server.
In our case, VMware ESXi detected 3 storage controllers :
- Union Point-H AHCI Controller with vmw_ahci driver : which corresponds to the AHCI (SATA) controller built into our motherboard.
- MSCC SmartRAID 3154-8i8e with smartpqi driver : which corresponds to the Microsemi Adaptec SmartRAID 3154-8i8e controller that we added in our computer.
- NVMe SSD Controller SM981/PM981 with the nvme driver : which corresponds to the NVMe slot present on our motherboard and which allows us to install VMware ESXi on an SSD in M.2 NVMe format.
For the adapter name, VMware ESXi numbers them "vmhbax" starting with 0.
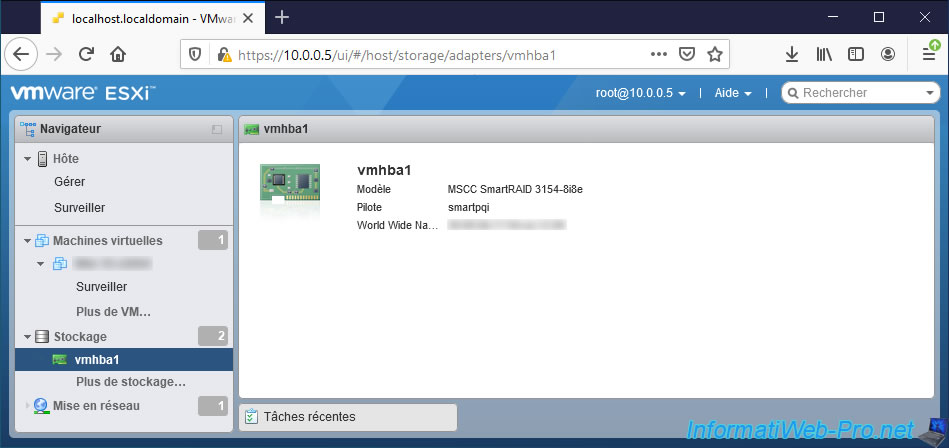
If you click on the name of one of these adapters, you will find the same information, as well as the World Wide Name (WWN) associated with it.
4.3. Devices
Dans "Stockage -> Périphériques", vous trouverez la liste des disques durs et SSDs (au format SATA et NVMMe) présent dans votre ordinateur ou serveur.
Mais, vous trouverez aussi les disques durs ou SSDs connectés à un contrôleur HBA, ainsi que les disques logiques RAID (ou volumes RAID) créés sur un contrôleur RAID.
In "Storage -> Devices", you will find the list of hard disks and SSDs (in SATA and NVMMe format) present in your computer or server.
But, you will also find hard drives or SSDs connected to an HBA controller, as well as logical RAID drives (or RAID volumes) created on a RAID controller.
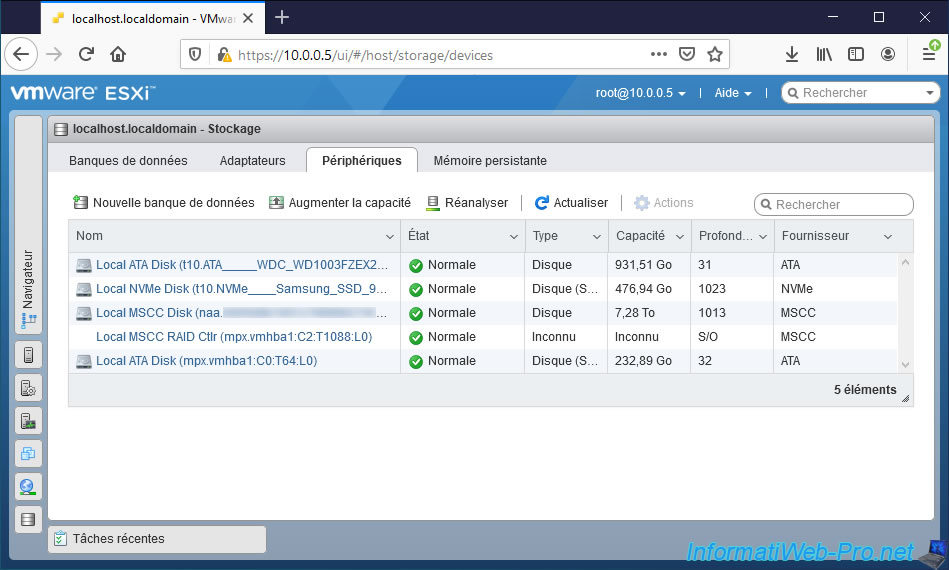
If you click on the name of a device (or in other words : a physical disk or a logical RAID disk), you will be able to get a lot of information about that one.
To begin, you will be able to know :
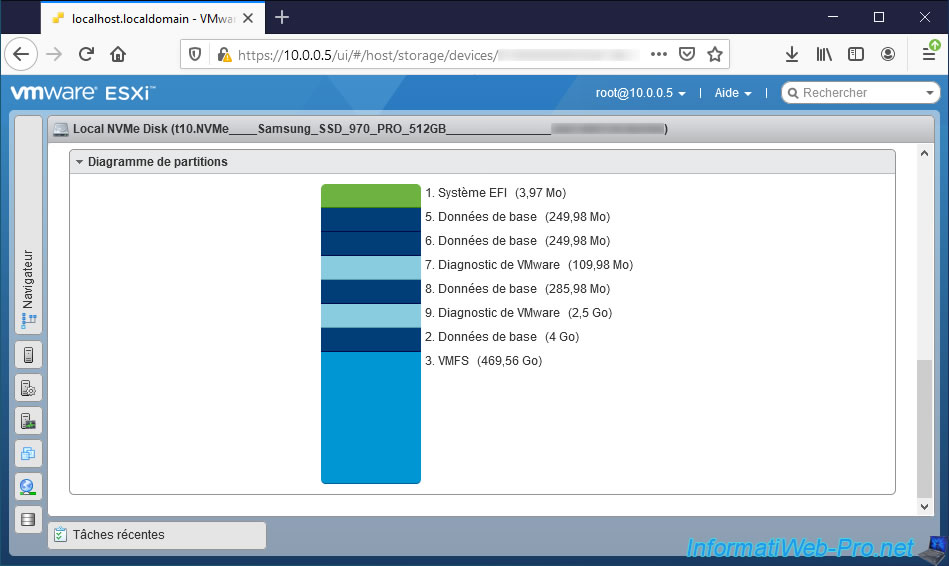
- its name under VMware ESXi. For example : Local NVMe Disk (t10.NVMe___Samsung_SSD_970_PRO_512_GB_____[UUID of the disk])
- its type : Disk
- its model : Samsung SSD 970
- its path (in the filesystem) : /vmfs/devices/disks/[device name]
- its capacity (size) : 467,94 Go
- its partition format : gpt
- its identifier (UUID)
Just below, you will also be able to know the list of the partitions which are there.
In this case, it's the NVMe SSD where we installed VMware ESXi, it's for this reason that there are so many partitions on it :
- EFI System
- Basic Data
- VMFS
- Basic Data
- Basic Data
- VMware Diagnostics
- Basic Data
- VMware Diagnostics
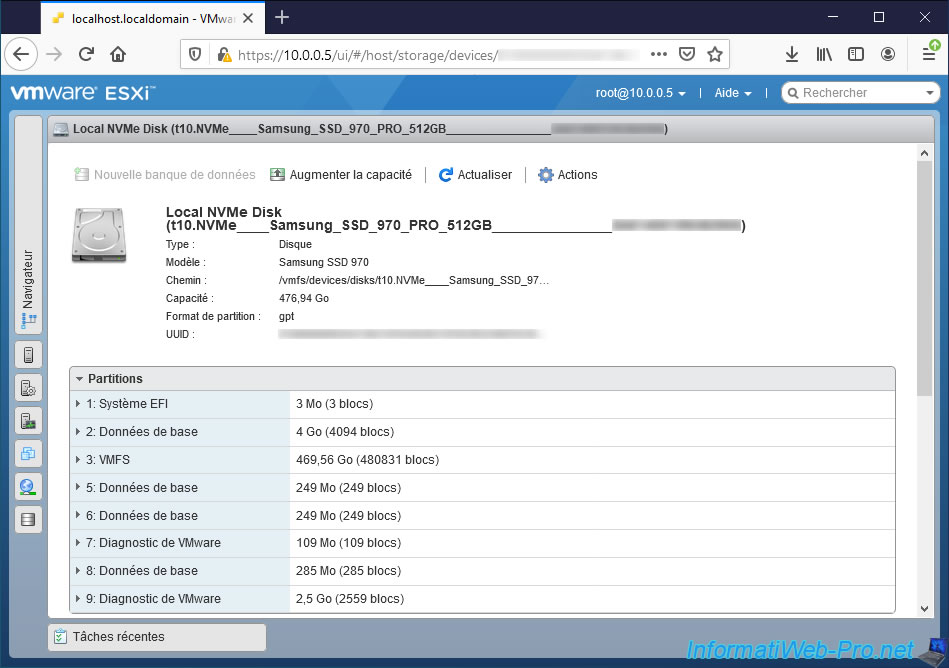
Below again, you will find this time the partition diagram of this disk.
4.4. Persistent Memory
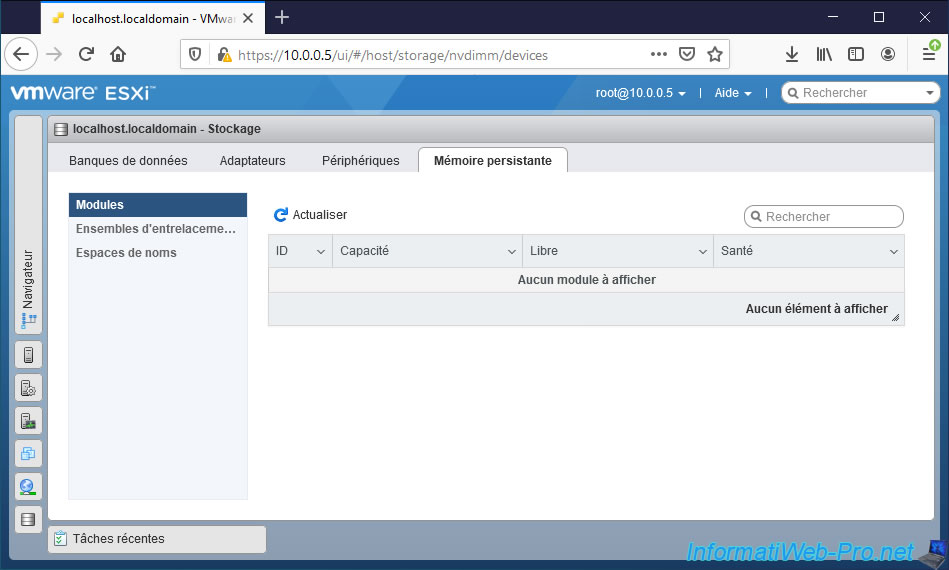
In "Storage -> Persistent Memory -> Modules", you will find the list of persistent memory modules present in your computer / server.
To use persistent memory, you need NVDIMMs, such as Intel Optane Persistent Memory (PMem).
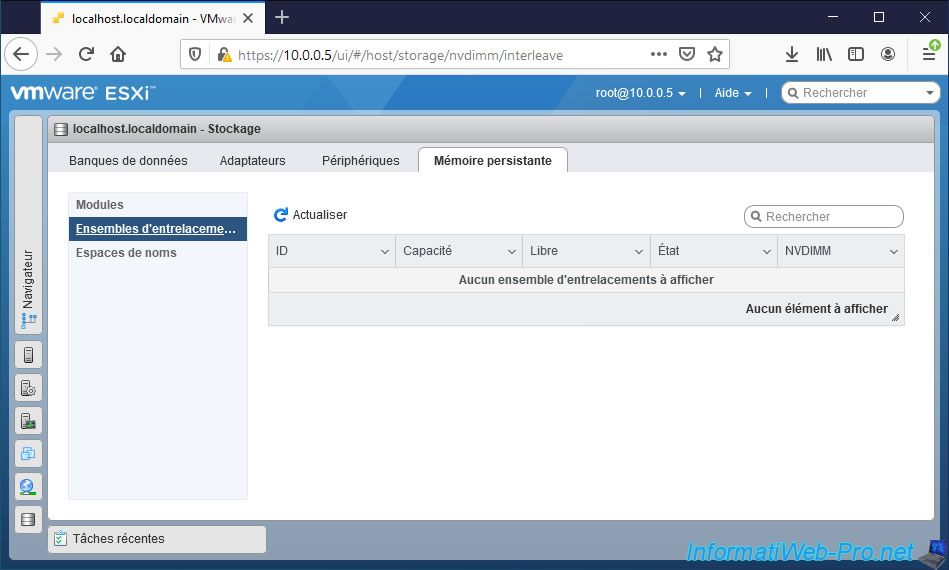
In "Storage -> Persistent Memory -> Interleave sets", you will be able to see the stripe sets available for persistent memory.
Interleave sets provide a way to logically group one or more physical NVDIMMs. This increases the read and write throughput on this logical grouping given that VMware ESXi will be able to read and write in parallel on the different NVDIMMs that make up this interleave set.
A bit like a logical RAID disk which would group together several hard disks or physical SSDs to improve the read and write speed on the logical RAID disk.
Source : Structure of the PMem Datastore
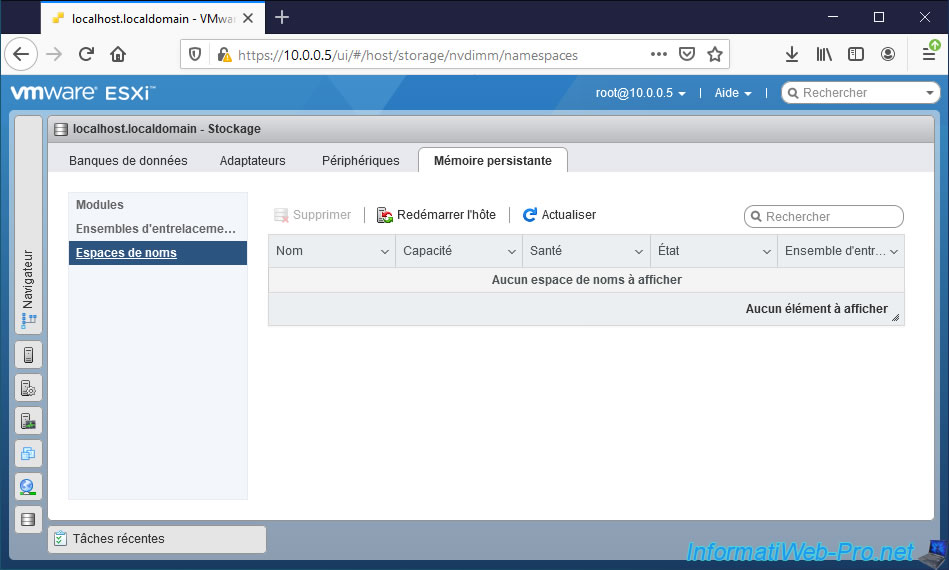
Namespaces allow persistent memory to be split into multiple memory regions that will be processed contiguously.
Once these namespaces are created, you will be able to know their name, capacity, health, state, and the interleave set they are in.
5. Networking
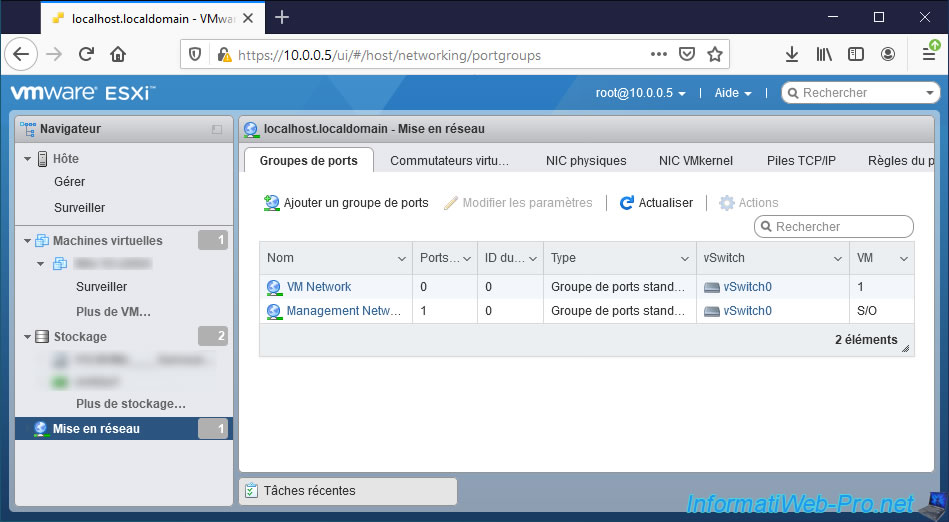
In "Networking -> Port groups", you will be able to view, add or modify the existing port groups on your VMware ESXi hypervisor.
By default, 2 port groups are already present :
- VM Network : for the network traffic of your virtual machines
- Management Network : to manage your VMware ESXi hypervisor
For more information about networking of your VMware ESXi hypervisor, refer to our "VMware ESXi 6.7 - Basics of network management on VMware ESXi" tutorial.
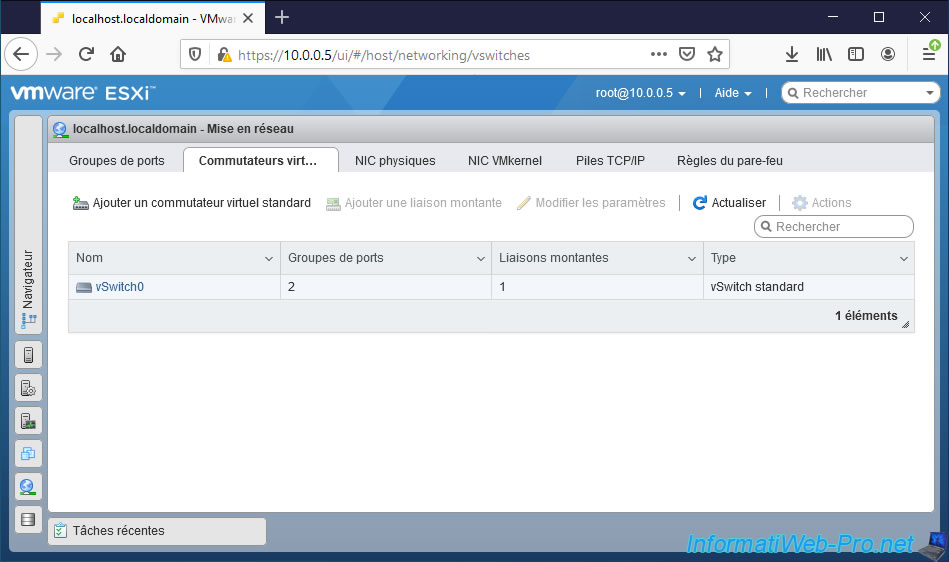
In "Networking -> Virtual switches", you will be able to manage your various standard virtual switches (standard vSwitch).
Note that with VMware ESXi, you will only be able to use standard virtual switches (standard vSwitch) by default.
Indeed, to use vSphere distributed switches, you will need the paid solution (VMware vSphere).
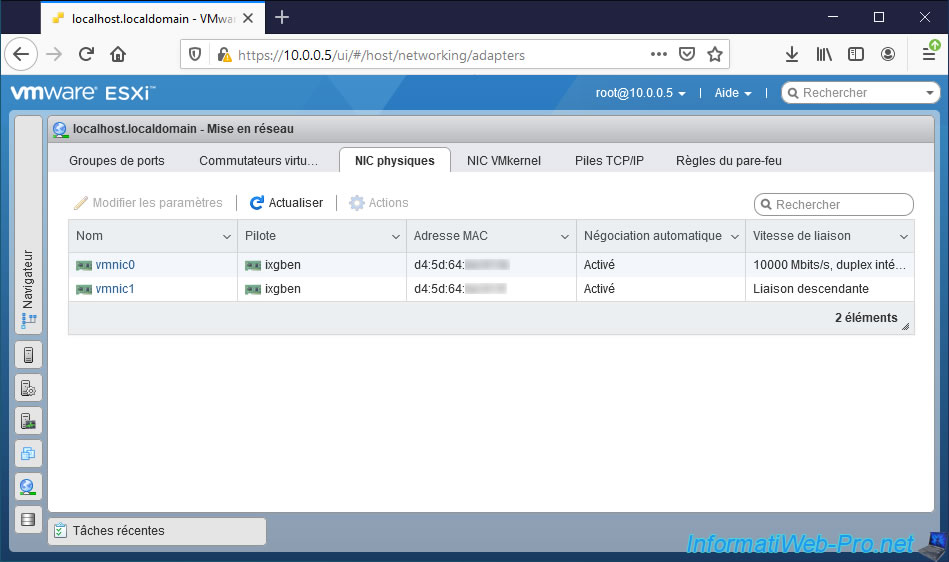
In "Networking -> Physical NICs" you will find the list of physical network adapters (or more precisely physical network ports) present in your computer / server.
In our case, the network adapter integrated into our motherboard has 2 network ports (RJ45). VMware ESXi therefore shows us 2 physical "network adapters", one of which is connected (link speed : 10000 Mbps) and the other not (link down).
In "Networking -> VMkernel NICs", you will find the list of VMKernel network adapters (NICs) present on your VMware ESXi hypervisor.
By default, you will find the VMKernel "vmk0" network adapter (NIC) which :
- is associated with the "Management Network" port group
- is associated with the default TCP/IP stack
- which can be used only for hypervisor management (by default)
- and more
Note that VMKernel network adapters (NICs) can also handle system traffic for VMware vMotion, IP storage, fault tolerance, vSAN, logging, ...
Source : Add a VMkernel Network Adapter in the VMware Host Client

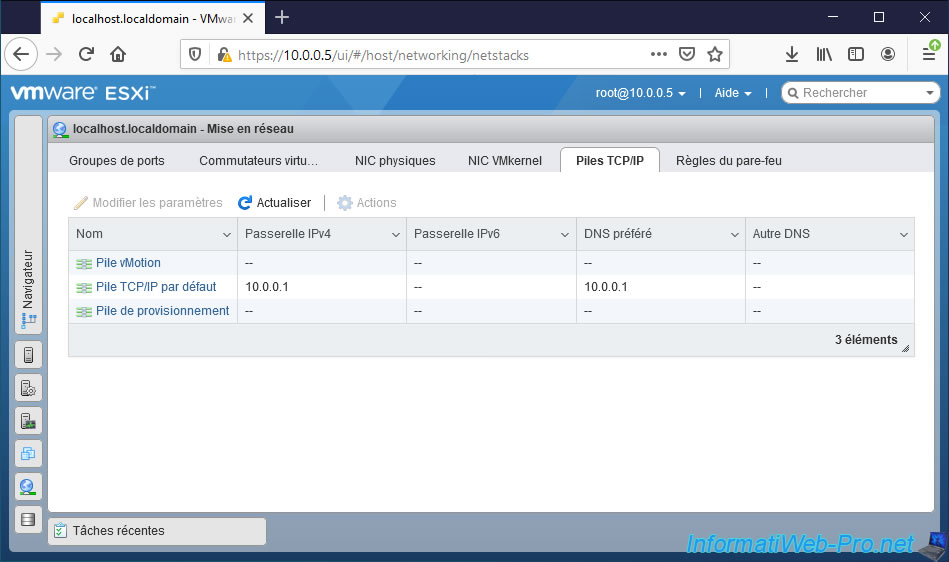
In "Networking -> TCP/IP stacks", you can manage the different TCP/IP stacks.
Note that managing multiple TCP/IP stacks is only possible since version 6.0 of VMware vSphere.
Using multiple TCP/IP stacks allows you to isolate network traffic from different services (management, vMotion and fault tolerance) to redirect them to different default gateways (if desired). Which was not the case before.
It also saves you from having to create static routes as was the case previously.
By default, 3 TCP/IP stacks are created :
- vMotion stack : used to isolate VMware vMotion traffic on this TCP/IP stack. If you use this stack, vMotion traffic will go through this "vMotion stack" instead of the "Default TCP/IP stack".
- Default TCP/IP stack : allows you to manage the services linked to the host and therefore all the services share the same default gateway.
- Provisioning stack : allows you to isolate some operations concerning virtual machines, cloning, cold migration, ...
However, by default, the only TCP/IP stack used is the "Default TCP/IP stack".
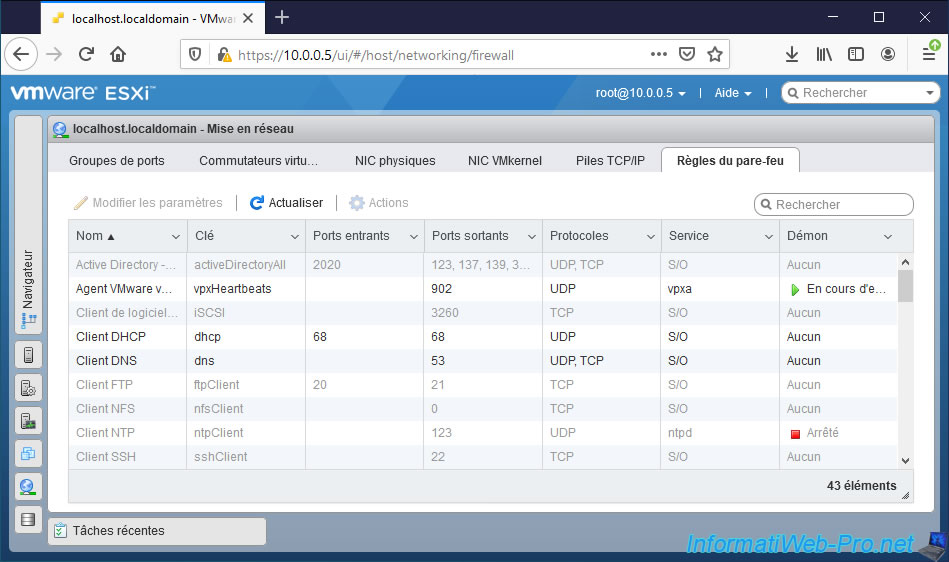
In "Networking -> Firewall rules", you will find the list of rules defined by default in the VMware ESXi firewall.
Thanks to this list, you will be able to know :
- which rules are enabled (in black) or not (in gray)
- what are the incoming and/or outgoing ports affected by them, as well as the protocols used
- what is the service associated with this firewall rule (if applicable)
- whether the service associated with this firewall rule is started or not (if applicable)
You can also edit these rules to add or remove restrictions based on clients IP addresses.
For more information about configuring the VMware ESXi firewall, refer to our "vmware-esxi-6-7-services-and-firewall" tutorial.
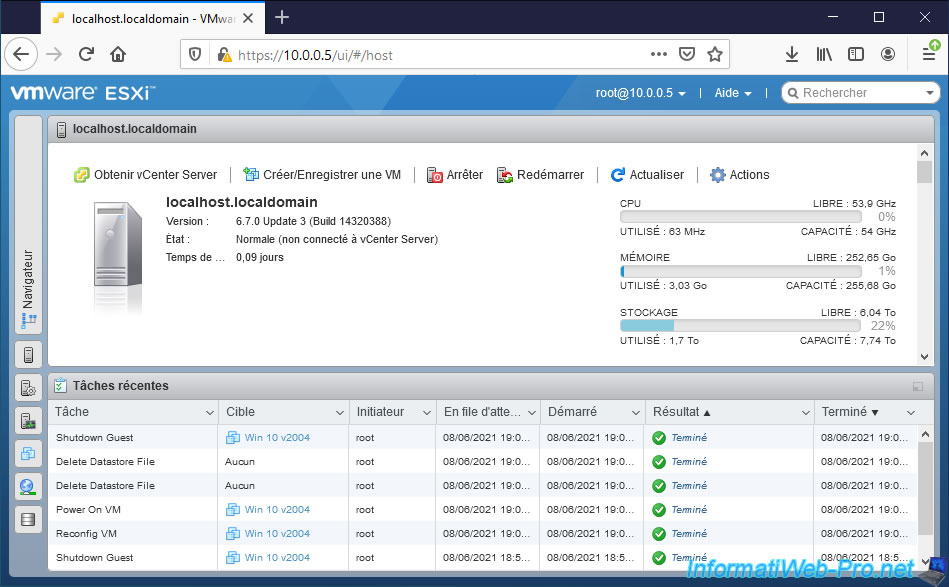
6. Recent tasks
At the bottom of each page, you can open a block named "Recent tasks".
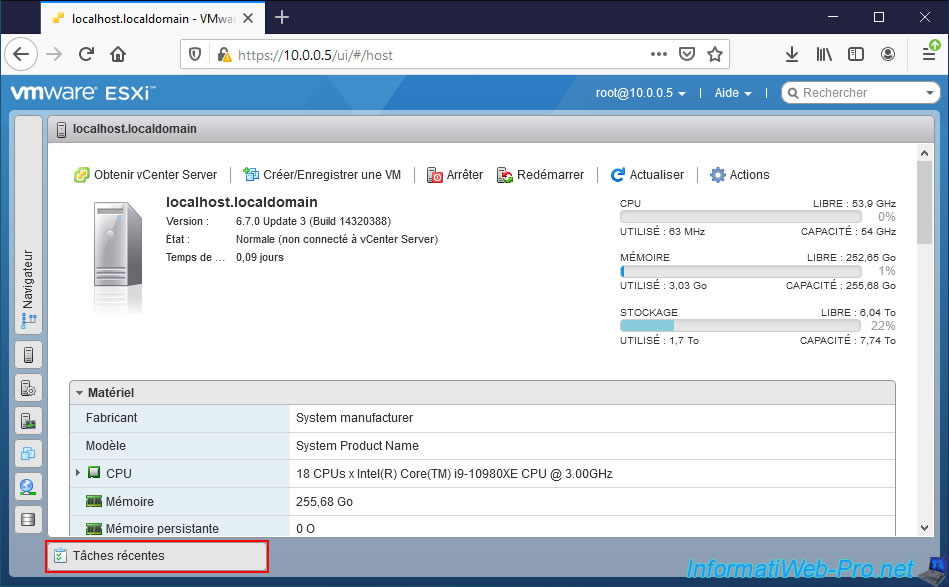
As the name suggests, this allows you to see the tasks that have been performed recently. Whether these are still running or completed.
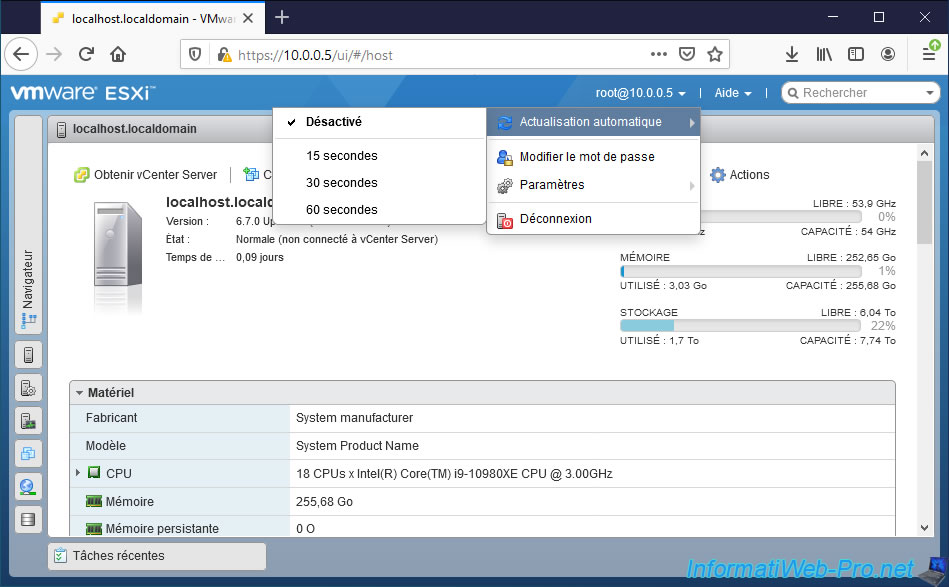
7. Top bar
At the top of the page, by clicking on "[name of your user account]@[IP address or domain name of your ESXi server]", you will find some options allowing you to :
- Auto-refresh : automatically refresh the page every 15, 30 or 60 seconds so that the displayed information is updated regularly or never refresh the page (Off) by default.
- Change password : change the password of the account with which you are currently logged in.
- Settings : allows you to enable or not some options, to set the language of this web client, ...
- Log out : allows you to log out of this "VMware Host Client" web client.
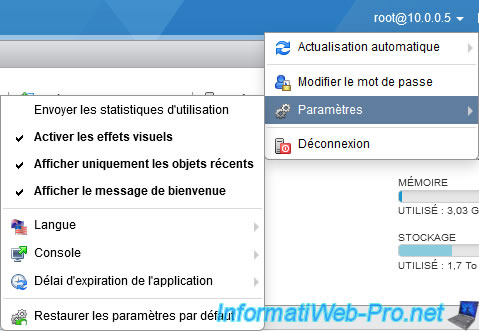
In the "Settings" submenu, you can :
- Send usage statistics : enable or disable sending usage statistics to VMware. Or in other words, join or leave the VMware Product Improvement Program (CEIP).
- Enable visual effects : allows you to enabole or not the visual effects. Such as the fade in (transparency) of context menus.
- Show only recent objects : show shortcuts only for recently used objects in the left menu.
- Show welcome message : allows you to enable or not the display of the welcome message displayed on a blue background when you connect to this web client.
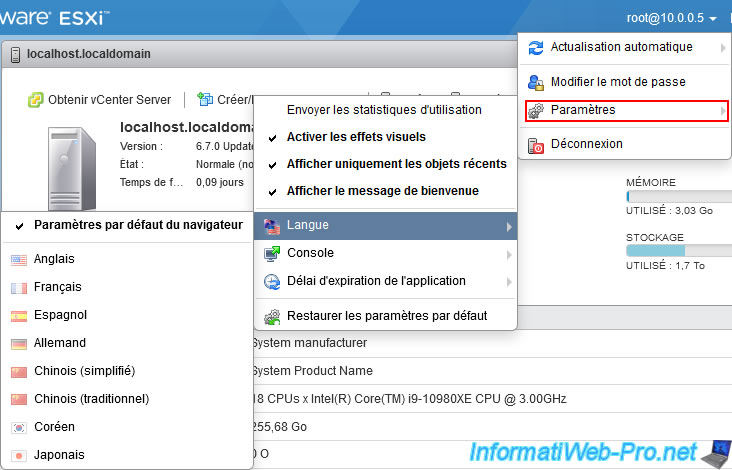
- Language : allows you to change the display language.
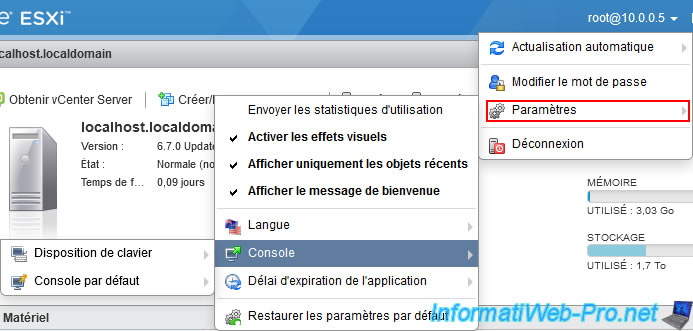
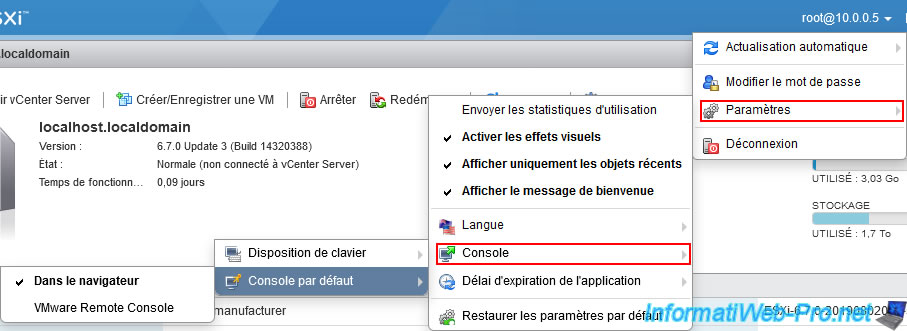
- Console : allows you to set the keyboard layout to be used, as well as the type of console to use by default.
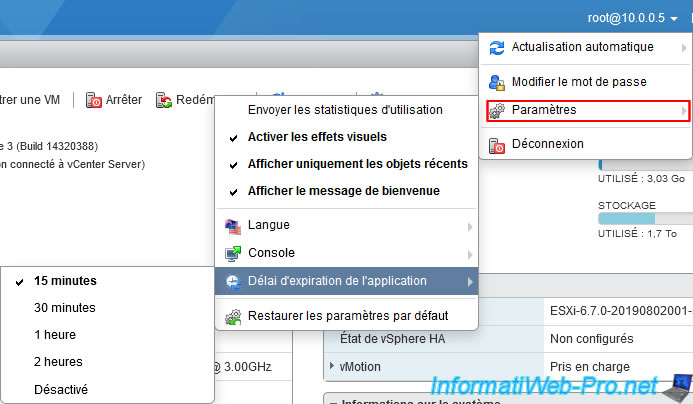
- Application timeout : allows you to specify the timeout for your session on this web client to expire.
- Reset to defaults : restores these settings to their default values.
In the "Settings -> Language" submenu, you can change the language of this web client by selecting your language (French, English, ...) or let the web client use the language corresponding to that of your web browser.
In the "Settings -> Console" submenu, you can :
- Keyboard layout : change the layout to be used for the keyboard.
- Default console : choose which type of console to use by default.
In the "Settings -> Console -> Keyboard layout" submenu, you can change the keyboard layout to use which by default is in English.
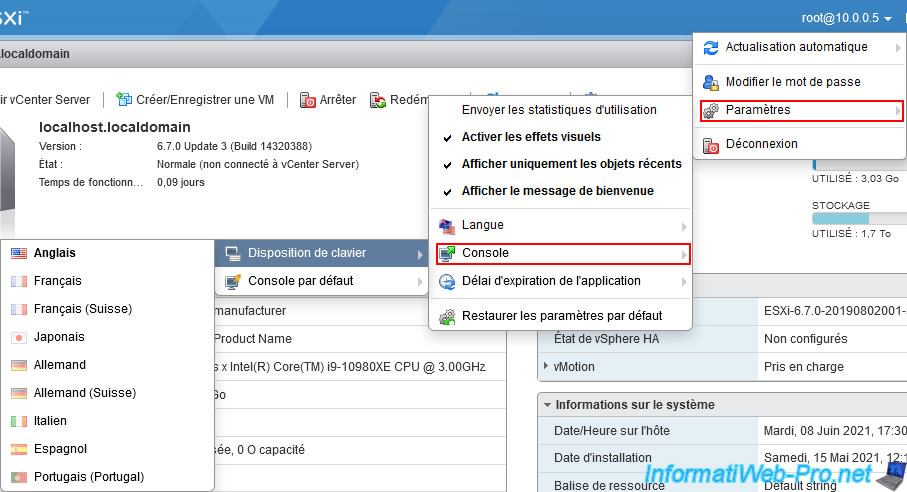
In the "Settings -> Console -> Default console" submenu, you can choose :
- In-browser : use a browser console. The console will therefore be opened in the same page with a gray frame.
- VMware Remote Console : access the console of a virtual machine using the VMware Remote Console (VMRC) or VMware Workstation program (which also supports "vmrc://..." links).
In the "Settings -> Application timeout" submenu, you can choose the timeout of your session (between 15 minutes and 2 hours) or disable this time limit.
However, in production, we strongly advise against disabling it.
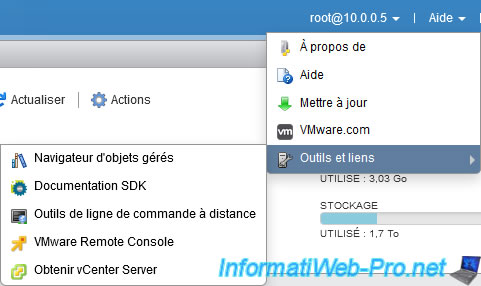
Finally, in the "Help" menu, you can :
- About : knowing the version and build number of your VMware ESXi server, as well as the client used.
- Help : provides access to official VMware documentation.
- Update : allows you to update a module by specifying the address (URL or path on the datastore) of the VIB file to install.
- VMware.com : provides access to the VMware site.
- Tools and links :
- Managed object browser : allows you to modify the VMkernel object model. However, you are strongly advised not to enable and/or modify it. If you enable it temporarily for debugging reasons, don't forget to disable it afterwards by restoring the value of the "Config.HostAgent.plugins.solo.enableMob" advanced setting to "false".
- SDK documentation : provides access to the documentation for the VMware SDK web services.
- Remote command line tools : access documentation for VMware ESXi command line tools (vSphere CLI).
- VMware Remote Console : allows you to download the VMware Remote Console program free of charge from the VMware site to access the consoles of your virtual machines from this program available for Windows and Linux.
- Get vCenter Server : access the download page for downloading VMware vCenter Server.
Share this tutorial
To see also
-
VMware 4/14/2023
VMware ESXi 6.7 - Best practices for creating a VM
-
VMware 2/17/2023
VMware ESXi 6.7 - Configure your virtual machines settings
-
VMware 6/2/2023
VMware ESXi 6.7 - Connect a smart card reader to a VM
-
VMware 10/19/2022
VMware ESXi 6.7 - DirectPath I/O (PCI passthrough)
No comment